
What have you done to/with your Boss 302 this week?

Cobra R Member
Joined: December 3, 2010
Posts: 1,851
Likes: 3
Yep, for guys like me we would be lucky to see much of a gain but we have some real racers here and I would hope they see more of a difference.
Shelby GT350 Member
Joined: November 20, 2010
Posts: 2,382
Likes: 1
From: Sioux Falls, SD

V6 Member
Joined: March 7, 2011
Posts: 82
Likes: 1
From: Moscow Russia and NC USA
That does look good, with all the talk about doing this so far I think you are the only that did it. Did they say anything about it being plug and play, just connect it into existing wire harnesses? If I did anything like this I think I would go all temps like oil, trans rear and engine. With the ability of the engine to go into limp mode I personally don't see much of a need for oil pressure. By the time you even see it the car would be in limp mode anyway. It seems to me for tracking it is all about temps.
http://www.boss302forum.com/index.ph...triple-guages/
Bullitt Member
Joined: March 15, 2011
Posts: 279
Likes: 0
From: SE Michigan
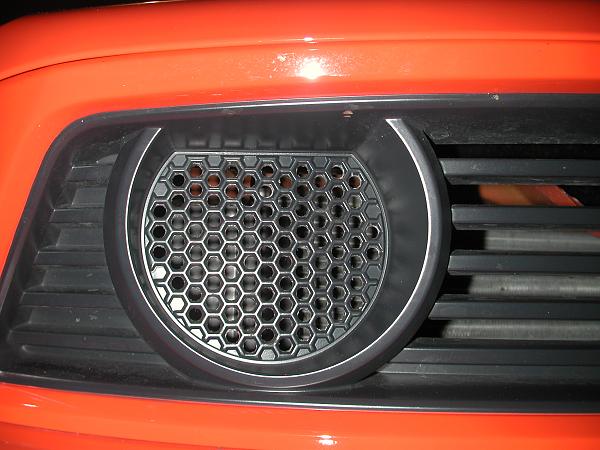
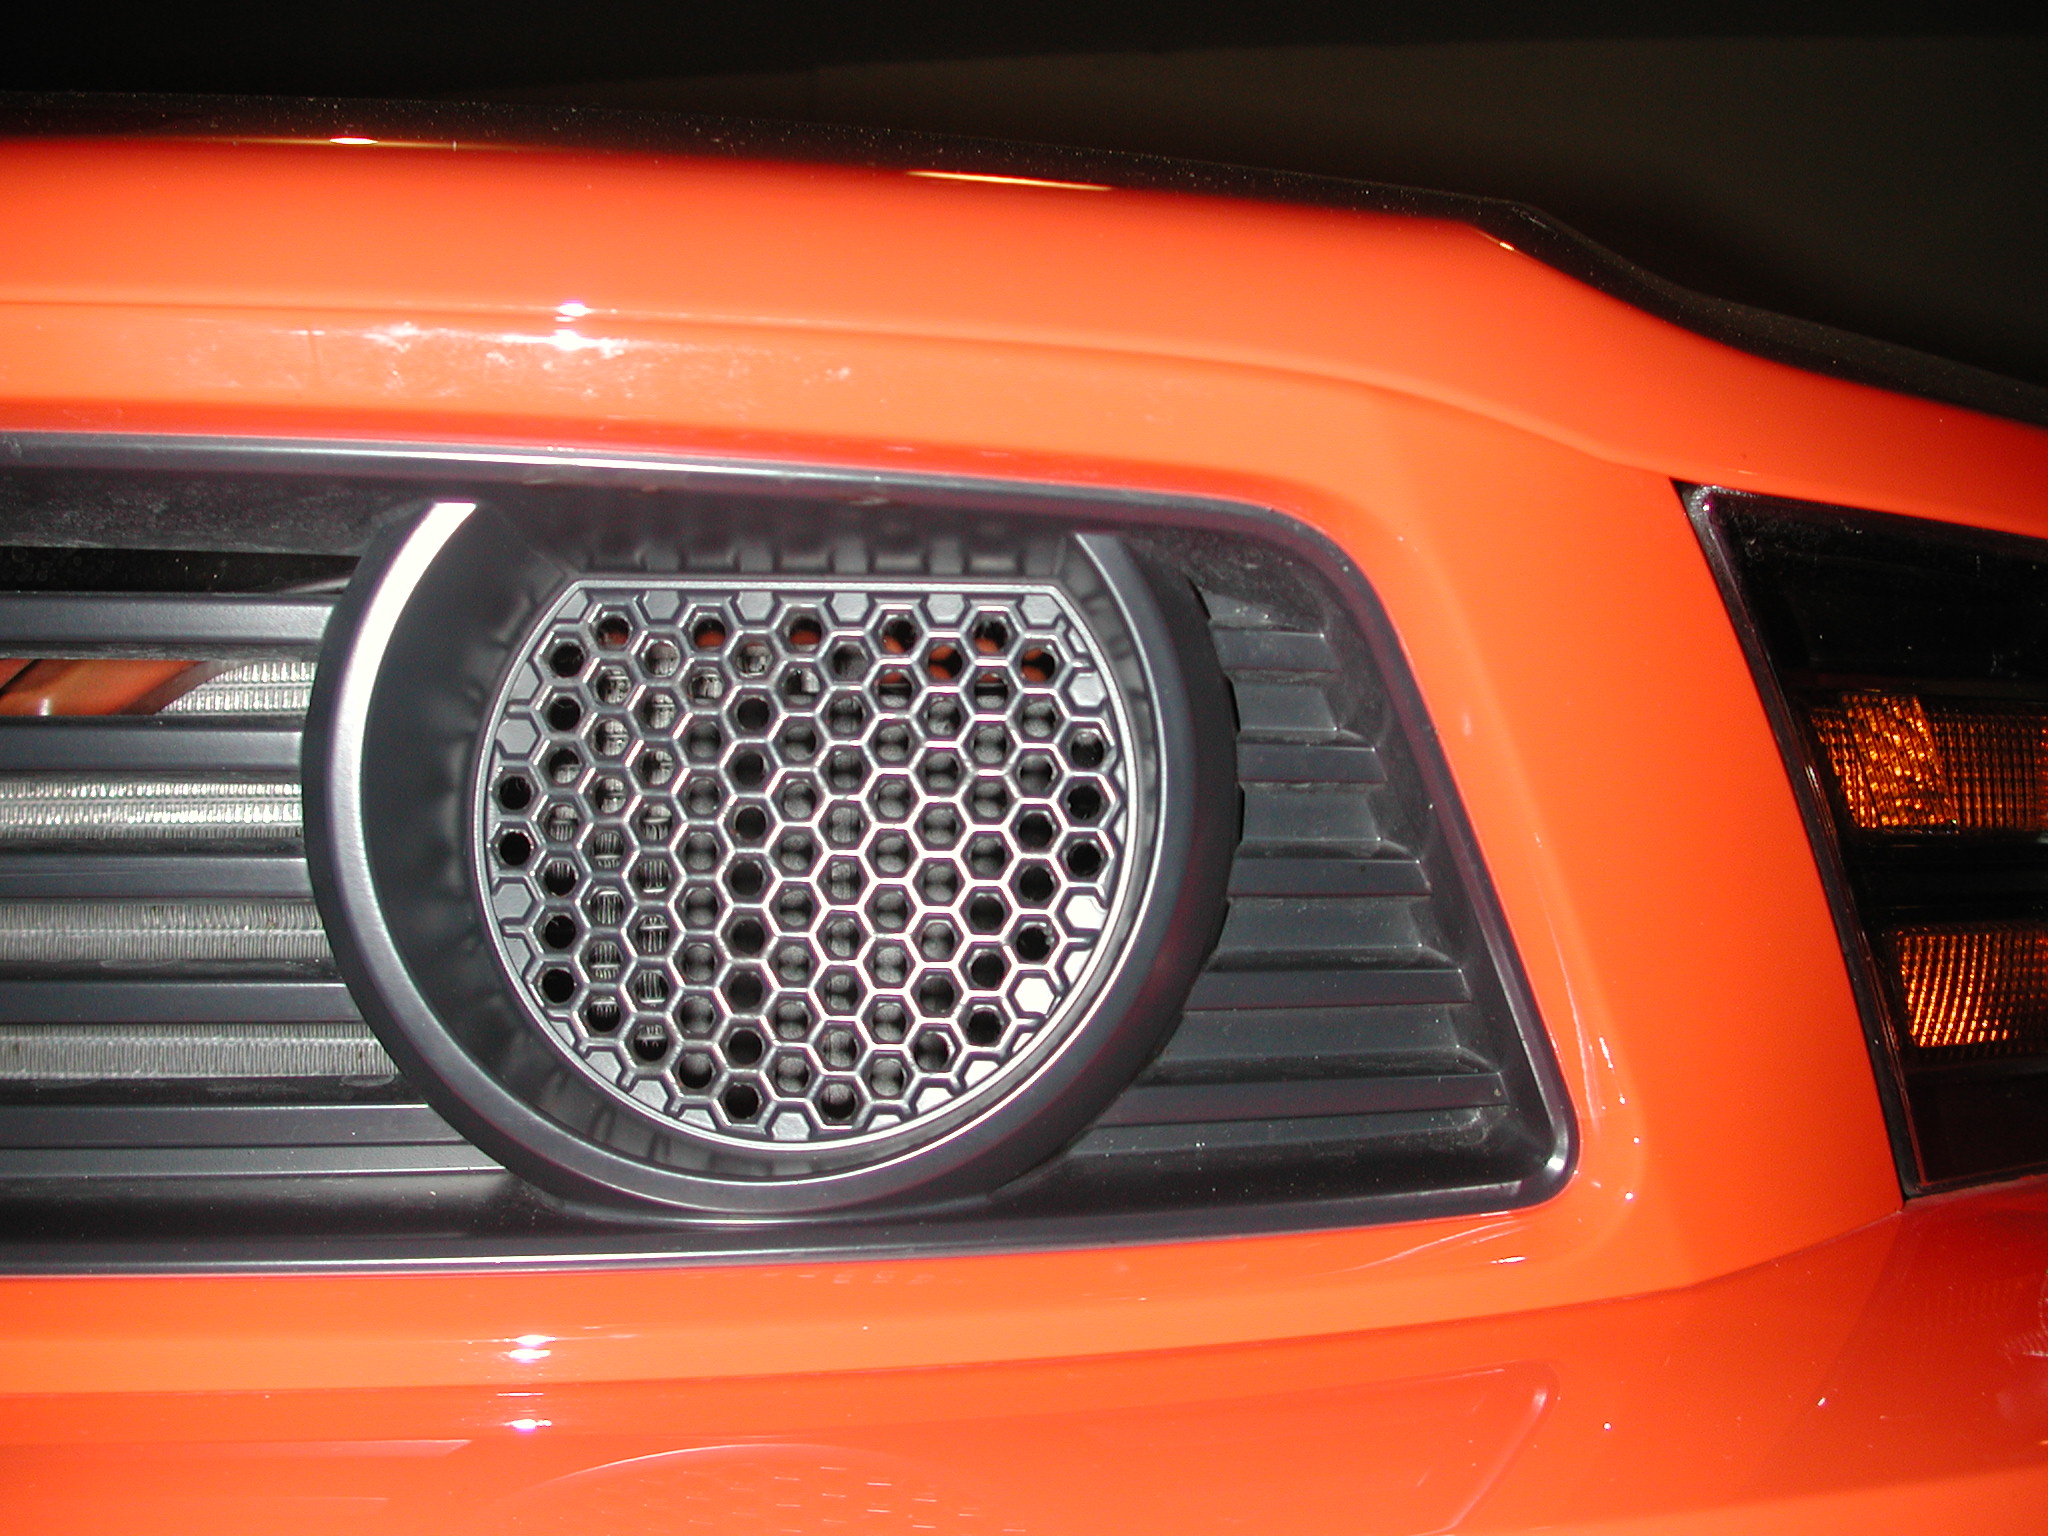
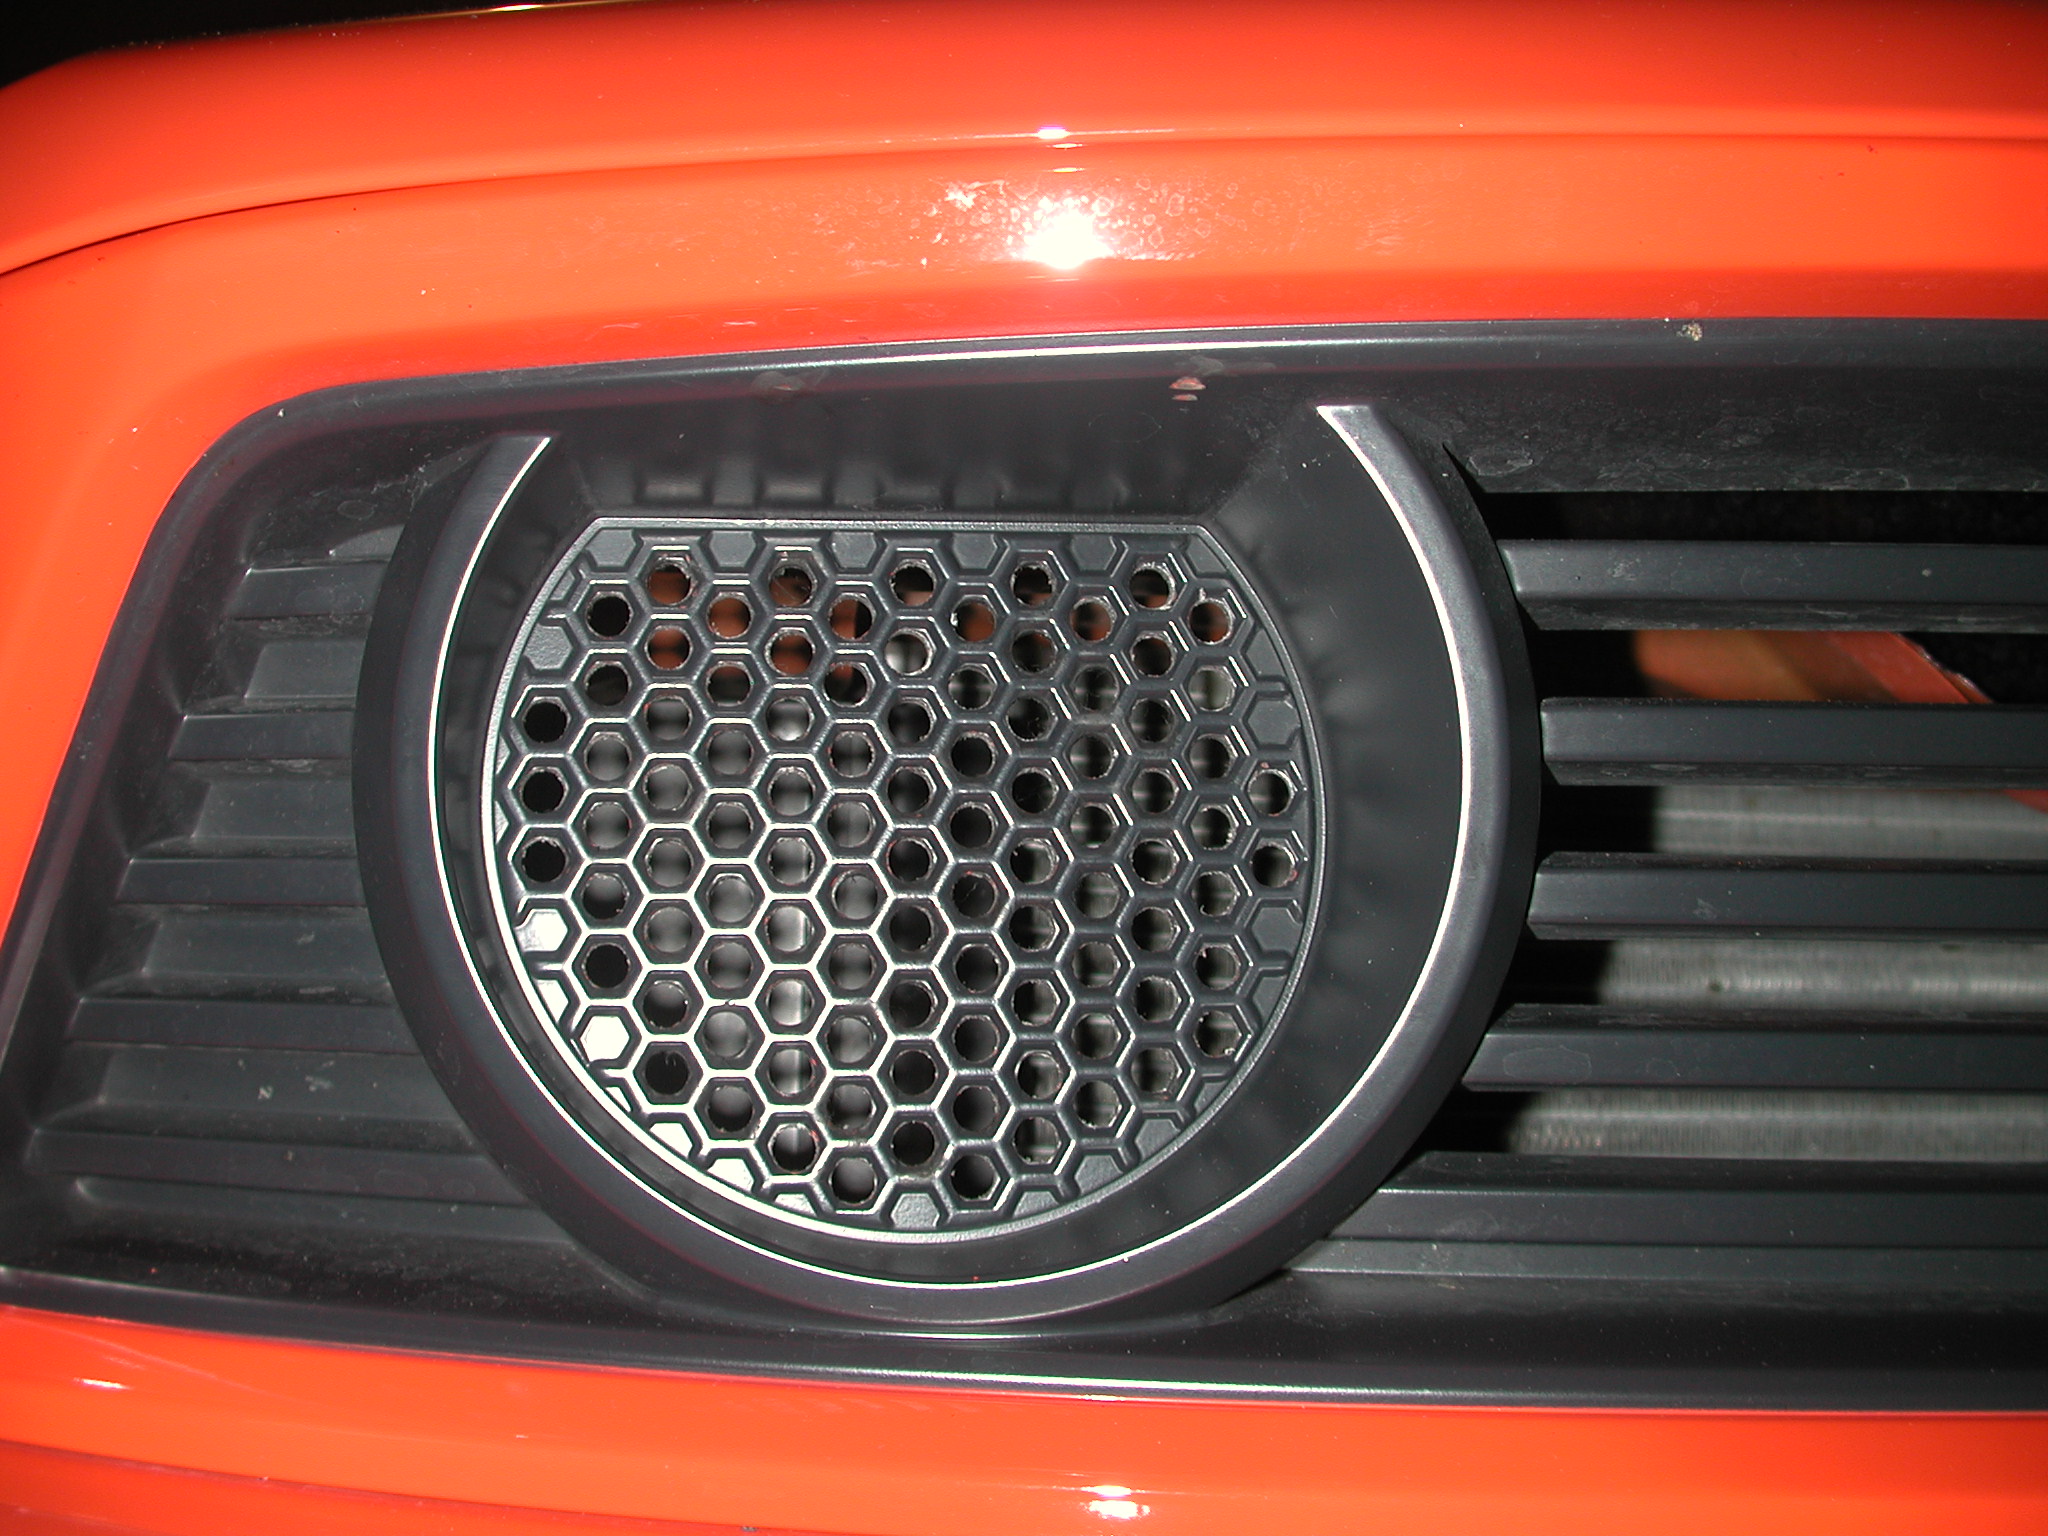
DONE!
I think it looks better than the Faux! I think it actually looks like it was intended.
Gary, I give you all the credit. I would have never had the Cahounas to try this one on my own!
Its plenty sturdy, the plastic is thick. I would expect no reduction in strength. The Grill was painted body color and then masked off and painted black. So, I touched up the areas that showed a small bit of body color paint from the drilling process with some flat black paint and a Q-Tip. It looks great and I'm a perfectionist!
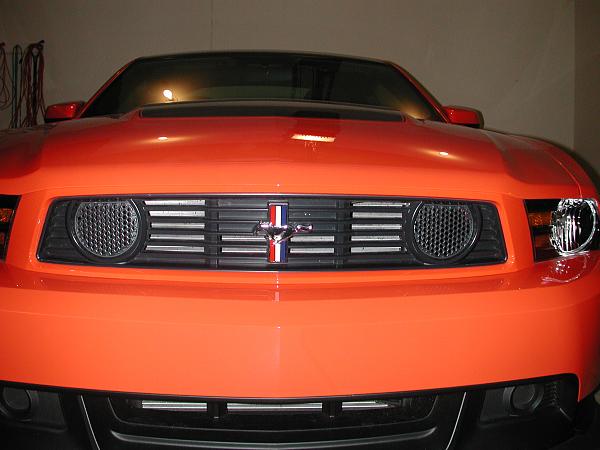

And here is Mod # 3 for this week end!
I think it looks better than the Faux! I think it actually looks like it was intended.
Gary, I give you all the credit. I would have never had the Cahounas to try this one on my own!
Its plenty sturdy, the plastic is thick. I would expect no reduction in strength. The Grill was painted body color and then masked off and painted black. So, I touched up the areas that showed a small bit of body color paint from the drilling process with some flat black paint and a Q-Tip. It looks great and I'm a perfectionist!

And here is Mod # 3 for this week end!

Last edited by Bossdog; Jun 30, 2011 at 04:42 AM.
That is a transmission scoop
Shelby GT350 Member
Joined: November 20, 2010
Posts: 2,382
Likes: 1
From: Sioux Falls, SD
Nice work Bossdog. I agree, it looks more factory than the original. I still think this is what they had in mind given the pattern on there. I looked at mine again this morning and the honeycomb "fake" mesh structure actually creates the radius edge that PTRocks recommended, so I'm not sure chamfering is necessary.
What specifically did you buy for touch up paint? The areas where I drilled only have a couple small spots of orange, but I've picked up several rock chips in the other parts of the grille that could use touching up.
What specifically did you buy for touch up paint? The areas where I drilled only have a couple small spots of orange, but I've picked up several rock chips in the other parts of the grille that could use touching up.
Mach 1 Member
Joined: December 13, 2006
Posts: 850
Likes: 0
I'm not planning anything as exciting as you guys, but once my joints cooperate, I'll be using this:

The center section is removable to allow for easier access. I need to make sure I put it back in position before driving off! The wheel chock block is removable to allow placing the sloping ramps in front to drive off forwards, if necessary.

The center section is removable to allow for easier access. I need to make sure I put it back in position before driving off! The wheel chock block is removable to allow placing the sloping ramps in front to drive off forwards, if necessary.
Tasca Super Boss 429 Member
Joined: December 18, 2010
Posts: 3,708
Likes: 0
From: NorCal
I'm not planning anything as exciting as you guys, but once my joints cooperate, I'll be using this:
The center section is removable to allow for easier access. I need to make sure I put it back in position before driving off! The wheel chock block is removable to allow placing the sloping ramps in front to drive off forwards, if necessary.
The center section is removable to allow for easier access. I need to make sure I put it back in position before driving off! The wheel chock block is removable to allow placing the sloping ramps in front to drive off forwards, if necessary.
Mach 1 Member
Joined: December 13, 2006
Posts: 850
Likes: 0
The ramps by themselves are real nice. If you get a set of the long ones, I'd suggest going with the two piece set for convenience of storage. Make sure you check what slope you need. Low cars (or long overhangs like what happens with the LS splitter in place), require the extensions.
Last edited by 1FAFP90; Jun 30, 2011 at 09:22 AM.
Bullitt Member
Joined: August 3, 2007
Posts: 349
Likes: 0
From: Florida
I'm not planning anything as exciting as you guys, but once my joints cooperate, I'll be using this:
The center section is removable to allow for easier access. I need to make sure I put it back in position before driving off! The wheel chock block is removable to allow placing the sloping ramps in front to drive off forwards, if necessary.
The center section is removable to allow for easier access. I need to make sure I put it back in position before driving off! The wheel chock block is removable to allow placing the sloping ramps in front to drive off forwards, if necessary.
Can you say car shows

Mach 1 Member
Joined: December 13, 2006
Posts: 850
Likes: 0
Hey Gary, are you gonna put an LS front splitter on your car to balance out the rear spoiler?
Bullitt Member
Joined: March 15, 2011
Posts: 279
Likes: 0
From: SE Michigan
Nice work Bossdog. I agree, it looks more factory than the original. I still think this is what they had in mind given the pattern on there. I looked at mine again this morning and the honeycomb "fake" mesh structure actually creates the radius edge that PTRocks recommended, so I'm not sure chamfering is necessary.
What specifically did you buy for touch up paint? The areas where I drilled only have a couple small spots of orange, but I've picked up several rock chips in the other parts of the grille that could use touching up.
What specifically did you buy for touch up paint? The areas where I drilled only have a couple small spots of orange, but I've picked up several rock chips in the other parts of the grille that could use touching up.
For paint I just used what I had on the shelf, Krylon Flat black. I sprayed it in a Snapple Cap and used a Q-Tip. It worked really well

FR500 Member
Joined: July 1, 2008
Posts: 3,352
Likes: 0
From: Oxford, UK