Ponies on The Run (Again)
 5/9/06, 10:40 PM
#421
GTR Member
Join Date: January 26, 2006
Location: Central Florida
Posts: 4,639
Likes: 0
Received 0 Likes
on
0 Posts
Dead Pedal
Originally Posted by TacoBill
Unless your foot is wider than that of Sasquatch, I think it'll be fine.
If I slide the dead pedal up a little, because of it's shape, the curved part will allow it to move over to the left more (where there is no kick panel), but then it's too high.
If I force it under the plastic kick panel, it lifts the dead pedal up in the air toward the right and this would put pressure on the screws.
So yours is touching the plastic kick panel, and still doesn't overhang on the right at all, and is down all the way?
 5/9/06, 11:12 PM
#422

Originally Posted by 89Trooper
Mine has done this from day 1 on the passenger side. I don't use the door much, so it didn't bother me. I did stop by to show the dealer and they said if it got worse or started to bother me that they would take care of it. If I do open that door, I just lightly push down on the piece a bit and it clears when the door closes. Then, since the window goes up when the door closes, the next time I open and close the door it snags again. With the windows down, after I push down on that piece to make it clear, it will clear every time. So, it's the window pushing up just a tad too far. Make sense?
5/9/06, 11:16 PM
#423
Originally Posted by 89Trooper
So yours is touching the plastic kick panel, and still doesn't overhang on the right at all, and is down all the way?
It may be overhanging just a bit. I do know that I didn't tuck it under the k-panel.
As far as up/down location, from my pic I posted earlier, it's positioned even with that slight drop ledge. I didn't wan't to locate it too far down towards the floor because it'll make a 'hidden triangle' space where junk can accumulate and almost impossible to clean (unless you remove the pedal).
5/9/06, 11:21 PM
#424
Somebody just ordered some Steeda Ultralite lowering springs... 
A quick refresher.. http://forums.bradbarnett.net/showthread.php?t=44908
A quick refresher.. http://forums.bradbarnett.net/showthread.php?t=44908
5/9/06, 11:41 PM
#425
Anyone want to guess what came off this truck this late afternoon?
I'll post pics tomorrow.
I'll post pics tomorrow.
5/10/06, 07:07 AM
#427
Shelby GT350 Member
Thread Starter
Join Date: January 17, 2006
Location: Tornado Alley
Posts: 2,061
Likes: 0
Received 0 Likes
on
0 Posts
Originally Posted by 89Trooper
Bill... see my sig! See anything new ordered?
Steeda Ultra Lights

Didn't you already install your pedals or no ??
I say FedEx is either Rotors or the MGW items
OK Hurricane, Tornado and Earthquake Allies (Love it)
You guys just need to get your GT Avatars back.
5/10/06, 08:51 AM
#428
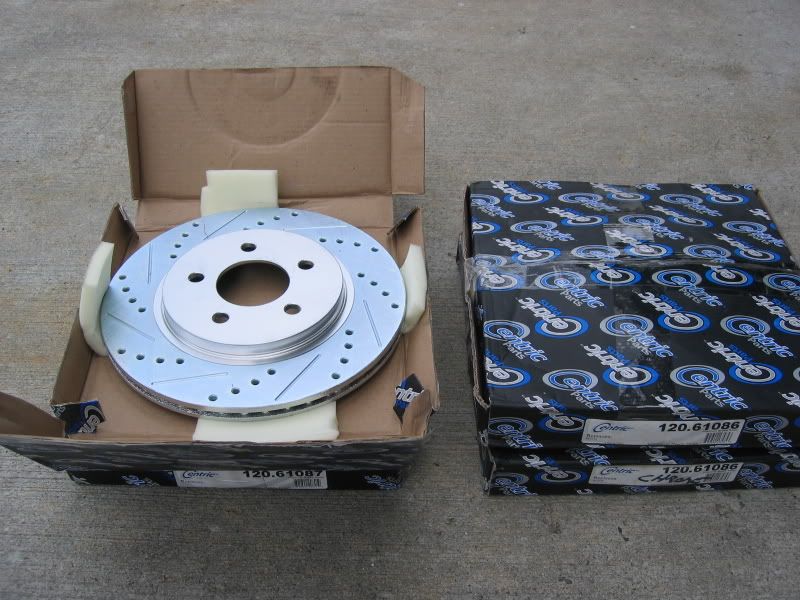
Rotorpros rotors came in!
Only had time to install the fronts.
Jacking: I learned that my current floor jack will not fit under my front end any longer. I even drove up on some 2x4's; worked, but the jack handle would only move up/down maybe 3 inches! Scrubbed that idea.
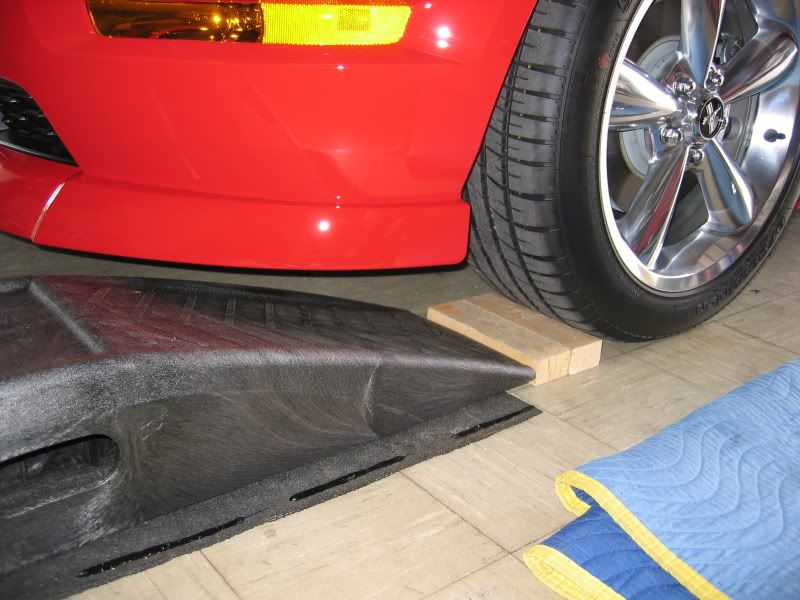
Next option, Rhino ramps ...
Steeda Ultralites + CDC Classic Chin = NO GO FOR RHINO RAMPS
(see pic below for what I had to do)
Rotors: Packaged well and they're very heavy. Overall quality/workmanship I give it a 9 (scratch on the silver painted hub surface, not a big deal, non-appearance), drilled holes and gas slots look great.
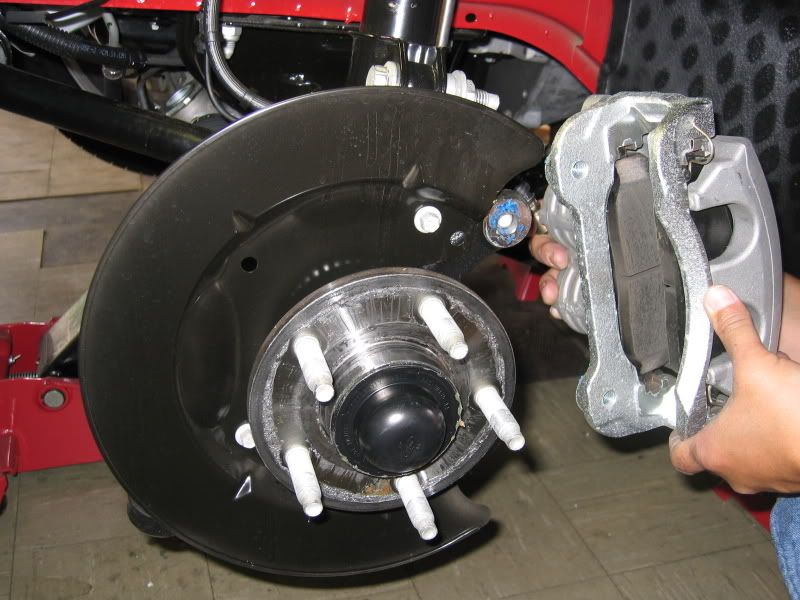
Install: Those 2 bolts holding the caliper assembly to the spindle were on TIGHT! (you can see the factory blue Loctite everywhere), had to use a 1/2" breaker bar just to crack them loose.
The calipers slid off the OEM rotors no problem. I had my bro-in-law swap out the rotors while I held the calipers up.
Re-installation of the caliper assy was no problem either; slid right back on. Installed the the 2 bolts, slapped the wheels back on.. done.
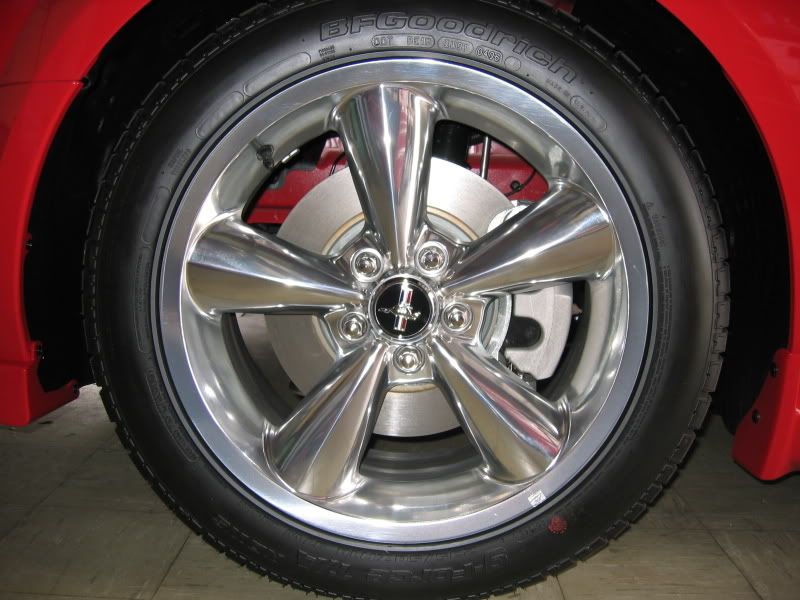
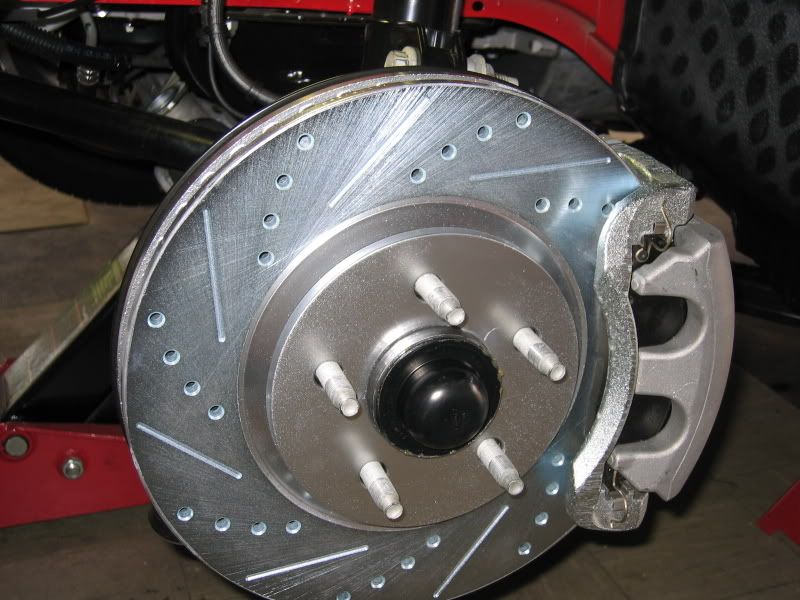
As you'll see from the pics below, just rolling back down the driveway, the rotors are starting to get a more 'shiny' finish to them from the 'frost' machined finish. I'm sure after several miles of driving/braking, most all the frost will be gone.
Sound: Because my OEM pads have yet to mate with the new rotors, is sounds very 'gritty' (best way to describe it). We'll see how long it takes before it's quiet.
Here's the pics...
Fresh out of the box (notice the different part numbers for front & rear).
Stock
Rhino ramp set-up
Backside - the 2 bolts that must be removed (silver (caliper assy) to black (spindle).

Cont. on next post... (darn 4 IMG limit!)
Only had time to install the fronts.
Jacking: I learned that my current floor jack will not fit under my front end any longer. I even drove up on some 2x4's; worked, but the jack handle would only move up/down maybe 3 inches! Scrubbed that idea.
Next option, Rhino ramps ...
Steeda Ultralites + CDC Classic Chin = NO GO FOR RHINO RAMPS
(see pic below for what I had to do)
Rotors: Packaged well and they're very heavy. Overall quality/workmanship I give it a 9 (scratch on the silver painted hub surface, not a big deal, non-appearance), drilled holes and gas slots look great.
Install: Those 2 bolts holding the caliper assembly to the spindle were on TIGHT! (you can see the factory blue Loctite everywhere), had to use a 1/2" breaker bar just to crack them loose.
The calipers slid off the OEM rotors no problem. I had my bro-in-law swap out the rotors while I held the calipers up.
Re-installation of the caliper assy was no problem either; slid right back on. Installed the the 2 bolts, slapped the wheels back on.. done.
As you'll see from the pics below, just rolling back down the driveway, the rotors are starting to get a more 'shiny' finish to them from the 'frost' machined finish. I'm sure after several miles of driving/braking, most all the frost will be gone.
Sound: Because my OEM pads have yet to mate with the new rotors, is sounds very 'gritty' (best way to describe it). We'll see how long it takes before it's quiet.
Here's the pics...
Fresh out of the box (notice the different part numbers for front & rear).
Stock
Rhino ramp set-up
Backside - the 2 bolts that must be removed (silver (caliper assy) to black (spindle).
Cont. on next post... (darn 4 IMG limit!)
5/10/06, 08:52 AM
#429
(Rotorpros install cont.)
Retaining rings removed and discarded (not required, only used for assembly at the factory).
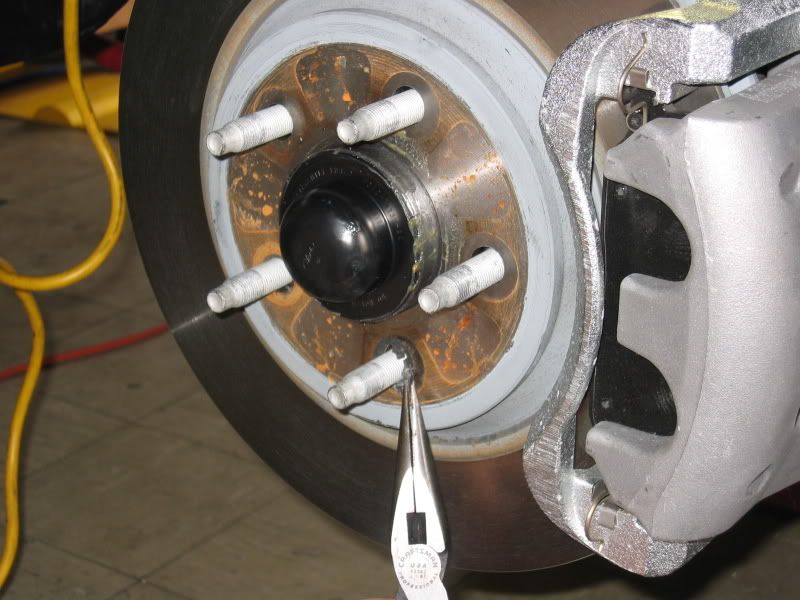
OEM rotor removed and caliper assy supported my me.
Rotorpros rotor installed.
Retaining rings removed and discarded (not required, only used for assembly at the factory).
OEM rotor removed and caliper assy supported my me.
Rotorpros rotor installed.
5/10/06, 09:29 AM
#431
Originally Posted by OKCMustangGT
Looks good Bill !!
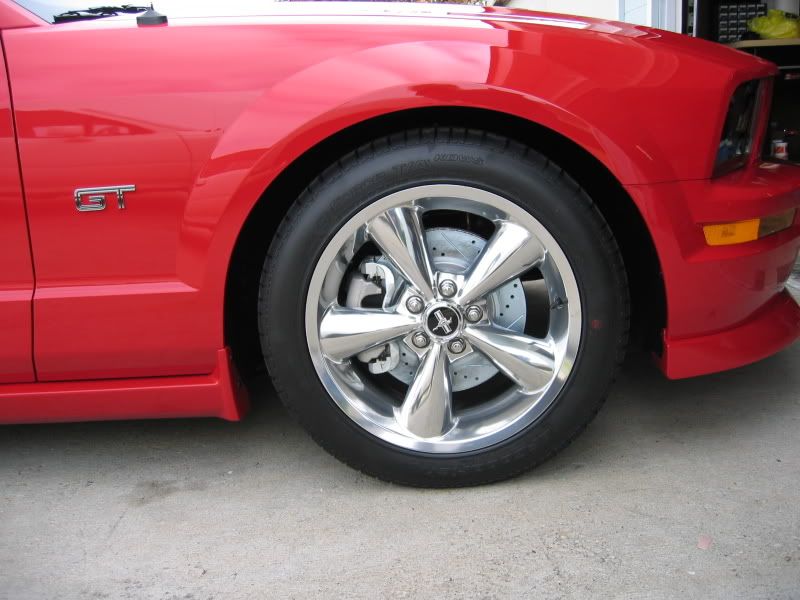
Got any shots from 10ft or so back? I wanted to see how it looks from a distance.
Got any shots from 10ft or so back? I wanted to see how it looks from a distance.
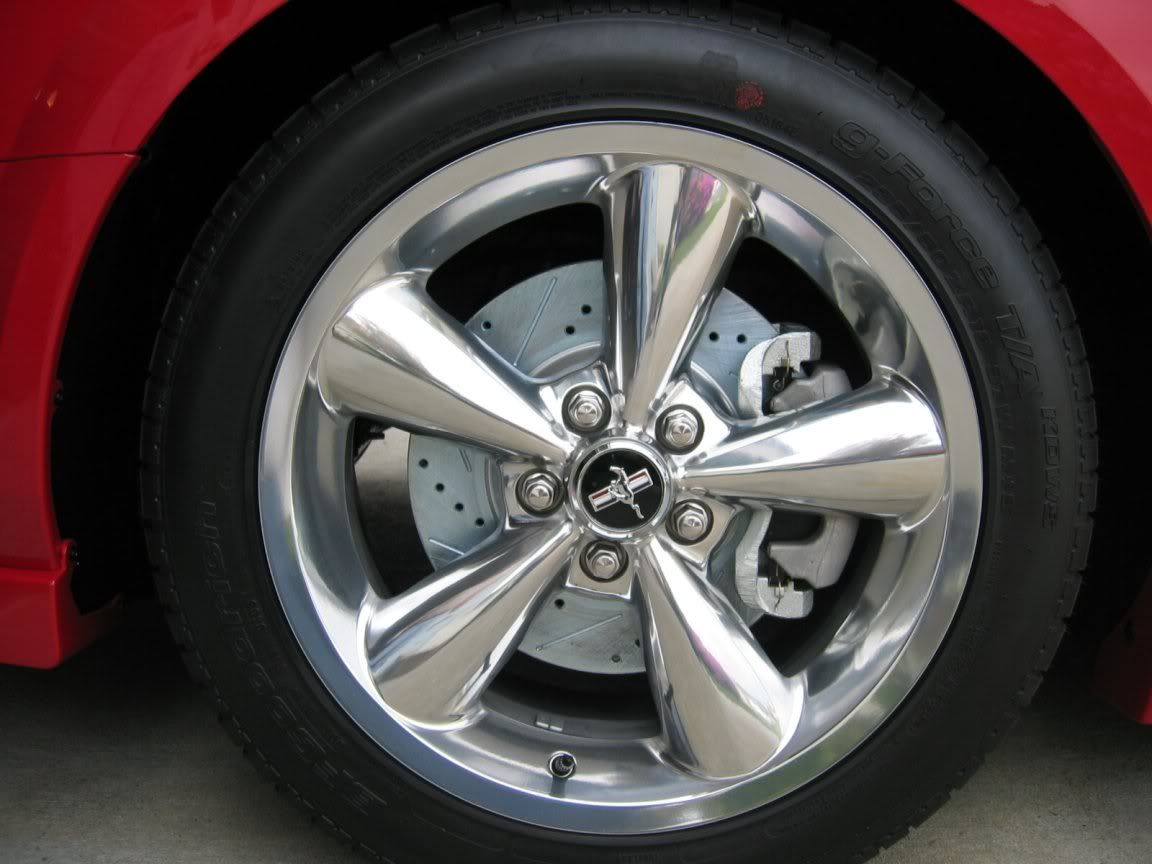
Here's the only pan shot I have, not exactly 10', maybe 5'.
 5/10/06, 10:36 AM
#432
GTR Member
Join Date: January 26, 2006
Location: Central Florida
Posts: 4,639
Likes: 0
Received 0 Likes
on
0 Posts
Originally Posted by OKCMustangGT
I'm not Bill but, Steeda Ultra Lights
Didn't you already install your pedals or no ??
OK Hurricane, Tornado and Earthquake Allies (Love it)
Didn't you already install your pedals or no ??
OK Hurricane, Tornado and Earthquake Allies (Love it)
I installed the 3 pedals completely, but not the dead pedal or the heel guard.
When did you guys change your locations? I was wondering if anybody would notice mine.
5/10/06, 11:42 AM
#433
Originally Posted by 89Trooper
I just said "Bill" because I told him I would never lower it.
I installed the 3 pedals completely, but not the dead pedal or the heel gaurd.
When did you guys change your locations? I was wondering if anybody would notice mine.
I installed the 3 pedals completely, but not the dead pedal or the heel gaurd.
When did you guys change your locations? I was wondering if anybody would notice mine.

I changed my location after I noticed Daryl's. I was thinking what kind of natural disaster does CA have? Just then, someone shook me.
5/10/06, 11:51 AM
#434
GTR Member
Join Date: January 26, 2006
Location: Central Florida
Posts: 4,639
Likes: 0
Received 0 Likes
on
0 Posts
Originally Posted by TacoBill
I missed the 'Bill' part somewhere..
I changed my location after I noticed Daryl's. I was thinking what kind of natural disaster does CA have? Just then, someone shook me.
I changed my location after I noticed Daryl's. I was thinking what kind of natural disaster does CA have? Just then, someone shook me.
Hurricane alley won't actually start until June 1. And I'll be spending my time here, as much as I spend time on TMS:
http://www.nhc.noaa.gov/
(National Hurricane Center)
Look at this map: http://www.nhc.noaa.gov/tracks/2004atl.gif
We live right where Charley, Francis, and Jeanne crossed over each other. Notice how Jeanne was going to go out to sea, but did a loop and came right back for Central Florida.
5/10/06, 11:55 AM
#435
Originally Posted by 89Trooper
Back on post 420 I asked you, specifically, if you noticed something else ordered in my sig, and Daryl said he wasn't "Bill", but he saw it was the springs. I explained that I asked "Bill" because "Bill" said he, "Bill", knew I would eventually lower it.
 )
)Tom- Any comment on the new rotors? You're just days away from receiving yours.
BTW- That Hurricane chart looks scary! At least you guys see it coming.
5/10/06, 12:01 PM
#436
GTR Member
Join Date: January 26, 2006
Location: Central Florida
Posts: 4,639
Likes: 0
Received 0 Likes
on
0 Posts
Originally Posted by TacoBill
Tom- Any comment on the new rotors? You're just days away from receiving yours.
BTW- That Hurricane chart looks scary! At least you guys see it coming.
BTW- That Hurricane chart looks scary! At least you guys see it coming.
Yeah, at least we have a warning (usually 3 to 7 days). Those three hurricanes ripped off every shingle in my neighborhood, practically.
5/10/06, 01:14 PM
#437
GTR Member
Join Date: January 26, 2006
Location: Central Florida
Posts: 4,639
Likes: 0
Received 0 Likes
on
0 Posts
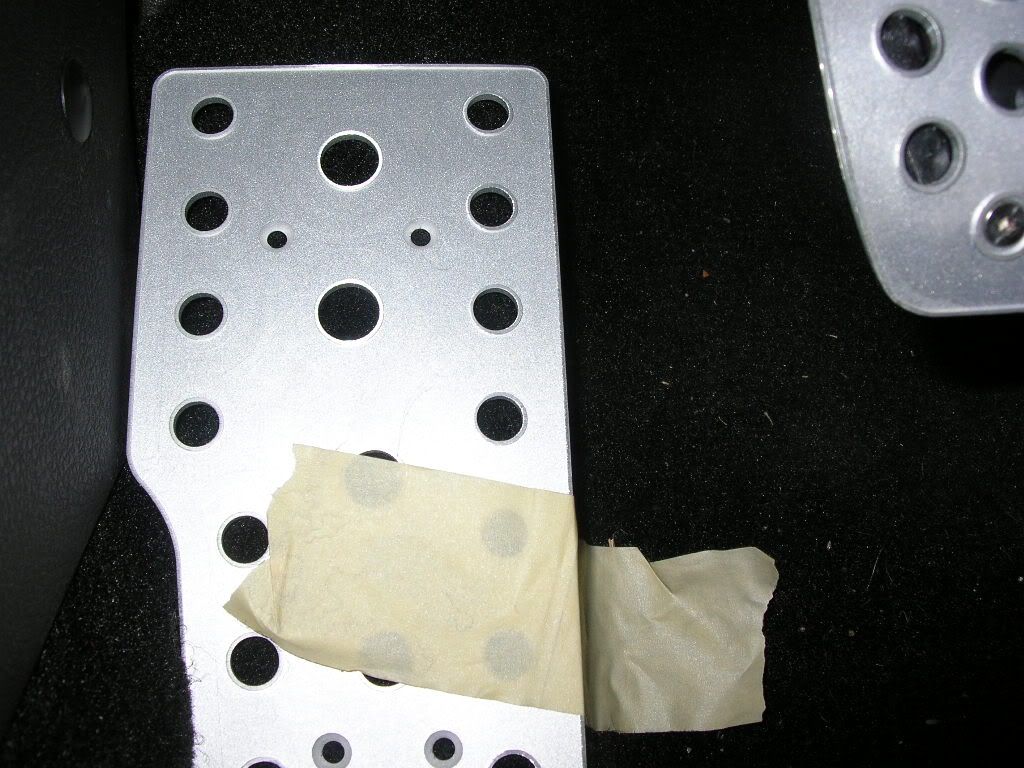
Dead Pedal Install
OK, here it shows how the dead pedal overhangs on the right. You can see the edge of the stock dead pedal area through the right set of holes:
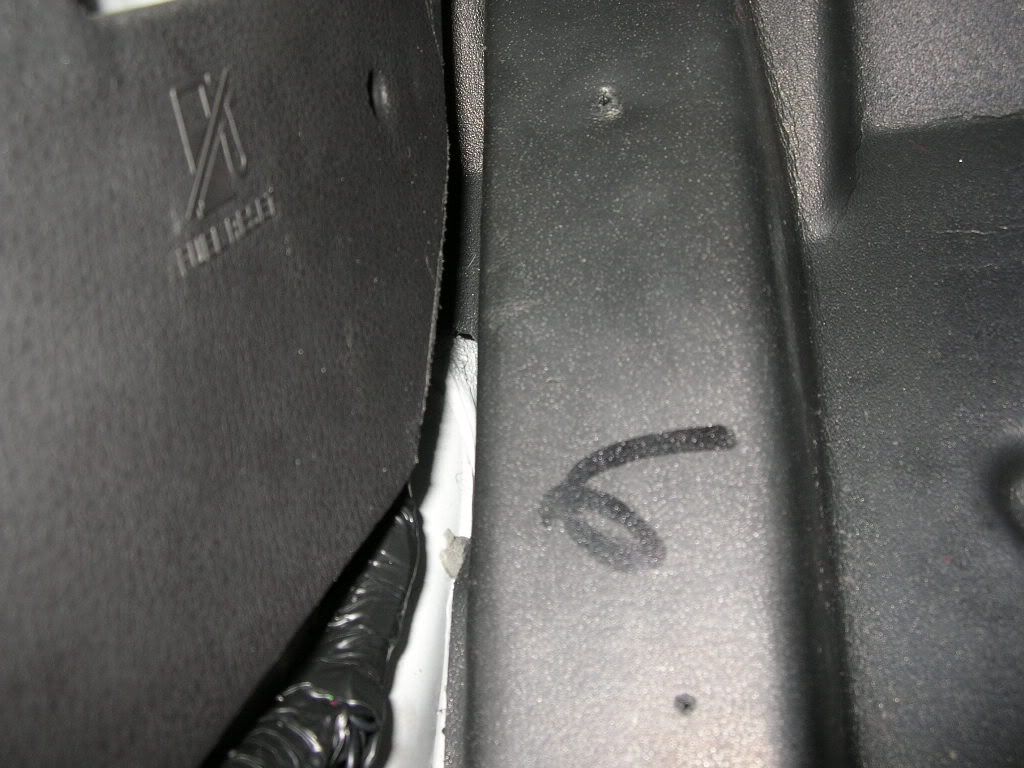
Here is how I trimmed the kick panel (I later used a blade to smooth out the cut). The bottom hole in the foam I did, the top hole was there.
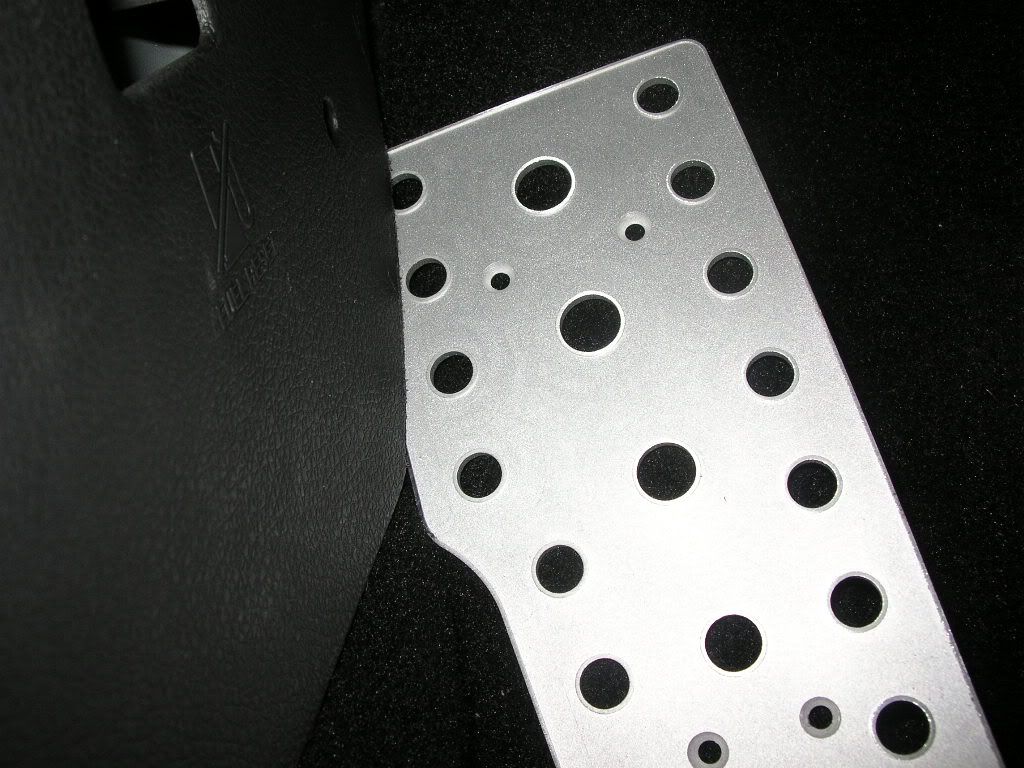
Here is how easily the dead pedal slides under the kick panel now :
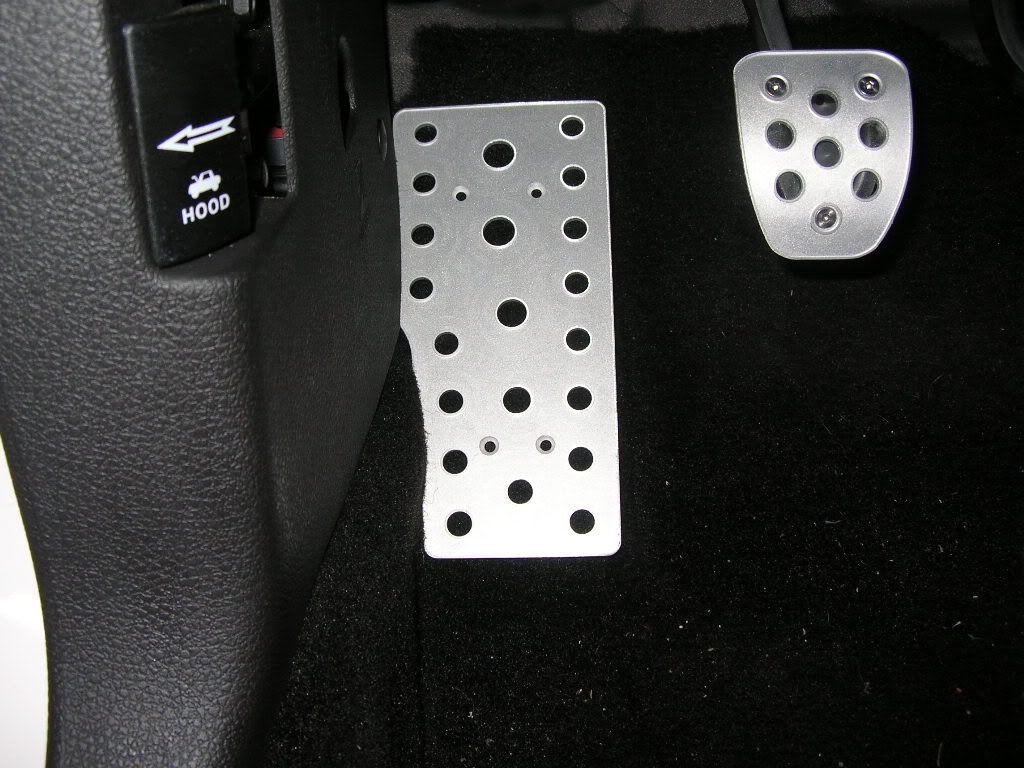
Here it is just laying in place. It's down a little, but doesn't close the "triangle area". Still easy to clean under it. Also, you can see how it's over to the left a little now. I would rather have it there, than have my foot catch on it.
I also found longer stainless steel screws that will go deeper into the foam backing.
Here is how I trimmed the kick panel (I later used a blade to smooth out the cut). The bottom hole in the foam I did, the top hole was there.
Here is how easily the dead pedal slides under the kick panel now :
Here it is just laying in place. It's down a little, but doesn't close the "triangle area". Still easy to clean under it. Also, you can see how it's over to the left a little now. I would rather have it there, than have my foot catch on it.
I also found longer stainless steel screws that will go deeper into the foam backing.
5/10/06, 02:02 PM
#438
Originally Posted by 89Trooper
Here it is just laying in place. It's down a little, but doesn't close the "triangle area". Still easy to clean under it. Also, you can see how it's over to the left a little now. I would rather have it there, than have my foot catch on it.
I also found longer stainless steel screws that will go deeper into the foam backing.
I also found longer stainless steel screws that will go deeper into the foam backing.
Did the longer screws help stiffen the pedal? The ones provided barely tap into the foam block. I don't rest my foot on it (yet), just for looks right now.
5/10/06, 02:08 PM
#439
GTR Member
Join Date: January 26, 2006
Location: Central Florida
Posts: 4,639
Likes: 0
Received 0 Likes
on
0 Posts
Well, I didn't feel it with the shorter screws, so I don't know what it felt like. But, it does feel pretty solid. They are about 4 times as long. I can say that with the short screws, they never got tight, but the longer screws seem to grab better.
5/10/06, 02:18 PM
#440
Off topic...
For those who want to know how to create a hyperlink here without posting the whole URL address, it's simple.
Type out your word: Mustang Cafe
Highlight your word(s)
Click on the 'Insert Link' icon (below white smiley)
Paste your URL.
Done.
Have this: Mustang Cafe
instead of this: http://www.bcmcmustang.homestead.com/MustangCafe.html