
The one and only GABE's '13 GT Build Thread!

Thread Starter
Legacy TMS Member
Joined: August 7, 2011
Posts: 5,246
Likes: 567
From: NC
Thanks Tony!
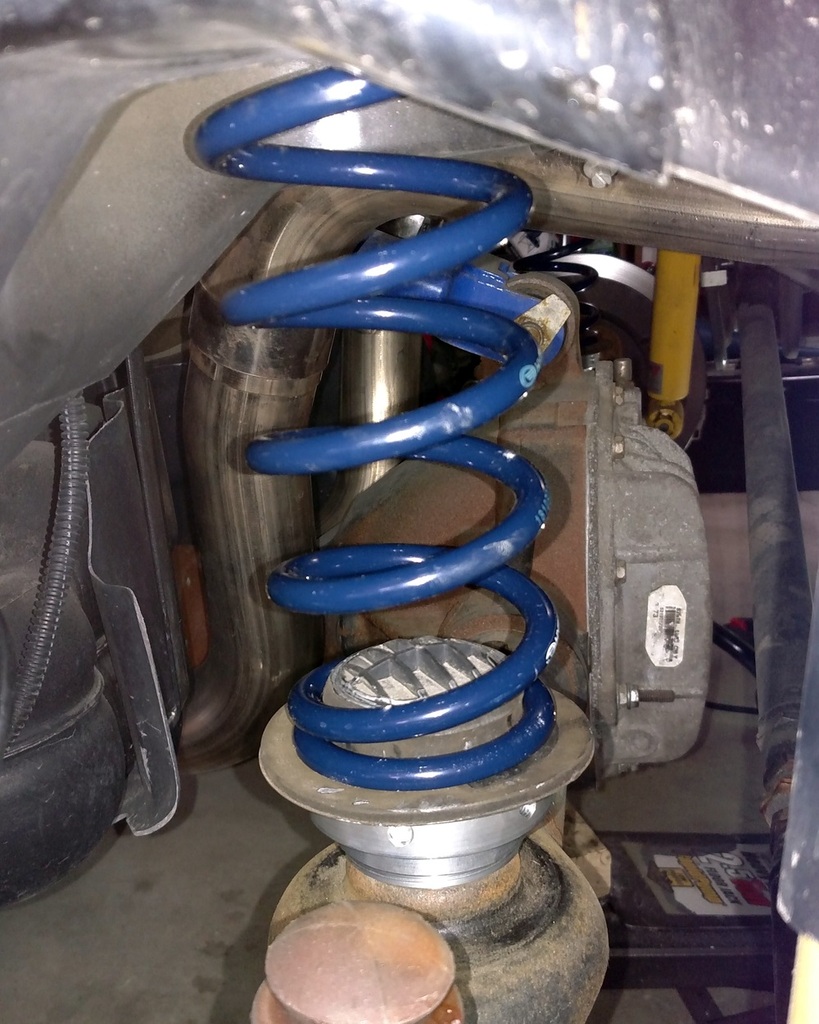
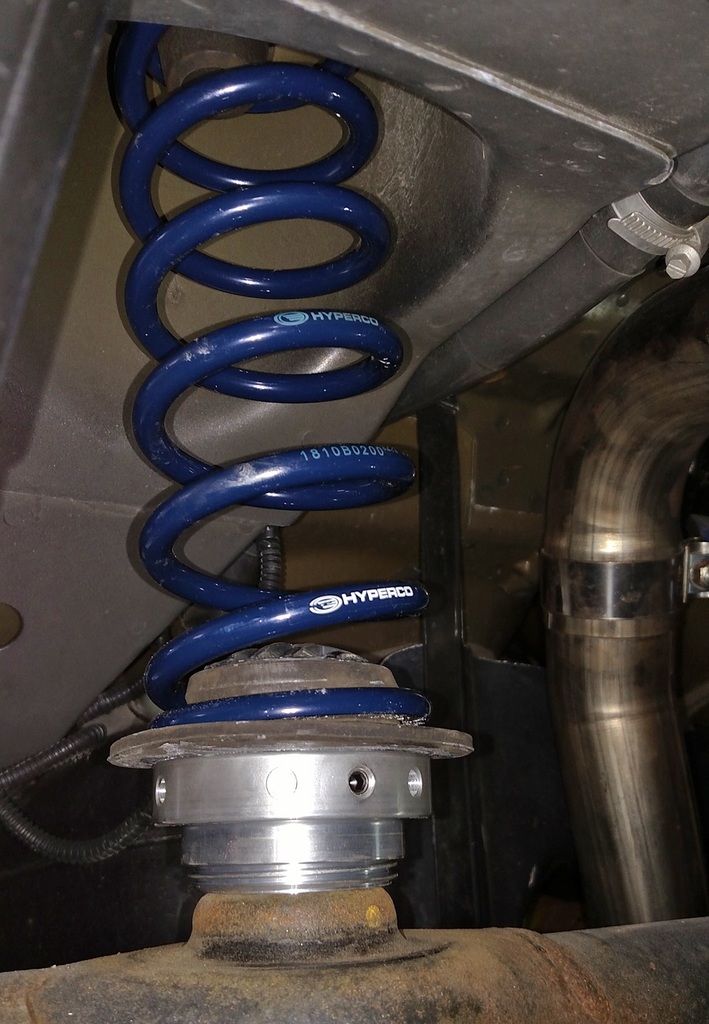
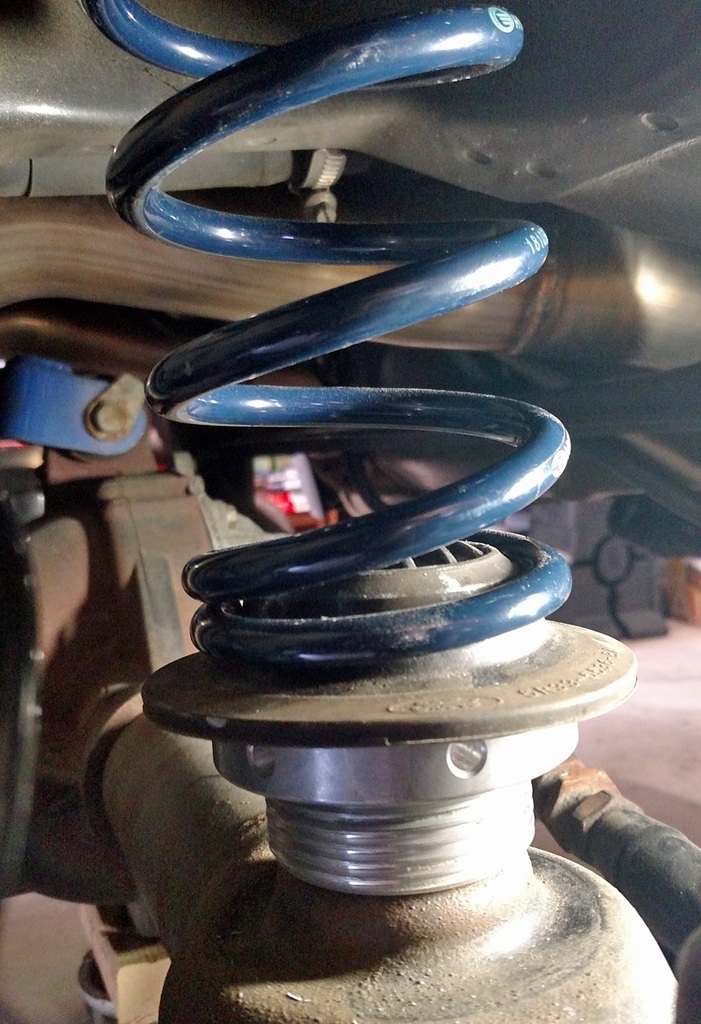
Some pics from the install of the perches and new springs.
The new springs are a must-have if doing these perches since they're quite a bit shorter allowing room for the perch:
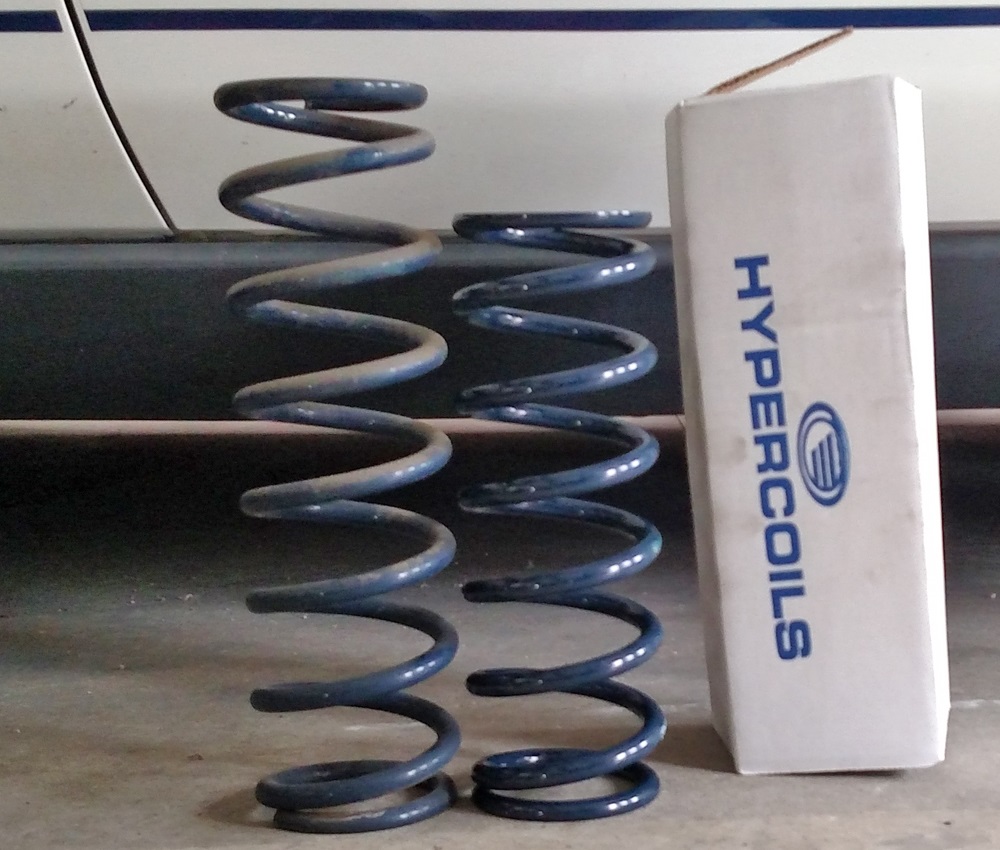
Something good to know is that the new coilover springs are the same diameter as the Sport springs, so the Sport springs should certainly fit just fine on the adjustable perches, but they would most likely lift the car a bunch, even with the lower spring rate of 175 lbs VS the shorter spring's 200 lbs:
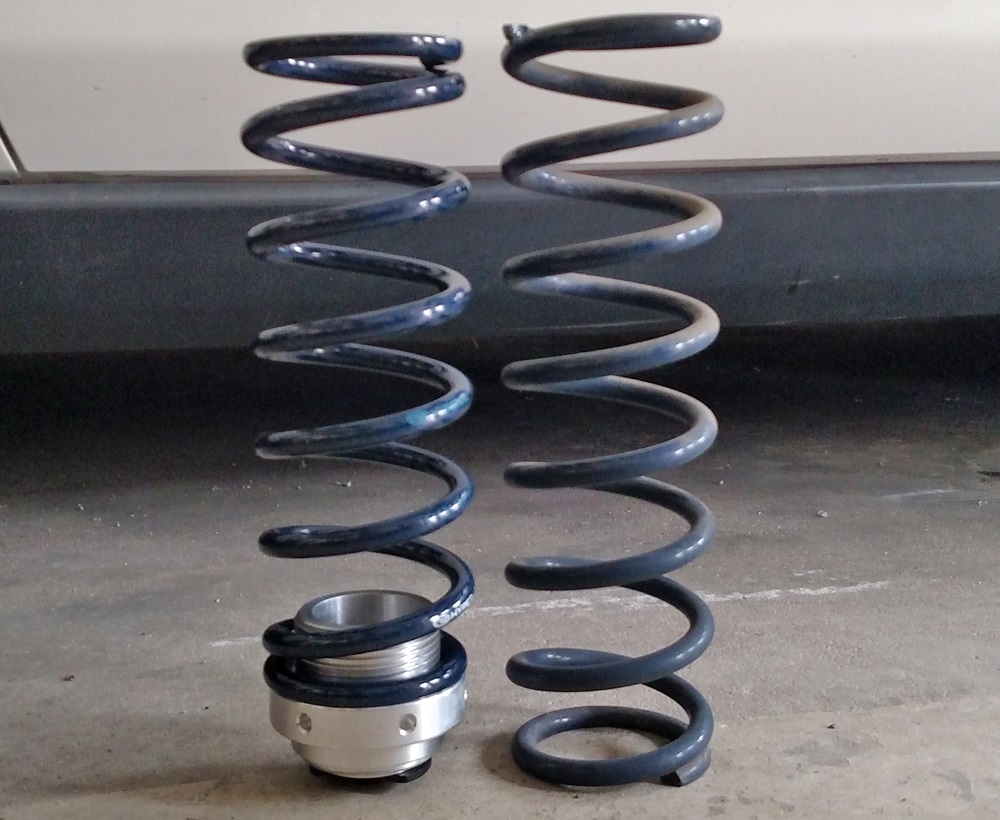
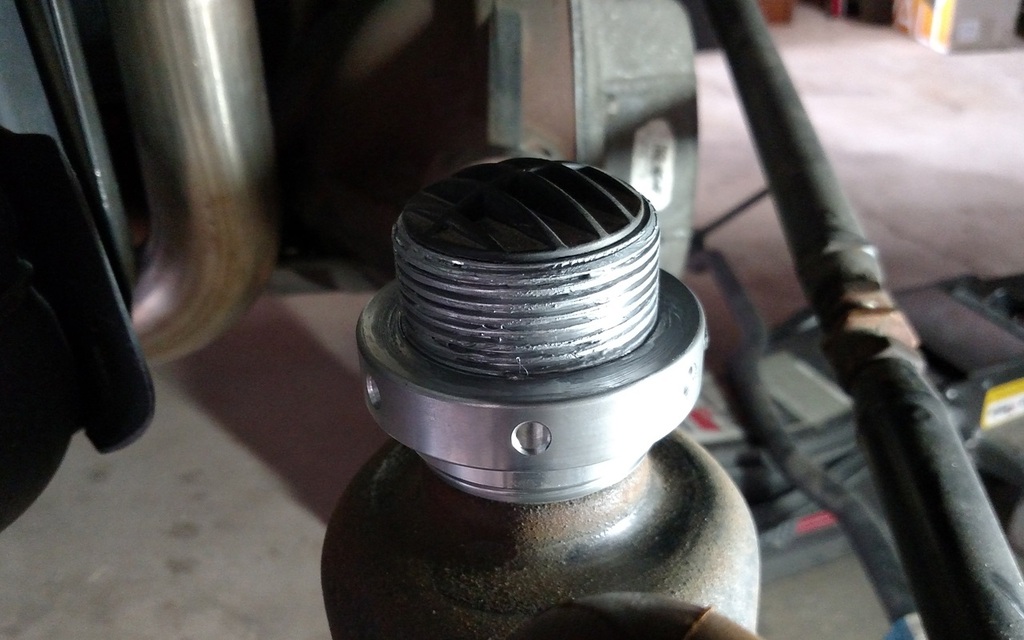
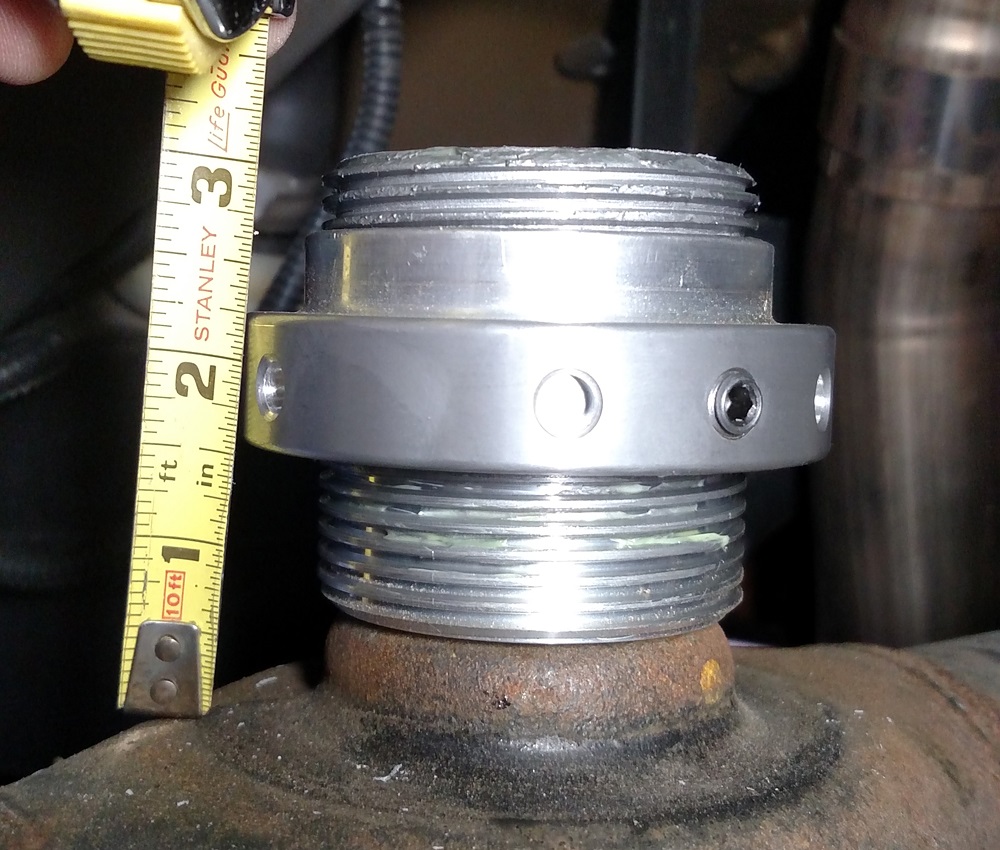
As far as the install itself, I removed the rubber lower spring seat, cleaned it up, and installed the perch and tightened it as much as I could (I set the torque wrench to 85 ft-lbs and it never got there, it just went from turning to a stop point - Steeda doesn't specify a torque spec).
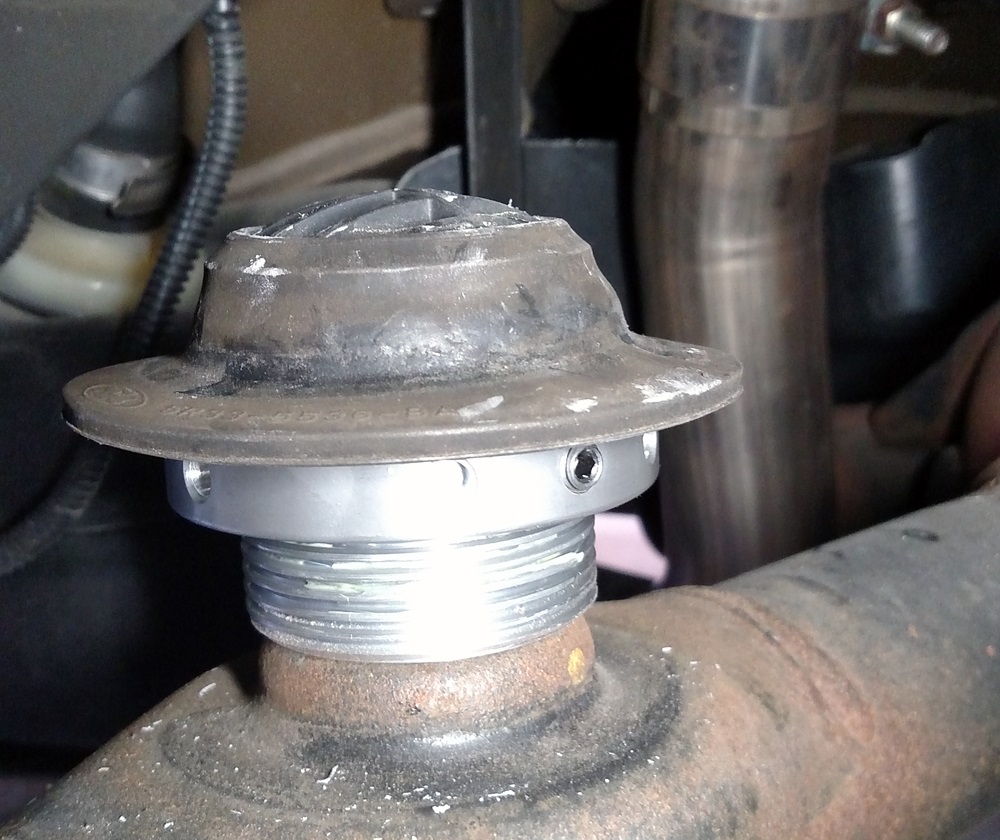
Steeda says to grease the threads, I used anti-seize, and also applied anti-seize on the inside and bottom of the rubber spring seat to keep any rust from forming, then re-installed the round plastic cap from the stock perch to the top of the Steeda perch:
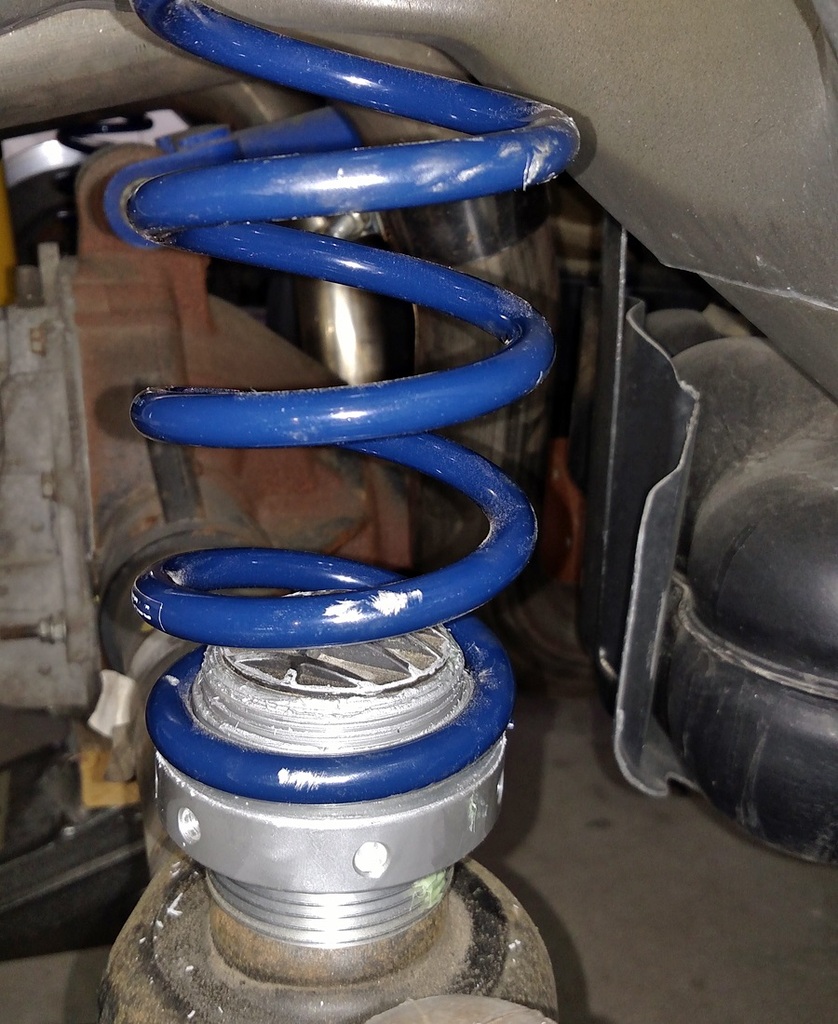
And how the new set-up looks once installed and set to the current setting that lifted the car a half-inch over where it sat with the Steeda Sport springs installed:
One slight issue I had was the driver side LCA relo bracket (CHE unit) gets in the way of the lower shock bolt, so I couldn't remove that bolt, I ended up removing the top nut and letting the axle droop down that way, with the shock still attached to it, then just had to be more careful when lifting the axle back into place, making sure that the shock shaft was going into its hole.
.
Some pics from the install of the perches and new springs.
The new springs are a must-have if doing these perches since they're quite a bit shorter allowing room for the perch:
Something good to know is that the new coilover springs are the same diameter as the Sport springs, so the Sport springs should certainly fit just fine on the adjustable perches, but they would most likely lift the car a bunch, even with the lower spring rate of 175 lbs VS the shorter spring's 200 lbs:
As far as the install itself, I removed the rubber lower spring seat, cleaned it up, and installed the perch and tightened it as much as I could (I set the torque wrench to 85 ft-lbs and it never got there, it just went from turning to a stop point - Steeda doesn't specify a torque spec).
Steeda says to grease the threads, I used anti-seize, and also applied anti-seize on the inside and bottom of the rubber spring seat to keep any rust from forming, then re-installed the round plastic cap from the stock perch to the top of the Steeda perch:
And how the new set-up looks once installed and set to the current setting that lifted the car a half-inch over where it sat with the Steeda Sport springs installed:
One slight issue I had was the driver side LCA relo bracket (CHE unit) gets in the way of the lower shock bolt, so I couldn't remove that bolt, I ended up removing the top nut and letting the axle droop down that way, with the shock still attached to it, then just had to be more careful when lifting the axle back into place, making sure that the shock shaft was going into its hole.
.
Thread Starter
Legacy TMS Member
Joined: August 7, 2011
Posts: 5,246
Likes: 567
From: NC
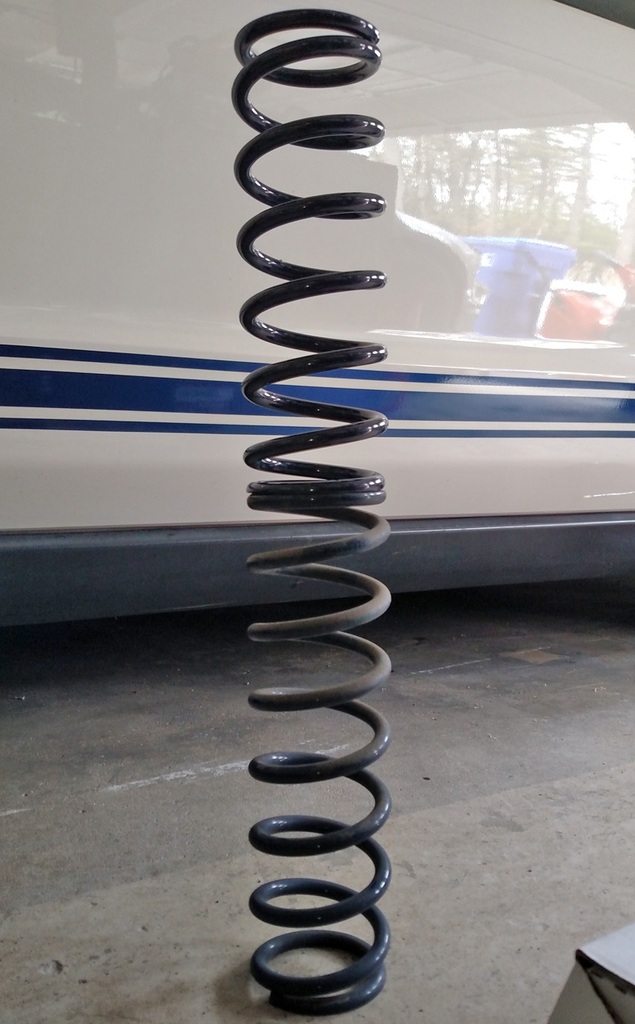
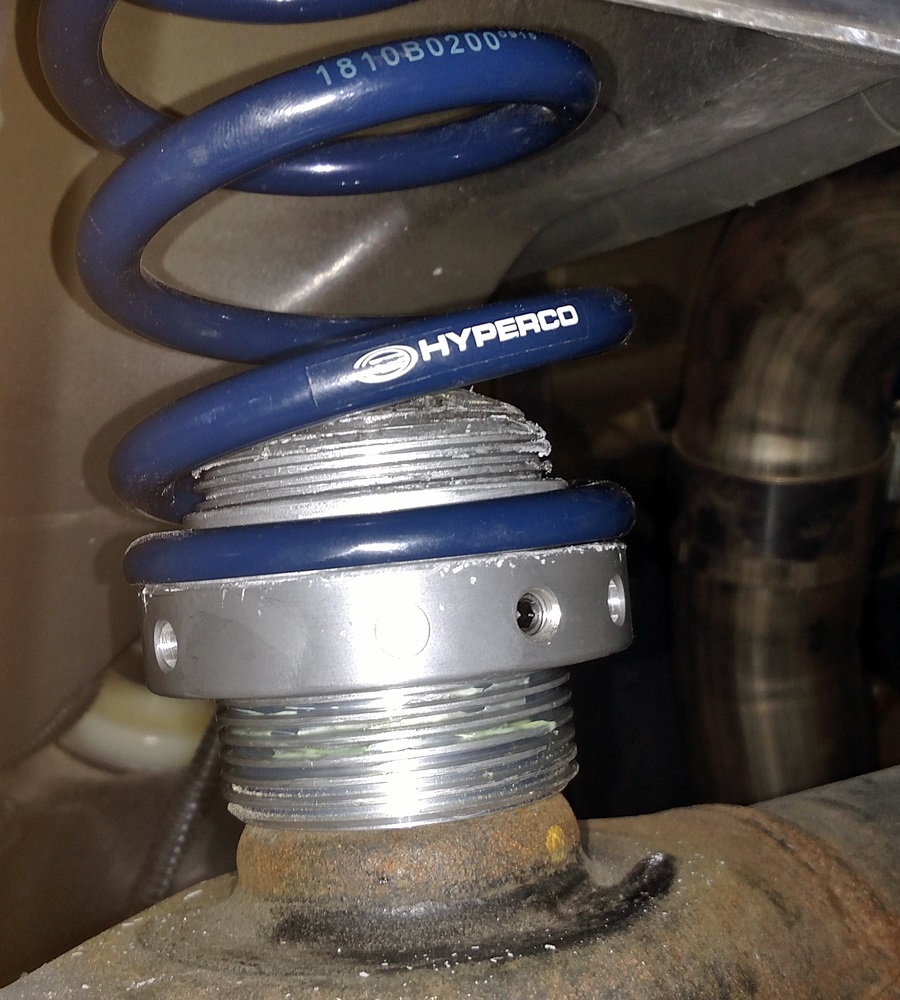
Today I took my new rear spring perches apart and installed them the right way, while also adjusting them up a tiny bit more, so the right rear measurement from the ground to the top of the wheel opening is 29", left rear almost a half inch more, but the driver side has always been higher ... I'll adjust it down in a few more days, bring it down a 1/4" or so.
Tried re-installing the rubber seat and it wouldn't fully go on:
And the springs wouldn't fit properly, they wouldn't sit down onto the spring's seat:
So now without the rubber thing the springs fit perfectly onto the seat:
Tried re-installing the rubber seat and it wouldn't fully go on:
And the springs wouldn't fit properly, they wouldn't sit down onto the spring's seat:
So now without the rubber thing the springs fit perfectly onto the seat:
Thread Starter
Legacy TMS Member
Joined: August 7, 2011
Posts: 5,246
Likes: 567
From: NC
I actually cut a bit of one of the rubber seats' tops, to see if it would go down lower, and it seems like it did, but the spring still wouldn't sit down fully until I removed the rubber seat altogether.

Bullitt Member
Joined: February 24, 2011
Posts: 358
Likes: 2
From: MD
Today I took my new rear spring perches apart and installed them the right way, while also adjusting them up a tiny bit more, so the right rear measurement from the ground to the top of the wheel opening is 29", left rear almost a half inch more, but the driver side has always been higher ... I'll adjust it down in a few more days, bring it down a 1/4" or so.

Tried re-installing the rubber seat and it wouldn't fully go on:

And the springs wouldn't fit properly, they wouldn't sit down onto the spring's seat:

So now without the rubber thing the springs fit perfectly onto the seat:


Tried re-installing the rubber seat and it wouldn't fully go on:
And the springs wouldn't fit properly, they wouldn't sit down onto the spring's seat:
So now without the rubber thing the springs fit perfectly onto the seat:
Thread Starter
Legacy TMS Member
Joined: August 7, 2011
Posts: 5,246
Likes: 567
From: NC
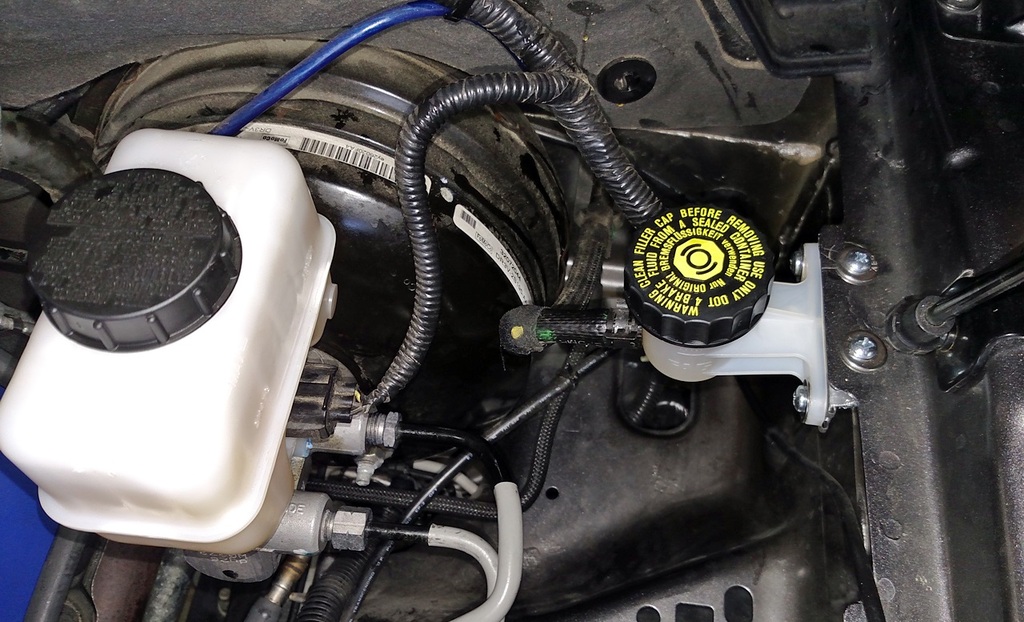
Today I installed the brake fluid reservoir from the auto cars, the GTO clutch fluid reservoir, and topped off the fluids with Amsoil DOT4 brake fluid.
Brake and clutch fluids are now "divorced", no longer heating each other up.
McLeod clutch line to be installed within the next few days.
The new set-up:
Brake and clutch fluids are now "divorced", no longer heating each other up.
McLeod clutch line to be installed within the next few days.
The new set-up:

Thread Starter
Legacy TMS Member
Joined: August 7, 2011
Posts: 5,246
Likes: 567
From: NC
Thanks Tony!
I like them.
They're quiet and grippy.
haven't put a lot of miles on them, the car's been in the garage for a couple of weeks now, but will start getting driven again next week sometime ...
They're quiet and grippy.
haven't put a lot of miles on them, the car's been in the garage for a couple of weeks now, but will start getting driven again next week sometime ...
Legacy TMS Member
Joined: January 6, 2006
Posts: 14,053
Likes: 166
From: Bay Area, CA
Originally Posted by Joeywhat
Cool, I just ordered a set. We'll see how they do on all four corners... Although I've got a lot less power to put down...
Cobra R Member
Joined: February 6, 2014
Posts: 1,564
Likes: 41
From: Motor City
Thread Starter
Legacy TMS Member
Joined: August 7, 2011
Posts: 5,246
Likes: 567
From: NC
Not a lot done to the car until a couple of days ago when I finally installed the Kenne Bell BAP I bought October of last year, then got re-tuned by a local shop.
The car also has the fuel pump wiring upgrade installed, and now the KB BAP:
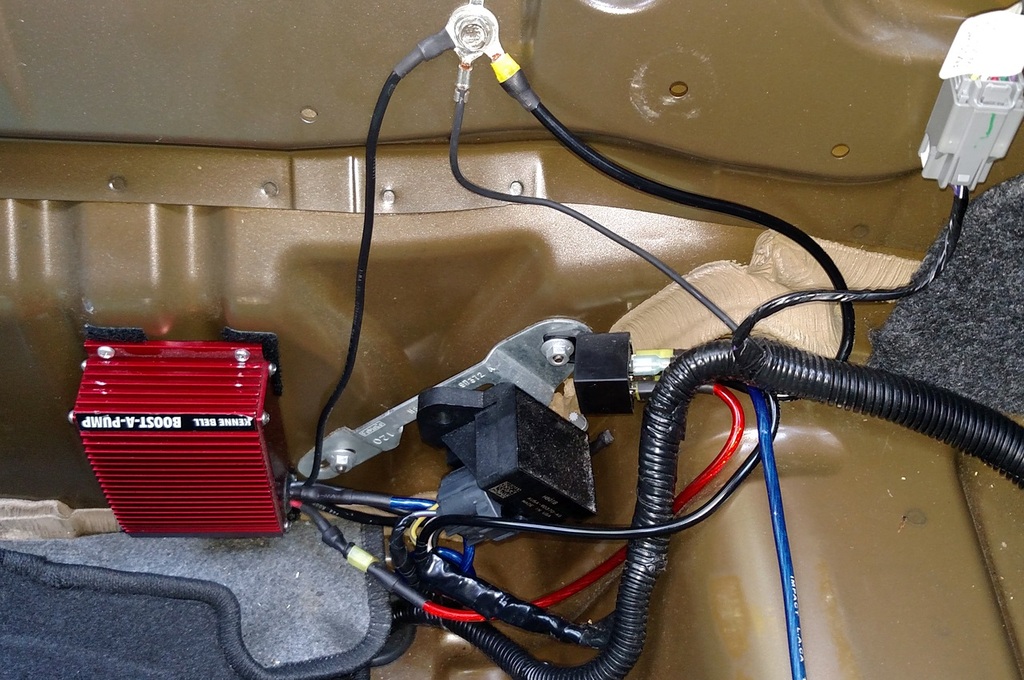
The re-tune brought me numbers of 562rwhp and 470 rwtq
That will have to do until I get a smaller pulley on there
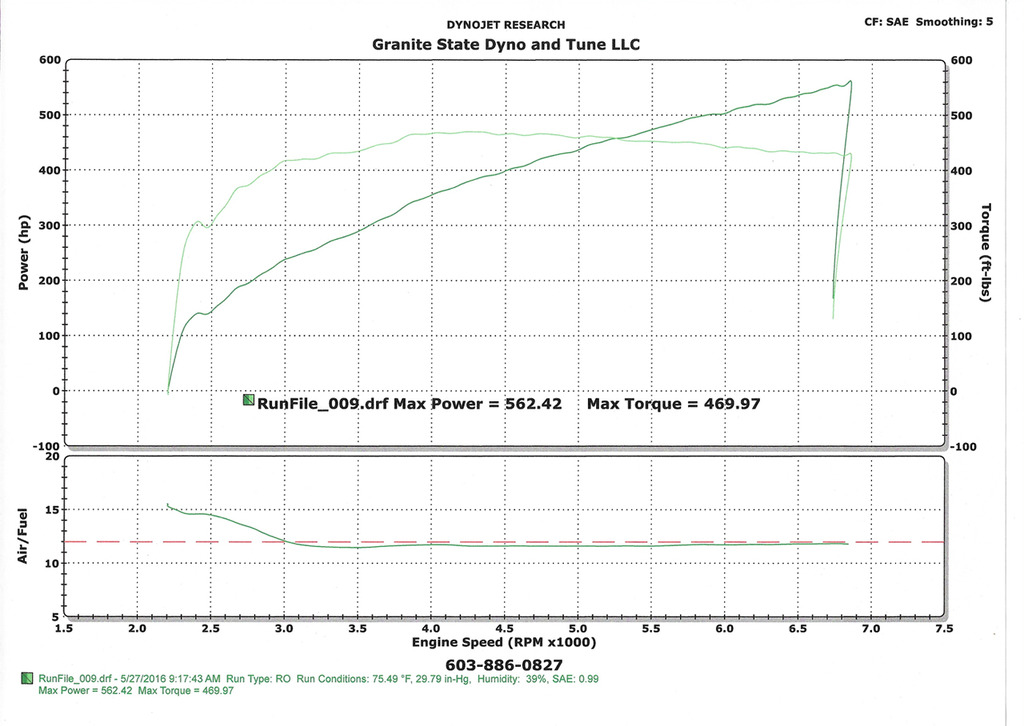
A video from a different run where the car put out 562 rwhp and 472 rwtq:
Mods: stock (for the kit) twin-60mm TB, ID1000 injectors, 3.25" pulley, JLT 123mm CAI, JBA 3" H-pipe, Lethat Perf 2.75" over-axle pipes, '11-'12 GT500 mufflers, Kenne Bell boost-a-pump. Tuned by Alex @ Granite State Dyno & Tune
.
The car also has the fuel pump wiring upgrade installed, and now the KB BAP:
The re-tune brought me numbers of 562rwhp and 470 rwtq
That will have to do until I get a smaller pulley on there
A video from a different run where the car put out 562 rwhp and 472 rwtq:
Mods: stock (for the kit) twin-60mm TB, ID1000 injectors, 3.25" pulley, JLT 123mm CAI, JBA 3" H-pipe, Lethat Perf 2.75" over-axle pipes, '11-'12 GT500 mufflers, Kenne Bell boost-a-pump. Tuned by Alex @ Granite State Dyno & Tune
.
Tasca Super Boss 429 Member
Joined: January 4, 2006
Posts: 3,904
Likes: 32
Cool Gabe!!!
My dad and I have gotten great help from the guys at Granite State Dyno & Tune.
Even for simple 4.6L repairs,
I highly recommend them.
http://dynonh.com/
Even for simple 4.6L repairs,
I highly recommend them.
http://dynonh.com/

Thread Starter
Legacy TMS Member
Joined: August 7, 2011
Posts: 5,246
Likes: 567
From: NC
Thanks guys!
Lately I've been dealing with a weird-wearing idler pulley and blower belt.
Also, just ordered a new smaller blower pulley, going to the 3.125" pulley, which should be good for 10-11 psi.
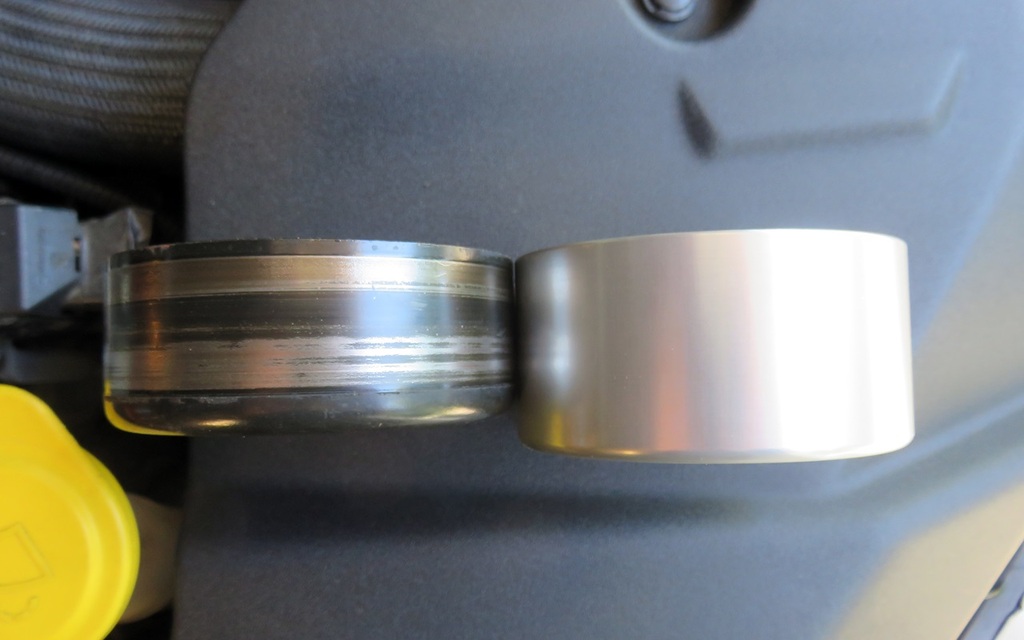
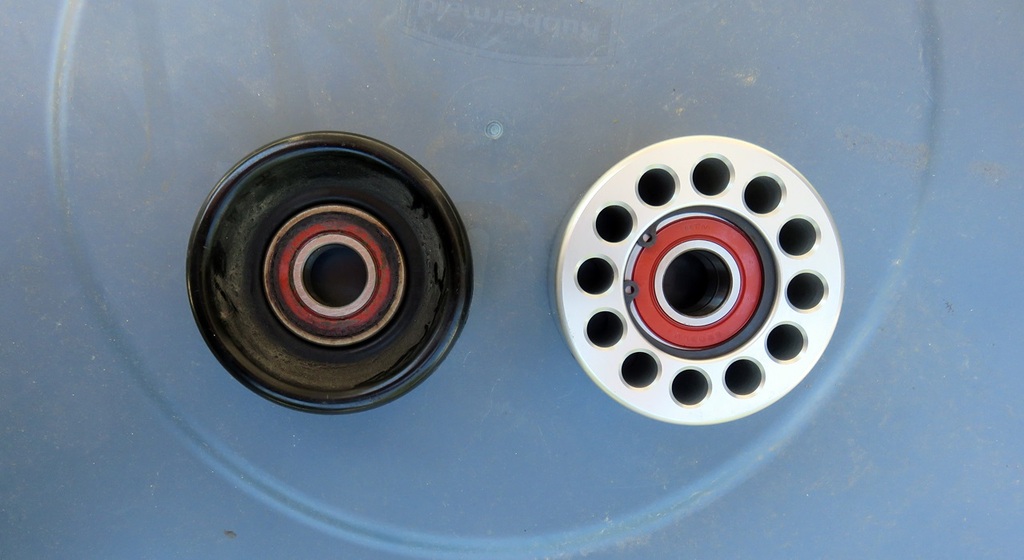
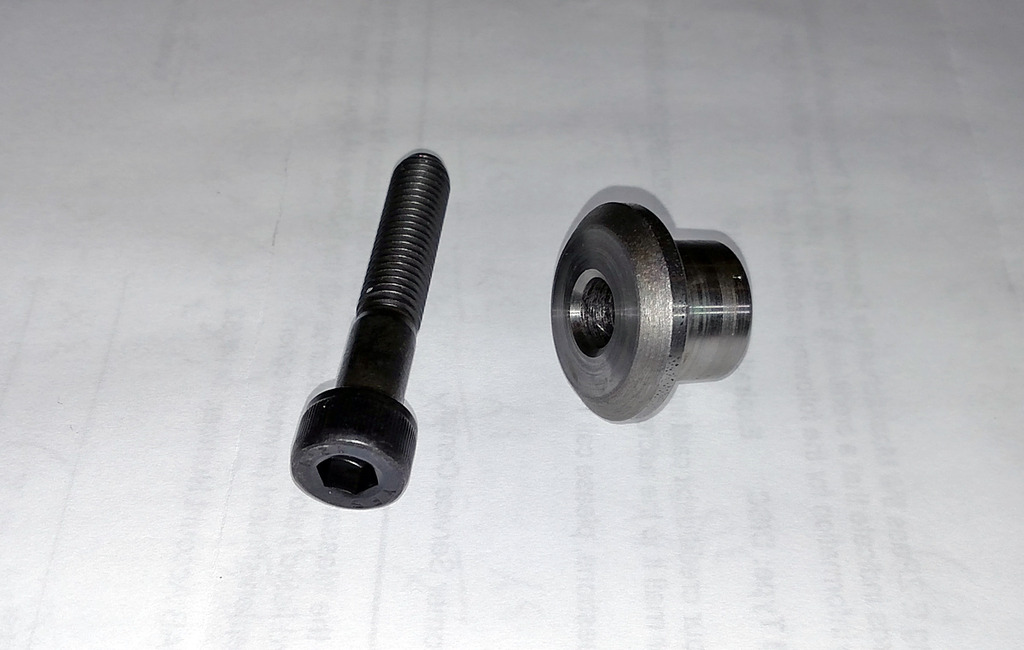
The new idler pulley is from Thump Racing, one of their 76mm double-bearing smooth pulleys. Here it is next to the stock unit:
Bought it from Lethal Performance, drop-shipped direct from Thump Racing, and they were nice enough to not include the stepped bushing and new mounting bolt that were supposed to come with the new pulley:
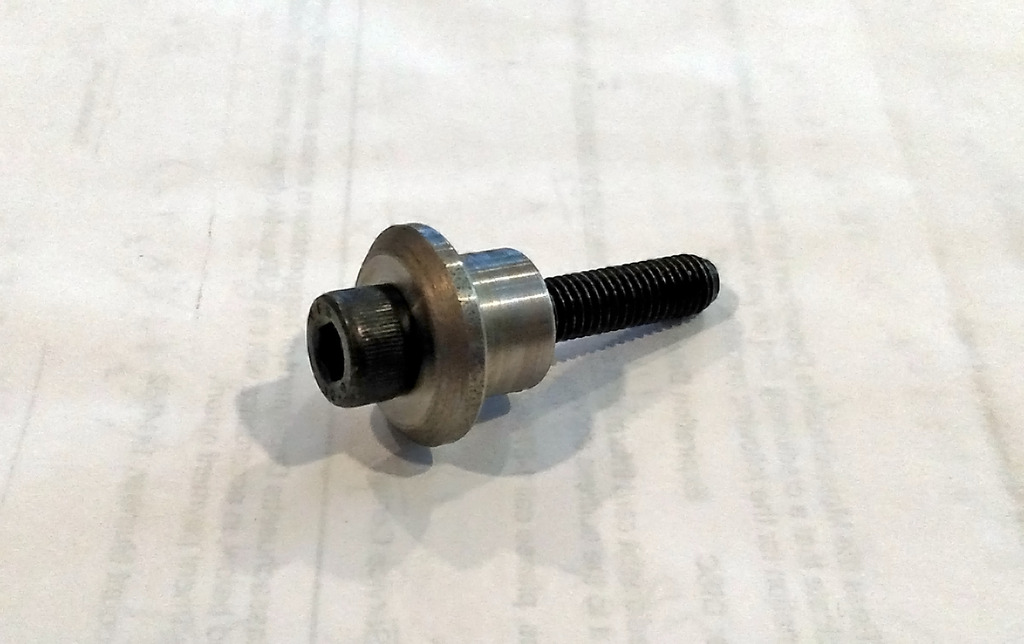
Received them after calling Lethal and asking for them, they had Thump ship them out direct.
New pulley looks great, but has lots of drag, doesn't spin freely.
Called up Lethal, they're washing their hands of it, told me to deal with Thump directly. A bit surprised at that since I bought it from Lethal, not Thump.
E-mailed Thump, included a link to the video below, 3 days later no reply, I called and spoke with Peter there, he told me he'd replace it but should be OK.
I prefer a freer-spinning pulley, so I'm sending it back to them for a replacement.
The video:
Lately I've been dealing with a weird-wearing idler pulley and blower belt.
Also, just ordered a new smaller blower pulley, going to the 3.125" pulley, which should be good for 10-11 psi.
The new idler pulley is from Thump Racing, one of their 76mm double-bearing smooth pulleys. Here it is next to the stock unit:
Bought it from Lethal Performance, drop-shipped direct from Thump Racing, and they were nice enough to not include the stepped bushing and new mounting bolt that were supposed to come with the new pulley:
Received them after calling Lethal and asking for them, they had Thump ship them out direct.
New pulley looks great, but has lots of drag, doesn't spin freely.
Called up Lethal, they're washing their hands of it, told me to deal with Thump directly. A bit surprised at that since I bought it from Lethal, not Thump.
E-mailed Thump, included a link to the video below, 3 days later no reply, I called and spoke with Peter there, he told me he'd replace it but should be OK.
I prefer a freer-spinning pulley, so I'm sending it back to them for a replacement.
The video:
Roush Forum Stalker
Joined: March 9, 2013
Posts: 11,140
Likes: 1,749
From: Massachusetts

New pulley looks great, but has lots of drag, doesn't spin freely.
Called up Lethal, they're washing their hands of it, told me to deal with Thump directly. A bit surprised at that since I bought it from Lethal, not Thump.
E-mailed Thump, included a link to the video below, 3 days later no reply, I called and spoke with Peter there, he told me he'd replace it but should be OK.
I prefer a freer-spinning pulley, so I'm sending it back to them for a replacement.
The video:
Good luck buddy!
Last edited by Stage_3; Jun 24, 2016 at 03:15 PM.
Thread Starter
Legacy TMS Member
Joined: August 7, 2011
Posts: 5,246
Likes: 567
From: NC
I got it shipped out yesterday, hope to get a new one soon, and hope it will spin much more freely. We'll see.
This morning I changed the MT82's trans fluid.
Car has about 36700 miles on it, the factory fluid was changed out at 10k miles.
The fluid that I dumped out today was a custom blend from BND Automotive, part of their Quantum Blue line of fluids.
It helped a lot, immediately offering smoother/cushier engagements, but it's due for replacement at 30-40k intervals, so I was getting close.
New fluid that went in today, a mix of fluids from Amsoil.
2 quarts of their Synchomesh fluid and 1 qt of their gear lube fluid:
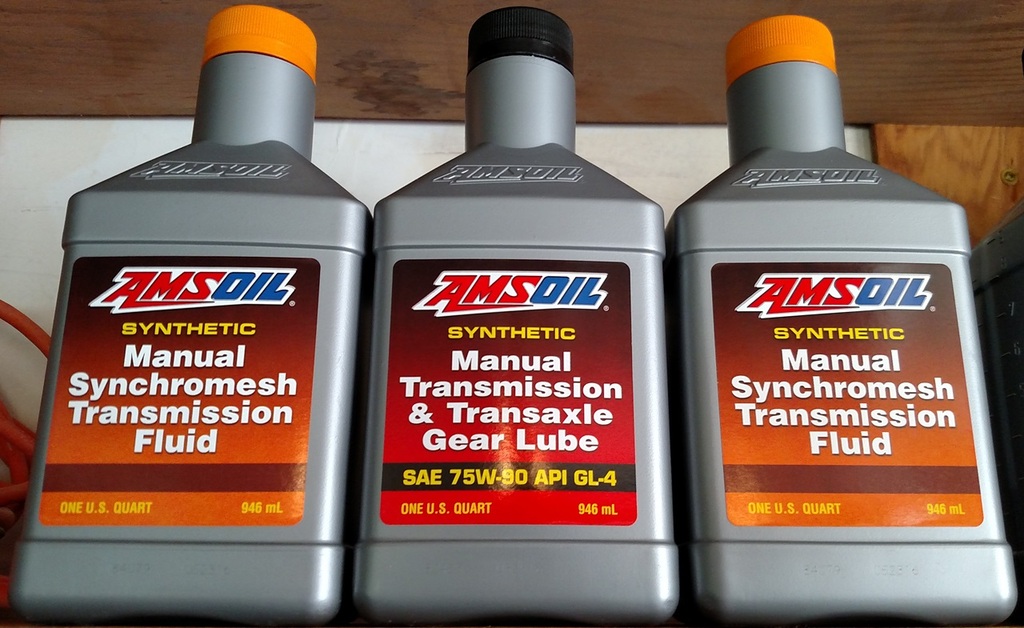
I mixed the 2 different fluids in a gallon jug:

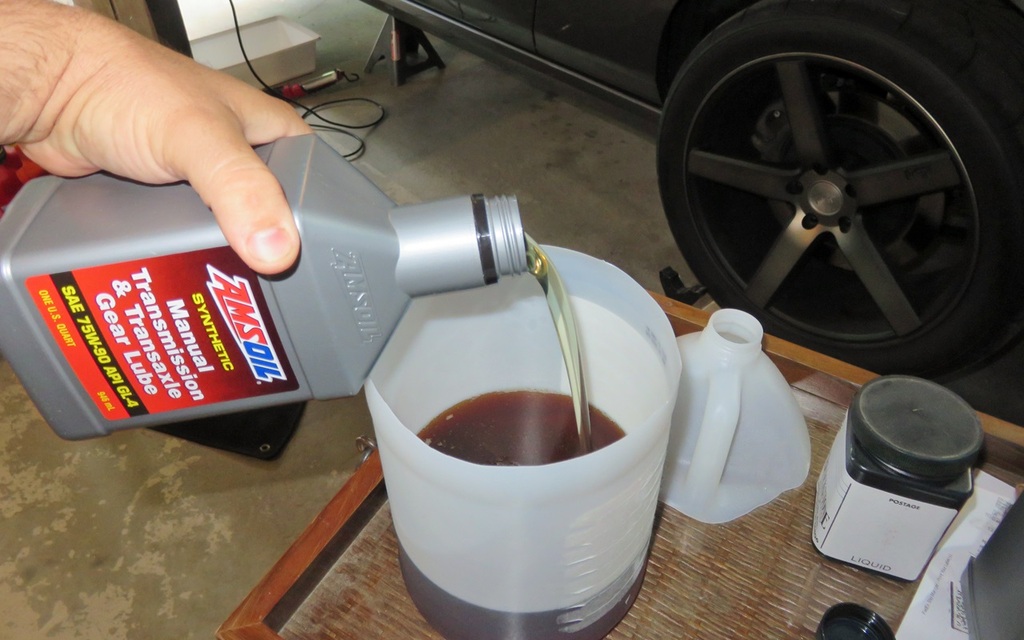
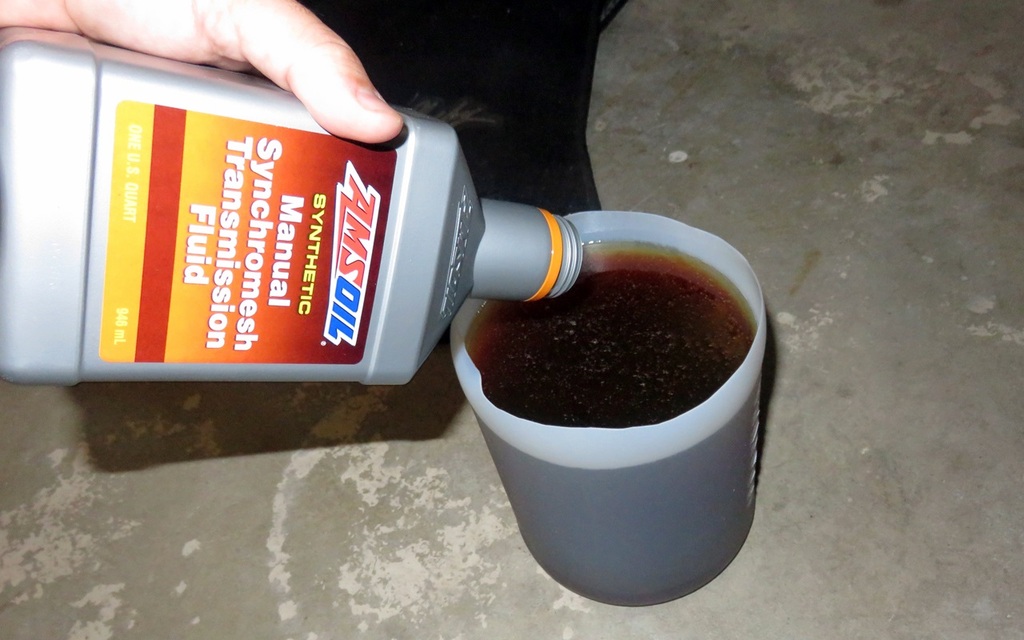
And I used a cheap Harbor Freight transfer pump to pump it into the trans from that jug.
The 2 plugs on the side of the transmission were a pain to remove since there's not much room on the side of the trans, but I loosened them with a 12mm Allen socket, then used a pair of pliers to back them out until I could undo them by hand.
Reverse procedure to get them back in.
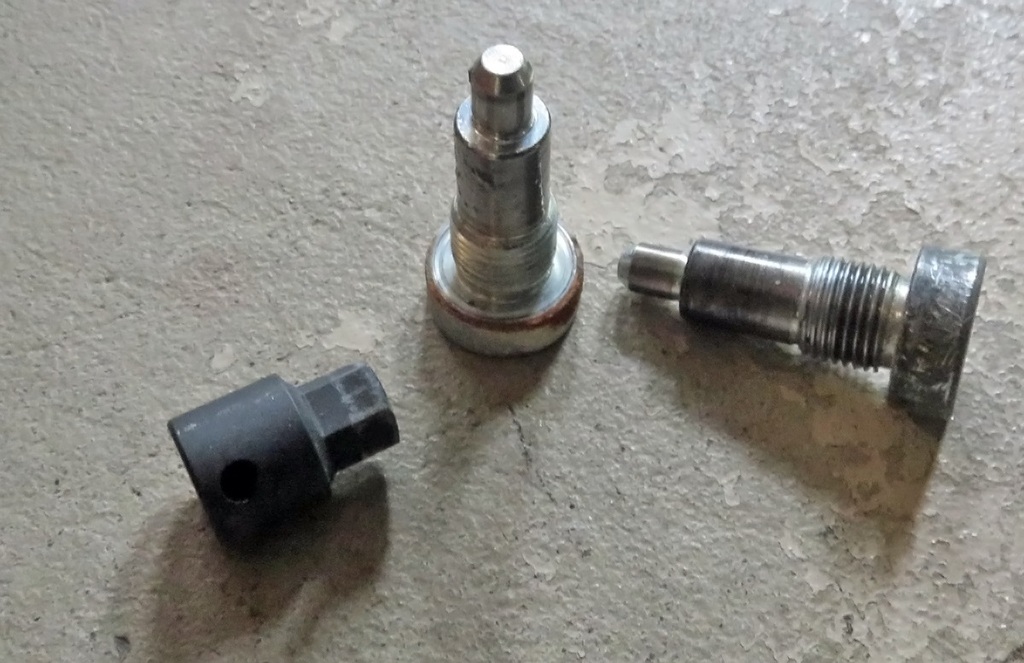
The drain plug is an 8mm Allen plug on the bottom of the trans:
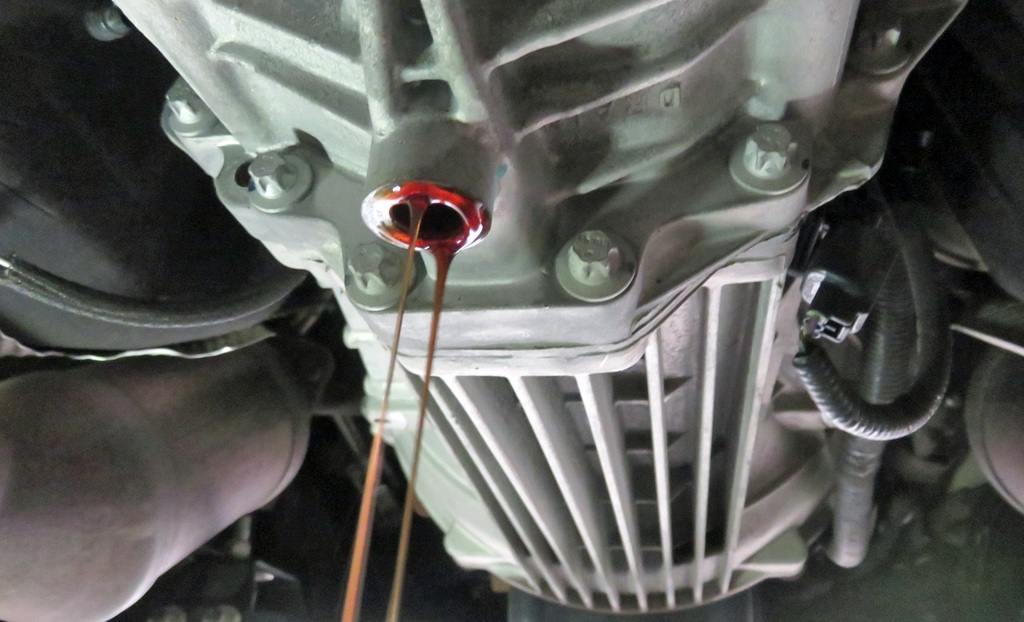
The old fluid didn't look terrible when it was coming out, although it was pretty dark once in the catch pan:

Once I drained it out of the catch pan, it left behind quite a bit of metallic residue:
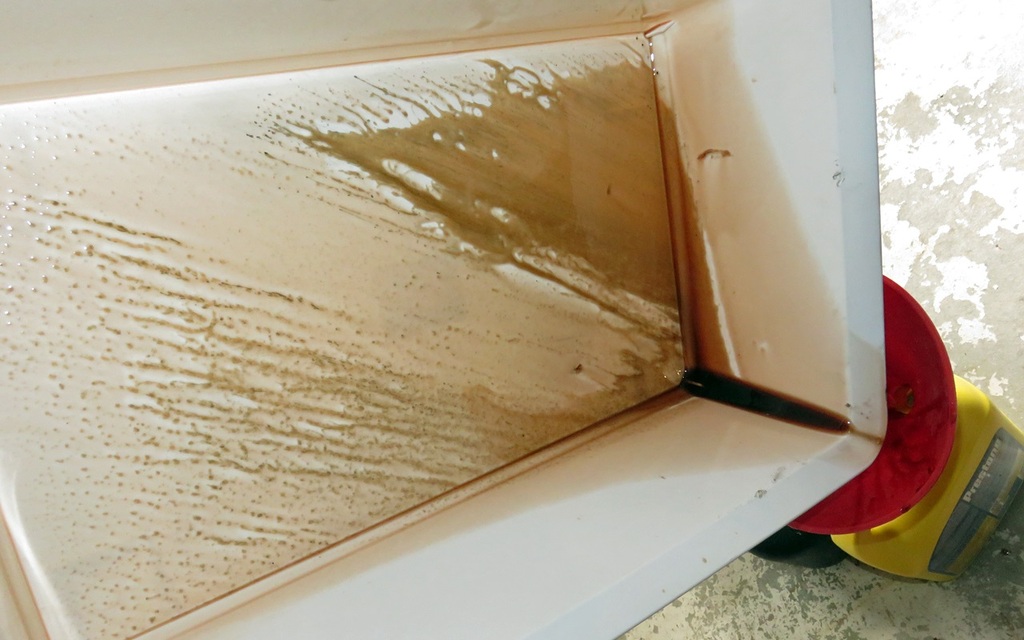
So I'm quite happy that I changed it out, and I took a sample of the fluid that I will be sending out to Blackstone Labs for analysis, to see what they say.
Planning on the next change around 60k miles.
.
Thread Starter
Legacy TMS Member
Joined: August 7, 2011
Posts: 5,246
Likes: 567
From: NC
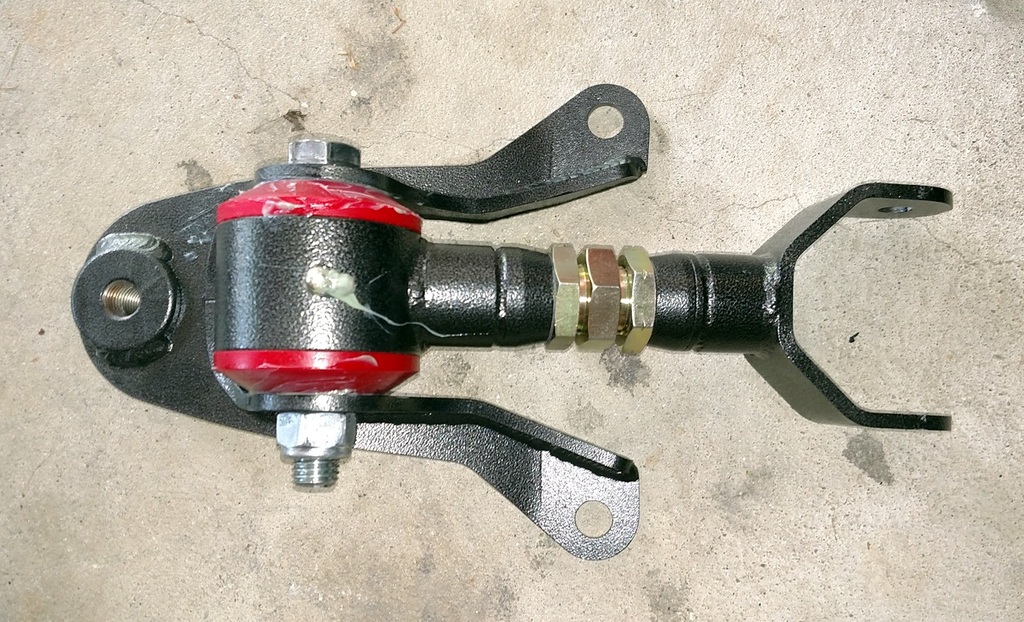
Yesterday I finally installed the BMR adjustable upper control arm and mount that I've had for about 7 months.
It replaced the factory mount and a Steeda upper control arm that I was never quite impressed with.
The Steeda was the solid "for lowered cars" unit, but measuring it against the factory arm it had the same length between the bolt holes, so not sure how it was supposed to change anything, other than add a bunch of NVH, which it certainly did.
I was also shocked at the size difference in the bolts between the Steeda and the beefy new BMR bolt connecting the arm to the mount (even the factory bolt was thicker than the Steeda):
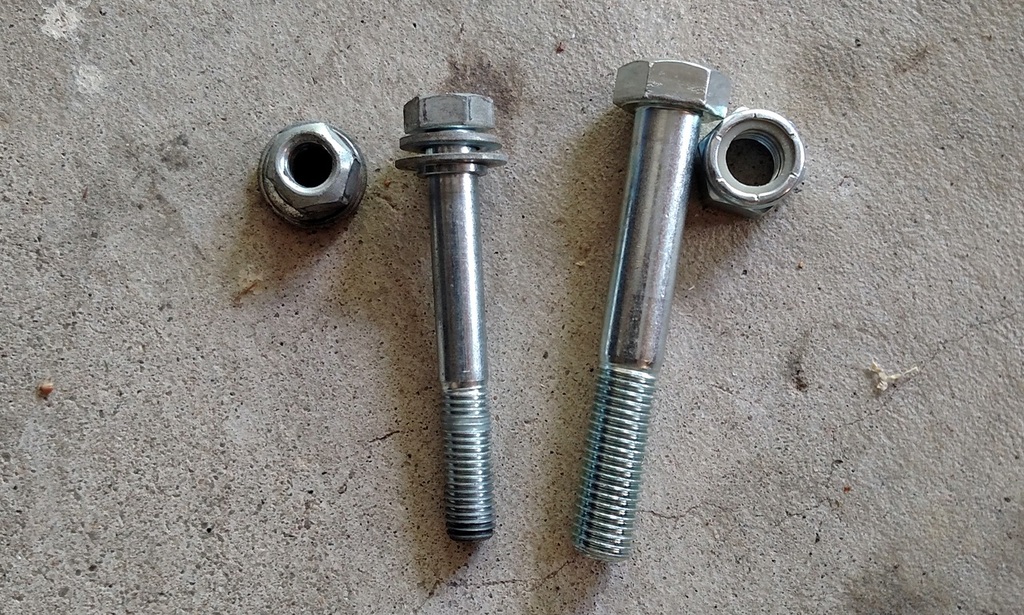
These are the 3 arms and 2 mounts: blue Steeda arm, stamped steel factory arm & mount, and the BEEFY BMR stuff on the right:
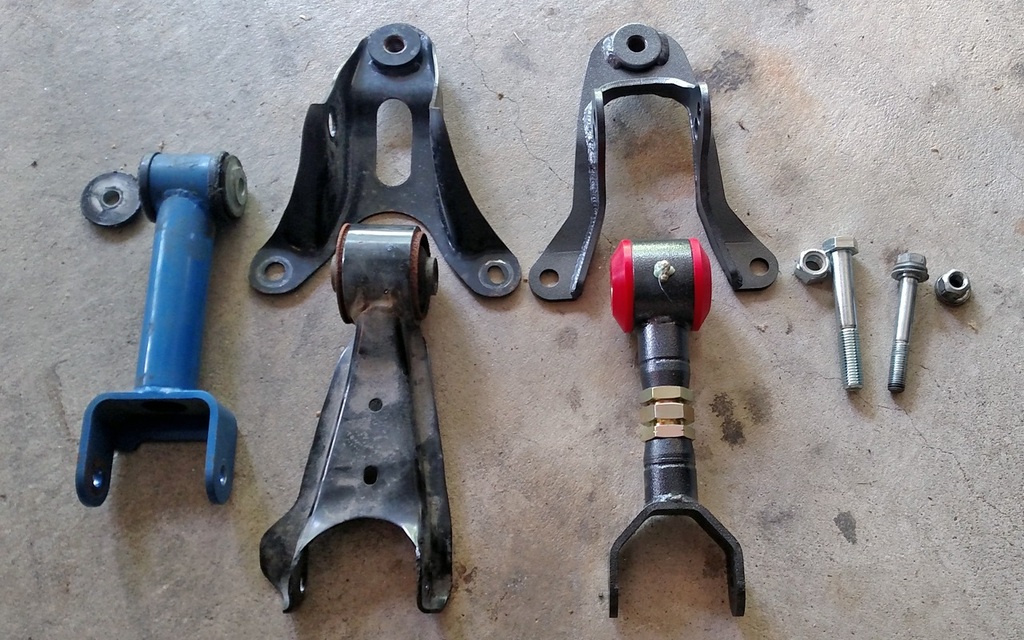
The BMR arm and mount together:
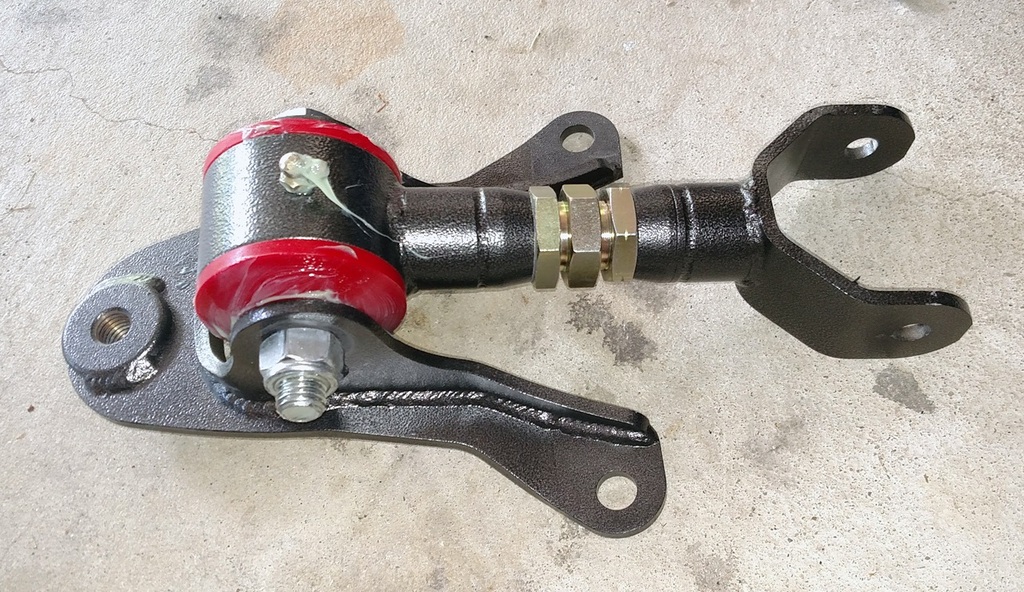
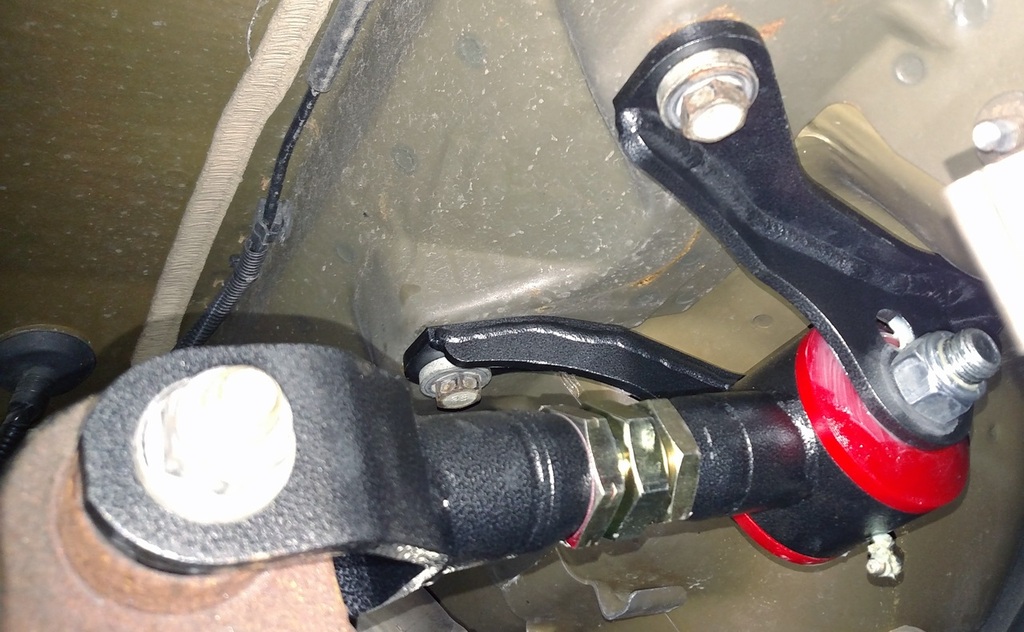
And installed:
It replaced the factory mount and a Steeda upper control arm that I was never quite impressed with.
The Steeda was the solid "for lowered cars" unit, but measuring it against the factory arm it had the same length between the bolt holes, so not sure how it was supposed to change anything, other than add a bunch of NVH, which it certainly did.
I was also shocked at the size difference in the bolts between the Steeda and the beefy new BMR bolt connecting the arm to the mount (even the factory bolt was thicker than the Steeda):
These are the 3 arms and 2 mounts: blue Steeda arm, stamped steel factory arm & mount, and the BEEFY BMR stuff on the right:
The BMR arm and mount together:
And installed: