Journal: MY American Racing LT Header install, day by day
 5/16/07, 09:51 AM
#21
Mach 1 Member
Thread Starter
Join Date: December 18, 2004
Posts: 669
Likes: 0
Received 0 Likes
on
0 Posts
I'm glad I started this thread! I'm getting some good bits of advice.
I do have jack stands and a jack, just not handy (they are across the county holding up the 67 Fastback). I'll get them, or borrow some from a near by buddy. And Bill, I did read the H-pipe how to (I've read most of your stuff), I just forgot about it, didn't think about it at the time. Good advice.
Uhhh...yeah, the wheels are chocked, yeah, yeah, that's the ticket.

 5/16/07, 09:56 AM
#24
 5/16/07, 11:52 AM
#26
Cobra R Member
Join Date: January 12, 2007
Posts: 1,875
Likes: 0
Received 0 Likes
on
0 Posts
They have a cool stamp on the headers
thats going to take you around 10hrs, removing the motors mounts jacking the engine a little, removing the steering column, removing the dipstick, battery, removing the a/c condenser according to borla (not neccisary), and thats just to begin your install.
thats going to take you around 10hrs, removing the motors mounts jacking the engine a little, removing the steering column, removing the dipstick, battery, removing the a/c condenser according to borla (not neccisary), and thats just to begin your install.
5/16/07, 01:36 PM
#27
V6 Member

Join Date: December 14, 2006
Posts: 98
Likes: 0
Received 0 Likes
on
0 Posts

Here's mine with ARH L/Ts and SLP loudmouths

http://www.mustang-gtcs.info/videos.htm
5/16/07, 01:40 PM
#28
V6 Member
Join Date: December 14, 2006
Posts: 98
Likes: 0
Received 0 Likes
on
0 Posts
Thanks dude - hope you find it useful! Doing the install on ramps alongside pretty much the whole suspension setup made things easier. The headers were still the hardest job though.
Take note of what I said about the fit of the ARH headers being a bit 'too' accurate (ie. v.little tolerance on the bolt holes). Nothing wrong with widening the manifold bolt holes a little. This will turn an hour of pain into a 5 minute job!
Take note of what I said about the fit of the ARH headers being a bit 'too' accurate (ie. v.little tolerance on the bolt holes). Nothing wrong with widening the manifold bolt holes a little. This will turn an hour of pain into a 5 minute job!
5/16/07, 03:44 PM
#29
Cobra Member
Join Date: September 10, 2004
Location: Austin TX
Posts: 1,456
Likes: 0
Received 0 Likes
on
0 Posts
Jim- Excellent work thus far on the write up! Myself and a friend of mine installed my bassani X this past Saturday and it turned out to be quite a chore. Then yesterday we decided to put on the race pipes and basically had to take most everything off, and put it all back together. So Id like to consider myself "Slightly" knowledgable if you need any help feel free to give a shout!
I do swear however, that Im not going to be working under my car, until I get a set of ramps, and really tall jackstands.
I do swear however, that Im not going to be working under my car, until I get a set of ramps, and really tall jackstands.
5/17/07, 06:41 AM
#30
Mach 1 Member
Thread Starter
Join Date: December 18, 2004
Posts: 669
Likes: 0
Received 0 Likes
on
0 Posts
May 16
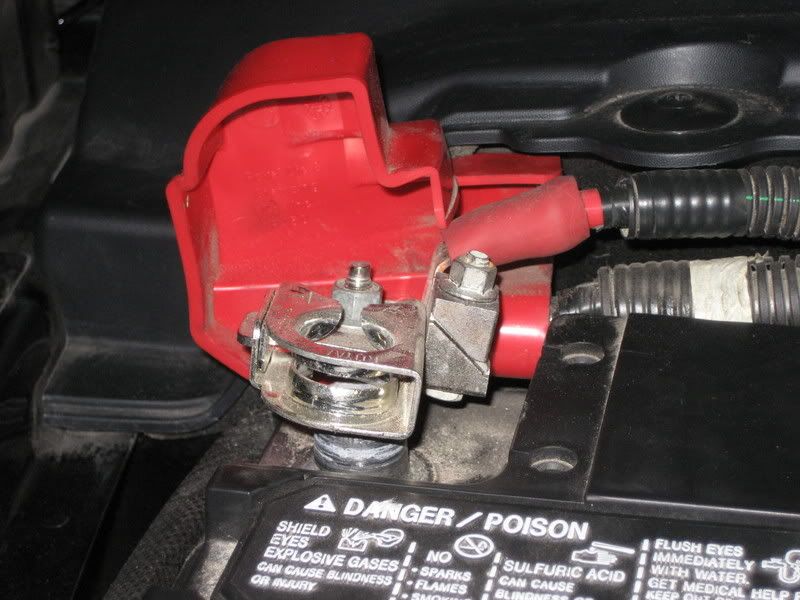
It was such a nice day Wednesday here in central Texas, that I didn't really feel like working on the car. This will be the nicest weather we have around here until....oohhh November. So I sat out on the porch, watched my kiddos play, and had a few beers. But, around 8:30pm I couldn't resist. I decided, as promised, to at least take out the battery (and battery tray).
I didn't have a metric socket small enough for the terminal clamps, tray screws, and tie-down bolt, but a 5/16" worked like a champ. Straight fwd enough, but what is up with the cute little blankie around the battery, and the over engineered +terminal clamp?!? Makes for easy removal, I'll give them that!!
As mentioned above, that upper p-side O2 sensor is MUCH easier to reach with the battery removed. Remember my little green friend?
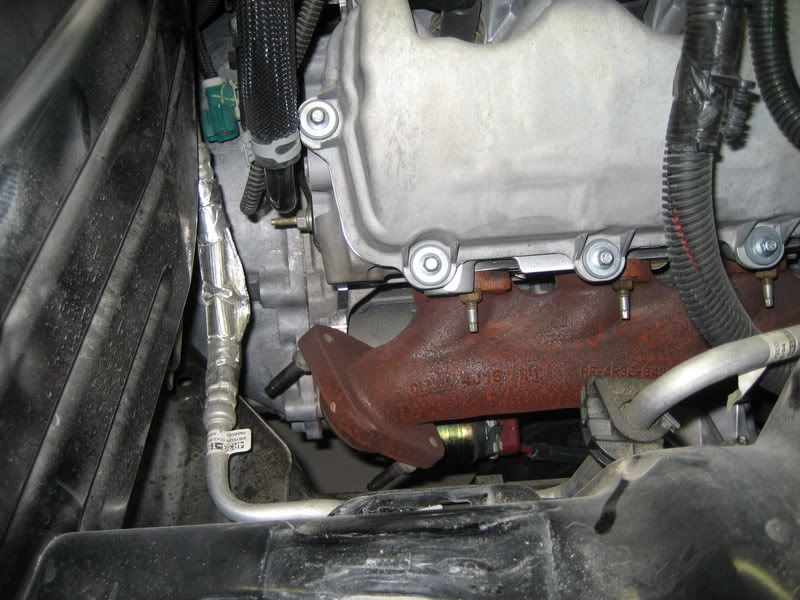
There was so much space, and those 4 nut/studs (per side) were just starring at me, so I said, "yeah, those nuts have gotta come out...tonight!"
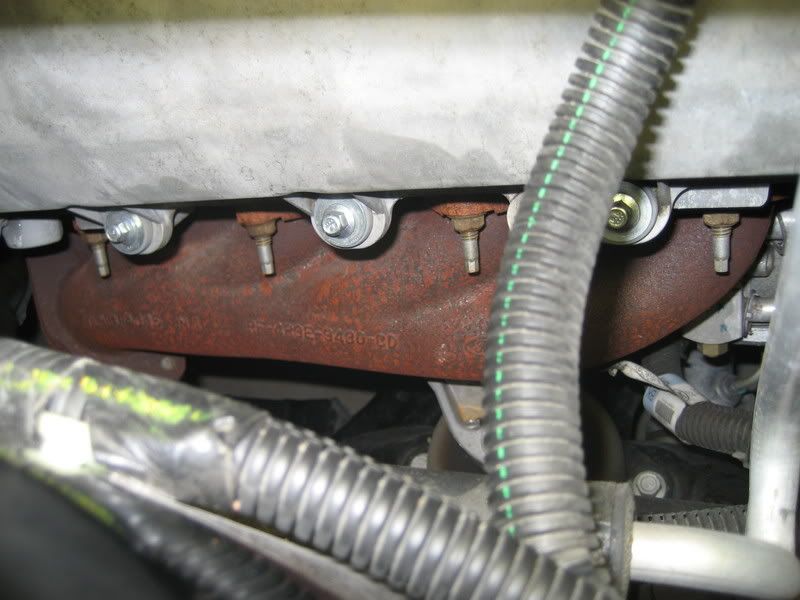
P-side:
D-side:
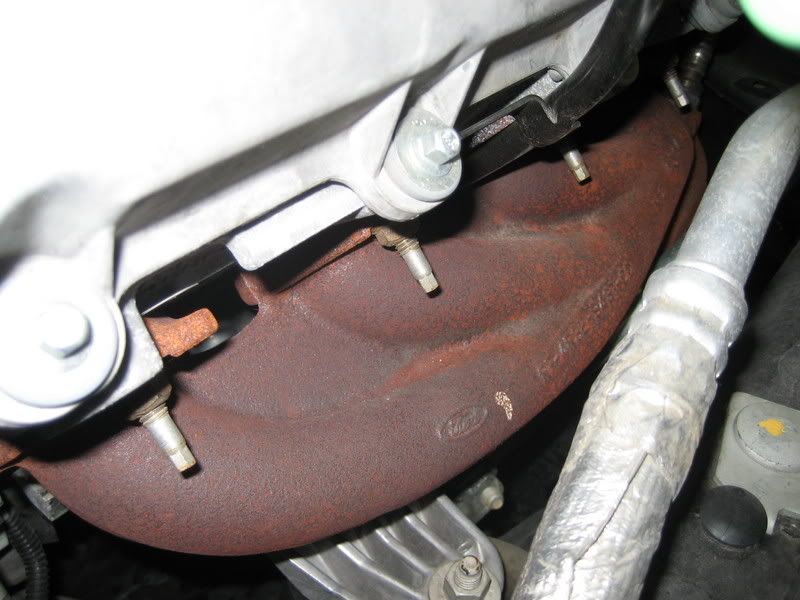
So in a little less than an hour (I'll round up), the battery stuff and all 8 of the top manifold nuts were off. As a bonus, one of the studs came out on it own! I was wondering why it was taking so long to get that one loose. I had a nice system going, get a nut off, partake of beverage, repeat x8. All it took was this rachet and a 1/2 deepwall socket. Granted the nuts are really 13mm, but the 1/2" fit just a little tighter (and I don't currently have a deep wall 13mm socket). Nor so I have a 5mm to remove the studs, so a trip to Sears is in order. The first of several I'm sure.
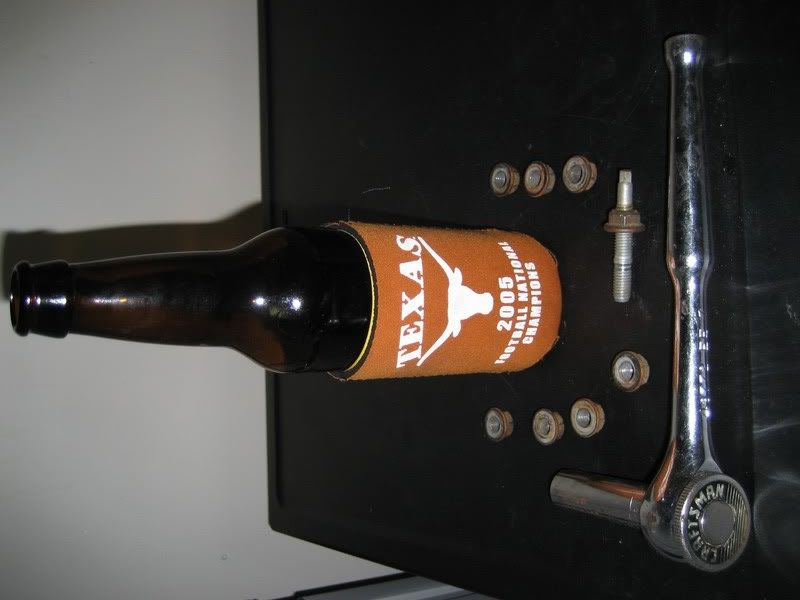
By count, HALF the work is done!
But I'm not fooling myself, by time, I'm sure the bottom 8 will take MUCH longer.
Time spent: 1 hr Total for project: 3.5 hrs
It was such a nice day Wednesday here in central Texas, that I didn't really feel like working on the car. This will be the nicest weather we have around here until....oohhh November. So I sat out on the porch, watched my kiddos play, and had a few beers. But, around 8:30pm I couldn't resist. I decided, as promised, to at least take out the battery (and battery tray).
I didn't have a metric socket small enough for the terminal clamps, tray screws, and tie-down bolt, but a 5/16" worked like a champ. Straight fwd enough, but what is up with the cute little blankie around the battery, and the over engineered +terminal clamp?!? Makes for easy removal, I'll give them that!!
As mentioned above, that upper p-side O2 sensor is MUCH easier to reach with the battery removed. Remember my little green friend?
There was so much space, and those 4 nut/studs (per side) were just starring at me, so I said, "yeah, those nuts have gotta come out...tonight!"
P-side:
D-side:
So in a little less than an hour (I'll round up), the battery stuff and all 8 of the top manifold nuts were off. As a bonus, one of the studs came out on it own! I was wondering why it was taking so long to get that one loose. I had a nice system going, get a nut off, partake of beverage, repeat x8. All it took was this rachet and a 1/2 deepwall socket. Granted the nuts are really 13mm, but the 1/2" fit just a little tighter (and I don't currently have a deep wall 13mm socket). Nor so I have a 5mm to remove the studs, so a trip to Sears is in order. The first of several I'm sure.
By count, HALF the work is done!
But I'm not fooling myself, by time, I'm sure the bottom 8 will take MUCH longer.
Time spent: 1 hr Total for project: 3.5 hrs
5/17/07, 09:27 AM
#32
Back when I was doing some research on replacing my stock manifolds with a set of shorties (it's now on the back burner.. $800+ for CARB approved shorties?? ), I discovered that using locking header bolts are the way to go.
Have you already looked into this?
Breslin Performance Header Locking Bolts
), I discovered that using locking header bolts are the way to go.Have you already looked into this?
Breslin Performance Header Locking Bolts
5/17/07, 12:21 PM
#33
Legacy TMS Member
Jim- glad to see you're ensuring constant refreshments! 
Bill- what info did you find out about really needing locking nuts for the shorties??
Bill- what info did you find out about really needing locking nuts for the shorties??
5/17/07, 12:41 PM
#34
If I were to get headers, I'd seriously consider these. If I have to remove components or jack up one side of the engine just to access 1 or 2 bolts, that's enough of a reason to get the Breslin's, because stuff like this, you only want to do once.
5/17/07, 02:30 PM
#35
Bullitt Member
Join Date: December 8, 2006
Location: Tewksbury, MA
Posts: 367
Likes: 0
Received 0 Likes
on
0 Posts
I've poked around in different forums like Modular Fords, StangNet, etc. and all mention the use of these specific Breslin lock bolts. Several have commented that re-using the OEM nuts and studs or the header supplied bolts have loosened up time and time again, even after re-torqueing.
If I were to get headers, I'd seriously consider these. If I have to remove components or jack up one side of the engine just to access 1 or 2 bolts, that's enough of a reason to get the Breslin's, because stuff like this, you only want to do once.
If I were to get headers, I'd seriously consider these. If I have to remove components or jack up one side of the engine just to access 1 or 2 bolts, that's enough of a reason to get the Breslin's, because stuff like this, you only want to do once.
5/17/07, 03:39 PM
#37
Mach 1 Member
Thread Starter
Join Date: December 18, 2004
Posts: 669
Likes: 0
Received 0 Likes
on
0 Posts
That's what we're here for!!
In fact, I just got off the phone with Nick (Mr. American Racing Headers himself), great guy. Not only did he answer my question concerning the use of a locking bolt or what to put on the bolts themselves, but gave a very clear explaination as to why the only thing I could possibly use, if I so desired, was a little anti-sieze. Due to the nature of the stock gasket, it is highly unlikely the bolts will need to be retightened. He also made me feel even more confident in doing this install myself, and gave me some tips and tricks to use along the way.
In fact, I just got off the phone with Nick (Mr. American Racing Headers himself), great guy. Not only did he answer my question concerning the use of a locking bolt or what to put on the bolts themselves, but gave a very clear explaination as to why the only thing I could possibly use, if I so desired, was a little anti-sieze. Due to the nature of the stock gasket, it is highly unlikely the bolts will need to be retightened. He also made me feel even more confident in doing this install myself, and gave me some tips and tricks to use along the way.
5/17/07, 05:30 PM
#39
Team Mustang Source
Join Date: June 19, 2004
Location: Phoenixville, PA
Posts: 6,839
Likes: 0
Received 2 Likes
on
2 Posts
That's what we're here for!!
In fact, I just got off the phone with Nick (Mr. American Racing Headers himself), great guy. Not only did he answer my question concerning the use of a locking bolt or what to put on the bolts themselves, but gave a very clear explaination as to why the only thing I could possibly use, if I so desired, was a little anti-sieze. Due to the nature of the stock gasket, it is highly unlikely the bolts will need to be retightened. He also made me feel even more confident in doing this install myself, and gave me some tips and tricks to use along the way.
In fact, I just got off the phone with Nick (Mr. American Racing Headers himself), great guy. Not only did he answer my question concerning the use of a locking bolt or what to put on the bolts themselves, but gave a very clear explaination as to why the only thing I could possibly use, if I so desired, was a little anti-sieze. Due to the nature of the stock gasket, it is highly unlikely the bolts will need to be retightened. He also made me feel even more confident in doing this install myself, and gave me some tips and tricks to use along the way.
 5/17/07, 05:31 PM
#40
Cobra R Member
Join Date: January 12, 2007
Posts: 1,875
Likes: 0
Received 0 Likes
on
0 Posts
I've poked around in different forums like Modular Fords, StangNet, etc. and all mention the use of these specific Breslin lock bolts. Several have commented that re-using the OEM nuts and studs or the header supplied bolts have loosened up time and time again, even after re-torqueing.
If I were to get headers, I'd seriously consider these. If I have to remove components or jack up one side of the engine just to access 1 or 2 bolts, that's enough of a reason to get the Breslin's, because stuff like this, you only want to do once.
If I were to get headers, I'd seriously consider these. If I have to remove components or jack up one side of the engine just to access 1 or 2 bolts, that's enough of a reason to get the Breslin's, because stuff like this, you only want to do once.