My custom (somewhat) dash kit project.
#21
Member
Join Date: April 25, 2015
Location: Beaumont, CA
Posts: 48
Likes: 0
Received 0 Likes
on
0 Posts
nice job guys, I too am looking to change my base model to a better system, I did see how on AM the Raxiom system can be installed and use without the Sync feature and they make a steering wheel button kit that or i'm going with a double DIN set up. was bummed when i found out it has a phone button on the controls but does not work unless there is a SYNC system, what a tease, they incorporate the phone button but it's not for use, I was disappointed when Ford told me that, i do agree with some on here that when the cars can be spec'd out it's a lot of money for the SYNC & Nav system feature.
#22
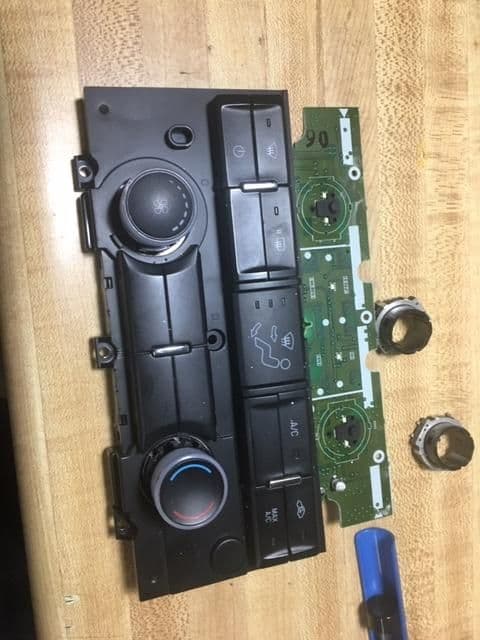
For the regular manual climate controls(not dual-zone or the automatic ones where you set the temperature degrees), it should still work if you cut the PCB. I cut it where the CD drive slot was since there weren't really any electronics besides traces and stuff for the stereo controls, but the HVAC controls still work fine. Also there are a bunch of traces in a row on both sides, I recommend sanding down the edges a little bit just to make sure that they're not shorting with eachother at all from the cut

(picture of the controls after cutting. had to desolder the volume and tuner **** so they would be flush behind the dashboard once bondo-ing that hole
Last edited by torbar; 3/24/19 at 02:25 PM.
#23
I know this is an old thread which is probably why the pictures are gone.
I'm trying to figure out how to deal with the climate control unit and the mounting brackets. You mentioned that you bent them up. What did you use? They are pretty thick.
Also... how does the CC unit come off of the brackets? Do I just push straight up? I tried that, but I'm concerned about breaking it using any more force than I applied that didn't take the unit off.
Finally, how did you replace the CC unit? Is it sitting loosely? Does it shift around as you make tight turns? Does it have to be horizontal?
If you can remember that far back, and advice would be appreciated. Thanks.
#24
I know this is an old thread which is probably why the pictures are gone.
I'm trying to figure out how to deal with the climate control unit and the mounting brackets. You mentioned that you bent them up. What did you use? They are pretty thick.
Also... how does the CC unit come off of the brackets? Do I just push straight up? I tried that, but I'm concerned about breaking it using any more force than I applied that didn't take the unit off.
Finally, how did you replace the CC unit? Is it sitting loosely? Does it shift around as you make tight turns? Does it have to be horizontal?
If you can remember that far back, and advice would be appreciated. Thanks.
I'm trying to figure out how to deal with the climate control unit and the mounting brackets. You mentioned that you bent them up. What did you use? They are pretty thick.
Also... how does the CC unit come off of the brackets? Do I just push straight up? I tried that, but I'm concerned about breaking it using any more force than I applied that didn't take the unit off.
Finally, how did you replace the CC unit? Is it sitting loosely? Does it shift around as you make tight turns? Does it have to be horizontal?
If you can remember that far back, and advice would be appreciated. Thanks.
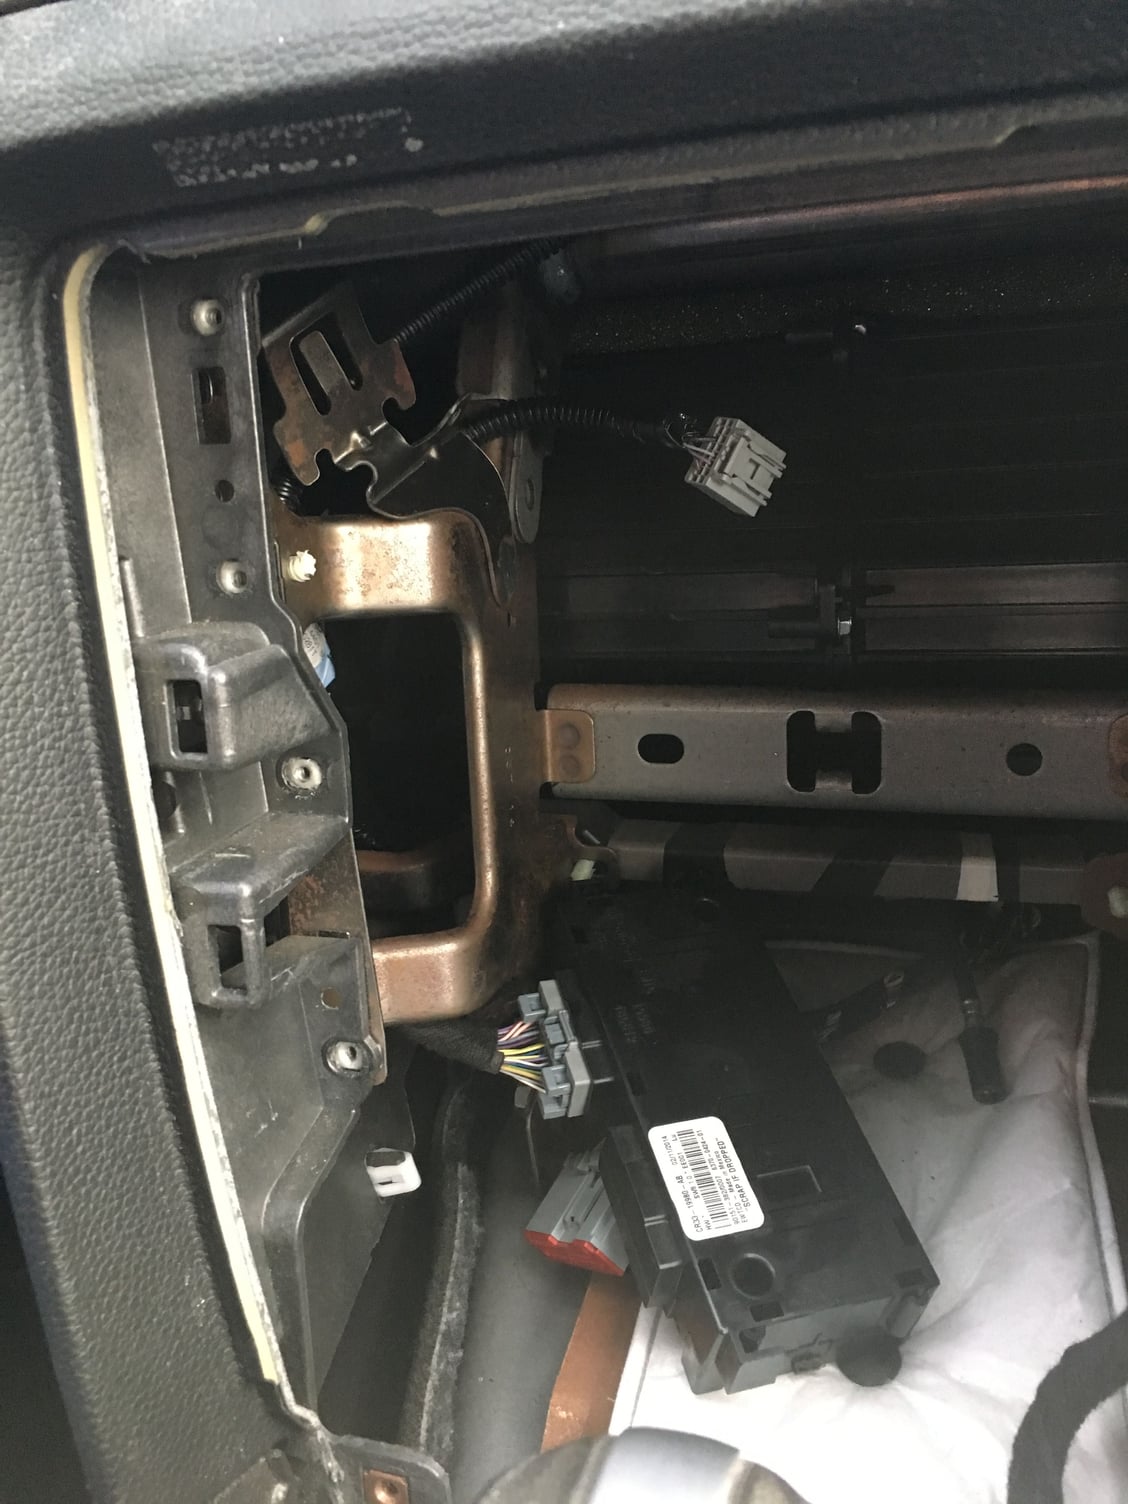
I was able to dig up some pictures from when I did my stereo install;
I don't remember how the climate control unit comes off the brackets, someone else hopefully can chime in. it might pull towards you?
I just moved mine to the bottom of that compartment and haven't had any issues with it making noise when turning. I had to unplug the wiring harness and run that down the side of the compartment.
To bend the brackets, I just used a pair of pliers, they're thick, but weren't too bad to bend.

#25
Perfect timing! Thanks for the response. I was just pulling the console over the stick shift as I got your message.
My original attempt was from June. I recall that the brackets are MUCH different that what I see in yours. Mine is a 2012 base model, so there my be differences between either years or model capabilities with the CCM. I'll post a picture when I get in the compartment.
I can see why people and/or companies don't think anything of moving the CCM in this case. I remember mine being a seriously long bracket from front to back inside the compartment. Pics to follow.
Thanks again!
#26
Perfect timing! Thanks for the response. I was just pulling the console over the stick shift as I got your message.
My original attempt was from June. I recall that the brackets are MUCH different that what I see in yours. Mine is a 2012 base model, so there my be differences between either years or model capabilities with the CCM. I'll post a picture when I get in the compartment.
I can see why people and/or companies don't think anything of moving the CCM in this case. I remember mine being a seriously long bracket from front to back inside the compartment. Pics to follow.
Thanks again!
My original attempt was from June. I recall that the brackets are MUCH different that what I see in yours. Mine is a 2012 base model, so there my be differences between either years or model capabilities with the CCM. I'll post a picture when I get in the compartment.
I can see why people and/or companies don't think anything of moving the CCM in this case. I remember mine being a seriously long bracket from front to back inside the compartment. Pics to follow.
Thanks again!
#27
Finished my install yesterday. Turns out my brackets were just like yours. Bad memory on my part. The picture helped give me a visual on how to bend them out of the way - truly appreciate that!
My challenge then became getting the CCM off the bracket. I found a metal tang that was not obviously visible and bent that back (on both sides) and the CCM slipped out like butter.
I had to ream out a little of the plastic enclosure around the opening at the bottom on both sides. The new Metra console was about 1/4" too deep to fit the opening. I was a bit surprised at that since it was designed for the 10-14 models specifically. 10 Minutes of getting out the dremel, seting up the bit, and grinding it out took care of it.
My daughter has a sweet looking radio now with the all important "hands free" phone capability.
Thanks again for the pic and the info on the CCM not making any noise. I was considering how to mount it somewhere, but left it sitting on the padding as well.
#28
Finished my install yesterday. Turns out my brackets were just like yours. Bad memory on my part. The picture helped give me a visual on how to bend them out of the way - truly appreciate that!
My challenge then became getting the CCM off the bracket. I found a metal tang that was not obviously visible and bent that back (on both sides) and the CCM slipped out like butter.
I had to ream out a little of the plastic enclosure around the opening at the bottom on both sides. The new Metra console was about 1/4" too deep to fit the opening. I was a bit surprised at that since it was designed for the 10-14 models specifically. 10 Minutes of getting out the dremel, seting up the bit, and grinding it out took care of it.
My daughter has a sweet looking radio now with the all important "hands free" phone capability.
Thanks again for the pic and the info on the CCM not making any noise. I was considering how to mount it somewhere, but left it sitting on the padding as well.
My challenge then became getting the CCM off the bracket. I found a metal tang that was not obviously visible and bent that back (on both sides) and the CCM slipped out like butter.
I had to ream out a little of the plastic enclosure around the opening at the bottom on both sides. The new Metra console was about 1/4" too deep to fit the opening. I was a bit surprised at that since it was designed for the 10-14 models specifically. 10 Minutes of getting out the dremel, seting up the bit, and grinding it out took care of it.
My daughter has a sweet looking radio now with the all important "hands free" phone capability.
Thanks again for the pic and the info on the CCM not making any noise. I was considering how to mount it somewhere, but left it sitting on the padding as well.
#29
2013 RR Boss 302 #2342


Join Date: March 6, 2012
Location: Lancaster, PA
Posts: 11,667
Likes: 0
Received 2,174 Likes
on
1,621 Posts


Thread
Thread Starter
Forum
Replies
Last Post


