
Morimoto XB Projector Fog Lights Installed

Thread Starter
V6 Member
Joined: December 4, 2010
Posts: 50
Likes: 1
From: South Carolina
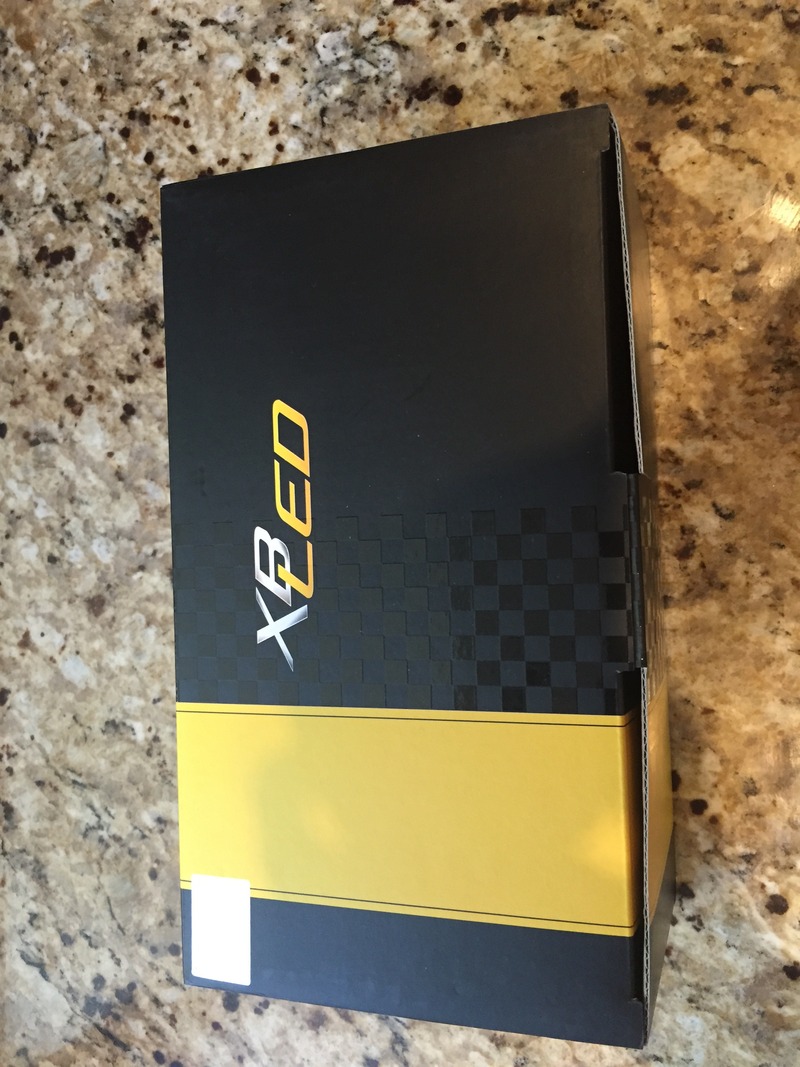
Morimoto XB Projector Fog Lights Installed
rMorimoto XB LED Projector Fog Lights
If you have already searched like myself and many others, you've probably found that there aren't many options for our foglights. You can:
1. Switch to a higher powered halogen or add HID and run the high probability of melting the plastic lenses/interior reflective material (even the lower 35w HID tend to melt the housings)
2. Switch to an LED bulb and lose all light ouput but get a nice color
3. Try to custom mount a universal, glass lens housing in place of the stock plastic one
4. Give up and stick with the stock bulbs
THERE IS FINALLY ANOTHER OPTION FOR US!!! Through "The Retrofit Source" you can get these Morimoto XB Foglights for all GT500 model years. If you have ever looked into retrofitted headlights you know that Morimoto is a company that makes some of the highest quality projectors. Now they have a direct fit (plug-n-play) replacement for our crappy fog lights.
The Morimoto XB mounts behind the bumper with all of the stock mounting points. They are powered by Nichia 5500k LED's that produce over 1200 raw lumens per side. The XB projectors concentrate a total of 2400 Lumens of pure white light into a beam that's super wide and perfectly distributed. The lens are made from durable polycarbonate and has a powder-coated cast aluminum housing preventing heat from damaging them inside. They also come with a 10 year Warranty!!
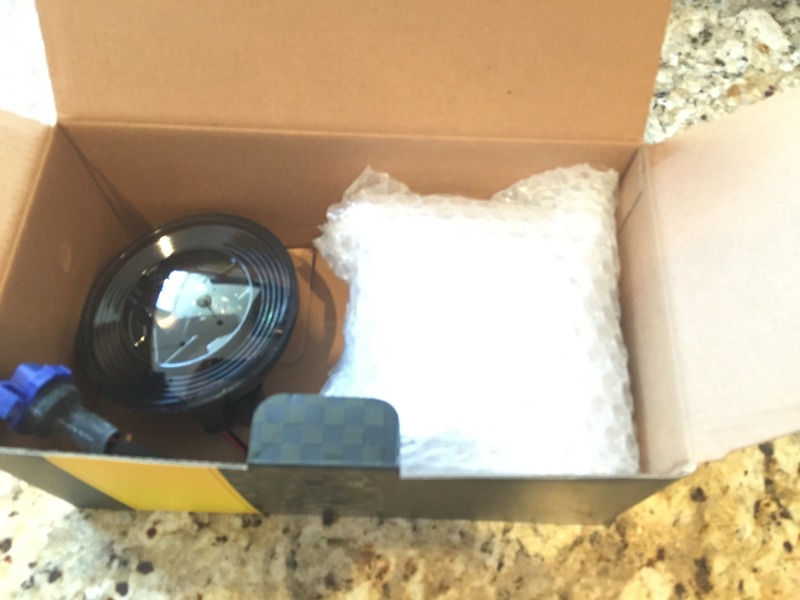
I was super excited to find out that these were delivered within only 2 days of ordering!!
As expected, the fog lights arrived packaged and protected by bubble-wrapped sleeves.
The black housings and inside create an amazing "smoked out" appearance.
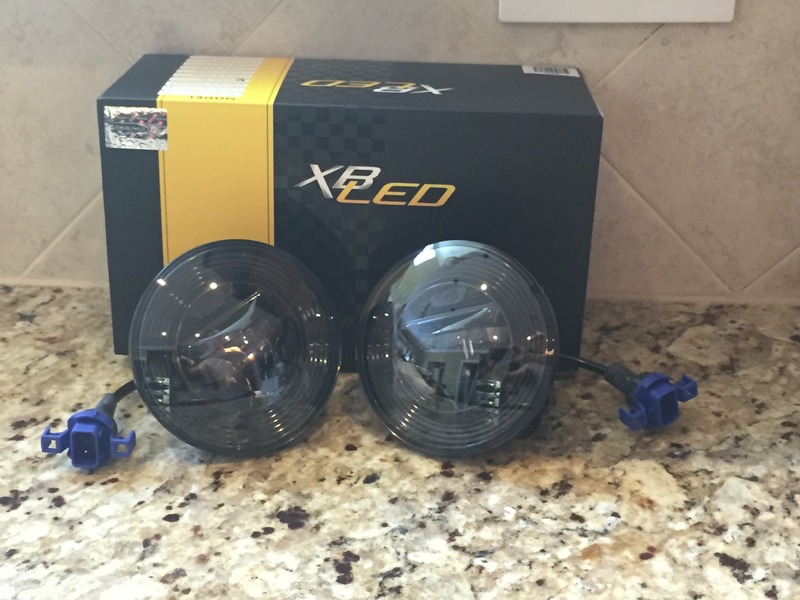
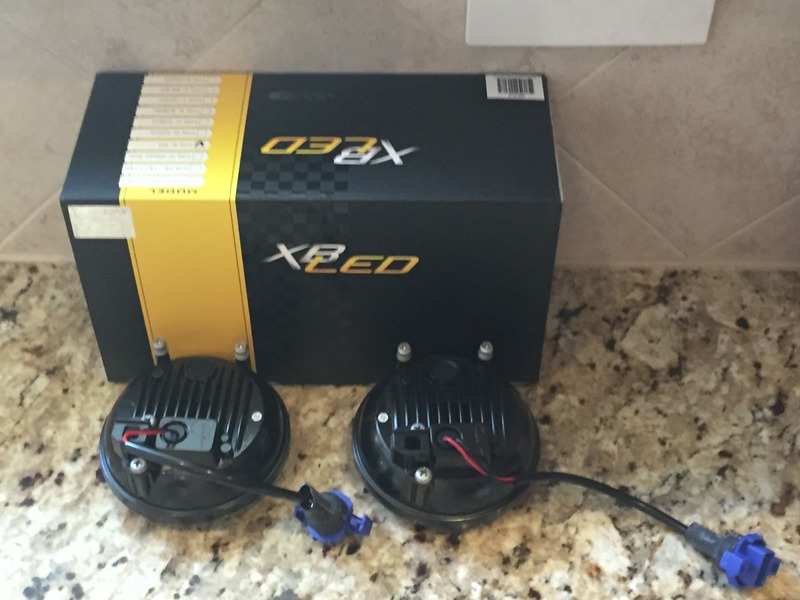
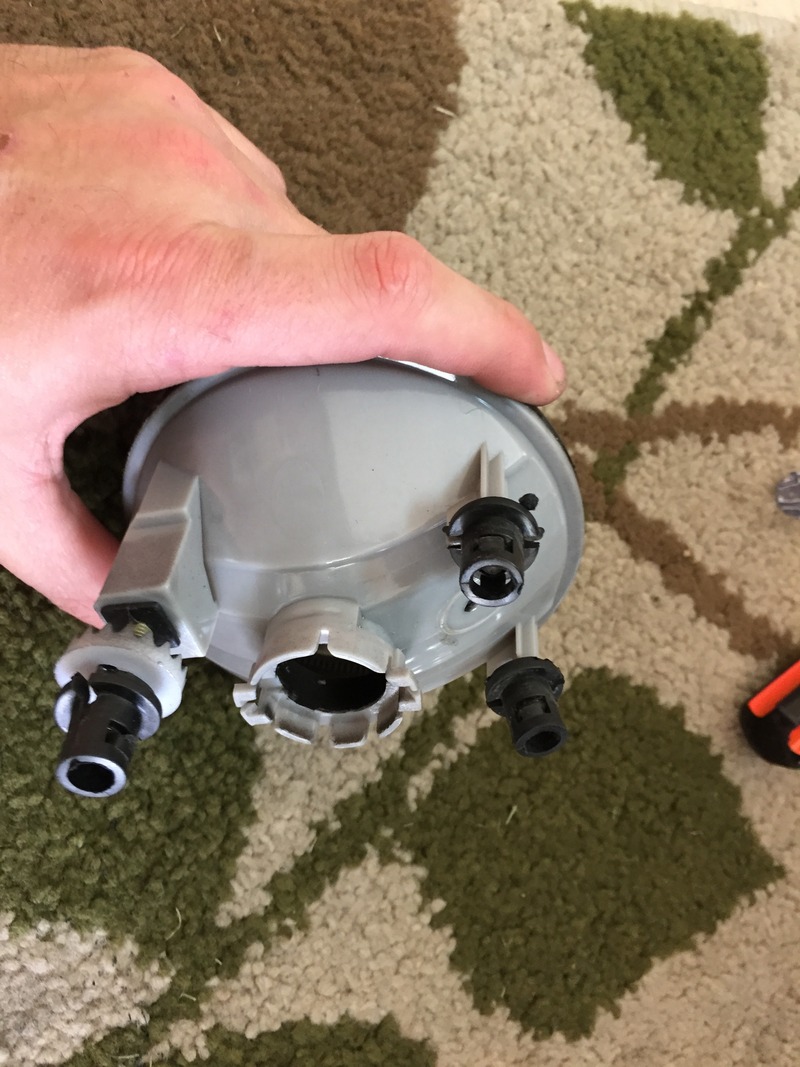
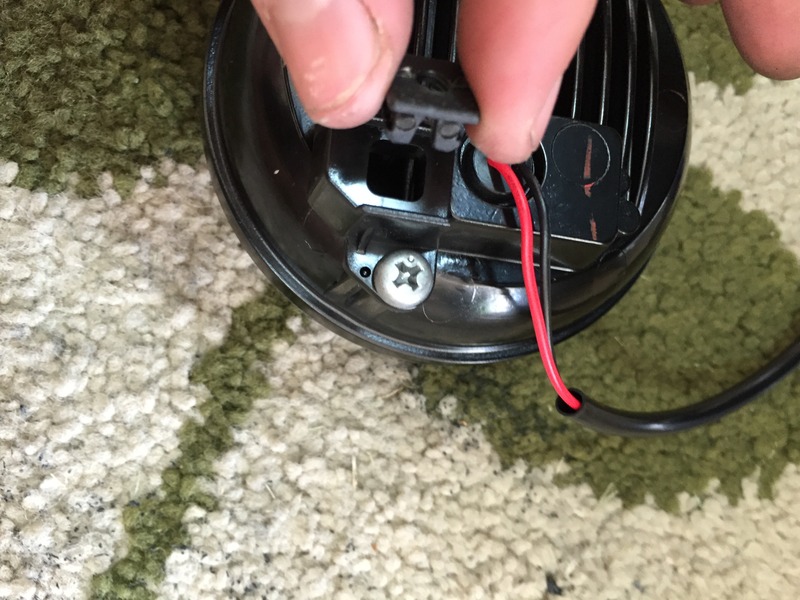
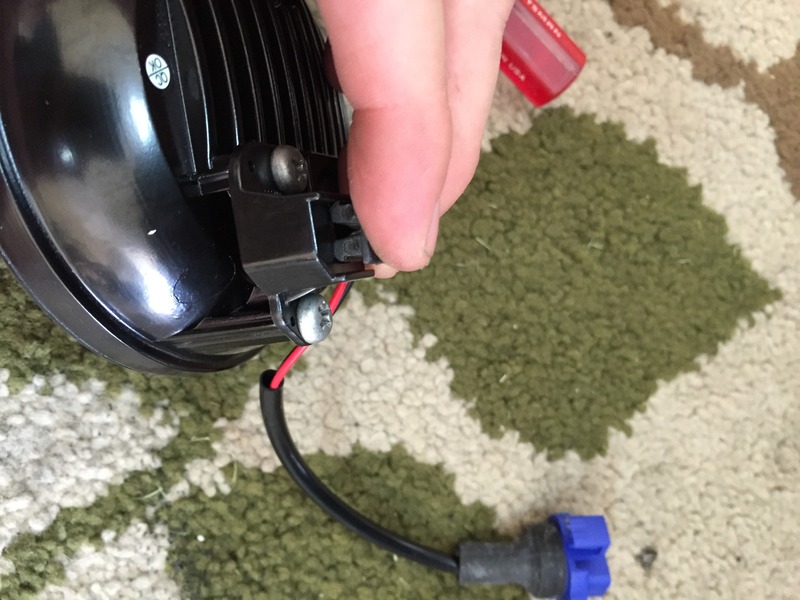
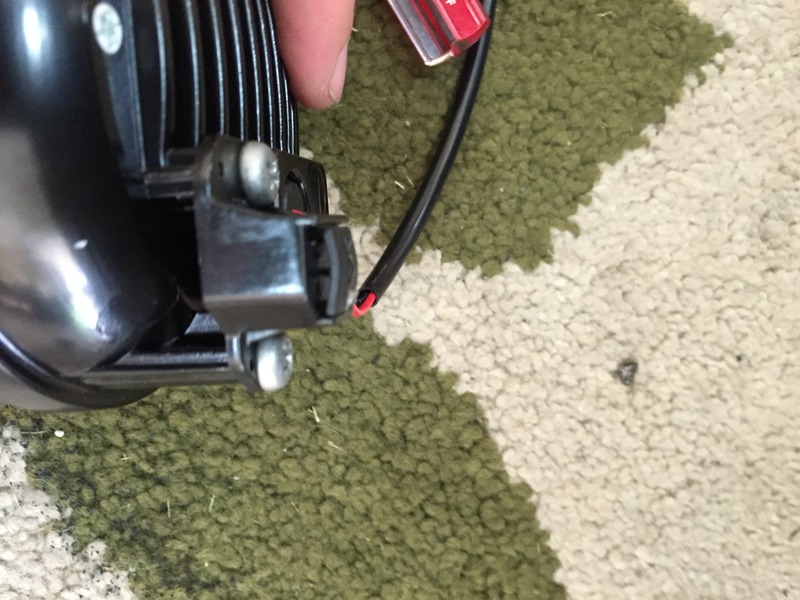
The back of the housing feel super tough with the aluminum material. And as you can see, they have the stock mounting points as well as the standard 5202 plug harness making it 100% plug'n'play.
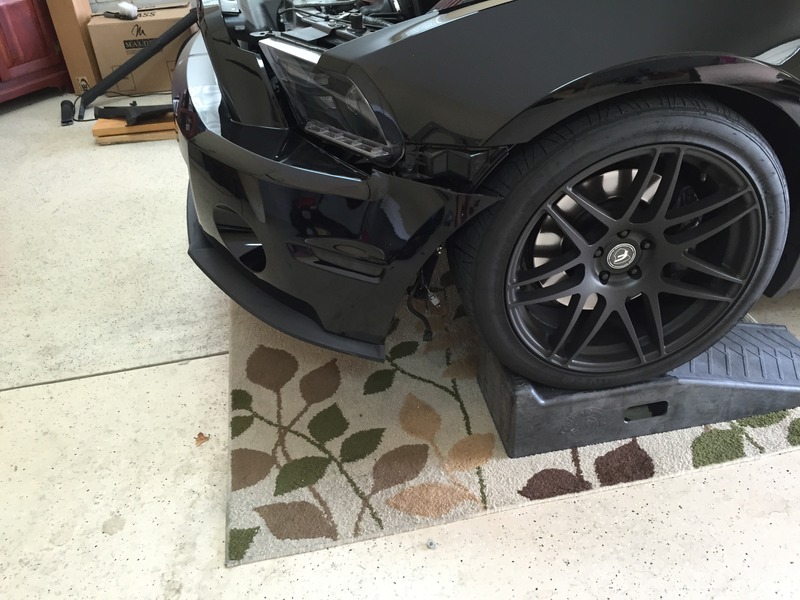
I couldn't wait to get started and get these installed. To install, I removed my front bumper so I would have full access to remove the stock fog lights. After going through the full install, you could probably remove the lower splash shield under the car and get plenty of access to remove them, saving a whole lot of time. I had removed my bumper so many times to install different grills and headlights that I felt comfortable taking it off.
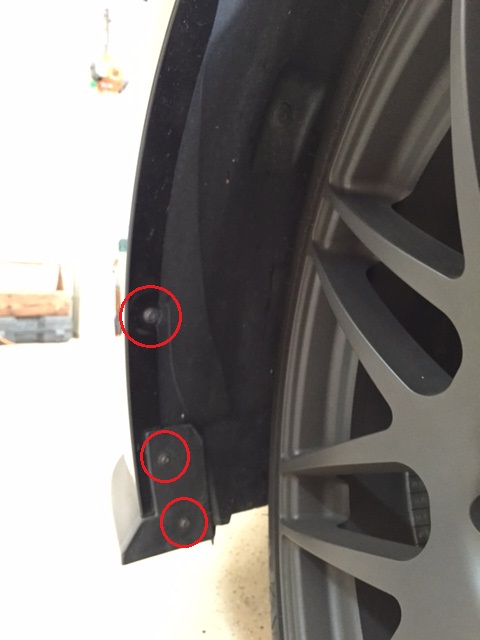
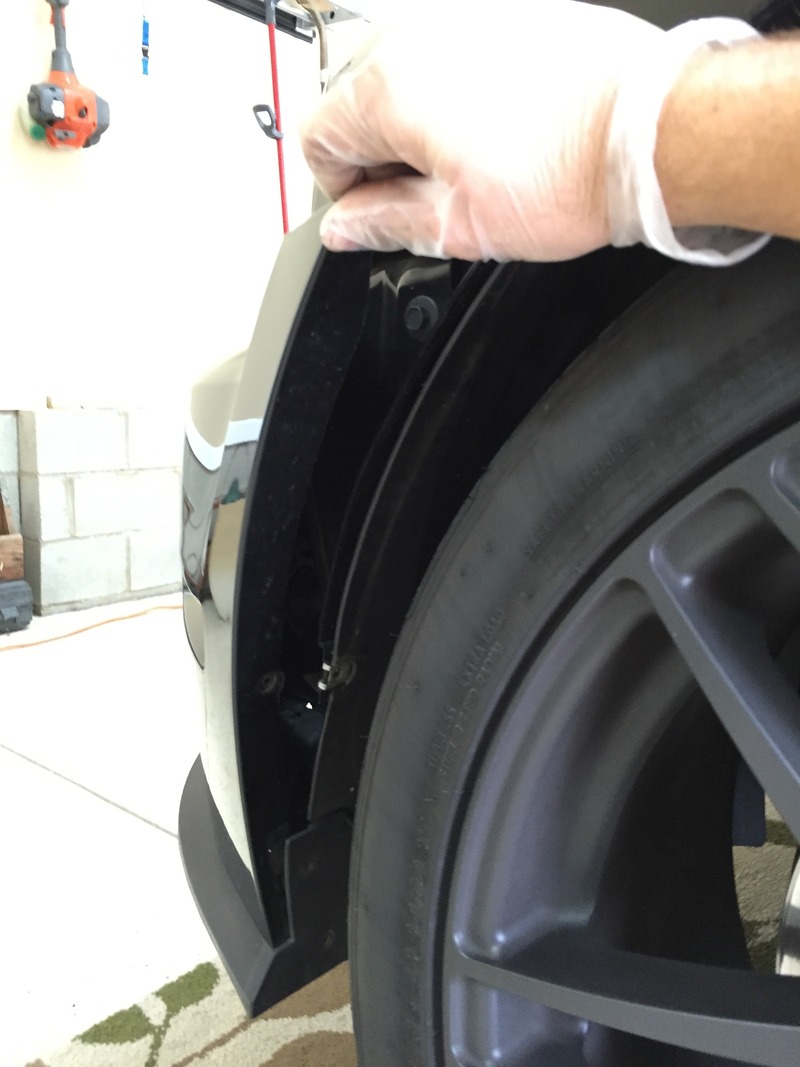
If removing the bumper, you first need to remove the three bolts in the tire well of the front wheels. Cut the wheels all the way to the right to access and remove the driver side screws. Then turn the wheels to the left to access and remove the passenger side screws.
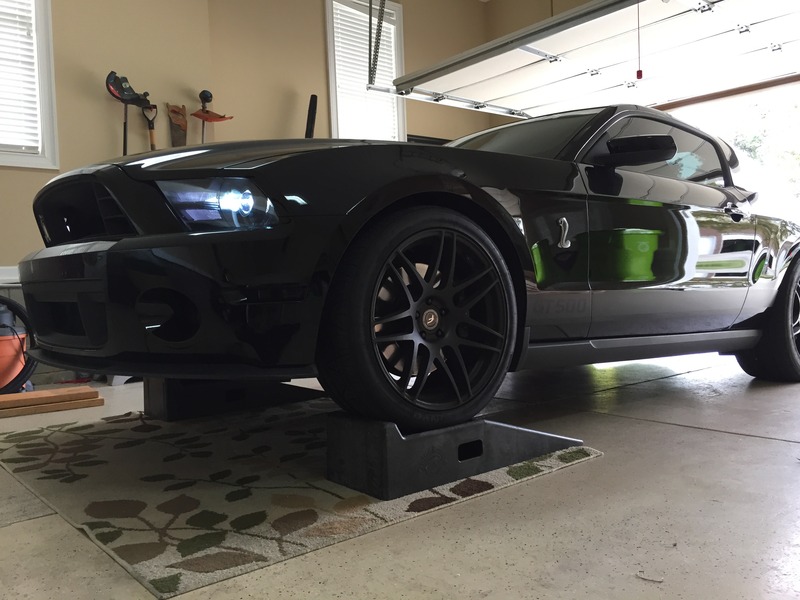
Use either ramps or jacks/jack stands to lift the front of the car.
Now remove the 5 screws from the underside of the lower splash shield. Sorry for the picture. I couldn't get the car up high enough to get it in one shot.

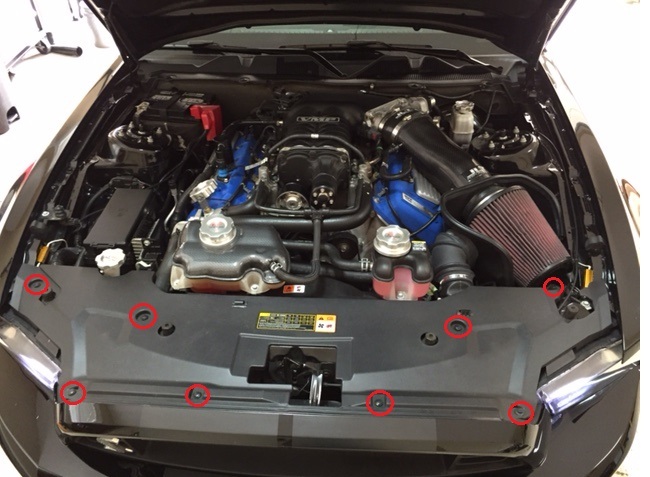
Remove the 8 retaining clips holding the radiator cover in place and remove the radiator cover.
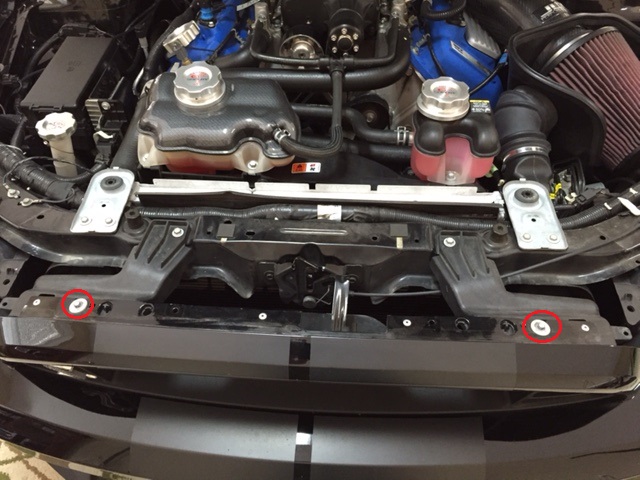
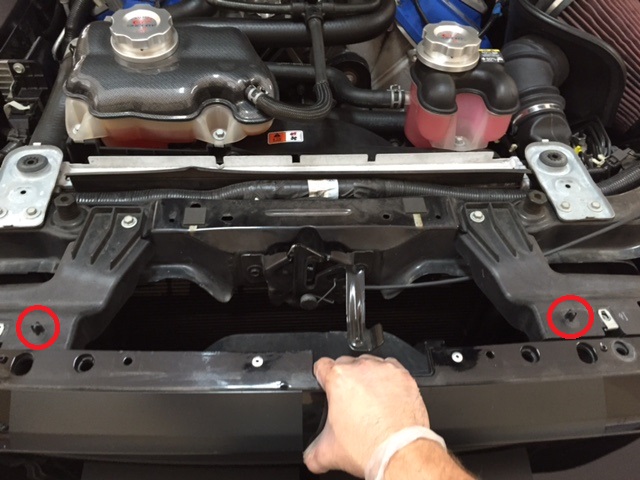
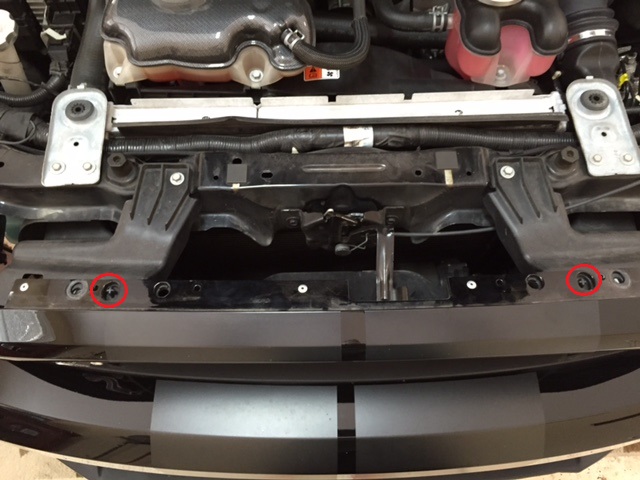
Now remove the two bolts holding the top of the bumper cover on.
Before removing the bumper, go ahead and remove the bulbs from the sidemarker lights and the fog lights.
This is the scary part for first timers. Grab the bumper on one side where it meets the fender and pull out and forward. It will simply pop out of clips when enough pressure is applied. Repeat on the other side.
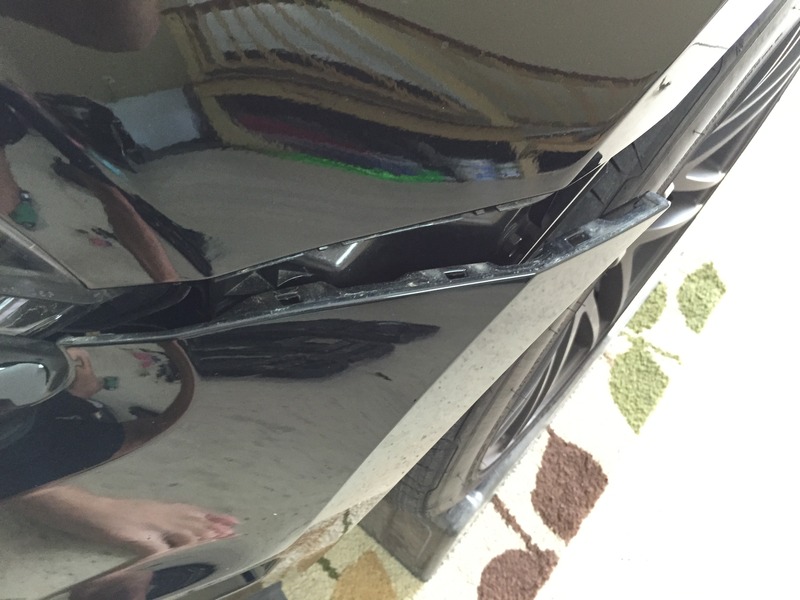
From the front, lift the bumper cover over the two plastic retainers and now the bumper is free. Slowly pull the bumper toward you and place to the side.
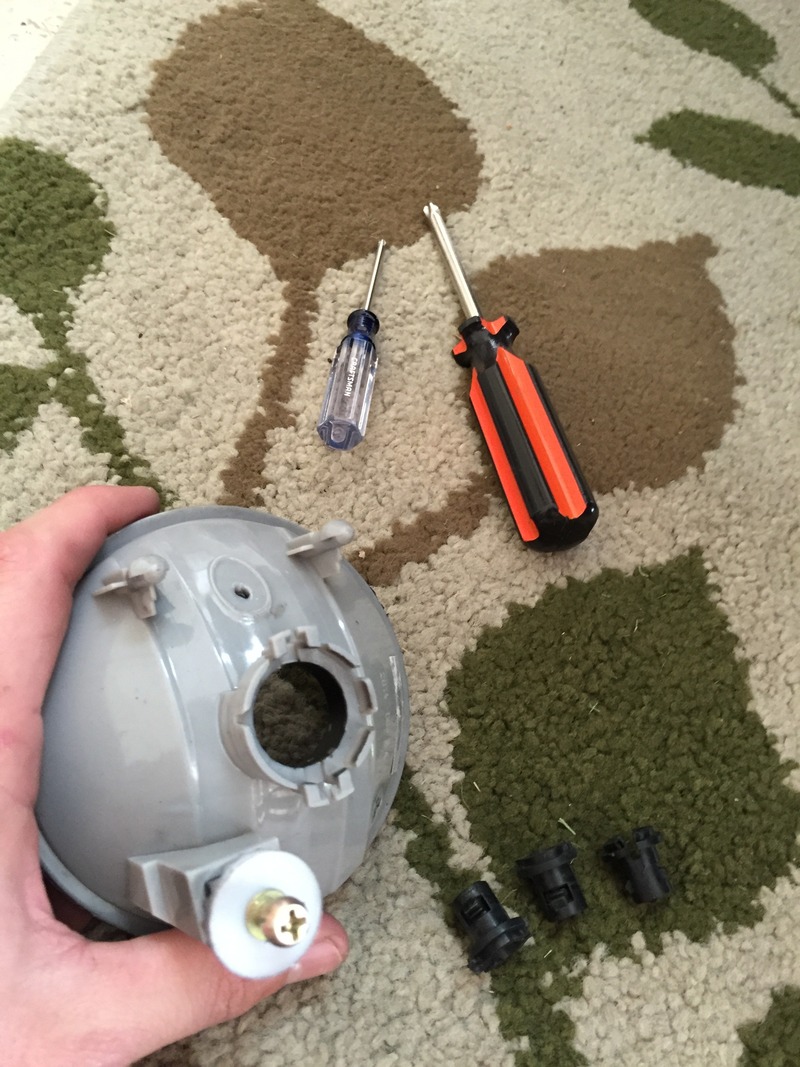
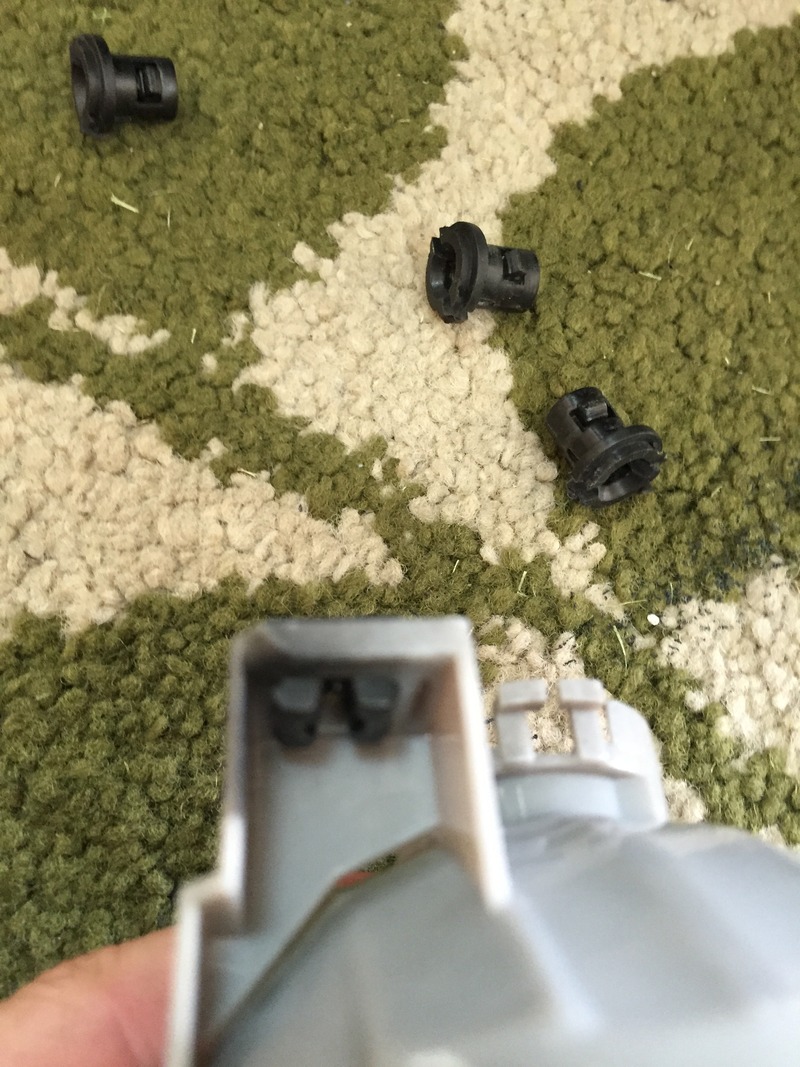
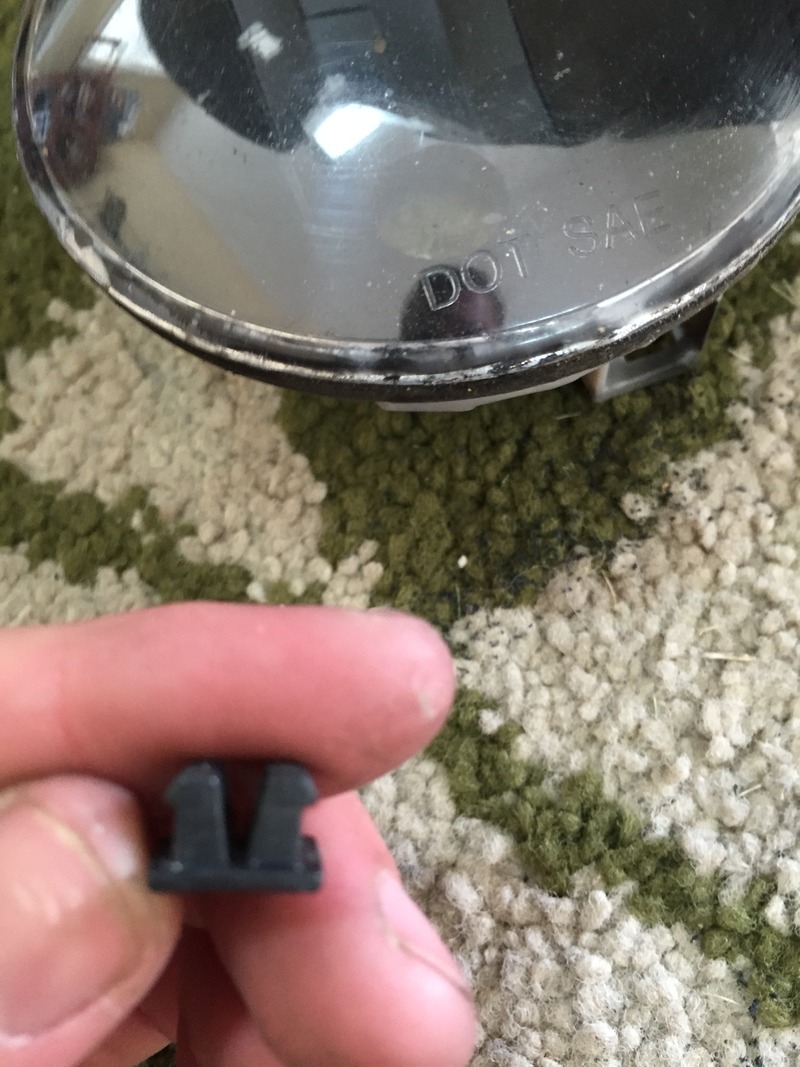
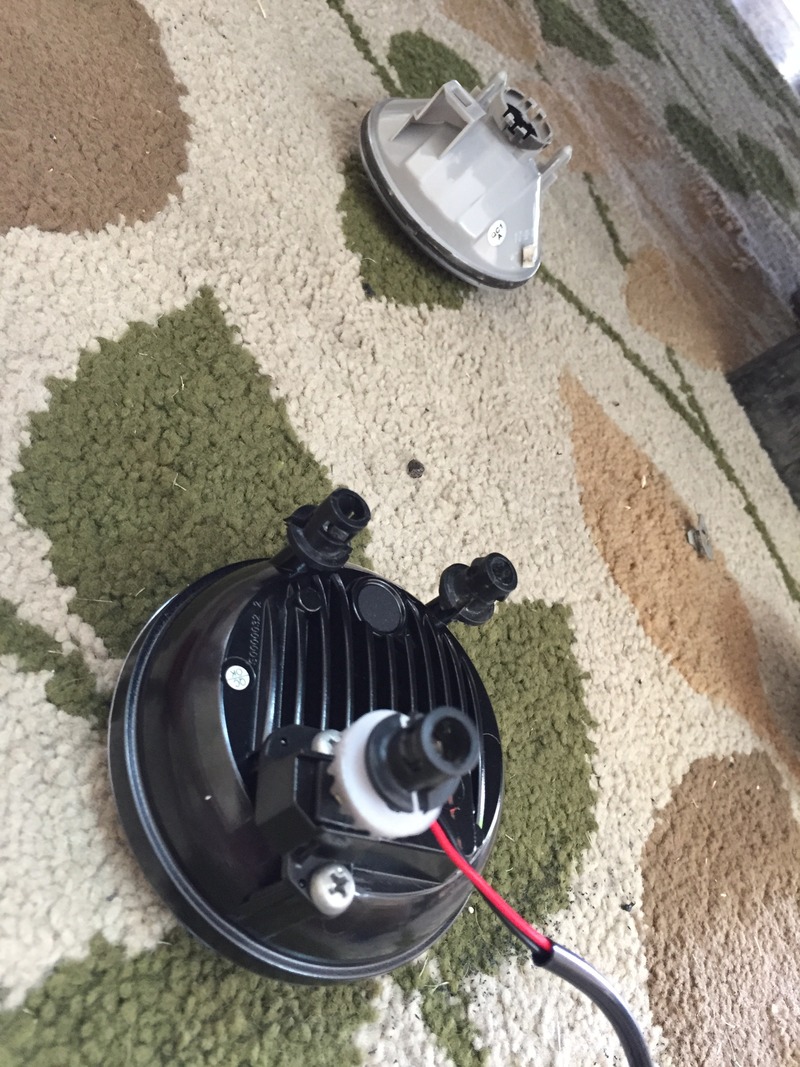
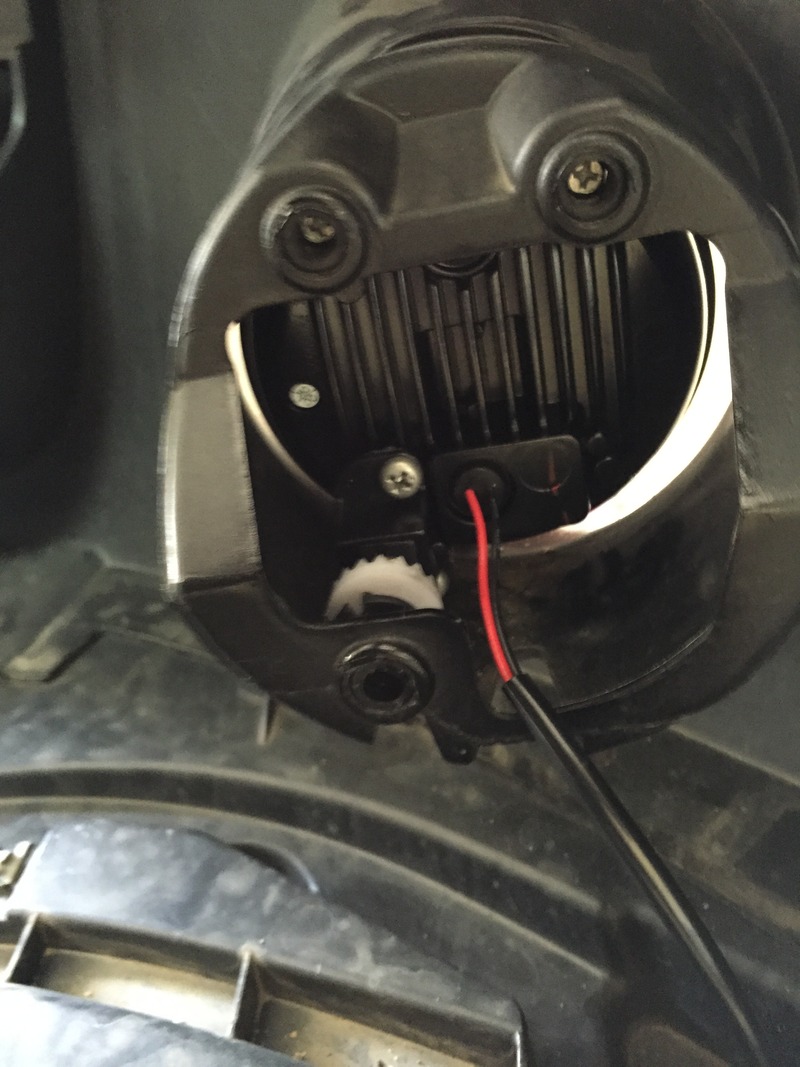
To remove the fog light assemblies, there are 3 plastic, circular retainers. Do not ruin these because they will be re-used. Each has 2 clips on each of them that have to be depressed to push through their holes. I found it best to use a flat head screw driver, unless you have a special tool for these. Push one tab in and put some forward pressure on it, then push the other tab in and it will push right through the hole.
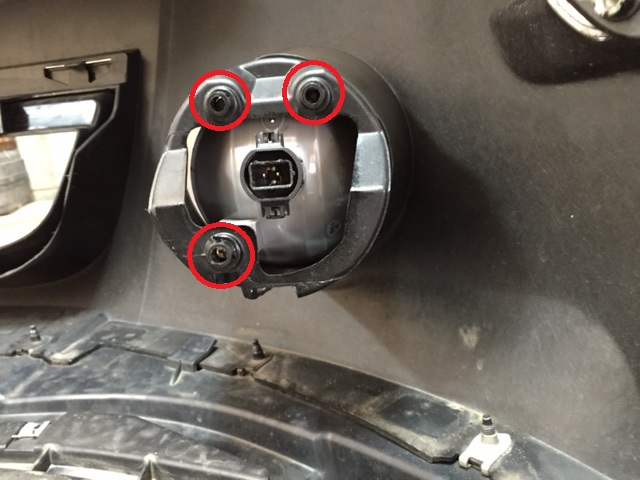

You will remove the three retainers from the stock fog lights by just pulling them off by hand.
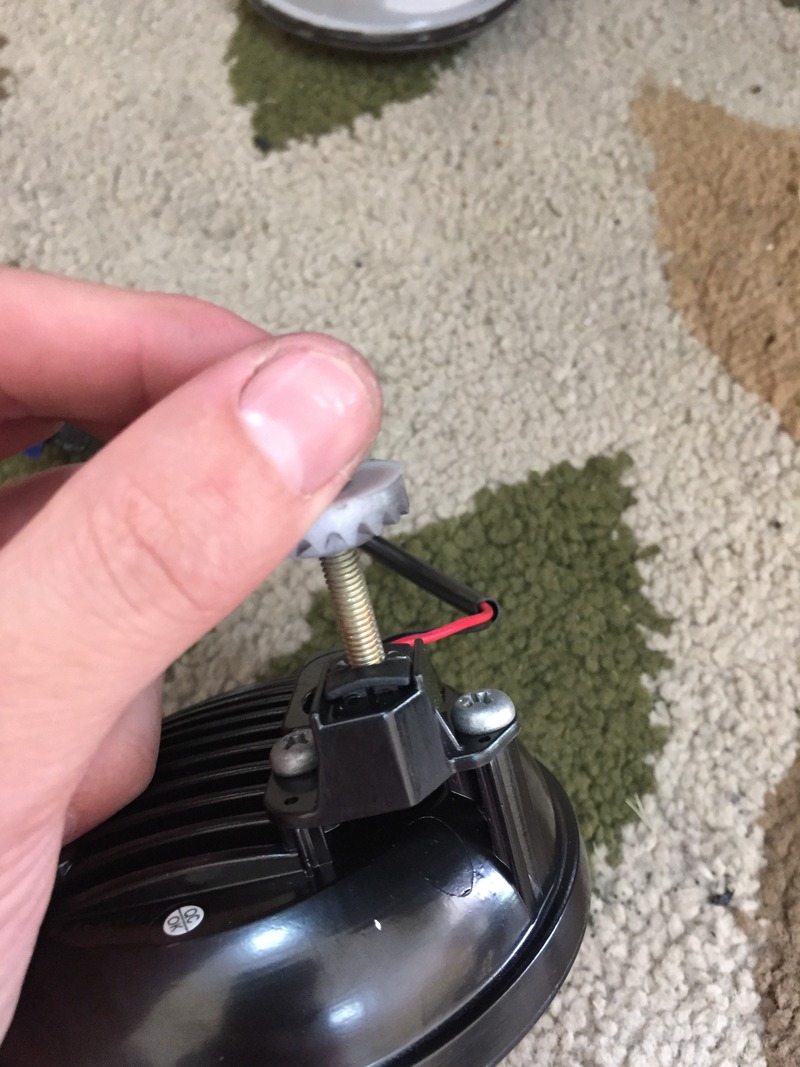
You will also have to remove and reuse the vertical leveling screw in the bottom.
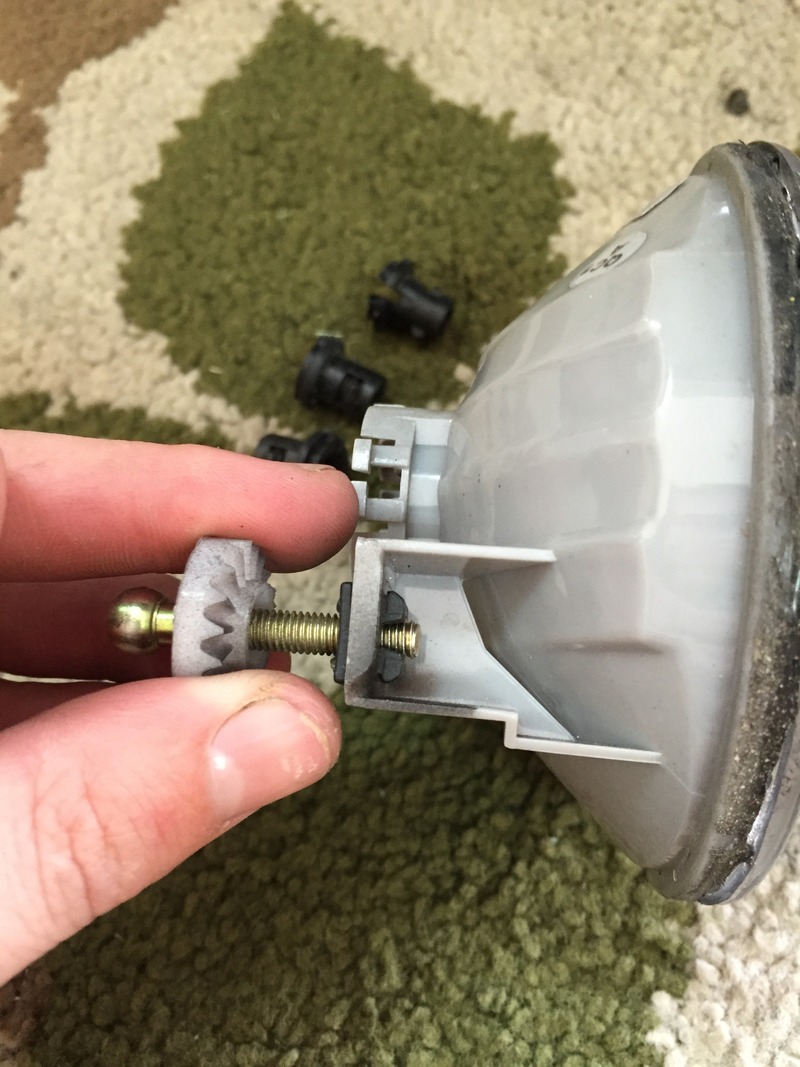
Remove the retaining clip that you just removed the screw from. With the flat head screw driver, push one of the clips inward and it should just pop right out.
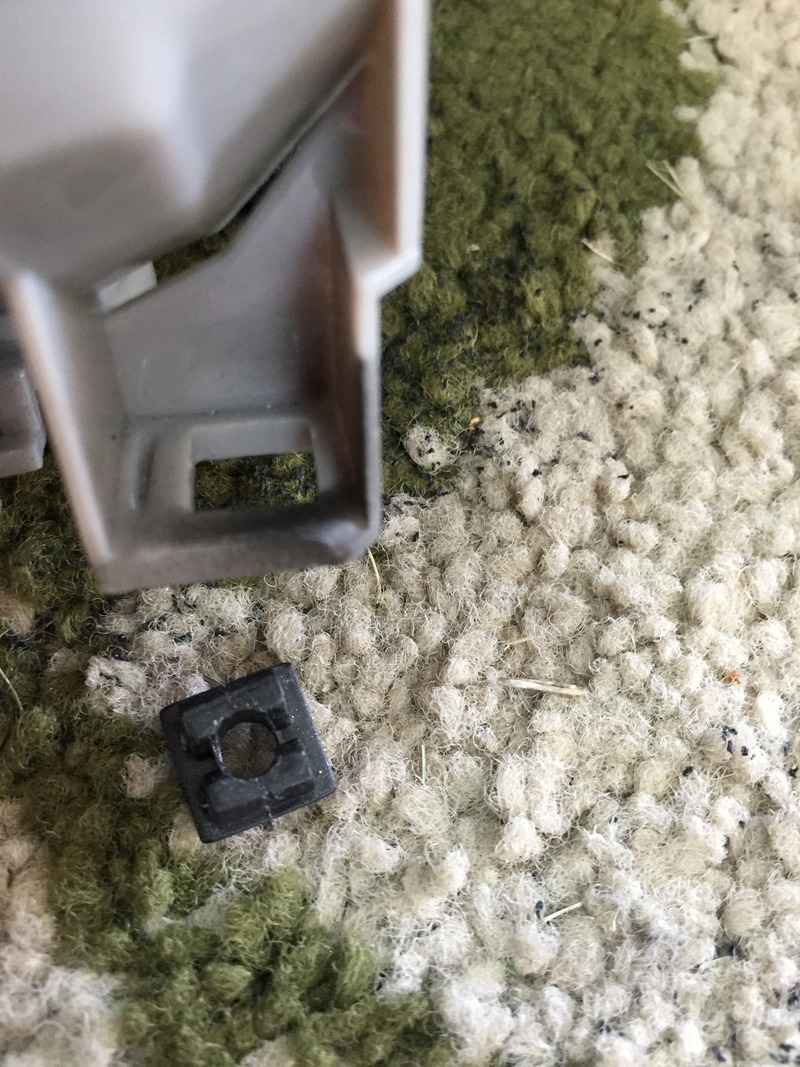
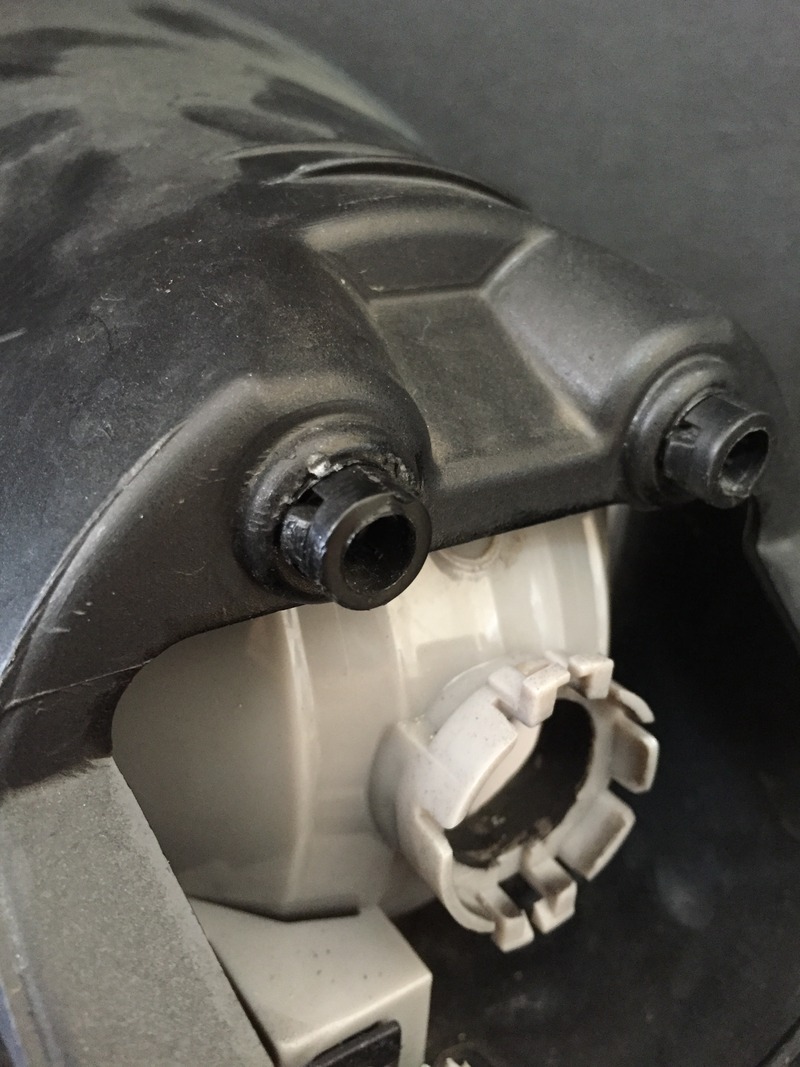
Now install the retaining clip into the square hole in the XB fog lights by applying some pressure. It does not go down flush until you begin to screw in the leveling screw.
Do not screw the leveling screw all the way in. Just enough so that it is threaded into the clip.
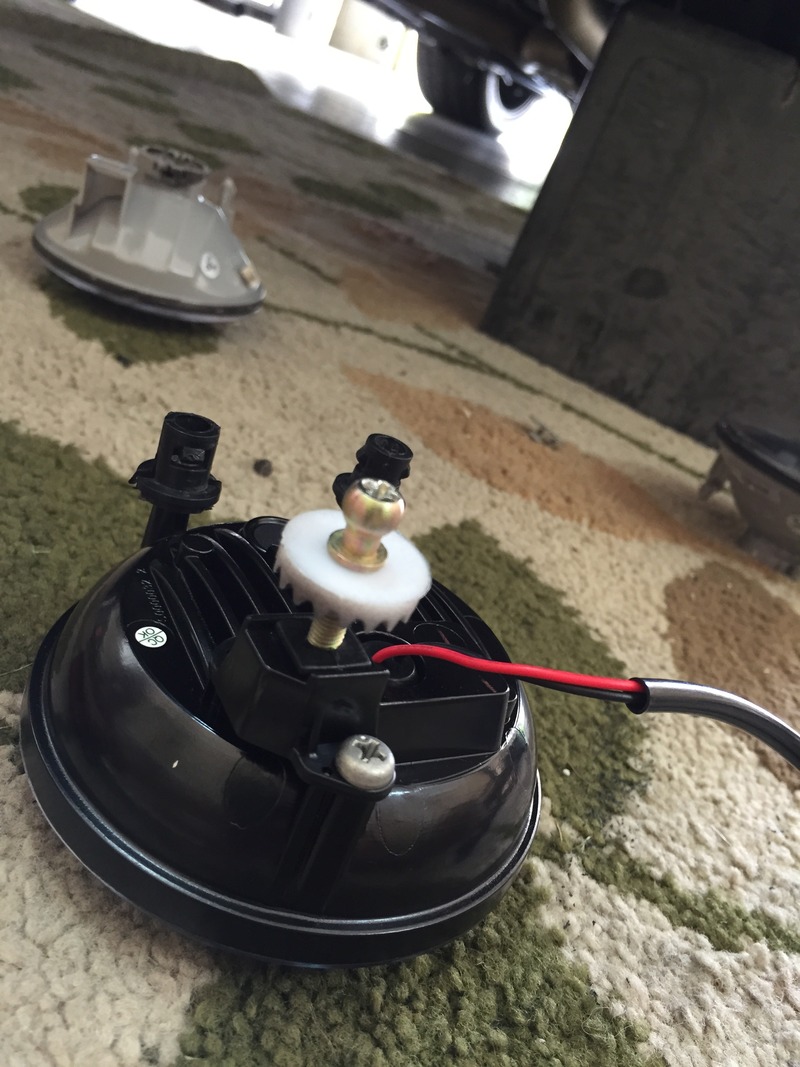
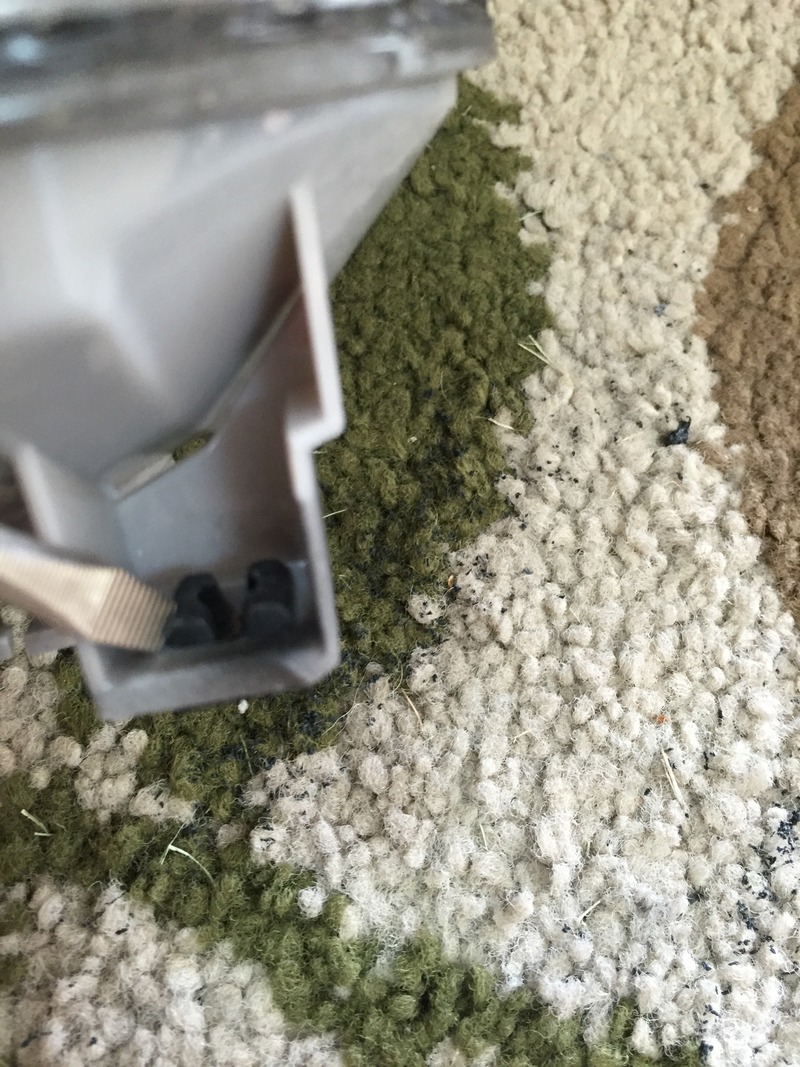
Put the 3 circular retaining clips on the mounting points of the XB Fog lights.
Insert the fog light from the front of the bumper and line the clips up with the three holes.
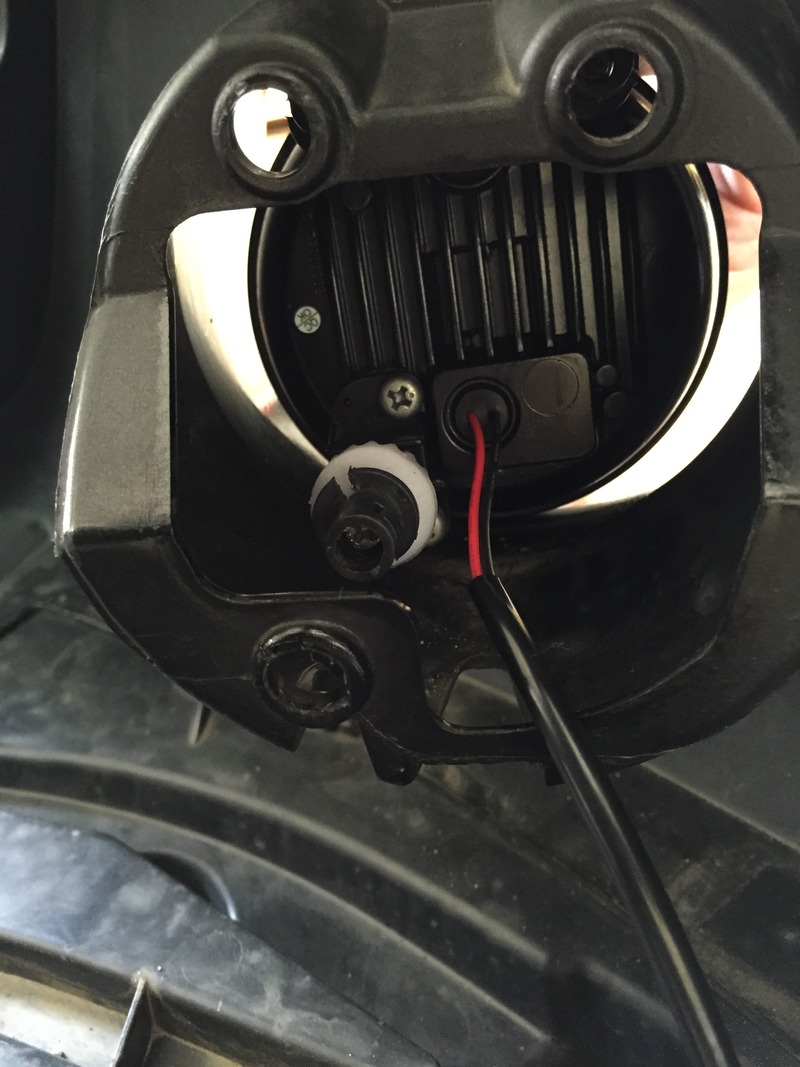
Push in with just a little pressure and they will snap into place. They may feel a little loose since we have not tightened the vertical leveling screw tight. Go ahead and tighten the screw until there is little play in the fog light.
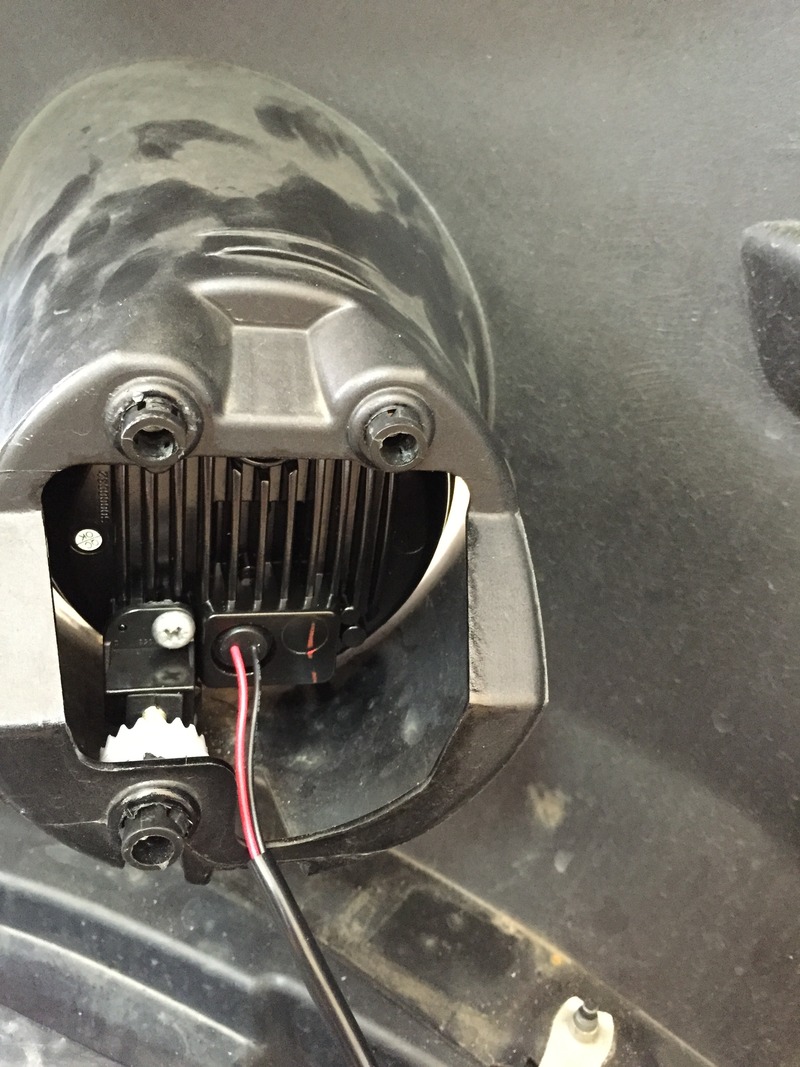
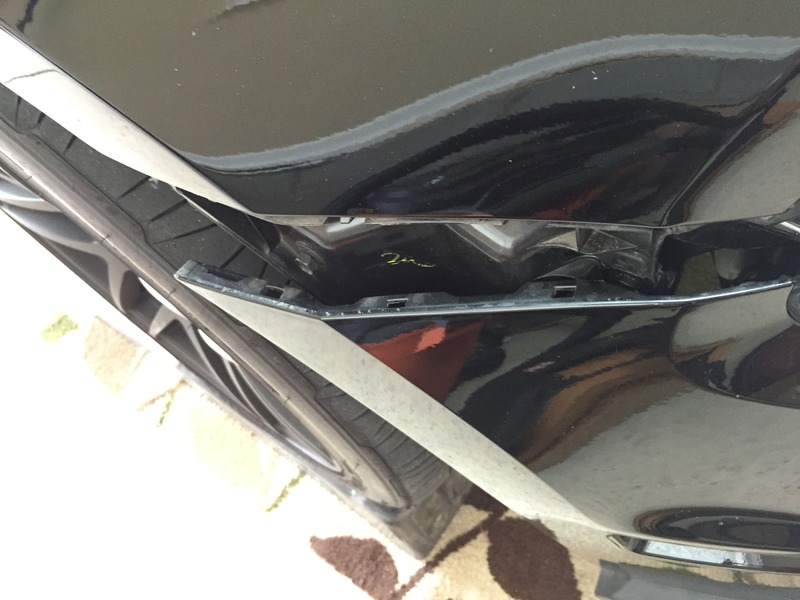
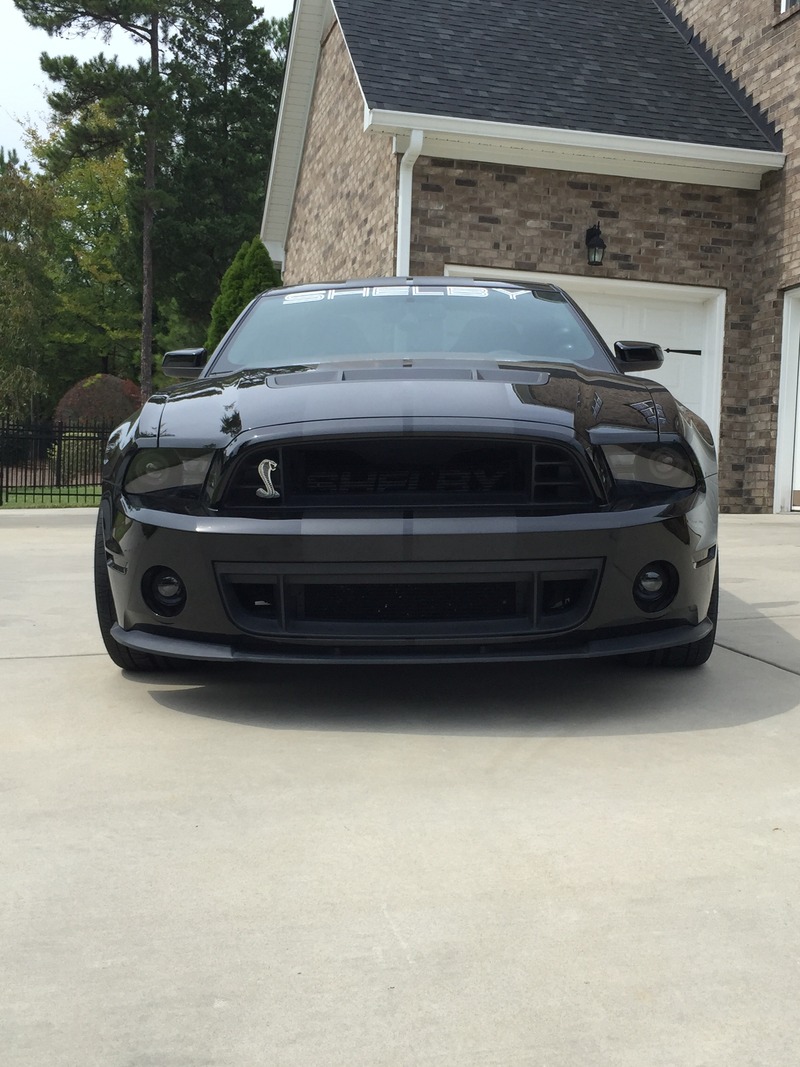
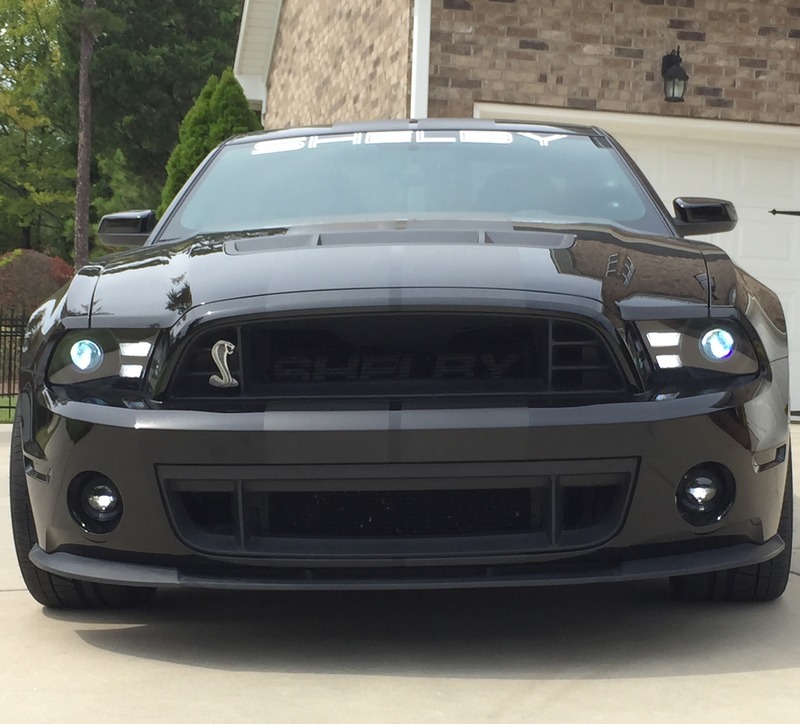
Here are the XB Fog Lights installed. The black smoked look is amazing!!!
Now just repeat in reverse to re-install the bumper.
Line up the front bumper cover and place the 2 holes on top over the black retainers.
One side at a time, re-fasten the sides back level and flush with the fender. When pressure is applied you will hear the bumper attach to the clips.
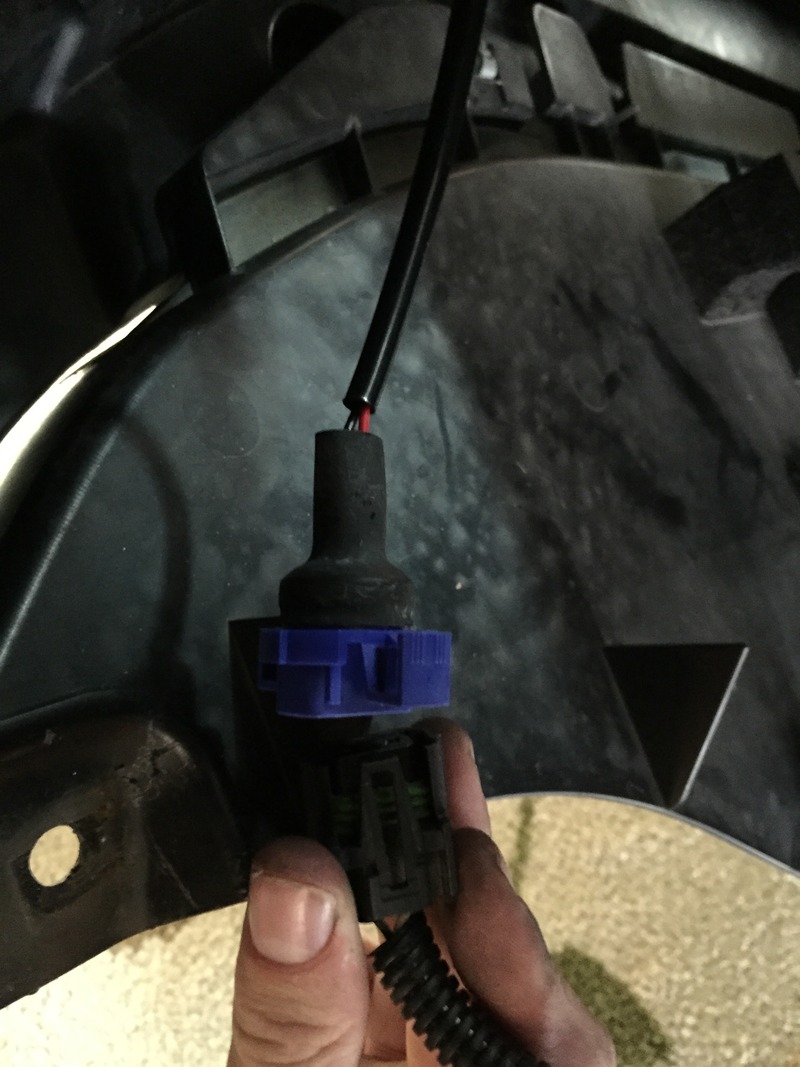
Plug in the 5202 adapter from the XB Fog Lights right into the fog light harness. Just like the 5202 bulb, you will see 2 vertical slots on one side and 1 vertical side on the other to line them up correctly into the harness. Also plug the side markers in.
Before fastening the lower splash guard, put the car back on the ground and use a phillips screw driver to level your fog lights even with each other. This is a lot easier without the splash guard and tire wells sealed up.
Now just reinstall the bolts into the lower splash guard and inner tire wells.
Like I said earlier, it would probably be easier and doable to just remove the bolts from the lower splash guard and inner tire wells to access the fog lights. However, I wanted to get a good and detailed look for the installation to be able to post pictures.
The stealthy smoked look is amazing on the car. And you never have to tint them like you would with the OEM chrome ones, which dramatically decreases the light output and makes them even more useless.
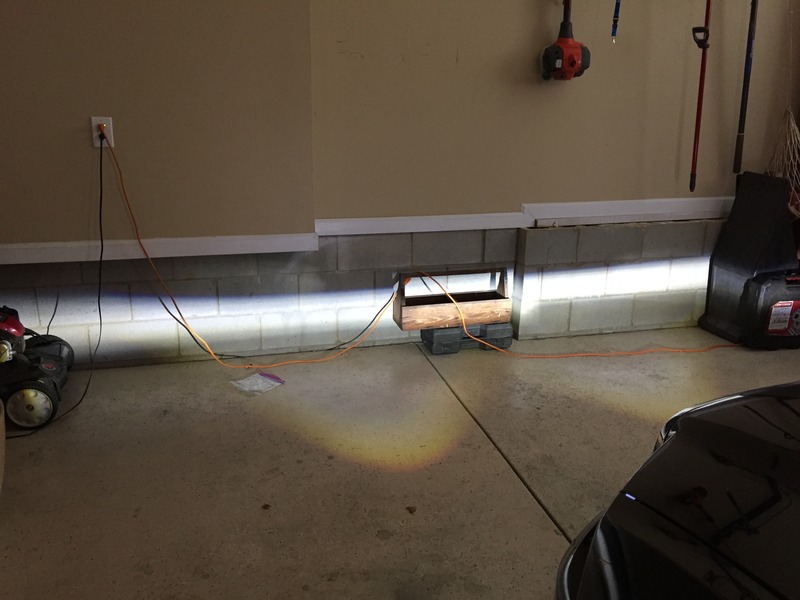
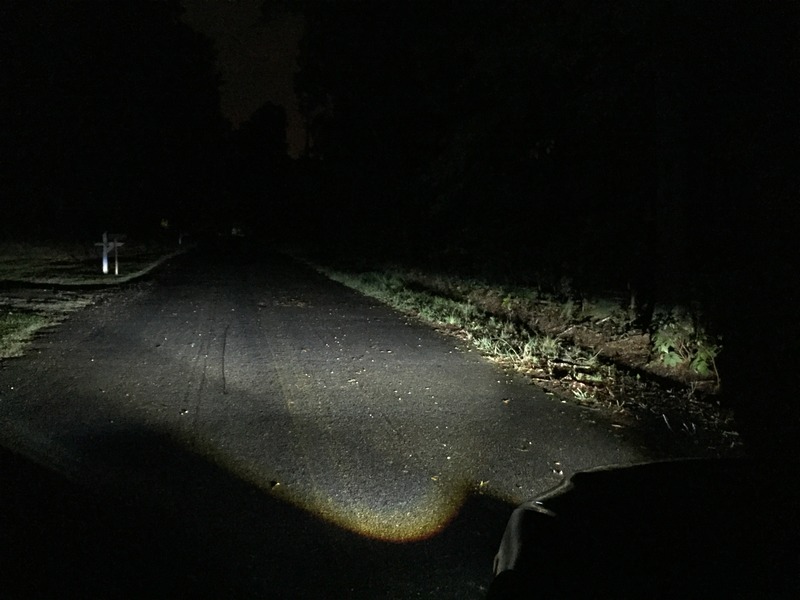
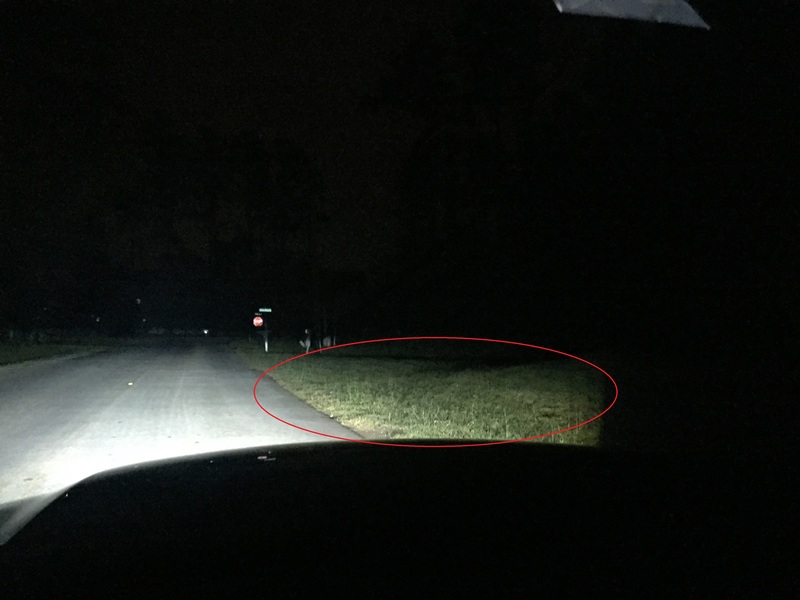
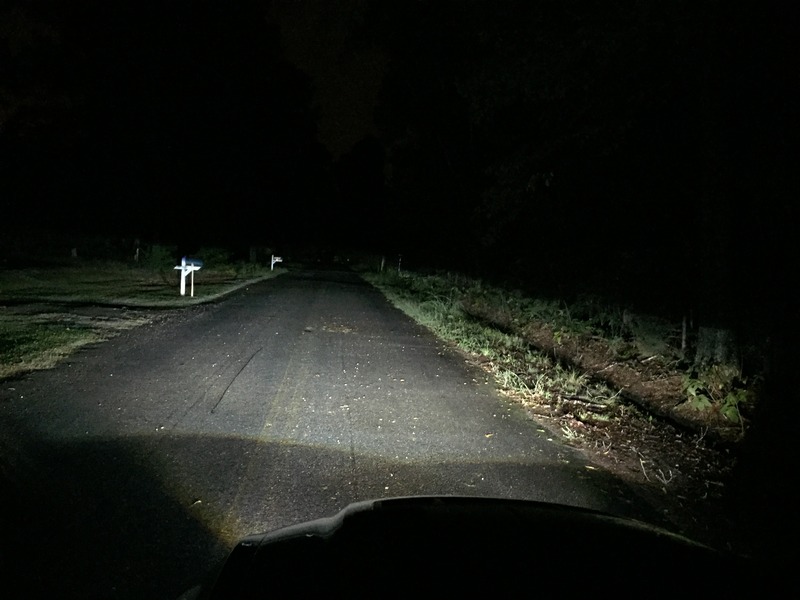
The crisp cutoff is amazing as is the output of these lights. You can tell from the picture how wide the beam is and how intense it is all the way to the left and right side of the beam. This is great at night and you gain so much peripheral light.
Here is a picture with just the XB Fog Lights on:
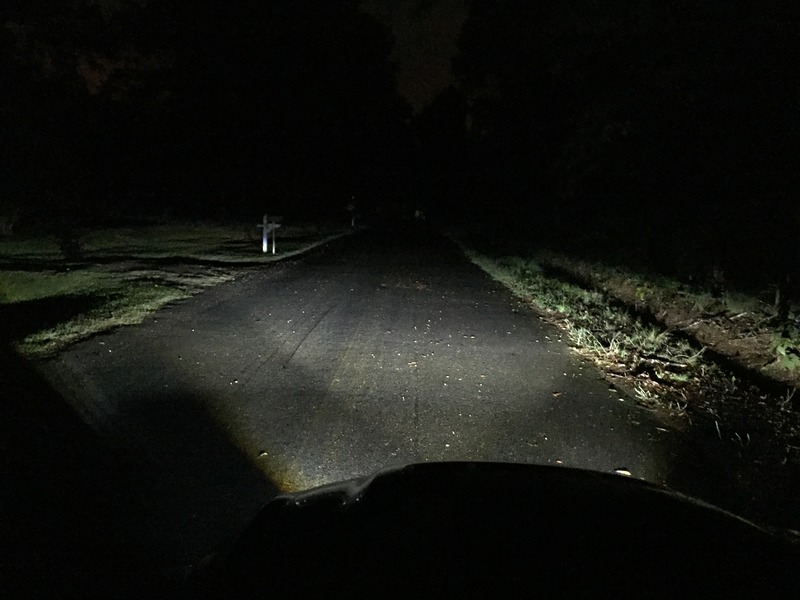
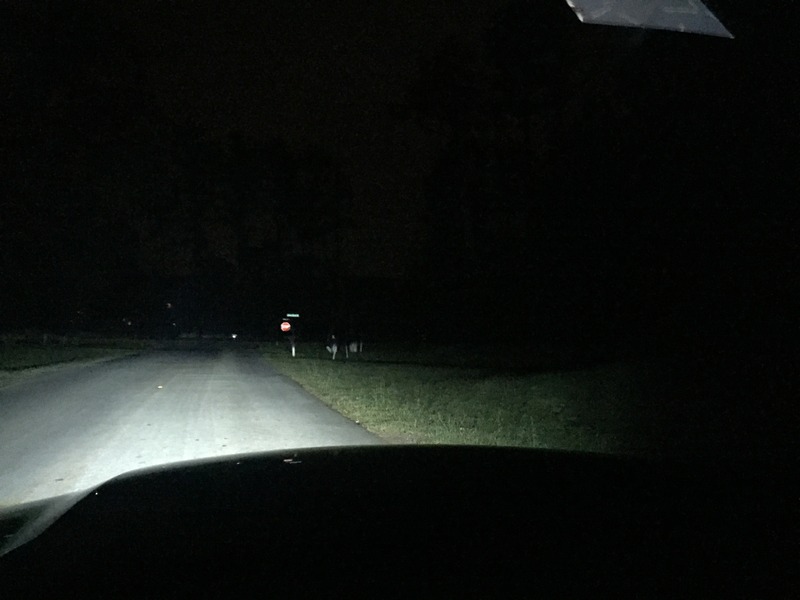
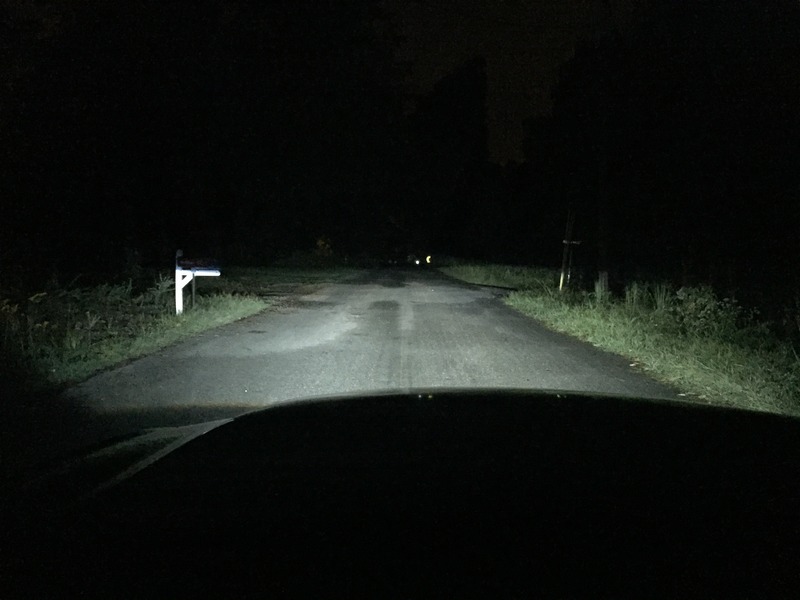
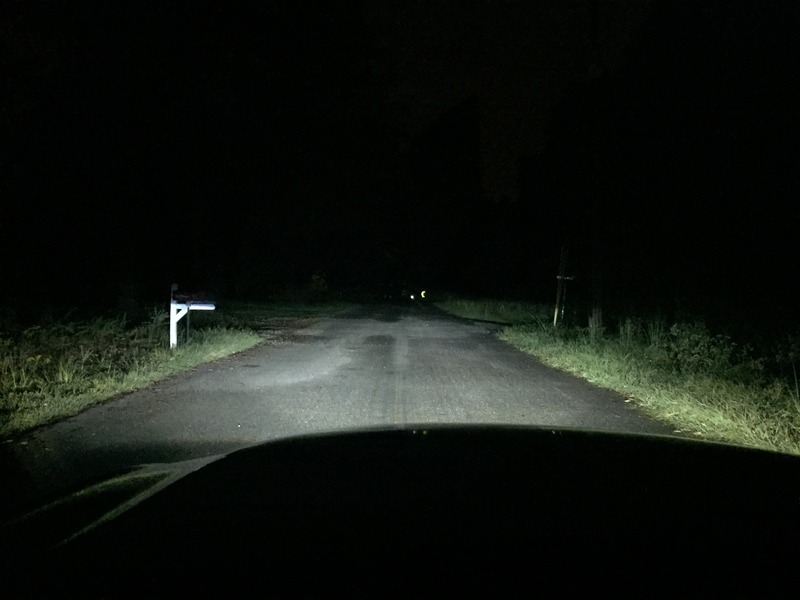
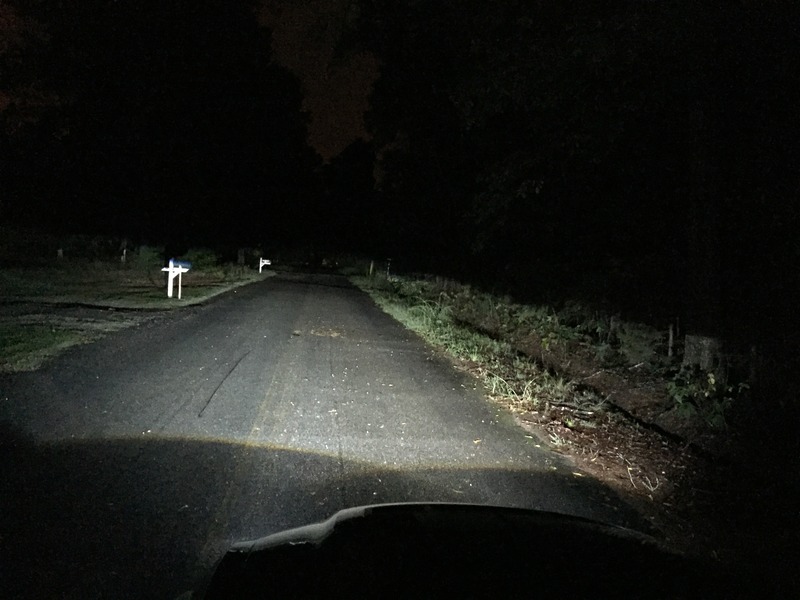
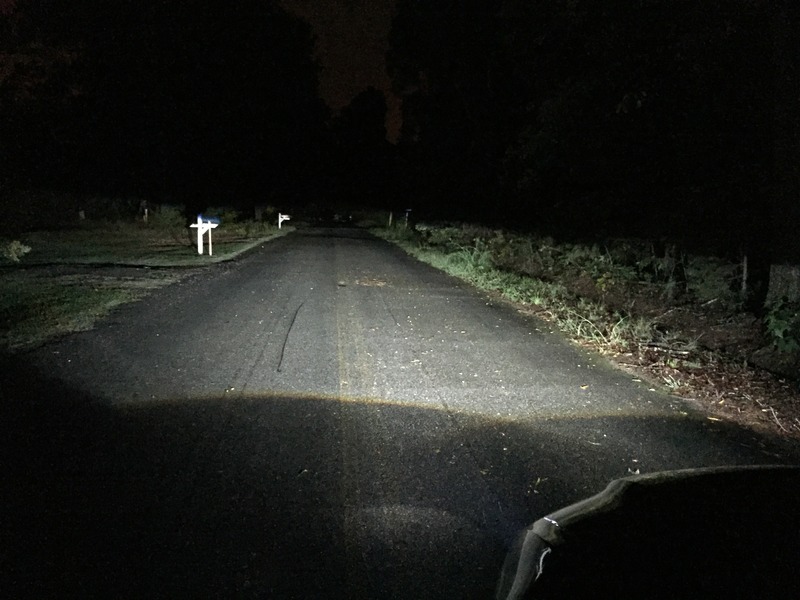
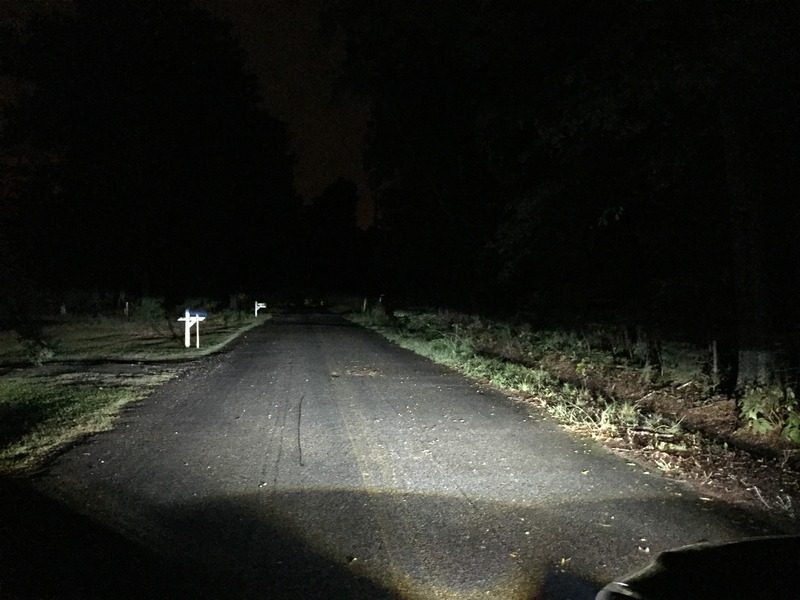
Here are a couple comparing my Retrofitted Headlights with Morimoto projectors and 55w HID with and without the fog lights. Keep in mind, my headlights are going to be a lot brighter than OEM HID because of the retrofitted projectors and 55w HID. So everyone else will see a more dramatic difference.
Headlights:
Headlights & Fog Lights
Headlights:
Headlights & Fog Lights
Headlights:
Headlights & Fog Lights
Headlights:
Headlights & Fog Lights:
You can tell the major advantage of these is the wide beam, which is where you want fog lights to light up since the headlights start losing intensity at the edge of the beams. I am so glad that someone finally brought an option to us for our fog light replacements. And these are not cheap replacement assemblies. They are high quality Morimoto Projectors!!
Here's the link:
http://www.theretrofitsource.com/com...rd-4-inch.html
For a limited time, use the discount code "XBGT500" they set up for $25 off!!
If you have already searched like myself and many others, you've probably found that there aren't many options for our foglights. You can:
1. Switch to a higher powered halogen or add HID and run the high probability of melting the plastic lenses/interior reflective material (even the lower 35w HID tend to melt the housings)
2. Switch to an LED bulb and lose all light ouput but get a nice color
3. Try to custom mount a universal, glass lens housing in place of the stock plastic one
4. Give up and stick with the stock bulbs
THERE IS FINALLY ANOTHER OPTION FOR US!!! Through "The Retrofit Source" you can get these Morimoto XB Foglights for all GT500 model years. If you have ever looked into retrofitted headlights you know that Morimoto is a company that makes some of the highest quality projectors. Now they have a direct fit (plug-n-play) replacement for our crappy fog lights.
The Morimoto XB mounts behind the bumper with all of the stock mounting points. They are powered by Nichia 5500k LED's that produce over 1200 raw lumens per side. The XB projectors concentrate a total of 2400 Lumens of pure white light into a beam that's super wide and perfectly distributed. The lens are made from durable polycarbonate and has a powder-coated cast aluminum housing preventing heat from damaging them inside. They also come with a 10 year Warranty!!
I was super excited to find out that these were delivered within only 2 days of ordering!!

As expected, the fog lights arrived packaged and protected by bubble-wrapped sleeves.

The black housings and inside create an amazing "smoked out" appearance.

The back of the housing feel super tough with the aluminum material. And as you can see, they have the stock mounting points as well as the standard 5202 plug harness making it 100% plug'n'play.

I couldn't wait to get started and get these installed. To install, I removed my front bumper so I would have full access to remove the stock fog lights. After going through the full install, you could probably remove the lower splash shield under the car and get plenty of access to remove them, saving a whole lot of time. I had removed my bumper so many times to install different grills and headlights that I felt comfortable taking it off.
If removing the bumper, you first need to remove the three bolts in the tire well of the front wheels. Cut the wheels all the way to the right to access and remove the driver side screws. Then turn the wheels to the left to access and remove the passenger side screws.

Use either ramps or jacks/jack stands to lift the front of the car.

Now remove the 5 screws from the underside of the lower splash shield. Sorry for the picture. I couldn't get the car up high enough to get it in one shot.

Remove the 8 retaining clips holding the radiator cover in place and remove the radiator cover.

Now remove the two bolts holding the top of the bumper cover on.

Before removing the bumper, go ahead and remove the bulbs from the sidemarker lights and the fog lights.
This is the scary part for first timers. Grab the bumper on one side where it meets the fender and pull out and forward. It will simply pop out of clips when enough pressure is applied. Repeat on the other side.


From the front, lift the bumper cover over the two plastic retainers and now the bumper is free. Slowly pull the bumper toward you and place to the side.

To remove the fog light assemblies, there are 3 plastic, circular retainers. Do not ruin these because they will be re-used. Each has 2 clips on each of them that have to be depressed to push through their holes. I found it best to use a flat head screw driver, unless you have a special tool for these. Push one tab in and put some forward pressure on it, then push the other tab in and it will push right through the hole.


You will remove the three retainers from the stock fog lights by just pulling them off by hand.

You will also have to remove and reuse the vertical leveling screw in the bottom.

Remove the retaining clip that you just removed the screw from. With the flat head screw driver, push one of the clips inward and it should just pop right out.


Now install the retaining clip into the square hole in the XB fog lights by applying some pressure. It does not go down flush until you begin to screw in the leveling screw.


Do not screw the leveling screw all the way in. Just enough so that it is threaded into the clip.


Put the 3 circular retaining clips on the mounting points of the XB Fog lights.

Insert the fog light from the front of the bumper and line the clips up with the three holes.


Push in with just a little pressure and they will snap into place. They may feel a little loose since we have not tightened the vertical leveling screw tight. Go ahead and tighten the screw until there is little play in the fog light.

Here are the XB Fog Lights installed. The black smoked look is amazing!!!

Now just repeat in reverse to re-install the bumper.
Line up the front bumper cover and place the 2 holes on top over the black retainers.

One side at a time, re-fasten the sides back level and flush with the fender. When pressure is applied you will hear the bumper attach to the clips.

Plug in the 5202 adapter from the XB Fog Lights right into the fog light harness. Just like the 5202 bulb, you will see 2 vertical slots on one side and 1 vertical side on the other to line them up correctly into the harness. Also plug the side markers in.

Before fastening the lower splash guard, put the car back on the ground and use a phillips screw driver to level your fog lights even with each other. This is a lot easier without the splash guard and tire wells sealed up.

Now just reinstall the bolts into the lower splash guard and inner tire wells.
Like I said earlier, it would probably be easier and doable to just remove the bolts from the lower splash guard and inner tire wells to access the fog lights. However, I wanted to get a good and detailed look for the installation to be able to post pictures.
The stealthy smoked look is amazing on the car. And you never have to tint them like you would with the OEM chrome ones, which dramatically decreases the light output and makes them even more useless.


The crisp cutoff is amazing as is the output of these lights. You can tell from the picture how wide the beam is and how intense it is all the way to the left and right side of the beam. This is great at night and you gain so much peripheral light.
Here is a picture with just the XB Fog Lights on:


Here are a couple comparing my Retrofitted Headlights with Morimoto projectors and 55w HID with and without the fog lights. Keep in mind, my headlights are going to be a lot brighter than OEM HID because of the retrofitted projectors and 55w HID. So everyone else will see a more dramatic difference.
Headlights:

Headlights & Fog Lights

Headlights:

Headlights & Fog Lights

Headlights:

Headlights & Fog Lights

Headlights:

Headlights & Fog Lights:

You can tell the major advantage of these is the wide beam, which is where you want fog lights to light up since the headlights start losing intensity at the edge of the beams. I am so glad that someone finally brought an option to us for our fog light replacements. And these are not cheap replacement assemblies. They are high quality Morimoto Projectors!!
Here's the link:
http://www.theretrofitsource.com/com...rd-4-inch.html
For a limited time, use the discount code "XBGT500" they set up for $25 off!!
Cobra Member
Joined: April 14, 2011
Posts: 1,072
Likes: 25
From: NJ. Waiting for our Gov. to be held accountable for his actions>>>Jersey Broke
I have to agree with the other posts. 
Wonderful write up. You left NOTHING out that I could see or read.
You must have spent more time putting your post together than installing your lights.
By the way>>>>> They look Great!
I can see from your pics. That you live in a rular area. Thats where you need them more than ever. I'm in the same boat. My roads all have drainage ditches that run along with the roads and the wildlife is always on the move.
Again....Verry clean look.
Last edited by boss man; Oct 2, 2015 at 01:01 PM.

Thread
Thread Starter
Forum
Replies
Last Post
Diode Dynamics
Vendor Showcase
3
Jun 12, 2018 03:26 PM
Diode Dynamics
Vendor Showcase
7
Feb 28, 2018 09:37 AM