
Sound Tube Delete parts list
 9/25/12, 04:56 PM
#81
Member
Join Date: August 16, 2012
Location: Tornado, WV
Posts: 28
Likes: 0
Received 0 Likes
on
0 Posts
 9/28/12, 11:00 AM
#82
GT Member

Join Date: August 20, 2012
Location: Pensacola, FL
Posts: 143
Likes: 0
Received 0 Likes
on
0 Posts
sound tube delete parts
I used a PVC 1.5 inch end cap  on the C&L CAI intake tube and the Ford brake cylinder cap mentioned in this same thread. Added a bit of duct tape for a snug fit and glued it all on after spraying it flat black. Drove to the Grand National in Mustang, OK this year and got 24mpg and 1st place in LMA..NO PROBLEMS at all. Be inventive...DIY!!!
on the C&L CAI intake tube and the Ford brake cylinder cap mentioned in this same thread. Added a bit of duct tape for a snug fit and glued it all on after spraying it flat black. Drove to the Grand National in Mustang, OK this year and got 24mpg and 1st place in LMA..NO PROBLEMS at all. Be inventive...DIY!!!
11/29/12, 08:11 PM
#83
Mach 1 Member
Giving your customers some designed-in engine intake sound enhancement is a long way from new: one of the selling points for Chrysler's Plymouth Barracuda "High Performance" 273-Cu.In. 4-barrel V8 in 1966 was a special air filter that eliminated the normal sound-suppressing wrapper. It actually did sound good from inside.
For those who have removed the Sound Tube: the part of the air path that has the spigot you had to plug on the intake, is it just a hole in the intake with a neck on it? Is there something in the air path that might cause a disturbance in the air flow? Would it be worthwhile to patch and smooth out the inside of the intake? Over the years I have spent a lot of hours cleaning up and polishing airflow paths in the interest of removing every impediment to smooth airflow.
Maybe it's like "porting and polishing": difficult to measure for actual efficiency improvement, but it's a great psychological boost to know it's there.
12/15/12, 07:30 PM
#84
Mach 1 Member
After mulling the situation for a while - two weeks or so, it seems - I was looking at all the hanging parts and whatnot in Pep Boys, looking for the plugs and caps mentioned in this thread. Happened there was a section of interior parts that included a piece that looked like the right-size plug for the tube: a window-winder replacement ****.
It was rounded on the widest end, tapered about half an inch, and was inexpensive - $3.95, as I recall.
I brought it home and tried it in the rubber end of the sound tube I had disconnected from the big Air Intake pathway tube. Lo! and behold, the fit was perfect. The old eye-ball caliper had been amazingly accurate: the tapered end went into the rubber sound tube, the large end sealed the opening, and it all stopped naturally at the perfect distance to allow reattaching the tube with the OE clamp. Perfect.
The only problem was another mental one: with the taper faced away from the big Air Intake tube, my imagination told me the suction between the throttle body and the air filter might dislodge the plug. I drilled a tiny hole through the rubber tube wall and into the plug, and fastened it with a gold-anodized screw. Realistically, there is no way that plug is going to move unless I move it: it'll take screwing and prying to get it out.
Did I say perfect?
12/15/12, 07:41 PM
#85
Had to scratch my head for what to us to cover the intake hole - ended up using a fishing pole end cap!
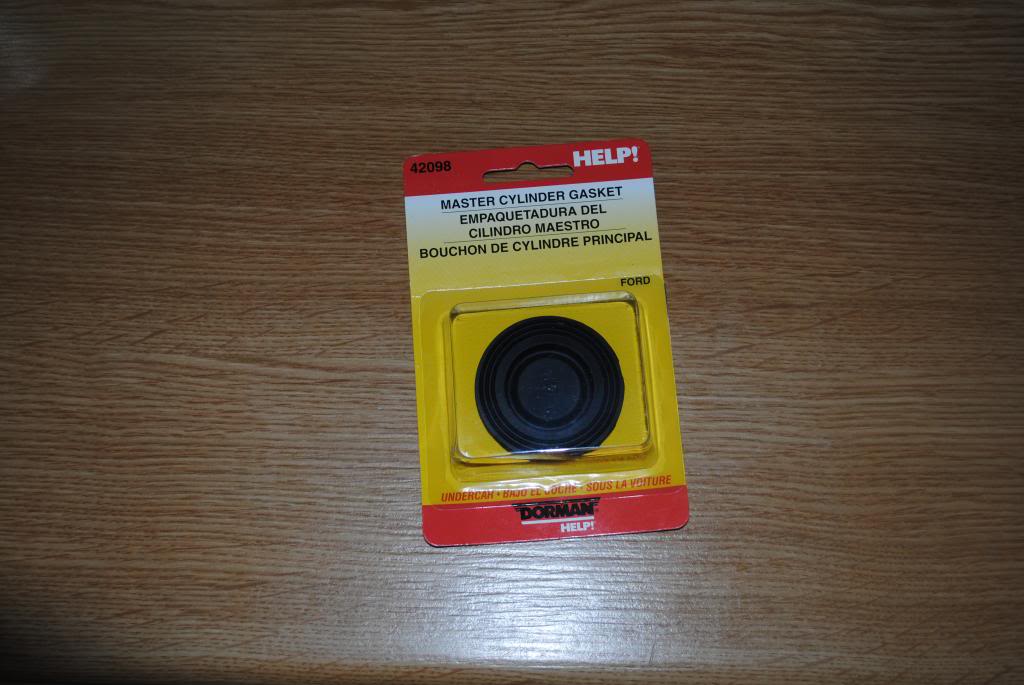
Parts used were this gasket for the firewall
and a fishing rod end cap for the induction side

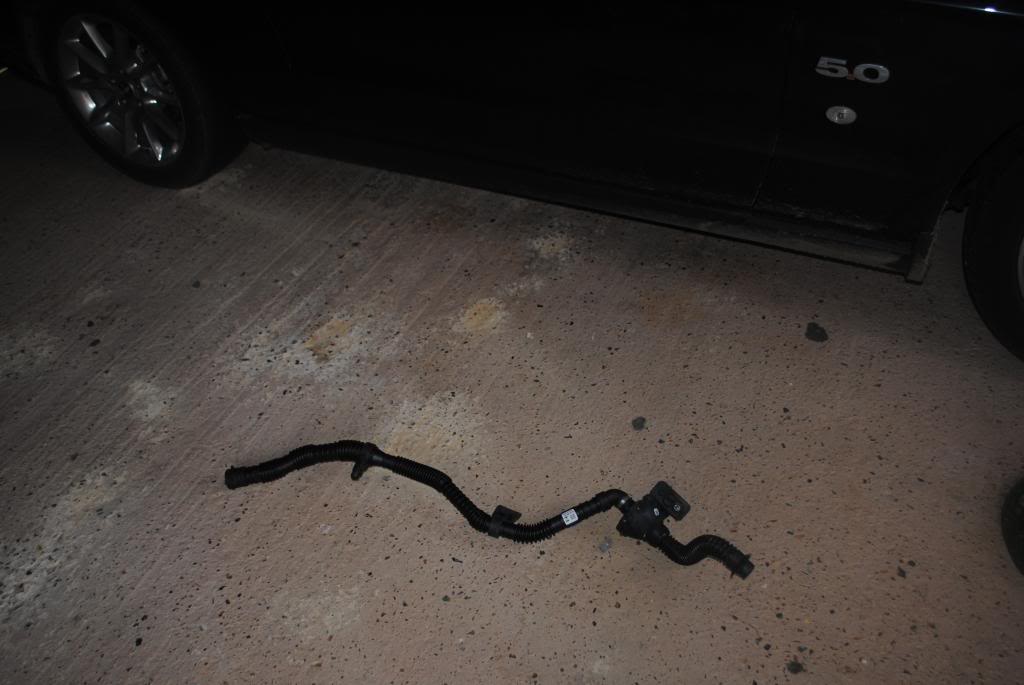
The tube is easy to remove
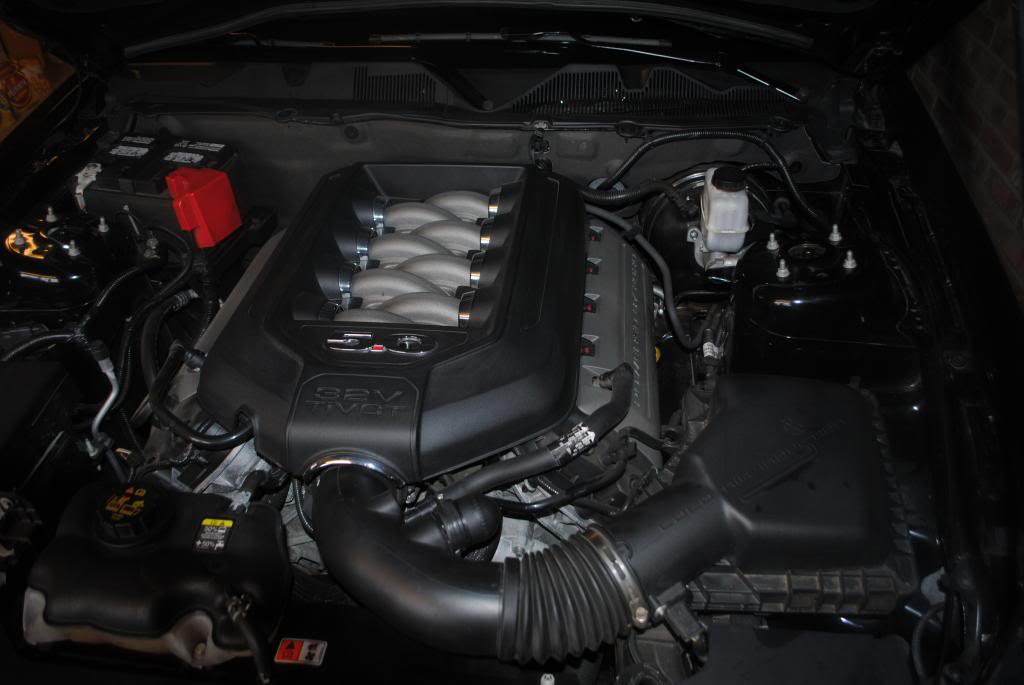
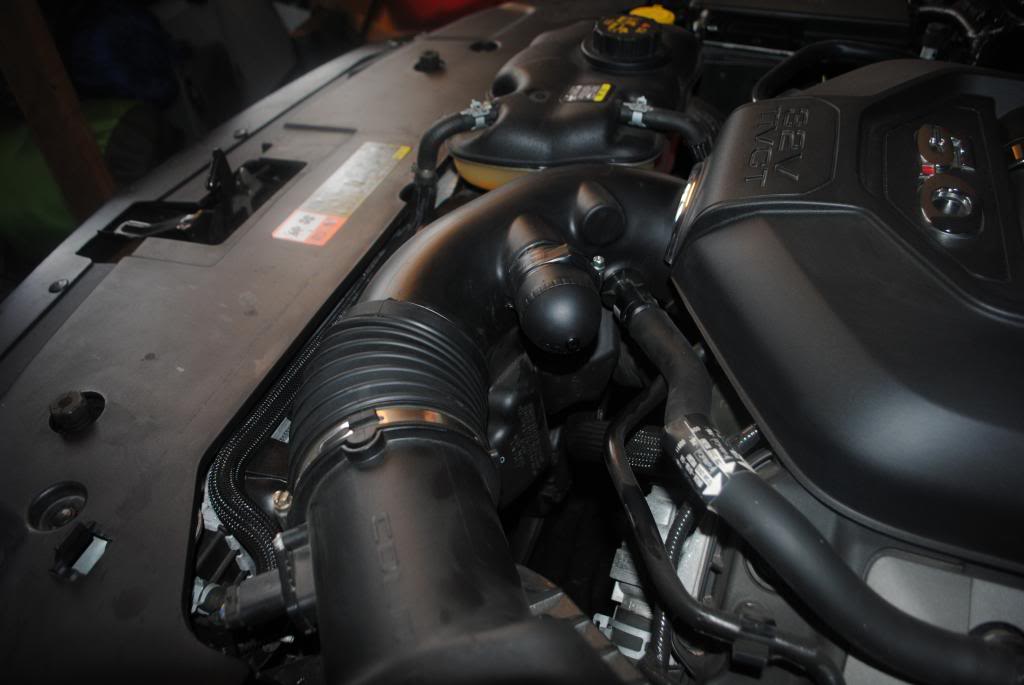
and the engine compartment is much more tidy once gone..
I actually got Dave at Hertford Tyre and Exhaust (UK) to do the job as the car was in for routine service before going over to France anyway and I wanted to make sure the induction side was completely air tight. The fishing rod end cap actually had a small hole in it to make it easier to slide on to a fishing pole - Dave had the brainwave of putting a self tapper in the hole to seal it - something I would never have thought of. Looks as if it was supposed to be like that !
The car sounds much better inside without it.
Next job is probably going to be painting the coil covers now they are exposed (and cleaning the engine bay)........Grabber blue thinks me.
Parts used were this gasket for the firewall
and a fishing rod end cap for the induction side
The tube is easy to remove
and the engine compartment is much more tidy once gone..
I actually got Dave at Hertford Tyre and Exhaust (UK) to do the job as the car was in for routine service before going over to France anyway and I wanted to make sure the induction side was completely air tight. The fishing rod end cap actually had a small hole in it to make it easier to slide on to a fishing pole - Dave had the brainwave of putting a self tapper in the hole to seal it - something I would never have thought of. Looks as if it was supposed to be like that !
The car sounds much better inside without it.
Next job is probably going to be painting the coil covers now they are exposed (and cleaning the engine bay)........Grabber blue thinks me.
1/13/13, 02:20 PM
#86
Shelby GT350 Member
Join Date: November 20, 2010
Location: Sioux Falls, SD
Posts: 2,382
Likes: 0
Received 1 Like
on
1 Post
I had bought the Cooltech kit, but this just looked like something that might crack/tear at an inopportune time (like at the track) so I wanted to make sure I had a backup part. I've had my JLT oil separator fitting crack at the track causing a vacuum leak, but fortunately had my stock line with me. I couldn't find the exact part but found some 1-1/2" rubber chair crutch tips (2-pack for $3.99) that looked like they'd do the trick. I ended up just using one of them and tossing the Cooltech plug in the parts bin in the trailer for backup. I also had the wires from my oil temp sensor going through the hole in the firewall so had to work around them. I used another member's idea and drilled a hole in the center and a box knife to clear a path so I could slide them inside the plug. I guess there are a bunch of different ways to skin this cat 


1/13/13, 02:29 PM
#87
I had bought the Cooltech kit, but this just looked like something that might crack/tear at an inopportune time (like at the track) so I wanted to make sure I had a backup part. I've had my JLT oil separator fitting crack at the track causing a vacuum leak, but fortunately had my stock line with me. I couldn't find the exact part but found some 1-1/2" rubber chair crutch tips (2-pack for $3.99) that looked like they'd do the trick. I ended up just using one of them and tossing the Cooltech plug in the parts bin in the trailer for backup. I also had the wires from my oil temp sensor going through the hole in the firewall so had to work around them. I used another member's idea and drilled a hole in the center and a box knife to clear a path so I could slide them inside the plug. I guess there are a bunch of different ways to skin this cat
1/13/13, 02:42 PM
#88
Shelby GT350 Member
Join Date: November 20, 2010
Location: Sioux Falls, SD
Posts: 2,382
Likes: 0
Received 1 Like
on
1 Post
In fairness to JLT they've recognized the problem and have switched to an aluminum fitting. You should call them and they'll either ship you the fitting to DIY or you can ship them your entire unit and they'll rebuild it. Turnaround was quick.
1/13/13, 02:42 PM
#89
Thanks. I should have contacted them, I will now.
1/20/13, 09:51 AM
#90
V6 Member

Join Date: July 6, 2004
Posts: 57
Likes: 0
Received 0 Likes
on
0 Posts

 3/23/13, 05:24 PM
#91
V6 Member

Join Date: July 3, 2012
Location: Texarkana Tx
Posts: 63
Likes: 0
Received 0 Likes
on
0 Posts
I used the same parts as SCHMOKN, Works great and does look factory! The car definitely sounds much better without it. I can still hear the engine and exhaust with the windows up (stock exhaust), but the gargling and rushing air noises are gone. Sound great with the windows down. Not to mention looks 100x better under the hood.
3/26/13, 03:01 PM
#92
V6 Member
Join Date: July 6, 2004
Posts: 57
Likes: 0
Received 0 Likes
on
0 Posts
3/26/13, 04:48 PM
#95
Cobra Member
And it definitely looks TONS better in the engine bay now... That was a useless piece of plastic...
