Show me your shakers
 1/11/08, 06:46 AM
#81
 1/30/08, 05:47 AM
#84
Cobra R Member
You couldnt cut that hood with tin snips if you were Arnold Schwarzenegger.
I used a jig saw and it wasnt easy (doing a good job).
There are a few areas in the cut out zone where you will be going through
several layers of metal.
I cant tell you how glad I am that I did it though.
The Shaker is the cherry on top.

I used a jig saw and it wasnt easy (doing a good job).
There are a few areas in the cut out zone where you will be going through
several layers of metal.
I cant tell you how glad I am that I did it though.
The Shaker is the cherry on top.
1/30/08, 08:14 PM
#85
Jig saw with fine tooth metal cutting blade. Actually I went through three blades, just to be on the safe side, and just because I had them. I highly recommend a variable speed saw. Slow and steady is the key.
1/31/08, 12:45 PM
#87
hey guys i used a 4" angle grinder and it worked great!!!
i just went through the first layer real slow, peeled it off and then cut out the under bracing....
went like a hot knife through butter, and was clean and simple too.... no jig sawing action to get jerky or throw you off
i just went through the first layer real slow, peeled it off and then cut out the under bracing....
went like a hot knife through butter, and was clean and simple too.... no jig sawing action to get jerky or throw you off
1/31/08, 12:58 PM
#88

1. Restricts view of the camcovers if you decide to paint or powdercoat them.
2. The shroud/scoop will need to be removed everytime you go to the dyno (PITA). They have to clip onto the #1 coil pack.
The way I (and a few others) trimmed the shroud, the noted 2 problems no longer exist.
1/31/08, 02:52 PM
#91
Team Mustang Source
Thread Starter
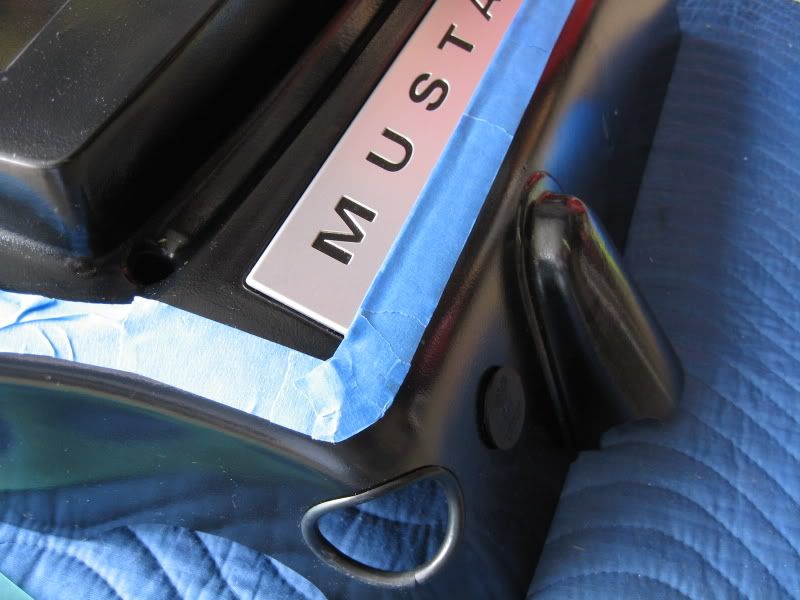
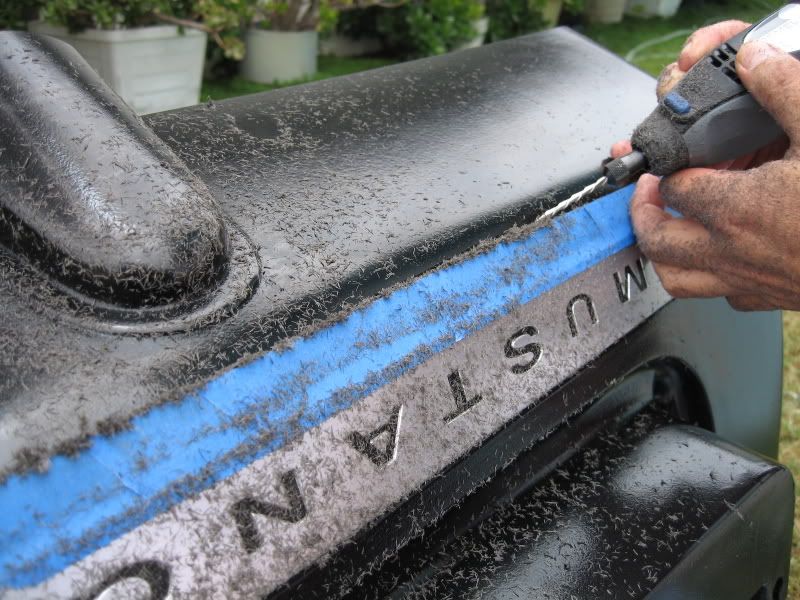
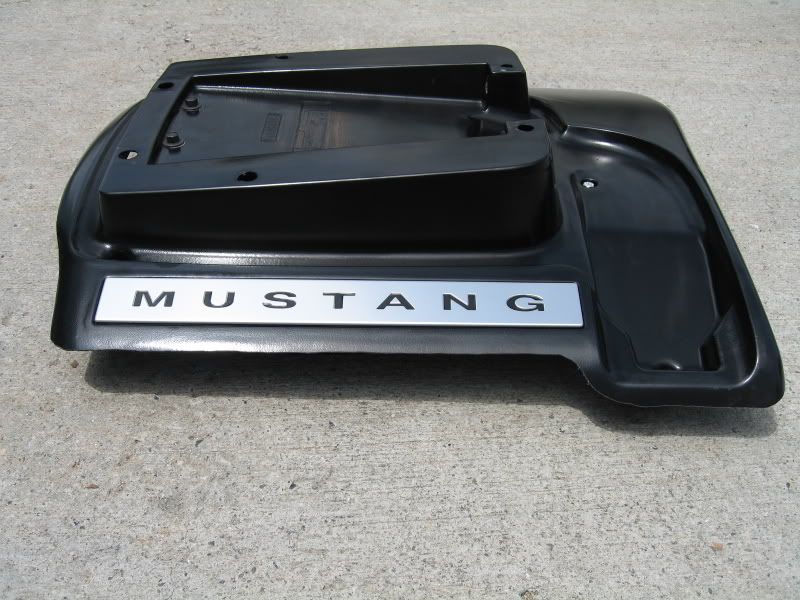
I guess I didn't post pictures of the end result so here they are. I used a cutting wheel to trim the shaker after I masked it off and used a sharpie to mark where I wanted to cut. I then took a propane torch and melted away the plastic fuzzies from the cutting wheel. Lastly I buffed the edges with a polishing wheel and it came out so nice I didn't even bother to add the trim around the edges.
1/31/08, 02:56 PM
#92
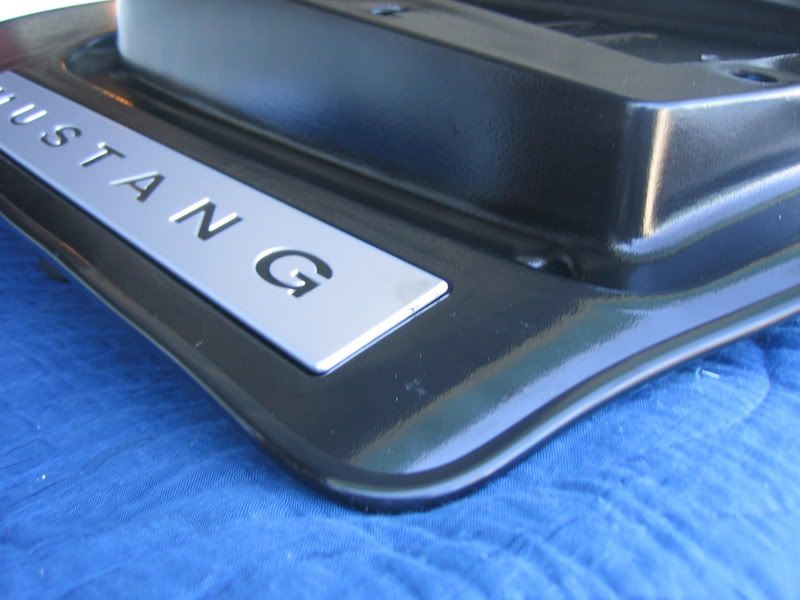
hey can you get a close up of the edges, i may do that to mine too, i dont really want to put some big nasty trim on the edge of my shaker if i dont have to... i prefer the clean edge if i can
1/31/08, 04:15 PM
#94
Cobra Member
Join Date: March 3, 2007
Location: Eden Prairie, MN
Posts: 1,187
Likes: 0
Received 0 Likes
on
0 Posts
2/3/08, 08:51 PM
#95
Bullitt Member
Join Date: May 30, 2005
Posts: 419
Likes: 0
Received 0 Likes
on
0 Posts
You couldnt cut that hood with tin snips if you were Arnold Schwarzenegger.
I used a jig saw and it wasnt easy (doing a good job).
There are a few areas in the cut out zone where you will be going through
several layers of metal.
I cant tell you how glad I am that I did it though.
The Shaker is the cherry on top.
I used a jig saw and it wasnt easy (doing a good job).
There are a few areas in the cut out zone where you will be going through
several layers of metal.
I cant tell you how glad I am that I did it though.
The Shaker is the cherry on top.

I imagine you have to have really steady hands if you plan on using a dremmel with a rotozip blade. A rotary blade might be a bit easier for straight lines but the curved ends might be a bit hard to do.
2/3/08, 09:18 PM
#96
Legacy TMS Member
Join Date: May 24, 2006
Location: San Diego
Posts: 7,409
Likes: 0
Received 0 Likes
on
0 Posts
 2/4/08, 07:25 AM
#98
i meant how did you trim the plastic shaker. I realize the hood couln't be cut with tins snips.
I imagine you have to have really steady hands if you plan on using a dremmel with a rotozip blade. A rotary blade might be a bit easier for straight lines but the curved ends might be a bit hard to do.
I imagine you have to have really steady hands if you plan on using a dremmel with a rotozip blade. A rotary blade might be a bit easier for straight lines but the curved ends might be a bit hard to do.