Coast Driveline 1-piece aluminum driveshaft install (w/pics)
 8/1/07, 05:05 PM
#21
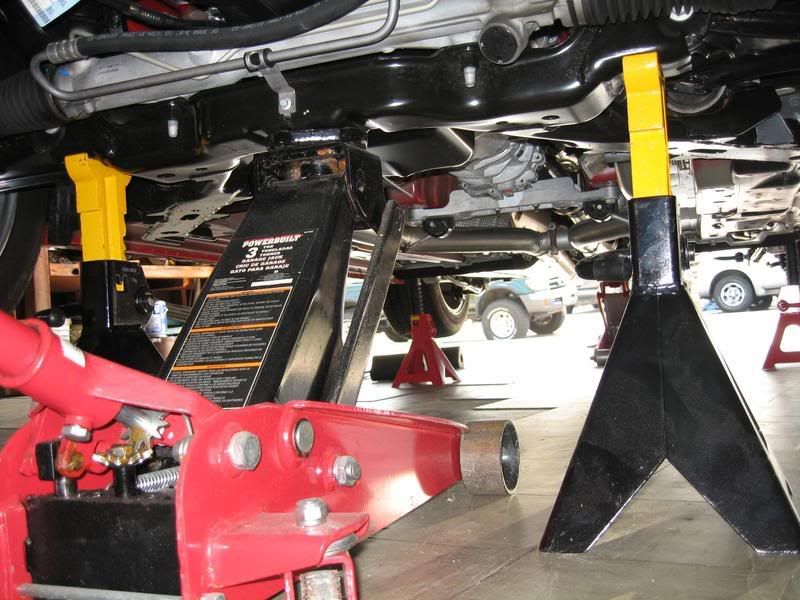
Great writeup but there is no way I would get under a car without having it on axle stands. I realize they can be a pain sometimes due to limiting access. I trust my jack but not with my life.
 8/1/07, 05:29 PM
#22
Thread Starter

 Oh, you mean floor jack stands!
C'mon Rob, you know me better than that. I took these pics, but didn't post them in the original write-up.
 8/1/07, 05:46 PM
#23
Legacy TMS Member
Join Date: January 9, 2005
Location: New Carlisle, Ohio (20 miles north of Dayton)
Posts: 6,982
Likes: 0
Received 6 Likes
on
6 Posts
Hey Bill...
I am not sure mind you. But I think it looked like I saw some dust and maybe a little rust on the underbelly of your car. Not trying to alarm but that's not like you.
Scott
I am not sure mind you. But I think it looked like I saw some dust and maybe a little rust on the underbelly of your car. Not trying to alarm but that's not like you.
Scott
8/1/07, 05:51 PM
#24
Cobra Member

Join Date: May 17, 2007
Location: Texa$
Posts: 1,201
Likes: 0
Received 0 Likes
on
0 Posts
But I think your right, Bill needs to jack it up and get under it again and get busy detailing it till it shines
Bill the King of detail

I also would like to add Bill is the King of safety and sets a good example for all of us (OK Bill send the $10 to my paypal account)
8/1/07, 05:52 PM
#25
My apologies Bill. From the first pic's angles, it appeared there weren't any supporting devices (axle stands - jack stands). I can clearly see from those pics you had them on the subframes. It just struck me as odd since you are so meticulous about everything. I should have known you wouldn't miss any details.
8/2/07, 07:23 AM
#26
Thread Starter
No problem Phil!
(Just as soon as you PayPal me the $100 for all the technical advisement.
)My apologies Bill. From the first pic's angles, it appeared there weren't any supporting devices (axle stands - jack stands). I can clearly see from those pics you had them on the subframes. It just struck me as odd since you are so meticulous about everything. I should have known you wouldn't miss any details.
8/2/07, 08:16 AM
#27
Cobra Member
Join Date: May 17, 2007
Location: Texa$
Posts: 1,201
Likes: 0
Received 0 Likes
on
0 Posts
 8/2/07, 10:55 PM
#29
Thread Starter
 8/3/07, 06:05 PM
#31
Thread Starter
8/3/07, 06:29 PM
#32

Join Date: May 27, 2007
Location: Tulsa Area
Posts: 67
Likes: 0
Received 0 Likes
on
0 Posts
Very Nice write-up..... 
8/3/07, 07:12 PM
#33
Another great write up Bill! I just finished installing a dennys unit in mine last weekend looks to be nearly identical as far as the install goes. That adaptor flange mating to the pinion is the key to zero vibrations. The buttometer for me says that the car feels about a 10th faster. The best way I know to describe the difference is like the car had the AC on and felt "heavy" and after the shaft felt like I turned the AC off.
8/3/07, 10:10 PM
#34
Bullitt Member
Join Date: May 25, 2007
Location: Robins AFB
Posts: 463
Likes: 0
Received 0 Likes
on
0 Posts
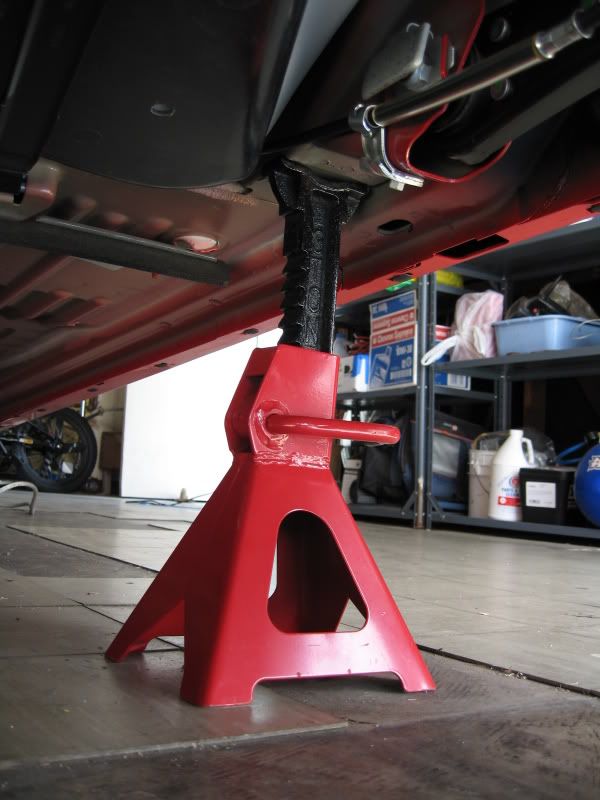
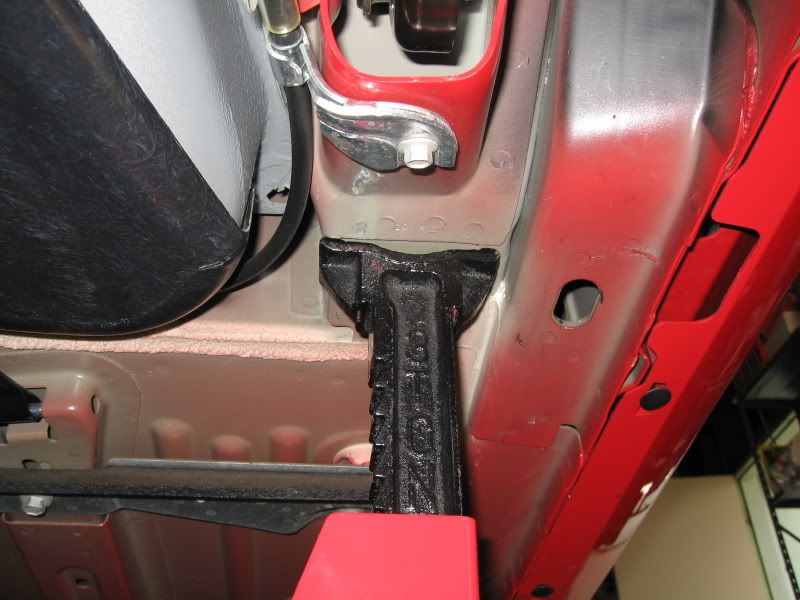
Bill, can you tell me what brand jack and stands you use and if your happy with them?
I would like to prepare to start working on my car and I want to make sure that I get the proper equipment because I already have great instructions!!!
I would like to prepare to start working on my car and I want to make sure that I get the proper equipment because I already have great instructions!!!
8/3/07, 10:19 PM
#35
Me Too and Mr.Tillman what sbout these shims that Bill had to use , with regards to the right up with your link saying ready to go kinda thing ? ps the UPS would that include BC, Canada ?
8/3/07, 11:48 PM
#36
Thread Starter
Of course, there are better lifting equipments out there, but for the price and quality, the Craftsmen series isn't too bad.
Another great write up Bill! I just finished installing a dennys unit in mine last weekend looks to be nearly identical as far as the install goes. That adaptor flange mating to the pinion is the key to zero vibrations. The buttometer for me says that the car feels about a 10th faster. The best way I know to describe the difference is like the car had the AC on and felt "heavy" and after the shaft felt like I turned the AC off.
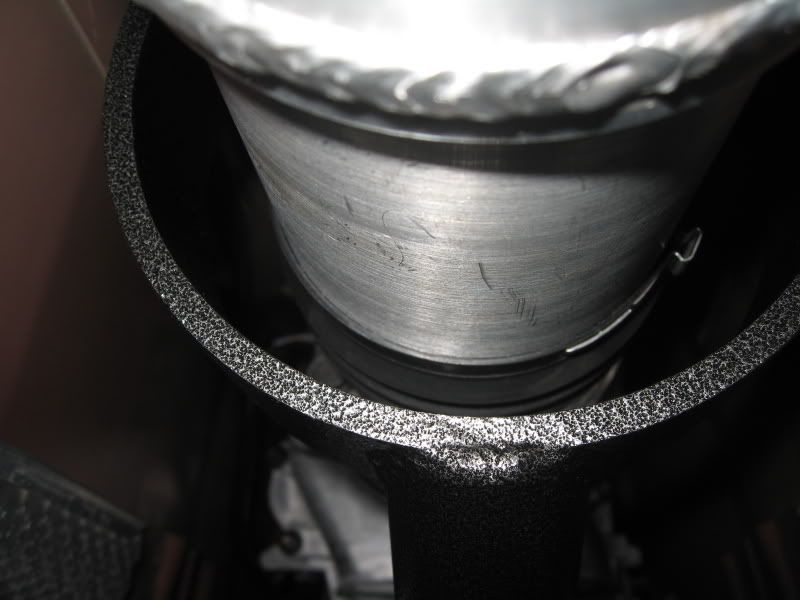
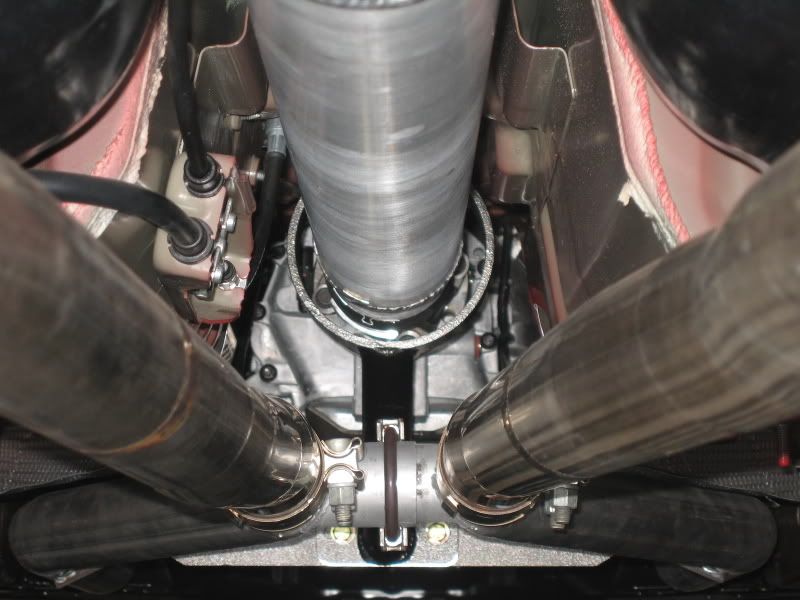
Yes, the Coast guys also told me that the key to a vibration free DS is in the pinion adapter. That's why I was sure to clean that flange surface really well to avoid the adapter from sitting unevenly on it.
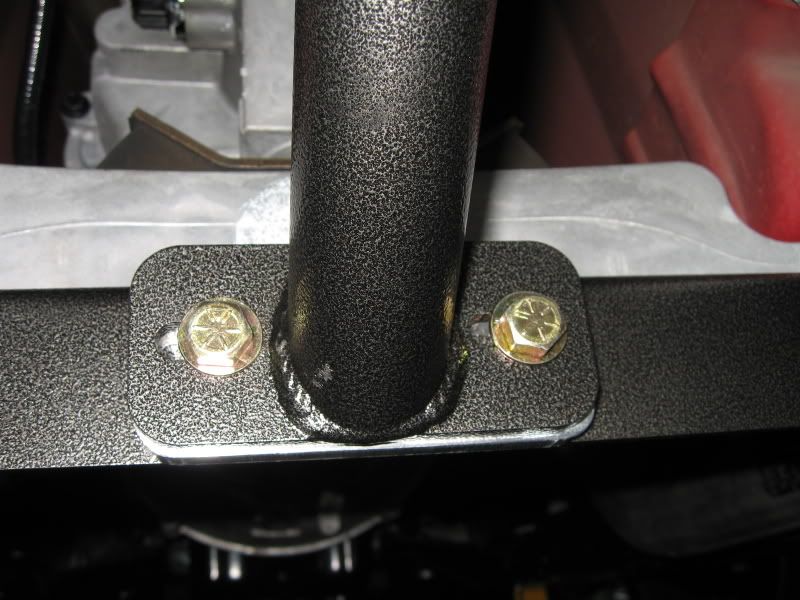
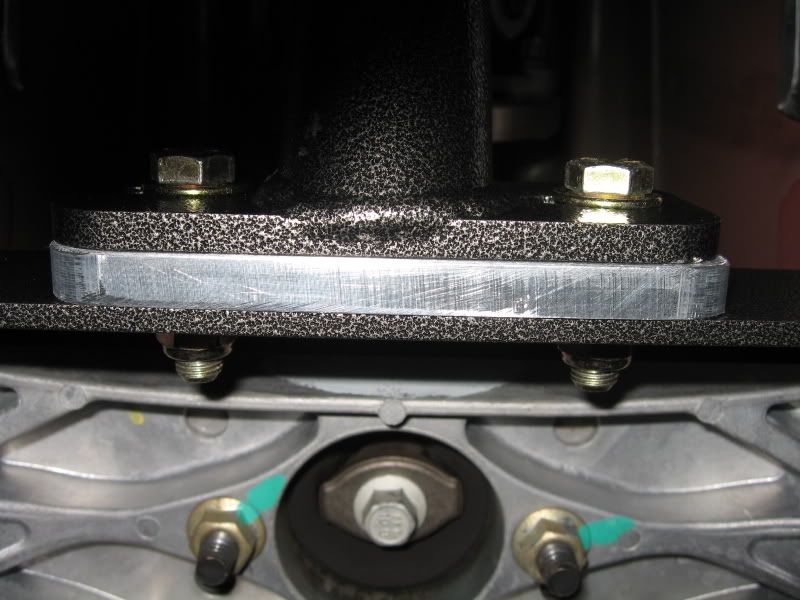
Completed the install today. New 0.350" shim is in place along with longer bolts and everything is fine, no riding conditions between the safety loop and MGW shifter block.
I was able to safely turn the shifter block out to 5 turns too.
Took the car out for a short test drive mainly to check for anything wierd (vibrations, etc.). Couldn't open her up on the highway because of traffic, but I went to my secret proving grounds and got up to 80 and no vibrations!

I didn't do any hard 'off the line' launches, but I can tell that it feels lighter under there. Also noticed that the car doesn't engine brake as slowly as it used to (it coasts faster in gear now).
Until I get on it, I can't say whether or not this was a good cost vs SOTP mod. At worst, it'll look good on my show poster.
If you have or planning on getting a MGW shifter and a BMR loop, you'll need to shim it, otherwise the shifter block will bang into the loop.
Also will need longer bolts than the ones supplied with the BMR loop. Supplied length is 1" Grade 8. I got some 1 1/2" long Grade 8 bolts from Lowes; length was perfect.
New pics from today...

 8/4/07, 09:59 AM
#38
Thread Starter
8/4/07, 10:28 AM
#39
Legacy TMS Member
Bill, I always enjoy reading your How-To writeups. Some of the quirks with the products are constant reminders (to me, at least) of why I prefer to stick with OEM/stock parts. The OEMs spend countless man-hours testing and qualifying components for the vehicle. The smaller aftermarket vendors use people's cars as test mules and churn out revisions as needed. While that's fine if you have time to tinker with stuff, I prefer drop-in/certified replacement parts that are good enough for the OEMs to select. The stock 2-piece steel shaft is good for at least 145 mph so I don't see any real reason for me to swap it out at this point. The BMR brace looks very sturdy but the hardware that comes with the brace looks ready to rust at any moment. Go stainless or go home is what I say.