Coast Driveline 1-piece aluminum driveshaft install (w/pics)
 8/5/07, 08:07 PM
#41
Thread Starter

Test drive is complete.
All is well, no drivetrain vibration issues to speak of!
http://www.youtube.com/watch?v=aCbsjNNtYsM
Possibly an iPhone!
All is well, no drivetrain vibration issues to speak of!
http://www.youtube.com/watch?v=aCbsjNNtYsM
Possibly an iPhone!
 8/5/07, 08:13 PM
#43
Thread Starter
 8/6/07, 09:00 PM
#46
Thread Starter
8/6/07, 10:43 PM
#48
Bullitt Member
Join Date: July 24, 2005
Posts: 440
Likes: 0
Received 0 Likes
on
0 Posts
I just thought I would add that I also have the same combo as Bill, MGW shifter, Coast 4" aluimunum DS and the BMR loop.
I just got the service pack from MGW for the shifter. Due to the increased diameter of the Coast D/S I had some concerns about being able to change the updated MGW shifter block and spring with the D/S still in the car.
It is more difficult than it would have been with the smaller diameter D/S but it IS possible.
It wasn't too bad at all actually. The only issue I had was that with the larger D/S in it is impossible to see the directional arrow on the bottom of the shifter block. This is not a problem however as the threaded portion of the block is much closer to one side than it is the other and I was able to get that right by feel.
So for those of you who may end up doing this be aware that it is possible without removing the drive shaft. You do have to remove the loop though. No need to remove the crossmember for the loop, just unbolt it from the cross member and slide back and out of the way and you will have no problems.
8/7/07, 10:59 AM
#50
Thread Starter

I did adjust the throw with the driveshaft in the car, and like you said, it's difficult seeing the arrow. I used a mirror to check the arrow as well look for any clearance issues.
Also, I'm pretty sure this Coast DS can be installed in Auto's too.
8/7/07, 09:03 PM
#52
Bullitt Member
Join Date: August 6, 2006
Posts: 451
Likes: 0
Received 0 Likes
on
0 Posts
 8/8/07, 08:04 AM
#53
Thread Starter
Check PM
Awesome!
Good luck with the install!
From my earlier research, that pinion nut is a 1 1/16" and gets torqued to 150 lbs-ft.
Good luck with the install!
From my earlier research, that pinion nut is a 1 1/16" and gets torqued to 150 lbs-ft.
8/8/07, 10:32 AM
#54
Bullitt Member
Join Date: August 6, 2006
Posts: 451
Likes: 0
Received 0 Likes
on
0 Posts
9/19/07, 08:45 AM
#56

looks great bill! can you feel the difference in power?
9/19/07, 09:14 AM
#57
Thread Starter
 9/19/07, 03:36 PM
#58
lol, yes im sure uve unlocked some ponies, but you just cant feel them... yet....
1/22/08, 07:52 AM
#59
Thread Starter
Update: Riding condition & e-brake bracket relo instructions
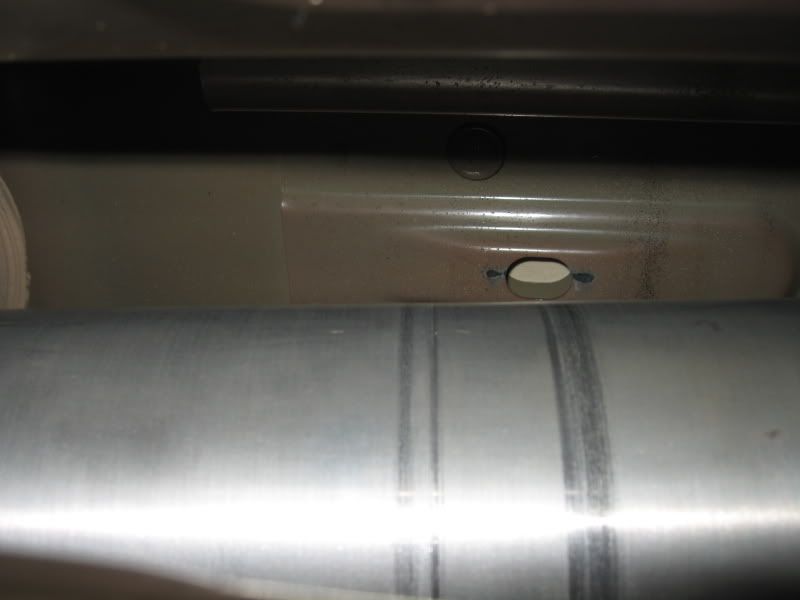
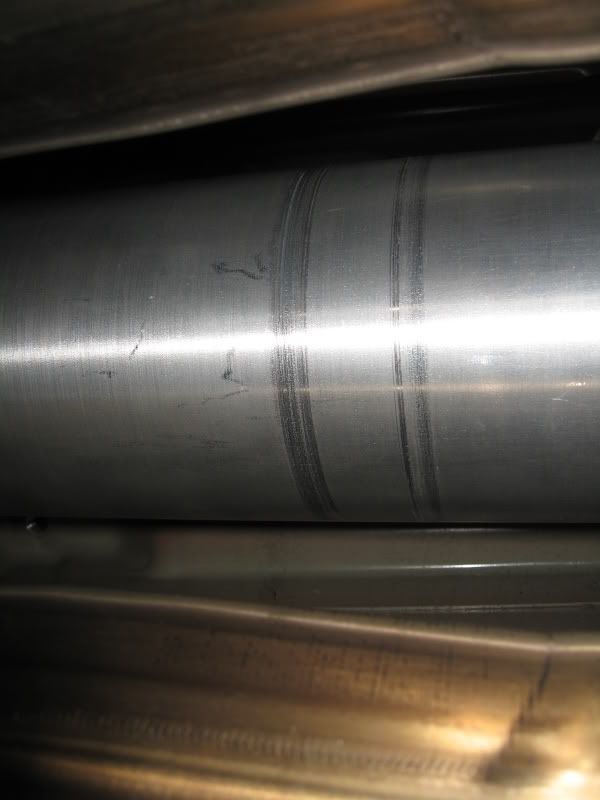
I discovered a riding/rubbing condition between the driveshaft and a stamped steel hump within the tunnel.
Rubbing appears to be only superficial and no deep scratches or gouges exist at this time.
I do believe that this occurred when I carried 2 passengers in the rear seats (~170 lbs combined) a month ago. Until I resolve this issue, NO rear passengers!
As previously noted, I have the Steeda Ultralite lowering springs which lowered the vehicle approx. 1" at the rear.
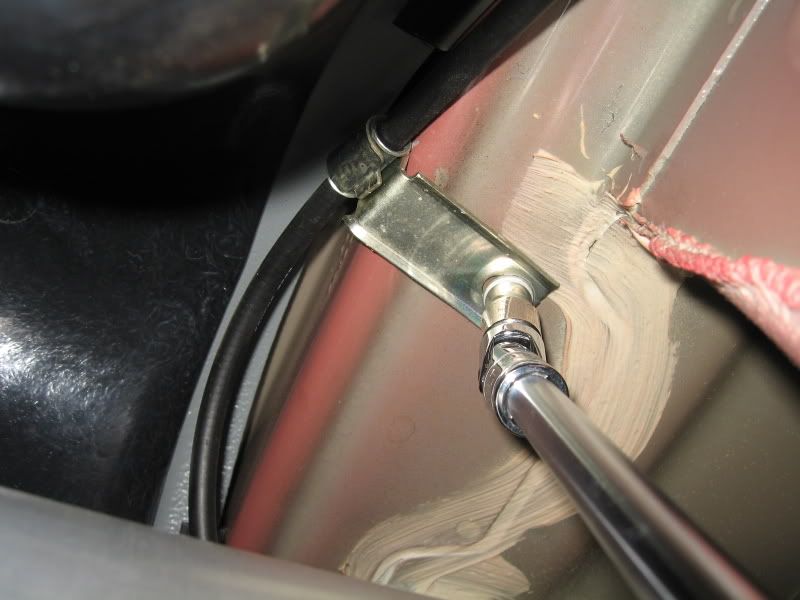
As a precautionary measure, I relocated the e-brake cable bracket away from the center tunnel so there's no chance of the driveshaft to come in contact with the bolt head (on that bracket).
Relocation of this bracket can be accomplished without the removal of the driveshaft, although drilling the new hole can be quite challenging.
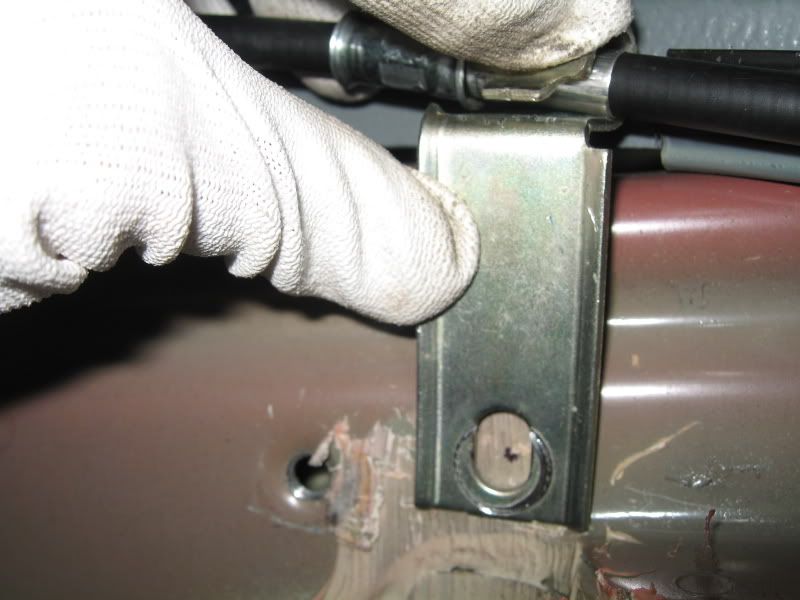
Stock location of e-brake cable support bracket
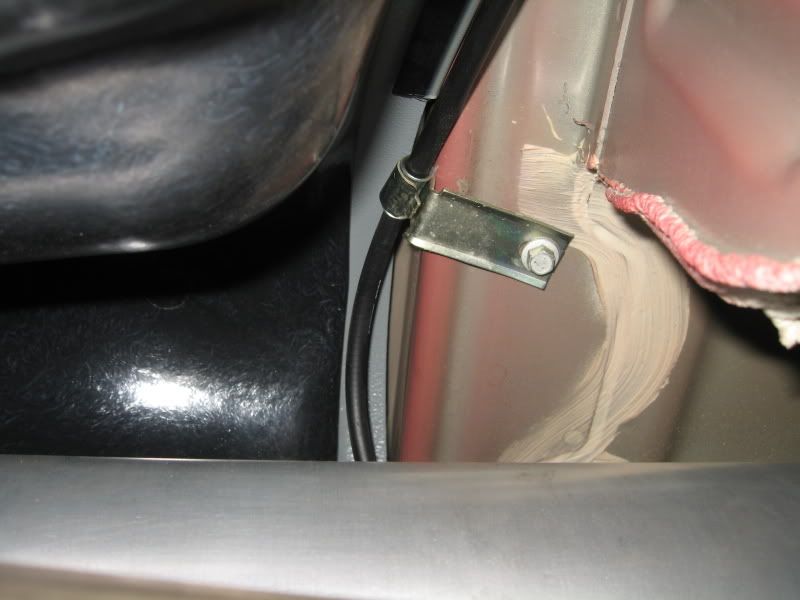
Bolt removal
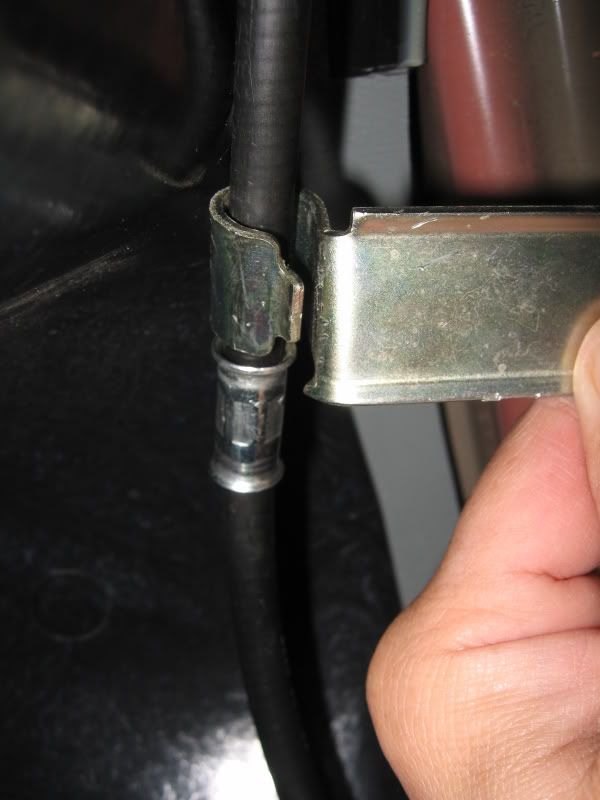
Metal band around the cable sheathing was crimped in place by the factory. Slightly open up the bracket with a flat blade screwdriver so the bracket can slip over the band. Can use pliers to close the opening gap if necessary.
Protective tape applied to cable sheathing to avoid any rub-thru condition. I used a metallic tape, but duct tape should work fine.

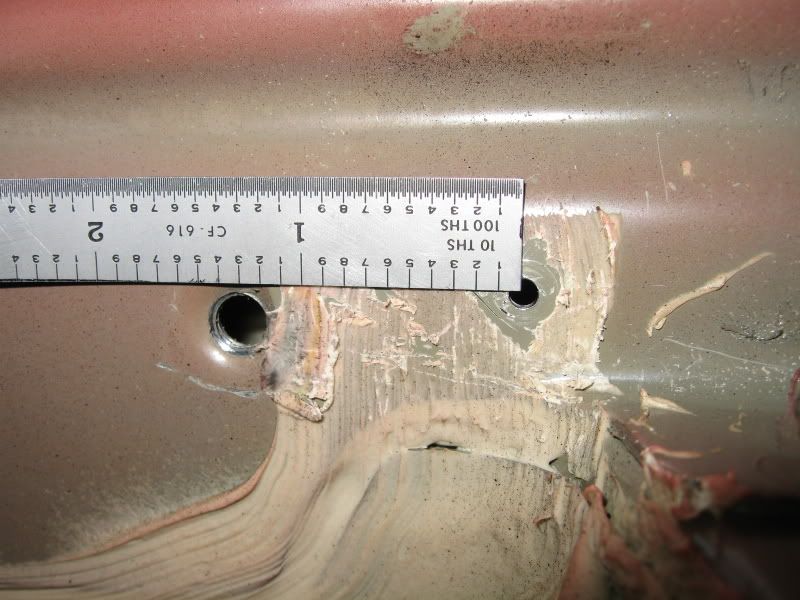
Mark and drill new hole.
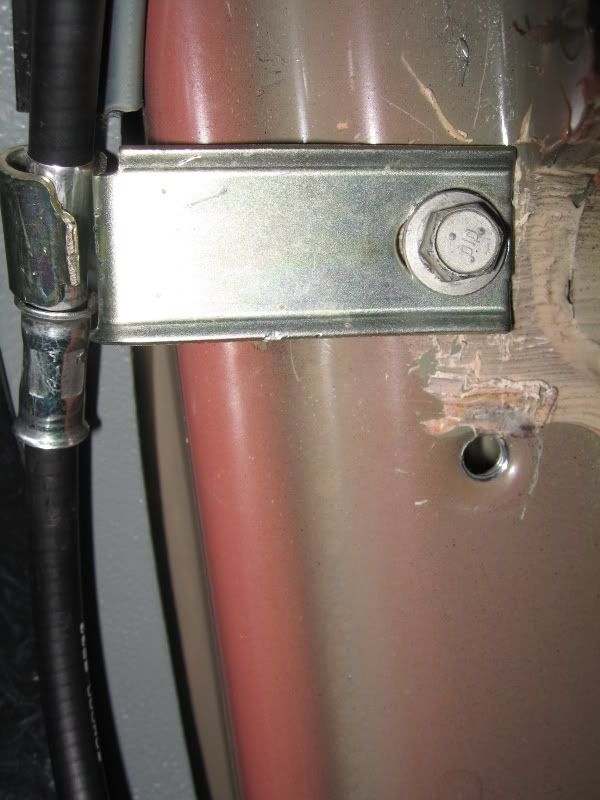
Relocation complete

Rubbing appears to be only superficial and no deep scratches or gouges exist at this time.
I do believe that this occurred when I carried 2 passengers in the rear seats (~170 lbs combined) a month ago. Until I resolve this issue, NO rear passengers!
As previously noted, I have the Steeda Ultralite lowering springs which lowered the vehicle approx. 1" at the rear.
As a precautionary measure, I relocated the e-brake cable bracket away from the center tunnel so there's no chance of the driveshaft to come in contact with the bolt head (on that bracket).
Relocation of this bracket can be accomplished without the removal of the driveshaft, although drilling the new hole can be quite challenging.
Stock location of e-brake cable support bracket
Bolt removal
Metal band around the cable sheathing was crimped in place by the factory. Slightly open up the bracket with a flat blade screwdriver so the bracket can slip over the band. Can use pliers to close the opening gap if necessary.
Protective tape applied to cable sheathing to avoid any rub-thru condition. I used a metallic tape, but duct tape should work fine.
Mark and drill new hole.
Relocation complete
1/22/08, 03:32 PM
#60
How much do you charge to install "off-site" 
Looks great Bill! Another superb write-up as well.
Looks great Bill! Another superb write-up as well.