
Install of 2013-14 heated/pony projector mirrors

Thread Starter
V6 Member
Joined: April 3, 2013
Posts: 55
Likes: 1
From: NC
Install of 2013-14 heated/pony projector mirrors
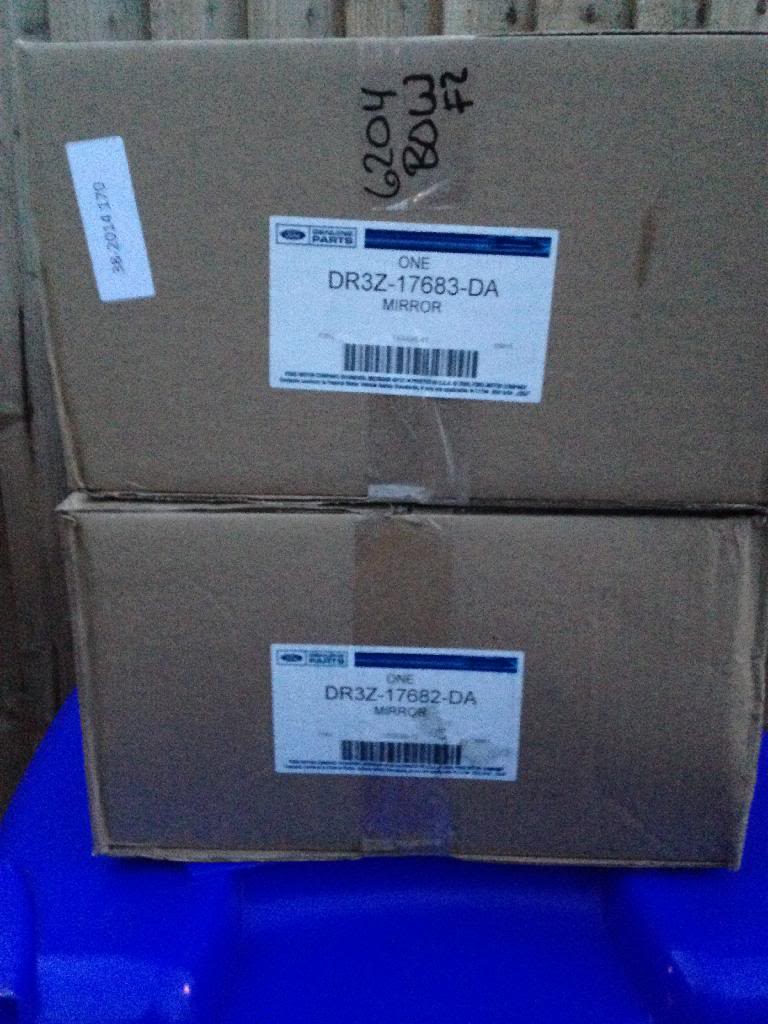
So I wanted the comfort pack on my 2013 Mustang when I got it, however they did not have one in the color I wanted with it so I did without. After doing a little research I discovered that my 2013 Mustang Gt had the wires for the Mirrors and pony projectors. I call Tousley Ford up and Ordered a pair. $325.00 Shipped
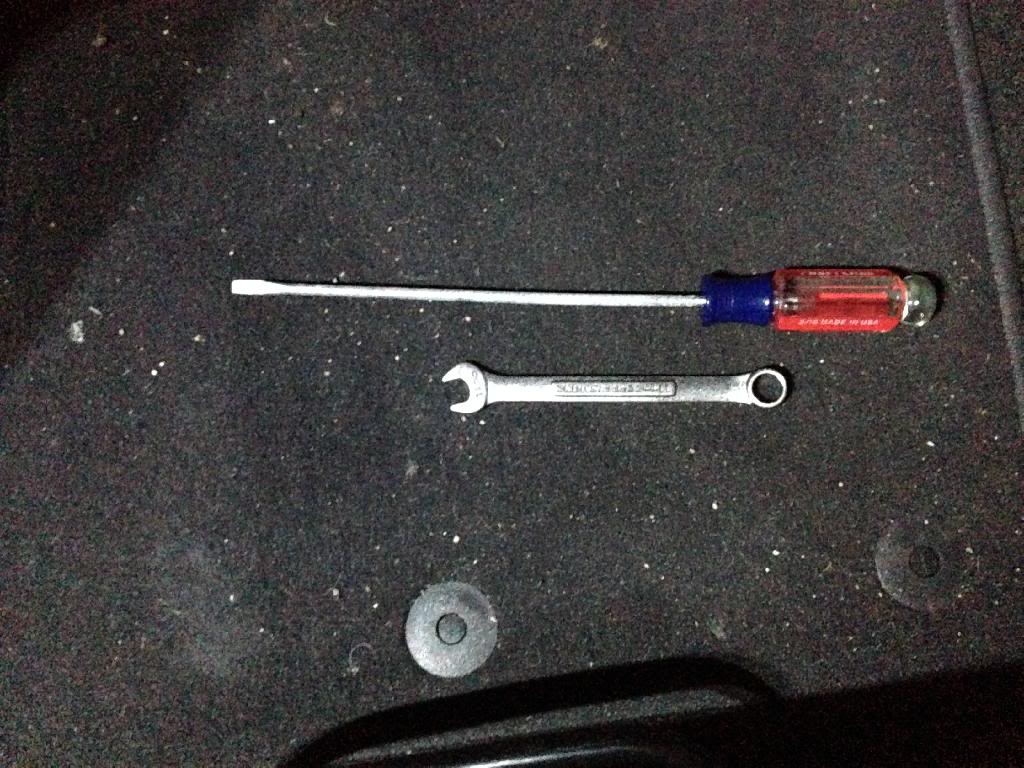
SO on to the install. The tool required is an 11MM wrench and 8" flat tip screw driver
First roll your windows down and adjust both mirrors all the way down.
Once that is done pull on the top corner of the cover panel with your fingers and you will notice a small gap appear. pull this cover off.
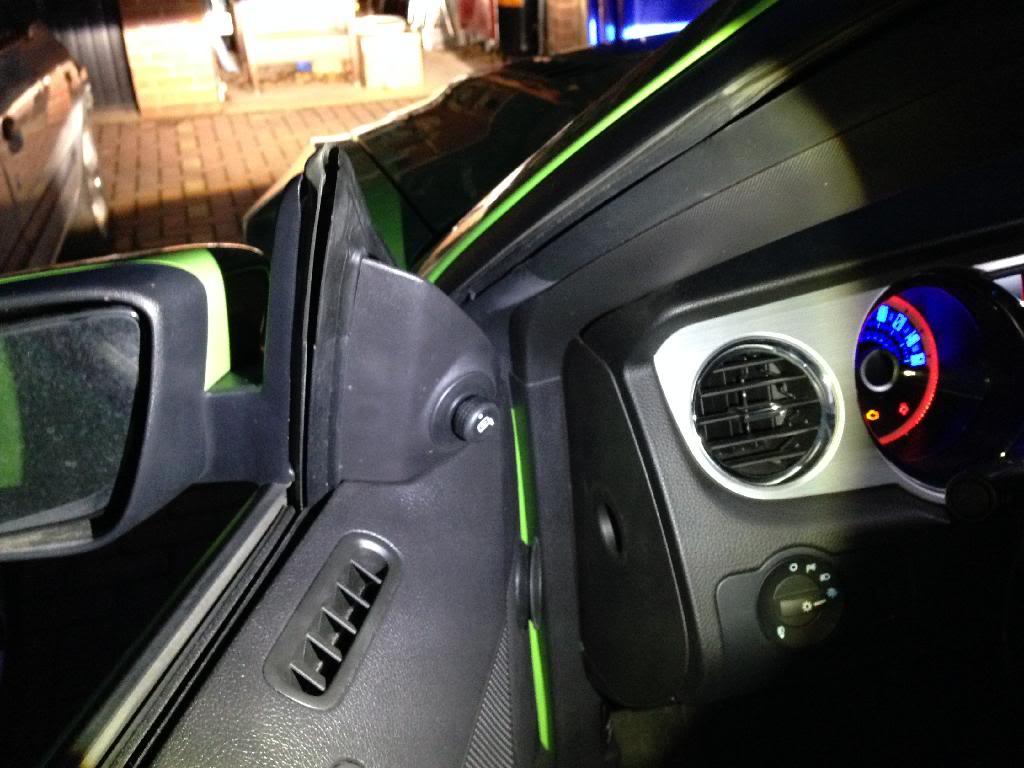
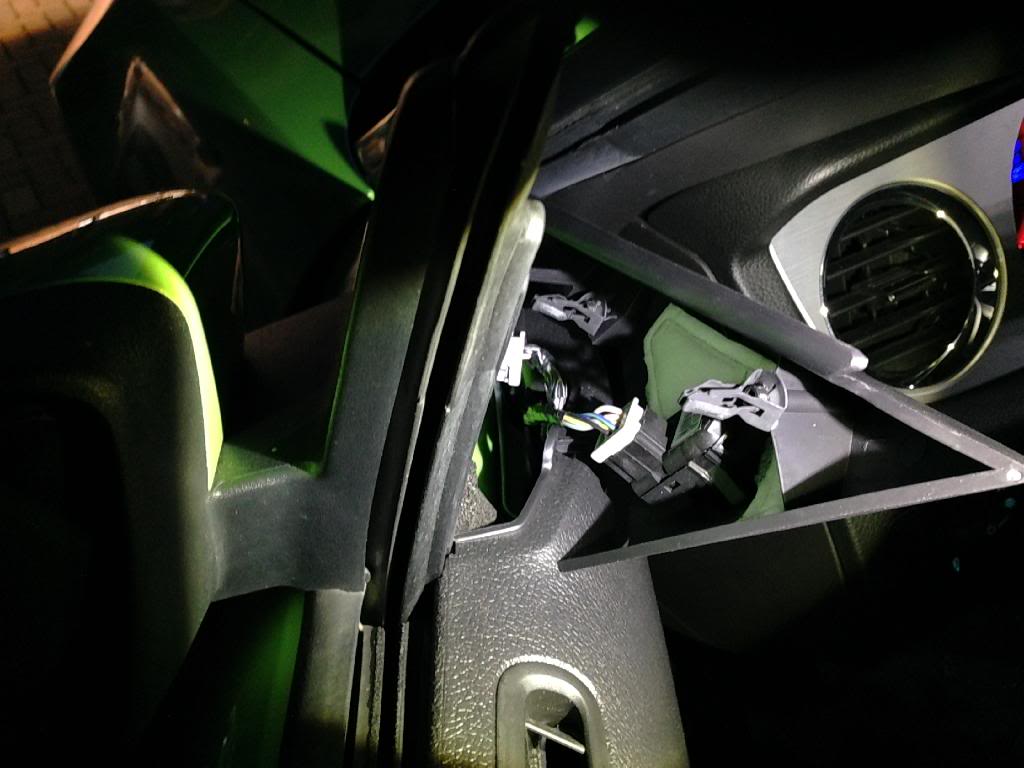
Disconnect the gray plug from the mirror adjust switch and set the panel aside to reveal the mirror plug and 3 11mm nuts.
Disconnect the black mirror plug.
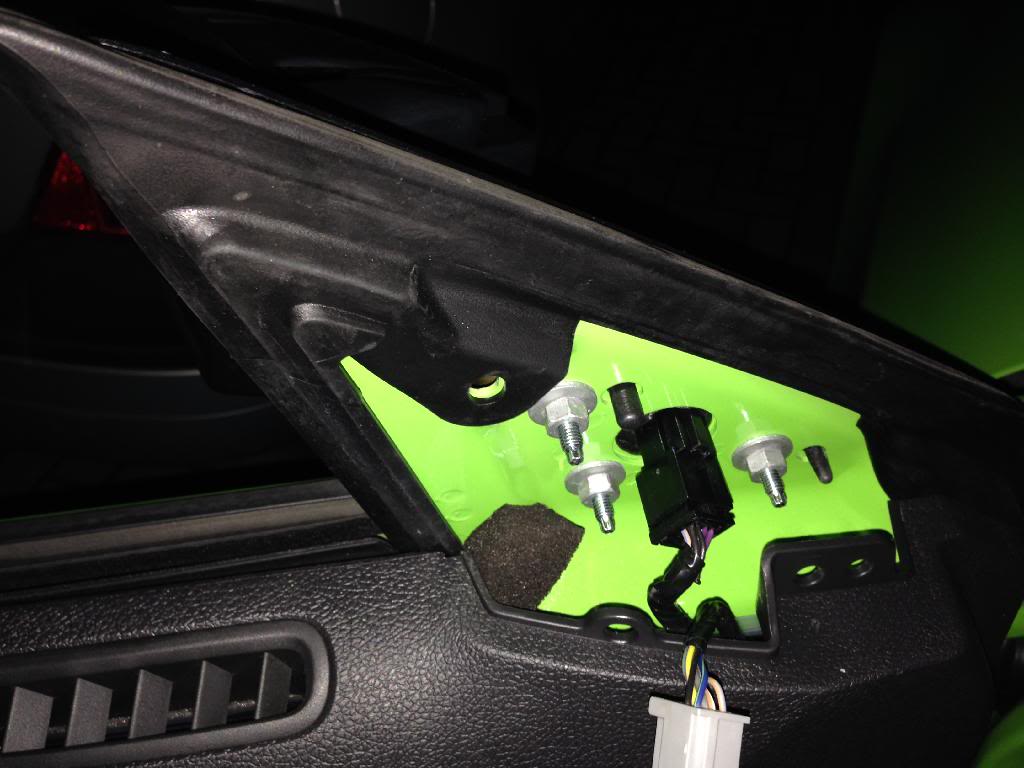
loosen the three 11mm nuts with your wrench. While supporting the mirror with one hand remove the nuts.

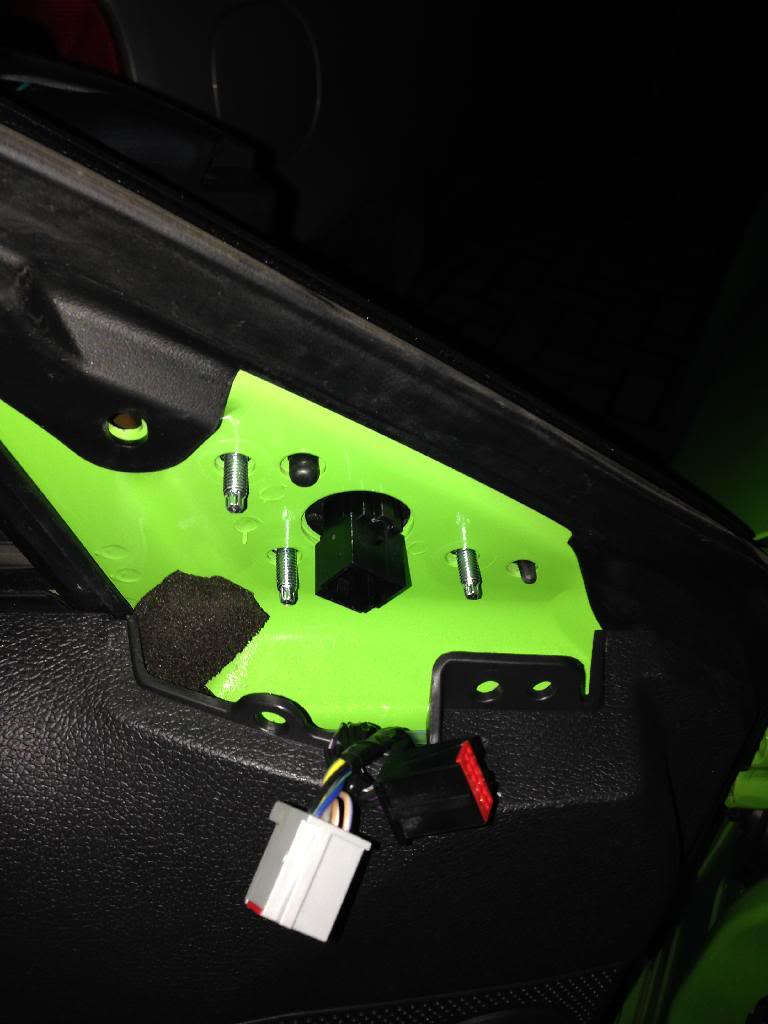
once you have removed the 3 nuts remove the old mirror and replace it with the new one.
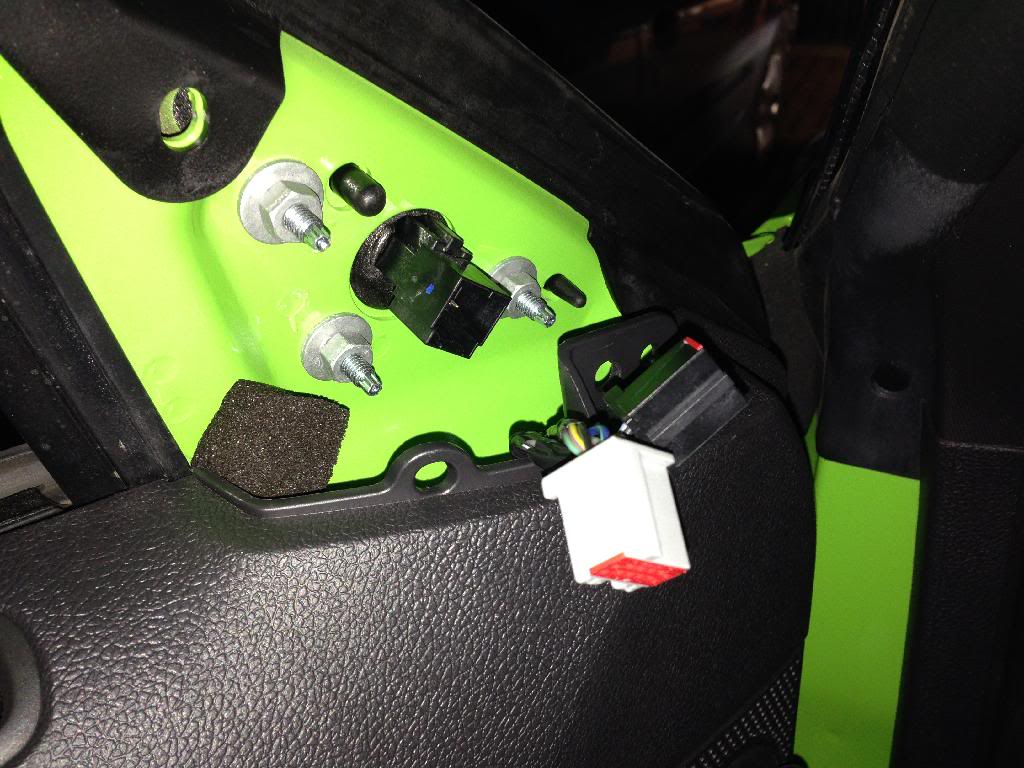
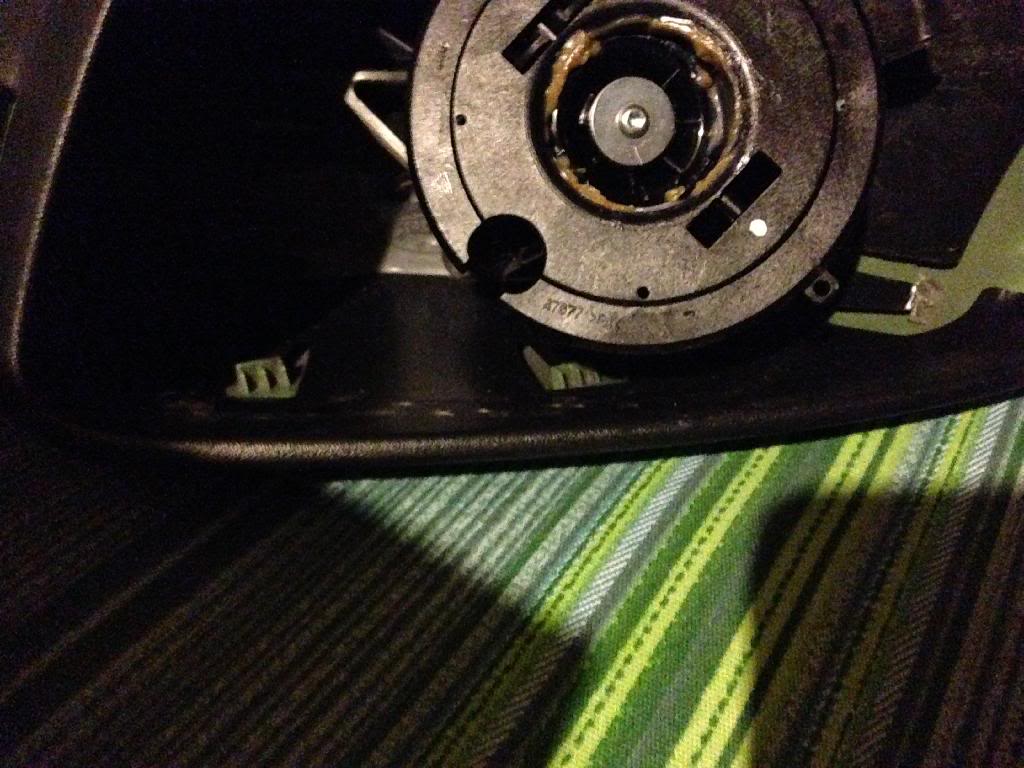
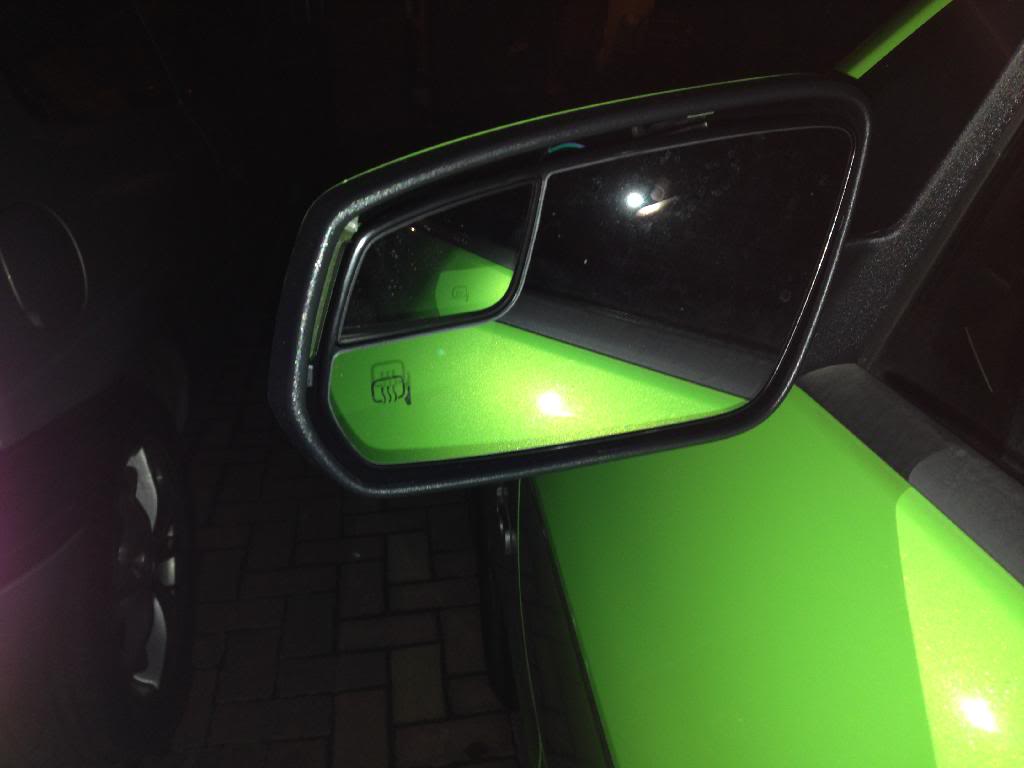
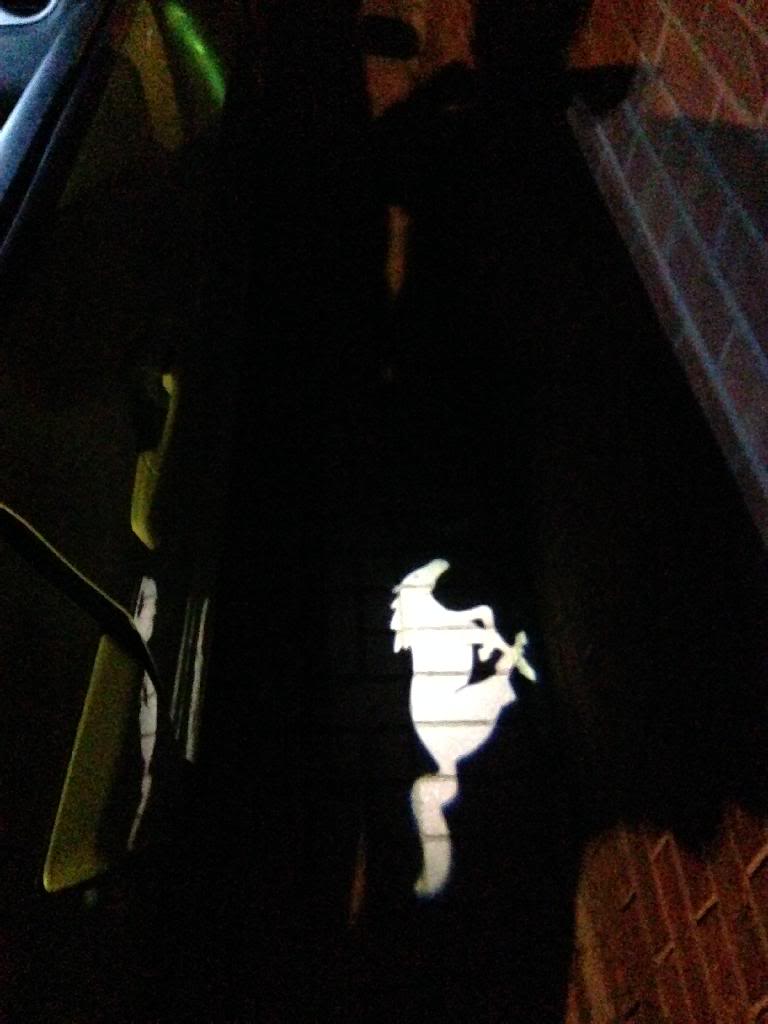
while supporting the new mirror reinstall the 3 11mm nuts and tighten. install the black plug into the new mirror and watch as the pony projector comes on.
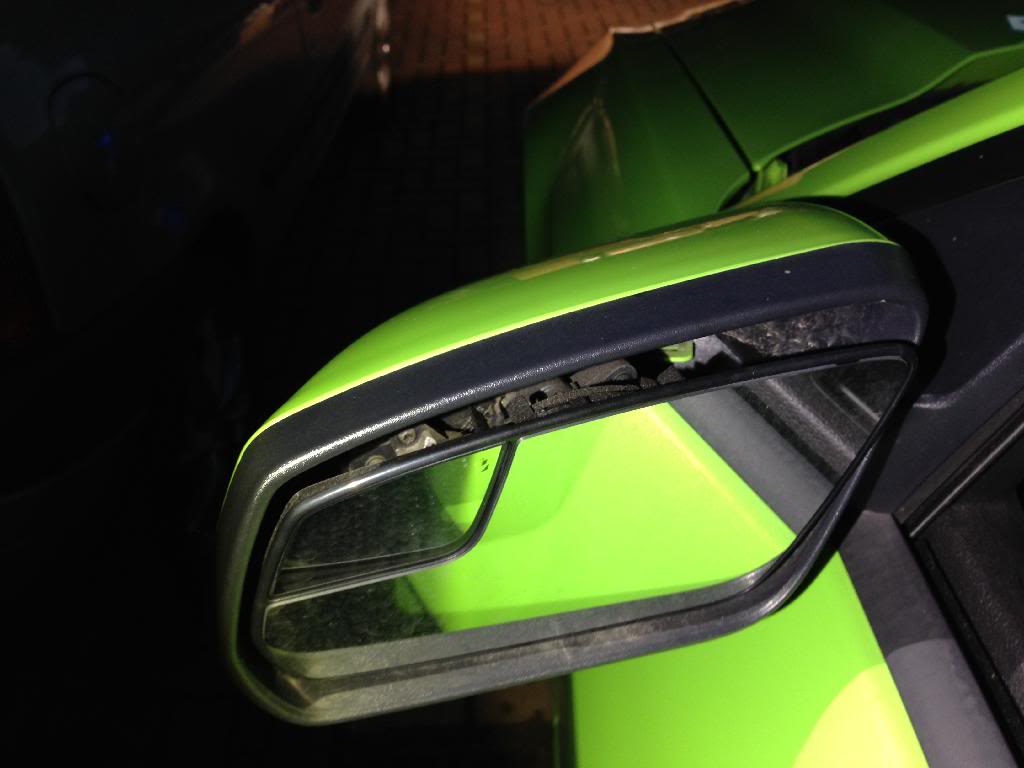
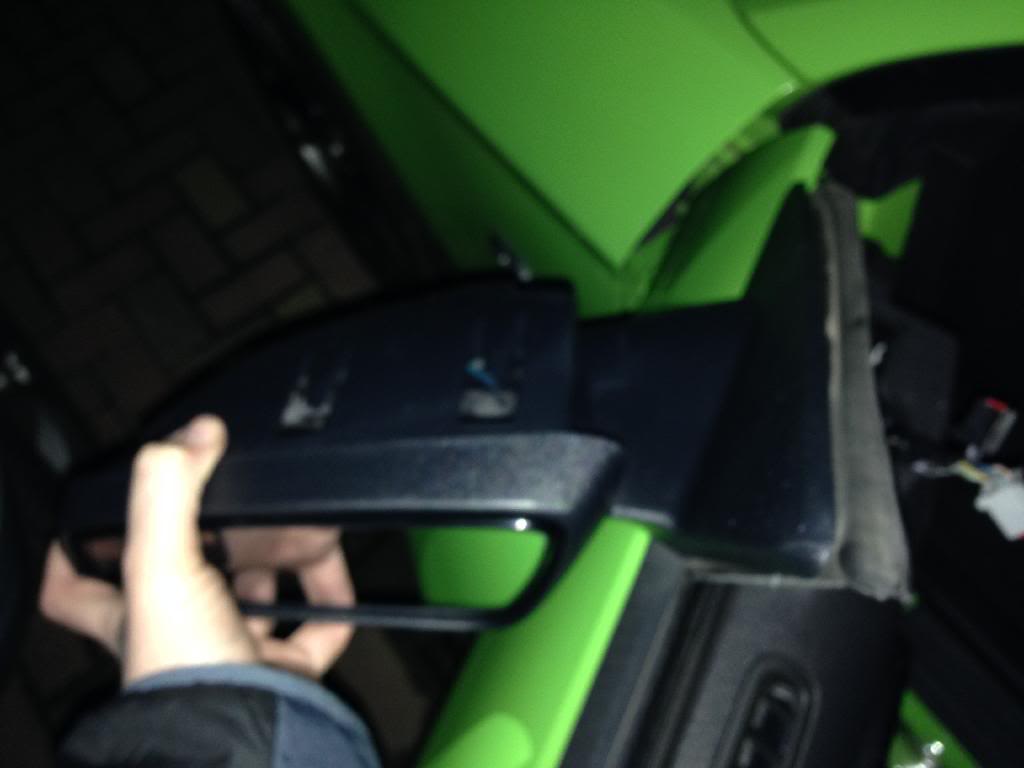
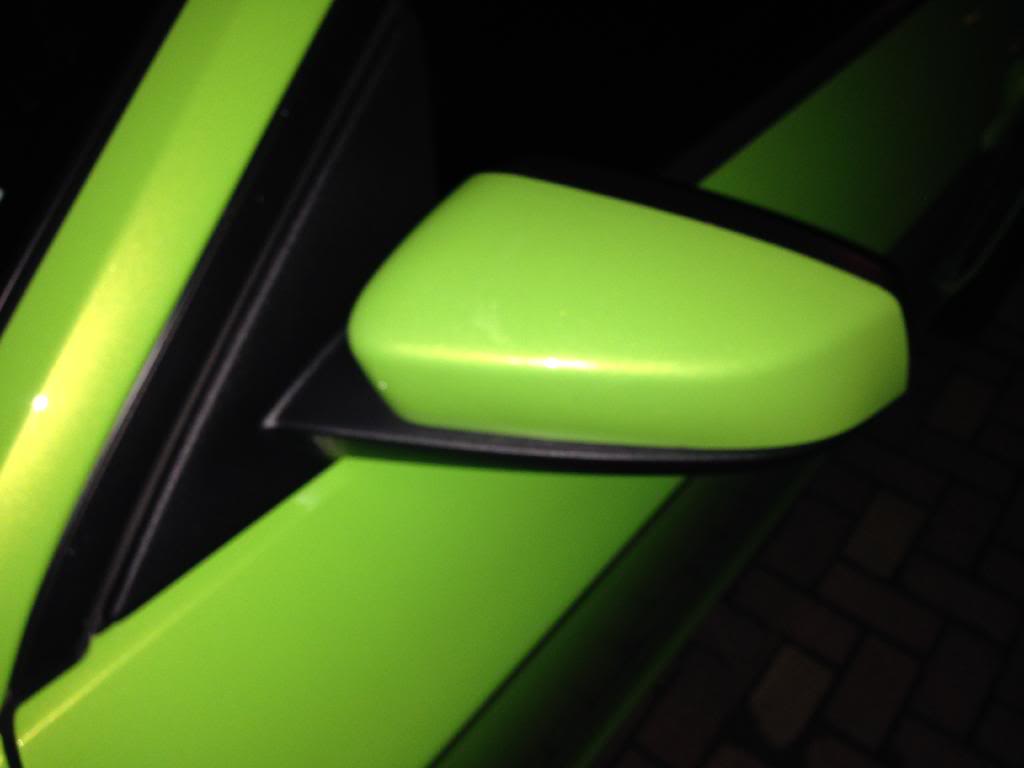
Reconnect the gray plug and snap the cover panel back onto the door. Now all you need is to get your outer mirror cap onto your new mirror. this is why you need to move your mirrors all the way down so that you can access the 4 taps. You can remove the glass assy to make it easier. this is what it looks like with the assy installed.
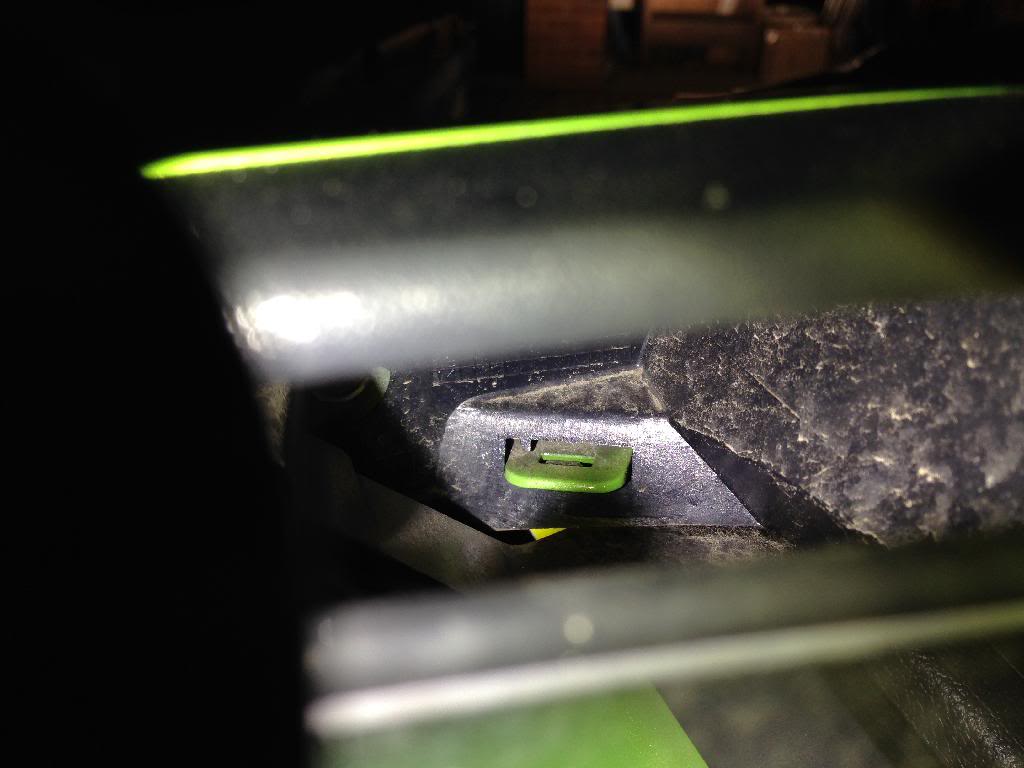

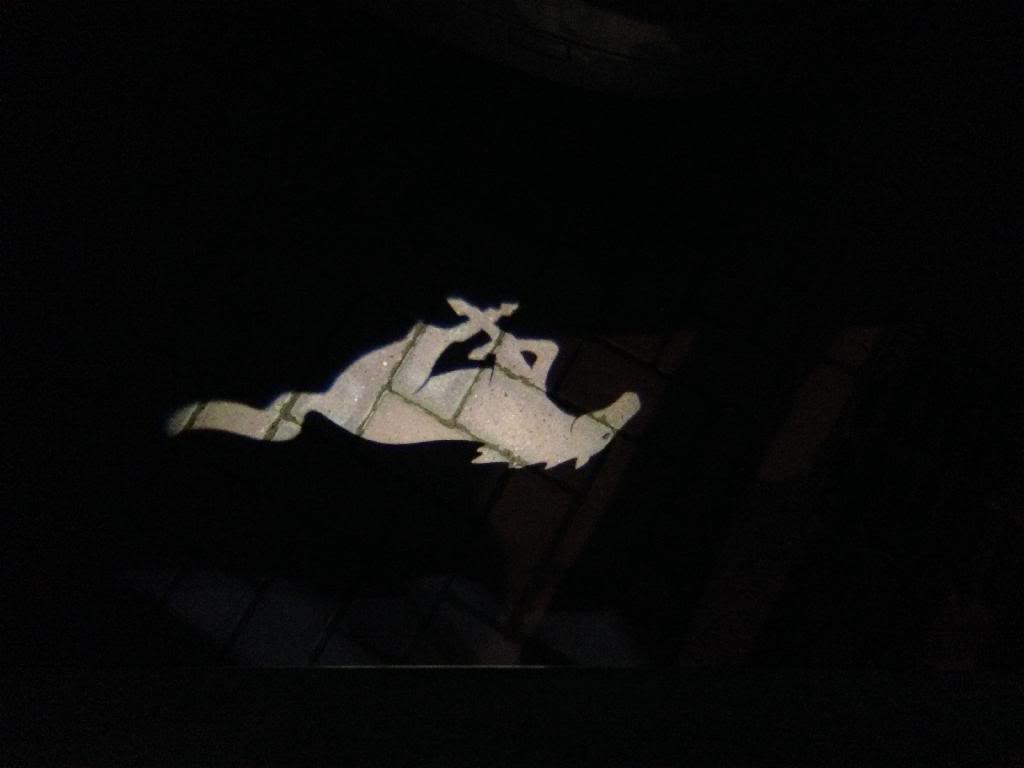
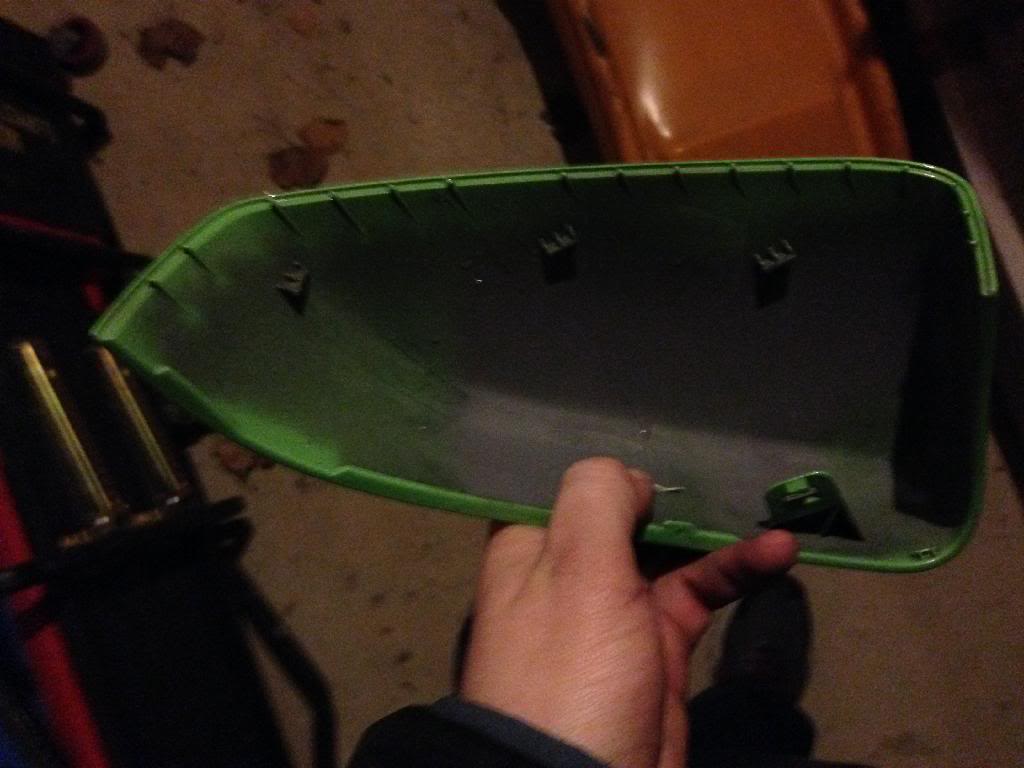
once the glass assy is removed you can get to the four tabs. 3 along the top and one on the bottom inboard side. (the picture below is upside down)
once the cap is removed then you snap it onto your new mirror and move on to the passanger side.
The passenger side is the same except you don't have to worry about the mirror adjust switch.
Very happy with how easy this was and it only take about 30-40 mins for the swap.

SO on to the install. The tool required is an 11MM wrench and 8" flat tip screw driver

First roll your windows down and adjust both mirrors all the way down.

Once that is done pull on the top corner of the cover panel with your fingers and you will notice a small gap appear. pull this cover off.


Disconnect the gray plug from the mirror adjust switch and set the panel aside to reveal the mirror plug and 3 11mm nuts.

Disconnect the black mirror plug.

loosen the three 11mm nuts with your wrench. While supporting the mirror with one hand remove the nuts.


once you have removed the 3 nuts remove the old mirror and replace it with the new one.

while supporting the new mirror reinstall the 3 11mm nuts and tighten. install the black plug into the new mirror and watch as the pony projector comes on.

Reconnect the gray plug and snap the cover panel back onto the door. Now all you need is to get your outer mirror cap onto your new mirror. this is why you need to move your mirrors all the way down so that you can access the 4 taps. You can remove the glass assy to make it easier. this is what it looks like with the assy installed.


once the glass assy is removed you can get to the four tabs. 3 along the top and one on the bottom inboard side. (the picture below is upside down)


once the cap is removed then you snap it onto your new mirror and move on to the passanger side.


The passenger side is the same except you don't have to worry about the mirror adjust switch.

Very happy with how easy this was and it only take about 30-40 mins for the swap.
Last edited by joshuabowman; Feb 7, 2014 at 04:30 PM.


Member
Joined: December 2, 2013
Posts: 21
Likes: 0
From: Vancouver, BC
Cobra R Member
Joined: February 6, 2014
Posts: 1,564
Likes: 41
From: Motor City


Legacy TMS Member
Joined: August 7, 2011
Posts: 5,246
Likes: 567
From: NC
GT Member
Joined: September 25, 2012
Posts: 152
Likes: 0
So I wanted the comfort pack on my 2013 Mustang when I got it, however they did not have one in the color I wanted with it so I did without. After doing a little research I discovered that my 2013 Mustang Gt had the wires for the Mirrors and pony projectors. I call Tousley Ford up and Ordered a pair. $325.00 Shipped
SO on to the install. The tool required is an 11MM wrench and 8" flat tip screw driver
First roll your windows down and adjust both mirrors all the way down.
Once that is done pull on the top corner of the cover panel with your fingers and you will notice a small gap appear. pull this cover off.
Disconnect the gray plug from the mirror adjust switch and set the panel aside to reveal the mirror plug and 3 11mm nuts.
Disconnect the black mirror plug.
loosen the three 11mm nuts with your wrench. While supporting the mirror with one hand remove the nuts.
once you have removed the 3 nuts remove the old mirror and replace it with the new one.
while supporting the new mirror reinstall the 3 11mm nuts and tighten. install the black plug into the new mirror and watch as the pony projector comes on.
Reconnect the gray plug and snap the cover panel back onto the door. Now all you need is to get your outer mirror cap onto your new mirror. this is why you need to move your mirrors all the way down so that you can access the 4 taps. You can remove the glass assy to make it easier. this is what it looks like with the assy installed.
once the glass assy is removed you can get to the four tabs. 3 along the top and one on the bottom inboard side. (the picture below is upside down)
once the cap is removed then you snap it onto your new mirror and move on to the passanger side.
The passenger side is the same except you don't have to worry about the mirror adjust switch.
Very happy with how easy this was and it only take about 30-40 mins for the swap.
Mach 1 Member
Joined: February 24, 2011
Posts: 916
Likes: 1
From: Metro Charlotte, NC
I wouldn't rig it so the pony projectors are on for an extended period of time, like with the parking lights. the heat sink is subsantial because they get REALLY hot when they're on. if you rig it up that way they will likely fail prematurely and you will be replacing them pretty often.

Thread Starter
V6 Member
Joined: April 3, 2013
Posts: 55
Likes: 1
From: NC
