3M CF Vinyl interior wrapping
 3/31/12, 10:02 PM
#61
Yeah, dont care for that satin or whatever it is, which is why I painted my door handles (almost done, I swear!) but the cf goes well with the rest of the grayish interior trim. The new premier trim is supposed to be a dark aluminum so Im hopeful I wont have to do this in the next ride. Hoping the sun will return tomorrow so I can finish up and post more pics meself.
Last edited by wheelman; 3/31/12 at 10:03 PM.
 3/31/12, 10:52 PM
#62
Shelby GT350 Member
Ok so I just wrapped the passenger side with the panels still in place. I split it down the middle for the air bag and it looked fine. Now 5 minutes later its separated down the middle and I can see the silver peeking through. I can't catch a fn break I swear..
3/31/12, 11:00 PM
#63
What do you mean by separated down the middle? And what silver? Did you do flat panels, not wrapped around the corners? I would think simple, flat panels would hold much more easily in that spot. Is the surface flat or ribbed? Could use stronger adhesive but could be tough to get off, if you ever plan to remove the wrap. Otherwise, the medium strength, spray-on 3M stuff for carpets is very sticky.
 3/31/12, 11:57 PM
#65
Shelby GT350 Member
Ha ha yeah!!

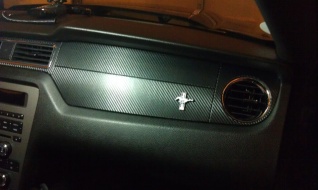
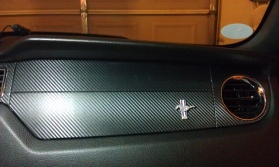
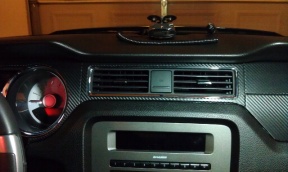
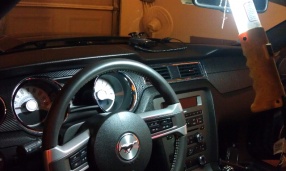
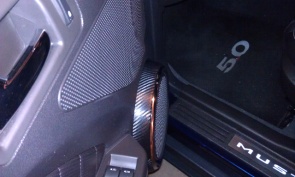
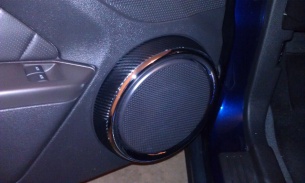
It was a biotch to get the passenger side done while still on the dash. I had to re-wrap one piece because the wrap shrunk from the heat. If there's an easier way, please enlighten me. I was feeling froggy so I used the left overs to wrap the door sub rings.
This overall was a total trial and error experience. Here's my advice to those who want to attempt this. Take your time, use a heat gun, and it helps to have a fridge full of beer because you'll need it after screwing up a section you worked on for an hour....trust me!
4/1/12, 12:10 AM
#66
Originally Posted by Hytek
Ha ha yeah!!
It was a biotch to get the passenger side done while still on the dash. I had to re-wrap one piece because the wrap shrunk from the heat. If there's an easier way, please enlighten me. I was feeling froggy so I used the left overs to wrap the door sub rings.
This overall was a total trial and error experience. Here's my advice to those who want to attempt this. Take your time, use a heat gun, and it helps to have a fridge full of beer because you'll need it after screwing up a section you worked on for an hour....trust me!
4/1/12, 12:19 AM
#67
Shelby GT350 Member
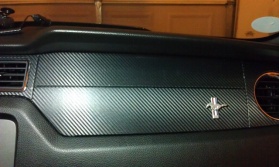
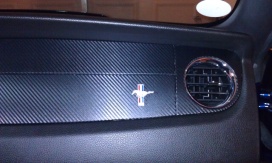
Lol you would notice that! It was, but I didn't notice until after the pics. It's actually a dash emblem from a 93 fox I had before. Just didn't position it right after the wrap...might of had 1 too many. Is this better?
4/1/12, 12:24 AM
#68
Originally Posted by Hytek
Lol you would notice that! It was, but I didn't notice until after the pics. It's actually a dash emblem from a 93 fox I had before. Just didn't position it right after the wrap...might of had 1 too many. Is this better?
4/1/12, 12:36 AM
#71
A Man Just Needs Some....
Originally Posted by Hytek
Hey it's new to me...well I'm getting old....so yeah.
4/1/12, 07:18 PM
#72
It was a biotch to get the passenger side done while still on the dash. I had to re-wrap one piece because the wrap shrunk from the heat. If there's an easier way, please enlighten me. I was feeling froggy so I used the left overs to wrap the door sub rings.
This overall was a total trial and error experience. Here's my advice to those who want to attempt this. Take your time, use a heat gun, and it helps to have a fridge full of beer because you'll need it after screwing up a section you worked on for an hour....trust me!
This overall was a total trial and error experience. Here's my advice to those who want to attempt this. Take your time, use a heat gun, and it helps to have a fridge full of beer because you'll need it after screwing up a section you worked on for an hour....trust me!
4/1/12, 09:37 PM
#74
Awesome; glad I could help. 
You actually finished before me! I stretched the piece in the video just a tad too thin I think and/or didn't use enough adhesive as the Scotchprint has pulled away at that curve I was working on and I still have to fix it. I did the piece on the opposite side of the dash at the same time, though, and its on there nice and solid as are some other pieces I've wrapped, so I'm sure it's just a combination of those things.
I had to wait on delivery of a larger sheet of wrap to do the dash sections in the correct fiber direction and in the meantime started doing other projects and just haven't gotten back to finishing yet. Almost done with those projects now, though, so will post final pics soon. Finally got rid of all of that "sport appearance" satin and now have matte black door trim to match some of the other matte trim, with gloss black handles, to match the shift ****. Looks pretty good IMHO, but at this point, I just want it DONE!
 4/2/12, 05:31 PM
#76
Cobra Member
Join Date: December 20, 2011
Location: Cerritos
Posts: 1,199
Likes: 0
Received 0 Likes
on
0 Posts
Originally Posted by perfect storm
Great work! I have the 1 piece Passenger Dash. Anyone have suggestions how to tackle it if its 1 piece?

Thread
Thread Starter
Forum
Replies
Last Post