The one and only GABE's '13 GT Build Thread!
 7/5/16, 04:58 PM
#401
Legacy TMS Member
Hey Gabe, I might be running a 20x10 +45 up front - can you tell me how much clearance you have to your struts with your current wheels? I know they're 20x10 +40 correct? I need to make sure that extra 5mm won't be an issue. I'll be running a 295/30/20, which is the same overall height as the stock 255/40/19. I have a 1/4" spacer on the stock wheels right now, so if that 5mm, which is about a 1/4" is an issue, I'll just continue to run it with the new wheels. I'm guessing the air struts are narrower than the Koni Yellows though...
 7/5/16, 05:37 PM
#402
Legacy TMS Member
Thread Starter
Hey Gabe, I might be running a 20x10 +45 up front - can you tell me how much clearance you have to your struts with your current wheels? I know they're 20x10 +40 correct? I need to make sure that extra 5mm won't be an issue. I'll be running a 295/30/20, which is the same overall height as the stock 255/40/19. I have a 1/4" spacer on the stock wheels right now, so if that 5mm, which is about a 1/4" is an issue, I'll just continue to run it with the new wheels. I'm guessing the air struts are narrower than the Koni Yellows though...
7/5/16, 06:48 PM
#403
Legacy TMS Member
Originally Posted by Gabe
I've got about a half inch of clearance between the strut and the side of the tire / wheel, so you should be perfectly fine
7/5/16, 07:07 PM
#404
Legacy TMS Member
Thread Starter
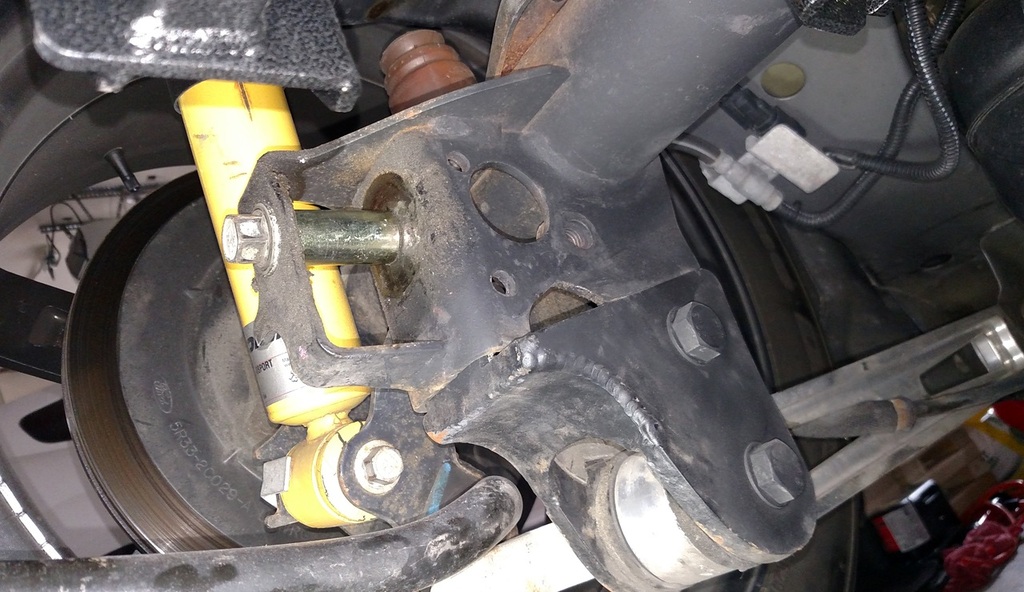
Perfect, thanks man. You'll be happy to note that I am most likely scrapping the flares. It's just too much money for me right now. I'm having 3-piece wheels made, and supposedly they're already done. I'm thinking I'll just subtract an inch from the outer lip up front, and 1.5" from the rear outer lip. Originally I was doing 20x11 up front and 20x12.5 rear. If they're cool with it, I'll end up with 20x10 and 20x11.
These are the latest clearance pictures I've taken of the front:
 7/5/16, 07:34 PM
#406
Legacy TMS Member
Thread Starter
The fill plugs, you have an inspection plug and one higher up that's actually the fill plug.
Have to remove both cuz you don't want to overfill, if it starts leaking out of the lower hole then you stop pumping fluid in.
I might be slightly low now since mine never leaked a drop from that inspection hole when I was pumping it in, I had mixed the 3 quarts that I had, and between the tubes and the pump itself I think I lost some.
Guess I should've used shorter or thinner hoses ...
7/5/16, 08:21 PM
#407
I like it. It's smooth, but I really didn't have any problems before, using the custom-blend fluid I had in there, made by BND Automotive
The fill plugs, you have an inspection plug and one higher up that's actually the fill plug.
Have to remove both cuz you don't want to overfill, if it starts leaking out of the lower hole then you stop pumping fluid in.
I might be slightly low now since mine never leaked a drop from that inspection hole when I was pumping it in, I had mixed the 3 quarts that I had, and between the tubes and the pump itself I think I lost some.
Guess I should've used shorter or thinner hoses ...
7/8/16, 06:55 AM
#408
Legacy TMS Member
Thread Starter
I love Amsoil. I just received another order for a little more oil (to replenish what I used for my generator), more rear-end fluid, and a tube of their water-resistant synthetic grease.
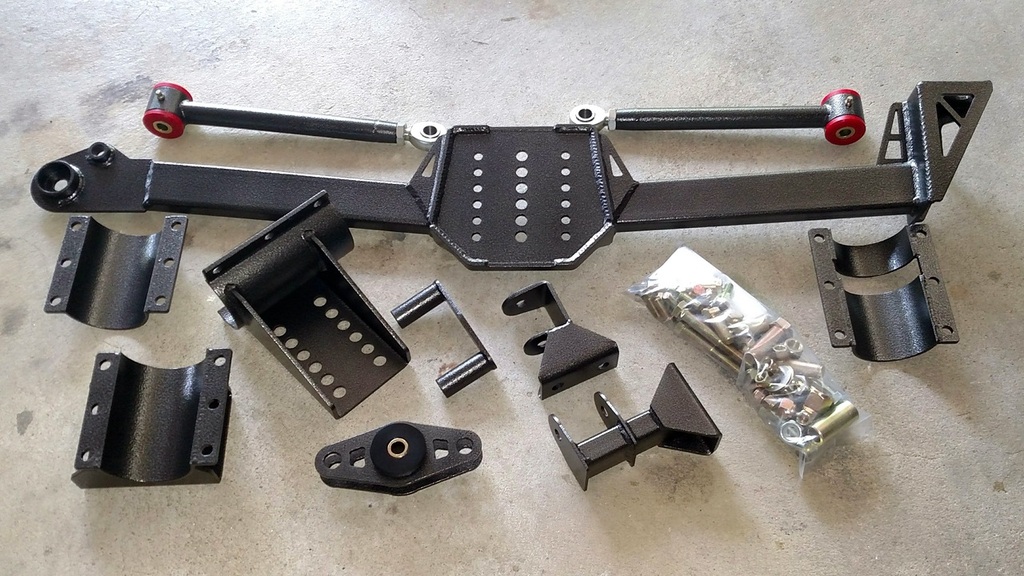
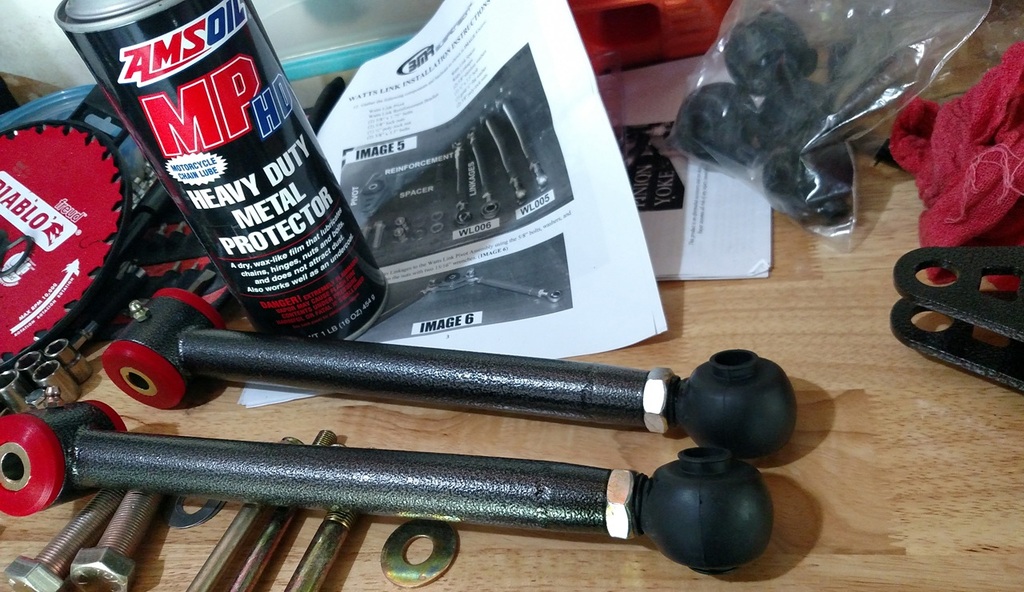
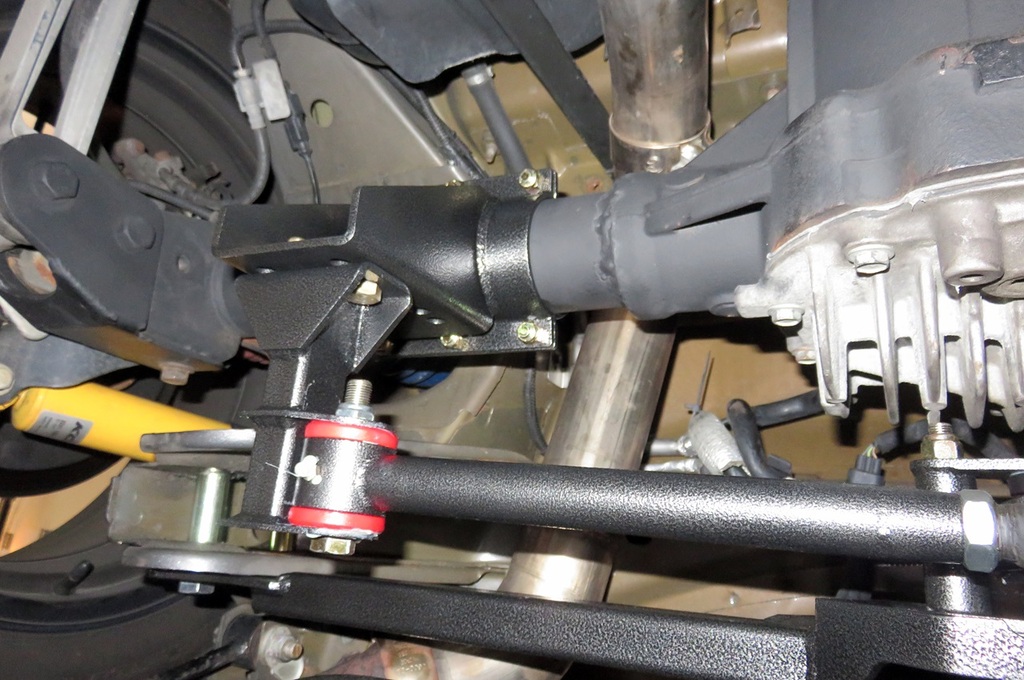
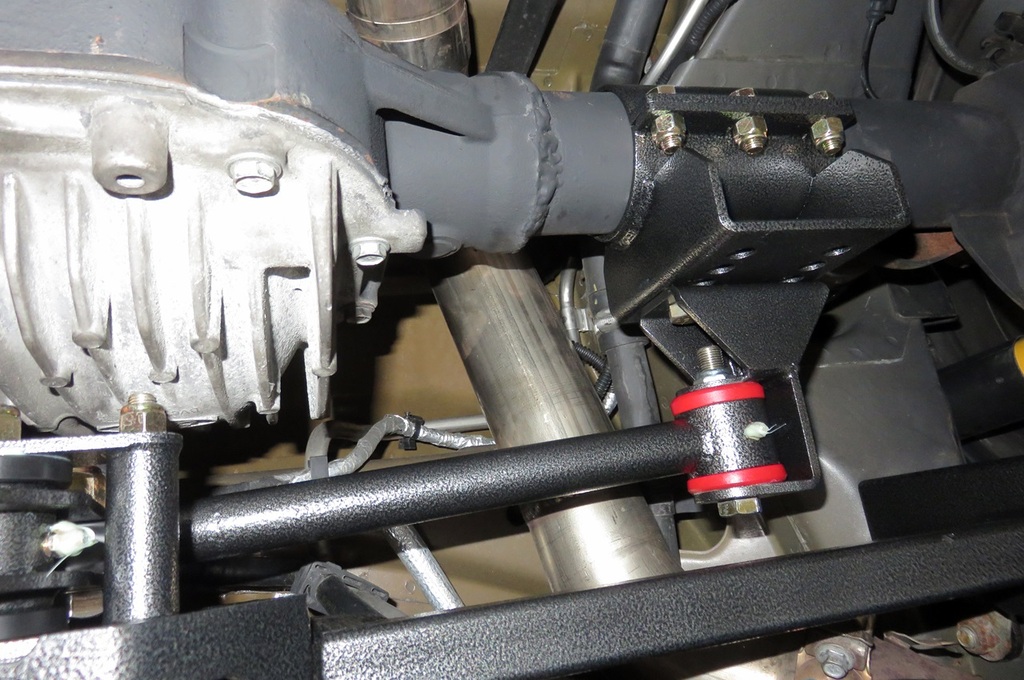
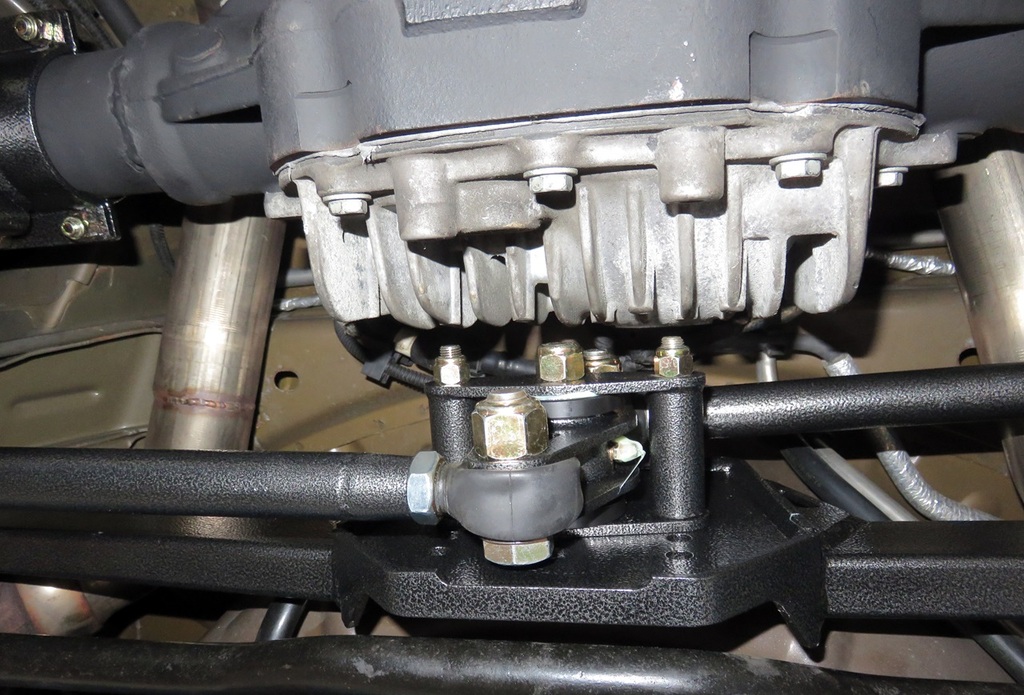
Yesterday I finally installed the BMR Watts Link that I've had sitting around for almost 8 months

Opened it up and marveled at the awesomeness that is BEEFY BMR stuff:
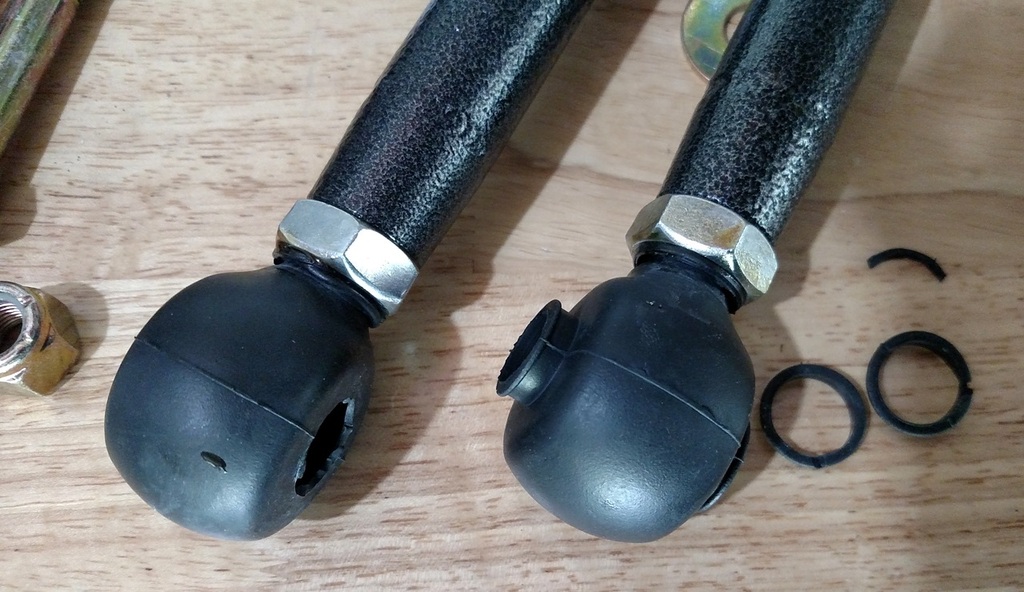
I used some rubber rod-end boots for the rod-end ends of the links, after spraying them with Amsoil HD Metal Protector:
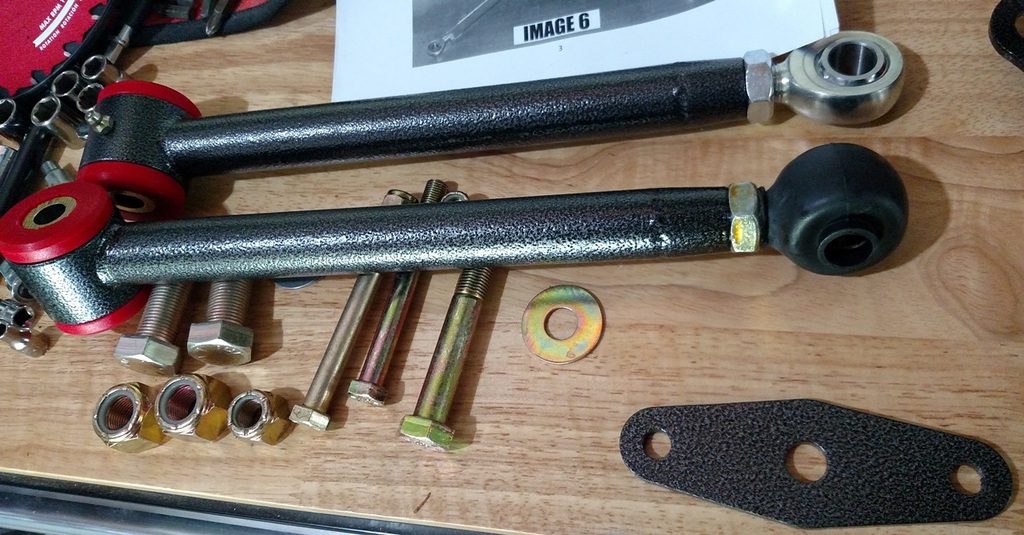
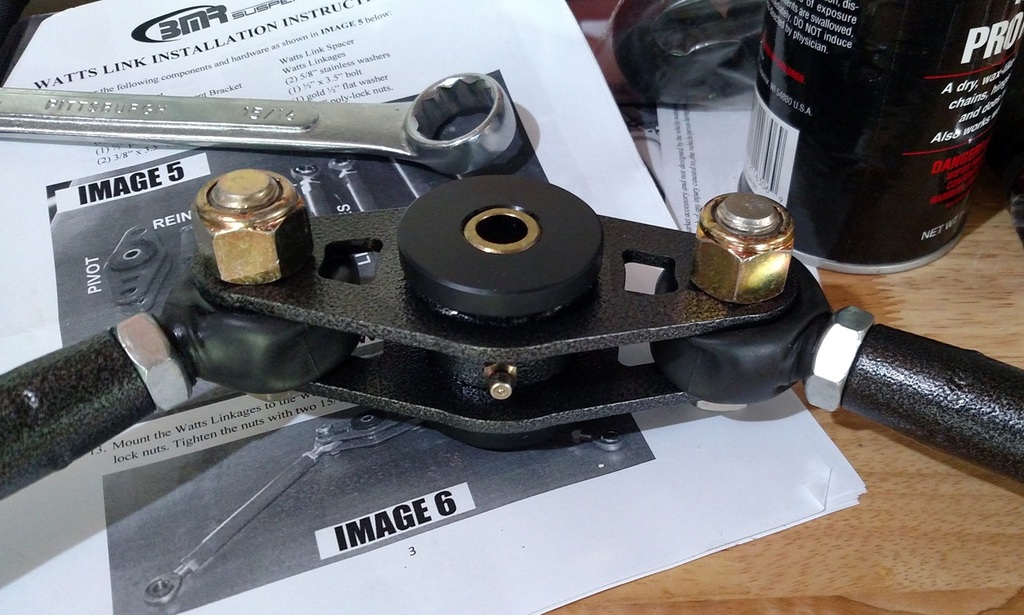
The pivot and linkages assembled:

I had to cut the little years off the rubber boots so I could get them inside the pivot assembly, this is one cut next to one the way they come:
And the whole shebang installed:
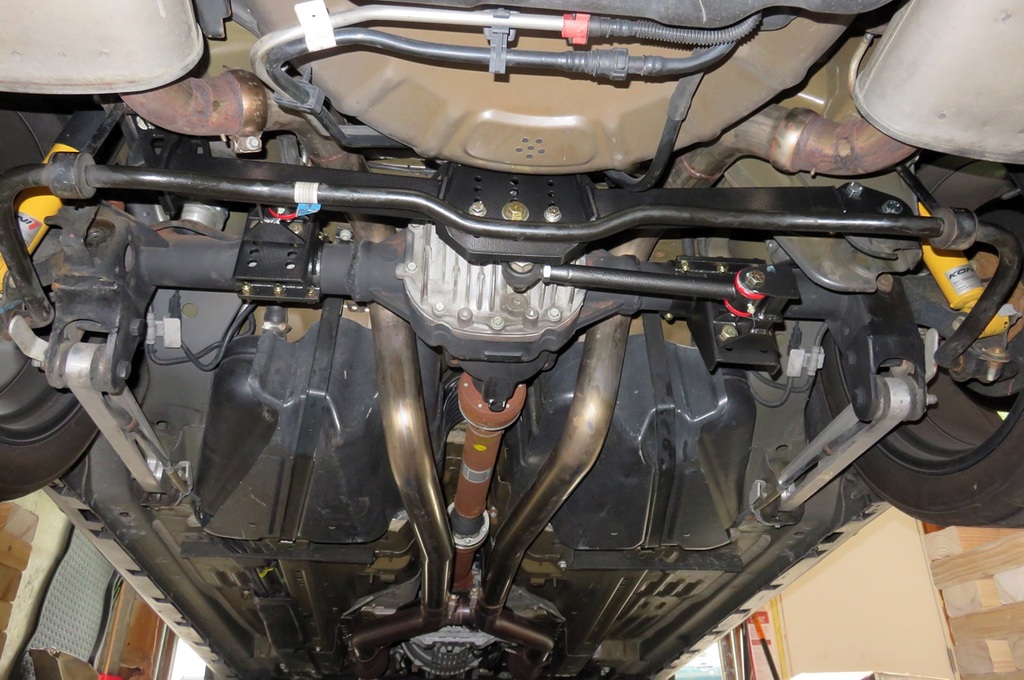
Some close-ups:
I was somewhat unhappy that the center section of the large Watts member is kinda touching the spare tire well:
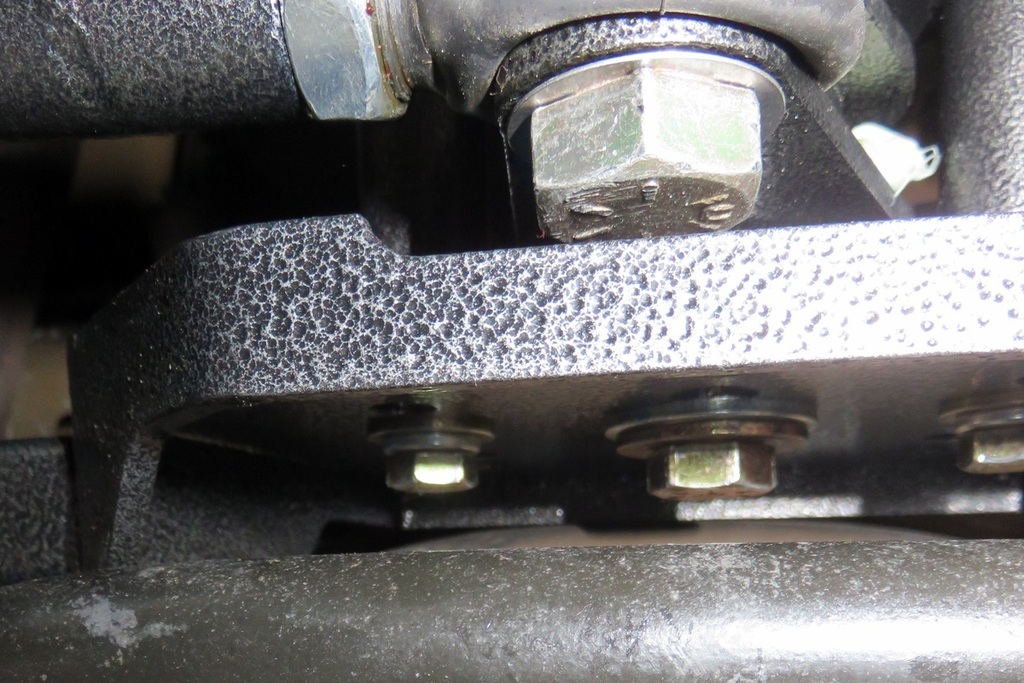
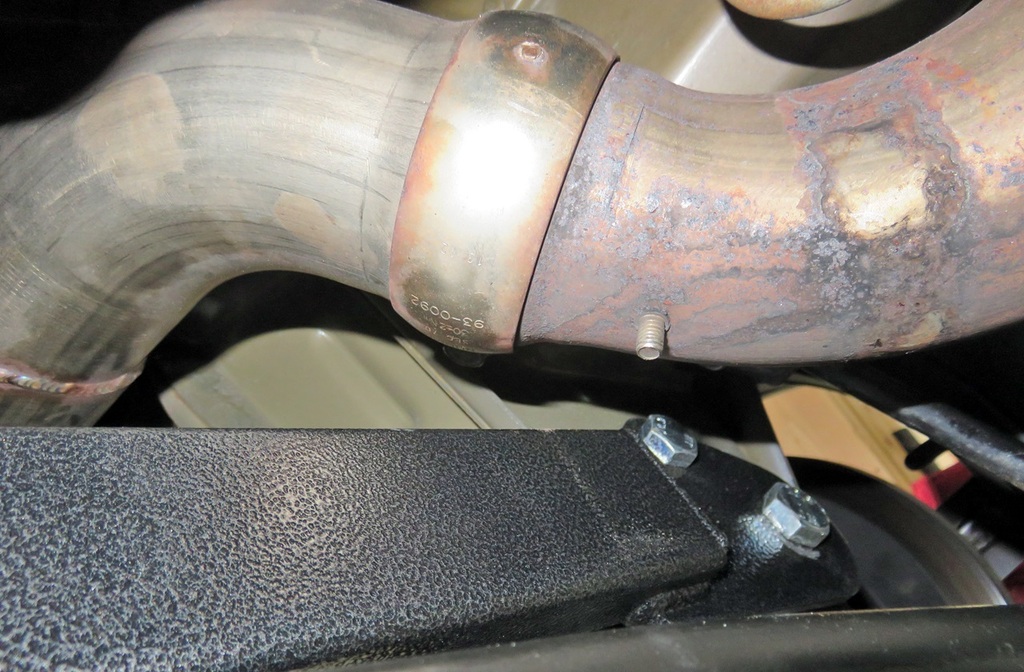
Driver-side exhaust clamp clearance:
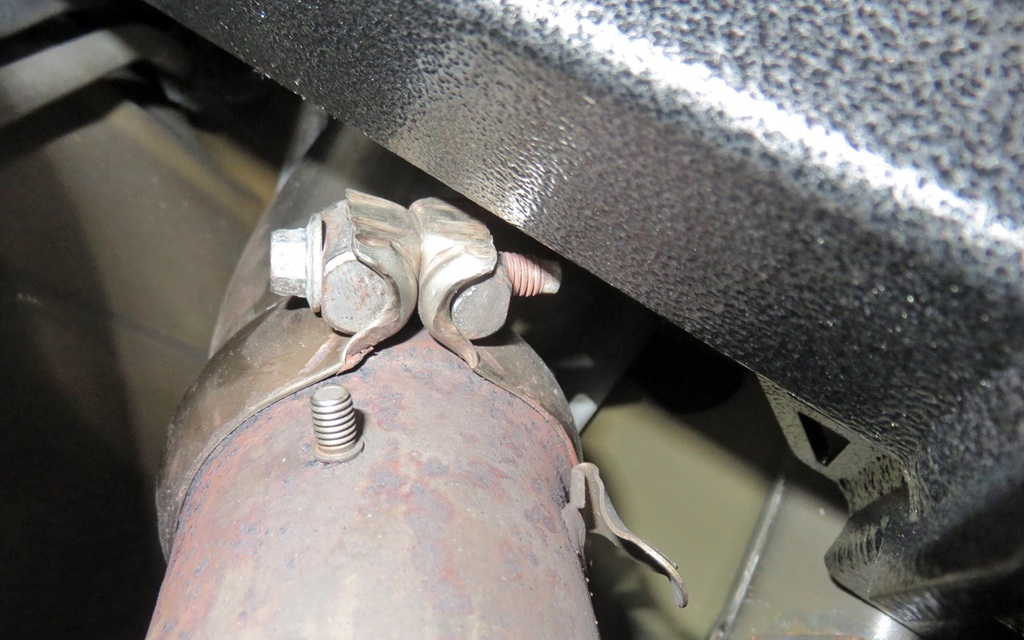
Passenger side exhaust clamp clearance, after I rotated the clamp since it was close enough that it would hit when I jostled the pipe around:
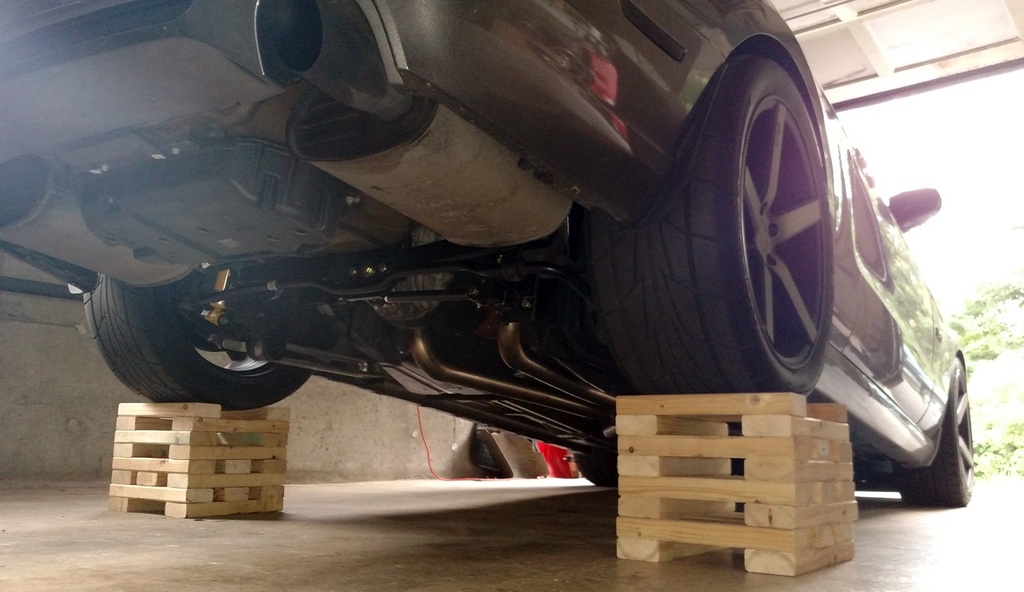
And my work area:
Brief test drive after, I love it.
Can't wait to drive the car some more, throw it into some more corners!!!!
Edit:
Remembered today that the panhard bar bolt and nut from the driver side didn't get re-installed, which wasn't a bad thing for the bolt since I knew exactly where it was, sitting on my toolbox, but the nut/bracket assembly ... well, it had fallen inside the LCA relocation bracket when the bolt got removed, and that's where I apparently had forgotten it.
Happy to still find it there even after I drove the car a couple of miles yesterday after the install.
I then remembered that there was an extra spacer that wasn't mentioned anywhere in the instructions, and kinda figured that maybe it's supposed to go where the panhard bar used to be mounted.
Low and behold, it sure as hell did:
Last edited by Gabe; 7/8/16 at 08:41 AM.
 7/8/16, 06:37 PM
#410
Roush Forum Stalker
Nice Gabe!
I await the results as well. Can't go wrong with BMR!
I await the results as well. Can't go wrong with BMR!
8/5/16, 06:33 AM
#411
Legacy TMS Member
Thread Starter
It added traction when cornering/turning, even when accelerating from a stop and turning.
And it seems to have reduced body roll somewhat.
It also seems to have changed the rear-end feel of the car a bit over bumps, it's a bit cushier but firm.
Updates on the car:
During the autocross event my fiancee and I did last Saturday, I overheated my brake fluid, my blower belt decided to start melting onto the pulleys, and that made me forego doing the last run of the day.
So new belts were ordered, I have new DOT4 Amsoil brake fluid waiting to be flushed-in, and yesterday I started working on the car.
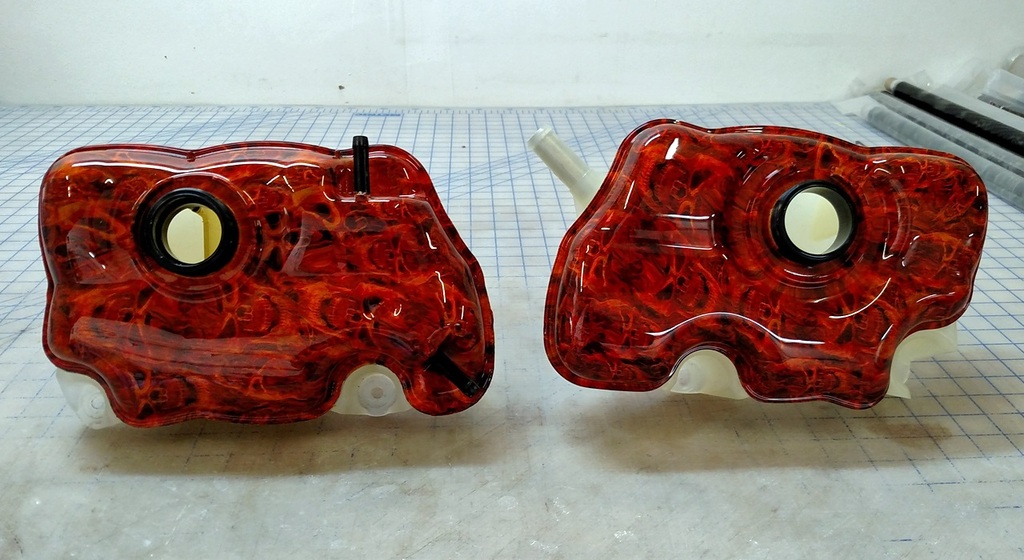
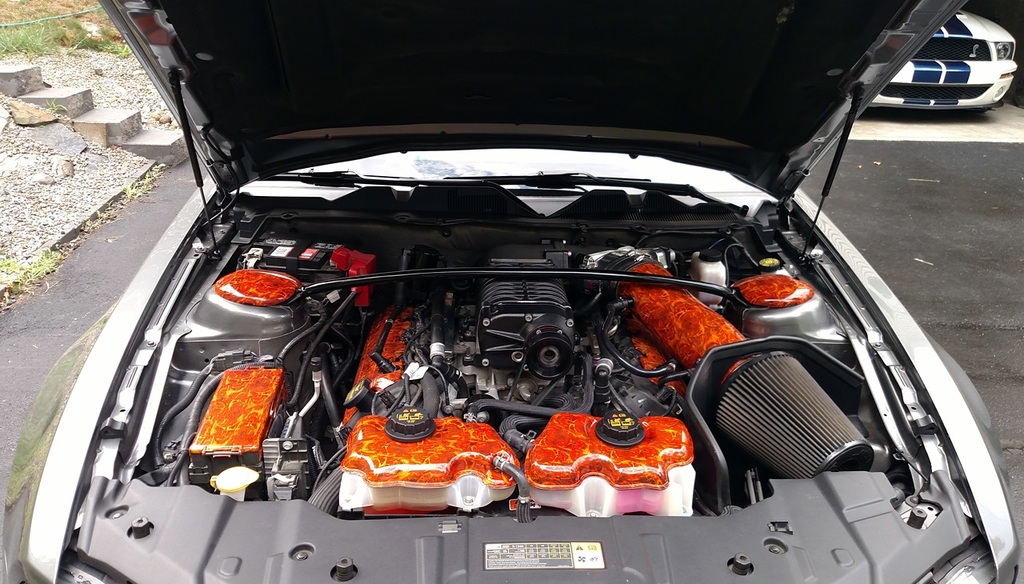
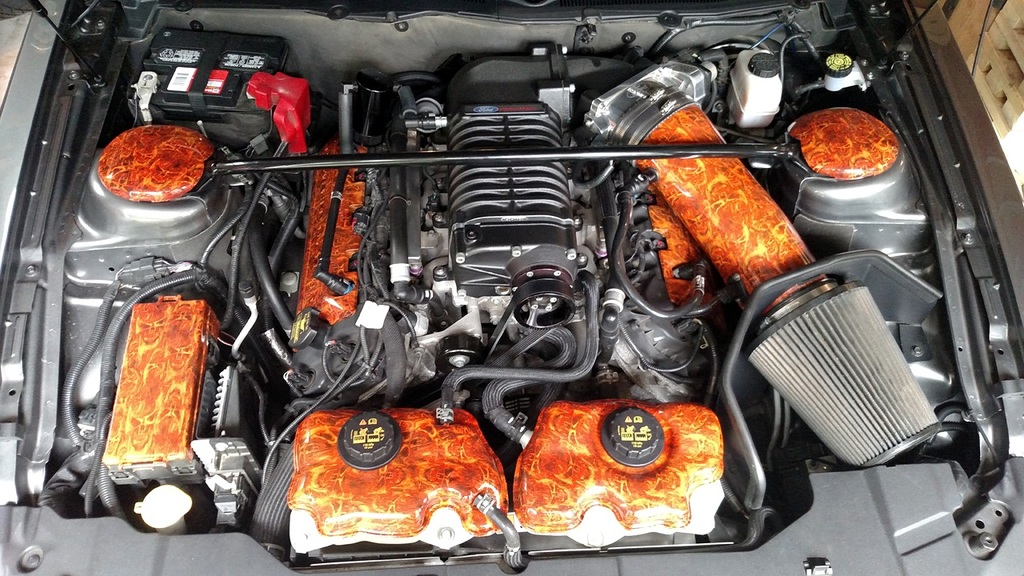
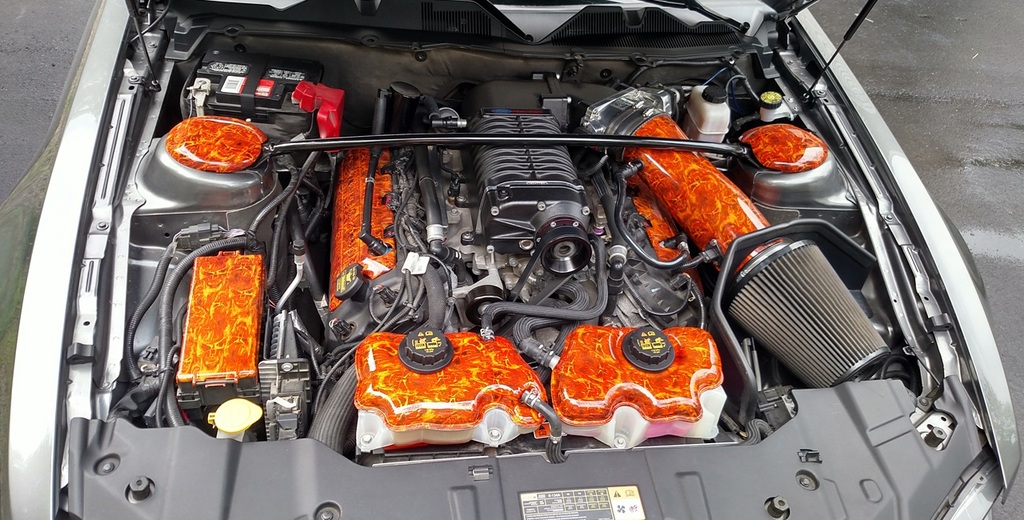
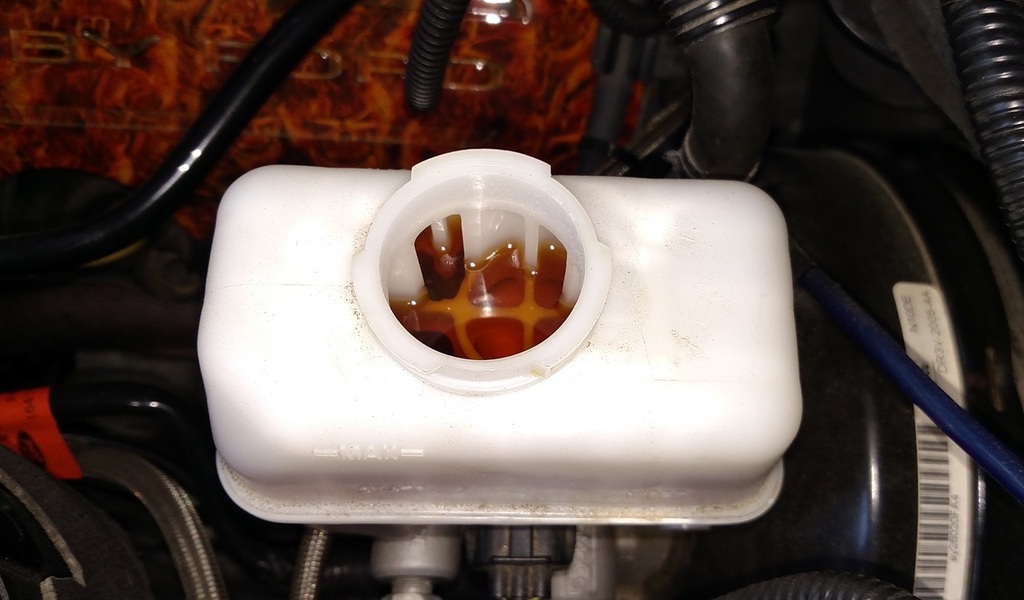
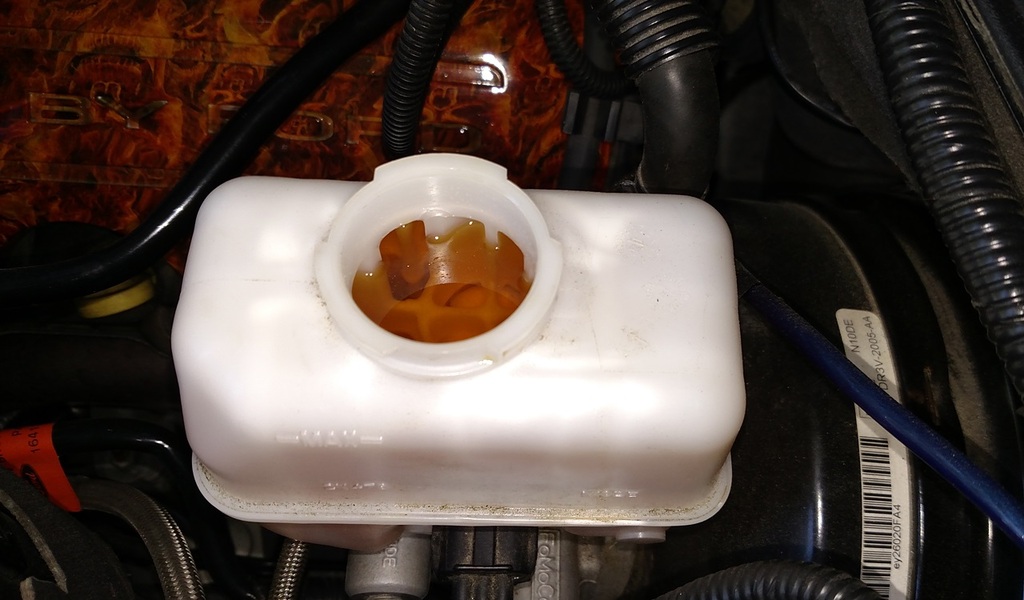
Got the blower belt replaced (a fun project since a large aluminum bracket has to be removed), and this was made much easier by the fact that I was replacing the coolant tanks with newly hydro-dipped ones.
Also got the thermostat replaced with the 170-degree Reische unit that I've had for over a year.
Stopped about half-done since the shipment with the new main serpentine belt, its tensioner, and a new idler pulley, didn't show up yesterday like it was supposed to.
But got the new engine coolant tank installed, and today will hopefully button it up, top off the coolant systems, and re-start it.
Still need to flush the brake fluid, and I might actually order some new DOT 5.1 fluid for that service.
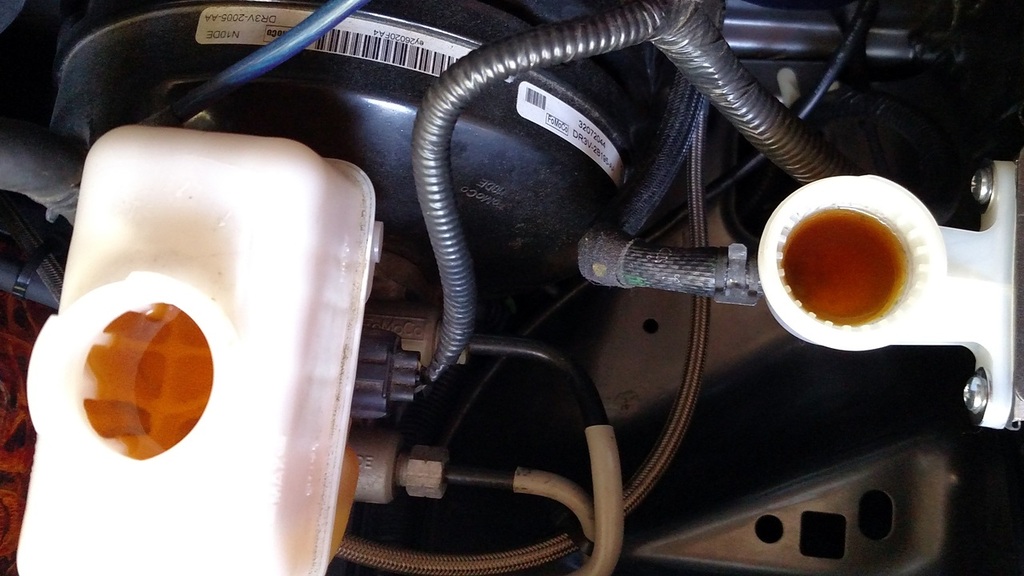
The new hydro-dipped coolant tanks I picked up yesterday from the dipper:
Pictures from yesterday's work:
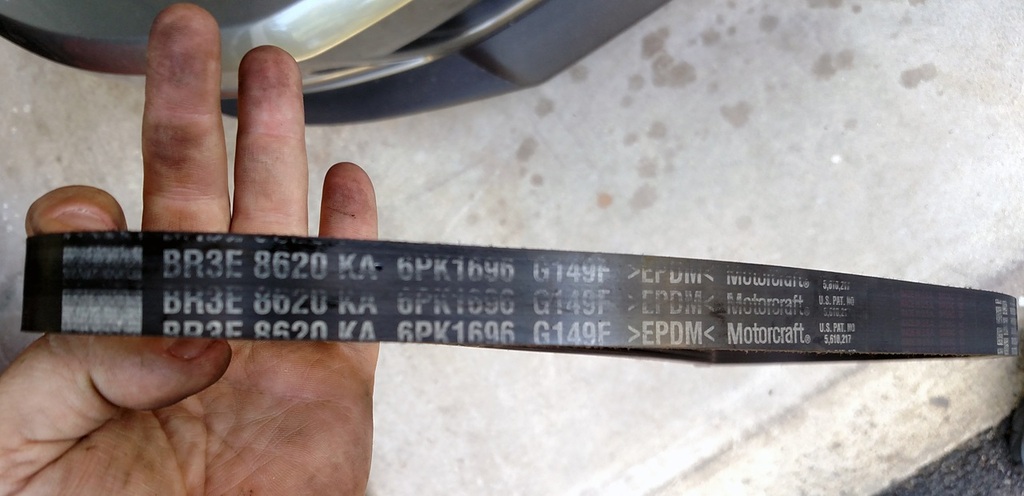
The alternator/front serpentine belt, original OEM part at the current 37k miles, being replaced mostly because it has to be removed anyway for the blower belt to be replaced:
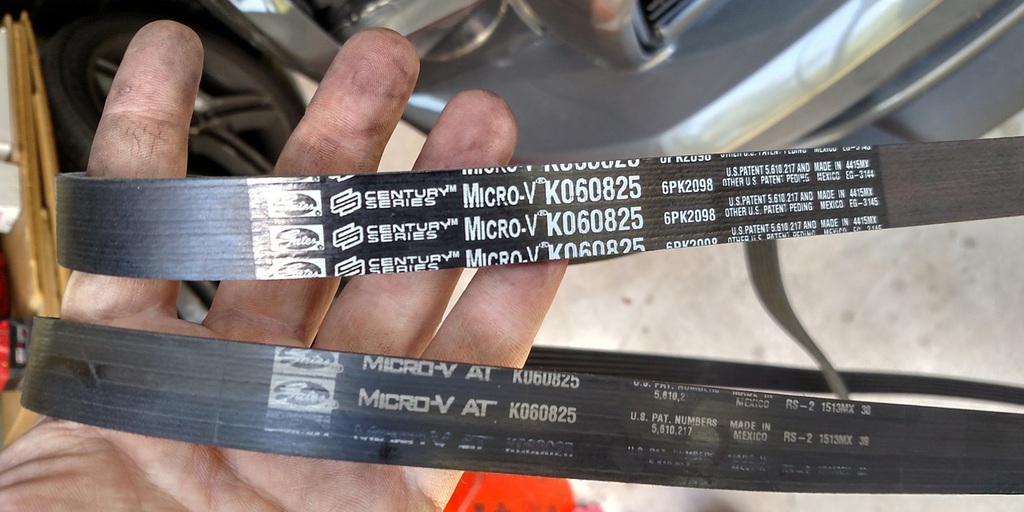
The old and the new blower belts. The old blower belt was starting to show a really odd wear on half of it, and it was sticky, this was the half that was leaving gummy residue onto the pulleys:
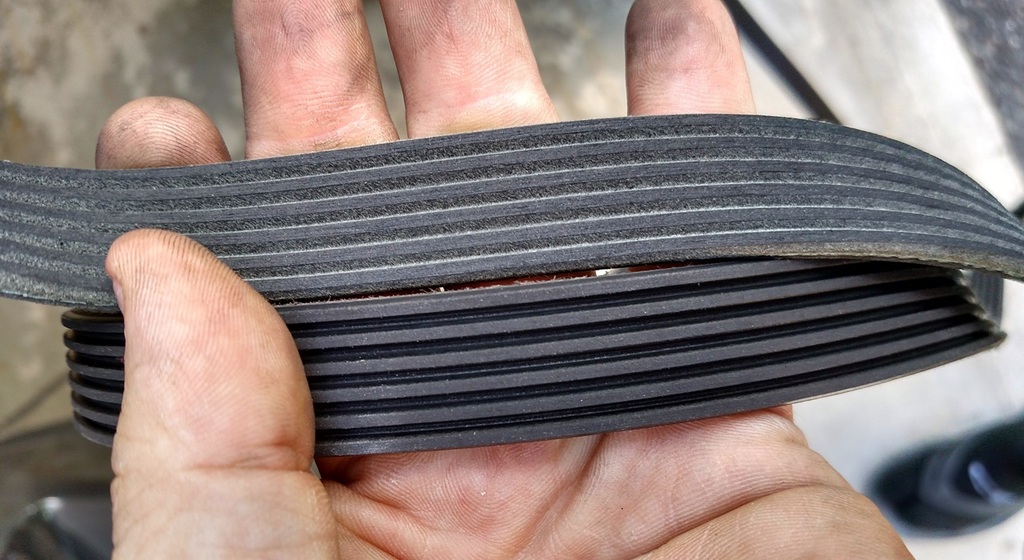
The belts removed, the top silver idler pulley clearly shows the belt residue that the blower belt was leaving on it:
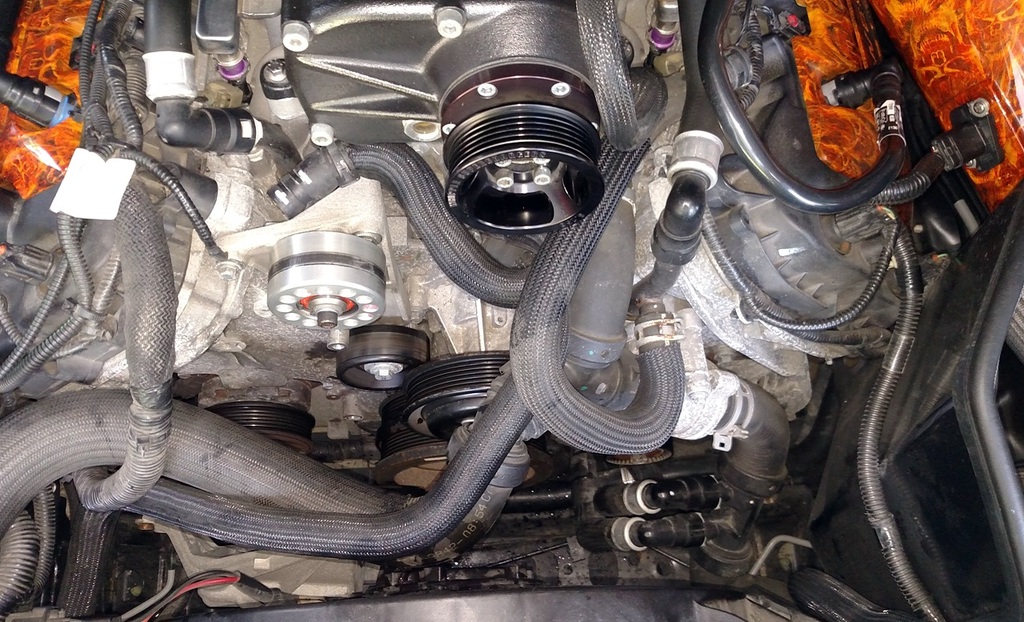
Pulleys cleaned and new blower belt routed, aluminum tensioner bracket reinstalled and torqued to 25 Nm (approx 222 in-lbs):
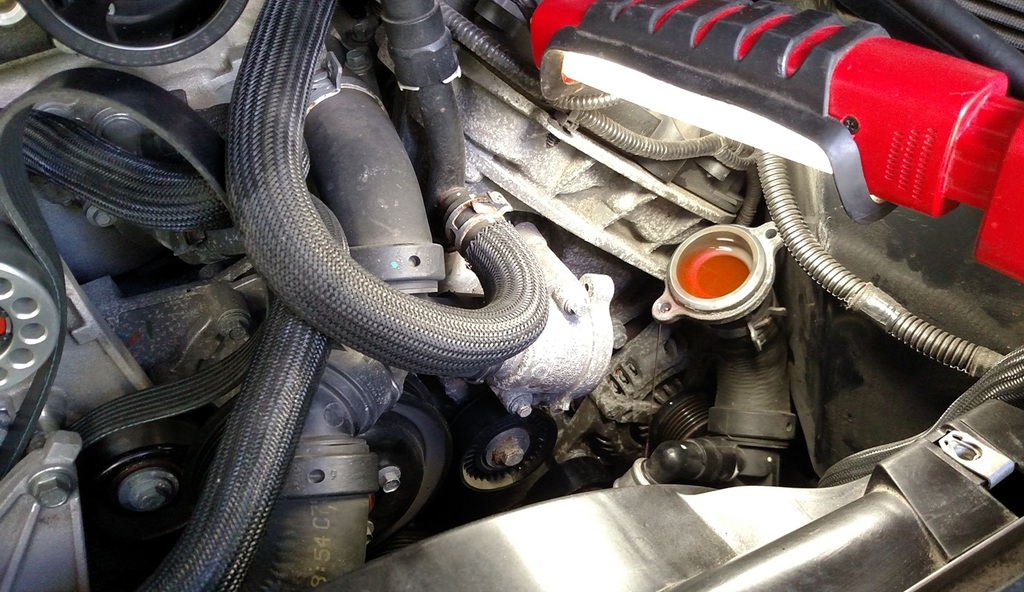
Thermostat-replacement. This caused a bunch of fluid to leak out, almost no way to have it not do that because of where the t-stat is located. I had a pan under the car that caught most of it.
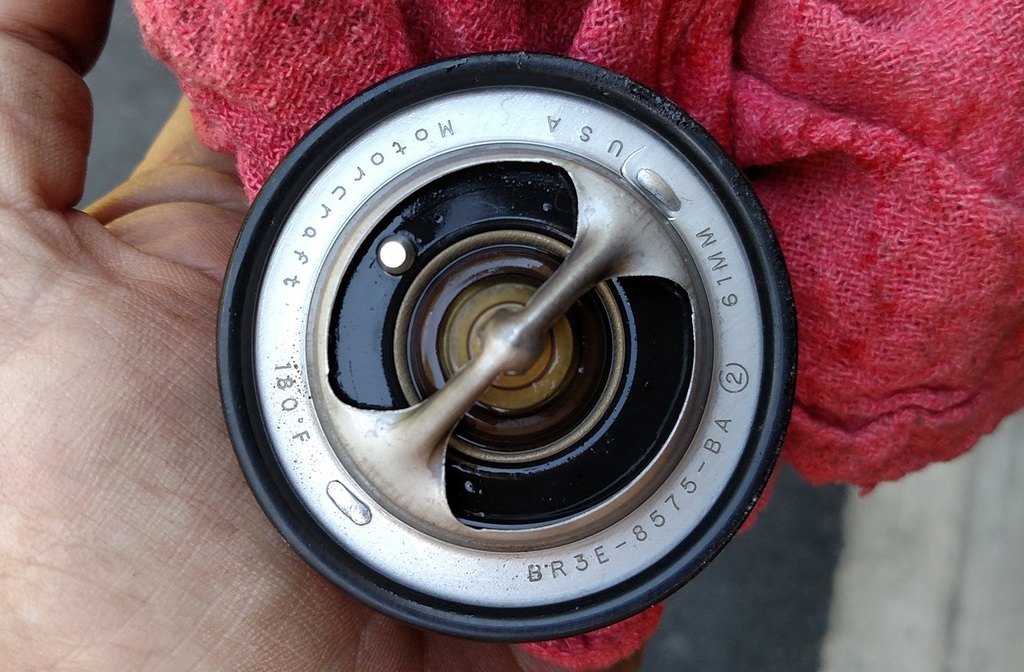
The factory 180-degree thermostat:
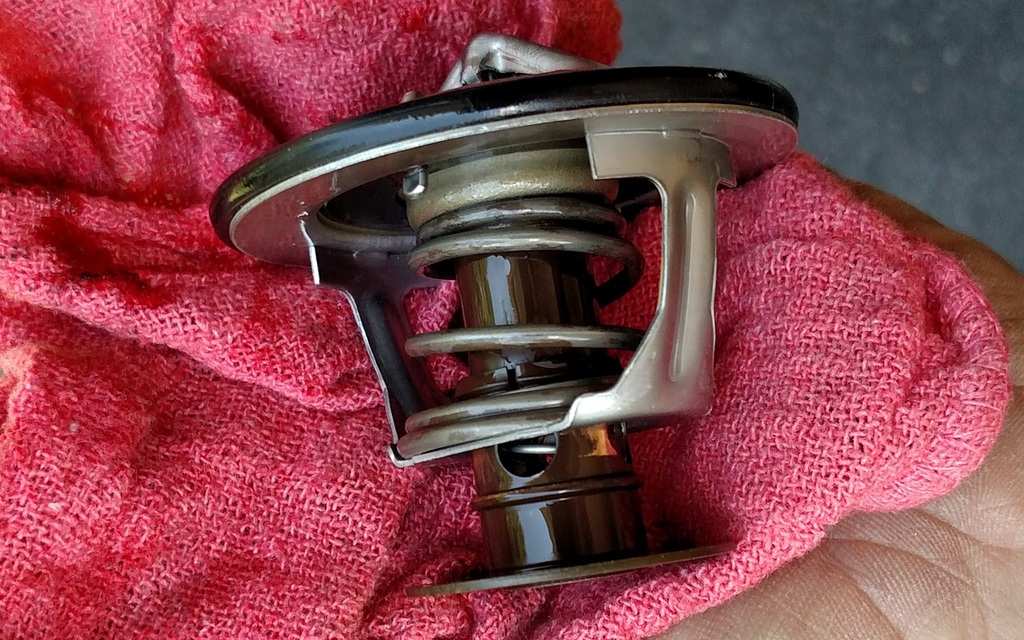
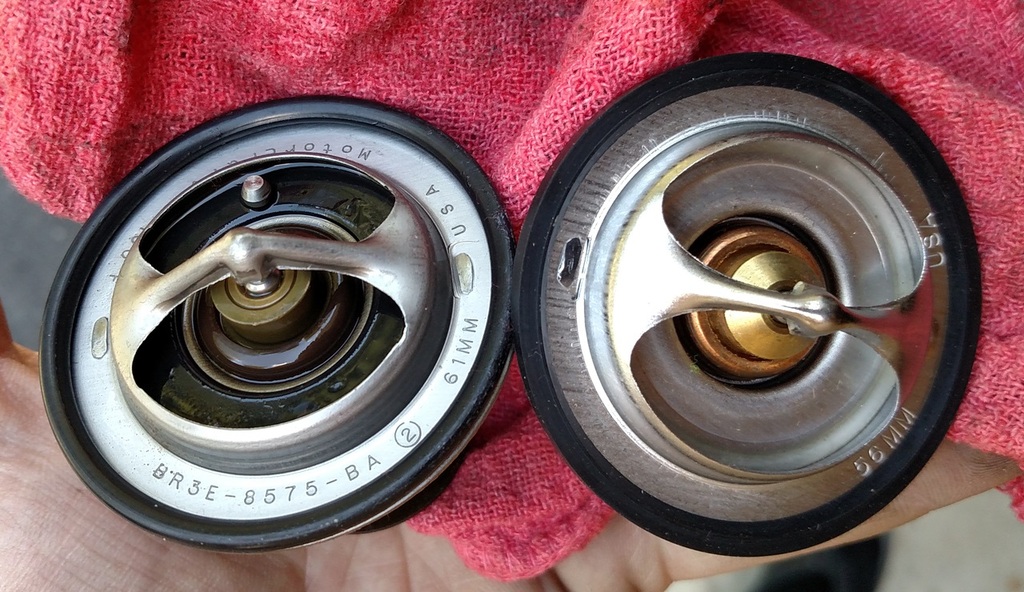
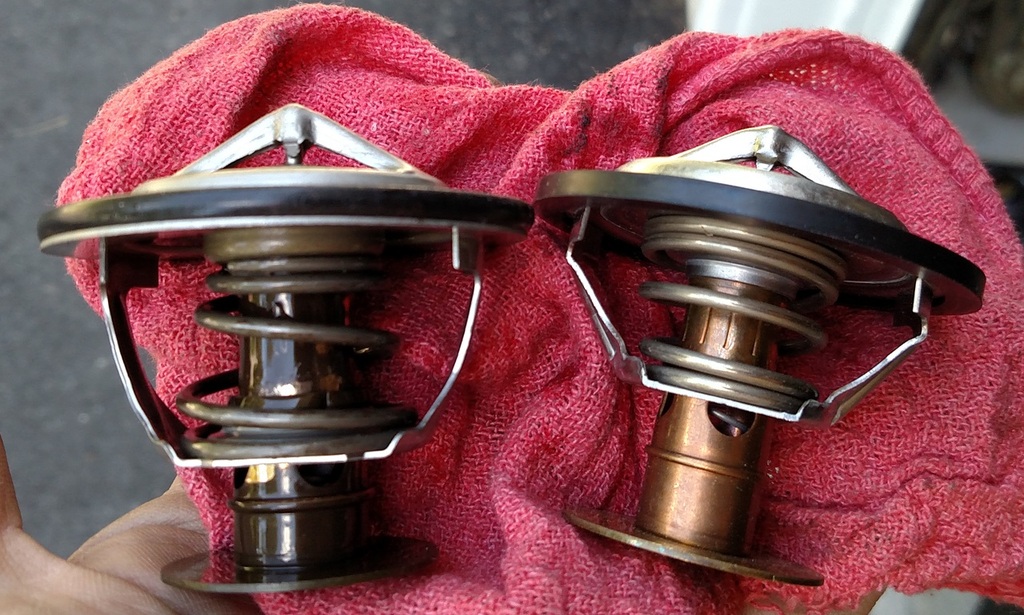
And the factory t-stat next to the new 170-degree Reische t-stat:

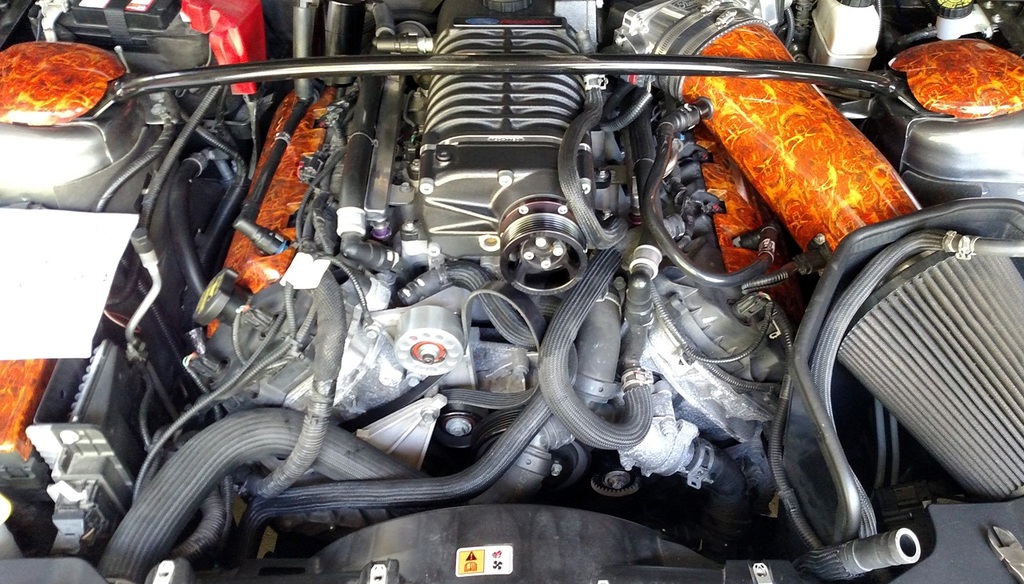
The way it looked at the end of the day yesterday, with the engine coolant tank installed and connected, but not re-filled yet, just in case I have to take it apart again for some reason:
Last edited by Gabe; 8/5/16 at 06:36 AM.
8/5/16, 12:44 PM
#413
Cobra R Member
Join Date: September 22, 2012
Location: Ontario, California
Posts: 1,691
Likes: 0
Received 17 Likes
on
17 Posts
Originally Posted by 13GetThere
Gabe, thanks for the feedback on the Watts link.
A Cortex Racing Watts link is the first on my list of suspension mods.
A Cortex Racing Watts link is the first on my list of suspension mods.
8/5/16, 01:14 PM
#415
Legacy TMS Member
Thread Starter
No additional noise that I noticed.
8/5/16, 02:40 PM
#416
Roush Forum Stalker
Looks good Gabe!
How much cooler with the new thermostat keep the temps? About 10 degrees cooler?
Gabe, have you thought about doing any internal work for your engine as you are getting up there in hp and tq? I'm assuming you're approaching the 600rwhp mark now.
How much cooler with the new thermostat keep the temps? About 10 degrees cooler?
Gabe, have you thought about doing any internal work for your engine as you are getting up there in hp and tq? I'm assuming you're approaching the 600rwhp mark now.
Last edited by Stage_3; 8/5/16 at 02:49 PM.
8/6/16, 11:20 AM
#417
Legacy TMS Member
Thread Starter
Had her running a while, the coolant temp was staying around 185-186 degrees.
I still have to adjust the fan settings for the new t-stat, but that's a great temp, much better than 200 or so where I think it was with the stock t-stat.
And yeah, I'd love to do a forged bottom-end, but the funds just aren't there right now.
Hopefully once we get our business rolling I'll be able to do something about it.
Got the car all buttoned up this morning.
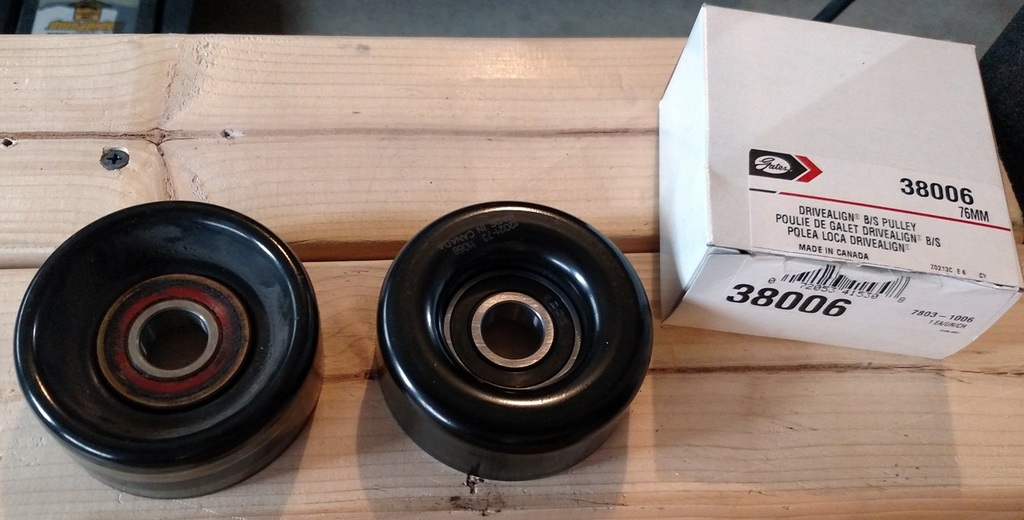
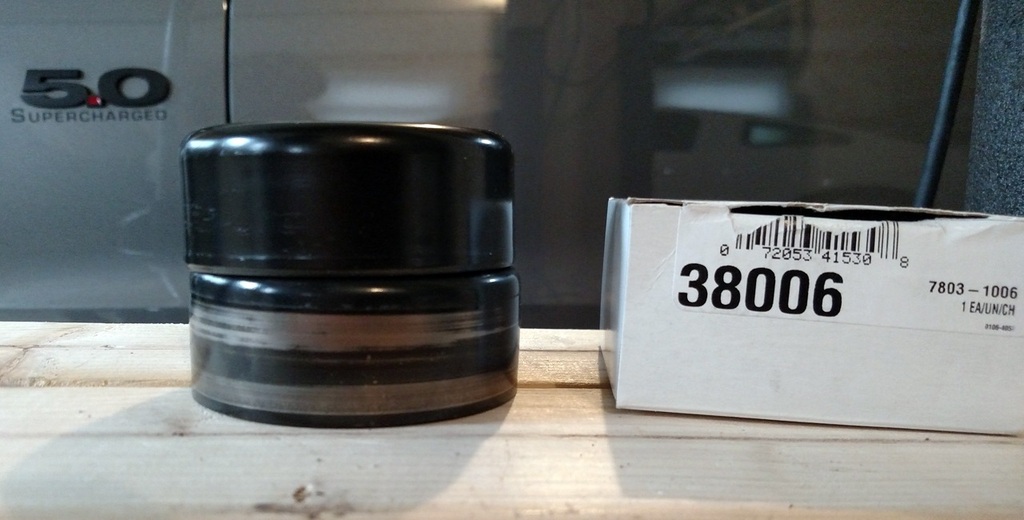
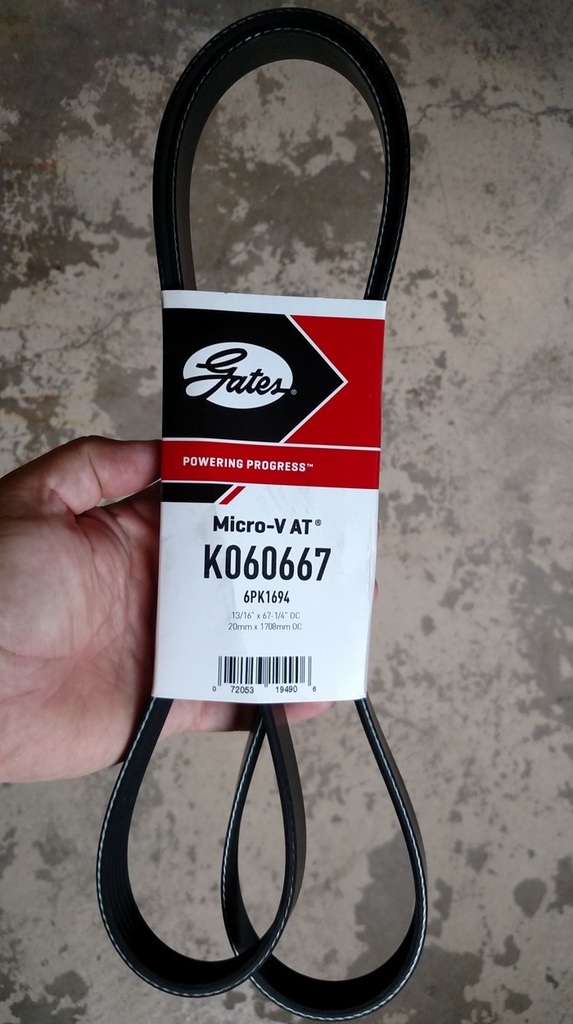
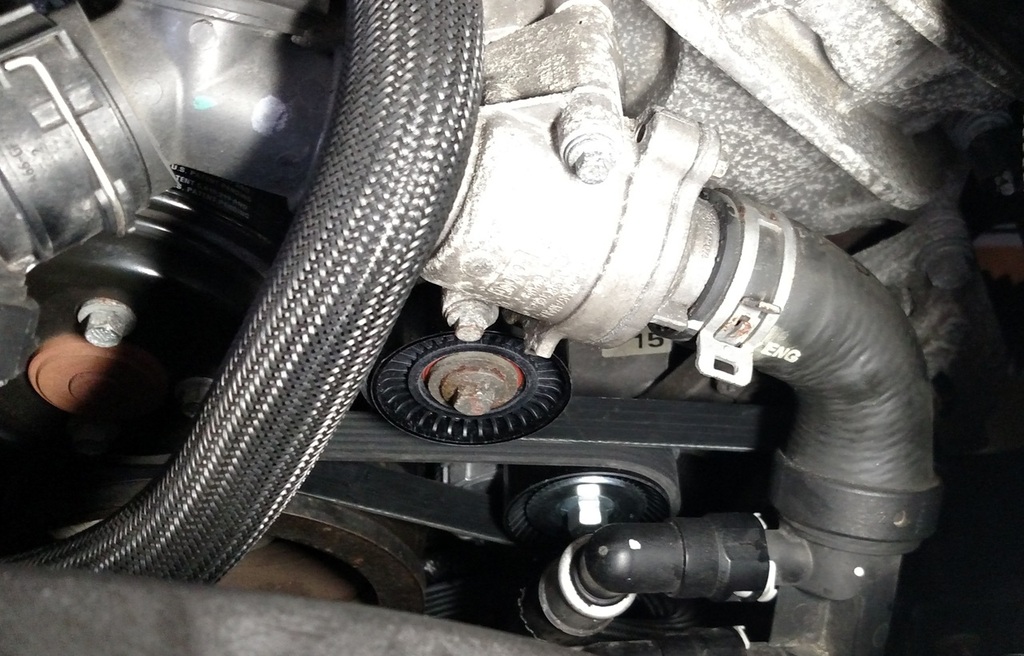
Quick trip to the local O'Reilly Auto Parts, got a new main belt (water pump and alternator belt), and a new idler pulley to replace the Thump Racing idler that I was never happy with.
$18 Gates pulley spins much better than the $140 Thump pulley:
And she's now running and looking great:
Gates idler pulley info, next to original Whipple kit's pulley:
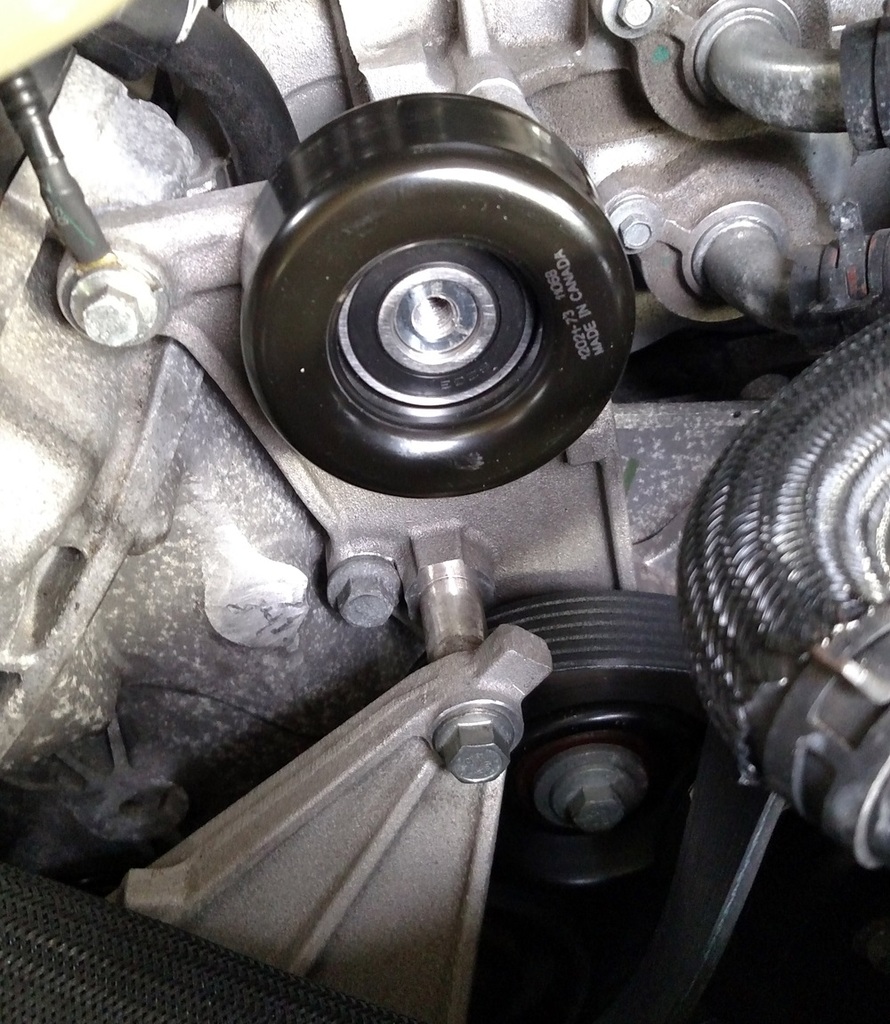
Gates idler installed:
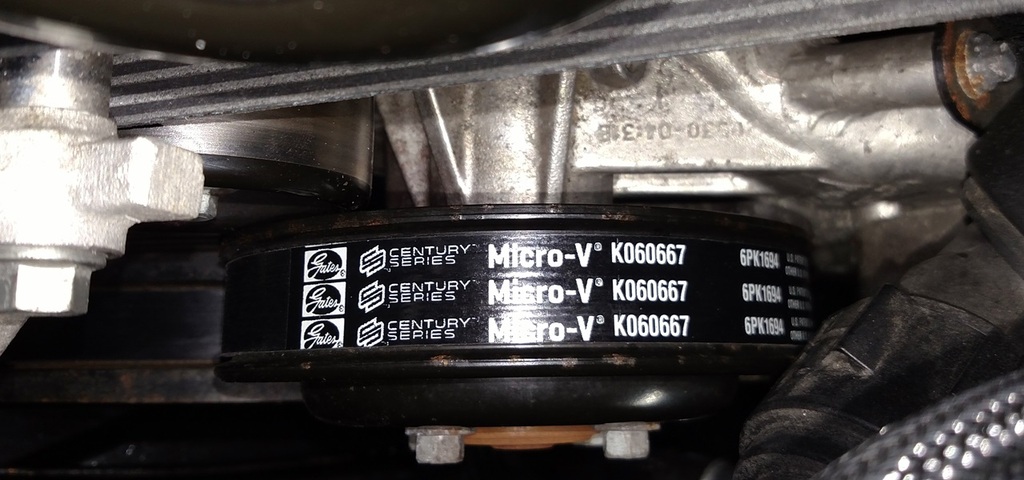
New Gates main-belt, replacing the Ford BR3Z-8620-D belt:
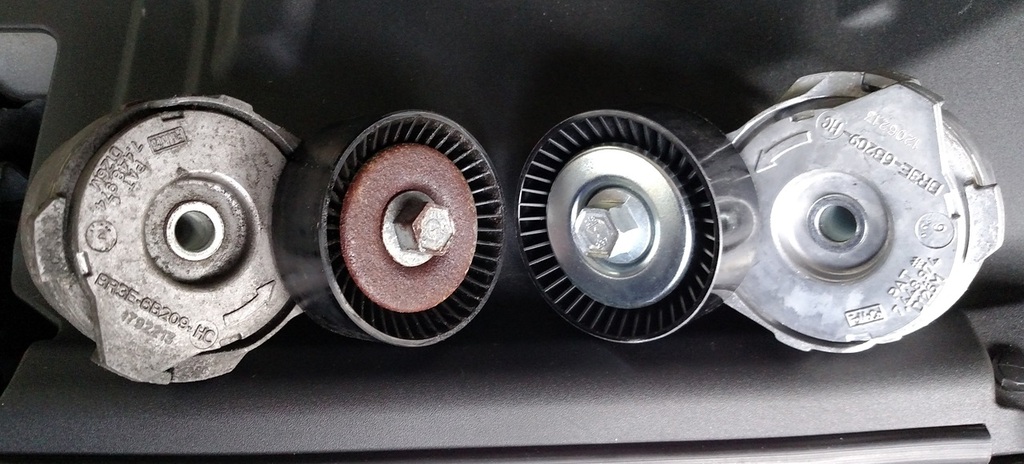
New Ford idler and tensioner installed:
Old and new tensioners, part # BR3Z-6B209-H:
And all done:
 8/6/16, 01:59 PM
#418
Roush Forum Stalker
Looks good man!
Are you going to try to get your money back for the Thump pulley? That was a new pulley, correct? 140 bucks is a lot of money.
Are you going to try to get your money back for the Thump pulley? That was a new pulley, correct? 140 bucks is a lot of money.
8/6/16, 02:19 PM
#419
Legacy TMS Member
Thread Starter
Thanks, and yeah, sent them an email.
We'll see what they say.
We'll see what they say.
8/8/16, 03:07 PM
#420
Legacy TMS Member
Thread Starter
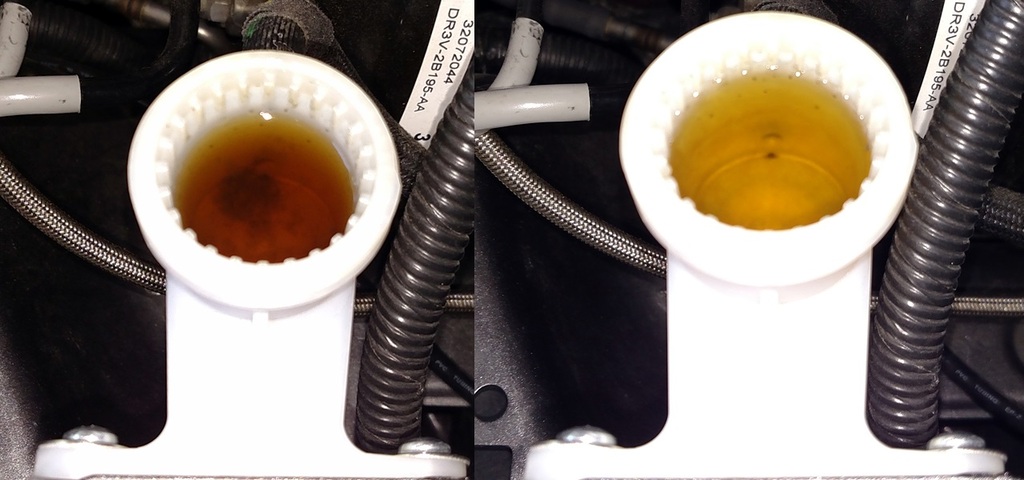
Today I flushed out the brake fluid in my car, got rid of the 4-year-old crap and put in some fresh Motul RBF600.
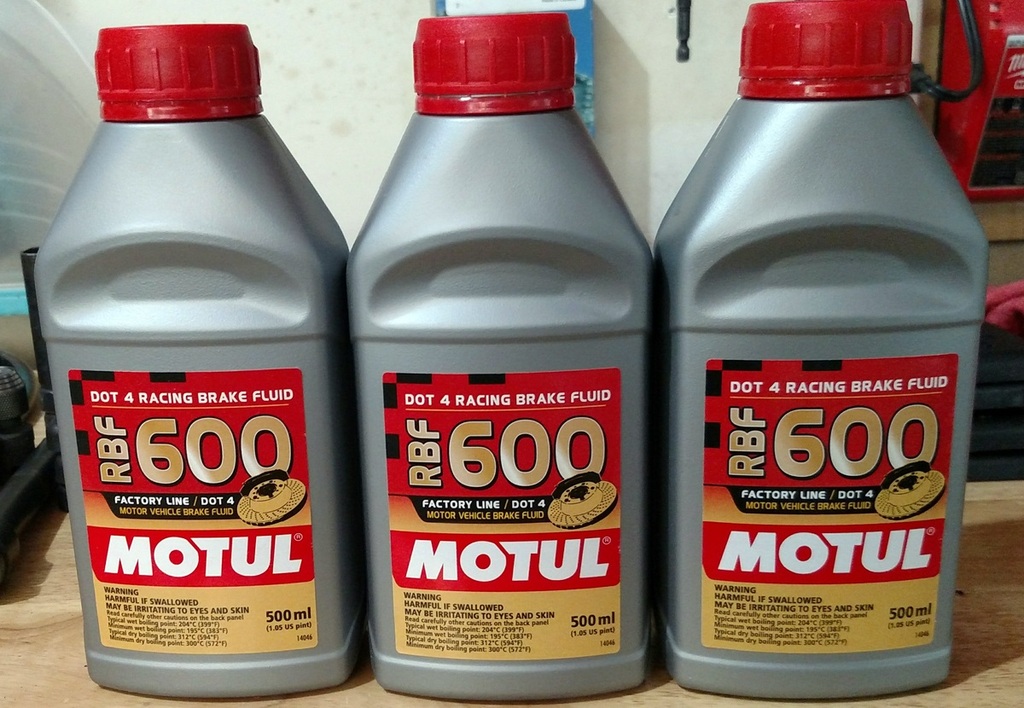
Quite surprised how cloudy and somewhat dark the old stuff was.
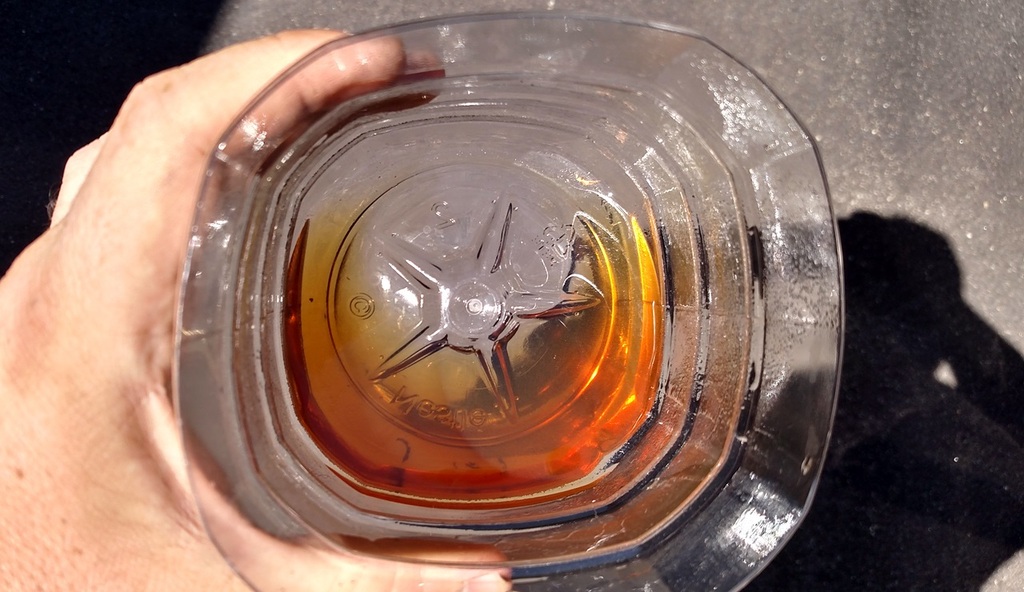
New fluid in the reservoir:
New fluid in the brake reservoir, old fluid in the clutch reservoir:
Also, using an old turkey baster I sucked out whatever I could out of the clutch fluid reservoir and re-filled with the same new Motul RBF600 stuff.
I will do the suck/refill procedure a few more times until I can consider that flushed.
The difference between the old and new clutch fluid, as it looked/looks in the reservoir: