
Performance And Tech
 10/12/07 | 10:26 PM
#721
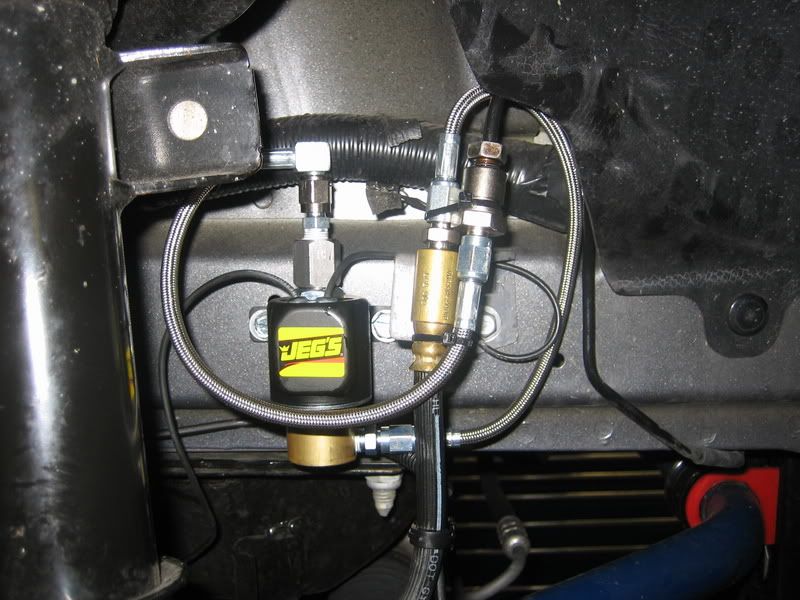
AND heres another way to install it
10/12/07 | 10:31 PM
#722
Got some info on bleeding the breaks... need to get some DOT 3
Stock fluid is DOT-3. Unless you are going to drain out the existing fluid - I'd stick with that rather than mixing them...
To bleed, get a bleed kit (small/clear hose that fits over the bleed valve and a cup to catch the fluid). Autozone, Sears, etc... will have these.
On each brake caliper, you will find a rubber nipple - pull it off to expose the bleed valve - put the hose on and loosen the bleed valve/screw until fluid flows out (do not remove the screw/valve all the way).
Once fluid starts coming out - stop and then have someone pump the brakes until there are no bubbles in the fluid.
tighten the valve and reinstall the nipple (not too tight or you will crack/strip it). Make sure the brakes are nice and firm and the pedal does not drop to the floor with sustained pressure from your foot.
Make sure to top-off the brake fluid reservoir afterward.
Oh and you might want to take a look at the bleed valve before you buy the bleed kit - I have seen some that have small hoses that won't fit over the valve...
10/12/07 | 10:37 PM
#723

haha i remember doing that on my dads old fox... i know how to do that! i feel so special! lol
10/13/07 | 12:45 AM
#724
Here is someone that used the Summit solenoids and made their own kit.
http://i20.photobucket.com/albums/b2...GE_00072-1.jpg
another do it yourselfer


Don W gives a little isight on pins?? done know what these are
Pin #30 goes to a 15 amp fuse the other end of the fuse goes to the battery.
Pin #87 goes to the solenoids with a 15A inline fuse.
Pin #86 goes to switched power.
Pin #85 goes to one prong of the safety switch. Another prong on the switch goes to ground.
http://i20.photobucket.com/albums/b2...GE_00072-1.jpg
another do it yourselfer
Don W gives a little isight on pins?? done know what these are
Pin #30 goes to a 15 amp fuse the other end of the fuse goes to the battery.
Pin #87 goes to the solenoids with a 15A inline fuse.
Pin #86 goes to switched power.
Pin #85 goes to one prong of the safety switch. Another prong on the switch goes to ground.
10/13/07 | 01:06 AM
#725
This is Donw again
This pic shows where I got power (both switched and constant). I used the "Add-a-Circuit" things. Slots "A" and "C" are switched power, and slot "B" is constant 12V power (battery).

This pic shows where I got power (both switched and constant). I used the "Add-a-Circuit" things. Slots "A" and "C" are switched power, and slot "B" is constant 12V power (battery).
10/13/07 | 06:33 AM
#726
NPT Fittings are cone shaped on the end and the lines should be concave on the inside to mesh male and female together to make for a tight fit. They are recommending the teflon type thread sealant to make sure it seals if you do not use NPT style lnes with your solenoid.
10/13/07 | 05:23 PM
#727
FINALLY GOT MY TUNE FROM DOUG FOR THE JLT CAI!!!!!!! Only took a week and a half.
10/13/07 | 05:46 PM
#728
Well at least you have it. As I recall you don't yet have posession of the JLT so what's the diff?
10/13/07 | 05:47 PM
#729
Sweeeeetage... Everything else working ok?
10/13/07 | 07:13 PM
#730
Well at least I have the tune hehe... more than I can say for yesterday...and the day before and the day before. Paul everything so far is working fine....
Thanks to David and Paul for your help with the line locks... You guys are awesome... well sorta... you guys could use some botox hehe then you would be awesome
Thanks to David and Paul for your help with the line locks... You guys are awesome... well sorta... you guys could use some botox hehe then you would be awesome
10/14/07 | 10:08 AM
#731
oh did you guys install that line lock? did it go together ok? jarrod have you tested it yet? lol
10/14/07 | 10:29 AM
#732
Installation complete. Test complete. Jerbear now can lock the front wheels and burn rubber.
10/14/07 | 10:44 AM
#733
Yup!! I tested her again last night for Cassie... she, in a sarcastic voice, was like Wow that neat. hehe Before I wasnt really burning rubber I was sliding my tire on the street. I now SMELL burning rubber
 Line locks are like a saying from a gospel song..... was blind now I see hehe
 10/14/07 | 03:35 PM
#734
10/14/07 | 06:16 PM
#735
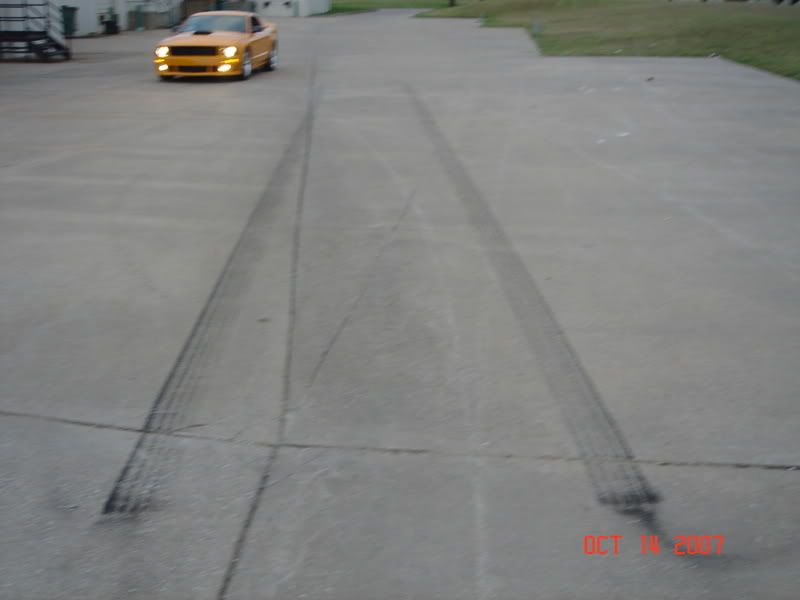
FOR YOUR VIEWING PLEASURE hehe Had some fun with the line locks today.
http://s137.photobucket.com/albums/q...t=MOV01649.flv
http://s137.photobucket.com/albums/q...t=MOV01649.flv
10/14/07 | 06:27 PM
#736
Very interesting. THere was clearly a puff of smoke from your passenger tailpipe. Looks like you are in need of a new motor
10/14/07 | 07:01 PM
#737
Look again... That's not smoke... That's rubber that built up on the front side of the tire... when he started moving forward he spun through it and thus sprayed it like dirt...
10/14/07 | 07:02 PM
#738
I PM'd him
10/14/07 | 07:51 PM
#739
bueno!
10/14/07 | 08:53 PM
#740
Yeah I thought it was smoke at first too, but it was power... there was a crap load of it sprayed all over the concrete after I spun forward.... My twin is holding the camera... he wanted to see them in action. Needless to say He now wants to complete his cobra motor hehe