
07 AC Controls


Cobra R Member
Joined: September 26, 2006
Posts: 2,019
Likes: 5
From: East Moline, IL
'07 ones should be on the way shortly. Here's my '05 ones I just received today. Not the best picture inside. Just snapped one off real quick. No time to clean up. I tore into my '07 and got the ***** off, only to realize these were '05 *****. Whoops.


Legacy Tms Member
Joined: January 9, 2005
Posts: 2,037
Likes: 2
Cool guys, glad that things are going well for the 07 owners!
We have been made aware of a possible problem on the 05 ***** that are anodized finishes, where the clip can come loose and chase down the bore, due to the step not being there that is supposed to be. Anyone who received a set of 05-06 ***** this week that experiences this, we will send you out a special bore reducer that will solve this issue in about all of 10 seconds... otherwise, they can be shipped back in to us and we'll install them for you. The chrome pieces are not susceptible to this, as they do have the proper step in the bore - not sure if there was a bad tool or what happened that it got by us, but we want to make sure everyone gets squared away on this. All 05-06 orders that came in since yesterday will be held until early next week when we can have enough reducers machined to take care of them, and we will go kill whoever measured the tools and didn't notice the diameter was off...
Meanwhile, 07+ is looking good, and I'm glad that the "easy" install method is working without issue. Method #2 does work, but yes, it is a bit long - I know, as someone had to do it to photograph the work! It's actually cool that everyone is starting to call and ask "but I thought it was impossible because xxx said they couldn't make them" - well, obviously it's not, you just have to want to do it!


Legacy Tms Member
Joined: January 9, 2005
Posts: 2,037
Likes: 2
Chrome 05-08 is all in one batch at the plater - like I said we expected it Friday, but it didn't arrive, so hopefully in the next couple of days we will get them all back and be able to start getting them together to go out.
Cobra R Member
Joined: September 26, 2006
Posts: 2,019
Likes: 5
From: East Moline, IL
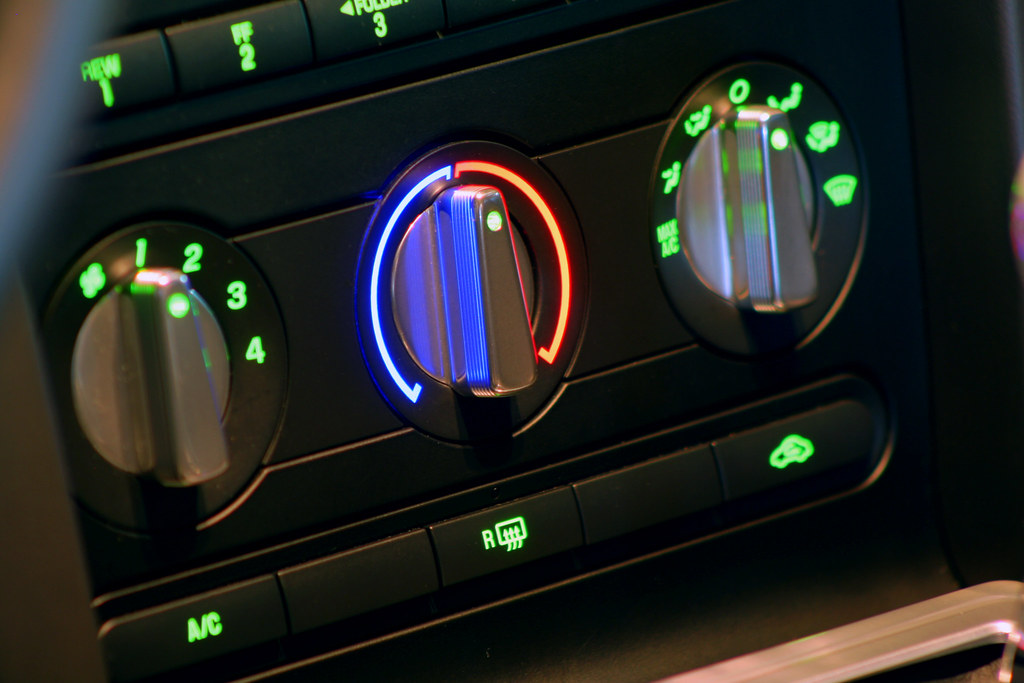
Got my '07 polished and satin anondized ones in. Very simple using method 1. Here's some pics:
*edit* Cleaned up the pictures and changed the color profile - print quality pics sent to your email Marcello.


*edit* Cleaned up the pictures and changed the color profile - print quality pics sent to your email Marcello.
Legacy Tms Member
Joined: January 9, 2005
Posts: 2,037
Likes: 2
They all have fiber-optics, and all look the same as the ones pictured in this thread. The difference is in attachment methods, as the 05-06 is different than the 07+ on the back half.
We also have red F.O. as an option, if you want to do a little different look.
We also have red F.O. as an option, if you want to do a little different look.
Mach 1 Member
Joined: October 20, 2005
Posts: 874
Likes: 0
From: Honolulu, Hawaii
it seems that this is because the part you grab on the oem **** does not stick out past the **** housing and the shr one does. and it is this part that is contacting the plastic trim around it. the quality of the part is great, but i feel a little sick right now. it is pretty minor damage, but i know it is going to bug me for a while just knowing that it is like that.
nothing against shr... i love my rear medallion. but just sharing my experience with my install. at this point, i am regretting this mod.
Legacy Tms Member
Joined: January 9, 2005
Posts: 2,037
Likes: 2
Gary,
My Blackberry was giving me grief at a little after midnight our time, so I got up to see what was making it dance...
I'm looking at an 07 head unit right now on the table, but unfortunately, I only have pre-production ***** laying around here, and will have to look tomorrow to see how production pieces fit to the head unit. We intentionally have the area in question close to the face for asthetics, but it should not rub on the face. I've looked carefully at the photos in question, and can see what appears to be a single mark in Darkfire's image on the center **** on the right side (hard to tell from what), but don't really see it in Alloy's photo (not sure what the color we're looking at is from there). It also is not an issue on my own personal car, the one that gets to be the guinea pig for many of these little toys... and even though mine is a 2005, the area in question is identical between the different part numbers we make for the different model years.
That said, you shouldn't ever not feel good about putting on one of our products. If there's an issue, I want to be the first to know about it, because we're not in the business of making parts that cause you grief. I will go in tomorrow on Sunday and re-measure some random samples of our ***** in different finishes, and see if there are any variations on our end, or if the variation is in the plastic pieces we are mating to (wouldn't surprise me). If memory serves (at this time of evening it may not) I think we had .050+ clearance in the area in question to avoid rubbing, but given the way plastic is molded, this may be something where on a few cars it is not enough (nightmares of the OEM rear center emblem varying by .060 or more to our honeycomb panel come to mind), and there needs to be more of a gap, asethetics or not. If this is the case, it's easy enough for us to do a little "opening up" of the tolerance in question, and at the same time, we'll get you taken care of - I'll be in touch, because none of our products should cause a problem for your car. If the tolerances on the production pieces look good, and this seems more isolated, we'll still be in touch with you, as we appreciate your business and want you to be satisfied, one way or the other.
Ok, 1:30am local time, I'm officially ending tech support for the day We'll be back in tomorrow to report on this at some point in the day.
My Blackberry was giving me grief at a little after midnight our time, so I got up to see what was making it dance...
I'm looking at an 07 head unit right now on the table, but unfortunately, I only have pre-production ***** laying around here, and will have to look tomorrow to see how production pieces fit to the head unit. We intentionally have the area in question close to the face for asthetics, but it should not rub on the face. I've looked carefully at the photos in question, and can see what appears to be a single mark in Darkfire's image on the center **** on the right side (hard to tell from what), but don't really see it in Alloy's photo (not sure what the color we're looking at is from there). It also is not an issue on my own personal car, the one that gets to be the guinea pig for many of these little toys... and even though mine is a 2005, the area in question is identical between the different part numbers we make for the different model years.
That said, you shouldn't ever not feel good about putting on one of our products. If there's an issue, I want to be the first to know about it, because we're not in the business of making parts that cause you grief. I will go in tomorrow on Sunday and re-measure some random samples of our ***** in different finishes, and see if there are any variations on our end, or if the variation is in the plastic pieces we are mating to (wouldn't surprise me). If memory serves (at this time of evening it may not) I think we had .050+ clearance in the area in question to avoid rubbing, but given the way plastic is molded, this may be something where on a few cars it is not enough (nightmares of the OEM rear center emblem varying by .060 or more to our honeycomb panel come to mind), and there needs to be more of a gap, asethetics or not. If this is the case, it's easy enough for us to do a little "opening up" of the tolerance in question, and at the same time, we'll get you taken care of - I'll be in touch, because none of our products should cause a problem for your car. If the tolerances on the production pieces look good, and this seems more isolated, we'll still be in touch with you, as we appreciate your business and want you to be satisfied, one way or the other.
Ok, 1:30am local time, I'm officially ending tech support for the day
We'll be back in tomorrow to report on this at some point in the day.
Cobra R Member
Joined: September 26, 2006
Posts: 2,019
Likes: 5
From: East Moline, IL
I wasn't trying to be careful when installing, necessarily, because I hadn't thought about that black just being a thin coat of paint. Had I been, I'm sure that mark wouldn't be there. It took me a while to find it in the photo. It seems to me this, at least on mine, came from the install. I've turned my ***** at least 10 times and don't have any other marks, so I'm positive mine is from the install. Had you not pointed it out, I would not have noticed. But again, this is just my experience. Yours may be different. I did pull my middle **** off and check it out. That is the only scrape I can find.
Team Mustang Source
Joined: September 16, 2005
Posts: 1,705
Likes: 2
From: Yatta-Abba, AL
well I'm not an engineer, and really can't tell sqwat about 'tolerences'. What I am, though, is **** about my 'toys', and what I do to them. I have no problems with the fittment at all, with any of the *****. We were careful to get out all the little pieces of old plastic, first. And used care in taking them out too. Possibly the mark was from the extraction process used versus the fitment of the new *****. After reading and rereading this, and relooking at the pic's; I spent time in the garage checking over mine. I have zero issues with the fit, or look. Lighting appears right on, in all lighting scenerio's I could come up with. So issue may be also your actual plastic surrounding. Not sure. But you can bet Marcello won't let this rest until he knows your satisfied.
Mach 1 Member
Joined: October 20, 2005
Posts: 874
Likes: 0
From: Honolulu, Hawaii
well darkfiregt, my bad. i just figured you scraped yours from turning the ****. that is what i get for typing and analyzing at the same time. who knows, maybe alloy 07 rn, purposely made his to look like that? idk. could be.
after corresponding with marcello, he offered to help out but i think i am first going to try to grind down the back of my ***** a bit with my dremel. i think that should do the trick. it wont help the damage that is already there, but at least hopefully it wont get any worse.
i enjoy doing business with shr and cant wait to see what they come up with next.

