
Trunk mount Batteries


Thread Starter
Bullitt Member
Joined: January 18, 2010
Posts: 297
Likes: 1
From: Woodland Park, CO
Trunk mount Batteries
There are a lot of ways to go about this, but here's what I came up with awhile ago (like 3 years). I wanted something 'sleeper', so this fits completely under the spare cover (spare doesn't fit over the Baers, so it went) in a custom box that I built out of MDF. This is sealed and vented, but not NHRA legal due to the switch being on the inside. The battery is mounted using the original tray that has been modified. This is a photo taken before the switch was added:
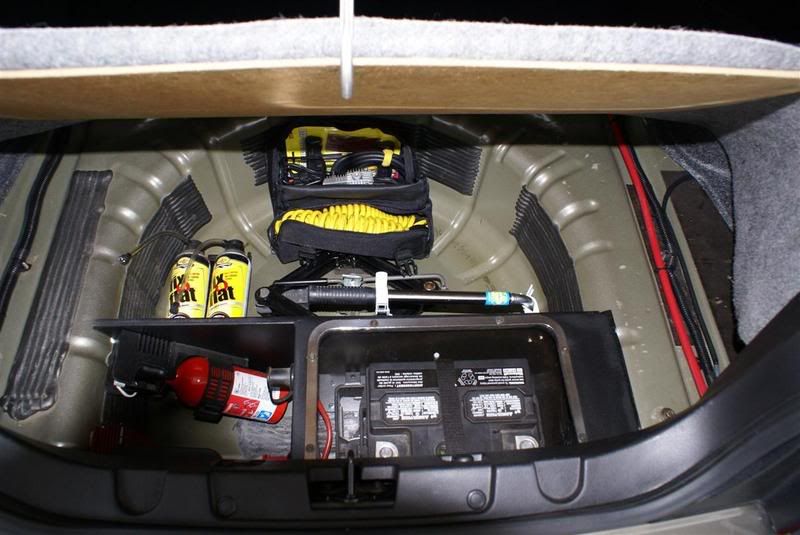
This is the way the box looked prior to painting with spray on bedliner:
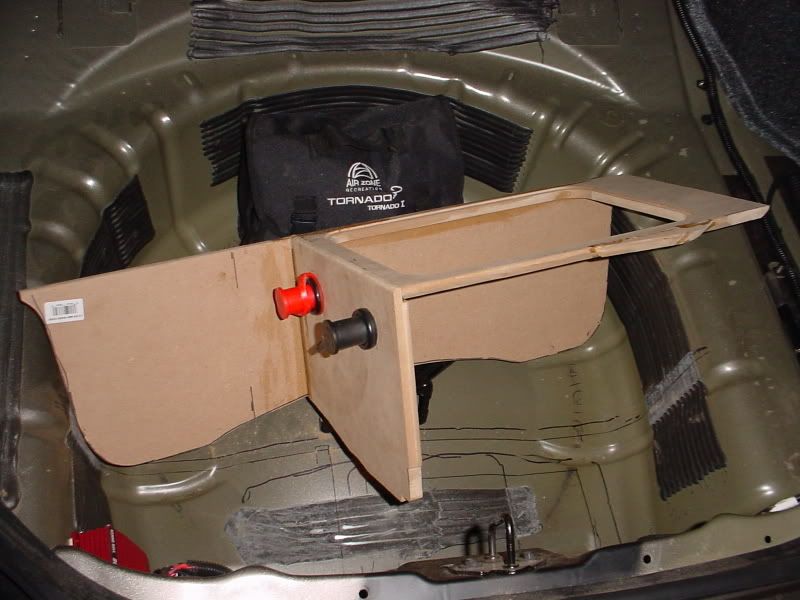
This is the way the box looked prior to painting with spray on bedliner:
Shelby GT350 Member
Joined: June 4, 2006
Posts: 2,244
Likes: 0
From: McAllen, TX
Dude this is awesome, i could mount my stereo battery like this when i finish my system. How did you bolt everything down? And what is that trim around the battery?
Last edited by RedDragon777; Jan 19, 2010 at 12:10 AM.

Thread Starter
Bullitt Member
Joined: January 18, 2010
Posts: 297
Likes: 1
From: Woodland Park, CO
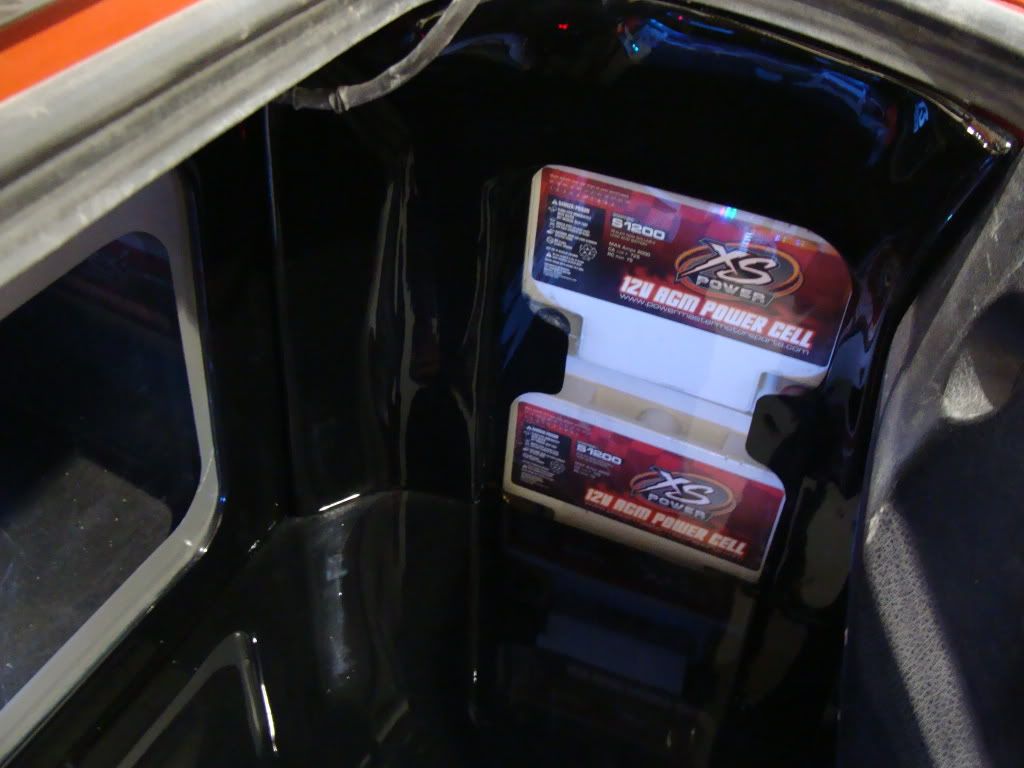
The box itself is glued in with adhesive caulk. The battery tray is bolted through the bottom of the spare well. The trim is a piece of stainless cut from a sheet and polished, holding down a piece of plexiglas.
GT Member
Joined: September 12, 2009
Posts: 183
Likes: 0
Very nice work...good job!
Don't have any pics but our right-lower rear bumper kill switch is being moved to the center faux gas cap area. Not sure how it will look and will still need the on/off markings.
but not NHRA legal due to the switch being on the inside
Shelby GT350 Member
Joined: June 4, 2006
Posts: 2,244
Likes: 0
From: McAllen, TX
I know there is a guy down here that cut a small peice off of his licence plate and fit his switch there and just wrote ON and OFF on his license plate next to the switch but i do not know if that qualifies to be NHRA legal or not.
Thread Starter
Bullitt Member
Joined: January 18, 2010
Posts: 297
Likes: 1
From: Woodland Park, CO
As long as the switch is accessable from outside the car, it's good. I suck at the track (and am not that interested in getting better) so it wasn't a big deal for me. I prefer corners!
Thread Starter
Bullitt Member
Joined: January 18, 2010
Posts: 297
Likes: 1
From: Woodland Park, CO
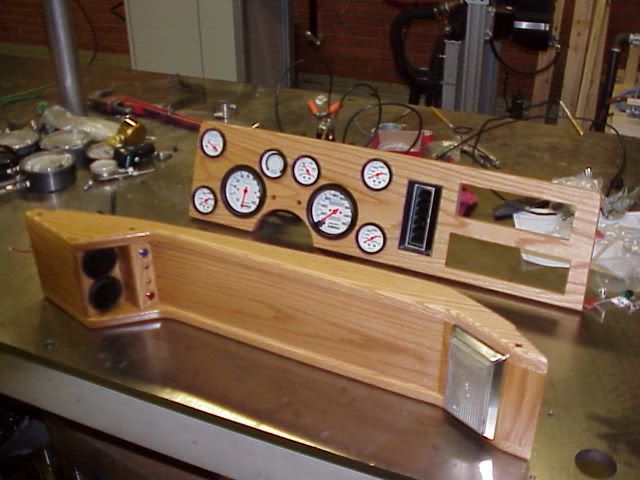
Thanks for the props! The woodwork on this was actually fairly simple compared to some of my other projects. This is the dash and overhead I put together for my Turbo 2.3 Ranger several years back.
Thread Starter
Bullitt Member
Joined: January 18, 2010
Posts: 297
Likes: 1
From: Woodland Park, CO
The negative is grounded in the trunk, the positive is a new cable going all the way to the front. I connected them at the jumper posts in the box. Check my 'Different Rewire Perspective' thread to see under the hood.

Thread
Thread Starter
Forum
Replies
Last Post
austin101385
'10-14 Shelby Mustangs
3
Oct 2, 2015 01:00 PM
PonyMuscletang13
2010-2014 Mustang
4
Sep 29, 2015 09:40 AM