
Sequentials for early S197's..Tons of Pics & Vid


Thread Starter
Mach 1 Member
Joined: October 15, 2006
Posts: 658
Likes: 1
Sequentials for early S197's..Tons of Pics & Vid
So, like most everyone, I've always liked those nifty sequential tail lights. But, there were two things that always kept me from getting em....
1. Cost....If you wanted a nice plug and play, that resembled OEM, it normally costs anywhere from 129.00 all the way up to 179.00. That to me, is crazy. The alternative was.....
2. Splice in kit. These are normally more reasonably priced, but involved the cutting and splicing of several factory wires....
As I'm sure many folks with early build S197's have discovered, I ended up with a pretty nice set of sequentials, and what I consider a bargain price....NOTE**These plug and plays are specifically designed for early build, prior to 10/2005. They are from GT Concepts...
At 79.95, no core charge, and no cut and splice, they are hard to beat. As noted below, install is a breeze, at about 30 minutes or so..
http://www.gtconcepts.net/mustang/0506.htm
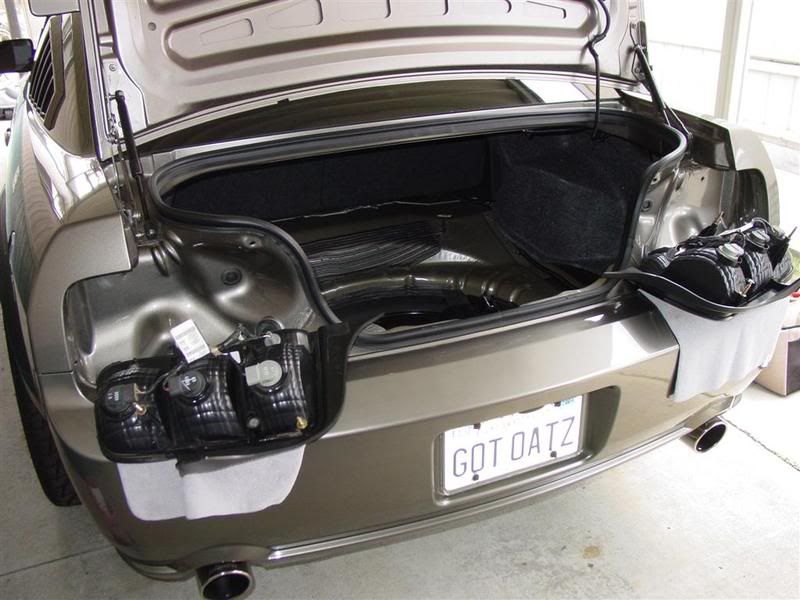
Remove trunk carpet liner
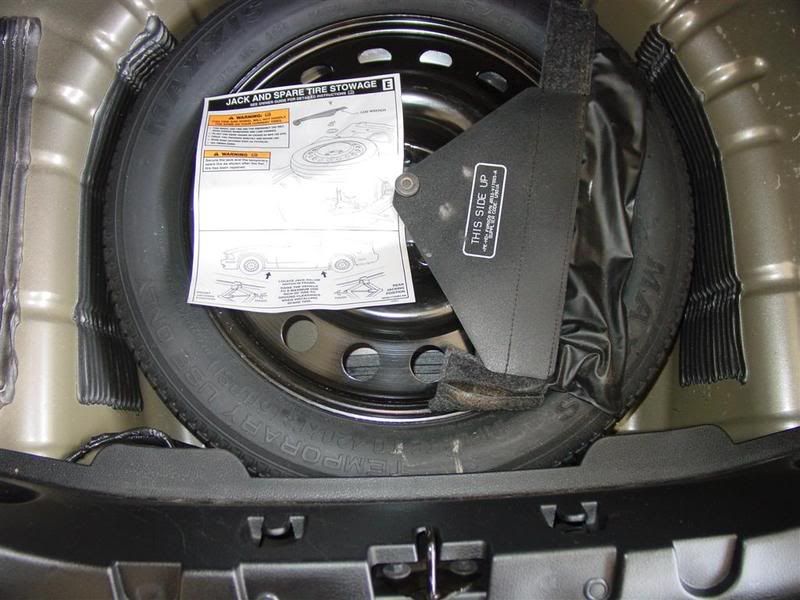
Remove rear plastic tail light protective cover. This entails four traditional push pins, and two torx type screws. Don't fret if you do not have a torx to fit. They are barely finger tight, plastic, and come out easily with a standard slotted screwdriver, or by hand.


Plastic cover removed..
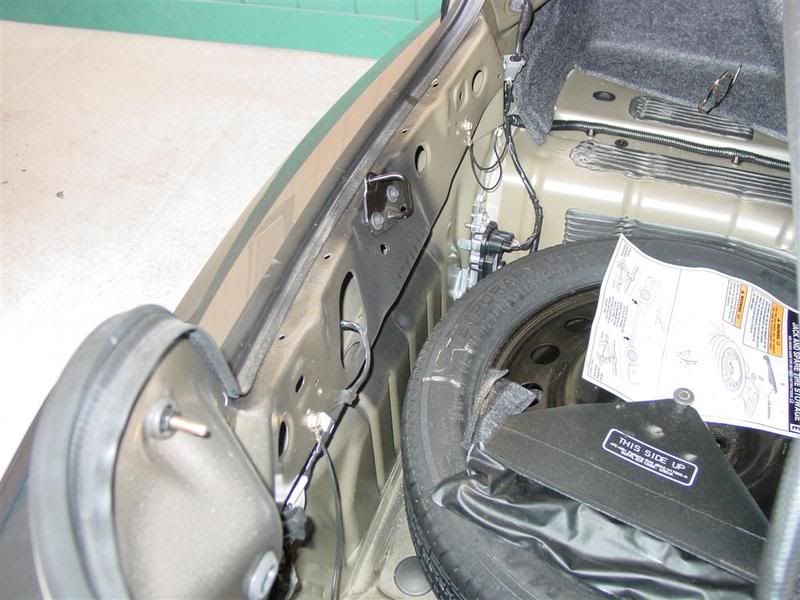
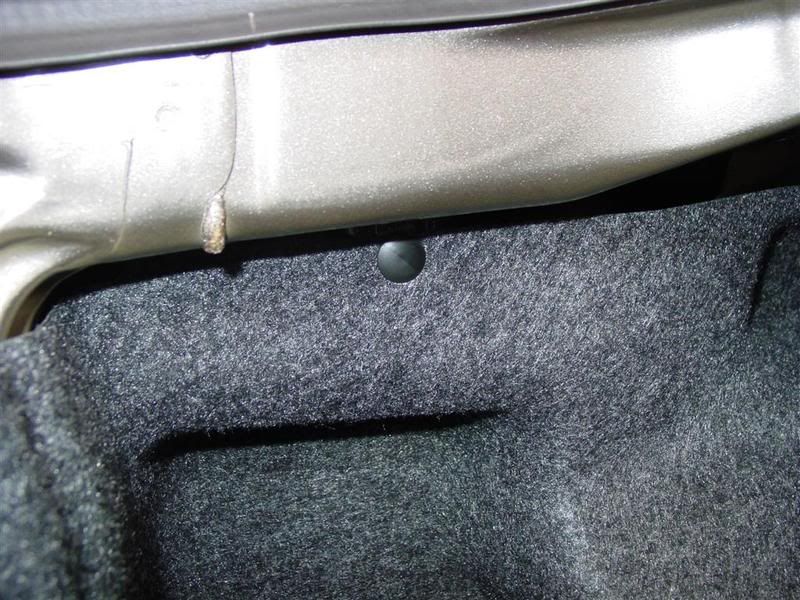
On both sides, remove these additional push pins that hold up the carpeting. This will allow you to fold it forward, in order to remove the tail light nuts..
Remove the three nuts on each side...
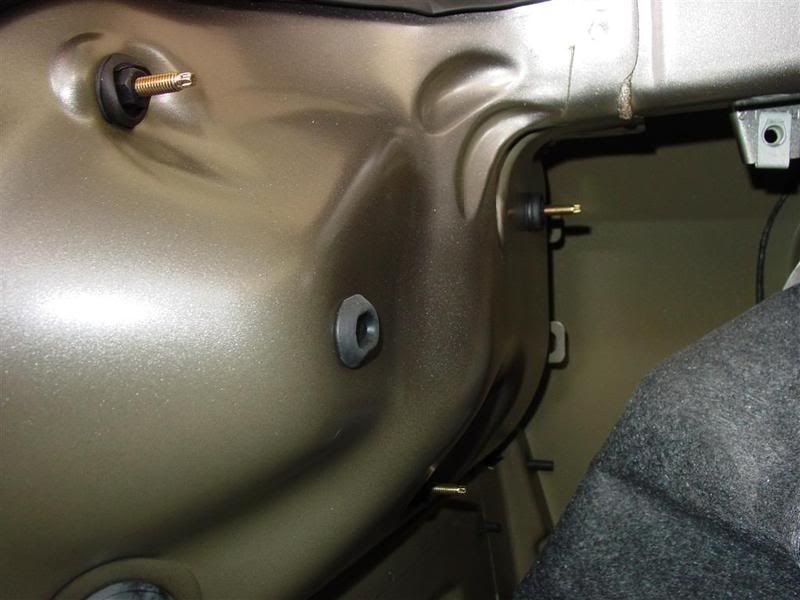
Before removing the tail lights, be sure to protect your rear bumper with something, just in case the lights pop out...

Push the bolts from inside the trunk to remove the tail lights. Carefully rest them on the covered bumper....
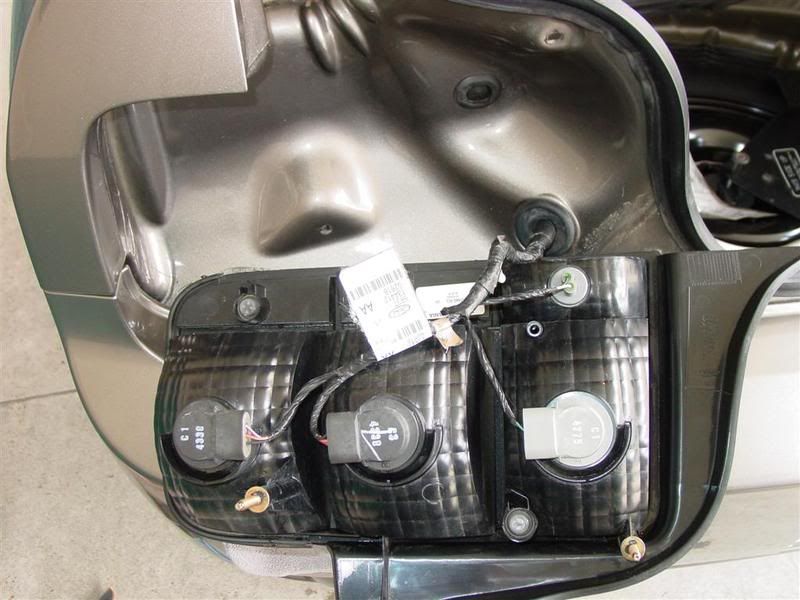
Note that the light socket toward the inside of the rear end only has two wires leading to in, as opposed to three wires as the other two have. I'm not sure, but I believe this is the difference between the early and later build S197's.
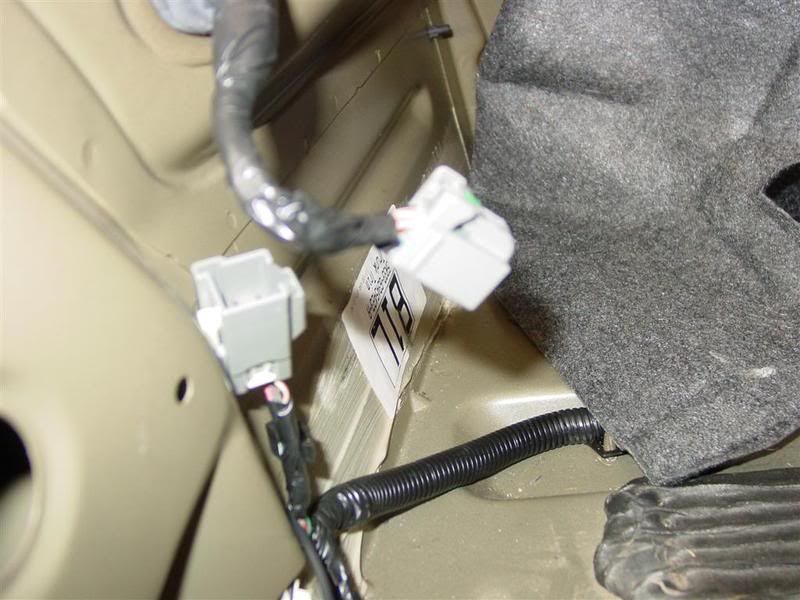
Back inside the trunk, you will be able to see the OEM tail light connector.

Disconnet the OEM connector, by pushing in on the release lever, and pulling the plug apart...
This is what the sequential plugs look like right out of the box...
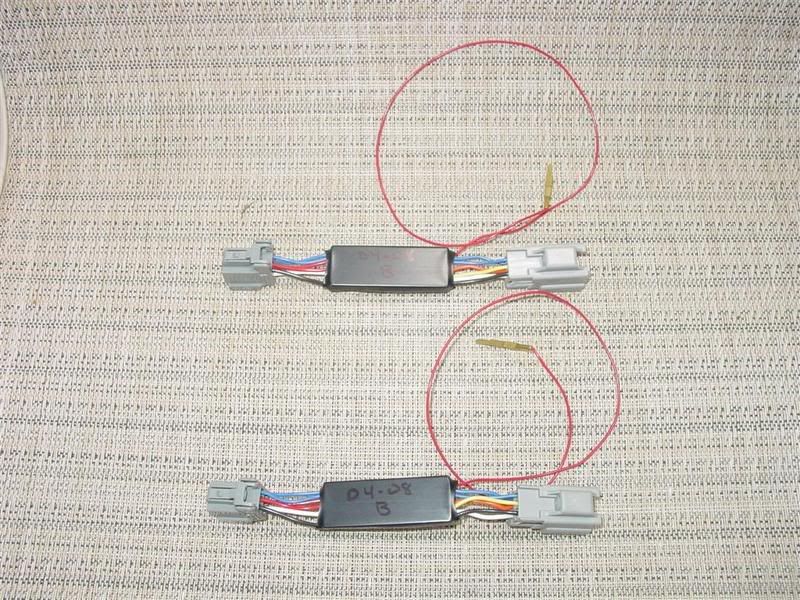
The sequential harness will only plug in one way. You will have one wire dangling loose....
Directly behind the plug, you will see the grommet that leads to the exterior of the car.....

Grommet from the exterior....

Twist and remove the one bulb from the socket, that is closest to the inside of the rear. This will be the one with two wires going to it, not three...

You can cut a slice in the grommet as the instuctions suggest, to feed the one wire through, but I opted to push a pair of needle nosed pliers through the edge of the grommet / wire loom (very carefully) from the exterior, and pull the one loose wire through.
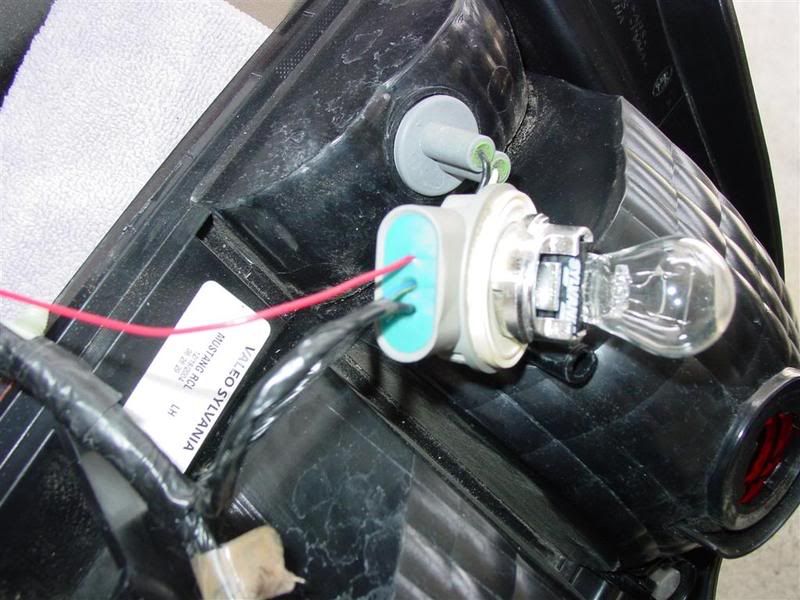
On the base of the one light socket you removed, there is a rubberized base plug with the two factory EOM wires running through it.
Use a small bladed screwdriver, and carefully remove the rubberized base. It pops out quite easily.
After removing the rubber plug, use and exacta knife to cut a slice to accept the extra wire....cut only half way across...
Under the rubber plug, inside the light socket, the two OEM wires are plugged in. There is an empty socket next to the OEM wires. Simply plug the one wire from the sequentials into the one vacant slot, and replace the rubber plug that you sliced...
Re-Install the light socket into the tail light housing. Re-install the tail light housing, holding it in place with one of the nuts inside the trunk. Repeat these same steps on the opposite side.

After completing the other side, and before completely putting everything back together, including the remaining two tail light nuts, verify the sequentials are working properly, by activating the emergency flashers, and or the turn signals. If all is well, reverse steps and put everything back together. If for some reason they do not function, double check your one wire connection inside the light socket. Mine worked perfectly without any issues....
Here is a terrible video of the finished product. Sorry about the quality, but the only video camera I have is actually built into my still camera....However, you get the idea.....
http://smg.photobucket.com/albums/v310/mvosborn/Sequentials/?action=view�t=Sequentials027.flv
Hope this is helpful for some of the early build owners out there. GT Concepts also makes a complete replacement plug and play for new model S197's, but unfortunately, they are on par with the price of most of the other available sequentials. However, I have found their quality to be outstanding, they are warrantied for life, and their shipping service was super quick....
Enjoy,
Mike
1. Cost....If you wanted a nice plug and play, that resembled OEM, it normally costs anywhere from 129.00 all the way up to 179.00. That to me, is crazy. The alternative was.....
2. Splice in kit. These are normally more reasonably priced, but involved the cutting and splicing of several factory wires....
As I'm sure many folks with early build S197's have discovered, I ended up with a pretty nice set of sequentials, and what I consider a bargain price....NOTE**These plug and plays are specifically designed for early build, prior to 10/2005. They are from GT Concepts...
At 79.95, no core charge, and no cut and splice, they are hard to beat. As noted below, install is a breeze, at about 30 minutes or so..
http://www.gtconcepts.net/mustang/0506.htm
Remove trunk carpet liner
Remove rear plastic tail light protective cover. This entails four traditional push pins, and two torx type screws. Don't fret if you do not have a torx to fit. They are barely finger tight, plastic, and come out easily with a standard slotted screwdriver, or by hand.
Plastic cover removed..
On both sides, remove these additional push pins that hold up the carpeting. This will allow you to fold it forward, in order to remove the tail light nuts..
Remove the three nuts on each side...
Before removing the tail lights, be sure to protect your rear bumper with something, just in case the lights pop out...
Push the bolts from inside the trunk to remove the tail lights. Carefully rest them on the covered bumper....
Note that the light socket toward the inside of the rear end only has two wires leading to in, as opposed to three wires as the other two have. I'm not sure, but I believe this is the difference between the early and later build S197's.
Back inside the trunk, you will be able to see the OEM tail light connector.
Disconnet the OEM connector, by pushing in on the release lever, and pulling the plug apart...
This is what the sequential plugs look like right out of the box...
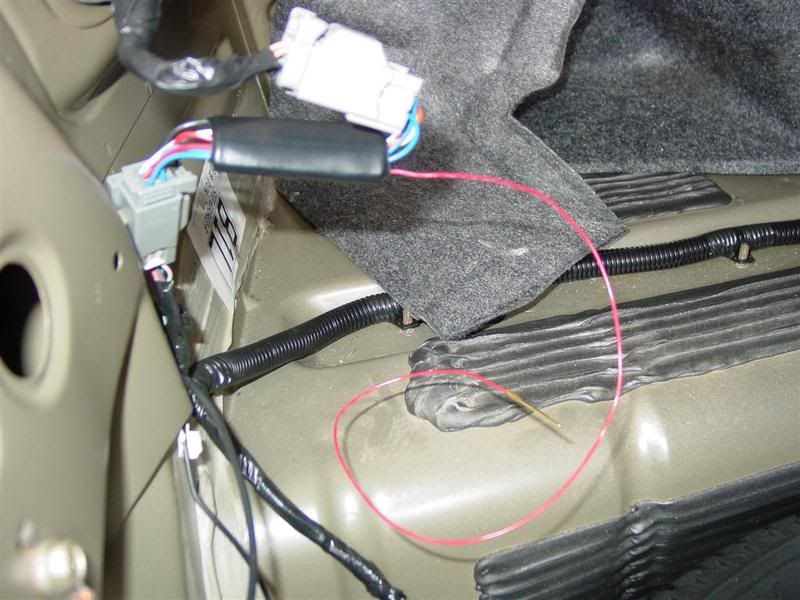
The sequential harness will only plug in one way. You will have one wire dangling loose....
Directly behind the plug, you will see the grommet that leads to the exterior of the car.....
Grommet from the exterior....
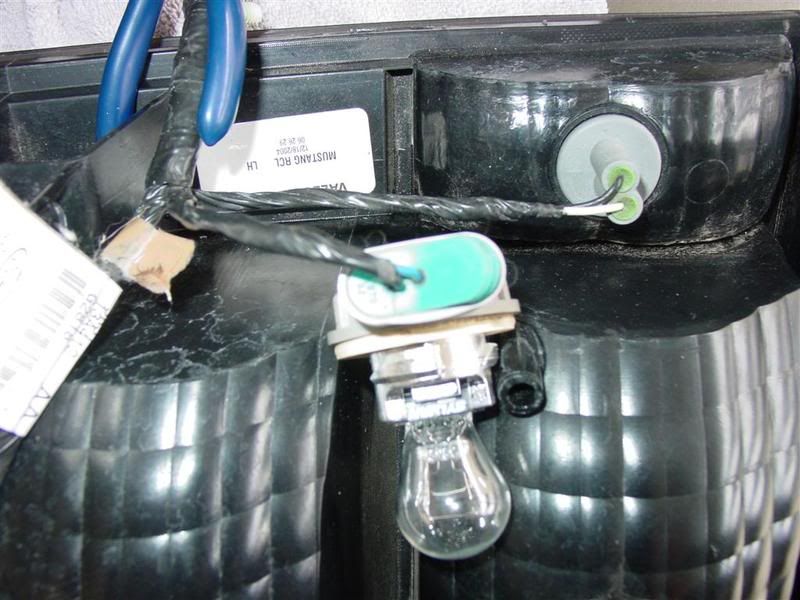
Twist and remove the one bulb from the socket, that is closest to the inside of the rear. This will be the one with two wires going to it, not three...
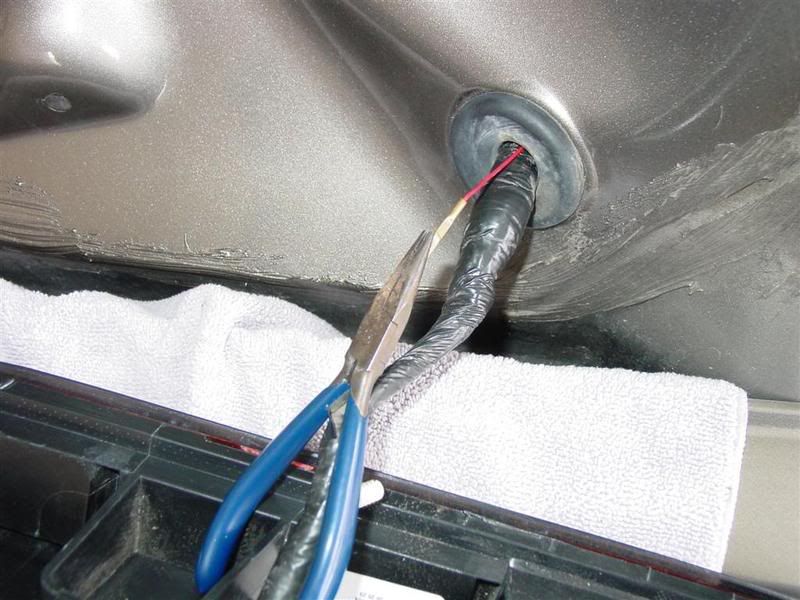
You can cut a slice in the grommet as the instuctions suggest, to feed the one wire through, but I opted to push a pair of needle nosed pliers through the edge of the grommet / wire loom (very carefully) from the exterior, and pull the one loose wire through.
On the base of the one light socket you removed, there is a rubberized base plug with the two factory EOM wires running through it.
Use a small bladed screwdriver, and carefully remove the rubberized base. It pops out quite easily.
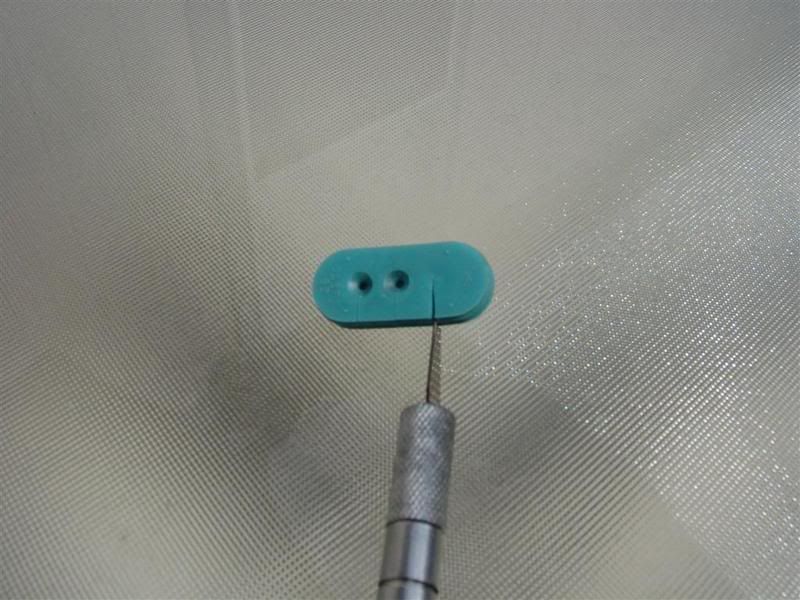
After removing the rubber plug, use and exacta knife to cut a slice to accept the extra wire....cut only half way across...
Under the rubber plug, inside the light socket, the two OEM wires are plugged in. There is an empty socket next to the OEM wires. Simply plug the one wire from the sequentials into the one vacant slot, and replace the rubber plug that you sliced...
Re-Install the light socket into the tail light housing. Re-install the tail light housing, holding it in place with one of the nuts inside the trunk. Repeat these same steps on the opposite side.
After completing the other side, and before completely putting everything back together, including the remaining two tail light nuts, verify the sequentials are working properly, by activating the emergency flashers, and or the turn signals. If all is well, reverse steps and put everything back together. If for some reason they do not function, double check your one wire connection inside the light socket. Mine worked perfectly without any issues....
Here is a terrible video of the finished product. Sorry about the quality, but the only video camera I have is actually built into my still camera....However, you get the idea.....
http://smg.photobucket.com/albums/v310/mvosborn/Sequentials/?action=view�t=Sequentials027.flv
Hope this is helpful for some of the early build owners out there. GT Concepts also makes a complete replacement plug and play for new model S197's, but unfortunately, they are on par with the price of most of the other available sequentials. However, I have found their quality to be outstanding, they are warrantied for life, and their shipping service was super quick....
Enjoy,
Mike


V6 Member
Joined: April 11, 2006
Posts: 54
Likes: 0
From: Mansfield TX
Nice write-up
I have the exact same from gt concepts. A problem I had with them was my drivers side would flash for about 2 sec. then shut off and you get the crazy turn indicator light in the cabin blinking rapidly like you have a blown bulb. It seemed my red copper wire was backing out so I put a dab of superglue on the grommet that was sliced to hold the red wire in. No problems since and that was 3 months ago. If you have a problem with these always check the red copper wire.
I have the exact same from gt concepts. A problem I had with them was my drivers side would flash for about 2 sec. then shut off and you get the crazy turn indicator light in the cabin blinking rapidly like you have a blown bulb. It seemed my red copper wire was backing out so I put a dab of superglue on the grommet that was sliced to hold the red wire in. No problems since and that was 3 months ago. If you have a problem with these always check the red copper wire.
Thread Starter
Mach 1 Member
Joined: October 15, 2006
Posts: 658
Likes: 1
It seemed my red copper wire was backing out so I put a dab of superglue on the grommet that was sliced to hold the red wire in. No problems since and that was 3 months ago. If you have a problem with these always check the red copper wire.
Mike

nice, what does that little wire do? it's not actually plugged into any lights...
Thread Starter
Mach 1 Member
Joined: October 15, 2006
Posts: 658
Likes: 1
Under the rubber plug, inside the light socket, the two OEM wires are plugged in. There is an empty socket next to the OEM wires. Simply plug the one wire from the sequentials into the one vacant slot, and replace the rubber plug that you sliced...
Bullitt Member
Joined: April 1, 2005
Posts: 258
Likes: 0
I told myself that I wasn't going to do any appearance mods until I'd done all the performance onces I could afford. I'm glad I gave in and did the taillights though and wish I had done them sooner. Even though I never actually get to see them actually work I love knowing that they are flashing.
I went with the Meter4it version though because I thought their chase version was by far the best looking. The sequential version looks "chopped off" to me for lack of a better description. Those thinking about this mod should check out the kit. http://www.meter4it.com/2006_and_2007_Mustang.htm
I went with the Meter4it version though because I thought their chase version was by far the best looking. The sequential version looks "chopped off" to me for lack of a better description. Those thinking about this mod should check out the kit. http://www.meter4it.com/2006_and_2007_Mustang.htm
Bullitt Member
Joined: April 16, 2006
Posts: 476
Likes: 0
Nice. Actually, the difference between early and late tail lights is that the "late" ones like I have on my '06 are sealed so you can't just pop out the blue plug on the back of the socket to add a wire. So for the "later" tail light sockets, you have to replace some sockets with ones that have 3 wires already in them.

Thread
Thread Starter
Forum
Replies
Last Post
Evil_Capri
Ford Discussions
4
Oct 14, 2015 12:18 PM