Agent 47 Retro Mirror install
 B
B
 8/5/08, 12:42 PM
#42
Mach 1 Member
Join Date: November 7, 2007
Location: Brigantine, NJ
Posts: 591
Likes: 0
Received 0 Likes
on
0 Posts
 Cause mine was *****in long before I bought the car...
  8/5/08, 12:52 PM
#43
Mach 1 Member
Join Date: November 7, 2007
Location: Brigantine, NJ
Posts: 591
Likes: 0
Received 0 Likes
on
0 Posts

BTW: I'll carry my club membership proudly!!!
 12/24/09, 06:22 PM
#45
Mach 1 Member
Join Date: August 7, 2004
Location: Socal
Posts: 723
Likes: 0
Received 0 Likes
on
0 Posts
bump:
just installed these. Did anyone else notice a gap between where the mirror housing meets the window trim? It's bugging me a little bit that there's a gap, only notice it when you're close up but I'm wondering if everybody's is that way.
just installed these. Did anyone else notice a gap between where the mirror housing meets the window trim? It's bugging me a little bit that there's a gap, only notice it when you're close up but I'm wondering if everybody's is that way.
12/24/09, 06:36 PM
#47
Mach 1 Member
Join Date: August 7, 2004
Location: Socal
Posts: 723
Likes: 0
Received 0 Likes
on
0 Posts
yah I had torx bits but not torx sockets. I highly recommend picking up the E5 socket that Jed uses because if not you have to use pliers and that was a major PITA to thread into the housing.
Also I did not have any luck getting at the rubber grommet from the back end with a screw driver, it just wasn't a straight shot at all to get at it. I eventually had to break the tabs holding the piece to the housing so I could get to the grommet.
Also I did not have any luck getting at the rubber grommet from the back end with a screw driver, it just wasn't a straight shot at all to get at it. I eventually had to break the tabs holding the piece to the housing so I could get to the grommet.
12/25/09, 01:00 AM
#48
Mach 1 Member
Join Date: August 7, 2004
Location: Socal
Posts: 723
Likes: 0
Received 0 Likes
on
0 Posts
here's a pic from LEO_06GT that illustrates what i'm talking about:
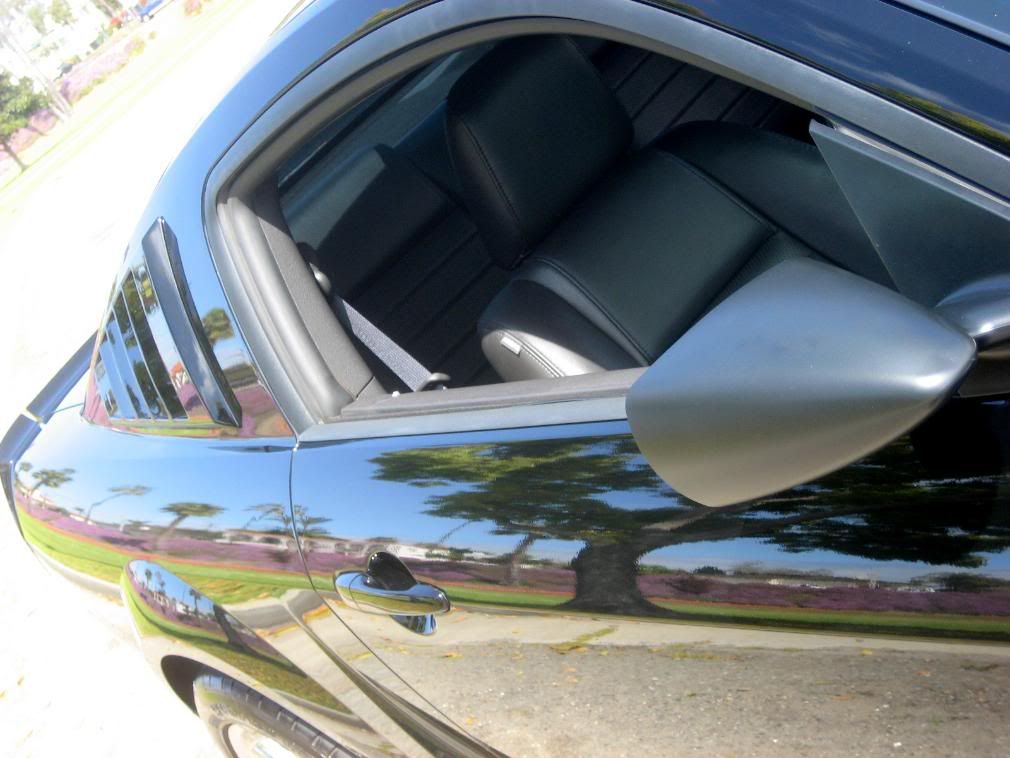
See the gap at the top. I looked around a bit and I see a lot of pictures showing that gap. So on one hand I feel better knowing I didn't mess something up, although it still kinda bugs me when I look at it close up.
See the gap at the top. I looked around a bit and I see a lot of pictures showing that gap. So on one hand I feel better knowing I didn't mess something up, although it still kinda bugs me when I look at it close up.
12/29/09, 11:53 PM
#50
Shelby GT500 Member
Thread Starter
Join Date: November 22, 2006
Location: Planet Earth
Posts: 2,932
Likes: 0
Received 0 Likes
on
0 Posts
I think I have a little gap also, I should look to see if I can make it fit better. I think that maybe the way it is? I'll take a look this weekend.
12/30/09, 06:14 AM
#51
Cobra Member
Join Date: October 15, 2008
Location: Brew City
Posts: 1,373
Likes: 0
Received 0 Likes
on
0 Posts
My painter shared a little trick that he uses to get body parts like these to fit... he heats the part up a bit with one of those torpedo style heaters. Mine had the same gap, so after I got them back from paint, I used this method and now the gap is gone. I am sure you could do the same thing with a heat gun as well.
12/31/09, 10:13 AM
#52
Shelby GT500 Member
Thread Starter
Join Date: November 22, 2006
Location: Planet Earth
Posts: 2,932
Likes: 0
Received 0 Likes
on
0 Posts
 1/2/10, 03:06 PM
#54
Member

Join Date: January 2, 2010
Posts: 2
Likes: 0
Received 0 Likes
on
0 Posts
hey guys, i've been busy today putting these new mirrors on - i'm quite stoked  . But I ran into a snag - I got the passenger side on pretty well but when I started on the drivers side and tried to pull the mirror out of the stock housing, I ended up tearing the motor into 2 pieces! I know, I know, every walk-through says 'firm but gentle' and I didn't pull any harder than the passenger side but the mirrors came off with the front/face of the motor still snapped/connected to the back of the mirror. I can see that the part of the motor face that's actuated by the electrical motor is torn off and seems beyond repair. I was able to shove the face of the motor back onto the main motor body and adjust the mirror manually since I was able to get the threaded plastic studs (connected to the face of the motor) back into their proper holes on the main body of the motor (this seems to be what allows you to manally 'snap' your motor incrementally up/down left/right without using the side view mirror adjusters from inside the car on the driver's side.
I'll try to post pics in a bit of the 'situation' but i'm pretty sure the mirror motor is beyond repair. I'm planning to call a nearby Ford dealership up on Monday and see if I can buy a new mirror motor - what I need help with:
Does anyone know the part # for the (driver's side, if it helps) mirror motor itself so that I can just fitscrew it into the mirror housing? Do you guys know how much that would set me back?
Thanks for any help in advance guys - it'd definately be really appreciated!
. But I ran into a snag - I got the passenger side on pretty well but when I started on the drivers side and tried to pull the mirror out of the stock housing, I ended up tearing the motor into 2 pieces! I know, I know, every walk-through says 'firm but gentle' and I didn't pull any harder than the passenger side but the mirrors came off with the front/face of the motor still snapped/connected to the back of the mirror. I can see that the part of the motor face that's actuated by the electrical motor is torn off and seems beyond repair. I was able to shove the face of the motor back onto the main motor body and adjust the mirror manually since I was able to get the threaded plastic studs (connected to the face of the motor) back into their proper holes on the main body of the motor (this seems to be what allows you to manally 'snap' your motor incrementally up/down left/right without using the side view mirror adjusters from inside the car on the driver's side.I'll try to post pics in a bit of the 'situation' but i'm pretty sure the mirror motor is beyond repair. I'm planning to call a nearby Ford dealership up on Monday and see if I can buy a new mirror motor - what I need help with:
Does anyone know the part # for the (driver's side, if it helps) mirror motor itself so that I can just fitscrew it into the mirror housing? Do you guys know how much that would set me back?
Thanks for any help in advance guys - it'd definately be really appreciated!
1/3/10, 09:11 PM
#55
Member
Join Date: January 2, 2010
Posts: 2
Likes: 0
Received 0 Likes
on
0 Posts
Ok - I managed to find the part number. In case anyone's interested or runs into the same situation as me:
Part: Door Mirror Drive Motor (same for either driver or passenger side)
Part #: 17D696
Found it off http://www.fordparts.com/default.aspx (under Category: Body / Sub-Category: Mirrors) and listed for $36.80.
Part: Door Mirror Drive Motor (same for either driver or passenger side)
Part #: 17D696
Found it off http://www.fordparts.com/default.aspx (under Category: Body / Sub-Category: Mirrors) and listed for $36.80.

Thread
Thread Starter
Forum
Replies
Last Post
MRGTX
2015 - 2023 MUSTANG
4
9/16/15 08:08 AM
tj@steeda
2015 - 2023 MUSTANG
0
9/10/15 12:44 PM