
Adjustable Panhard Bar and Lateral Stiffener Bar installation (w/pics)


Adjustable Panhard Bar and Lateral Stiffener Bar installation (w/pics)
Adjustable Panhard Bar and Lateral Stiffener Bar installation
Installation was performed on Leo_06GT�s 2006 GT (hardtop, Automatic). Both the panhard bar and lateral stiffener are from Steeda. Leo selected Steeda because of the �maintenance free� bushings that do not require greasing.
Installation time: 1-2 hours (depending on level of experience and tool availability)
Tools/Materials needed:
Jack stands (or ramps)
Metric sockets (standard depth and deep) � 15mm, 18mm
Various length socket extensions
Metric wrenches (optional) � 15mm, 18mm
Breaker bar (optional, but handy)
Torque wrench capable up to 129 lb-ft
Loctite
Grease
Marker pen (or white-out)
String
Tape
Ruler
1. Safely load the rear axle up in the air. Jack stands placed on the outward ends of the axle tubes or the use of car ramps will suffice. Be sure to chock the front tires.
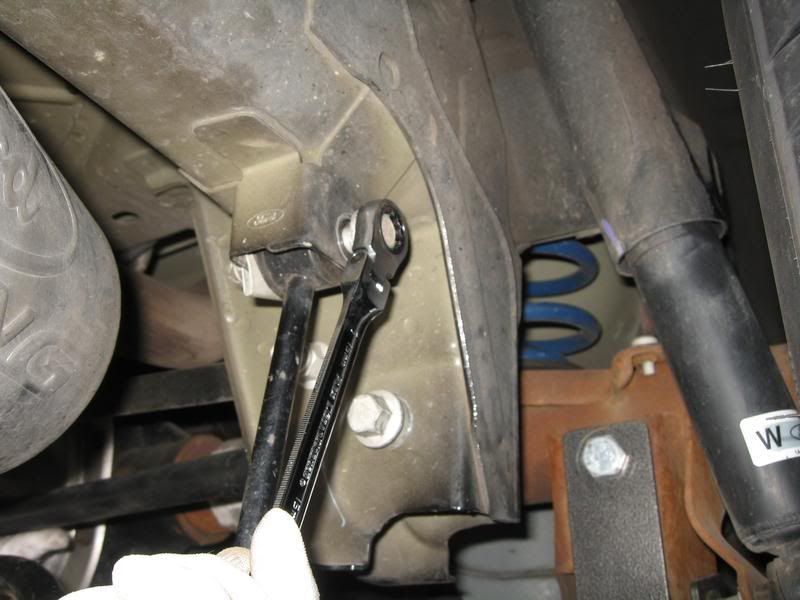
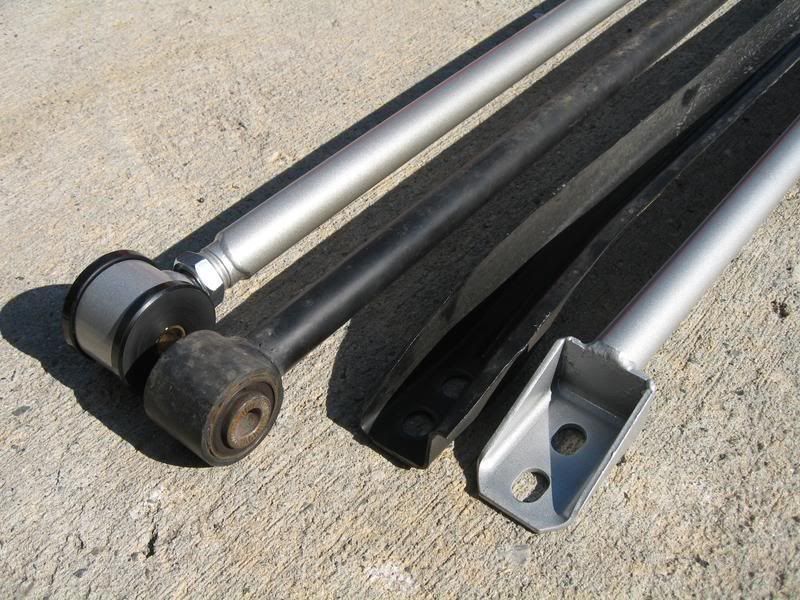
2. Remove the factory panhard bar.
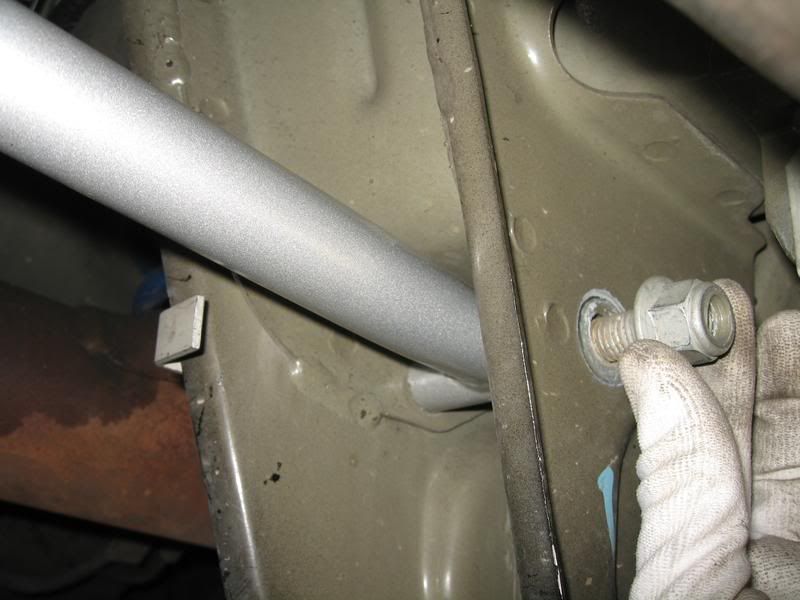
Plastic cover over Drivers side panhard bar attaching bolt.
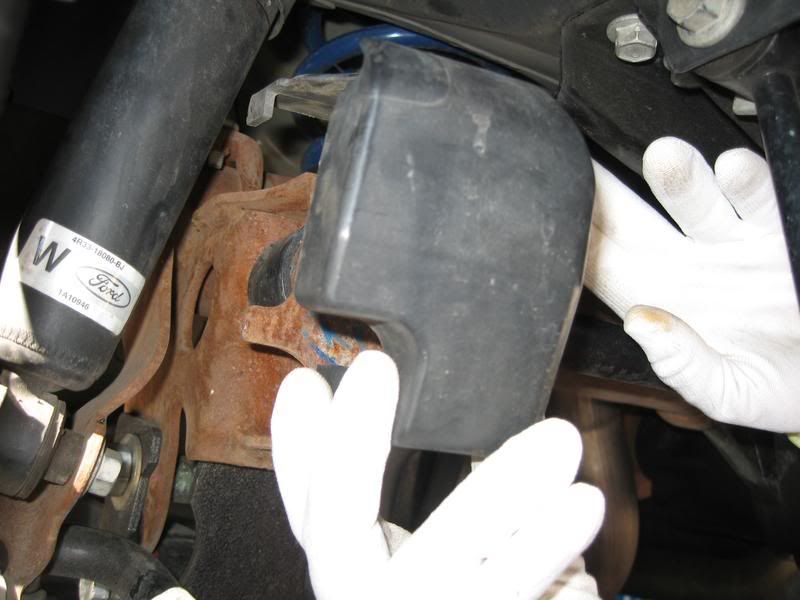
This bolt is on tight, breaker bar may be required.
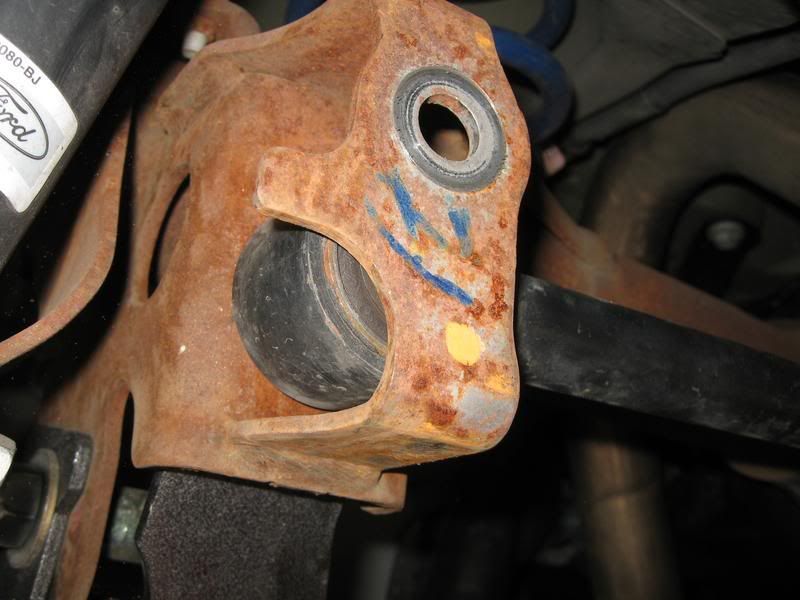
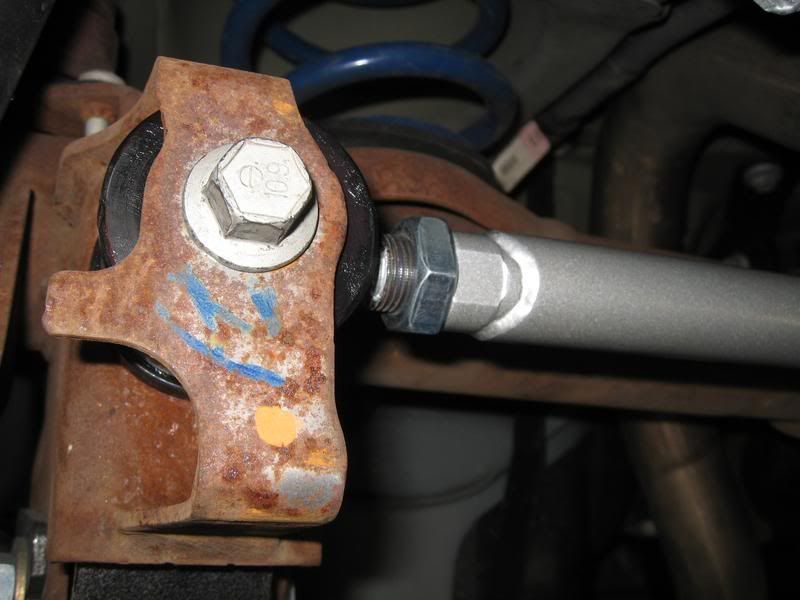
Moving to the Passenger side, remove the 18mm bolt and flag nut.
Note: The factory installed Leo�s panhard bolt on the wrong side (per the service manual). The swaybar end link interfered with the removal of the bolt, so the link had to be unbolted from the body to provide the clearance.
Panhard bar removed.
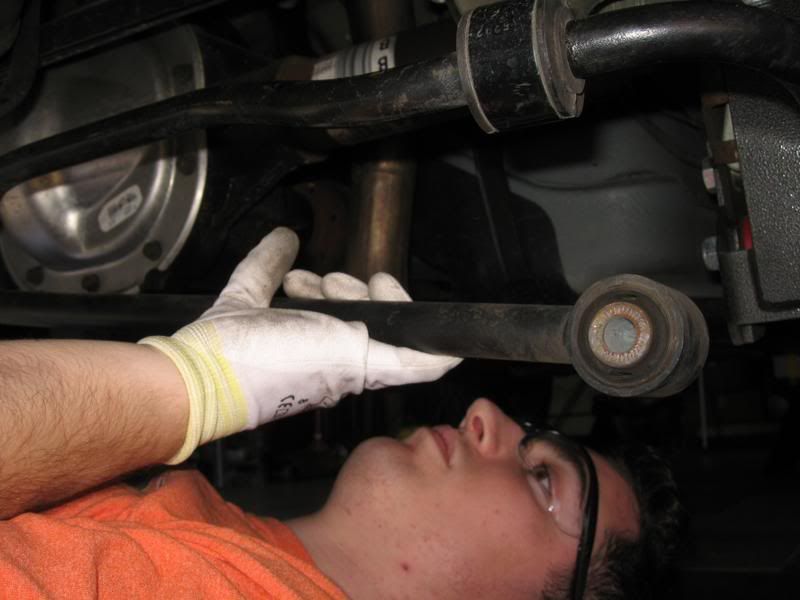
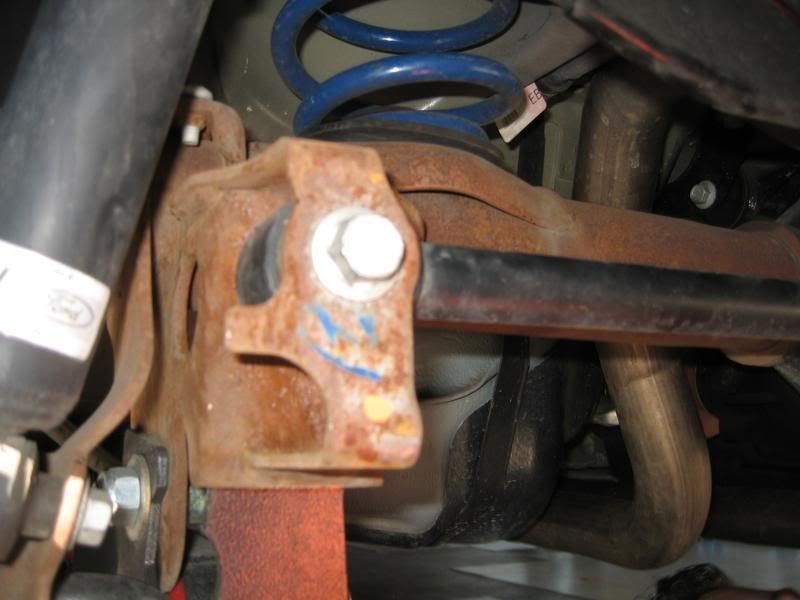
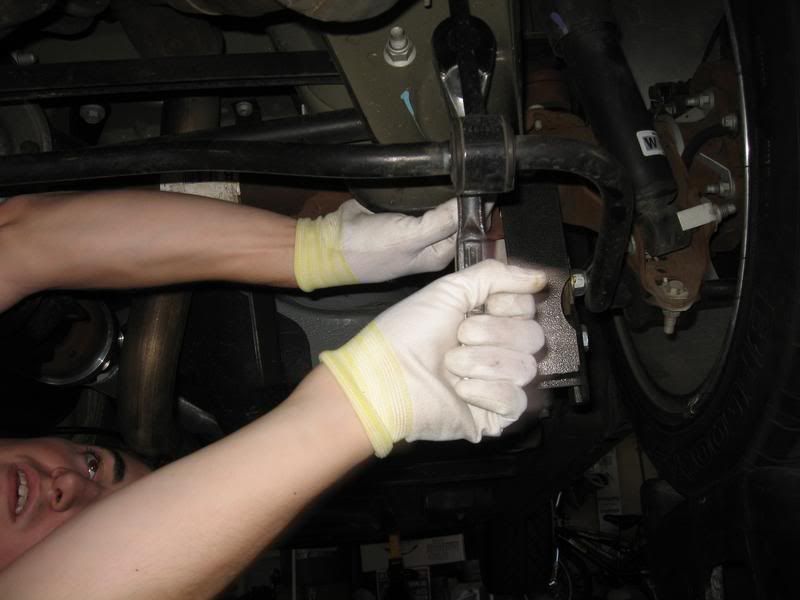
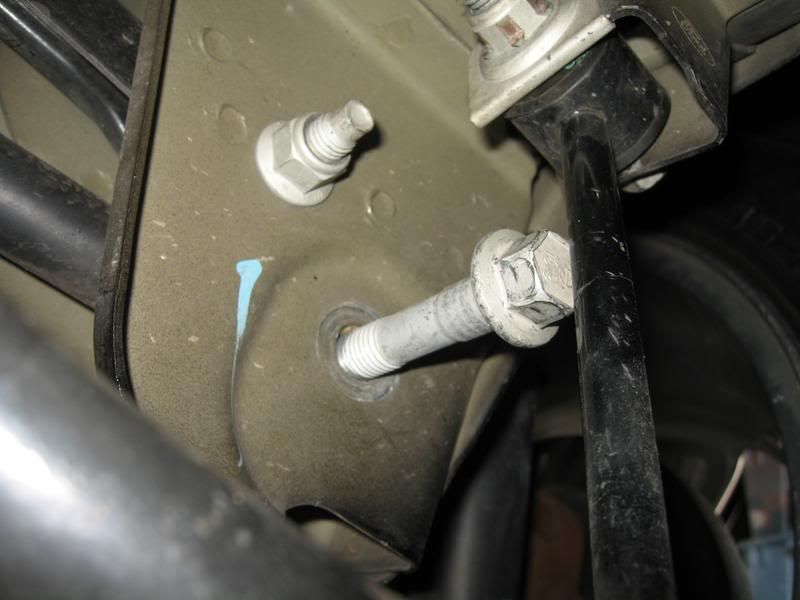
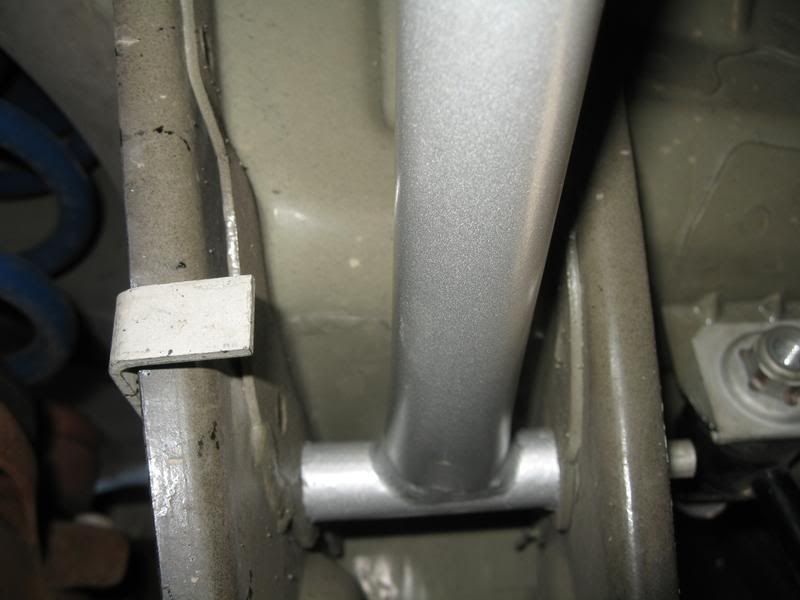
3. Remove the lateral stiffener bar.
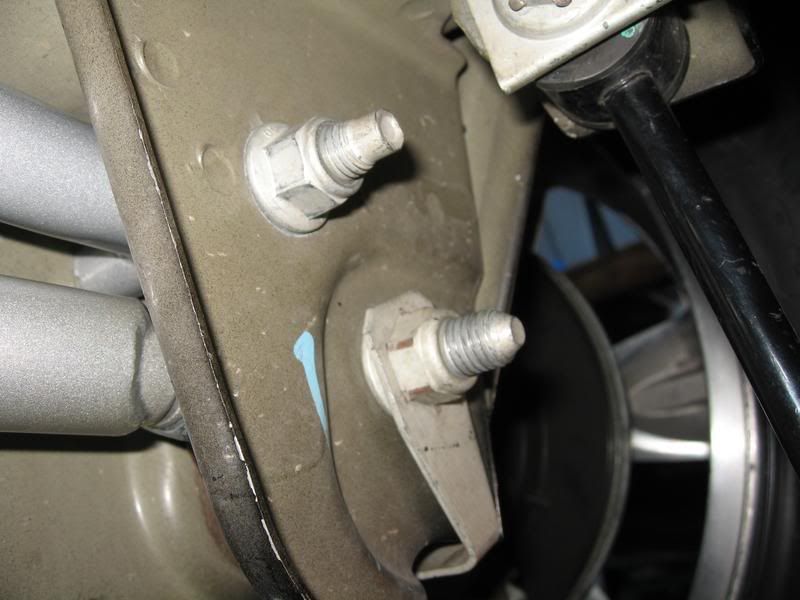
Drivers side, (2) bolts, 15mm socket.
Passenger side, flag bolt, 18mm deep socket or wrench.

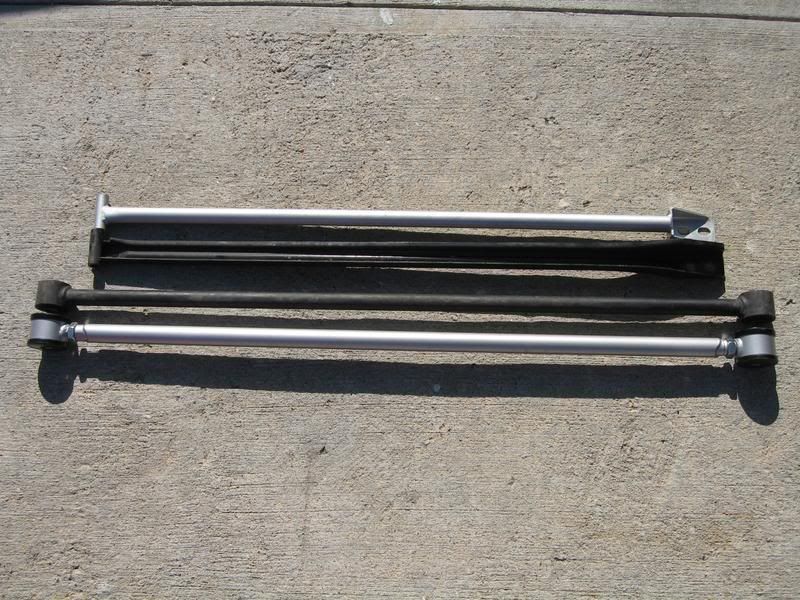
Side-by-Side comparison
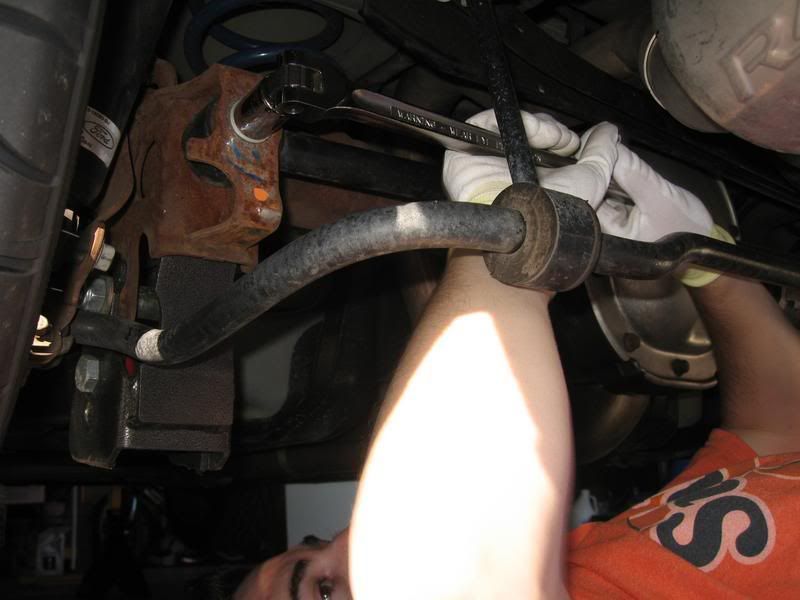
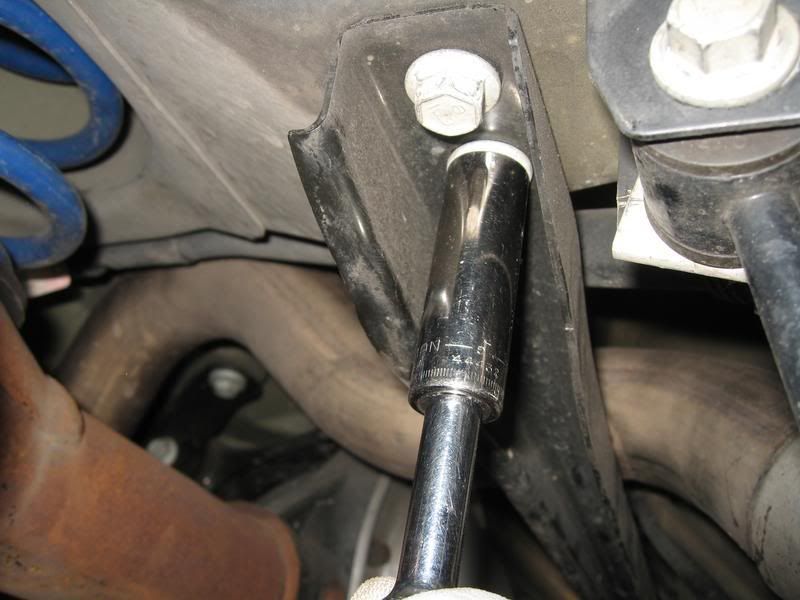
4. Install the Steeda lateral stiffener bar.
Re-use the factory hardware, install tight. Torque once both ends are in.
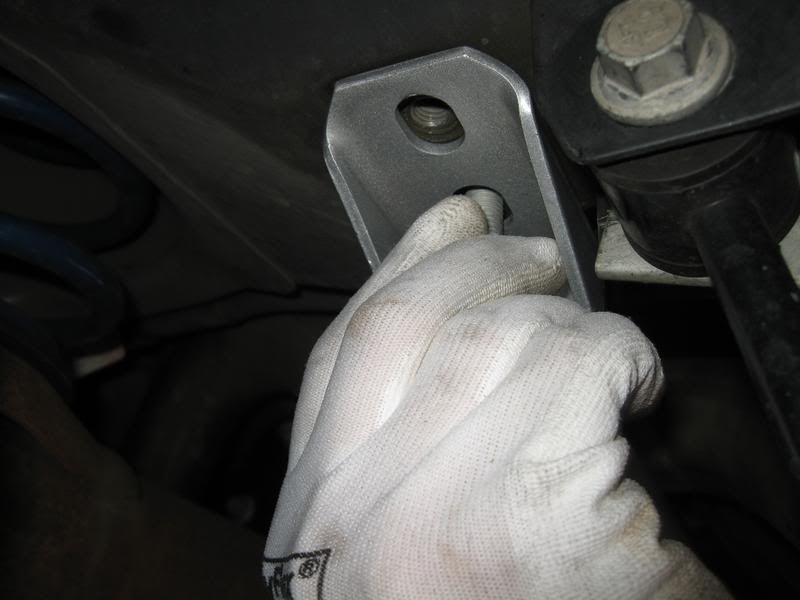
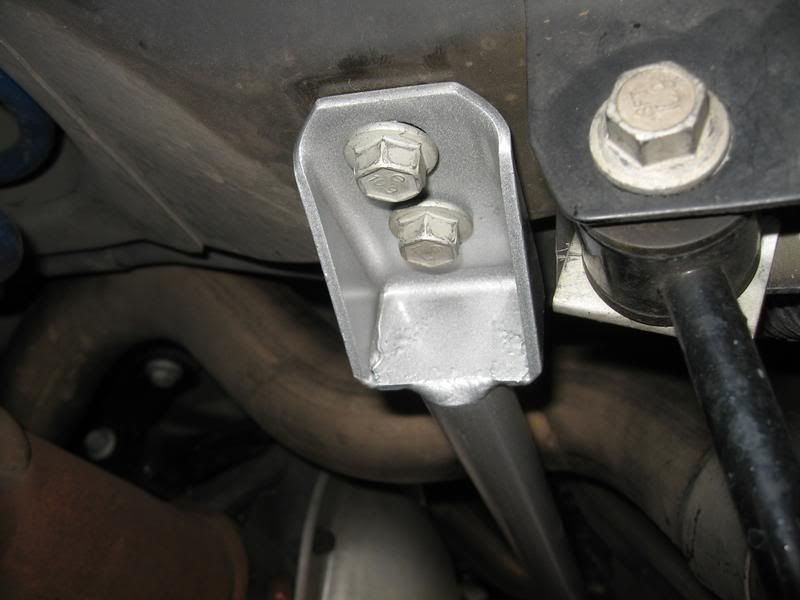
Torque
(2) Drivers side bolts: 46 lb-ft
(1) Passenger side flag bolt: 85 lb-ft
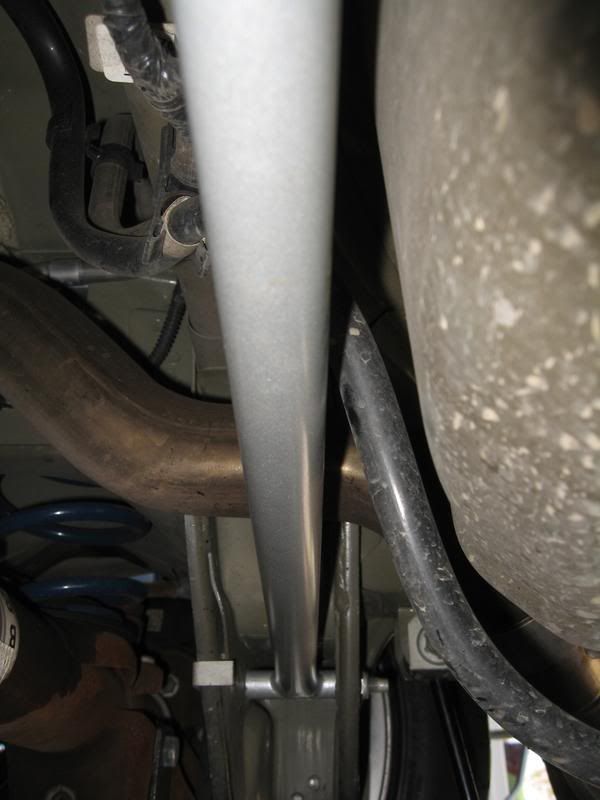
Lateral stiffener bar installed complete.
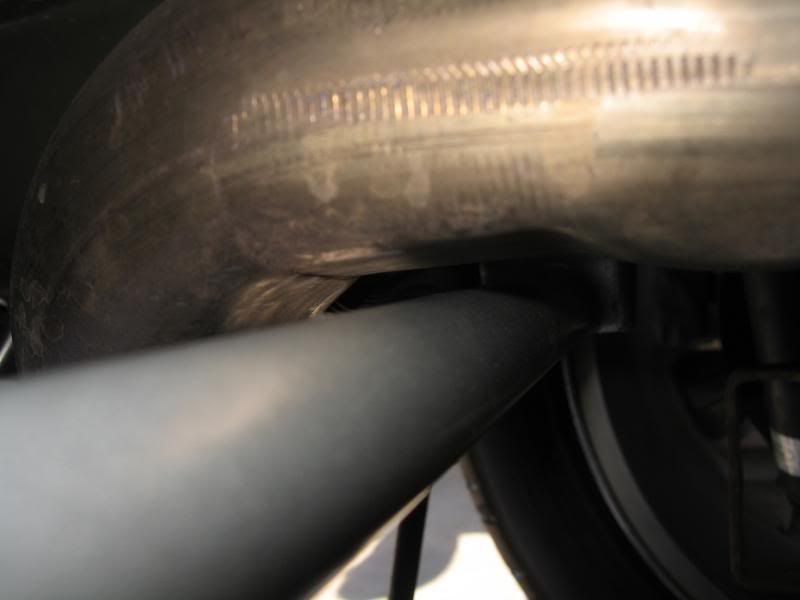
Note: Ensure clearance between the lateral bar and the exhaust over-axle pipe. If touching (or too close), adjust from the mid-pipe exhaust clamps and/or over-axle clamps.
Note: If the swaybar endlink was removed, re-install it.
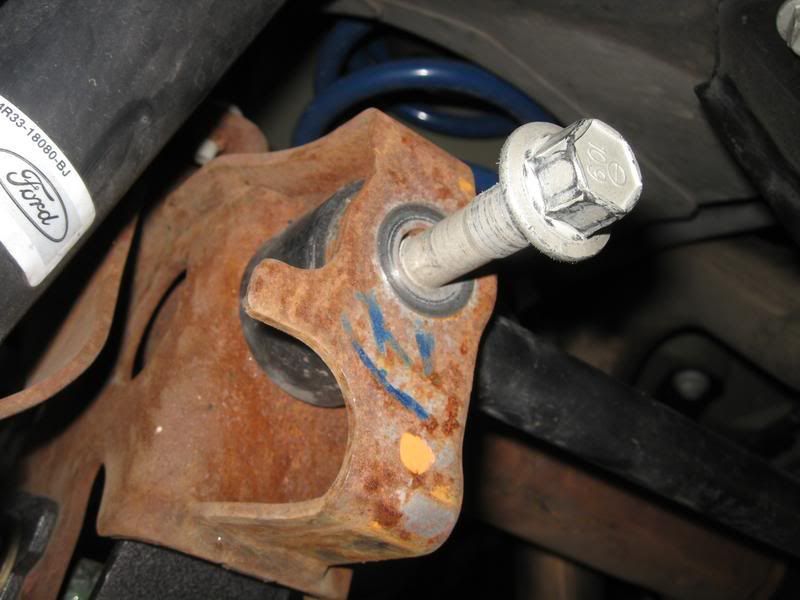
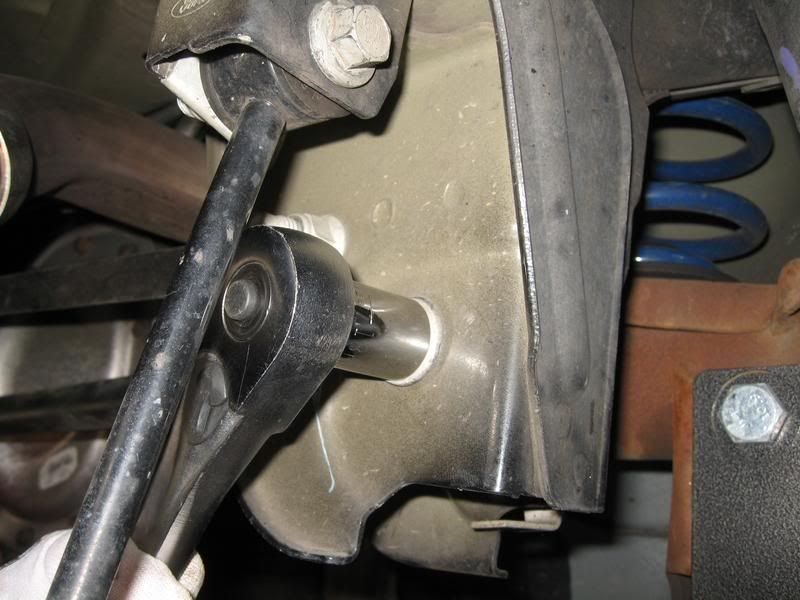
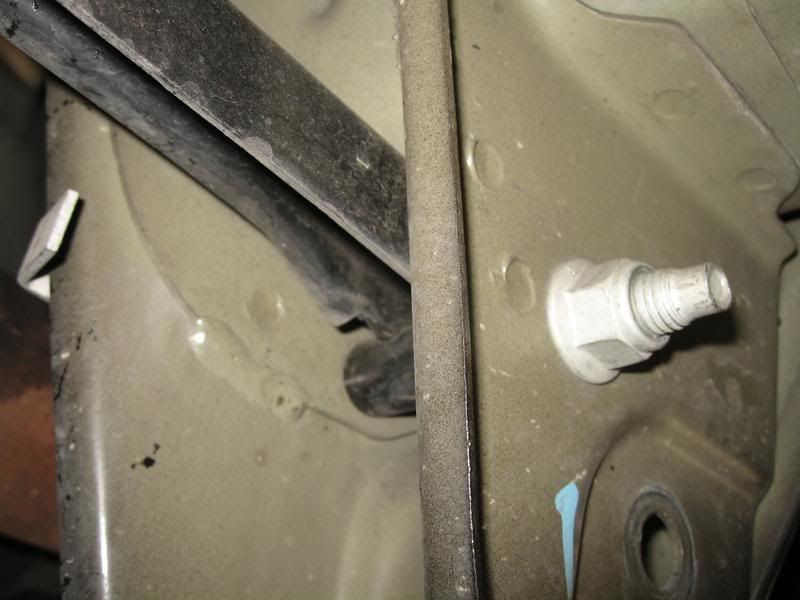
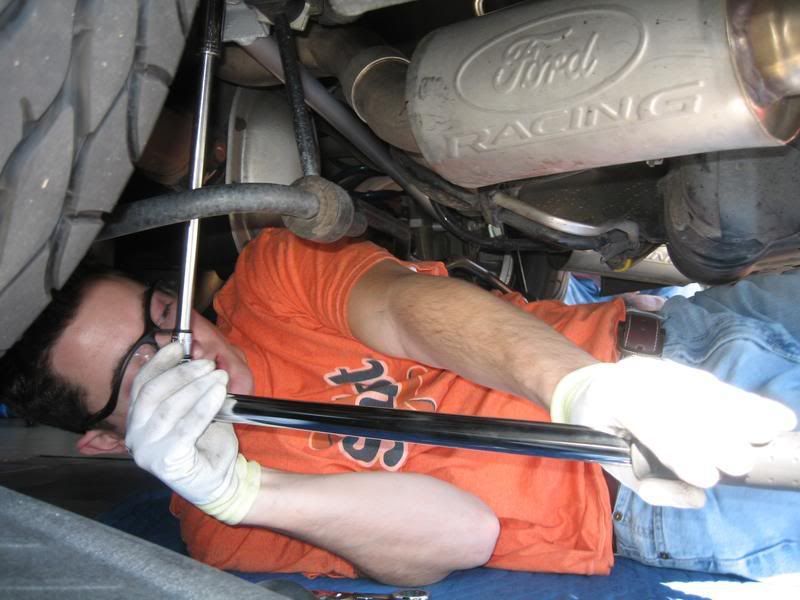
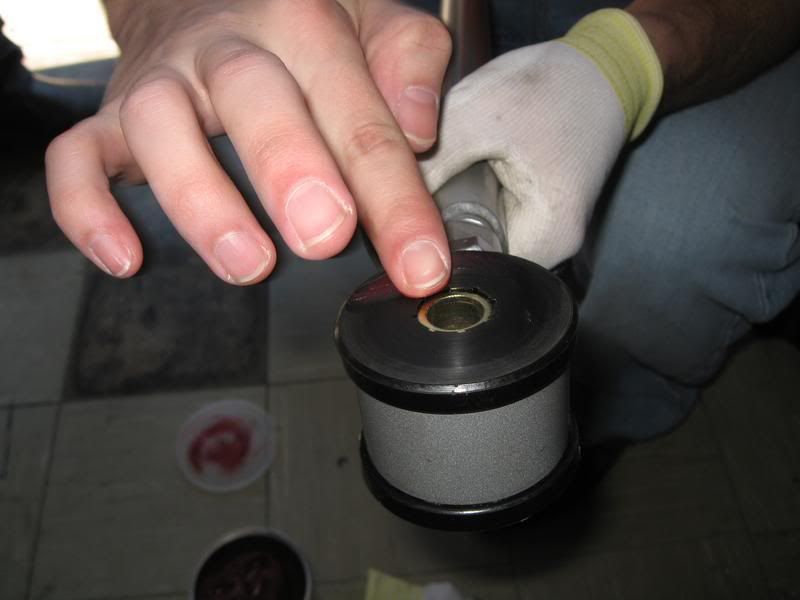
5. Install the Steeda adjustable panhard bar.
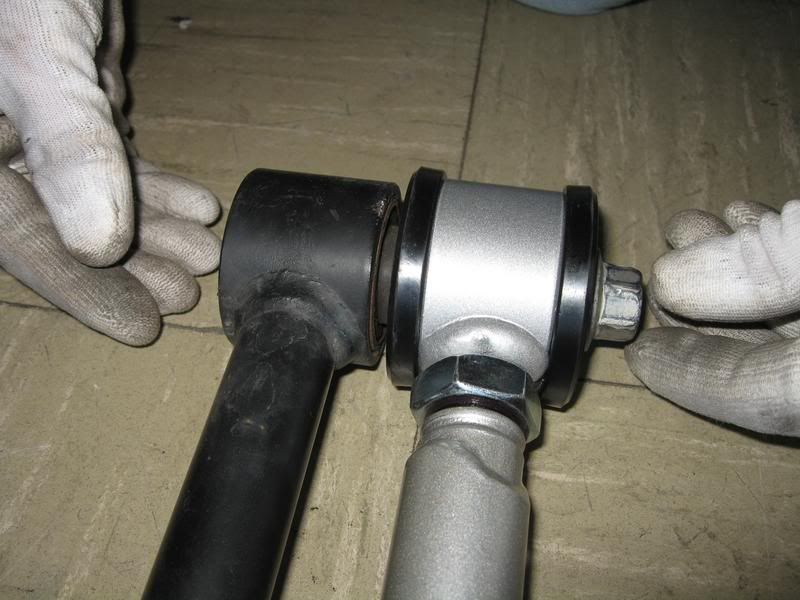
Adjust the length of the Steeda bar to match the factory bar; use factory bolts as a guide.
Note: Steeda bar adjusts at both ends, we opted to center the bar, approximately 4 threads on each end.
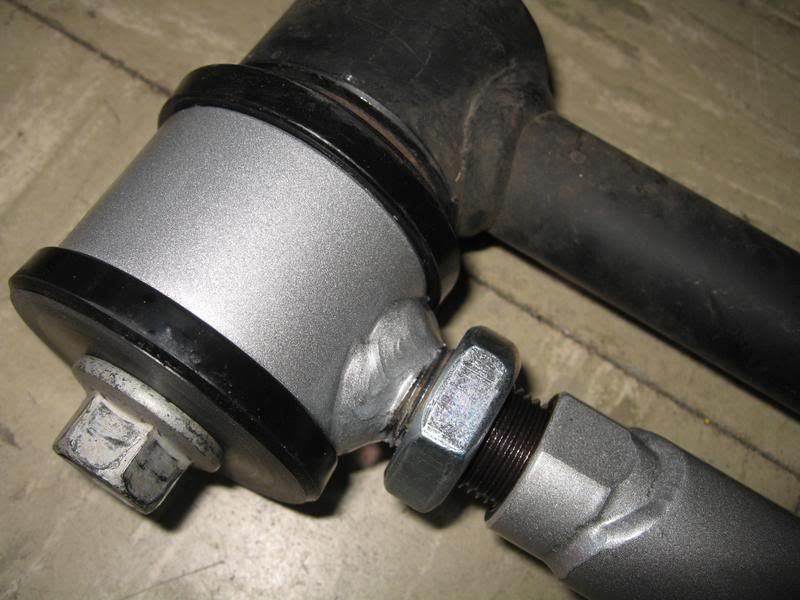
Although not in the directions, we used Mobil 1 grease on both sides of the bushing face.

Re-use the factory hardware, install tight. Torque once both ends are in.
Torque: 129 lb-ft (both bolts)

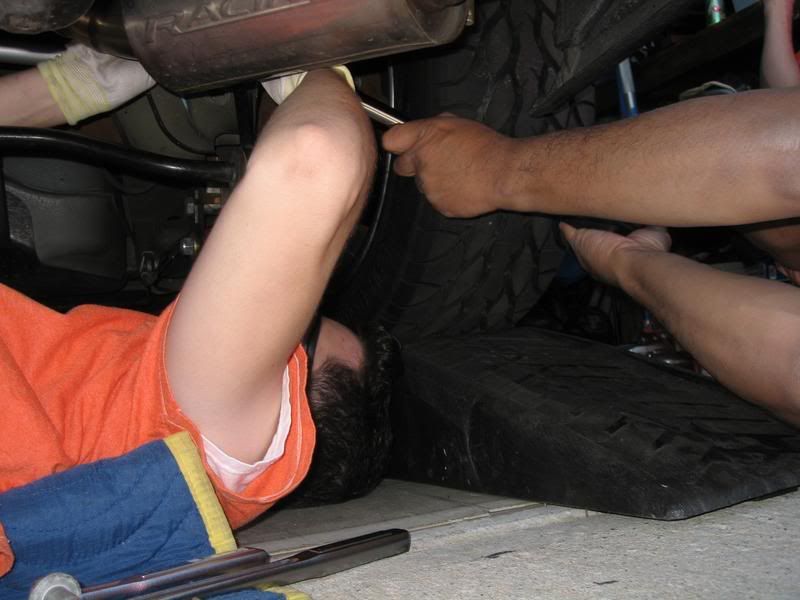
6. Using some string and a weighted object (ie. Socket), rig up a plumb-bob to measure axle shift.
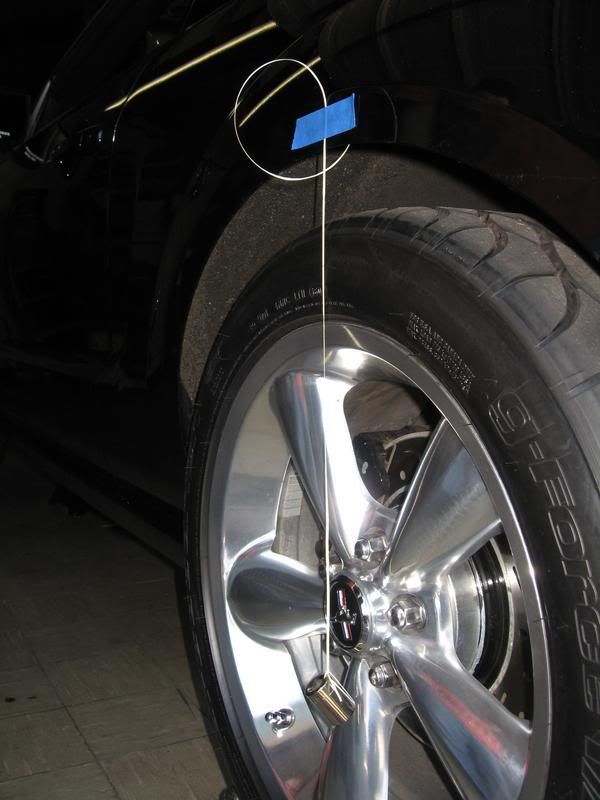
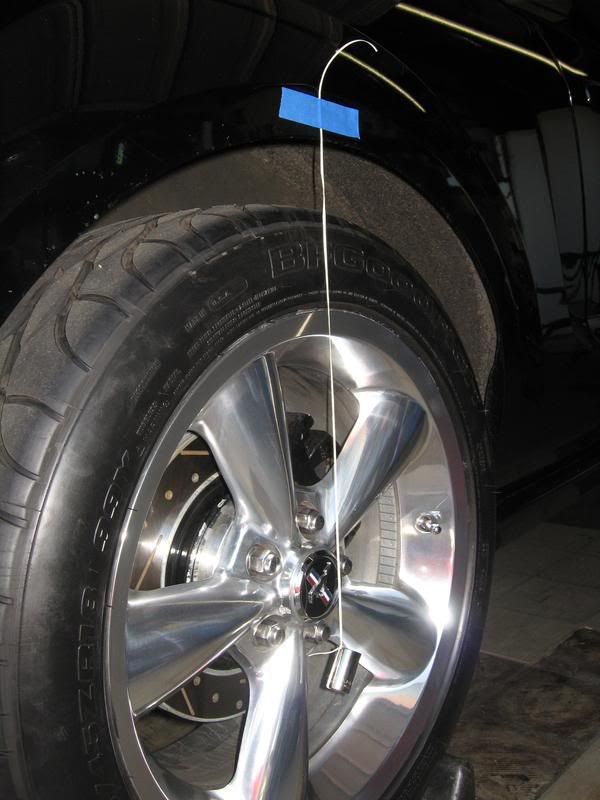
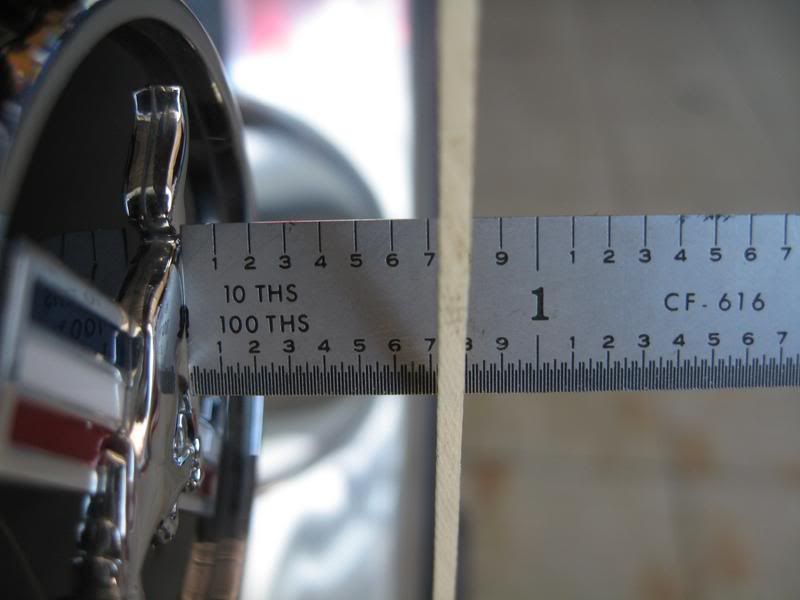
Measure the distance from the string to a fixed section (we used the wheel�s center cap) on both sides to determine which way the axle needs to shift.
Loosen both jam nuts on the adj. panhard bar and rotate the bar by hand. You will see the body of the car move as you turn the panhard bar.
Center the axle until the distance measured is equal on both sides.
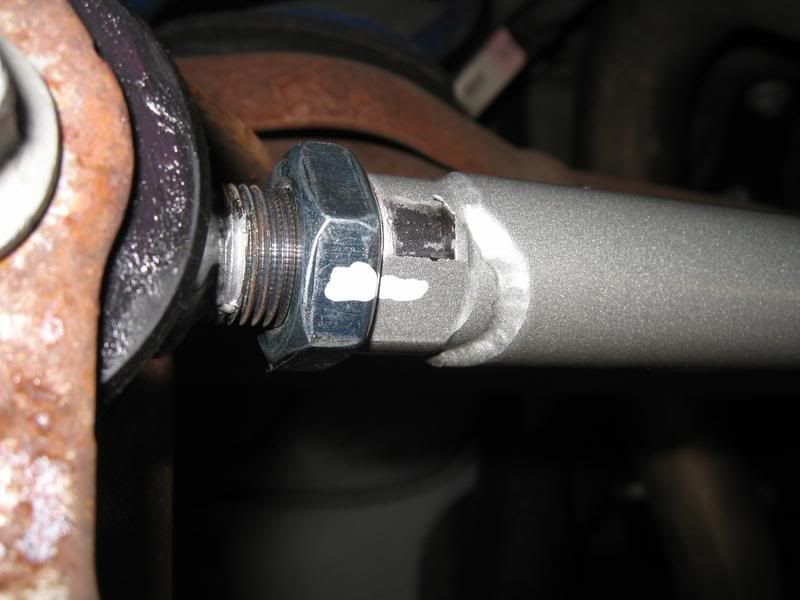
7. Once in the position, Loctite the jam nuts in place to prevent further movement of the bar. (2) wrenches can be used to tighten the jam nut.
Note: The Passenger side jam nut may be difficult to access with a wrench.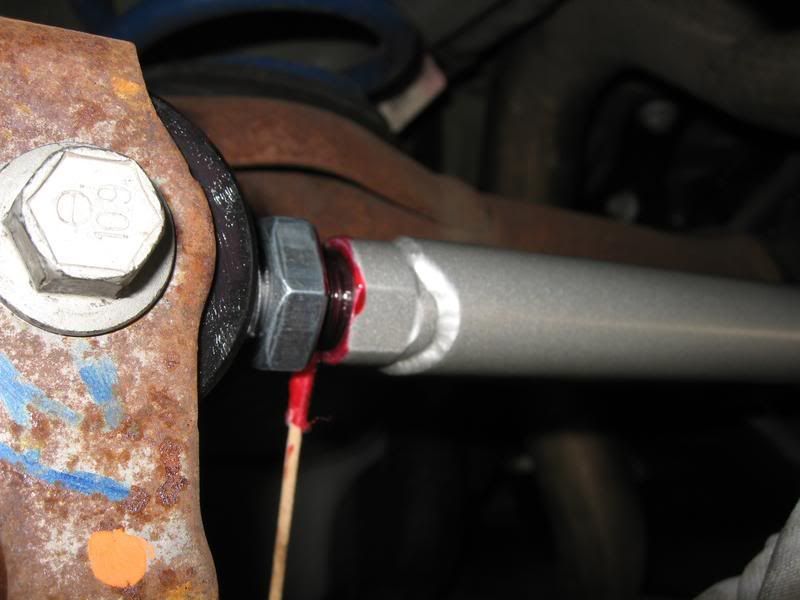
8. Using a marker or white-out, apply a torque stripe along the jam nut and panhard bar to monitor any slippage or movement. Re-check this mark periodically.
Installation complete!
Installation was performed on Leo_06GT�s 2006 GT (hardtop, Automatic). Both the panhard bar and lateral stiffener are from Steeda. Leo selected Steeda because of the �maintenance free� bushings that do not require greasing.
Installation time: 1-2 hours (depending on level of experience and tool availability)
Tools/Materials needed:
Jack stands (or ramps)
Metric sockets (standard depth and deep) � 15mm, 18mm
Various length socket extensions
Metric wrenches (optional) � 15mm, 18mm
Breaker bar (optional, but handy)
Torque wrench capable up to 129 lb-ft
Loctite
Grease
Marker pen (or white-out)
String
Tape
Ruler
1. Safely load the rear axle up in the air. Jack stands placed on the outward ends of the axle tubes or the use of car ramps will suffice. Be sure to chock the front tires.
2. Remove the factory panhard bar.
Plastic cover over Drivers side panhard bar attaching bolt.
This bolt is on tight, breaker bar may be required.
Moving to the Passenger side, remove the 18mm bolt and flag nut.
Note: The factory installed Leo�s panhard bolt on the wrong side (per the service manual). The swaybar end link interfered with the removal of the bolt, so the link had to be unbolted from the body to provide the clearance.
Panhard bar removed.
3. Remove the lateral stiffener bar.
Drivers side, (2) bolts, 15mm socket.
Passenger side, flag bolt, 18mm deep socket or wrench.
Side-by-Side comparison
4. Install the Steeda lateral stiffener bar.
Re-use the factory hardware, install tight. Torque once both ends are in.
Torque
(2) Drivers side bolts: 46 lb-ft
(1) Passenger side flag bolt: 85 lb-ft
Lateral stiffener bar installed complete.
Note: Ensure clearance between the lateral bar and the exhaust over-axle pipe. If touching (or too close), adjust from the mid-pipe exhaust clamps and/or over-axle clamps.
Note: If the swaybar endlink was removed, re-install it.
5. Install the Steeda adjustable panhard bar.
Adjust the length of the Steeda bar to match the factory bar; use factory bolts as a guide.
Note: Steeda bar adjusts at both ends, we opted to center the bar, approximately 4 threads on each end.
Although not in the directions, we used Mobil 1 grease on both sides of the bushing face.
Re-use the factory hardware, install tight. Torque once both ends are in.
Torque: 129 lb-ft (both bolts)
6. Using some string and a weighted object (ie. Socket), rig up a plumb-bob to measure axle shift.
Measure the distance from the string to a fixed section (we used the wheel�s center cap) on both sides to determine which way the axle needs to shift.
Loosen both jam nuts on the adj. panhard bar and rotate the bar by hand. You will see the body of the car move as you turn the panhard bar.
Center the axle until the distance measured is equal on both sides.
7. Once in the position, Loctite the jam nuts in place to prevent further movement of the bar. (2) wrenches can be used to tighten the jam nut.
Note: The Passenger side jam nut may be difficult to access with a wrench.
8. Using a marker or white-out, apply a torque stripe along the jam nut and panhard bar to monitor any slippage or movement. Re-check this mark periodically.
Installation complete!
Mach 1 Member
Joined: October 20, 2005
Posts: 874
Likes: 0
From: Honolulu, Hawaii
thanks bill. i just installed my bmr adjustable panhard and support bar today. of course i used your thread as a guideline. install went smoothly thanks to you.
one thing... i couldn't use the plumb bob technique to make sure the axle was centered. i have 285/40/18s in the back and the tires got in way and prevented the string from hanging down the edge of the fender. ended up having to eye-ball it, but i think it is pretty close to center.
anyways, thanks again. your thread gave me the confidence to do this mod on my own.

Cobra Member
Joined: September 25, 2004
Posts: 1,470
Likes: 0
one thing... i couldn't use the plumb bob technique to make sure the axle was centered. i have 285/40/18s in the back and the tires got in way and prevented the string from hanging down the edge of the fender. ended up having to eye-ball it, but i think it is pretty close to center.
Or measured the amount the tire stuck out?
Just if you wanted to be really **** about it.
In either case, the eyeball adjustment would be more than adequate.
Mach 1 Member
Joined: October 20, 2005
Posts: 874
Likes: 0
From: Honolulu, Hawaii
 .
. but yeah, honestly i didn't really think of that. visually it looked pretty darn equal to me. i guess i will go and check it out tomorrow with a piece of wood. thanks for the tip.
Good deal sw.. glad all turned out well with the install. 


V6 Member
Joined: May 2, 2007
Posts: 76
Likes: 0
Just did this myself today as well. One thing to add. You can remove the stiffener without removing the Bar if you need to. I had the Bar removed and realized I needed to run out for a doctors appointment, so I slapped the new bar in and when I got home, without removing the bar, I replaced the stock brace with the new one.
 I just had shoulder surgery, when are you coming here to install my brakes and rotors? I keed, I keed...
Mach 1 Member
Joined: July 16, 2010
Posts: 864
Likes: 2
In most cases the groove simple indicates which end has the left hand threads. No real reason it matters which end is on which side.
Bullitt Member
Joined: October 14, 2004
Posts: 508
Likes: 1
Hard to tell for this specific mod since I changed a lot of things in a short timeframe (Lowered and added shocks/struts, and put on skinny 235 winter tires) but I can say I've been spinning the winter tires a lot and there's been no bucking - I only know they have lost traction by sound or if the I feel the car deviating from the straight line. The real test will be taking it out to the strip and that won't be until spring.

Member
Joined: April 16, 2010
Posts: 9
Likes: 0
From: Bethlehem,PA
Guys--This is an awesome write up. I have a silly question. If I install the adjustable panhard bar and new brace without a lowered suspension and center the rear axle, does that put the front end out of alignment. I really like this mod to center the axle and improve handling, but I do not want to throw the front end out of alignment. Thanks...
Guys--This is an awesome write up. I have a silly question. If I install the adjustable panhard bar and new brace without a lowered suspension and center the rear axle, does that put the front end out of alignment. I really like this mod to center the axle and improve handling, but I do not want to throw the front end out of alignment. Thanks...
Mach 1 Member
Joined: June 22, 2013
Posts: 580
Likes: 101
From: the beautiful "Shenandoah Valley of Virginia"
Bill, another great write-up! That exactly how I installed mine....right down to using string and sockets for plumb bobs....

This is only accurate IF the car is level itself "side to side" .... and any
slope in the floor across right to left will throw these string measurements off.


Thread
Thread Starter
Forum
Replies
Last Post
dohc97
Suspension, Brakes, and Tire Tech
16
Sep 24, 2015 05:40 PM
ustabawannab
Suspension, Brakes, and Tire Tech
5
Aug 5, 2015 08:32 PM