
2005 Mustang Revivial Thread! A Lost Pony Comes Back To Life!

Thread Starter
GT Member
Joined: January 30, 2014
Posts: 137
Likes: 9

Wish I did.
What parts of the trunk? Pics?
Thread Starter
GT Member
Joined: January 30, 2014
Posts: 137
Likes: 9


Thread Starter
GT Member
Joined: January 30, 2014
Posts: 137
Likes: 9
Got a little more work done over the weekend.
Picked up a steamer Saturday and the wife and I got to peeling tint Saturday evening.

You may remember what the tint originally looked like and why it had to go. It was actually unsafe, couldn't see a **** thing out the back.


Coming off fairly well.

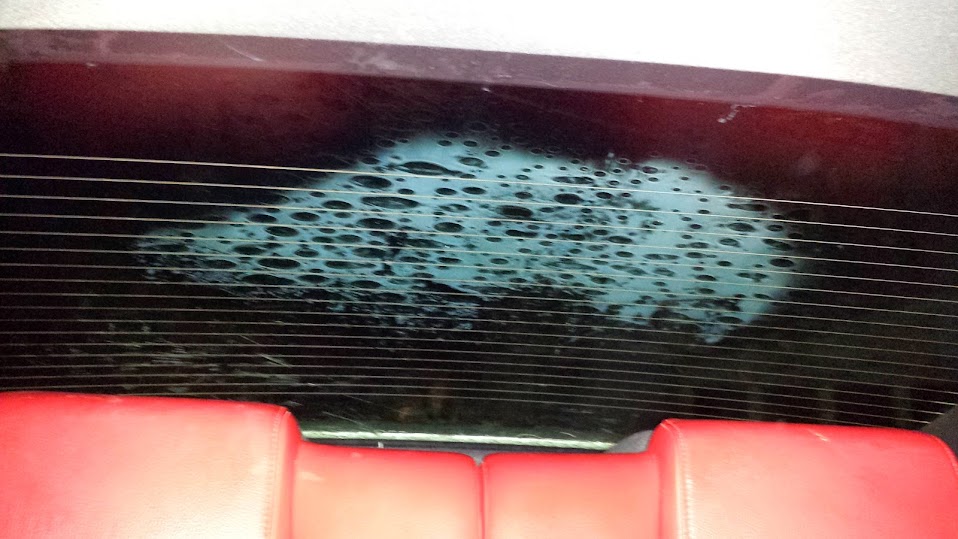
Sunday after church I picked up some of this stuff and went over the my buddy's house.
Sprayed the rear windshield down with it, it was ok. Bout the same as goo gone.

While that was going to town I took the hood off and went to town removing the cowl cover. That leak that was around the ECU, it was time to fix.

Cowl covers pretty straight forward, get the clips out and it just pulls right off.

And here we can see why it was leaking, one of the grommets had rotted so much that it just fell out apparently.
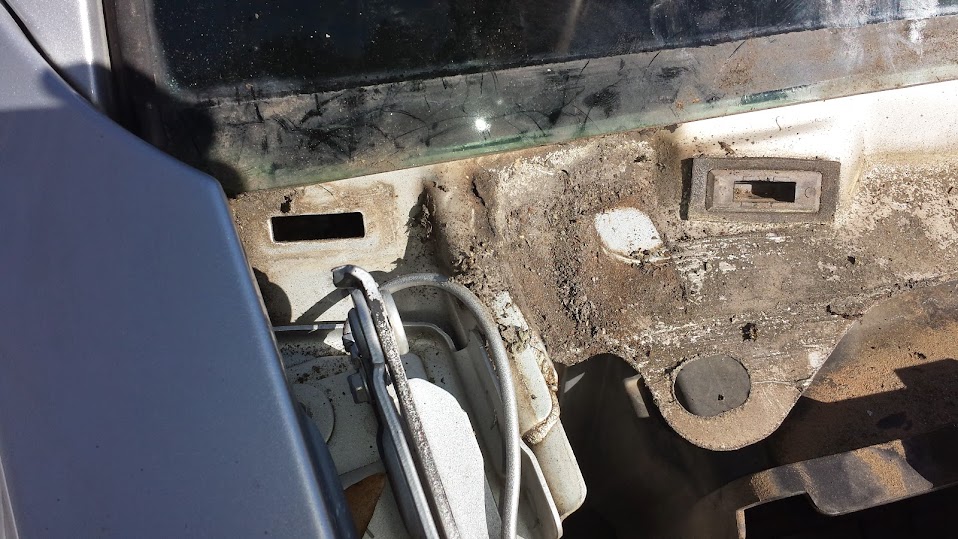
And it was a little gross so I sprayed it down and went back to work on getting the tint and goo off.


Came back and cleaned it all up

This is what the grommets should look like compared to one of the ones I pulled from my car. No wonder they were leaking.

After I had that all done and the hood back on I finished up the goo on the rear windshield. At which point I realized I'm apparently missing the cover for the child restraint thing.

Picked up a steamer Saturday and the wife and I got to peeling tint Saturday evening.
You may remember what the tint originally looked like and why it had to go. It was actually unsafe, couldn't see a **** thing out the back.
Coming off fairly well.
Sunday after church I picked up some of this stuff and went over the my buddy's house.
Sprayed the rear windshield down with it, it was ok. Bout the same as goo gone.
While that was going to town I took the hood off and went to town removing the cowl cover. That leak that was around the ECU, it was time to fix.
Cowl covers pretty straight forward, get the clips out and it just pulls right off.
And here we can see why it was leaking, one of the grommets had rotted so much that it just fell out apparently.
And it was a little gross so I sprayed it down and went back to work on getting the tint and goo off.
Came back and cleaned it all up
This is what the grommets should look like compared to one of the ones I pulled from my car. No wonder they were leaking.
After I had that all done and the hood back on I finished up the goo on the rear windshield. At which point I realized I'm apparently missing the cover for the child restraint thing.
Mach 1 Member
Joined: March 3, 2015
Posts: 756
Likes: 33
From: Lexington, Ky

I am just happy to see the Mustang getting cleaned up and much needed TLC and hope the best for it!!
Last edited by Jim74656; Mar 9, 2015 at 09:49 AM.
Thread Starter
GT Member
Joined: January 30, 2014
Posts: 137
Likes: 9
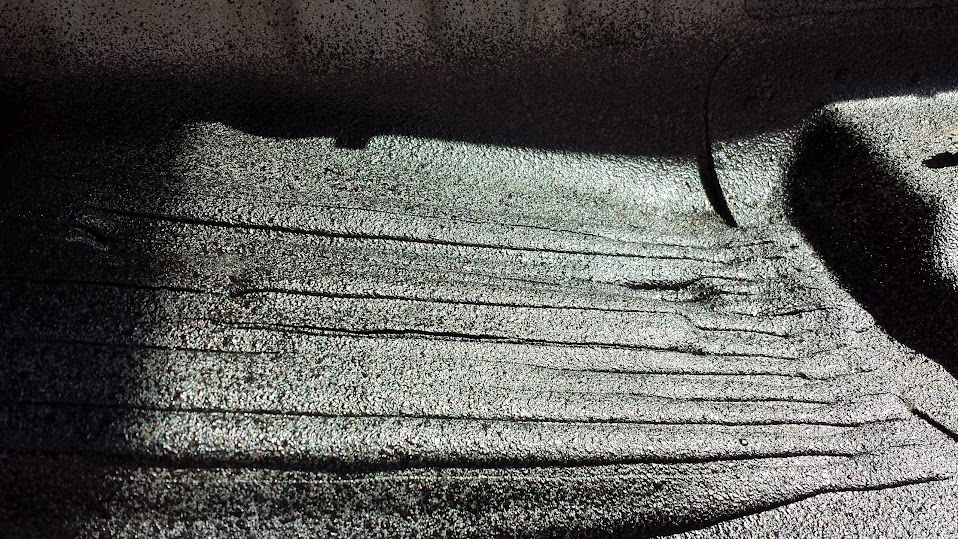
I tried to miss those for a reason...the filth just made me want to find this person and take a noodle and smack them with it, and I figured its going to have to be removed at least twice to get the amount of filth out, as for the mold...steam will help...just be sure you are wearing a mask with respirator!!
Post 47 pulling interior out
Post 92 Cleaning the carpet
Anyway, I got the mold out a long time ago. Basically if you don't want to go back and look at the pics, I soaked the carpet in vinegar to neutralize the mold, let it sit in the sun. Scraped all the jute off the back, then took a pressure washer and scrub brush and some peroxide mixed with dawn dish soap and cleaned the carpet. It actually came out really good after I was done.

Thread Starter
GT Member
Joined: January 30, 2014
Posts: 137
Likes: 9
Thread Starter
GT Member
Joined: January 30, 2014
Posts: 137
Likes: 9
Got some real work done yesterday.


At least this time it was cleaner when I got all the interior out.

So I took this stuff

And went to work.


After the final coat on the driver's side
Time to get the passenger side


Well that needed a few hours to drive so I figured in the mean time I'd try to work on my shifter.
So I took the whole thing apart

And found this in the bottom

Some all purpose and this to blow it out

Figured I'd start taking the rest of it apart, in hopes of fixing the gear indicator.


But then I got frustrated with it so I moved on to the upkeep stuff.


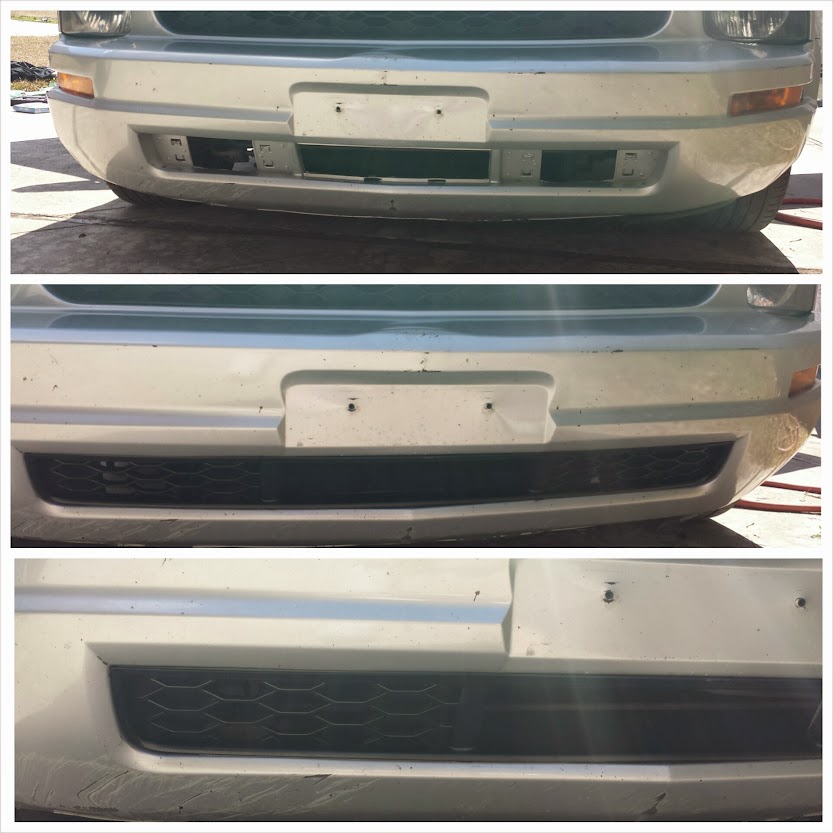
Still needed more time to dry so I got my bumper grill put in. Looks better. Not my favorite grill but at least it's a matching honeycomb as the top grill.
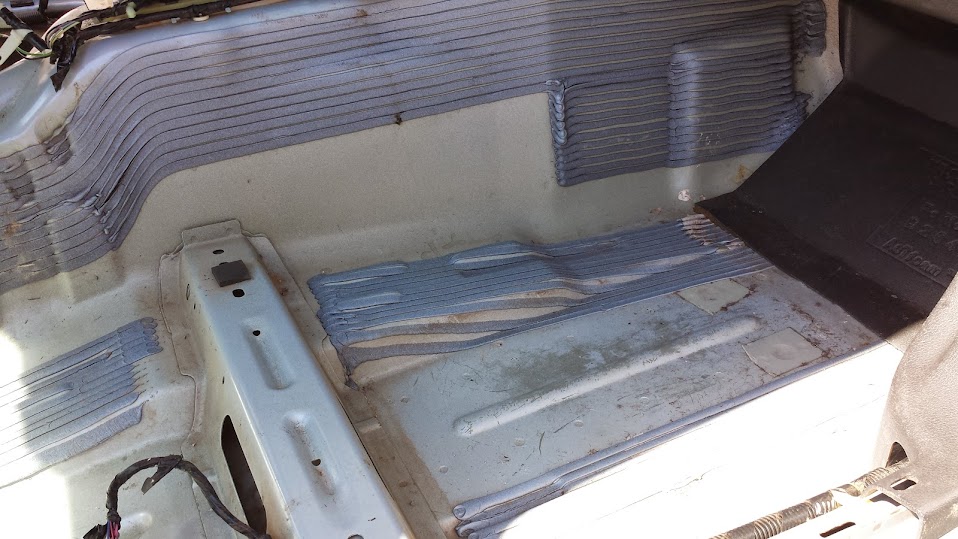
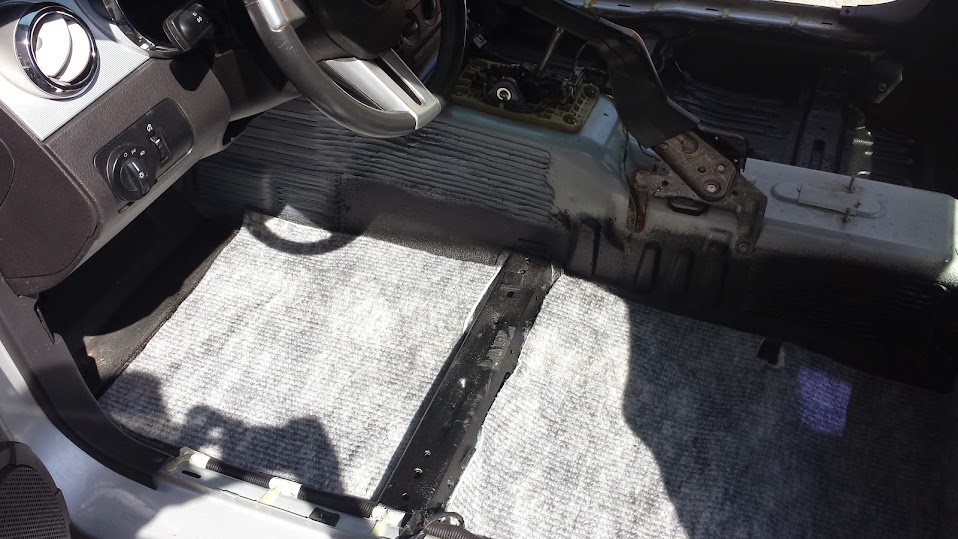
Well now it dried. Time to get the boom mat in.


Measured it out at about 20 inches across, though if you are doing this I suggest you measure yourself.


Driver's side done.
Passenger side done.

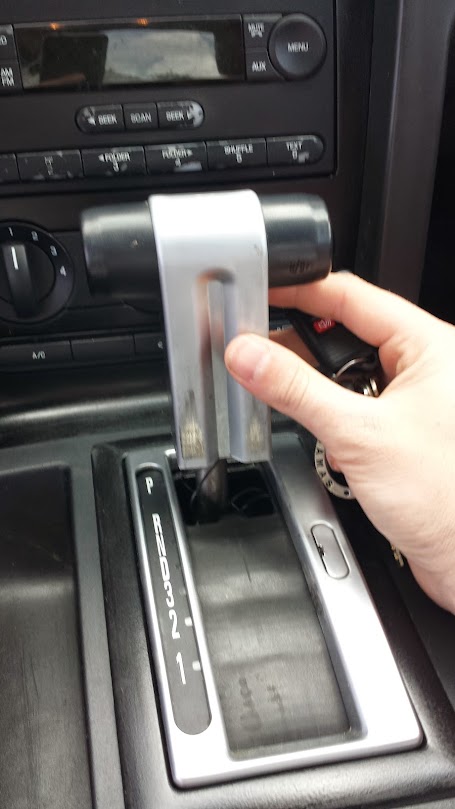
I did succeed in losing the screw that holds my shifter handle in, as well as breaking the shifter indicator. Unfortunately I stepped on it and it is now in two pieces, so I'm pretty sure I'm just going to replace the shifter all together in the not too distant future.
Now everytime I touch the shifter it wants to do this.
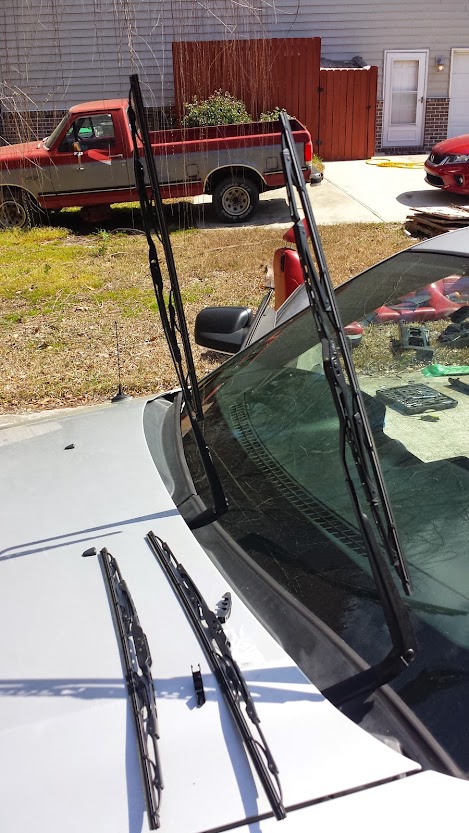
On a better note, I did also pick up some mats for free. They aren't the red ones I want, and I don't really like rubber mats, but for free I couldn't complain until I buy the red ones I want.

At least this time it was cleaner when I got all the interior out.
So I took this stuff
And went to work.
After the final coat on the driver's side
Time to get the passenger side
Well that needed a few hours to drive so I figured in the mean time I'd try to work on my shifter.
So I took the whole thing apart
And found this in the bottom
Some all purpose and this to blow it out
Figured I'd start taking the rest of it apart, in hopes of fixing the gear indicator.
But then I got frustrated with it so I moved on to the upkeep stuff.
Still needed more time to dry so I got my bumper grill put in. Looks better. Not my favorite grill but at least it's a matching honeycomb as the top grill.
Well now it dried. Time to get the boom mat in.
Measured it out at about 20 inches across, though if you are doing this I suggest you measure yourself.
Driver's side done.
Passenger side done.
I did succeed in losing the screw that holds my shifter handle in, as well as breaking the shifter indicator. Unfortunately I stepped on it and it is now in two pieces, so I'm pretty sure I'm just going to replace the shifter all together in the not too distant future.
Now everytime I touch the shifter it wants to do this.
On a better note, I did also pick up some mats for free. They aren't the red ones I want, and I don't really like rubber mats, but for free I couldn't complain until I buy the red ones I want.
Last edited by austinkli; Mar 12, 2015 at 10:22 AM.
Thread Starter
GT Member
Joined: January 30, 2014
Posts: 137
Likes: 9

This stuff is a no good waste of money. Not the tiniest bit of noise reduction. The ONLY place I noticed any difference was the trunk, and to be honest, it wasn't enough to matter.
As for the inside of the car, I assumed that by doubling up, doing two coats of DEI spray AND using the dei boom mat I would surely notice some difference. None whatsoever. My wife road in the car with me and asked if I had even done anything at all.
DO NOT waste your money on a dei product. I will never be buying any of this again. Might as well throw your money out the window.
Cobra Member
Joined: November 19, 2005
Posts: 1,105
Likes: 18
From: Central Alabama
Now let me take a moment to give my personal review for this dei boom mat spray. This stuff is a no good waste of money. Not the tiniest bit of noise reduction. The ONLY place I noticed any difference was the trunk, and to be honest, it wasn't enough to matter. As for the inside of the car, I assumed that by doubling up, doing two coats of DEI spray AND using the dei boom mat I would surely notice some difference. None whatsoever. My wife road in the car with me and asked if I had even done anything at all. DO NOT waste your money on a dei product. I will never be buying any of this again. Might as well throw your money out the window.
Thread Starter
GT Member
Joined: January 30, 2014
Posts: 137
Likes: 9
So yesterday my deck lid black out panel came in. I don't think it looks quite as good as my wife's mach 1 style panel, but it still looks pretty decent. Hers was also $130, and mine I had a lucky find on ebay, so I can't complain.
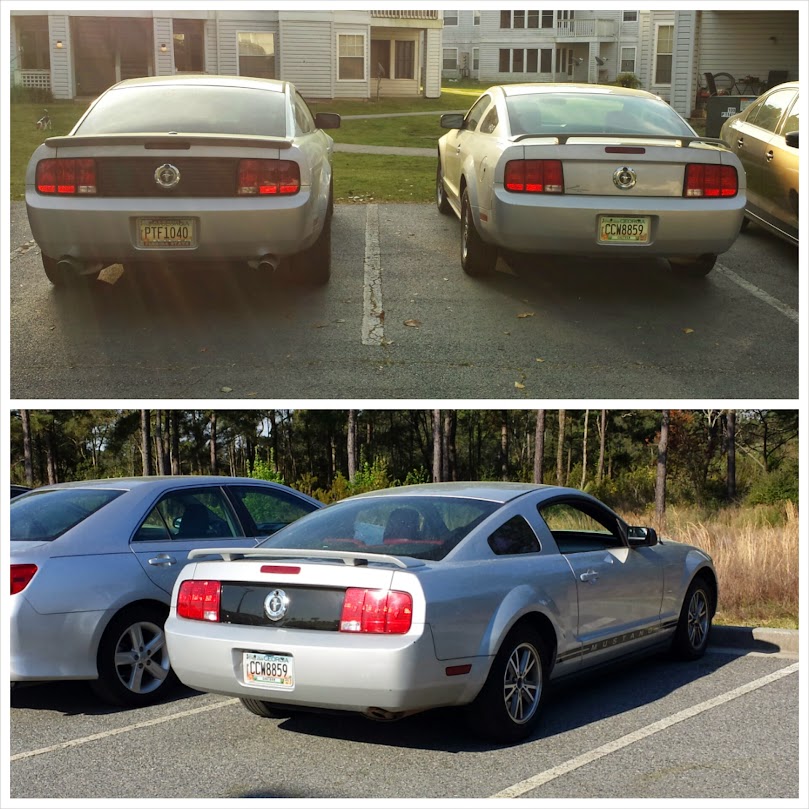
So that made me feel a bit better. I think that black out panel just changes the look of the rear so much!
Got my seats fixed up really nice today. You may remember what they looked like before.
PASSENGER SEAT

DRIVER'S SEAT

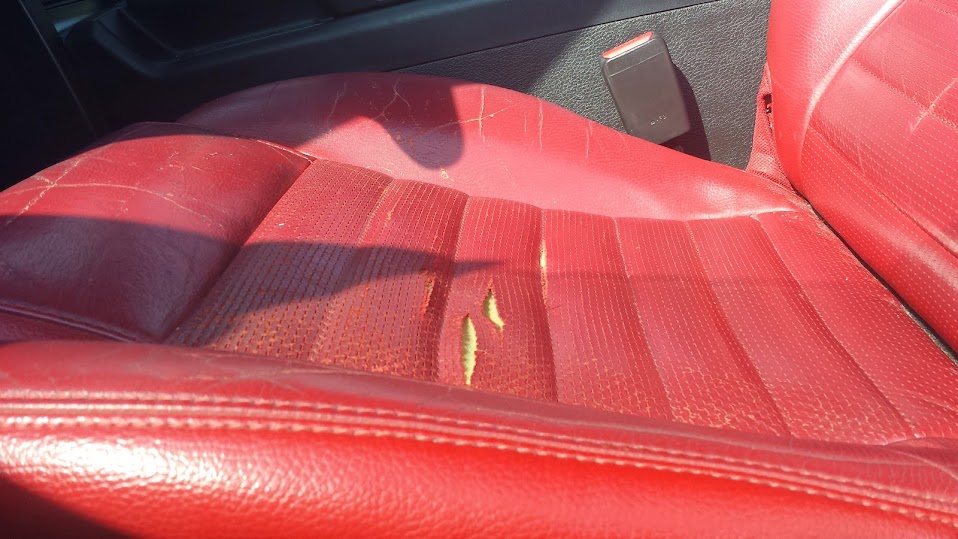
The red was so dull too. When you looked at the back seat you could tell a huge difference.

Working on filling in the cracks in the leather and vinyl.

And here's how they came out! I'm pretty excited.
PASSENGER SEAT

DRIVER'S SIDE

So shiny red! I love it!

They aren't perfect, but they are loads better than they were. Eventually I want to replace the the two middle leather inserts, with black leather to make the seats two tone.
So that made me feel a bit better. I think that black out panel just changes the look of the rear so much!
Got my seats fixed up really nice today. You may remember what they looked like before.
PASSENGER SEAT
DRIVER'S SEAT
The red was so dull too. When you looked at the back seat you could tell a huge difference.
Working on filling in the cracks in the leather and vinyl.
And here's how they came out! I'm pretty excited.
PASSENGER SEAT
DRIVER'S SIDE
So shiny red! I love it!
They aren't perfect, but they are loads better than they were. Eventually I want to replace the the two middle leather inserts, with black leather to make the seats two tone.