
My Pioneer FH8000BT install w/ pics

Thread Starter
Legacy TMS Member
Joined: February 13, 2006
Posts: 2,523
Likes: 150
My Pioneer FH8000BT install w/ pics
Well, I finally got bored with the Skipper 500 with both looks and especially sound. The Shaker had pounding bass if you turned down the treble and turned up the volume but all the highs were muddy at best. I installed some Pioneer 4-way 6x8's in front to help but if you turned up the treble, you'd get ear-piercing highs but the midtones still sucked. I finally decided it was time for a new deck. I did a week's worth of research in...a week. After going to Crutchfield and talking to their advisors, I ordered a Pioneer FH8000-BT. On a side note, Crutchfield has f###ing amazing customer service, plus you get everything you need for the installation (minus the tools) absolutely FREE. Shipping's FREE too. Now back on subject. The installation itself went pretty easily. Crutchfield provided great instructions, but I had to improvise on a few counts and that's mainly what I put in here.
The Steps...
1. Solder up the Pioneer wire harness to the Metra adapter harness. All the color codes matched, and the metra harness even had labels PRINTED right on the insulation! This is the first part where I had to go outside of the directions. I read here on these forums that the amp turn-on signal from the deck was going to be 12V, whereas the amps themselves take 5V. The result is a popping sound when you turn the radio on. So I went to radioshack got a 5V voltage regulator, was just over $1. I soldered the input to the output of the pioneer (blue wire on the Pioneer harness), the output to the blue wire on the Metra harness, and the ground lead to the ground wires in the harness. Problem solved. I tested it using my laptops power supply, and sure enough 19.8V reduced to 4.9V
2. Mount the stereo in the dashboard adapter.
3. Remove center console finish panel, side trim pieces, and the center instrument panel. When you remove the last panel, make sure you disconnect the blower fan and HVAC control harnesses first (you can access from the sides), otherwise it'll be a B*TCH to remove
4. remove the Skipper 500, plug in the adapter harness.

5. Now while everything is apart, its the easiest time to route the USB extension cable and the blutooth microphone. But to properly mount the blutooth microphone I to remove some extra panels. The ones I removed, in order: Kick plate panel, lower a-pillar trim panel, lower dash panel, A-pillar, overhead console, driver's side sunvisor, and sunvisor clip. "Wait..sunvisor?!" you say? Patience.
6. I started by routing the microphone through the dashboard, beginning at the area where the radio goes and running it next to the wiring harness that already travels through the center of the dash, below the steering shaft. I zip-tied the microphone wire to the harness to make sure it couldn't get wrapped up or tangled on anything important down there, but didn't fully tighten the zip ties until completely done with routing, for obvious reasons.
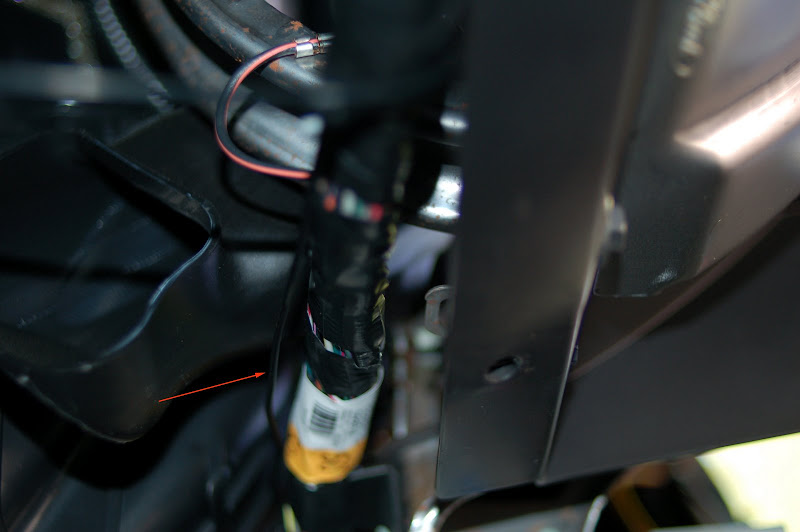
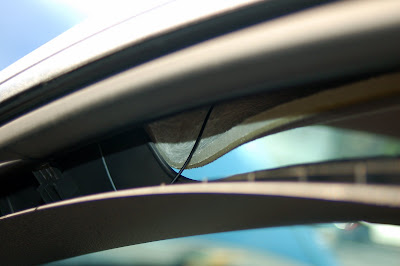
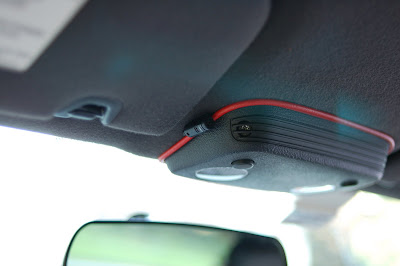
I used a zip tie to hold the cord at a right angle at the very left of the dash and then snaked it up through the A-pillar. Now for the reason for removing the sunvisor, overhead console, and associated parts. I routed the microphone over the headliner from the A-pillar to the overhead console:
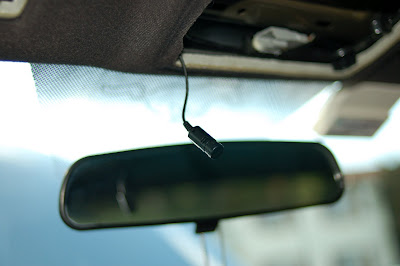
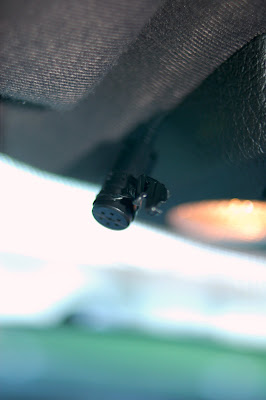
6. Next it was a simple matter of reinstalling the overhead console. The microphone has a tendancy to just hang from the seam which looks...pretty stupid. So my answer is pretty simple and decidedly low-tech. I wrapped a black twist-tie around the microphone and then flattened the ends out like so. After putting the welt back in, I just pushed the twist tie in the seam and now it blends in pretty well!
7. Next, take up the slack on the mic line and tighten down the zip ties, and put all the trim panels back in, with the exception of the stuff related to the center console.
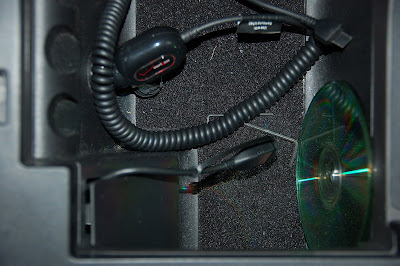
8. Route the USB cable through the center console and through the access plate in the console compartment under the armrest. I zip tied the cable to the wires that go to the e-brake so they wouldn't interfere with the e-brake lever. This is what the USB cable looks like right now. I'm pretty sure I'm going to have to drill a hole through the access plate to get it to close flush again.
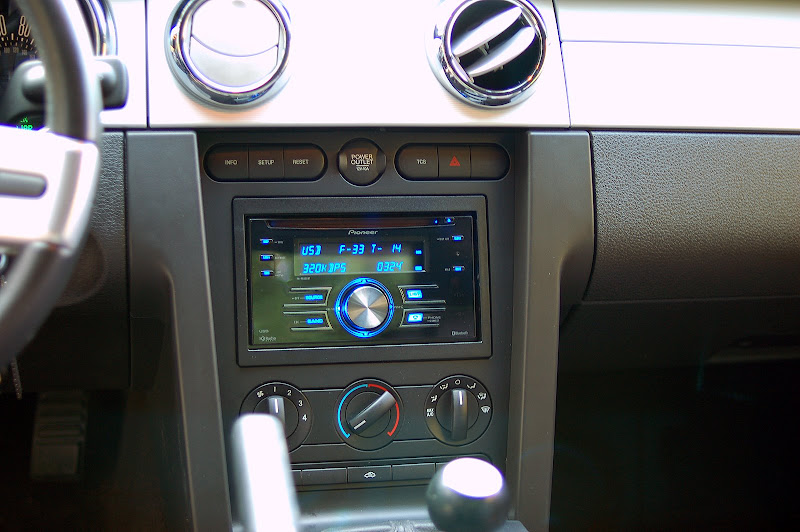
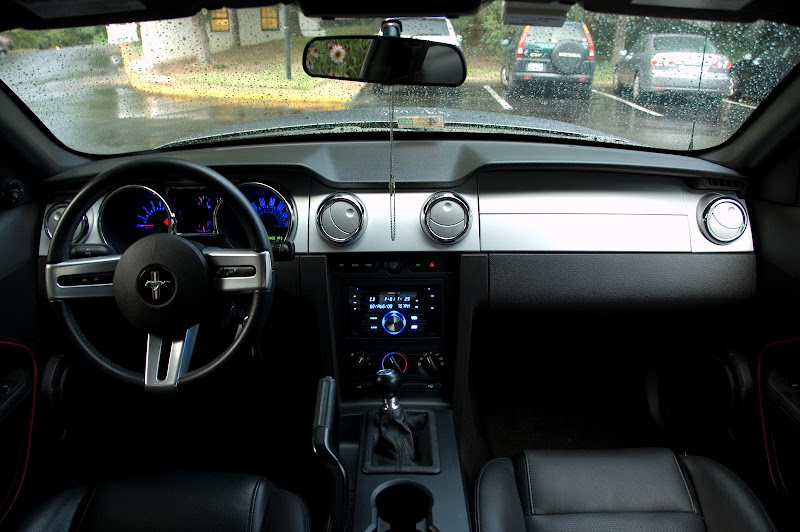
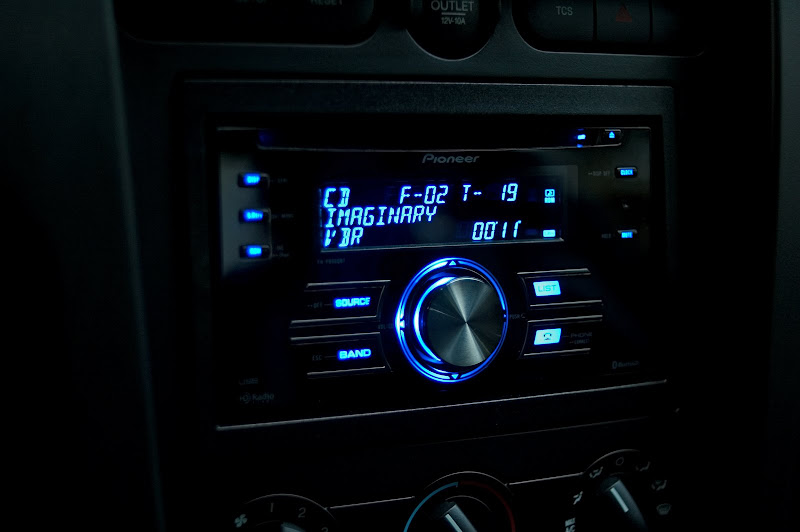
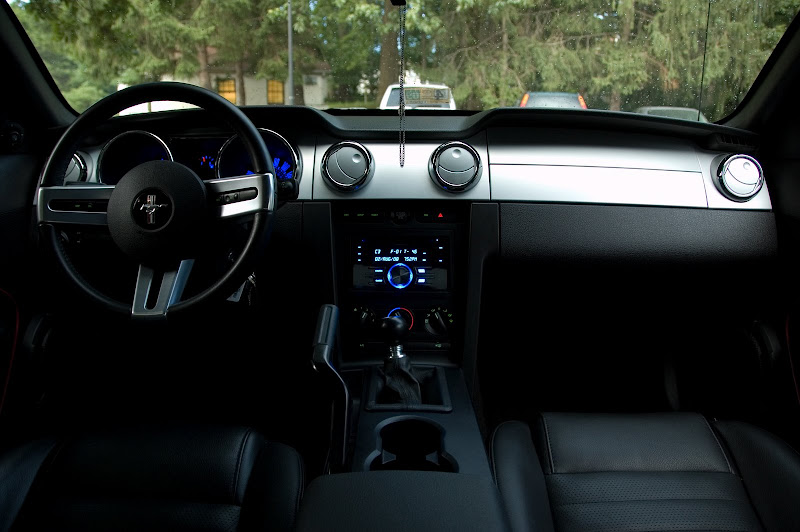
8. From there on out, its just a matter of attaching the wiring harness, USB cable, and MIC cable to the back of the stereo, bundling the extra wire from the mic, bolting the deck in, and putting everything back together and enjoying the music. And now the results! (1st pic over exposed so you can see the details better)
The selling points:
-Clean design
-MP3 playback w/ sound retriever (restores lost quality from compression)
-full iPod control (too bad I don't have an iPod)
-USB (allows you to play songs off your mp3 player, or even a thumb drive)
-Blutooth (both audio players and acts as a headset for your phone)
-subwoofer pre-outs
-dimmer
-7 band eq
-a lot more features that you can probably look up. The advisor said he couldn't hear a difference between the Pioneer 8000 and the competing Alpine that was $70 more. And that Alpine needs hundreds of dollars more in accessories to have the same USB and Blutooth accessories.
Three complaints with the stereo though:
1. The dimmer apparently doesn't work with the Mustangs wiring harness. According to Crutchfield, the radio is looking for a 12V signal from the car but the car uses some kind of data system. I'm going to have to tap off the headlight switch. Had I known that ahead of time I would have done it while everything was taken apart.
2. I can't turn off the beep. But the beep isn't that annoying
3. I realize how much my factory rear speakers suck. I couldn't really tell from the driver's seat but when I sat in the back to get the pictures it was brutally obvious. Guess the next audio upgrade is going to be some new 3-ways.
It does sound amazing though. I turned the Skipper 500 right before I started the installation process for a point of reference. After the installation I expected to hear crappy quality until I got the EQ's set up but my jaw dropped when it first turned on. Even more, it was the RADIO. The **** thing sounds better on FM than the Shaker did on CD! I'm extremely satisfied with it.
The Steps...
1. Solder up the Pioneer wire harness to the Metra adapter harness. All the color codes matched, and the metra harness even had labels PRINTED right on the insulation! This is the first part where I had to go outside of the directions. I read here on these forums that the amp turn-on signal from the deck was going to be 12V, whereas the amps themselves take 5V. The result is a popping sound when you turn the radio on. So I went to radioshack got a 5V voltage regulator, was just over $1. I soldered the input to the output of the pioneer (blue wire on the Pioneer harness), the output to the blue wire on the Metra harness, and the ground lead to the ground wires in the harness. Problem solved. I tested it using my laptops power supply, and sure enough 19.8V reduced to 4.9V
2. Mount the stereo in the dashboard adapter.
3. Remove center console finish panel, side trim pieces, and the center instrument panel. When you remove the last panel, make sure you disconnect the blower fan and HVAC control harnesses first (you can access from the sides), otherwise it'll be a B*TCH to remove
4. remove the Skipper 500, plug in the adapter harness.
5. Now while everything is apart, its the easiest time to route the USB extension cable and the blutooth microphone. But to properly mount the blutooth microphone I to remove some extra panels. The ones I removed, in order: Kick plate panel, lower a-pillar trim panel, lower dash panel, A-pillar, overhead console, driver's side sunvisor, and sunvisor clip. "Wait..sunvisor?!" you say? Patience.
6. I started by routing the microphone through the dashboard, beginning at the area where the radio goes and running it next to the wiring harness that already travels through the center of the dash, below the steering shaft. I zip-tied the microphone wire to the harness to make sure it couldn't get wrapped up or tangled on anything important down there, but didn't fully tighten the zip ties until completely done with routing, for obvious reasons.
I used a zip tie to hold the cord at a right angle at the very left of the dash and then snaked it up through the A-pillar. Now for the reason for removing the sunvisor, overhead console, and associated parts. I routed the microphone over the headliner from the A-pillar to the overhead console:
6. Next it was a simple matter of reinstalling the overhead console. The microphone has a tendancy to just hang from the seam which looks...pretty stupid. So my answer is pretty simple and decidedly low-tech. I wrapped a black twist-tie around the microphone and then flattened the ends out like so. After putting the welt back in, I just pushed the twist tie in the seam and now it blends in pretty well!
7. Next, take up the slack on the mic line and tighten down the zip ties, and put all the trim panels back in, with the exception of the stuff related to the center console.
8. Route the USB cable through the center console and through the access plate in the console compartment under the armrest. I zip tied the cable to the wires that go to the e-brake so they wouldn't interfere with the e-brake lever. This is what the USB cable looks like right now. I'm pretty sure I'm going to have to drill a hole through the access plate to get it to close flush again.
8. From there on out, its just a matter of attaching the wiring harness, USB cable, and MIC cable to the back of the stereo, bundling the extra wire from the mic, bolting the deck in, and putting everything back together and enjoying the music. And now the results! (1st pic over exposed so you can see the details better)
The selling points:
-Clean design
-MP3 playback w/ sound retriever (restores lost quality from compression)
-full iPod control (too bad I don't have an iPod)
-USB (allows you to play songs off your mp3 player, or even a thumb drive)
-Blutooth (both audio players and acts as a headset for your phone)
-subwoofer pre-outs
-dimmer
-7 band eq
-a lot more features that you can probably look up. The advisor said he couldn't hear a difference between the Pioneer 8000 and the competing Alpine that was $70 more. And that Alpine needs hundreds of dollars more in accessories to have the same USB and Blutooth accessories.
Three complaints with the stereo though:
1. The dimmer apparently doesn't work with the Mustangs wiring harness. According to Crutchfield, the radio is looking for a 12V signal from the car but the car uses some kind of data system. I'm going to have to tap off the headlight switch. Had I known that ahead of time I would have done it while everything was taken apart.
2. I can't turn off the beep. But the beep isn't that annoying
3. I realize how much my factory rear speakers suck. I couldn't really tell from the driver's seat but when I sat in the back to get the pictures it was brutally obvious. Guess the next audio upgrade is going to be some new 3-ways.
It does sound amazing though. I turned the Skipper 500 right before I started the installation process for a point of reference. After the installation I expected to hear crappy quality until I got the EQ's set up but my jaw dropped when it first turned on. Even more, it was the RADIO. The **** thing sounds better on FM than the Shaker did on CD! I'm extremely satisfied with it.
Cobra Member
Joined: February 2, 2005
Posts: 1,221
Likes: 1
From: Aurora, IL
Looks great, nicely done. I recently did the same with my Shaker 1000, my new Power Acoustik PAVN 7210 navigation/dvd stereo has much better sound than stock. There's much more mid-bass than before.
You can hook the dimmer circuit in at the message center buttons, yellow/white wire. That's where I tapped into mine, it works perfectly.
You can hook the dimmer circuit in at the message center buttons, yellow/white wire. That's where I tapped into mine, it works perfectly.

Member
Joined: March 4, 2011
Posts: 2
Likes: 0
Hey, I just got this stereo, I have the shaker 500 aswell so I was hoping you could help me out. My wire harness is scosche brand and most of the wires match up color to color but on the wire harness I have 4 browns wires that say mute on them, 2 orange/orange black wires that say dimmer and dimmer ground, then a pink wire that says phone mute, and a blue wire that says power antenna.
So my questions...
Hook all the brown wires to the yellow mute wire?
Where do I hook up the pink phone mute wire?
Do I just leave the blue power antenna wire alone?
And what do the dimmer wires do? Do i really need to hook them up?
So my questions...
Hook all the brown wires to the yellow mute wire?
Where do I hook up the pink phone mute wire?
Do I just leave the blue power antenna wire alone?
And what do the dimmer wires do? Do i really need to hook them up?
Thread Starter
Legacy TMS Member
Joined: February 13, 2006
Posts: 2,523
Likes: 150
Ok, luckily I keep EVERYTHING, so I have the diagram Crutchfield sent me when I got the stereo and harness. My harness doesn't have mute wires, nor a phone mute, nor a power antenna wire (obviously the Mustang doesn't have a power antenna anyway). So clearly you don't need any of those. You can just tape them off individually with electrical tape and then bundle them together so they don't short anything in the dash.
The dimmer dims the backlight on the radio when you turn on the headlights. It's not a variable dimmer (it doesn't hook into the dimmer switch for the instrument cluster). It doesn't dim it by a huge amount, but it dims it enough so the radio isn't obnoxious when you're driving at night. You can either tap into the message center buttons like Justin said in post#3, or into the headlight switch like I did. I think I backprobed the headlight switch with a volt meter to figure out what pin to tap into. It needs to see 12V to know the headlights are on.
Honestly, if I really need it to be dark in the car while I'm driving at night, I just hold down the "CLOCK" button on the radio for 3 seconds and it shuts off the display entirely (hold the clock button again for 3 sec to turn it back to always on), and if you touch any of the buttons on the radio the display comes back on for 5 seconds I think and then shuts back off. It's nice that the display isn't as bright when it turns back on for those few seconds though. Before I hooked up the dimmer it was blinding.
Back to the subject of wiring, don't forget the voltage regulator (see post #1) to keep your subs from popping.
Here is the wiring diagram for my harness:
Thread Starter
Legacy TMS Member
Joined: February 13, 2006
Posts: 2,523
Likes: 150
Quick correction about the mute wires: The Pioneer instructions say "If you use an equipment with Mute function, wire this lead to the Audio Mute lead free of any connections." I think that's intended for amps that have a mute function, so that when you mute the radio it sends a signal to the amps to mute themselves so they're not just wasting power or amplifying baseline noise.
Legacy TMS Member
Joined: August 7, 2006
Posts: 16,113
Likes: 789
From: In Boredom
if you guys/girls want better/more sound out of your tuner install sound deadner any where you can. You won't be sorry... Trust me on this one. it even make the stocker sound better.
Thread Starter
Legacy TMS Member
Joined: February 13, 2006
Posts: 2,523
Likes: 150
My next on the list is transmission tunnel and floor boards. I've just been procrastinating for 2 years because I don't want to gut the entire interior to get the carpet out.
Mach 1 Member
Joined: June 27, 2011
Posts: 822
Likes: 8
From: Houston, TX
Agreed. I've done the rear seat pan and rear quarters and doors with Dynamat, MAN what a difference that made. Frankly it just makes the car a nicer place to be on long hauls
My next on the list is transmission tunnel and floor boards. I've just been procrastinating for 2 years because I don't want to gut the entire interior to get the carpet out.
My next on the list is transmission tunnel and floor boards. I've just been procrastinating for 2 years because I don't want to gut the entire interior to get the carpet out.

Thread
Thread Starter
Forum
Replies
Last Post
jim010
2010-2014 Mustang
29
Oct 12, 2015 08:33 PM
glo106
2010-2014 Mustang
16
Aug 11, 2015 08:29 AM