When you click on links to various merchants on this site and make a purchase, this can result in this site earning a commission. Affiliate programs and affiliations include, but are not limited to, the eBay Partner Network.
That stinks Sean. Sorry you're not going to finish your build.
You'll be in great hands with JPC though, as you already know. Those guys are great with engines and tuning.
Good luck bro and keep us posted!
Thanks Tony! It was a bit of a gut wrenching moment for sure. I remember after putting all the timing equipment on and just standing back with a big *** smile on my face knowing all I had to do was degree the cams and button up the front of the motor and I was done. I was really happy with how things turned out and then that happened. I was none to happy that's for sure.
Thanks Tony! It was a bit of a gut wrenching moment for sure. I remember after putting all the timing equipment on and just standing back with a big *** smile on my face knowing all I had to do was degree the cams and button up the front of the motor and I was done. I was really happy with how things turned out and then that happened. I was none to happy that's for sure.
You're welcome bud!
You accomplished more than most of us on here could do, so nothing to feel bad about Sean. Good luck going forward and keep us posted.
Hi Sean. I know little to nothing about all of the detailed engine tear-down and re-build that you did. Very impressive. I had a question for you. I believe the 2011-2012 Coyote motors came with a small feature called 'piston oil squirters'. I also believe that the 2013-2014 removed this same feature. Now I'm not sure if this was built into the heads, the block, or what But, considering your mixing different year/model block & heads, how will this affect what you're doing? (if at all)
Well for what it's worth Sean I couldn't do any of the stuff you attempted!
Hahaha well I guess neither could I!
In all honesty, the most involved thing I did to a vehicle was swapping injectors on a truck at work and a brake job so this was something to get me doing something and to learn about the engines in these cars in a way I couldn't have gotten by doing anything else and I'm glad I did it ..... as long as I didn't break anything
Originally Posted by Stage_3
You're welcome bud!
You accomplished more than most of us on here could do, so nothing to feel bad about Sean. Good luck going forward and keep us posted.
I have a lot more to post, I just have to find the time to do it haha
Originally Posted by PJRManagement
Hi Sean. I know little to nothing about all of the detailed engine tear-down and re-build that you did. Very impressive. I had a question for you. I believe the 2011-2012 Coyote motors came with a small feature called 'piston oil squirters'. I also believe that the 2013-2014 removed this same feature. Now I'm not sure if this was built into the heads, the block, or what But, considering your mixing different year/model block & heads, how will this affect what you're doing? (if at all)
Hey Peter, yes the 11-12 coyote did have piston squirters. I have attached a picture of them just for reference.
They go on the underside of the block right next to the end of the bores on the block. What happens is the oil moves through the "stems" and will "squirt" the underside of the pistons in order to keep them cool. From my understanding the Boss didn't need the cooling jets for their pistons due to the design of them, but that I do not know for certain. I would have to try and go digging around for the info on that but these were the oil squirter deletes on the Boss 302.
For the 2013-14 models Ford redesigned the piston (actually they redesigned the piston 3 times I believe, but I am not 100% sure about that) focusing mainly on the ring land area. The problem with saying that the 13-14 pistons did away with the oil squirters is that it isn't exactly true. While there are cases of people opening up their engines and not finding any oil squirters, there are probably just as many cases where there are people with the oil squirters.
Below are the 3 different piston designs along with the Boss piston. I also have pictures of the Boss 302 rod vs a GT rod if anyone is interested in looking at the difference between those as well.
Early GT production Piston (11-12 piston {03/22/2010-12/08/2011})
Late GT production piston (Late 12 piston {12/08/2011-02/27/2012}
You can see the phosphate coating that was added to the piston around the ring land and the piston skirt when you compare it to the Early GT piston and how shiny it is.
2013 GT piston (02/27/2012-end of production)
Now for the 2013 redeisgn you can see that it kept its phosphate coating but they also added extra oil drainback passages as well as a gas groove below the first ring.
Here is the differences between the GT piston and the Boss piston. The Boss 302 piston is on the right while the GT piston is on the left. (looks like it is an early production piston)
In talking with Kelly about these he had mentioned that for guys who are going to be drag racing their cars, they wouldn't need this as you aren't exactly putting a lot of stress on the A-Arms. For people who are going to be using their cars for road course or autocross or street driving this would make sense as you are tying the two A-arms together making them stronger and stiffer. There would be less deflection on the A-arms for improved handling.
This is made out of billet steel and is FAR stronger than the cast piece that Ford offers. On high boost applications, the factory sprocket has been known to break on cars with superchargers or turbochargers and will destroy your engine. Once this breaks, there is nothing holding the timing chains onto the crankshaft and thus your primary chains will have the potential to skip a bunch of teeth along the sprocket and will throw the timing off.
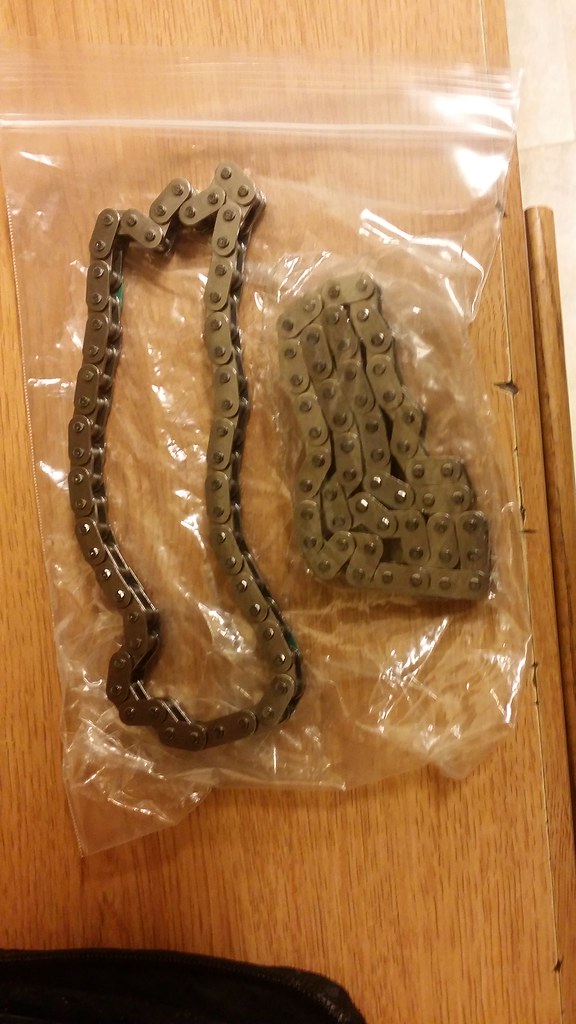
The problems with going with aftermarket cams and springs is that you may get a larger lift along with increased duration camshaft that the engineers at Ford never designed the secondary chains for. With these aftermarket cams, most will replace the valve springs that have increased spring pressure and seat pressure which will put some added stress on the secondary chains. For the most part, I think you will be ok to run the factory units but with the added RPM's and extended higher RPM's that the engine would see on a road course, I thought this would have been a good idea. I know I would have kicked myself if the cams broke on me. They feature thicker pins holding the chain links together along with thicker plates.
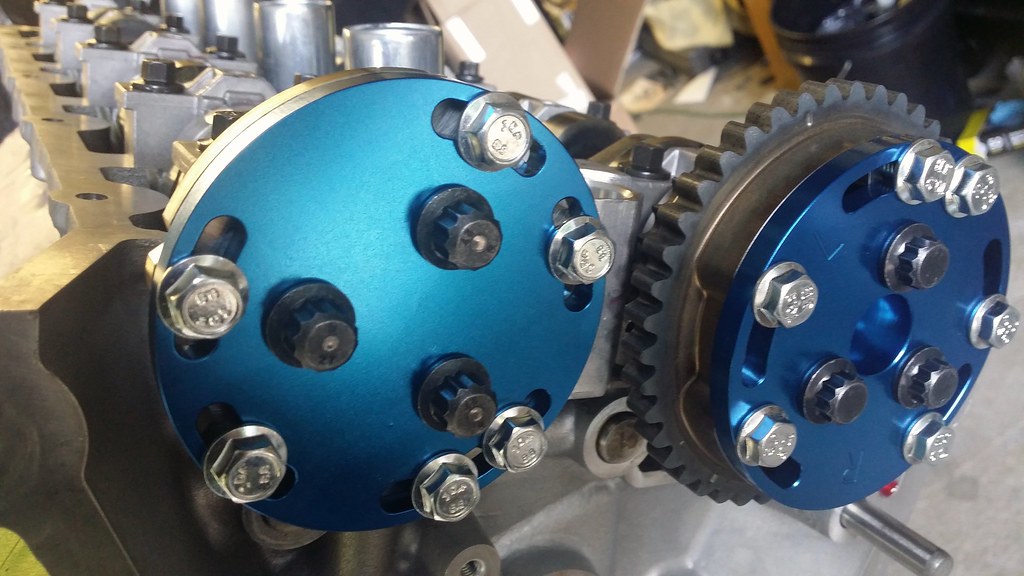
These are going to delete the internals of the VCT phasers which is going to end up saving a lot of rotating mass off of your cams and timing system. While not expressly heavy, you can certainly feel the difference when you hold a stock phaser along with one of these phasers in your hand, especially with the exhaust phasers. If you are locking out the phasers, you might as well go the extra step and get these as well. Anything to gain an edge against your competition right?
Well, these I can't really say much about these as the cam grinds don't belong to me. I will say however that in researching cams for the coyote in N/A form, it seems that the lift, isn't the important part. The thing you want to focus on here is the duration, as this is what is going to be making the most power with these motors. If you think about it, you are only at your maximum lift for a fraction of a second but the longer you have your valves open, the more air and fuel you can get into the combustion chamber as well as the exhaust gases out of the chamber.
Just as a point, it is possible to make cams lope in these cars. These aren't RGR cams, but I just want to point that out but it is too badass not to share haha.
With the over axle pipes you are obviously removing the factory resonators but you are also gaining some power. With these you are going to gain somewhere around 7-15HP and when playing the N/A game, every little bit helps.
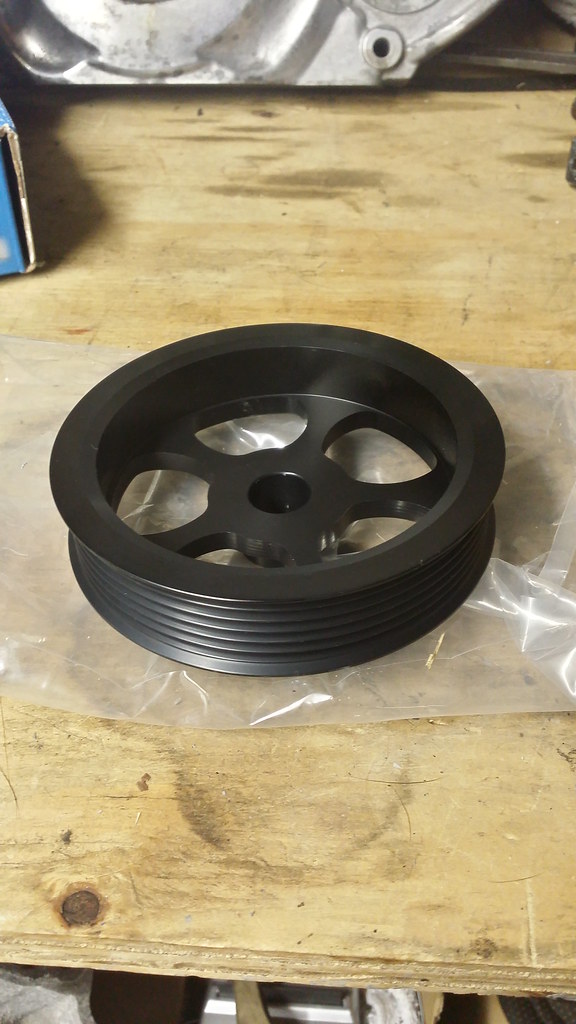
This is a lightweight pulley and I can tell you that when they say lightweight, they mean LIGHTWEIGHT!!! This thing feels like a feather to be honest. Anyway, this replaces the pulley on your alternator which will slow down the alternator and increase the longevity of the alternator. JPC says that they see about a 2-4HP increase with these and on a coyote stock car these would be some BIG numbers when you have to run the same equipment as everyone else. As previously stated on a N/A build, just like with the 3V every little bit counts. You are going to need a bigger belt that is 70 7/8" belt which should be NAPA 25-060703 according to JPC. I haven't had a chance to measure this so once I do, I will confirm.
Recently, Darren (the car in the video above) had been posting asking about some blowby issues and one of the suggestions was to go with larger AN lines from the valvetrain to the catch can so you aren't choking the motor and getting rid of the blow by fast enough. with this in mind, I said **** it. I might as well get these and prevent any future issues. If it works cool, if not, no biggie right? Not to mention, this is MUCH cheaper than going with the 3 vane vacuum pump setup that you would need for road race applications.
The startlite hoses are 45% lighter than similar stainless steel hoses and IIRC they were something like 30g per foot lighter than the AQP Stainless steel hoses that Aeroquip sells. In the spirit of MattD ... weight savings *****
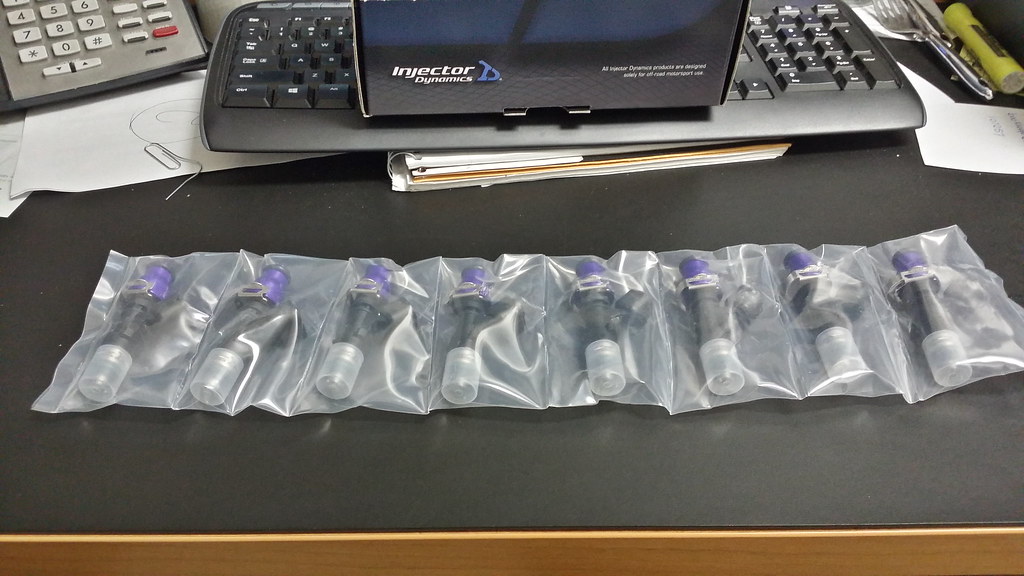
I know that these are way overkill for my setup but if I ever wanted to go bigger and badder with the car I will be setup injector wise, not to mention I have been talking about getting an actual fuel system for the car so this is once less thing I would have to get when I go down that route.
This makes wiring the voltage booster stupid simple! Just plug everything in and you are all set and I am all about convience here! Comes with everything you see here and is stupid simple.
Since I have to comply with emissions for NYS I decided to go with the Kooks green cats H-Pipe system which will tie into the existing Kooks side pipes I have. As is, the Kooks side pipes make the car ****ing loud as **** and sound amazing so I am really dying to hear how they sound with the long tubes. The important part here is that these are 49 state legal so I should be all good to go with emissions.
Well, since the motor I turned my attention to getting everything else ready for the car going down to JPC. I started with the VMP voltage booster (It is the same thing as a Boost-a-Pump except that Kenne Bell owns that name) and it is so stupid simple that even a caveman could do it. Once again, I had my helper with me once I pulled the trunk mat out of the car.
So I laid out everything for this install. As you can see there is not much to it.
It was so simple, I used the adhesive strips and placed them on the back of the voltage booster and then attached it to the side of the tire well. I then disconnected the FPDM connection and plugged it into harness and then the harness into the voltage booster. I grounded the wire into the ground bolt that is sitting at right behind the factory plastic
trunk piece.
I then moved my way to the fuse box and put the supplied fuse in location F13 in the fuse box
Parts Used
VMP Plug and Play Voltage Booster - vmppnpamp
Since my battery is so beyond dead at this point I tied some twine to the emergency trunk latch in the trunk this way I could just pull on the twine and it will pop the trunk in case I needed to get into the trunk for whatever reason.
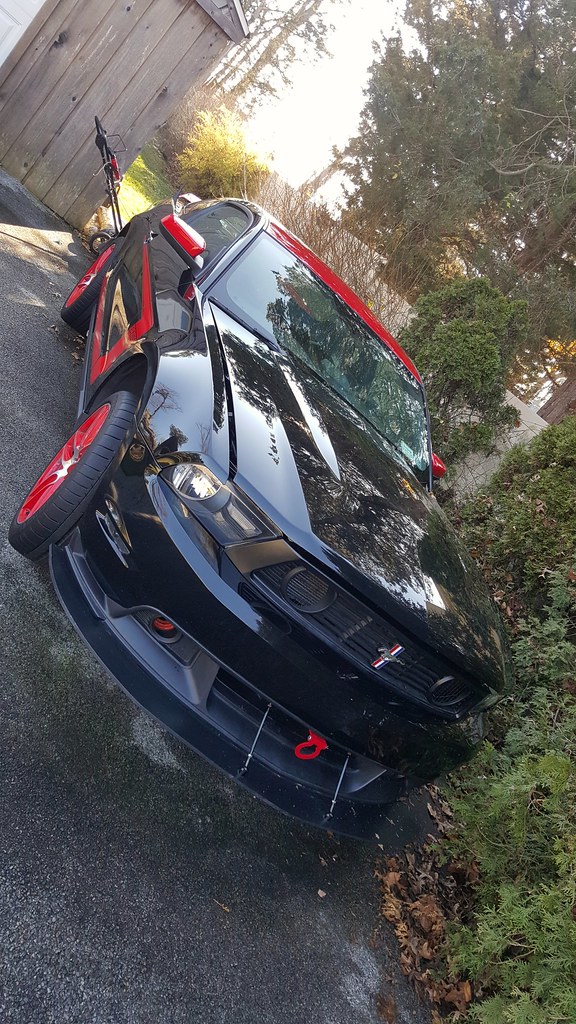
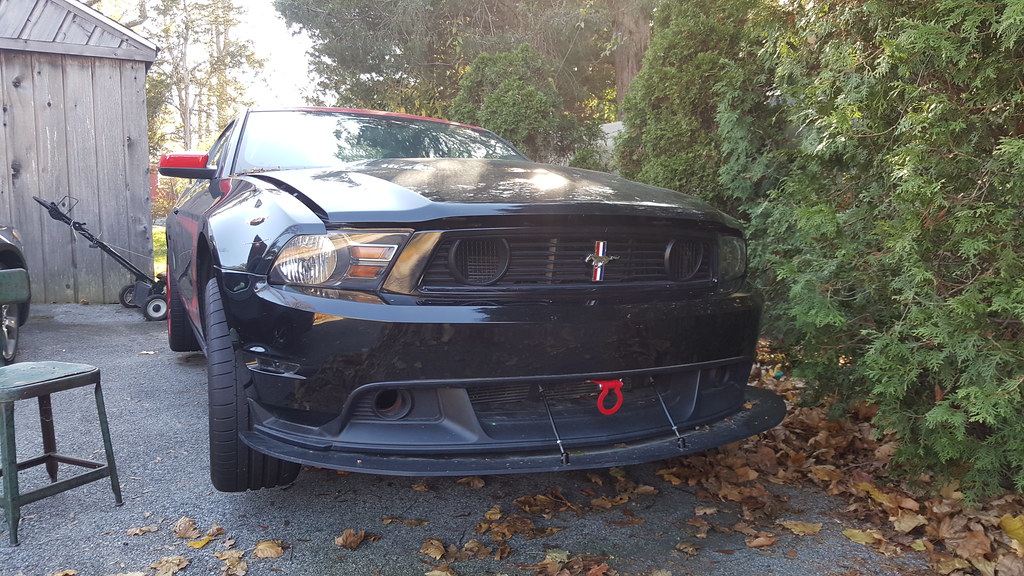
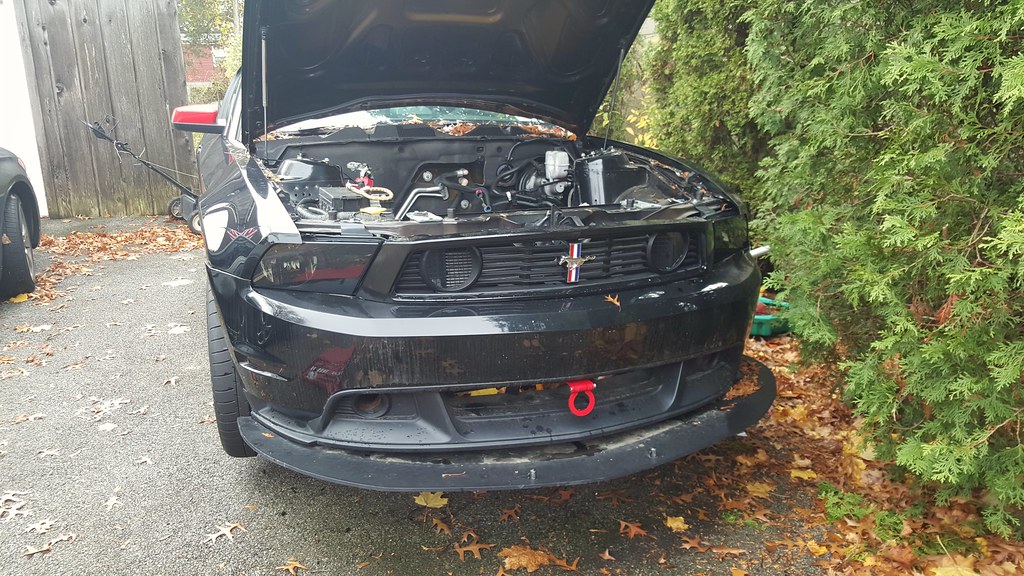
Once day I was standing on my front porch staring at was has now become driveway art and looking at the rust brown rotors on my poor car and thinking that I will probably have to winch this thing onto a trailer, so I might want to start looking for some tow hook options.
Since I was going to use this on the road I didn't like the Ford Racing option which replaces the front bumper beam with a tubular bumper bar and they mount the tow hook onto the bar and send it through the front bumper cover as such.
I didn't want to hack up my front bumper and if I got into an accident I would like to have the beam there to help absorb some of the energy from a crash. The next kit that I knew of was the Cooltech front tow hook kit and while it does look pretty cool you would have to drill into the front bumper plus I think it looks a wee bit off not being centered on the car.
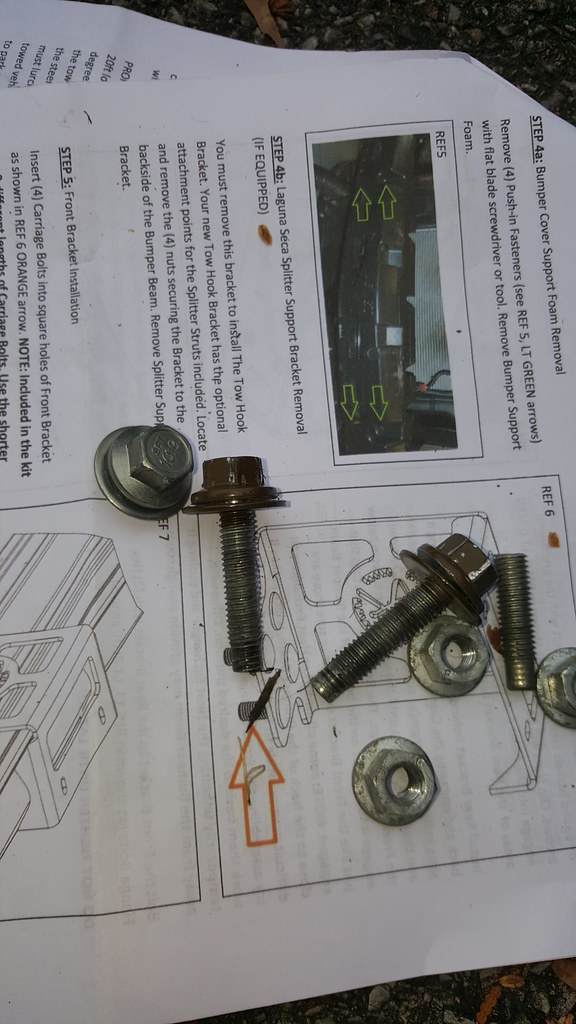
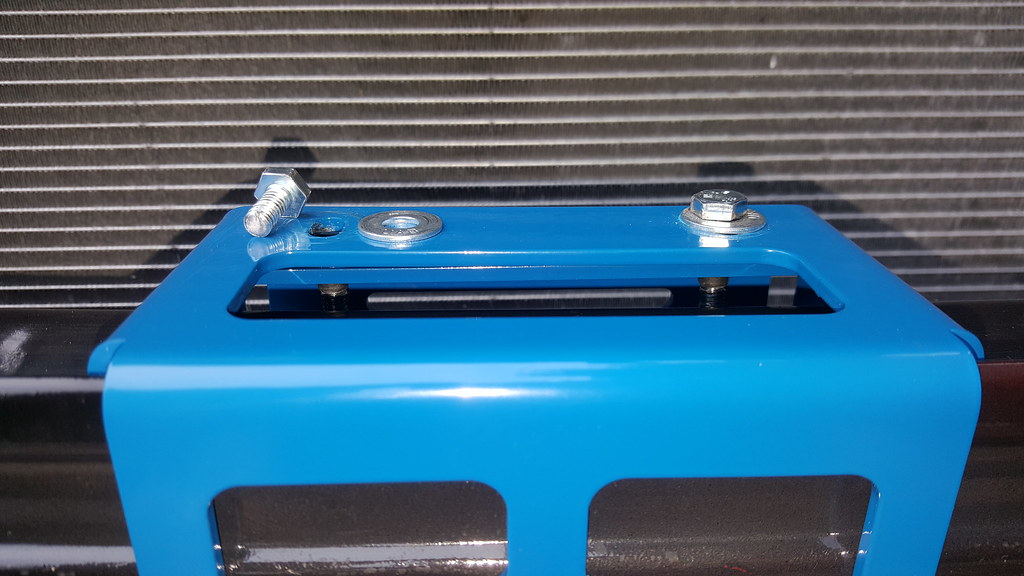
So I went and hit up Steve at Blowfish Racing and asked him about his Tow hook and if there was anything that I needed for the Laguna Seca front splitter and he said that everything was included so I went ahead and grabbed his kit. I have to say that it is a very high quality kit IMO everything is perfectly powdercoated with no issues, no splatter from welding or anything like that and they even give you a tow protection strap. I received it in a few days and got home and assembled it on the table in my TV room. Pardon my shoes I just ran home for lunch.
As I said before, I think that I can break just about anything. When I went to go put on my blowfish tow hook I ended up breaking one of the bolts from the Laguna Seca bracket while taking it off the car. It looks like someone replaced it at one point since I only had 3 out of 4 bolts installed and the 3rd bolt that I broke was a different kind of bolt all together.
If you look at the bolt heads, you will see that 2 of them are painted that brown primer color while the broken one isn't and even the bolt itself is different. I'm not sure if that is by design but it looks like the bracket was replaced at one point.
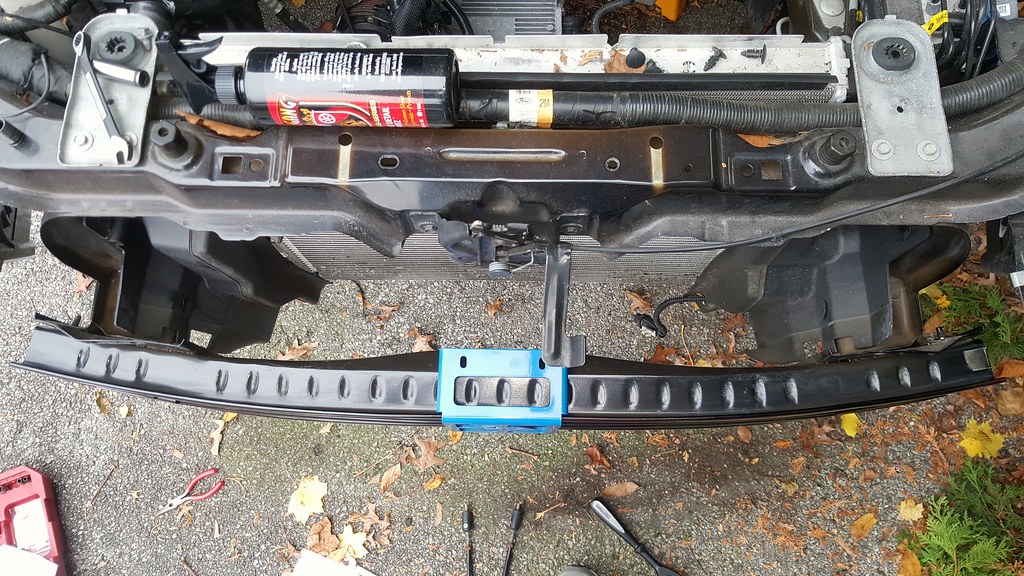
The install is pretty straight forward, you basically center the bracket up and line them up in the recesses in the bumper bar and you can bolt the two halves together.
Since I have a 2012 I had to use the supplied spacer along with the longer carriage bolts.
Oh, and I ended up braking a bolt from the blowfish hardware -_-
I sent a message to Steve on a Sunday I believe and within like 4 minutes he sent me a message and we talked about and said he was going to send new hardware out on Monday. I got the new hardware in 2 days and I was back in business. He even sent me two new bolts and inserts for the top of the mount which was very nice. The customer service from my side of things is absolutely excellent with Steve, I would HIGHLY recommend the blowfish bracket. It appears to be very well constructed and the hardware seems to be of pretty good quality (despite me breaking one) and the powder coating on this is very nice! I bolted everything up and used Blue Loctite #242 on all of the bolts for a little bit of extra security.
On the 2010-2012 with the Boss 302 front valance you have to cut a hole in it so that the tow hook assembly can fit through the bumper. It is pretty easy though so no big deal here.
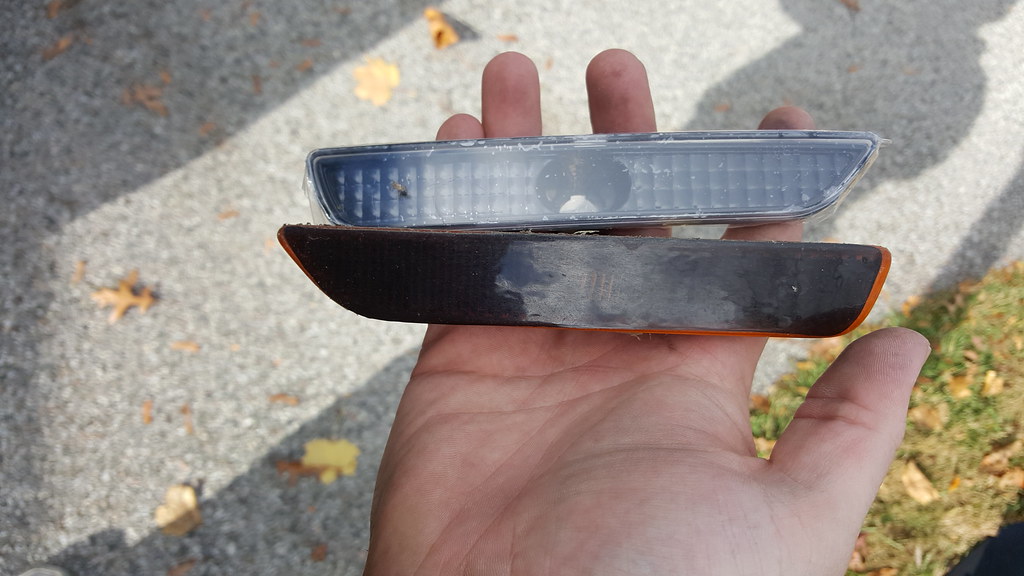
While I had the bumper off I figured I would take the old turn signals out and put some new blackout ones in which was a pretty simple mod. Just remove these two plastic nuts, pop the old one out and put the nuts back on.
One of the biggest problems of the Boss 302 is the cooling especially on the 2012 models. With the smaller grill opening and lack of heat ventilation they tend to overheat pretty well on track. One of the many solutions is to run a billet style grill such as the Roush, Saleen or CJ grill. Just as an FYI the Cobra Jet grill is nothing more than a GT/CS grill that is completely open for maximum airflow.
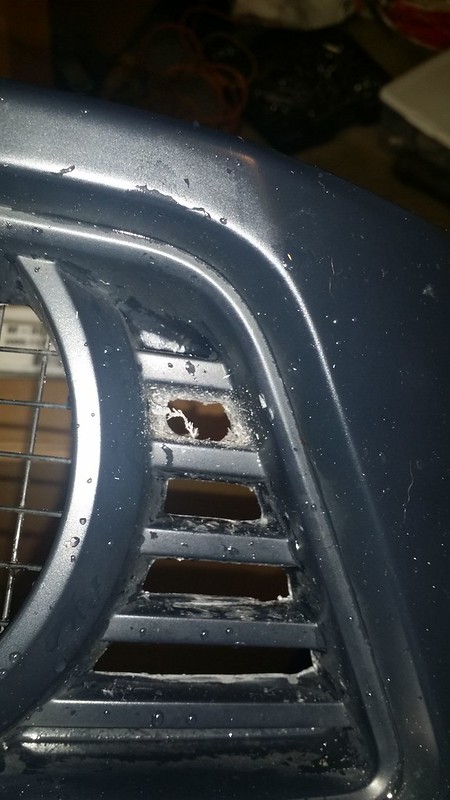
That being said, I love the styling on the Boss 302 grill along with the Boss 302S grill. The problem with the Boss 302 S grill is that it tapers down towards the backside of the grill so the actual opening isn't that big. in order to combat this I decided I would take a dremel and open up the back side a bit more by removing a lot of the plastic on the upper portion of the grill slats. I also removed the plastic pieces along the grill that are covering the air inlet in hopes to bring more air into the inlet to the factory intake.
I took a drill and drilled out holes as such this way I could get the sanding drum from my dremel in there and sand away at it.
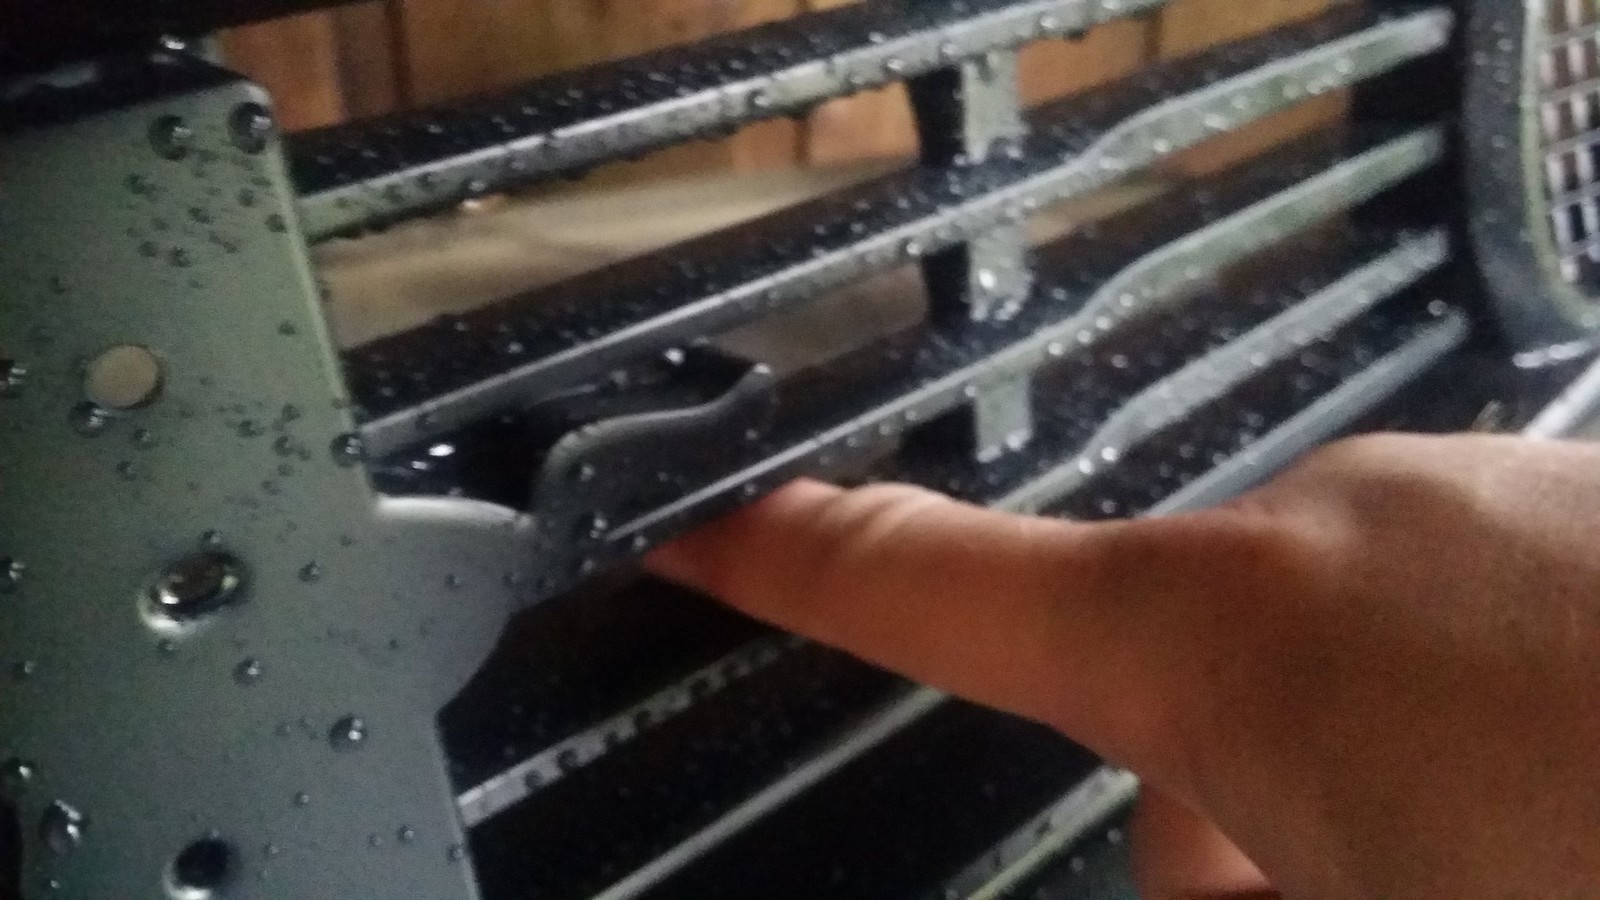
When I first started this I was barely able to get my finger in the openings up to the end of my finger nail. Now I can get all up in this bish! It doesn't seem like much, but hopefully this will allow more air to pass through the radiator into the grill.
You can see that from the first picture it is crappy ABS plastic colored and it just gives the front of the car sort of this unfinished look. SO I grabbed some black vinyl and decided I would wrap the grill. I have wrapped things before without issue but let me tell you, this was a pain in the butt!
This is what it looked like after the first attempt. From far away it looked good but once you got up close it looked like poo to me.
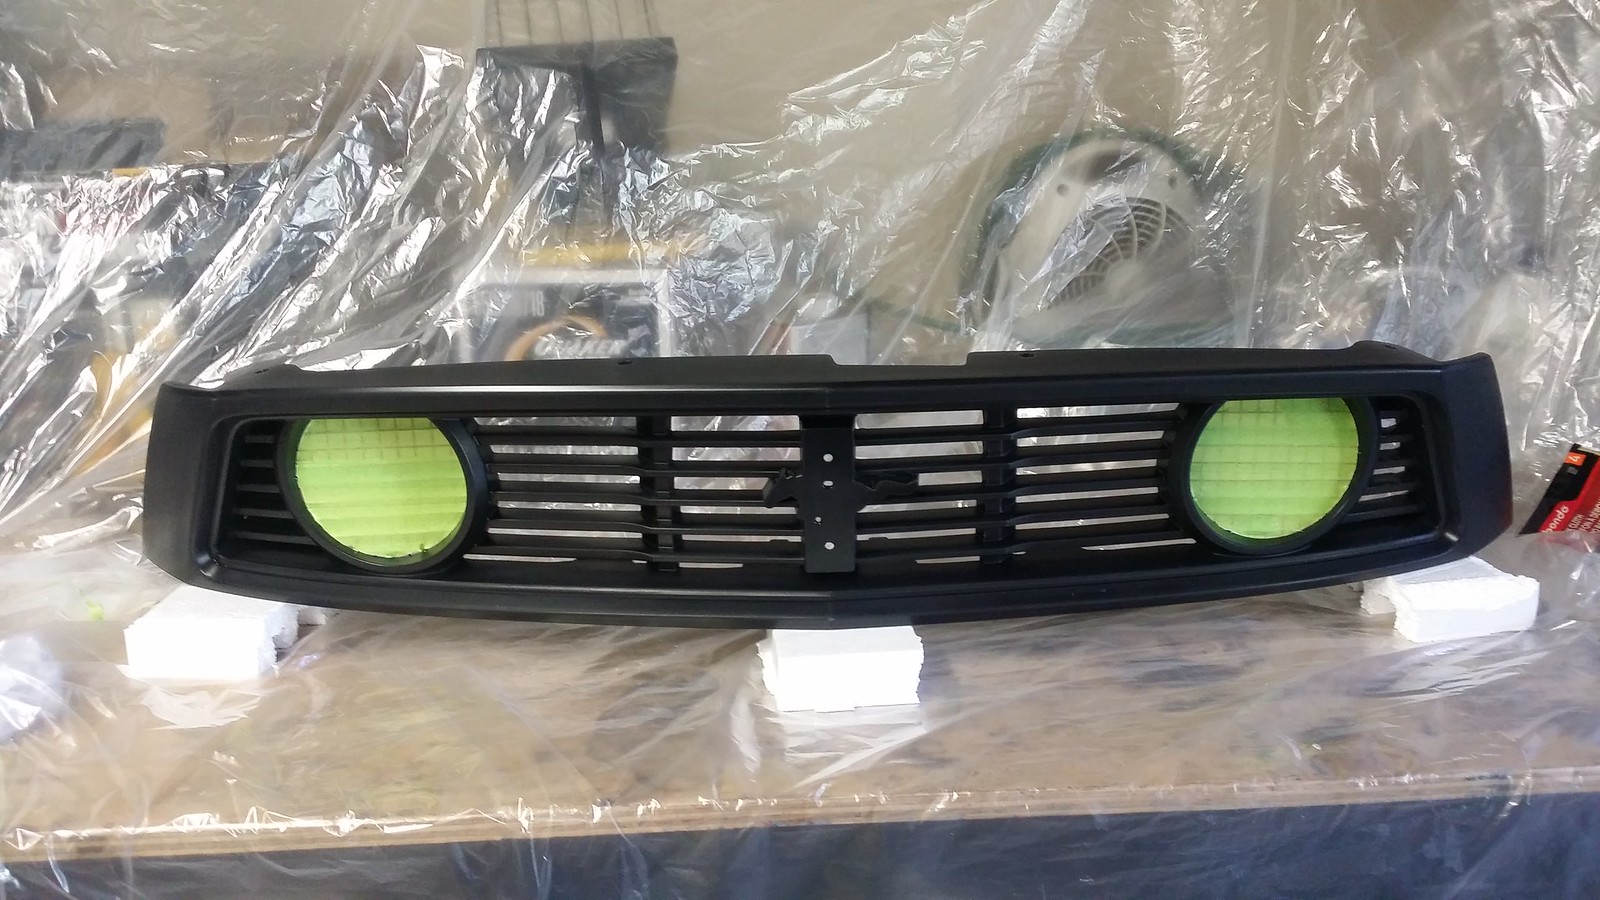
You can kind of see it in the lower left hand corner of the grill it starting to peel up. no matter what I did, I couldn't make the vinyl stick in these corners so I ended up pulling it off and decided I would just paint it black. I masked everything off and let it hit it with some Ford black.
Kind of looks like an RTR car with the bright green fog lights haha. At this point I popped it back into the car.
To continue on with the cooling theme I also picked up a GT500 cooling fan. There are people who put this on and said that it really hasn't lowered their oil temps much if any but I would imagine that with the more airflow being able to get through to the grill with the added slats it has to do something.
Boss 302/GT cooling fan
GT500 Cooling Fan
You can see the difference not only in the size of the fans but also the shape of the fan blades along with the flaps along the bottom to allow more air through the shroud at high speeds.
I wanted to change up the front end a little bit and I remembered seeing a set of headlights that AM and LMR had sold so I went looking for them. I found them on LMR, or so I thought. They were supposed to look something like this according to their webpage:
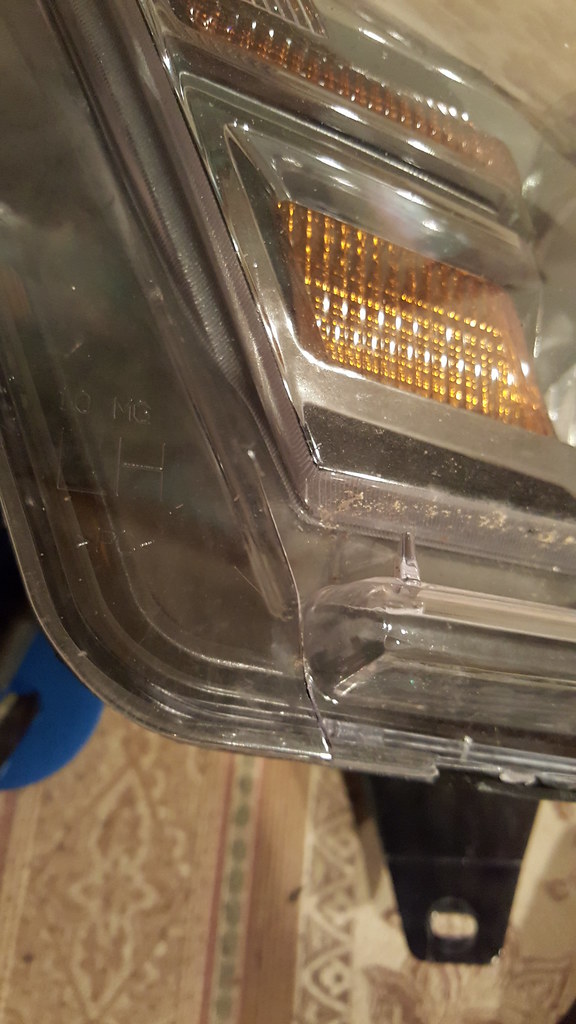
When I received them they looked just a wee bit different:
Not only were the lenses black black, they didn't properly fit! Notice the large gap between the headlight and the grill -_-
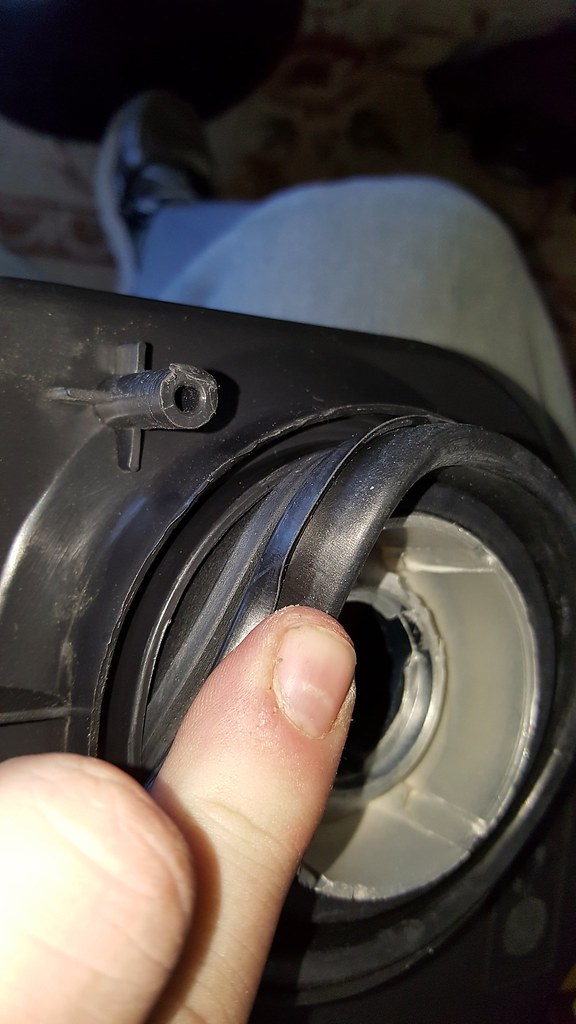
Anyway, I figured I would pull the black lens off and swap it with my factory clear lens since the internals are all black with clear turn signal lenses. So I pulled out the factory headlights and turned the oven on and set the temperature to 235 degrees. While I was waiting for the oven to preheat I removed the rubber gasket for the headlights.
Once I removed those, I ended up putting the headlight in the over for 10 minutes. I was wearing my work gloves but you could still feel the heat as you were prying off the lens. I ended up putting it in for 2 cycles at 10 minutes each and finally the lens popped off to reveal the lights.
In order to get all of the rubber out, I threw it back in the oven for another 10 minutes and it all easily came out without issue. I grabbed the rubber butyl I bought and began putting it in the recess where I removed the old rubber. Granted this stuff is a little thick at 3/8" but if you stretched it a little and pinched the bottom it went in without issues not to mention I have so much left over. This is what I used:
Made in America
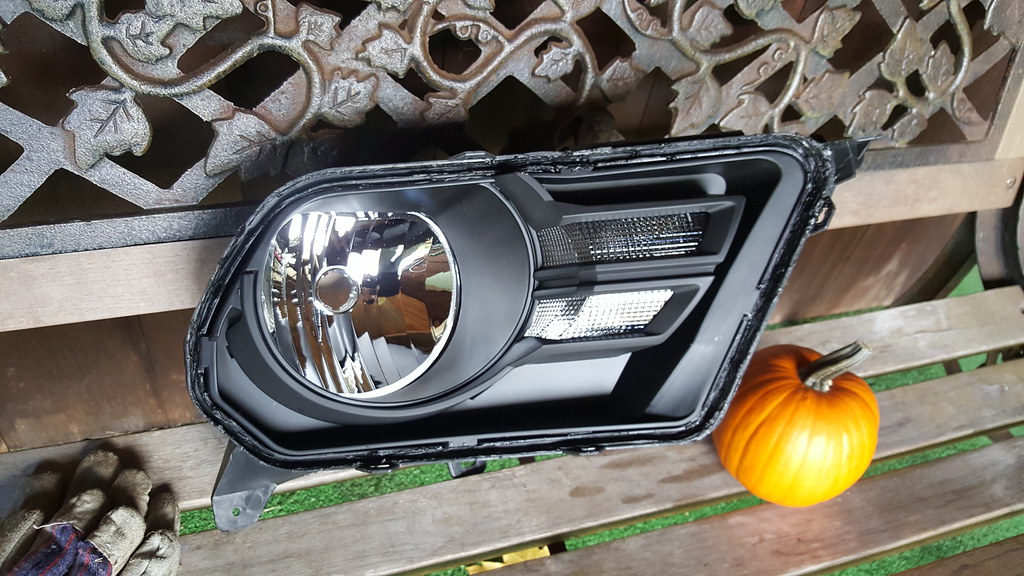
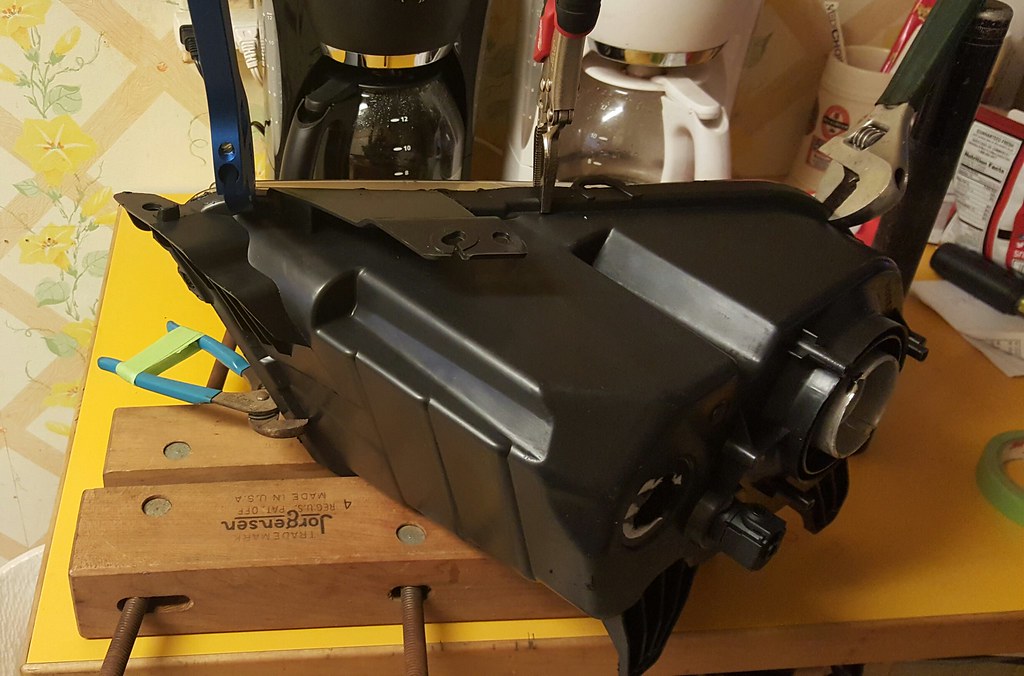
From this point I grabbed my factory headlight and turned the oven up to 275 and put that one in there. After 3 rounds of 15 minute intervals I was able to get the lens off and put it on the new headlight housing. After squeezing it in together by hand I put it in the oven at 275 for 7 minutes and took it out again and clamped it down.
As you can see I only had one pair of vice grips so I had to improvise a little.
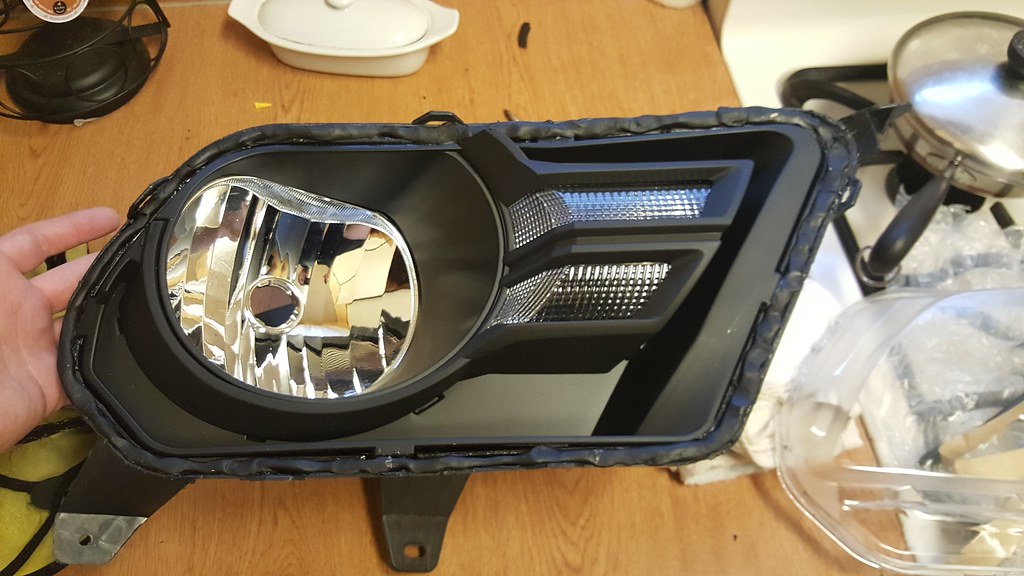
Anyway, as I let that one sit for 45 minutes I went to work on the second factory light. Remember when I said I can break anything
I had the entire lens off except for that one corner .... ****
I bought a factory lens off of ebay with a tab missing for $55 shipped and went along my way. I got the second headlight a few days later and without much, if any difficulty it popped out and went back on easy peasy.
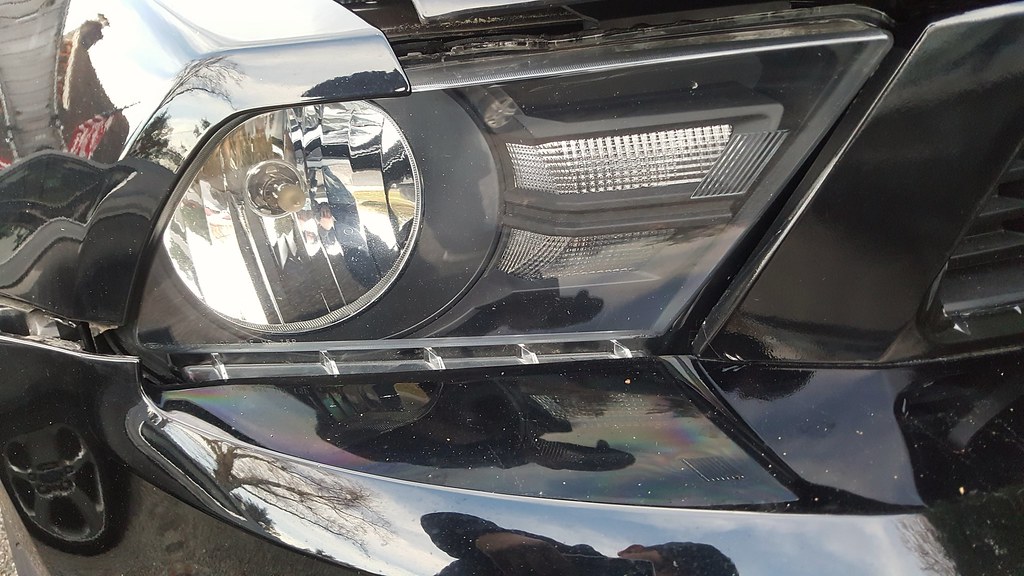
It looks like with the factory lenses in there the gap is smaller so I think I am ok with it now and it isn't going to drive me crazy. Maybe it will but who knows. After almost 2 months of rain and most recently snow, the headlights have held up and I don't see any fogging inside of the housings so I think I am pretty good on this setup. I like them, they add a small distinct touch and a bit of the blackout look without going overboard IMO. Now I just need to get clear turn signal bulbs.
Parts Used
2010-12 Ford Mustang SVE Euro Style Headlights Black - S197 - SDT-MST10SM
During the time I bought the headlights I also ended up spending about 3 weeks tracking down the bolts for the Laguna Seca splitter. When you look up the kit that FRPP sells it lists them as 20 M8x25mm bolts. I went around looking for M8 fine thread x 25mm countersunk bolts and was sort of laughed at when I kept asking because turns out nobody has them. I went to one place who did have them, but they said they had to order them from the UK and it could take 2 or 3 weeks to get them. So I turned to Amazon and found some! I ordered 20 of them and in a couple of days I checked the tracking. It turns out that they are shipping from the UK as well
2 weeks go by and I get the bolts ... turns out they are WAY too big.
So, I run to The Home Depot and look at their selection of bolts and I think I found them in 1/4" x 28 x 1" using their little bolt measuring thing. I go to my local hardware store since they have just about every bolt in SAE and grab 20 of those. I get home and wouldn't you know it, they don't fit. Wrong thread size ****ing piece of junk bolt measuring crap never works. I even threaded it in 98% of the way down by hand without issue.
Well I run down to work and dig through our boxes of spare hardware from all of the European furniture and low and behold M6 x fine thread x 20mm bolts. So I grab them and head home hoping that they are the right thread size!!!!! Hallelujah!!!!! I put everything together and now the car looks complete finally! For the first time since like Last November the car finally looks like it is complete.
when do you think that LS will be back on the road. Been quite some time sense all 4 wheels have been on the ground.
I was enjoying your engine build. I give you a lot of credit being able to go that far with the build.
Will the shop have to un-do everything that you did with the engine or will they just finish where you left off.
I'm old school and not at all up to speed on the new Tri Vic engines. Still in the pushrod era and now......Flat Plane Crank
Keep up the good work and let us know when your engine is ready.
I gives you guys a thumbs up that tackle this stuff.
Make me wish I was 25 again.
Then I tried for 35...
Ok maybe 45. That's it I give up....LOl
I am hoping to have it up and running by Spring time. I still have to get the car to JPC Racing in Maryland.
I think they will probably tear down the timing components because I had the engine all good to go, it was when I had to tear it down again that I ran into the issues. If they have to tear it all the way down then so be it, I wouldn't mind in all honesty since I would have the peace of mind knowing that it was done and inspected by professionals. I basically got to as far as you can go without putting the timing cover back on the engine so that part kind of sucked. Thank you for the compliments though!
In all honesty, if I wasn't going with aftermarket cams I would have had the engine done as I wouldn't have needed to degree the cams and all I would have had to do was line up the colored links on the chains and that was it. It is really easy as long as you don't have to do anything involved such as testing seat pressures or coil bind when you replace springs and things like it.
Even at 27 I sure was feeling it the next week after pulling the engine from the car, that was a pain in the behind quite literally haha.
Where in NJ are you, we might bump into each other one day!
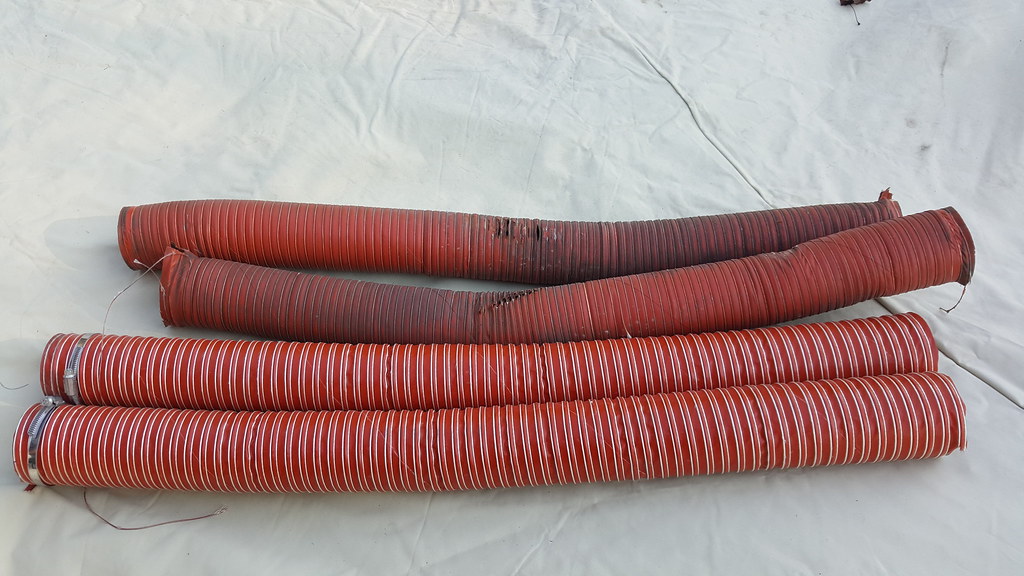
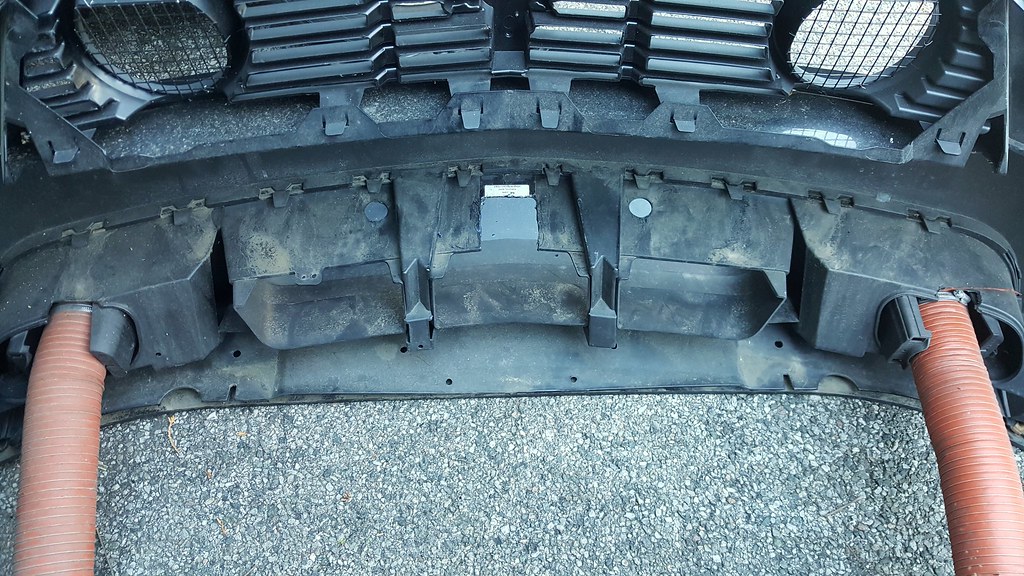
I ordered some brake cooling duct hose from Pegasus Auto Racing since the old one got chewed up something fierce by the splash shields! They had seen better days that's for sure. The wheel well liners had rubbed up against them for 18k miles (I think. I forget how many miles are on the **** thing) and caused the rubber liner to wear away and caused holes in the ducts which I'm sure isn't that great for brake cooling.
New ducts were cut to 35" and I put them in. As you can see, this is why the old ones had been rubbed to nothing.
So I cut the wheel well liner to give ample clearance so that this wouldn't happen again. I need to get some zip ties and zip tie the hoses to the wheel well liners to keep them in place. I have to say though getting them onto the cooling ducts was a major pain in the ***!
All nice and new now
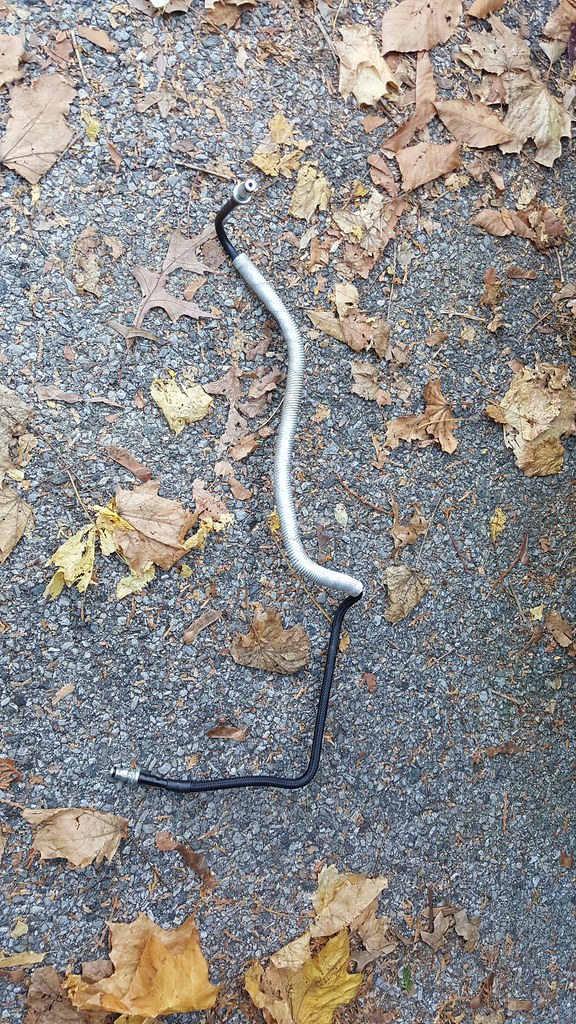
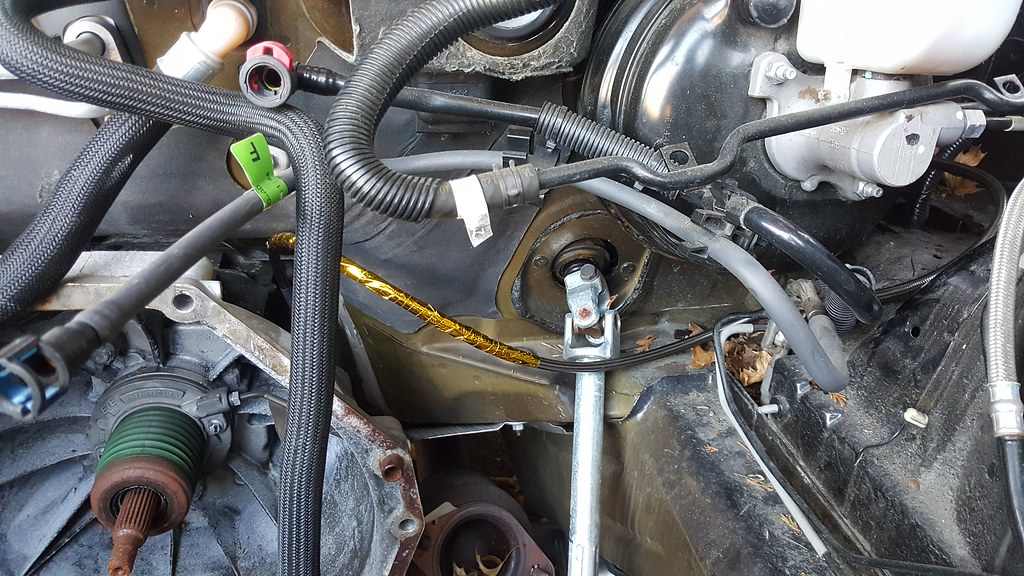
I also got my braided clutch line installed as well this weekend. It was a fairly simple and easy thing to do. The little clip by the master cylinder was a pain to get out but still very manageable. Out with the old:
In with the new
I had no idea what the metal surrounding the factory clutch line was so I figured it was either for heat resistance or for abrasion control so to speak so either way I grabbed some gold Heat Tape I had laying around and wrapped the line at the same point as the factory one was wrapped. Who knows if it will help or hurt but I figured why not, what's the worst that can happen.
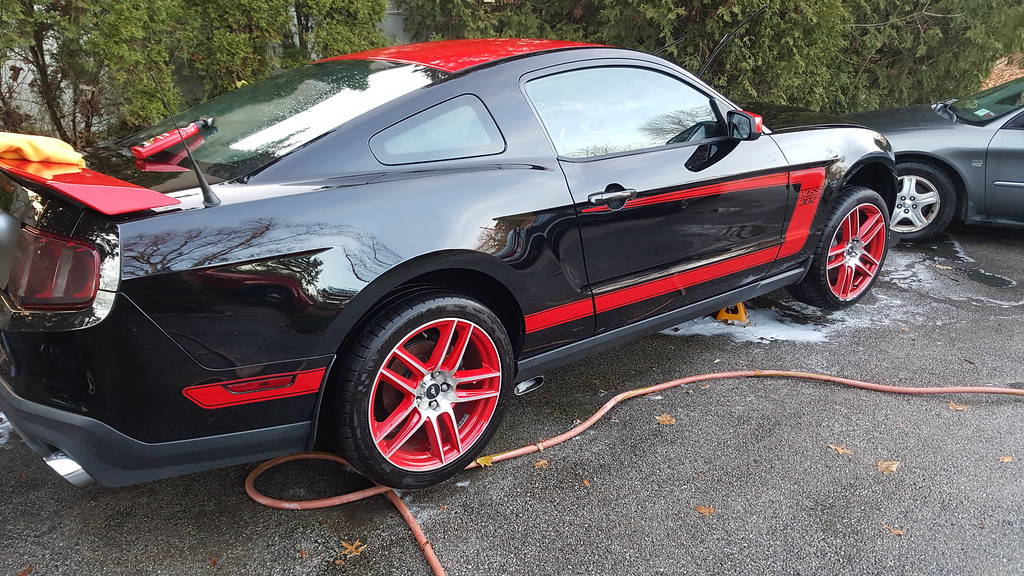
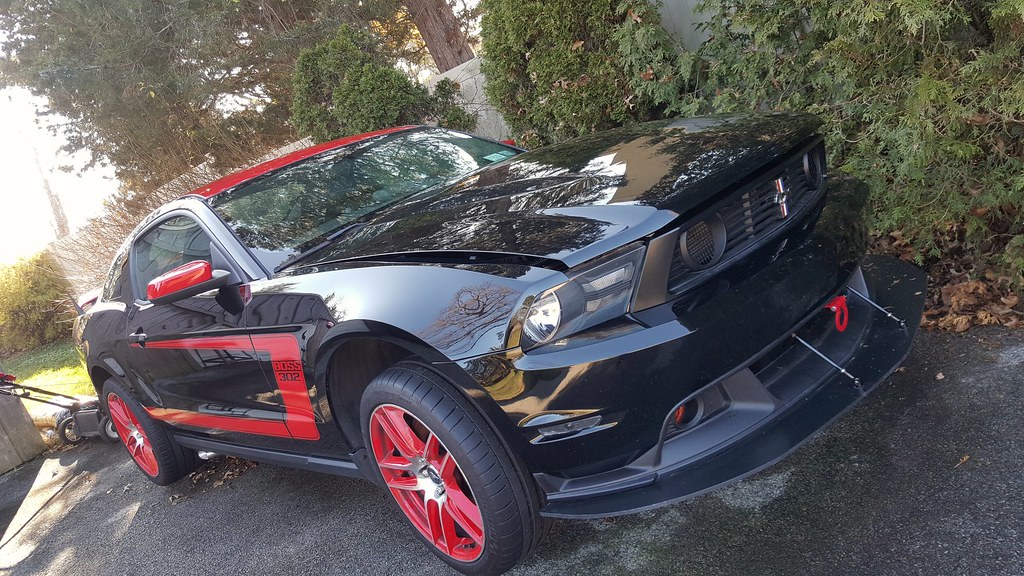
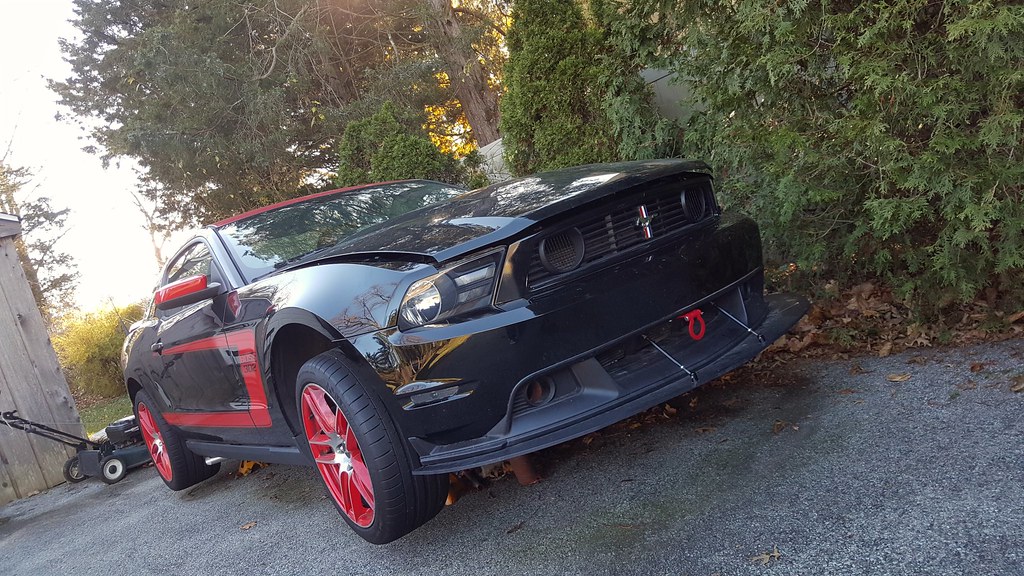
After that I cleaned the engine bay. As you can see, it was not at all pretty. So I ran some spray wax through that and cleaned it up all nice and nice. I then turned to the exterior and just washed it and gave it a quick claybar. I still have to do a quick spray wax to make it shine a bit more. Considering the fact that it has been sitting outside for the last year and 4 months I think it looks pretty **** good. You can see that it needs a correction when you get up close to it but hot **** it still shines pretty **** nice.
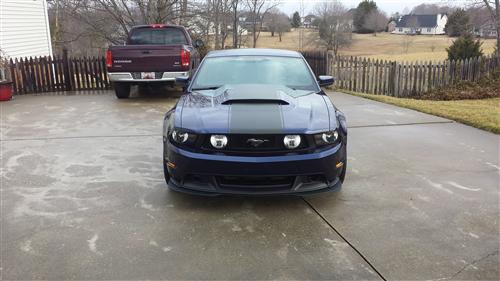
I ended up removing the vinyl that was on the grill since it just looked like hell! I think I like the way the grill looks now more than I did when I had the vinyl on it. Here are some more recent pictures of the car with the hood closed
 1/10/16, 06:24 PM


 ****ing piece of junk bolt measuring crap never works. I even threaded it in 98% of the way down by hand without issue.