
Cool Tech - Front & Rear Tow Hook Kits

Order submitted!


Thread Starter
Bullitt Member
Joined: April 21, 2011
Posts: 482
Likes: 0
From: Santa Clarita, CA
Hey everyone. First, thanks very much for your orders. Quite frankly, we were a little overwhelmed with the interest in these - and the number of pre-orders we received. We had expected to get the main plates back from powdercoating yesterday but learned later in the day that they had issues with their oven, and our run was delayed. We had the boxes, hardware bags, and shipping labels ready to go. The good news is that the plates got finished today and I just got back from dropping off almost all of the pre-orders that we had received. There were 3 orders - all received this week that didn't ship. ALL other orders shipped (whew!)
The 3 orders that we didn't ship are just awaiting red tow hooks. We completely depleted the inventory of our supplier for these!! We do expect to have another shipment Monday or Tuesday at which time we will be caught up and we will have inventory available. Again, thank-you everyone for your business. Now, let's see some pics of your installs!!!
The 3 orders that we didn't ship are just awaiting red tow hooks. We completely depleted the inventory of our supplier for these!! We do expect to have another shipment Monday or Tuesday at which time we will be caught up and we will have inventory available. Again, thank-you everyone for your business. Now, let's see some pics of your installs!!!
Bullitt Member
Joined: December 29, 2010
Posts: 294
Likes: 1
From: NY
GT Member
Joined: September 9, 2012
Posts: 116
Likes: 0
From: Escondido, CA
Yes! Just got a FedEx shipping update. They will be here tomorrow.
Would love some advice on locating the spot to drill through the front and rear facia.
If I f-up ill just call all the holes extra cooling. Lol
Would love some advice on locating the spot to drill through the front and rear facia.
If I f-up ill just call all the holes extra cooling. Lol
Tasca Super Boss 429 Member
Joined: December 18, 2010
Posts: 3,708
Likes: 0
From: NorCal

Thread Starter
Bullitt Member
Joined: April 21, 2011
Posts: 482
Likes: 0
From: Santa Clarita, CA
Yes! Just got a FedEx shipping update. They will be here tomorrow.
Would love some advice on locating the spot to drill through the front and rear facia.
If I f-up ill just call all the holes extra cooling. Lol
Would love some advice on locating the spot to drill through the front and rear facia.
If I f-up ill just call all the holes extra cooling. Lol
I'll spoil the surprise... and it delayed us a day or two as I tried to figure out how to include something in every kit. Getting the hole in the bumper right is paramount. I was fully intending to provide reference dimensions - from known points. For example - all Mustangs minimally have the front license plate dimples - even if they are not drilled. So, I could say, "measure over X.XX inches and then measure down Z.ZZ" and then drill at this intersection." But, what if you were off?? (You'd rightfully be mad at me!!) Not liking people to be mad at me, we came up with a clever little tool. We cut ~1" sections of threaded rod. Then we drilled a 9/64" hole in the end at about 1/4" deep. Then I bought 50 hardened ice pick ends. I cut each of these down and inserted them into the holes we drilled in the threaded rod along with some red loctite to secure them. So, after you mount our custom plate and then modify the Styrofoam to account for our plate being there, you thread this nifty pokey tool into the tow hook boss. Set it to a depth is that about 1/8-3/16" protrudes past the Styrofoam. Then.... and this is the critical part, you temporaily put your bumper skin in place. Line everything up on both sides - just before snapping it in. Check both sides, check underneath for alignment to any mounting holes. Do it all twice. When you're satisfied that the bumper skin is in it's right, final orientation, you simply gently push-in where the tow eye is. Watch you hand/fingers! The ice-pick tool will pierce the bumper and you will have a precise, on-center hole! Easy..... and no way to be mad at me!! These little locating tools were a pain in the butt to make.... but, like you, we want the alignment to be right!!
Something you might consider doing in the future if the prods are too expensive/painful to manufacture is to include a paper template in each kit that attaches precisely to the bumper so a center punch or 1/8" pilot hole can be located.

Mine arrived this morning, kit looks great! Won't install for a couple weeks yet however.
V6 Member
Joined: July 29, 2012
Posts: 73
Likes: 0
Did the install this afternoon...great kit! I'm very happy with the results.
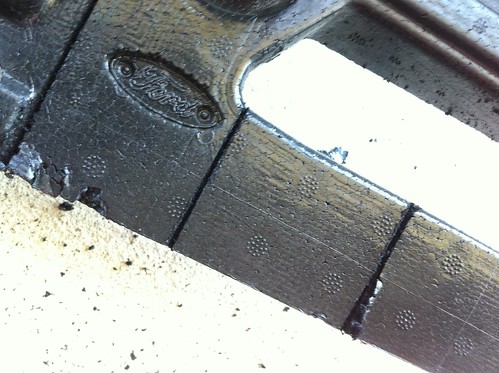
Started with a hand saw. Scored the back of the foam to make sure I was cutting to the ~1/4' depth needed:
Switched to a dremel cut-off tool and swiss-cheesed it:

Not so pretty:

Perfect fit:
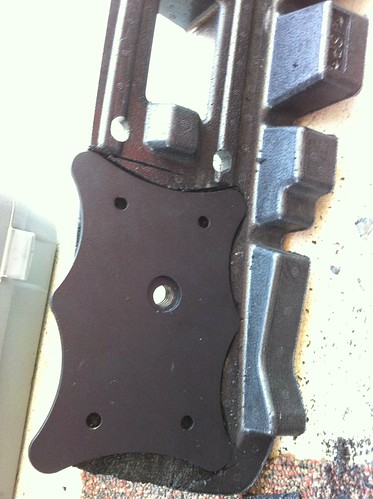
Recess for bolt head:

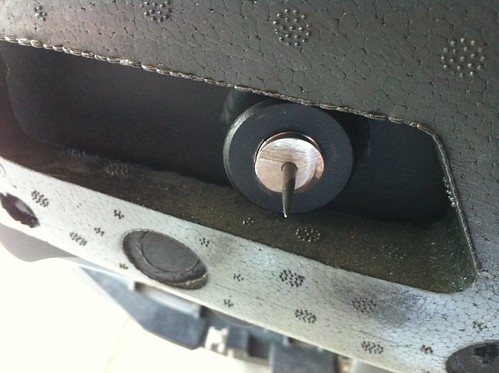
Ice pic installed:
Scored the paint with this OLFA circle cutter. Totally not needed. Then drilled with a hole saw from the back.

Initial hole:

Installed:
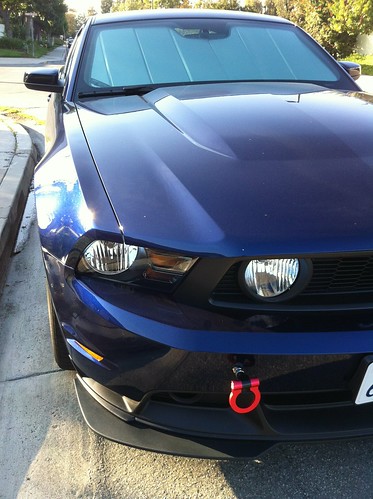

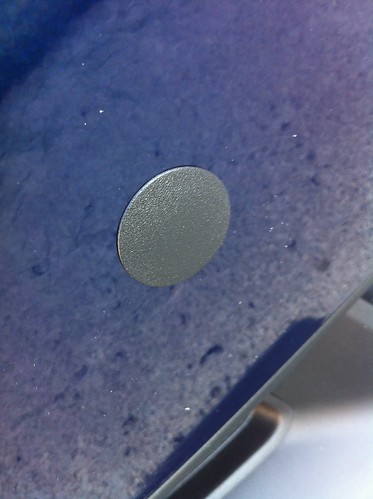
Plugged:
Total install time for me was 2 hours 8 minutes from when I parked the car.
Started with a hand saw. Scored the back of the foam to make sure I was cutting to the ~1/4' depth needed:
Switched to a dremel cut-off tool and swiss-cheesed it:
Not so pretty:
Perfect fit:
Recess for bolt head:
Ice pic installed:
Scored the paint with this OLFA circle cutter. Totally not needed. Then drilled with a hole saw from the back.
Initial hole:
Installed:
Plugged:
Total install time for me was 2 hours 8 minutes from when I parked the car.
V6 Member
Joined: July 29, 2012
Posts: 73
Likes: 0
Didn't do the back yet. The whole bumper cover and grille come off as an assembly. 8 clips for the radiator cover, two 8mm bolts and eight 7mm screws. Spent more time cleaning gravel out of nooks than taking off the cover. Trickiest part is pulling apart the seam between the cover and the front fenders.