When you click on links to various merchants on this site and make a purchase, this can result in this site earning a commission. Affiliate programs and affiliations include, but are not limited to, the eBay Partner Network.
Alright. I've been thumbing over threads for months now, trying to figure out how to add factory my color functionality to my base model mustang. (Yeah, yeah, I know. "why not just buy a premium?" Look, I got what I could, when I could. Plus I like modding my cars and don't mind the extra work.)
So first off, my mustang is a 2011 base as you can get 3.7 mustang. The concept for this car is to make a better premium model than ford did. This is the first large step in that direction. (Also more or less affordable.)
I will keep editing this post as I go along with pictures, links and step by step precess.
Alright so first thing I did was swap out the gauge cluster for a premium model one. This is a necessity if you want factory my color and there are plenty of in depth how to's for doing this swap, so I'll skip over most of the details. Eventually I'll upgrade to a 13-14 cluster but that's a whole nother project by itself.
To get the 10-12 cluster swapped, make sure you have 2 keys. They don't need to be programmed just make sure you have them.
Next you'll need forscan and the accompanying adapter.
Swap the cluster out, use forscan to program keys and initialize the new cluster module. (Again details on this swap are easy to find)
Next is the fun part that I could find very few details on. Installing all the my color lights and what not.
So I'll list the locations and items you need to have the lights for.
Footwells- I just ordered a dash harness from ebay and plan on just splicing in what I need. This is probably your cheapest and easiest option.
Center console- you'll need the whole thing, there are the cup holder lights and rear footwell lights. (Though I suppose you could by one of the aftermarket ford kits but it won't be oem)
Door sills-well this one's easy, you just need to get your preferred lighted door sills.
Door panels- there are lights in the premium door panels, right in the arm rest
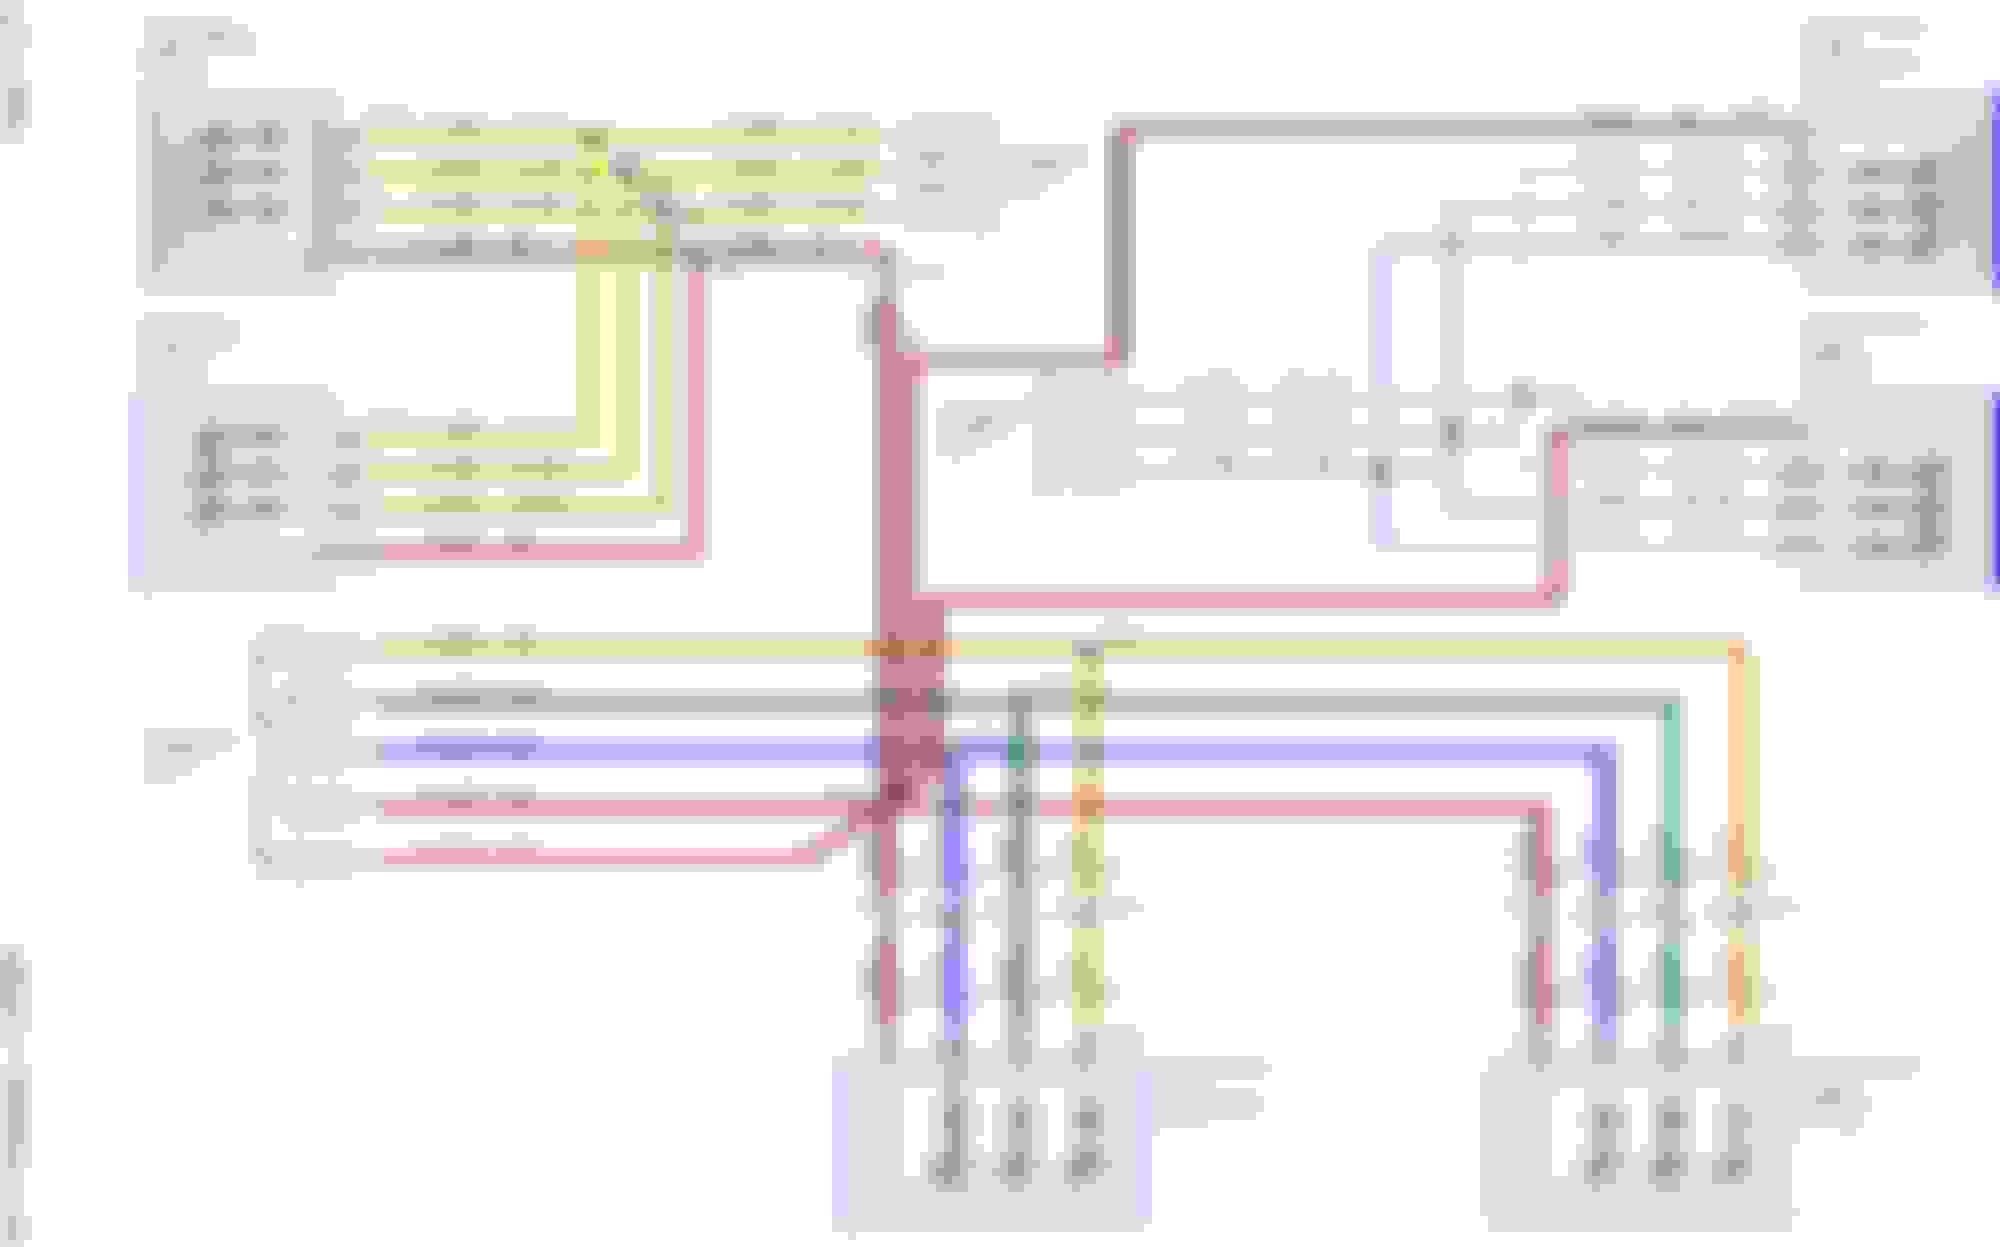
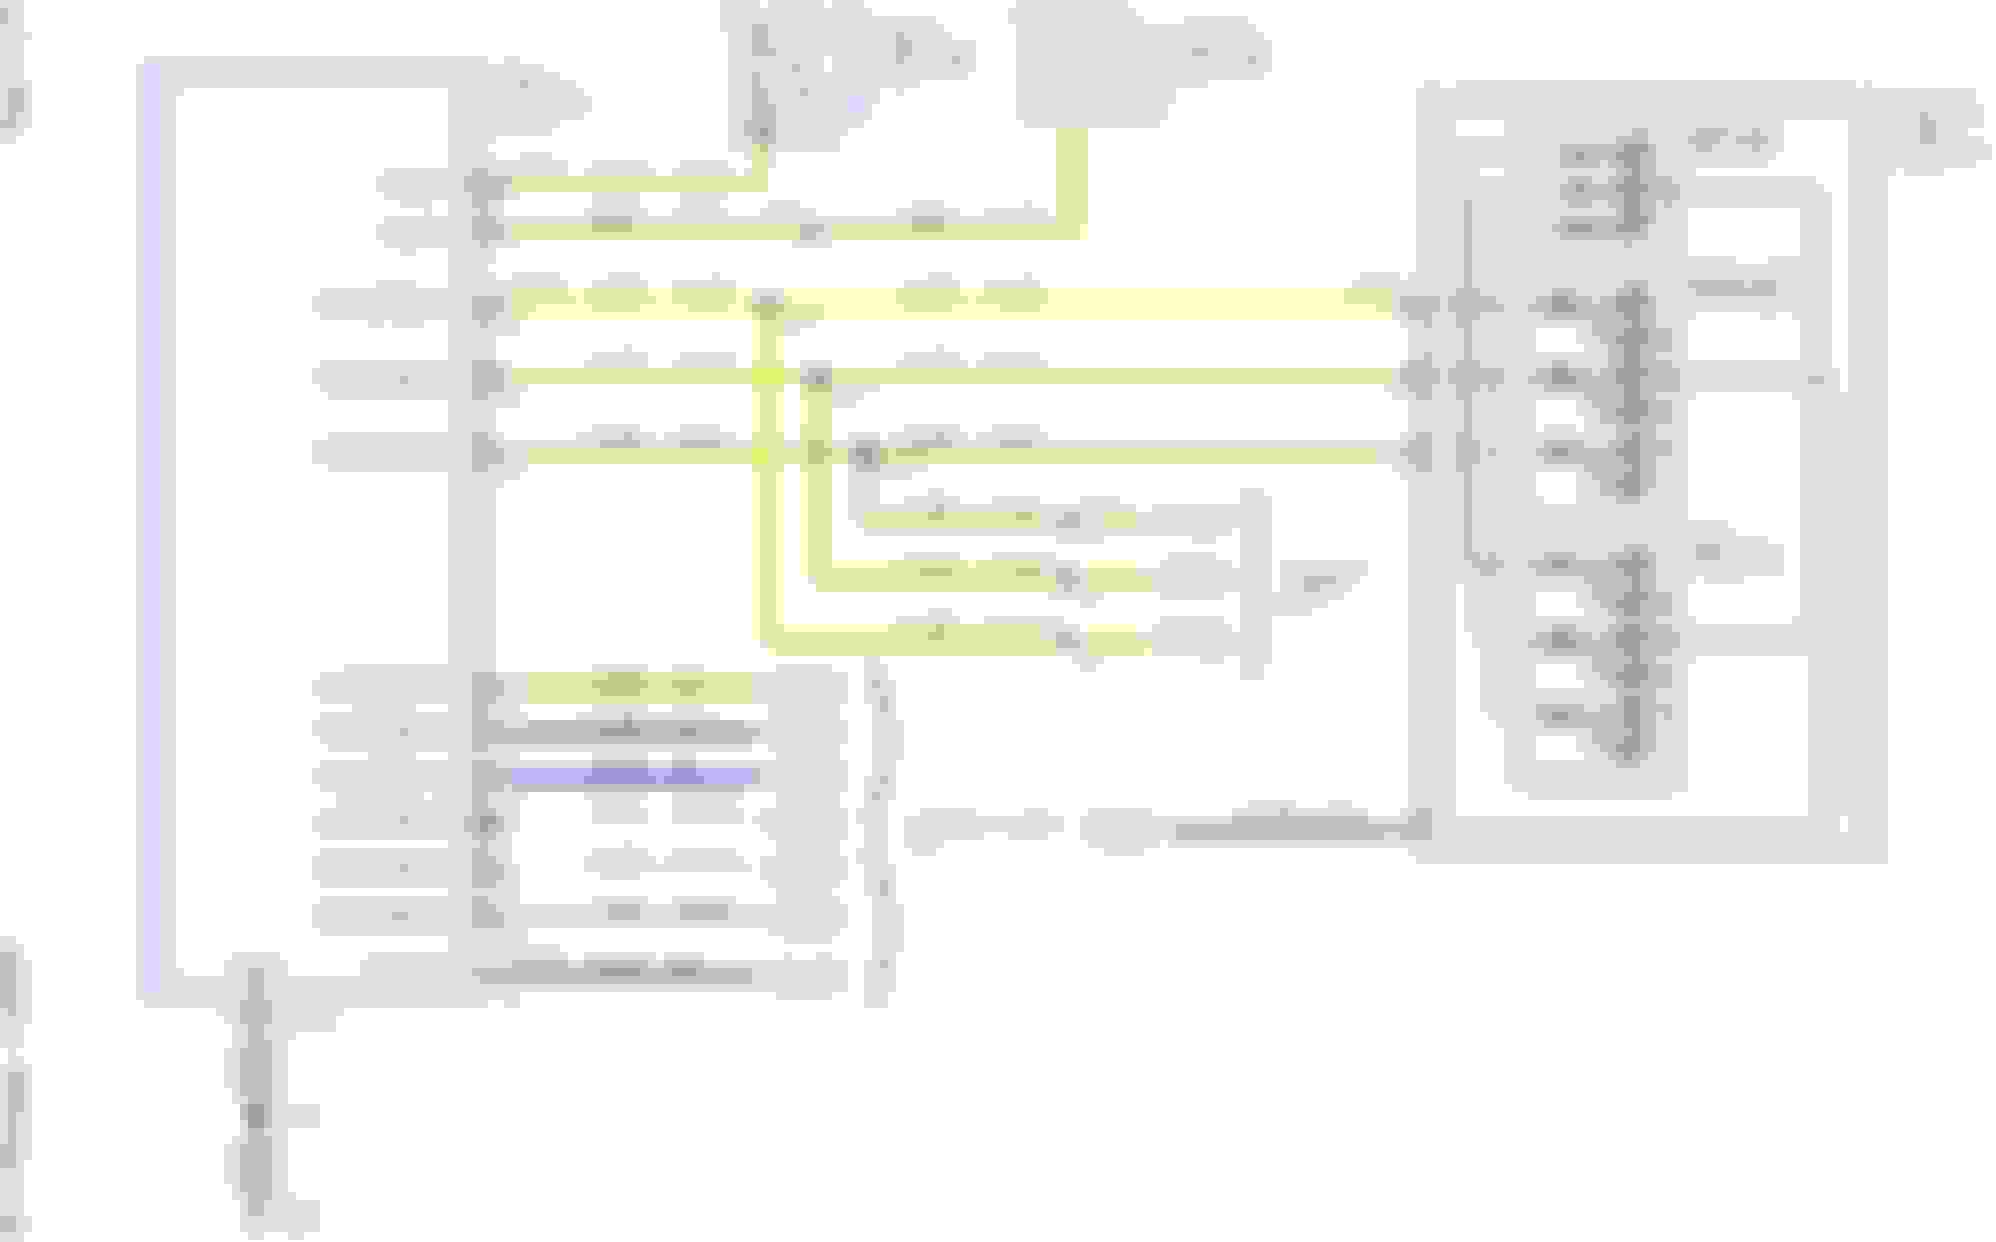
BCM-B- this one was tough. In the wiring diagrams it's referred to as 'body control module-b' but when you look for it on ebay search for lighting control module.
So I'll start with the BCM-B. Supposedly there is a way to reprogram the factory one using forscan but I heard mixed responses to this. I decided to just get one pulled from a premium to be safe. This makes the module plug and play, and only costs $50-$100 for the part on ebay. But make sure you verify it's out of a premium. Easiest way I found to do this was to just look at other items the seller has listed with the same vin#. It's pretty easy to tell a premium from a base by looking at the interior so that's nice at least.
The BCM-B has 2 connectors, 1 black and 1 grey. The black is the harness for tail lights and a number of other things. The grey (which has nothing plugged into it in the base model) is the one you'll be splicing into most. There's a couple ways to do this. Easiest would be just buy a chassis whiting harness of ebay to you can cut the connectors off it and just splice the wires in. My first attempt is going to be using terminal connectors to tap off the pins- I'll keep everyone updated on how that goes.
There are 3 zones for the lighting. Zone 1 is the door panels, Zone 2 is the front footwell, cup holder and rear footwell, zone 3 is the door sill plates. Your lighting control comes from the grey connector on the BCM-B, ground/control all go to the same pin on the black connector- base models don't have this wire so you'll have to find a way to add it to the factory connector, I'll show you how I do it when I add my pictures.
(Again bare with me on pictures, I will at them sometime this week hopefully)
Here's the connectors and where they go as well as the factory wire colors: (wire colors should be the same all the way through, just make sure your min number matches to the correct wire color when you are splicing it in)
Zone 1:
Doorpanel
Grey pin #11 to orange wire on door panel light
Grey pin#12 to green wire on door panel light
Grey pin #13 to blue wire on door panel light
Black pin# 24 to brown wire on door panel light
Zone 2:
Footwells and cup holders
Grey pin#24 to yellow with orange stripe on all lights
Grey pin#25 to yellow with green stripe on all lights
Grey pin#26 to yellow with blue stripe on all lights
Black pin#24 to brown on all lights
Zone 3:
Scuff panels
Grey pin# 23 to white with blue stripe on sill panel
Grey pin#10 to white with green stripe on sill panel
Grey pin#9 to white with orange stripe on sill panel
Black pin#24 to brown wire on sill panel.
Once wiring it together as stated above, everything should work as OEM intended. The pins on numbers on the BCM-B connector, the print is just really small. Again, I will post pictures of the project, the wiring connectors I build and I'll post pictures of the wiring diagrams. One thing I'll look into is adding additional lights to the zones. Should be simple to figure out which wires are red, green and blue light, which makes me think of the possibility of wiring underglows off the door sills. That way the underglow will be whatever color the door sills are. Could also wire and interrupt switch to just the underglows so they can be turned of without Turing off the my color as well (for legality reasons)
Anyway, I hope this thread help out. I should have all the needed components by Saturday l, should have everything wired and completed no later than next Friday, as my weekend is Thursday Friday Door panel, sill plates and front footwell wiring Zone wiring Cup holders and rear footwell wiring This is what the BCM-B looks like, base models only have a plug the black connector without the brown wire, so you'll need to build a plug for the grey connector and add in the brown wire to the black connector- located in the right side of the trunk behind the silver panel
I don't have the money or patience to wait for/order a doner wiring harness for the factory plugs so I popped the connectors out of an old set of wires I had lying around. Nowhere near as professional but I can always go back and fix it later on. As you see here, I wrapped the connectors in tape so they don't touch each other or the other terminals. I'll splice the led wires onto these ones, connect them to the correct terminals and use some electrical tape to keep them in place for now
Last edited by MajorTPain; 9/25/21 at 07:59 AM.
Reason: Update
 9/23/21, 10:43 PM