DMichaels Build Thread

 12/28/14, 11:39 AM
#22
Love the thread. I'm a bit at a standstill on my build right now, though I did get some new badges from my kids for christmas. You're building yours similar to how I would do mine....or will do it nice I pay it off.
12/28/14, 05:46 PM
#23
GT Member

Join Date: November 25, 2013
Location: White Mountains NH
Posts: 148
Likes: 0
Received 2 Likes
on
2 Posts

On the sound mid state.
DMichaels. You are a busy guy this winter! My GT is tucked away in a heated storage garage.
12/29/14, 07:31 AM
#24
Shelby GT350 Member
Thread Starter

Yes, trying to keep busy. Spent a little time working on the rear seat delete yesterday. It's a little more challenging than I expected! Should be able to wrap it up by Wednesday though... slightly anxious to have spring arrive
 12/29/14, 07:32 AM
#25
Shelby GT350 Member
Thread Starter
12/29/14, 07:34 AM
#26
Shelby GT350 Member
Thread Starter
I'm trying to do everything on a budget overall... spend too much as it is. I'm also very much looking forward to having the car paid off though, it will open up quite a bit of funding for lots of other projects!
12/29/14, 07:54 AM
#27
Shelby GT350 Member
Thread Starter
Rear Seat Delete
Removed pictures here and relocated further down for full documentation of the project.
Removed pictures here and relocated further down for full documentation of the project.
Last edited by dmichaels; 12/30/14 at 07:28 PM.
12/29/14, 09:26 AM
#28
Shelby GT350 Member
Thread Starter
Not directly related to the Mustang, but also just put in "air bags" into my Jeep to support towing next season. it was very un-level with the Mustang on the trailer, so these helper air bags insert inside the rear coil springs and have tubing routed to the back bumper where I can adjust the air pressure to level the car. Just tried it with the Jetta loaded up on the trailer real quick and it's great! Nice and level ride and I won't be resting on the bump stops while towing!
Without airbags:


With airbags at about 25 psi


Without airbags:
With airbags at about 25 psi
12/29/14, 07:16 PM
#30
Looks like its coming along well DM. Are you going to add dynomat to any of it to prevent road noise from getting in via the trunk area?


 12/30/14, 04:50 AM
#31
Shelby GT350 Member
Thread Starter
No because my goal is minimal weight. My carpet arrives today and I will wrap the wood in at least one layer which should be reasonably good for vibes.
12/30/14, 07:26 PM
#32
Shelby GT350 Member
Thread Starter
Rear seat delete completed
Everything removed

Template made out of cardboard. Lots of trimming required....

Template used to outline shape for base and back on thin plywood

Cut and pre-drilled (for bolting to car) laid out on carpet

Wrapping carpet - used glue and lots of staples from trusty staple gun.

Everything wrapped, dried, and a bolts pre-placed (not covered yet)

Back piece put in

Both upper and lower installed and one of two hinges attached (to retain seat fold down capability). I'll be covering the hinges with a small flap of carpet

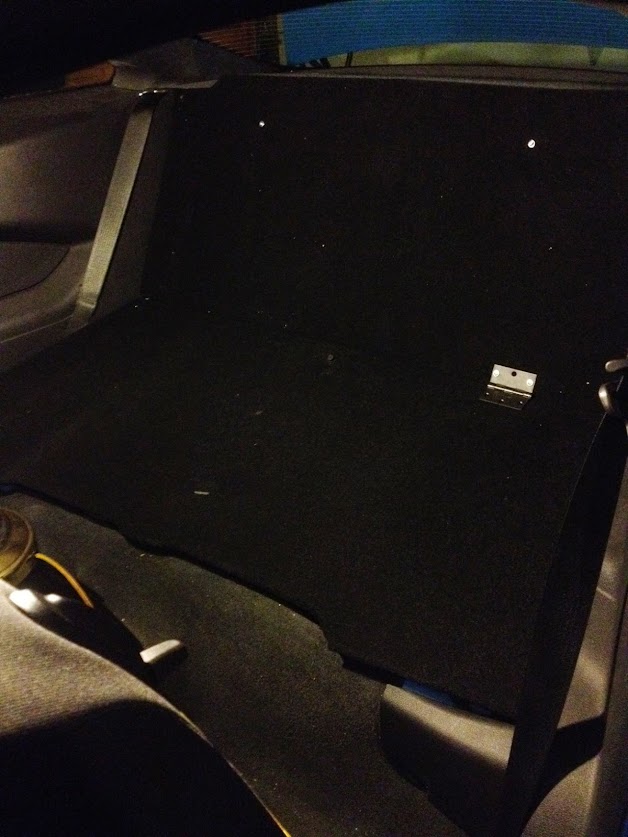
Front seats back in place. Tough to see it all in place.


Everything removed
Template made out of cardboard. Lots of trimming required....
Template used to outline shape for base and back on thin plywood
Cut and pre-drilled (for bolting to car) laid out on carpet
Wrapping carpet - used glue and lots of staples from trusty staple gun.
Everything wrapped, dried, and a bolts pre-placed (not covered yet)
Back piece put in
Both upper and lower installed and one of two hinges attached (to retain seat fold down capability). I'll be covering the hinges with a small flap of carpet
Front seats back in place. Tough to see it all in place.
Last edited by dmichaels; 12/31/14 at 08:59 AM.
12/30/14, 08:18 PM
#33
Mach 1 Member
Join Date: March 27, 2014
Location: Winnipeg, MB
Posts: 919
Likes: 0
Received 0 Likes
on
0 Posts
Rear seat delete completed
Everything removed
Template made out of cardboard. Lots of trimming required....
Template used to outline shape for base and back on thin plywood
Cut and pre-drilled (for bolting to car) laid out on carpet
Wrapping carpet - used glue and lots of staples from trusty staple gun.
Everything wrapped, dried, and a bolts pre-placed (not covered yet)
Back piece put in
Both upper and lower installed and one of two hinges attached (to retain seat fold down capability). I'll be covering the hinges with a small flap of carpet
Front seats back in place. Tough to see it all in place.
12/30/14, 08:30 PM
#34
Shelby GT350 Member
Thread Starter
Thanks! I need to get a couple shots in the daylight as it's hard to really capture what it looks like in my garage under limited lighting. But I'm very happy wih how it turned out. Just need to test drive to see if it mutes road noise from the trunk area. Thinking it will cause the carpet is fairly thick. Bet I could do this project again in 1/3 the time now that I worked out the kinks!! Good learning experience.
 12/31/14, 08:41 AM
#36
Shelby GT350 Member
Thread Starter
I don't ever put anything in the back seat, so not concerned, and if I fold down the seat, I will have close to 3/4" of plywood to support weight in the event I do for some reason need the space. But the roll bar will likely be installed by March, so I certainly won't be folding down the seat ever again after that, and definitely won't be putting anything back there.
I trailer the car to track days so all the tools, wheels, gear, etc go in the SUV and on my trailer
Dogs in the back? No way!!! My Jetta and Jeep are for that
12/31/14, 12:25 PM
#37
Mach 1 Member
Join Date: March 27, 2014
Location: Winnipeg, MB
Posts: 919
Likes: 0
Received 0 Likes
on
0 Posts
 1/1/15, 08:58 PM
#38
