
New **PICS** of my GT v.ScottDrakeHoodPins

Best I could do in my garage at this time of night...I was too lazy to take off the shroud.
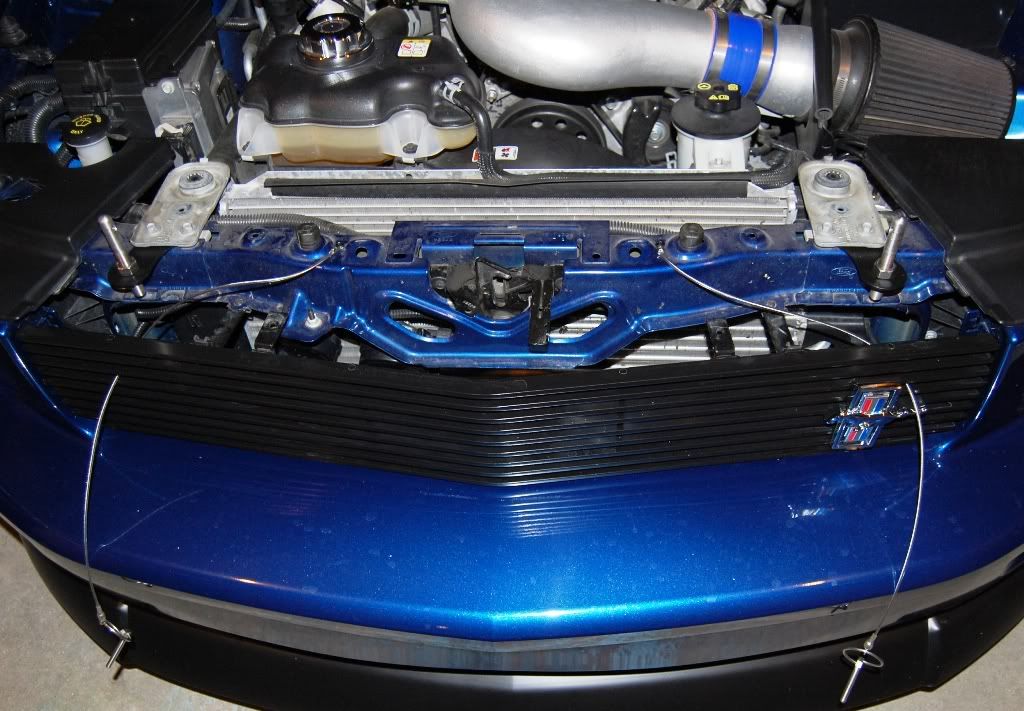
Drill out the lanyard ring holes so they will fit around the bolts I circled, then sandwich them in there. Route the cable on the inboard side of each radiator mount, then snake them behind the lower portion of the hood pin pole on each side. Finally, bring the cable out in the groove between the grille and the fascia as shown.
Drill out the lanyard ring holes so they will fit around the bolts I circled, then sandwich them in there. Route the cable on the inboard side of each radiator mount, then snake them behind the lower portion of the hood pin pole on each side. Finally, bring the cable out in the groove between the grille and the fascia as shown.
Bullitt Member
Joined: May 29, 2006
Posts: 450
Likes: 0
From: Victoria, BC
Well I got them sorted out finally today, what a PITA installation! I took a wack of pics and if I get the chance I'll do up an install/tips thread. I think not having the instructions was in some ways better as the documentation may have made the install seem more daunting. It's not hard, it's just tedious adjustments over and over again. But I got along better with the tips on here by you kind fellows. I think Shelby or Scott Drake should include the install documentation by default, I mean WTF? Also they reference a template forcutting the radiator cover, also would have been handy. My hack job is far from great but it'll do for now, I may order the precut one they reference depending on how much they gouge for them.
I ended up having to replace ALL my screws for the scuff plates today, I couldn't find the exact same screws at my home depot, they had the #6 1/2" pan head screws but only in a robertson head so I had to back out all the screws and replace them one at a time. In the end though the new screws I put in fit better than the others somehow. They were a smidge shorter which may have helped but the scuff plates are on there good and firm. I've put some pics below from my install, forgive the water drops and mess I didn't have time to take shots after I hosed it down and what not after the install today. I'll hopefully post some new ones in another thread Sunday.
This shows where I ended up mounting my lanyard connections, works pretty well here. I may move them later but for now this will work fine.
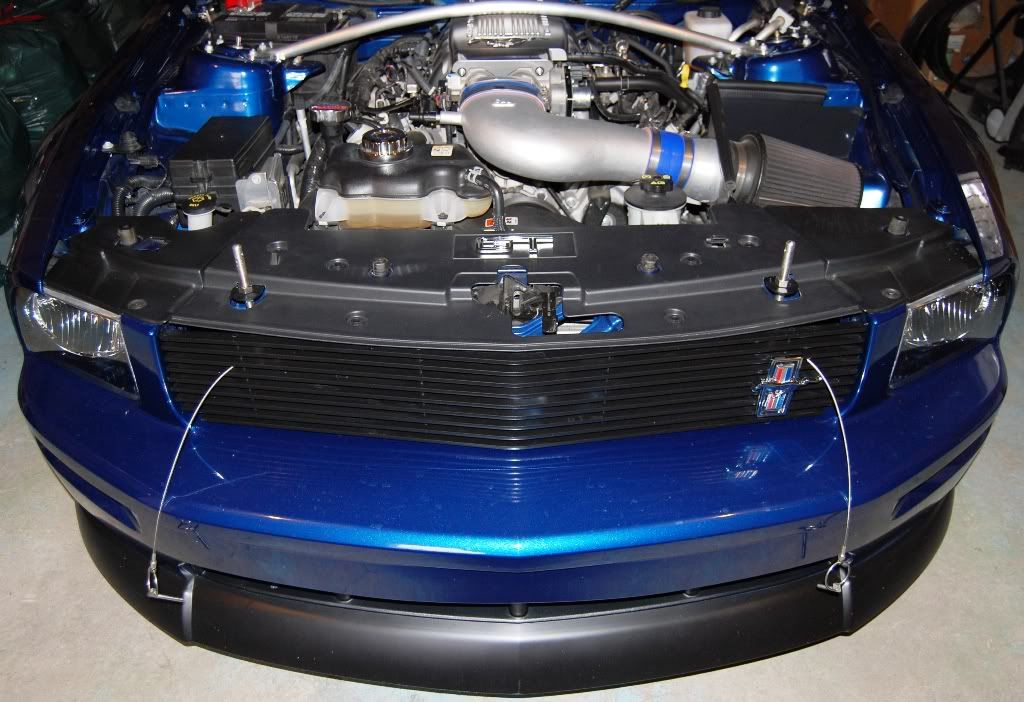
This shows the engine bay with the radiator cover back on.
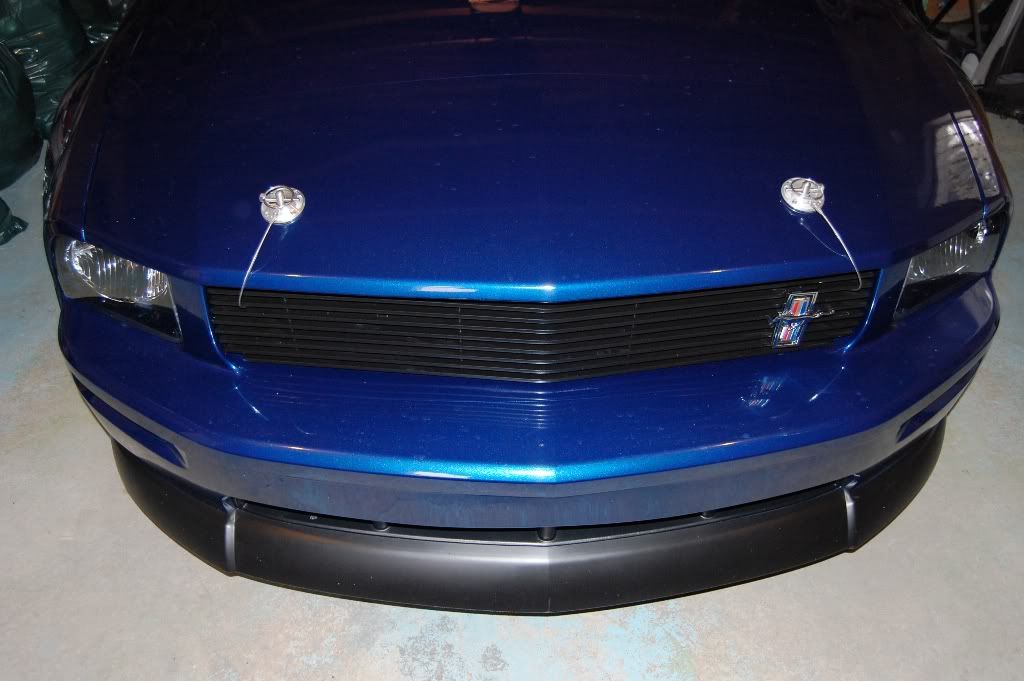
A pic straight on
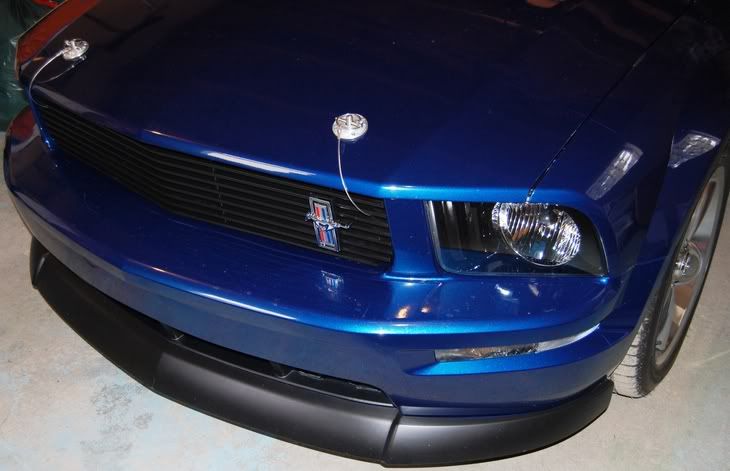
And showing more of the front
I ended up having to replace ALL my screws for the scuff plates today, I couldn't find the exact same screws at my home depot, they had the #6 1/2" pan head screws but only in a robertson head so I had to back out all the screws and replace them one at a time. In the end though the new screws I put in fit better than the others somehow. They were a smidge shorter which may have helped but the scuff plates are on there good and firm. I've put some pics below from my install, forgive the water drops and mess I didn't have time to take shots after I hosed it down and what not after the install today. I'll hopefully post some new ones in another thread Sunday.
This shows where I ended up mounting my lanyard connections, works pretty well here. I may move them later but for now this will work fine.
This shows the engine bay with the radiator cover back on.
A pic straight on
And showing more of the front
Last edited by Cowtown; Mar 22, 2008 at 12:52 AM.

Mach 1 Member
Joined: July 13, 2007
Posts: 687
Likes: 11
From: LaSalle, Ontario
Cowtown,
Can yo do me a favour and take a measure of the space between the two Shelby scuff plate brackets on the hood. I am looking at getting a hood stripe painted, and need to know if the Shelby hoodpins are to close to the stripe.
I am looking at getting a single 22" wide stripe down the center of the hood.
Thanks,
Sean
Bullitt Member
Joined: May 29, 2006
Posts: 450
Likes: 0
From: Victoria, BC
Should be safe Sean, mine are just a hair under 26.75" apart from inside edge to inside edge. This will vary on your install but no more than a 1/4" if you have them adjusted all the way outward on both sides and the plates are all the way out but this would cause rubbing on the pins so not idea.
Anyways over 26"+ apart so you should be good.
Anyways over 26"+ apart so you should be good.

Member
Joined: March 3, 2008
Posts: 3
Likes: 0
Bullitt Member
Joined: June 28, 2006
Posts: 336
Likes: 1
From: Providence Forge, VA
Earl
Mach 1 Member
Joined: July 13, 2007
Posts: 687
Likes: 11
From: LaSalle, Ontario
Should be safe Sean, mine are just a hair under 26.75" apart from inside edge to inside edge. This will vary on your install but no more than a 1/4" if you have them adjusted all the way outward on both sides and the plates are all the way out but this would cause rubbing on the pins so not idea.
Anyways over 26"+ apart so you should be good.
Anyways over 26"+ apart so you should be good.
Thanks!