'10 upgrades for my '06

 8/24/10, 12:31 AM
#22
Shelby GT350 Member
It is a challenge to drill the hole without excessive shavings falling into the lamp housing. Since I have done this type of mod before on other lamps in other cars, I already anticipated that this could happen. I drilled mine with the taillamp elevated and back of the lamp housing facing down so shavings would not fall into the lamp housing. Even being careful with that a couple of shavings got loose but I held the taillamp facing up and used a vaccum cleaner held to the new opening and it sucked them right out. It helps to use masking tape to keep the other bulb socket holes covered (or leave the paper seals on the socket openings that come with it until you are ready to install the sockets) so the vacuum can create suction. Leave at least one hole open in one of the other lamp sections and use your hand over it to regulate suction while you are vacuuming through the new hole.
Also, take your time drilling the hole as straight as possible. The back-up lamp sections are quite narrow inside. You do not want to hit the insides of the reflector housing and you do not want to go too deep if you have a long drill bit, or you might damage the outer lens if you let the drill get away from you when the hole finally pierces...
Last edited by watchdevil; 8/24/10 at 12:47 AM.
8/24/10, 12:35 AM
#23
Shelby GT350 Member

Oh this is hilarious... especially considering you blew up the section that is already made with the back-up lamp socket opening...
 8/26/10, 01:10 AM
#26
Shelby GT350 Member
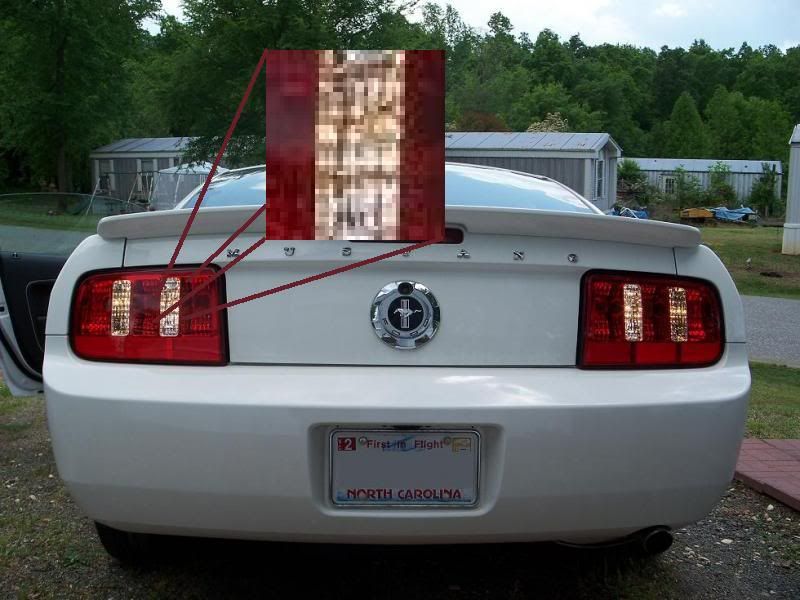
One interesting thing I have noticed is that in the inside each section of the reflector housing on these lamps that there are these strange unused but seemingly unessary slots that look like they would support something inserted inside the lamp housing like the reflectors found in the actual 2010 models.
Something makes me speculate that it is possible that these lamps were originally meant for an actual model year update before the 05-09 style ended. Perhaps it was abndoned and the vendor was stuck with tooling that they decided to sell aftermarket... It's not gospel.. but just curious if it is so... Maybe these were originally meant for LED bulbs hence the unused slots to hold reflectors.
8/26/10, 12:25 PM
#28
Bullitt Member
Thread Starter
Where in Texas are you Wallace?
I saw another thread where people really dogged those lights. I like them. A nice clean mod. Might have to do it.
8/29/10, 05:23 AM
#30
Cobra R Member
OK....I spent like 2 hours yesterday adding the wiring and drilling & dremeling the hole.
Drilling it at an angle left ZERO shavings in there. Then I went to dremel it to fit.
To make a long story short -dremeling it left a ton of crap inside it. Took about 10 min to get it all out.
I used my finger, a toothbrush and a vacuum. I actually got it all out of both of them. Just takes some time.
I also purchased a smaller vacuum attachment from Home Depot a few weeks back and it worked perfectly
for this -Clicky here to see it.
One small correction to WD's write up-
While the wiring harness is the 194 (2 wire), the bulb isnt.
The bulb to use is the 921. It fits and that way they are equally bright.
If you use the 194 bulb then the lights will look different. Plus the 194 is tiny and it makes
it look like something is wrong with the lights (2 bright & 2 dim).
End result is they are in and look awesome. I took a video of it but havent uploaded it yet.
I will add the vid here later this afternoon. Im at work and cant access it.
A big thanks to Watchdevil to push me into doing this. lol
I only took one picture during the install.....when I stopped to go get something to drink
but WD's pix are pretty much the same thing.
The only difference I did was made the hole a tad smaller and dremeled it to look like a
makeshift German cross so the pigtail plug would fit.
Last edited by Barricade; 8/29/10 at 05:25 AM.
8/29/10, 09:58 AM
#31
Mach 1 Member
Barricade,
I'm confused about the light bulb differance. If we are using are stock bulb to replace the one, how does another stock buld not look the same?
Or, I'm I completely lost here. My tails come tomorrow.
I'm confused about the light bulb differance. If we are using are stock bulb to replace the one, how does another stock buld not look the same?
Or, I'm I completely lost here. My tails come tomorrow.
8/29/10, 10:04 AM
#32
Cobra R Member
They are definitely plug and play! And yes you will only have one back-up lamp unless you modify like I did and cut a hole in the unused lens section and add a 194 bulb and socket spliced together with the original back up lamp bulb and socket.
Hard for me to capture sequentials in action unless I do video...
Hard for me to capture sequentials in action unless I do video...
A 194 bulb is tiny and is mostly used for license plate lamps. Dont buy the 194 bulb (although it will fit!).
Our stock reverse light bulb is a 921.
The 921 will fit in the 194 socket/pigtail that you will buy.
Sooo -buy two 194 pigtails (Autozone has them for $3.89 each) and a couple of 921 bulbs for it.
The end result will look EXACTLY like its brother you will be tying it into.
Clear as mud??
 8/29/10, 02:28 PM
#33
Legacy Supercharged Tms Member

I just installed a bezel I got from American Muscle. I cut the two center posts and repainted the bezel black. It really finishes off the mod.
I'm still on the fence about the 194/921 bulb mod. I like the idea but I'm not in reverse long enough for the mod to have a return on the time invested and the lenses look fine without it. Am I wrong?
I'm still on the fence about the 194/921 bulb mod. I like the idea but I'm not in reverse long enough for the mod to have a return on the time invested and the lenses look fine without it. Am I wrong?
Last edited by RedFire281; 8/29/10 at 06:28 PM.
8/29/10, 05:57 PM
#34
Mach 1 Member
What WD means is the 194 is the name of the socket & pigtail (wires).
A 194 bulb is tiny and is mostly used for license plate lamps. Dont buy the 194 bulb (although it will fit!).
Our stock reverse light bulb is a 921.
The 921 will fit in the 194 socket/pigtail that you will buy.
Sooo -buy two 194 pigtails (Autozone has them for $3.89 each) and a couple of 921 bulbs for it.
The end result will look EXACTLY like its brother you will be tying it into.
Clear as mud??
Crystal clear now. I'm using my old 194 WD socket, to splice into my sequentail set. I just needed schooling on the bulb # so I can get them before I start.
Thanks.
8/29/10, 06:00 PM
#35
Mach 1 Member
Why did you have to bring this up
 I have the black trim in myOEM set, and know I'll be looking for them for this set. Maybe paint this time
*oops, just remembered, I ordered the smoked ones. I should be set
Last edited by ARBO; 8/30/10 at 08:51 AM. Reason: Brain woke up
8/29/10, 11:52 PM
#36
Mach 1 Member
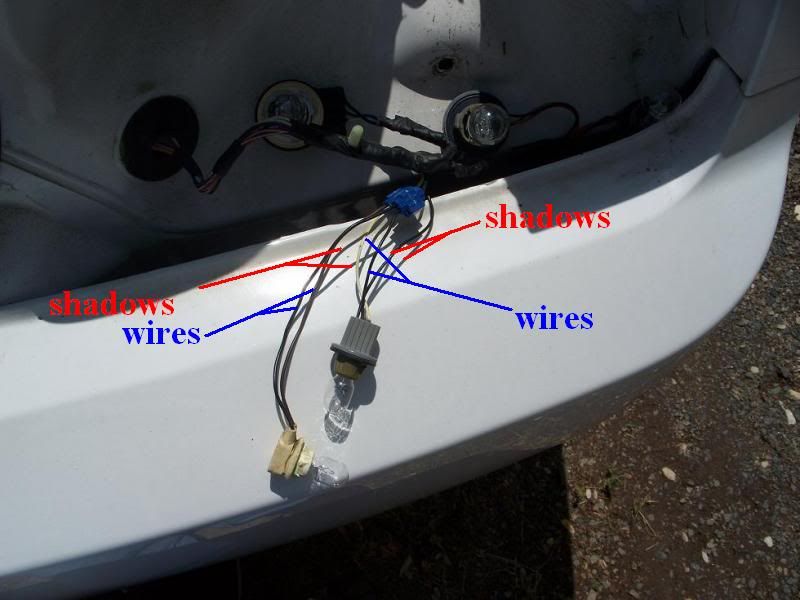
It looks like in your picture the add-on, back-up wiring socket only has two wires and the stock OEM one has three. Because I have my stock ones that I will use and they have 3 wire sockets do I take same three like colored wires and and splice in the add-on bulb socket, three per side? Or am I missing somthing here? I just want to have every thing here I need to instal when they arrive tomorrow. I haven't taken the trunk liner out yet to see what my Web-Electric looks like, but I'm guessing three wires just like stock.
Steve
8/30/10, 03:56 AM
#37
Cobra R Member
Connect it to your other reverse light wiring. It only has two wires.
2 wires to 2 wires. Black to black and brown to white in my case.
Easy cheesy. I used those simple blue wire connects.
It will be clear as easy when you open it up and look.
2 wires to 2 wires. Black to black and brown to white in my case.
Easy cheesy. I used those simple blue wire connects.
It will be clear as easy when you open it up and look.
Last edited by Barricade; 8/30/10 at 04:02 AM.
8/30/10, 08:08 AM
#38
Mach 1 Member
I'm holding my stock set in my hand now (ones that came out to install sequencials), the back-up socket has 3 wires coming out of socket, 2 black and 1 white with yellow stripe. Will I see the sequencials are differant with only 2 wires coming out? If so I will have to go buy the 2 wire sockets at Autozone instead of using my old 3 wire stock set. If it matters, my car is 08 GT.
Hope you understand my delema
8/30/10, 08:13 AM
#39
Cobra R Member
hhhmmmmm....They do make 3 wired sockets. The guy at the parts store asked me if I wanted
the 2 or 3 wire set.
Pull your tail light. Whats it look like on your sequential? Also 3?
I wouldnt hack your stock set when replacements are less than $4.
Mine are sequential as well but mine are tied into the stock set and not full replacements.
Guess i should get that video on here huh?
Looks like he tied into the wire closest to the white wire.
hardest part on my install was getting someone to put it in reverse while I checked everything. lol
Last edited by Barricade; 8/30/10 at 08:15 AM.