
Any plumbers in here?

Thread Starter
Legacy TMS Member
Joined: August 7, 2011
Posts: 5,246
Likes: 567
From: NC
I need a little plumbing help.
I'm no plumber by any means, but am in the process of remodeling my condo and want to replace the bath tub, bath faucet, drain cover, and bath sink faucet.
I've already removed the tile that was on the walls above the tub, and will be replacing it with pre-fab walls that go from the tub all the way to the ceiling.
I'm reading about the new faucet set-up and it says something about a rough-in valve which I have no idea what it is.
I need to know if maybe I already have one installed.
The old set-up has different levers for temp and volume control, which is what makes me think there may already be a valve in there.
I'd also love to know if the current drywall above the bath tub has to be removed for the new pre-fab walls to be installed.
Thanks in advance to whomever will help
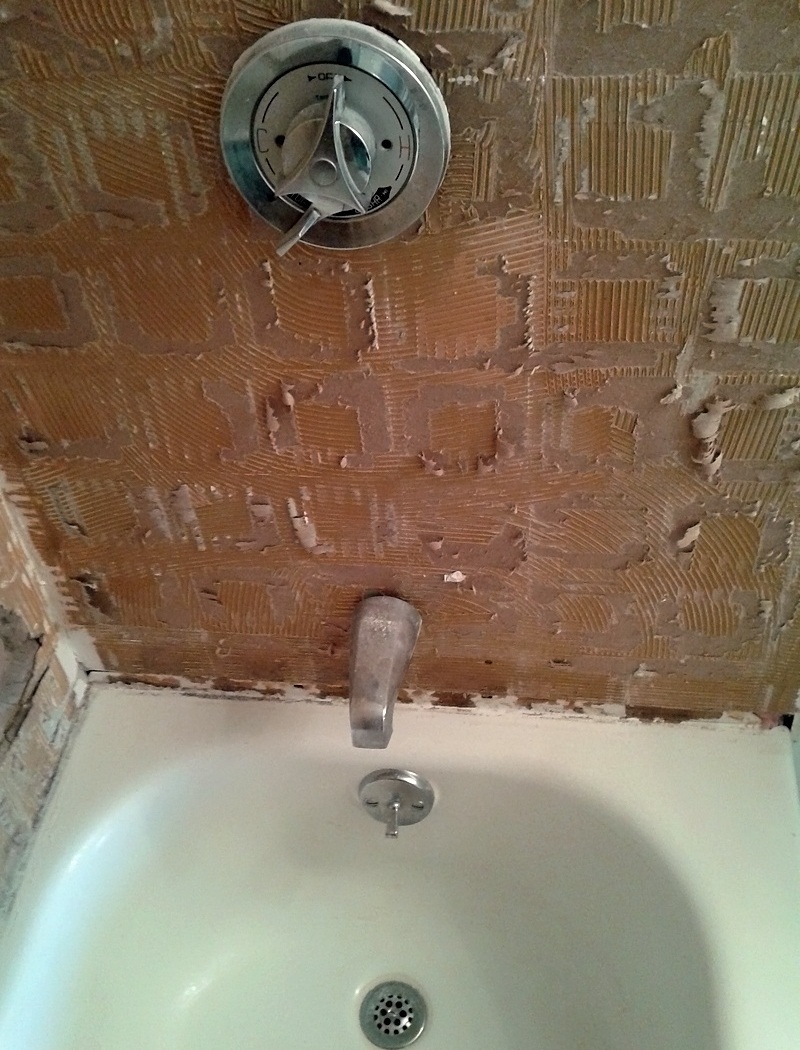
This is what I have now:
This is what I want to install:
http://www.lowes.com/pd_356602-866-8...ductId=3517962
"Caldwell Trim Kit Spot Resist Brushed Nickel 1-Handle Tub and Shower Faucet Trim Kit with Single-Function Showerhead
- Spot Resist™ Brushed Nickel resists fingerprints and water spots
- Lever design for ease of use
- Includes valve trim, showerhead, arm, flange, and diverter tub spout
- To be used with Posi-Temp rough-in valve, model number 82510 "

I'm no plumber by any means, but am in the process of remodeling my condo and want to replace the bath tub, bath faucet, drain cover, and bath sink faucet.
I've already removed the tile that was on the walls above the tub, and will be replacing it with pre-fab walls that go from the tub all the way to the ceiling.
I'm reading about the new faucet set-up and it says something about a rough-in valve which I have no idea what it is.
I need to know if maybe I already have one installed.
The old set-up has different levers for temp and volume control, which is what makes me think there may already be a valve in there.
I'd also love to know if the current drywall above the bath tub has to be removed for the new pre-fab walls to be installed.
Thanks in advance to whomever will help
This is what I have now:
This is what I want to install:
http://www.lowes.com/pd_356602-866-8...ductId=3517962
"Caldwell Trim Kit Spot Resist Brushed Nickel 1-Handle Tub and Shower Faucet Trim Kit with Single-Function Showerhead
- Spot Resist™ Brushed Nickel resists fingerprints and water spots
- Lever design for ease of use
- Includes valve trim, showerhead, arm, flange, and diverter tub spout
- To be used with Posi-Temp rough-in valve, model number 82510 "
Bullitt Member
Joined: February 18, 2012
Posts: 622
Likes: 0
Yes you will need to replace the drywall since the paper has been peeled and you'll want to replace it with waterproof drywall since its in the bathroom, ya don't want it to warp from steam or disintegrate or get moldy if it gets water on it. The water valve is behind your old on/off handle and if your new handle has different settings than you will probably need to replace it with the one that comes with your new handle its not that hard

Mach 1 Member
Joined: August 15, 2012
Posts: 937
Likes: 3
From: Boob City, Indiana
The waterproof drywall McNassty refers to is called greenboard, and it is not susceptible to moisture-induced degeneration like ordinary drywall would be. You will need to strip your walls down to the studs, of course, before installing the greenboard. If you do not have shutoff valves for the shower behind your on/off valve, this would be the perfect time to install them, provided you can get access from the space on the other side of your showerhead wall: hopefully a linen closet where a small access door will not be an eyesore. This will save you time and $$ if the shower valve needs work in the future (i.e. O-ring replacement), and only the shower's supply lines will need to be "out of order", not the sinks or TOILETS! When you replace the valve(s), check for leaks with some soapy water applied at connections. You do NOT want any water leaks inside your walls.
Thread Starter
Legacy TMS Member
Joined: August 7, 2011
Posts: 5,246
Likes: 567
From: NC
Thanks guys.
I don't have the option of installing shut-off valves behind the shower since on the other side is the 2nd shower in the apartment, the one in the master bedroom.
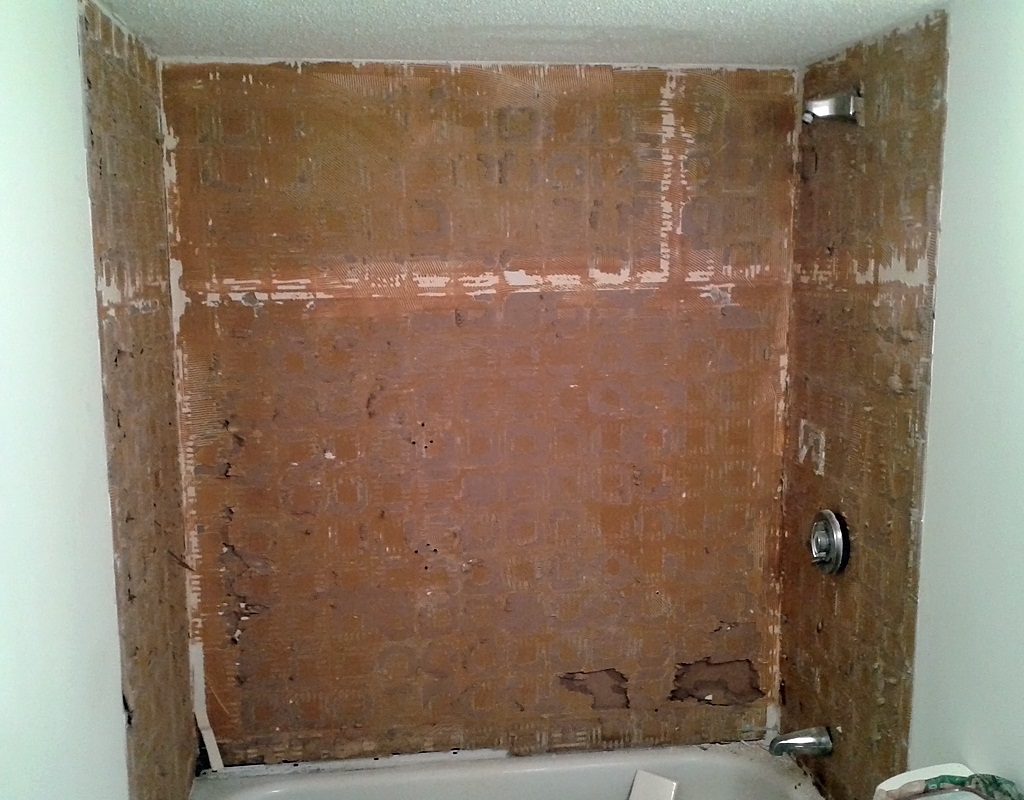
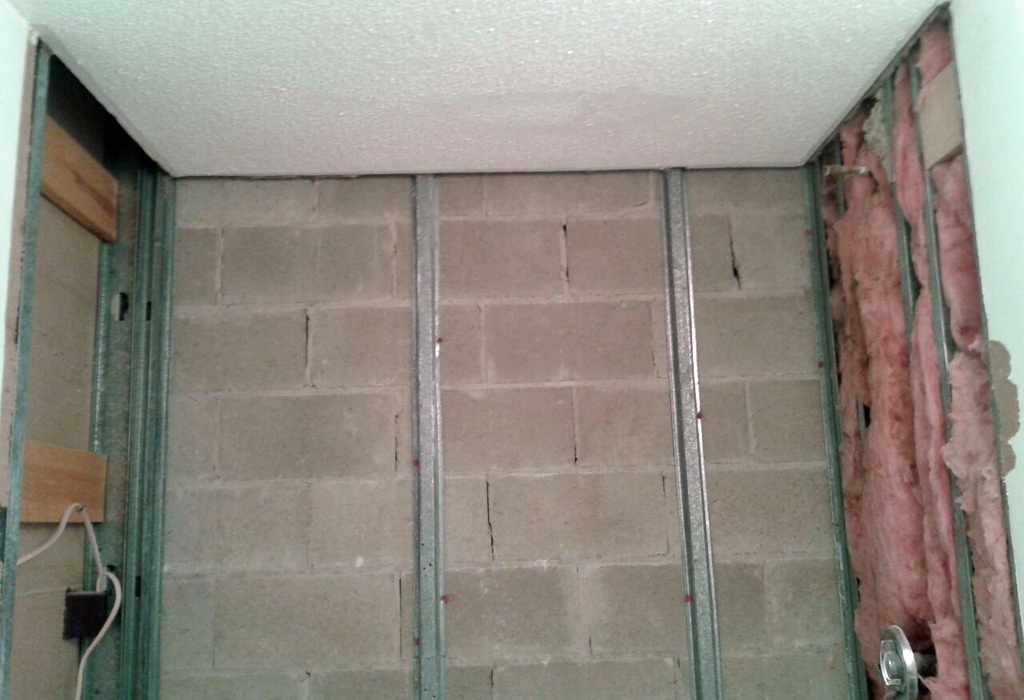
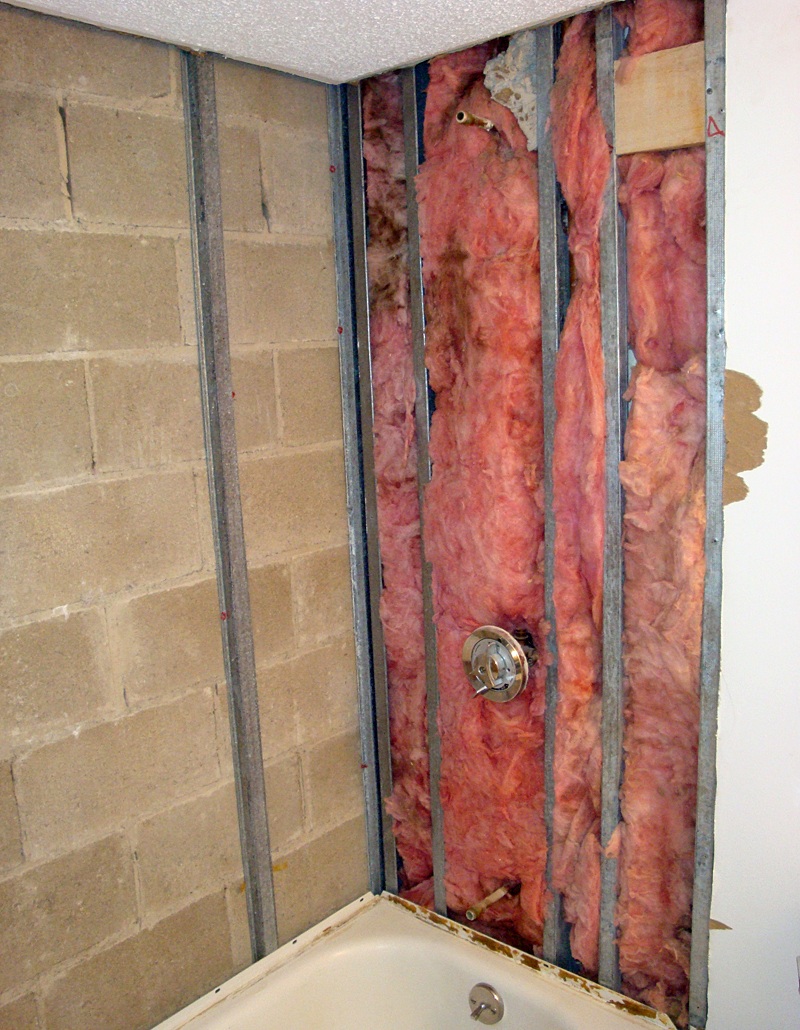
So this morning I started removing the drywall/greenboard/whatever-it's-called:
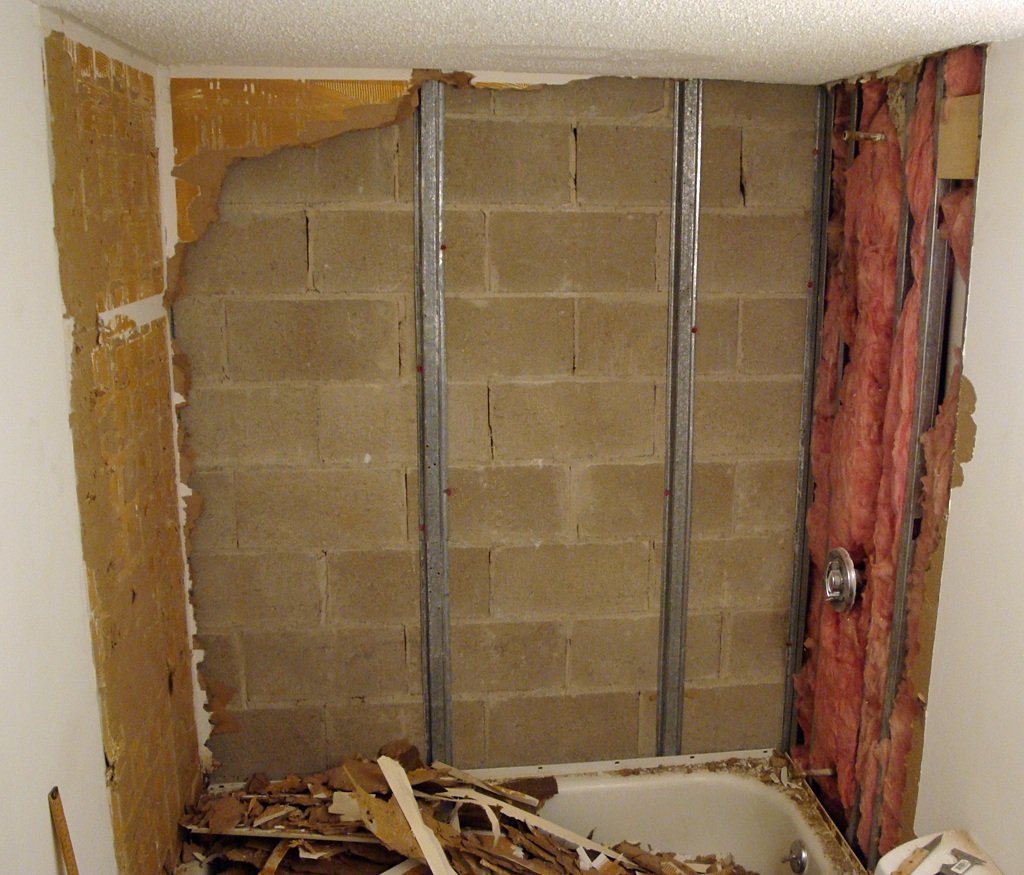
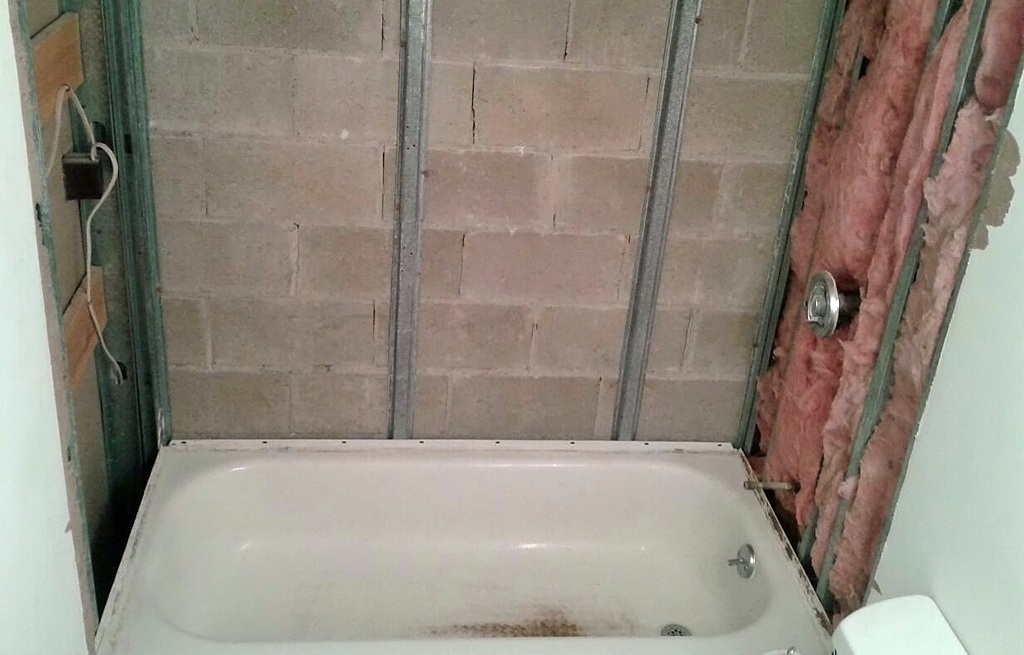
Got it all removed from above the sides and behind the tub, all the way to the ceiling:
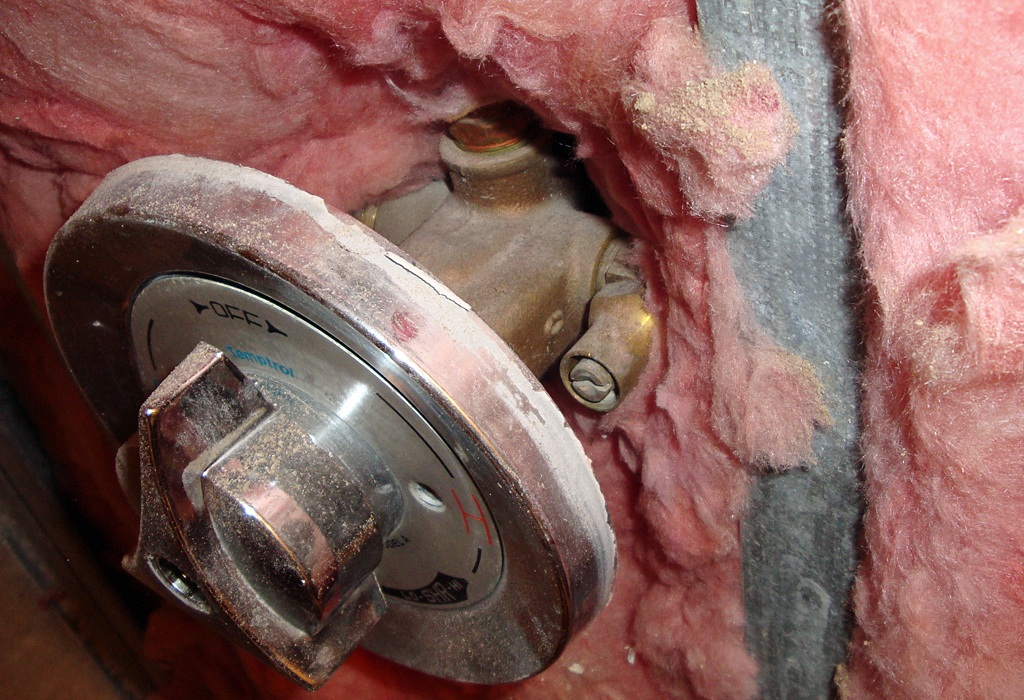
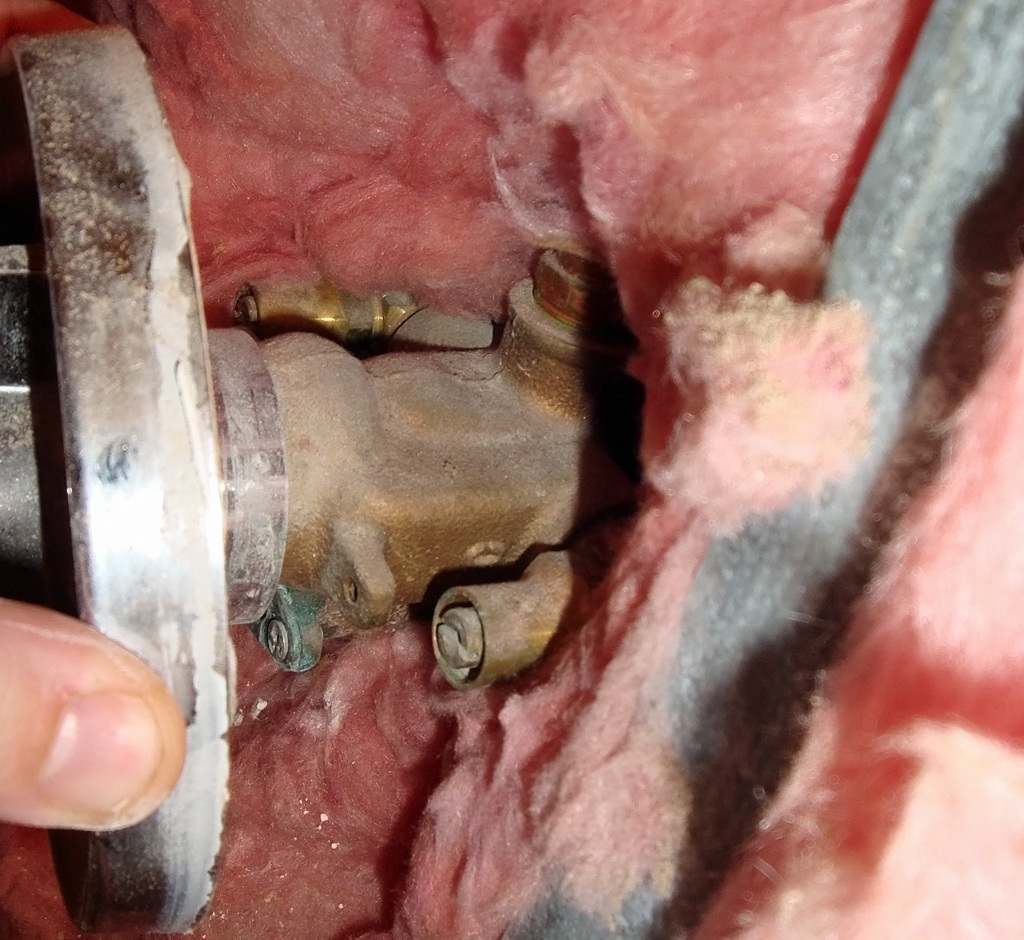
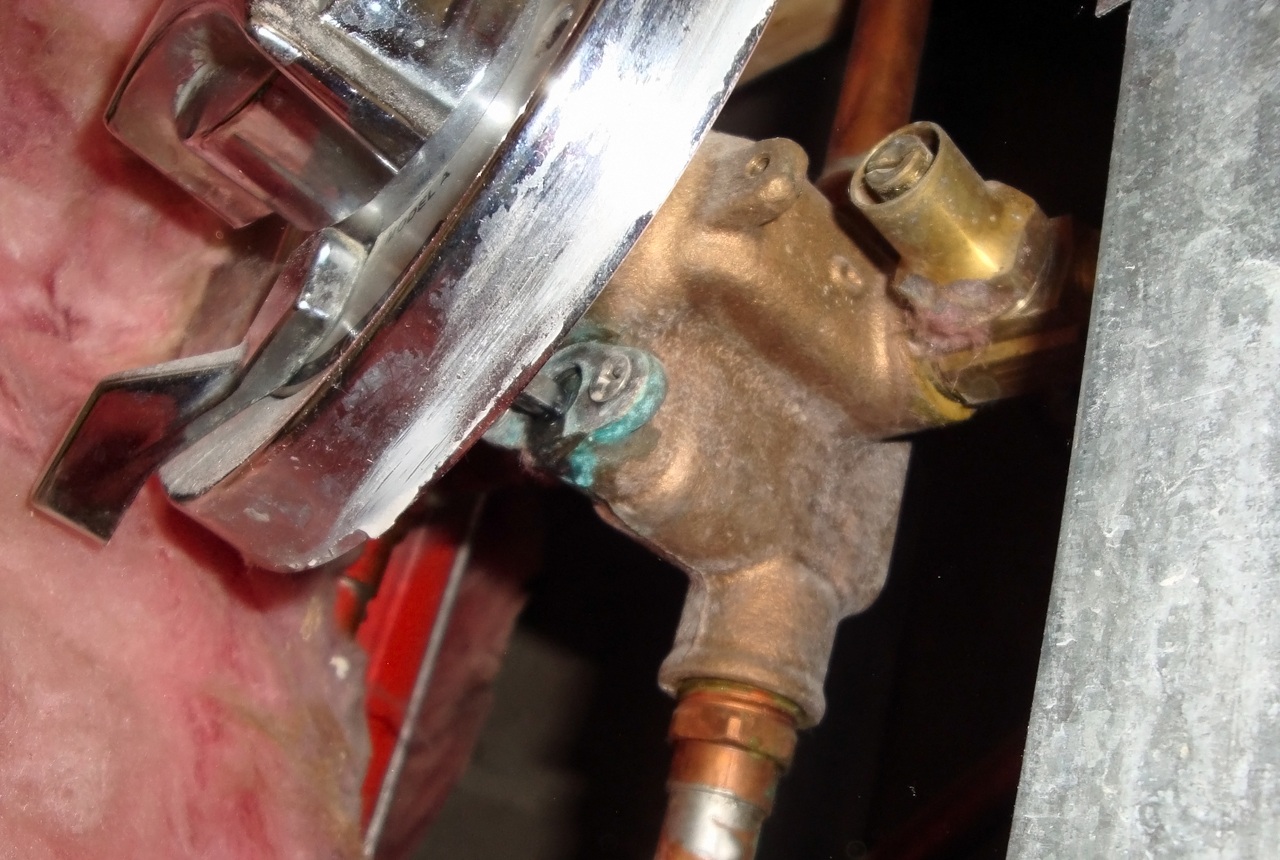
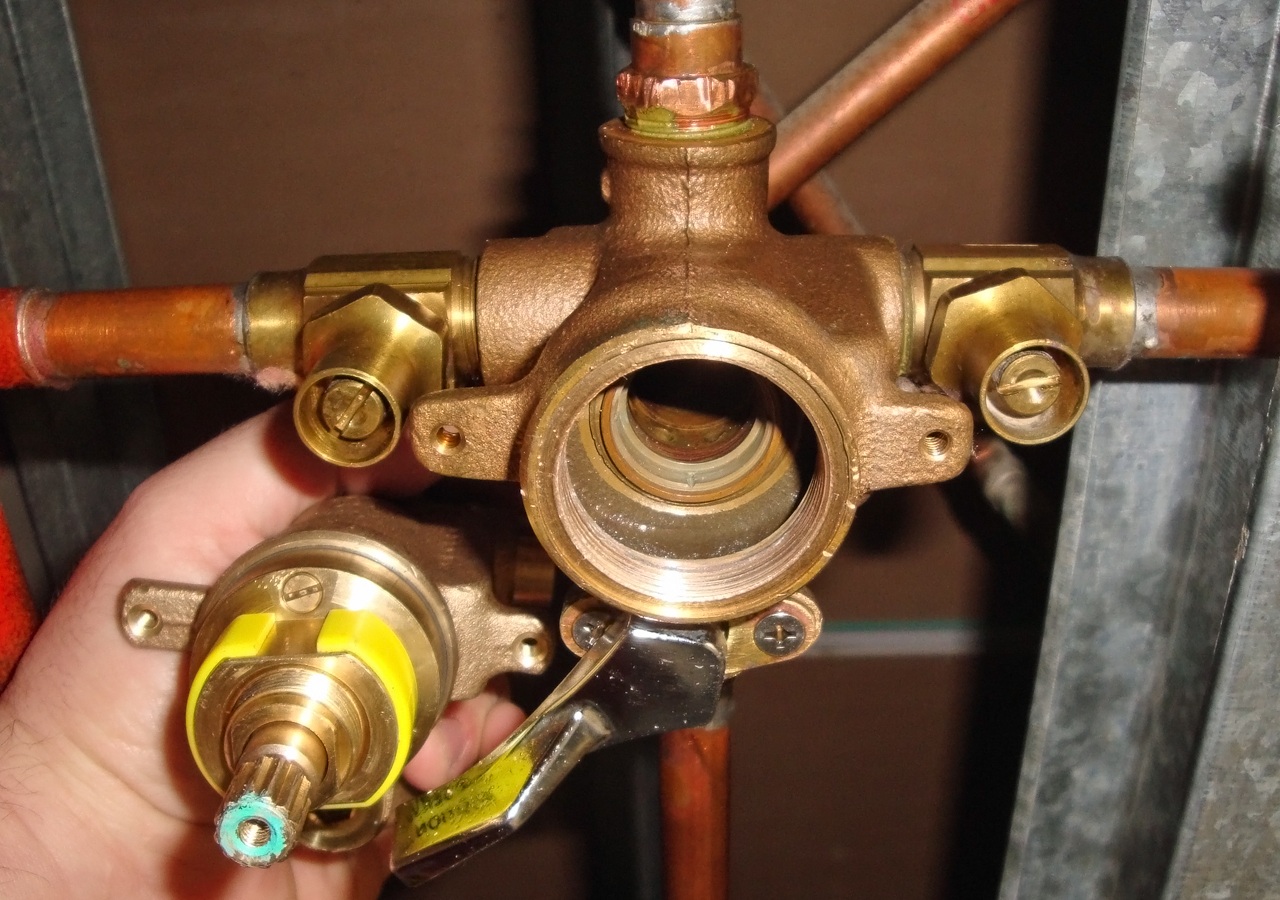
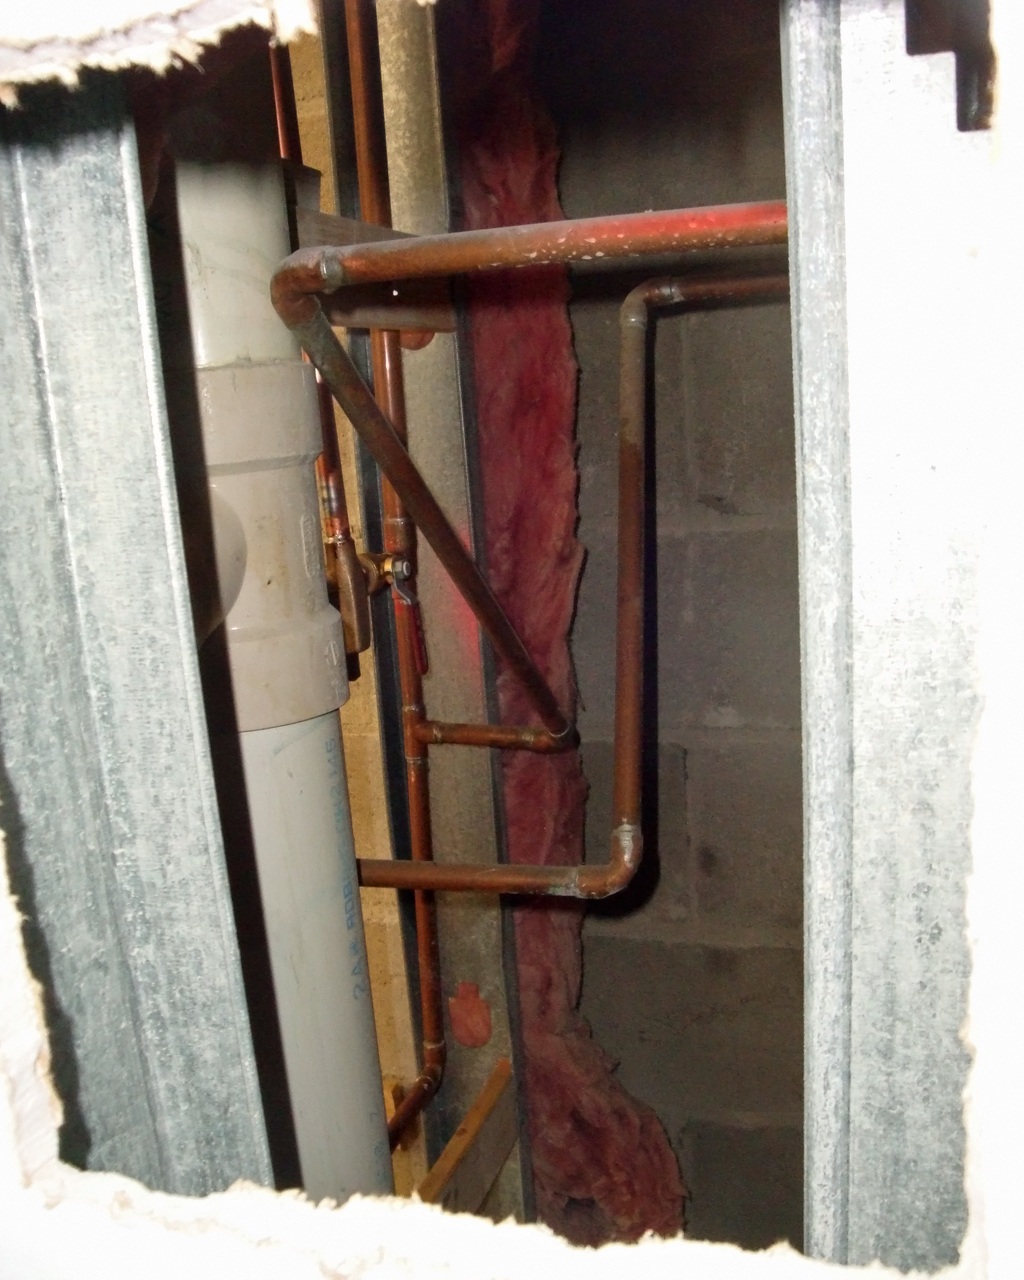
Got a better look at the existing rough-in valve and snapped a couple of pics of it:
I'm kinda thinking I made a boo-boo by removing the drywall to the point where I did on this side, since there are no studs behind it for quite some time, I fit my left hand behind it and couldn't feel anything for the length of my forearm/hand. I'm hoping that the new pre-fab wall will mount to the studs and have a lip to go over the drywall where they will meet.
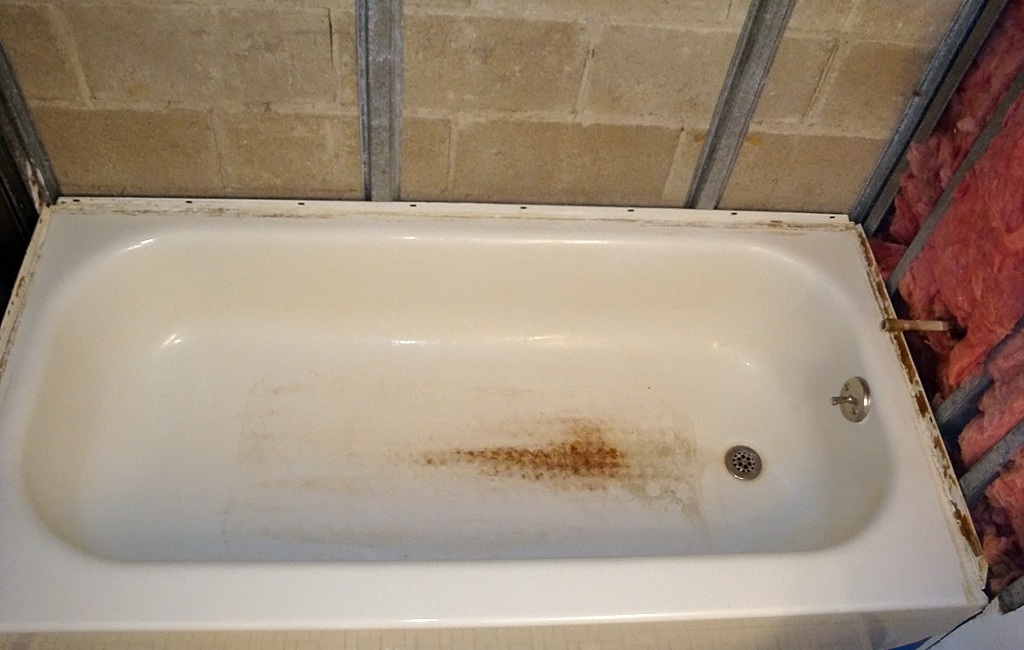
And this is what got me doing all this, a rusted tub that feels like it will crack under your feet as you stand in it:
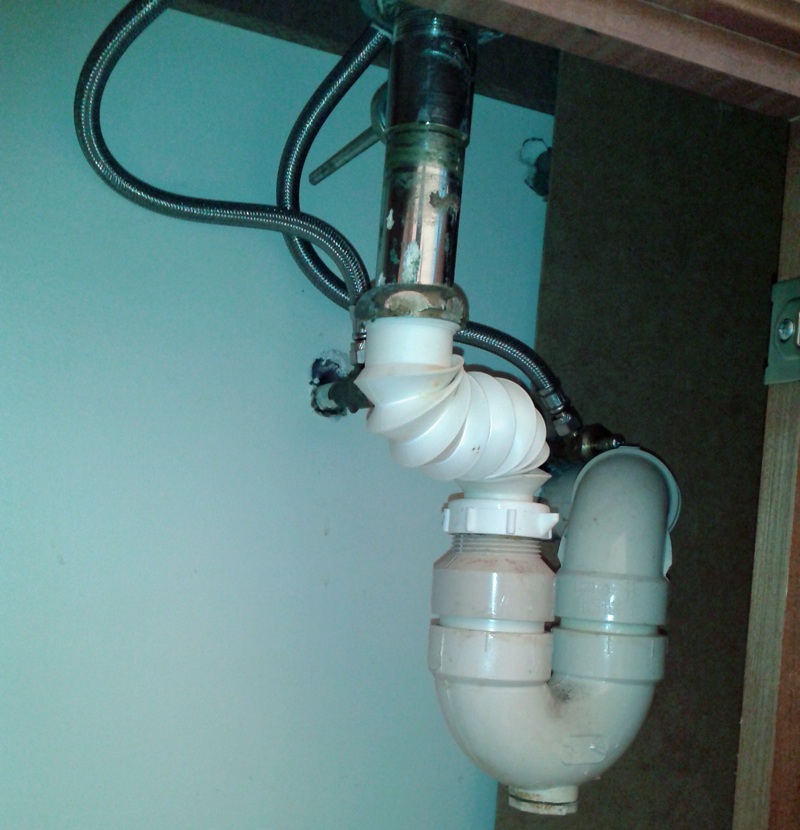
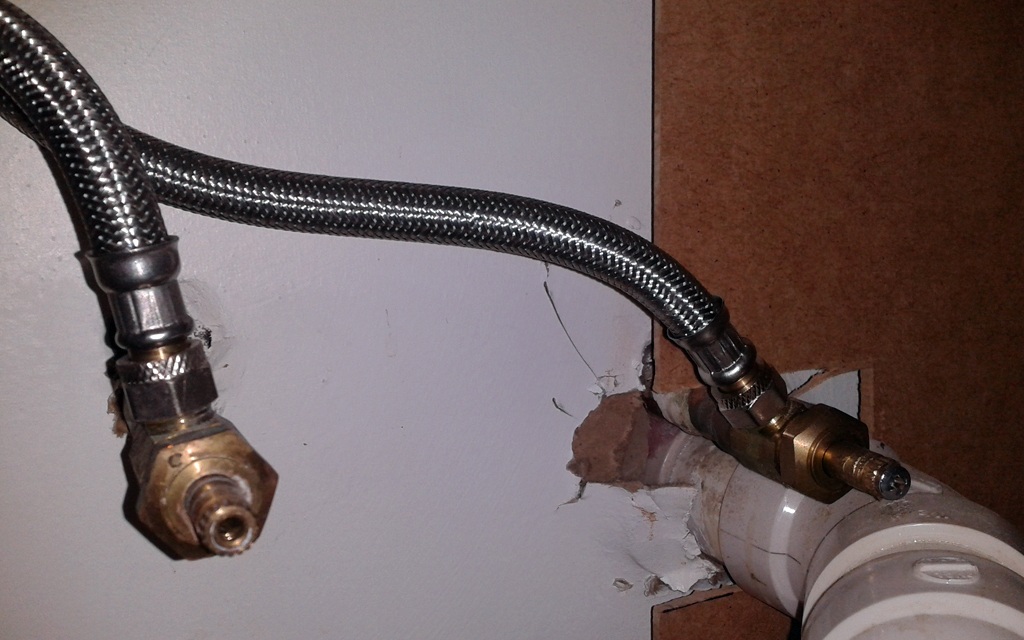
A very unpleasant surprise was waiting for me under the bath sink. Turns out the "plumber" that installed that sink about 3 years ago did such a great job, I now have no ***** to turn the water on or off from under the sink, the drain stop is not hooked up to the faucet, and that accordion-style white connector will have to go, I hate it, I'm gonna have to do a different hook-up under there :
I don't have the option of installing shut-off valves behind the shower since on the other side is the 2nd shower in the apartment, the one in the master bedroom.
So this morning I started removing the drywall/greenboard/whatever-it's-called:
Got it all removed from above the sides and behind the tub, all the way to the ceiling:
Got a better look at the existing rough-in valve and snapped a couple of pics of it:
I'm kinda thinking I made a boo-boo by removing the drywall to the point where I did on this side, since there are no studs behind it for quite some time, I fit my left hand behind it and couldn't feel anything for the length of my forearm/hand. I'm hoping that the new pre-fab wall will mount to the studs and have a lip to go over the drywall where they will meet.
And this is what got me doing all this, a rusted tub that feels like it will crack under your feet as you stand in it:
A very unpleasant surprise was waiting for me under the bath sink. Turns out the "plumber" that installed that sink about 3 years ago did such a great job, I now have no ***** to turn the water on or off from under the sink, the drain stop is not hooked up to the faucet, and that accordion-style white connector will have to go, I hate it, I'm gonna have to do a different hook-up under there :
Post *****
Joined: October 9, 2007
Posts: 32,808
Likes: 163
"Caldwell Trim Kit Spot Resist Brushed Nickel 1-Handle Tub and Shower Faucet Trim Kit with Single-Function Showerhead
- Spot Resist(TM) Brushed Nickel resists fingerprints and water spots
- Lever design for ease of use
- Includes valve trim, showerhead, arm, flange, and diverter tub spout
- To be used with Posi-Temp rough-in valve, model number 82510 "
The rough in valve described in the last line is model specific I'm sure and will need to be purchase. That's the past ogre faucet you don't see. That's put in before the new walls go up. That's the necessary guts. Then you get your trim kit and install if after your finish shower wall is done. Think of it as a two piece system. Rough in for what we call rough in (inside the wall stage) and trim kit for what we call final trim (finish stage).
You must purchase the correct tooth in kit for your faucet trim kit. Your old one will not work.
Also I'd shoot the plumber that installed that sink. That's ****ing pathetic. I wouldn't be able to sleep at night knowing I put that in someone's house. You'll need to rebuild the p trap so that it lines up with the drain of the sink properly. Everything rotates in mock up so it'll be easy.
NTTAWWT
Joined: January 27, 2007
Posts: 14,456
Likes: 35
From: That town you drive through to get to Myrtle Beach
Also I'd shoot the plumber that installed that sink. That's ****ing pathetic. I wouldn't be able to sleep at night knowing I put that in someone's house. You'll need to rebuild the p trap so that it lines up with the drain of the sink properly. Everything rotates in mock up so it'll be easy.
Thread Starter
Legacy TMS Member
Joined: August 7, 2011
Posts: 5,246
Likes: 567
From: NC
"Caldwell Trim Kit Spot Resist Brushed Nickel 1-Handle Tub and Shower Faucet Trim Kit with Single-Function Showerhead
- Spot Resist(TM) Brushed Nickel resists fingerprints and water spots
- Lever design for ease of use
- Includes valve trim, showerhead, arm, flange, and diverter tub spout
- To be used with Posi-Temp rough-in valve, model number 82510 "
The rough in valve described in the last line is model specific I'm sure and will need to be purchase. That's the past ogre faucet you don't see. That's put in before the new walls go up. That's the necessary guts. Then you get your trim kit and install if after your finish shower wall is done. Think of it as a two piece system. Rough in for what we call rough in (inside the wall stage) and trim kit for what we call final trim (finish stage).
You must purchase the correct tooth in kit for your faucet trim kit. Your old one will not work.
Also I'd shoot the plumber that installed that sink. That's ****ing pathetic. I wouldn't be able to sleep at night knowing I put that in someone's house. You'll need to rebuild the p trap so that it lines up with the drain of the sink properly. Everything rotates in mock up so it'll be easy.
- Spot Resist(TM) Brushed Nickel resists fingerprints and water spots
- Lever design for ease of use
- Includes valve trim, showerhead, arm, flange, and diverter tub spout
- To be used with Posi-Temp rough-in valve, model number 82510 "
The rough in valve described in the last line is model specific I'm sure and will need to be purchase. That's the past ogre faucet you don't see. That's put in before the new walls go up. That's the necessary guts. Then you get your trim kit and install if after your finish shower wall is done. Think of it as a two piece system. Rough in for what we call rough in (inside the wall stage) and trim kit for what we call final trim (finish stage).
You must purchase the correct tooth in kit for your faucet trim kit. Your old one will not work.
Also I'd shoot the plumber that installed that sink. That's ****ing pathetic. I wouldn't be able to sleep at night knowing I put that in someone's house. You'll need to rebuild the p trap so that it lines up with the drain of the sink properly. Everything rotates in mock up so it'll be easy.
Whatever, it will be fixed up the right way when I'm done with it
I keep finding new things that need to be done, and I decide to do everything myself at each step, saving me a boatload of cash and learning a whole lot in the process
I can't wait to start the re-assembly.
I actually want to schedule an in-house consultation with Home Depot to see about having them install the new tub and wall liners, and remove/discard the old tub.
Bullitt Member
Joined: February 18, 2012
Posts: 622
Likes: 0
Sorry to put more of a load on ya but if you stand in your tub and it feels like its going to crack or break you may need to replace the flooring underneath it maybe even the floor joists worst case. The drywall you had on there looked like normal drywall not moisture proof so it may have caused water damage in your floor and in the walls, I would check for mold and flimsy boards
Thread Starter
Legacy TMS Member
Joined: August 7, 2011
Posts: 5,246
Likes: 567
From: NC
It's a condo, built on concrete slabs, so I don't think I have to worry about the joists 
And trust me, I wish I knew who the idiot was that did the plumbing in there ... I was shaking my head so much I started hearing some rattling in there ... lol
And trust me, I wish I knew who the idiot was that did the plumbing in there ... I was shaking my head so much I started hearing some rattling in there ... lol
Thread Starter
Legacy TMS Member
Joined: August 7, 2011
Posts: 5,246
Likes: 567
From: NC
Wow it's been a while since I updated this thread.
Meanwhile, I got the old tub out, had to cut it up with my new SawzAll which was a fun little project, recently got the new tub and went to install it, just to find out that the drain pipe and the overflow pipe don't line up with the new tub.
Was able to adjust the overflow pipe so it fits, got the drain pipe cut but I got it cut too short, so I got a new drain pipe, cut it to the revised measurement, installed the tub and had a leak from the tub AND from the old rough-in valve.
I was all ready to hire a plumber when a friend told me HE is in the process of doing the same thing and he plans on doing it all himself.
With his help I learned to solder copper pipe, and was able to install the new rough-in valve by MYSELF
Some pictures to show some of the progress:
Old valve and one of the spots where it was leaking from:
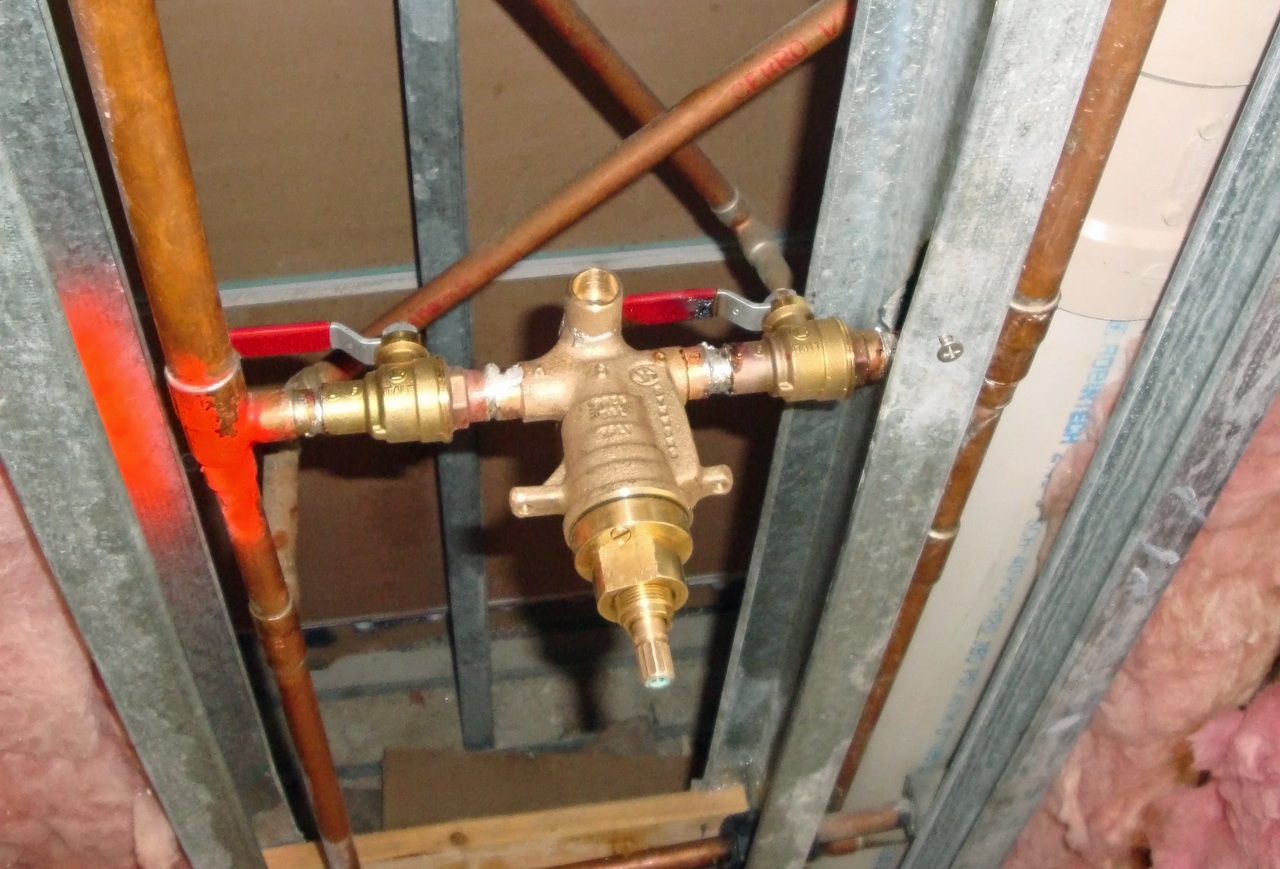
Old valve still installed, new valve being shown off for the first time on camera, lol :
(the old valve is missing the guts cuz I tried to see if the new valve's guts might fit but they were different)
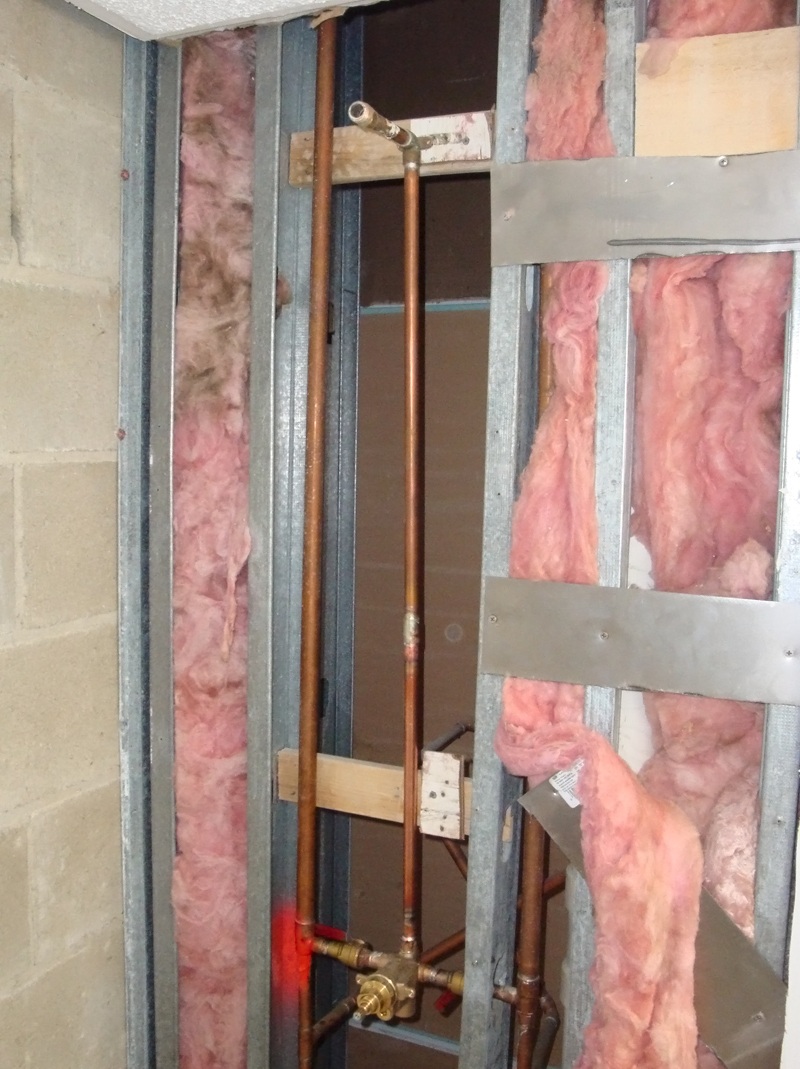
New valve installed, along with new shut-off valves for cold/hot lines :
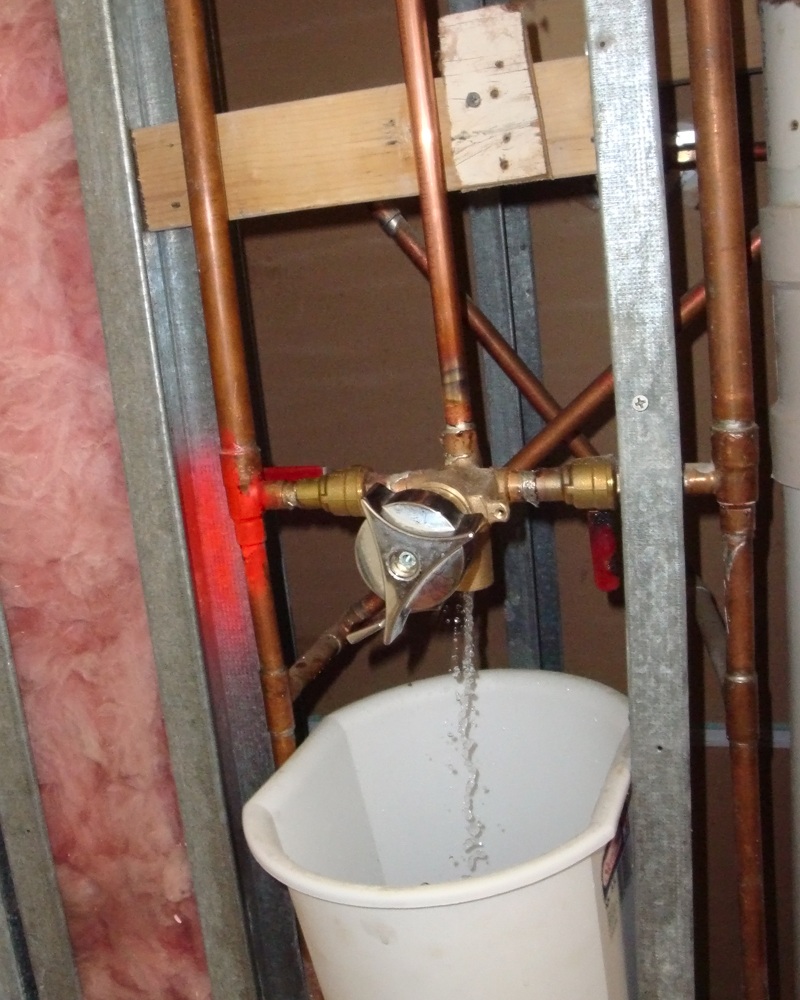
New valve installation being tested for leaks:
The bottom pipe is the last one I installed, and I'm kinda proud of the soldering job I did at its bottom where it connects to the 90-degree cast elbow that will feed the tub spout.
I actually have a cleaner-looking soldering job there than some of the original stuff done by pros when the place was built, lol.

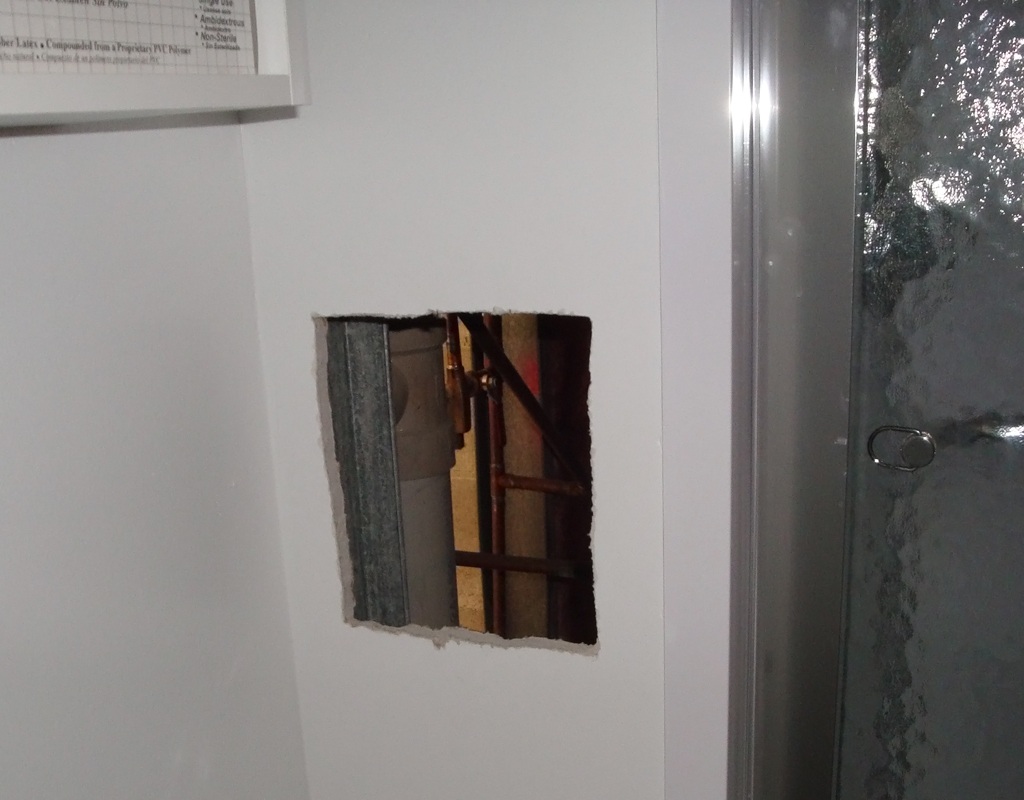
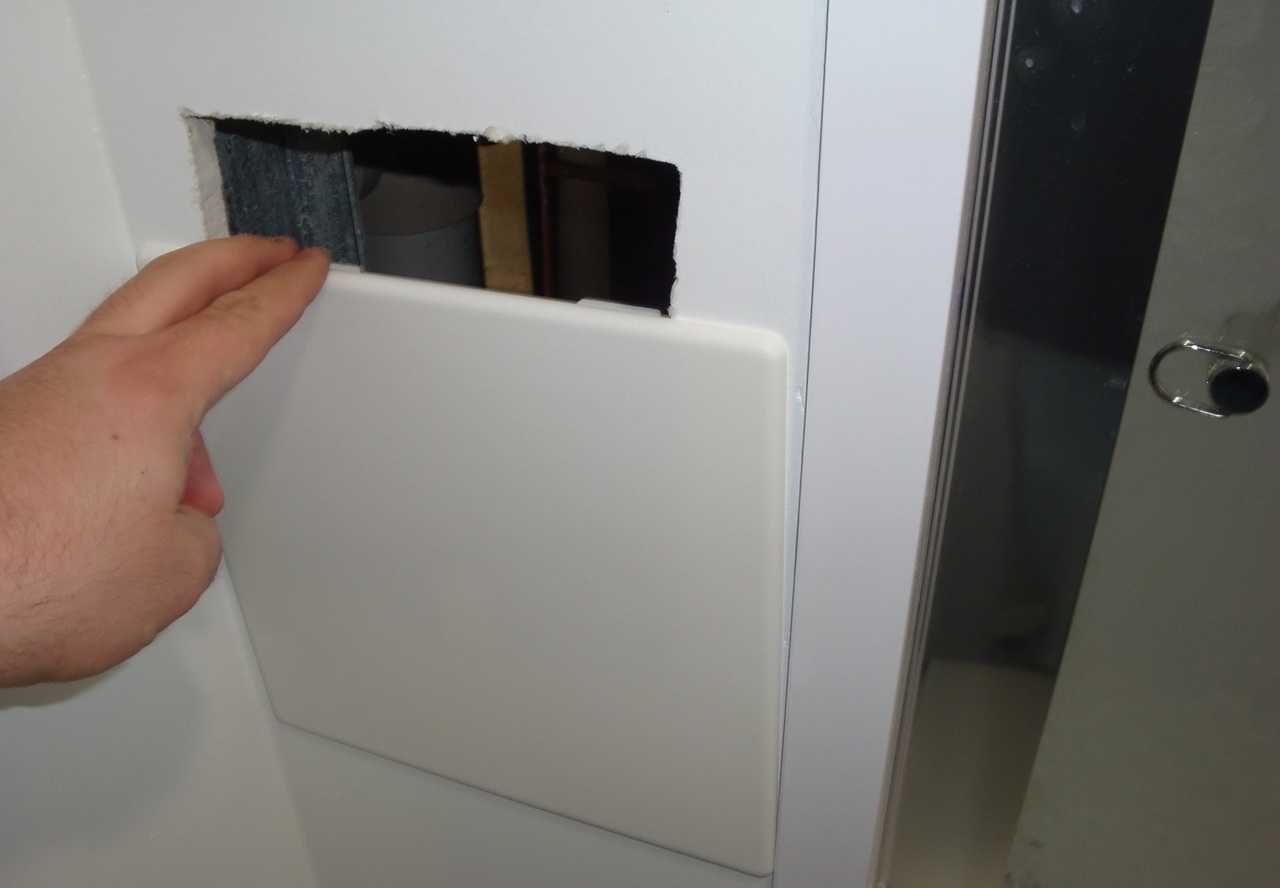
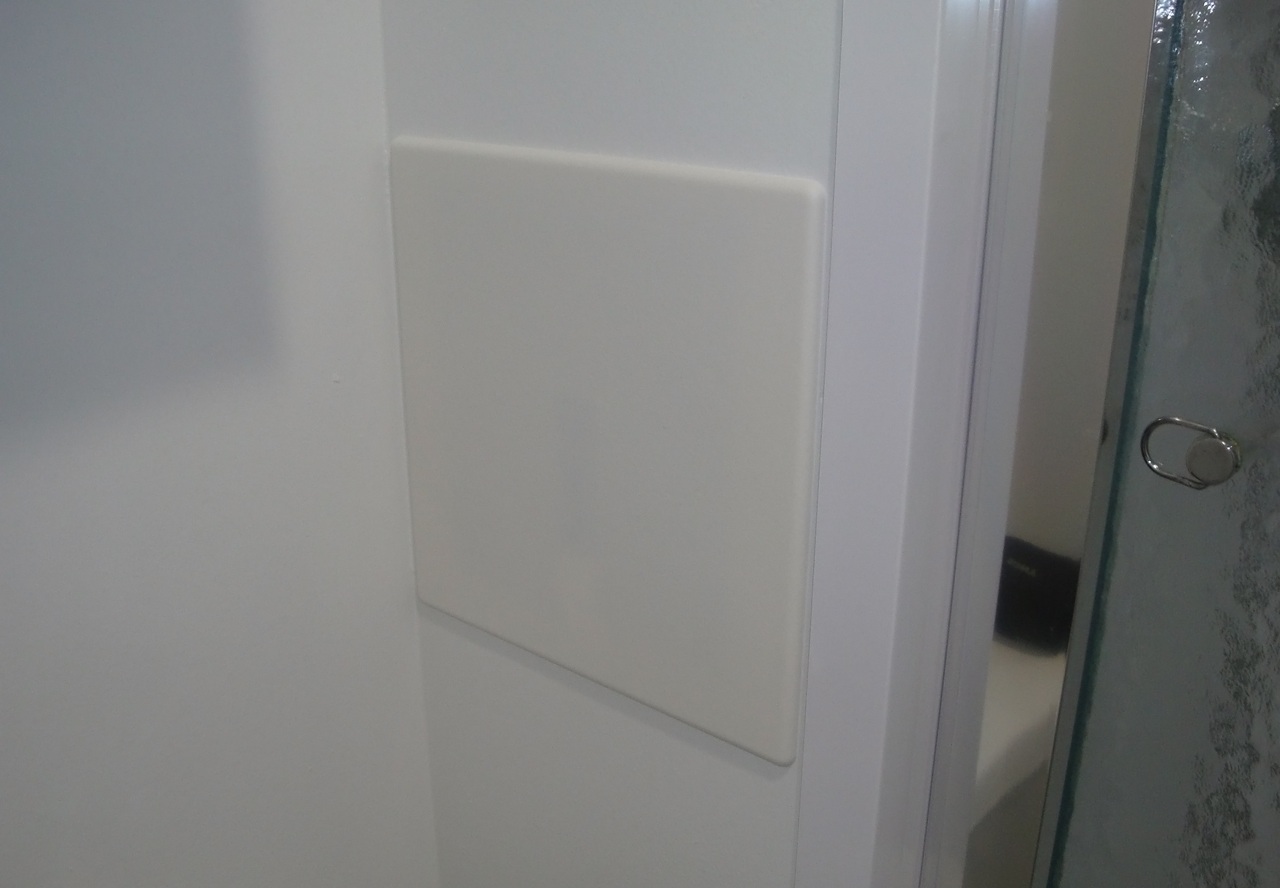
I also went ahead and installed an access panel in a wall that's in the next room over (the master bathroom), a sideways wall that turned out to be perfect width for the new panel to fit, and for me to reach in and be able to work the shut-off valves :
I still have to tackle the little nightmare under the sink, but I have parts and some know-how now, so I'm no longer that afraid / apprehensive to do it.
Looking forward to it, actually
.
Meanwhile, I got the old tub out, had to cut it up with my new SawzAll which was a fun little project, recently got the new tub and went to install it, just to find out that the drain pipe and the overflow pipe don't line up with the new tub.
Was able to adjust the overflow pipe so it fits, got the drain pipe cut but I got it cut too short, so I got a new drain pipe, cut it to the revised measurement, installed the tub and had a leak from the tub AND from the old rough-in valve.
I was all ready to hire a plumber when a friend told me HE is in the process of doing the same thing and he plans on doing it all himself.
With his help I learned to solder copper pipe, and was able to install the new rough-in valve by MYSELF
Some pictures to show some of the progress:
Old valve and one of the spots where it was leaking from:
Old valve still installed, new valve being shown off for the first time on camera, lol :
(the old valve is missing the guts cuz I tried to see if the new valve's guts might fit but they were different)
New valve installed, along with new shut-off valves for cold/hot lines :
New valve installation being tested for leaks:
The bottom pipe is the last one I installed, and I'm kinda proud of the soldering job I did at its bottom where it connects to the 90-degree cast elbow that will feed the tub spout.
I actually have a cleaner-looking soldering job there than some of the original stuff done by pros when the place was built, lol.
I also went ahead and installed an access panel in a wall that's in the next room over (the master bathroom), a sideways wall that turned out to be perfect width for the new panel to fit, and for me to reach in and be able to work the shut-off valves :
I still have to tackle the little nightmare under the sink, but I have parts and some know-how now, so I'm no longer that afraid / apprehensive to do it.
Looking forward to it, actually
.

Thread Starter
Legacy TMS Member
Joined: August 7, 2011
Posts: 5,246
Likes: 567
From: NC
Thanks man ...
Thread Starter
Legacy TMS Member
Joined: August 7, 2011
Posts: 5,246
Likes: 567
From: NC
I have a lack of volume adjustment on the new Symmons rough-in valve I just installed.
It starts out ok but then it goes to full blast with no in-between.
Anybody know what the problem might be ?
A quick video showing the problem :
It starts out ok but then it goes to full blast with no in-between.
Anybody know what the problem might be ?
A quick video showing the problem :
Post *****
Joined: October 9, 2007
Posts: 32,808
Likes: 163
I have a lack of volume adjustment on the new Symmons rough-in valve I just installed.
It starts out ok but then it goes to full blast with no in-between.
Anybody know what the problem might be ?
A quick video showing the problem :
<a href="http://www.youtube.com/watch?v=vPRtPtX45FY">YouTube Link</a>
It starts out ok but then it goes to full blast with no in-between.
Anybody know what the problem might be ?
A quick video showing the problem :
<a href="http://www.youtube.com/watch?v=vPRtPtX45FY">YouTube Link</a>
Most people just want full on flow and don't care about adjusting it.