
BMR Lower Control Arm (LCA) and Relocation Bracket Installation (w/pics)


BMR Lower Control Arm (LCA) and Relocation Bracket Installation (w/pics)
BMR Lower Control Arm (LCA) and Relocation Bracket Installation
Install Time: 2 Hours
Tools Required: Basic Metric tools, large wrenches (up to 22mm), torque wrench (up to 130 lb-ft)
This install was performed on my buddy's car, Leo06GT.
See BMRs website for info as to what functions the LCA and Relo-Brackets serve.
Tip by RUgoinUP
Note: Be sure to do one LCA side at a time. Otherwise the LCA's may not reach the relocation axle bracket upon re-installation.
If you already removed both LCA's, use a jack near the front of the axle housing (pumpkin) by the pinion flange, which will bring it close enough to work.
Procedure:
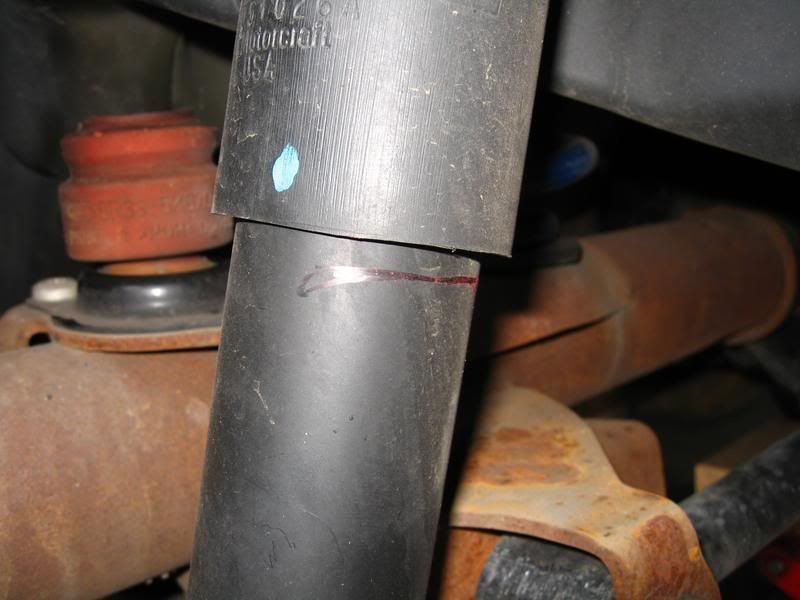
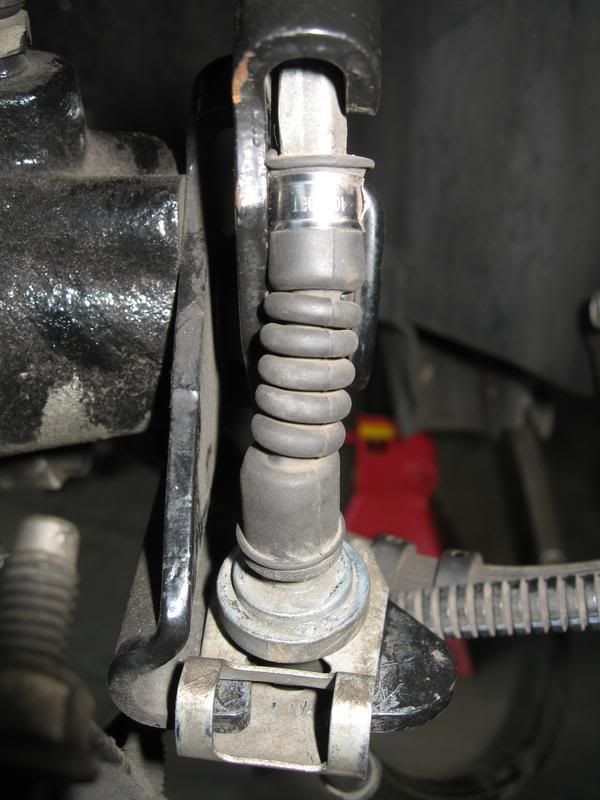
With the car on level ground, mark the rear shock relative to the protective outer sleeve.
Loosen the lug nuts on the rear wheels. Jack up the rear of the car and support it with jack stands. Remove both rear wheels.
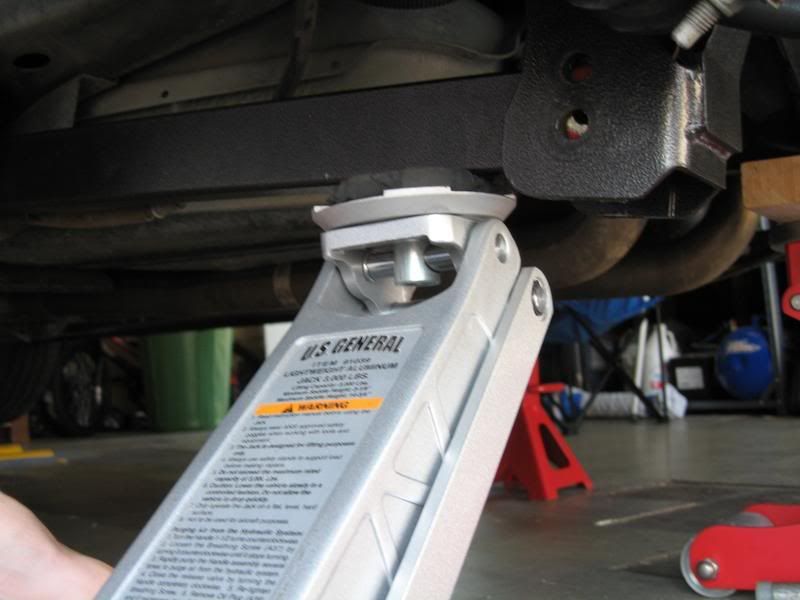
Place floor jack under the rear axle housing and jack up the rear until the reference marks you made on the shock line up as if it were on the ground.
This procedure replicates the car in static, level state. Also required to be in this position when torquing all the associated bolts.
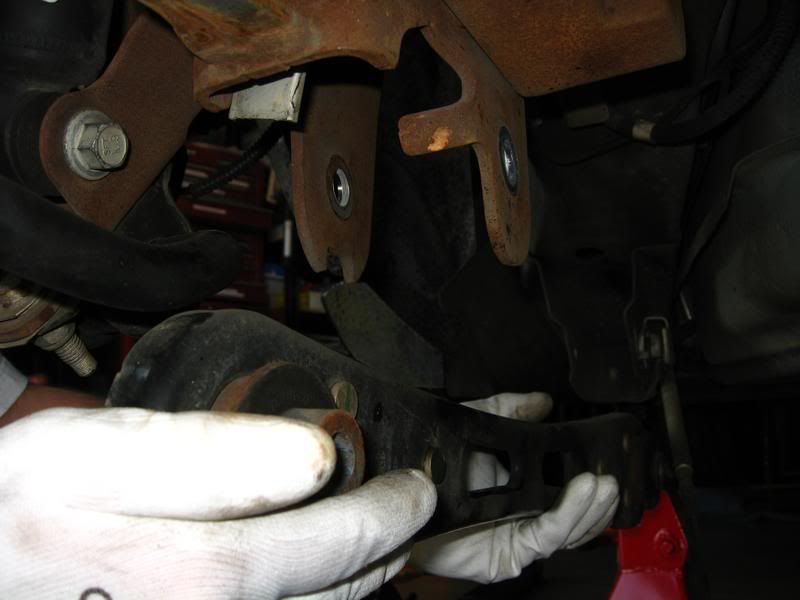
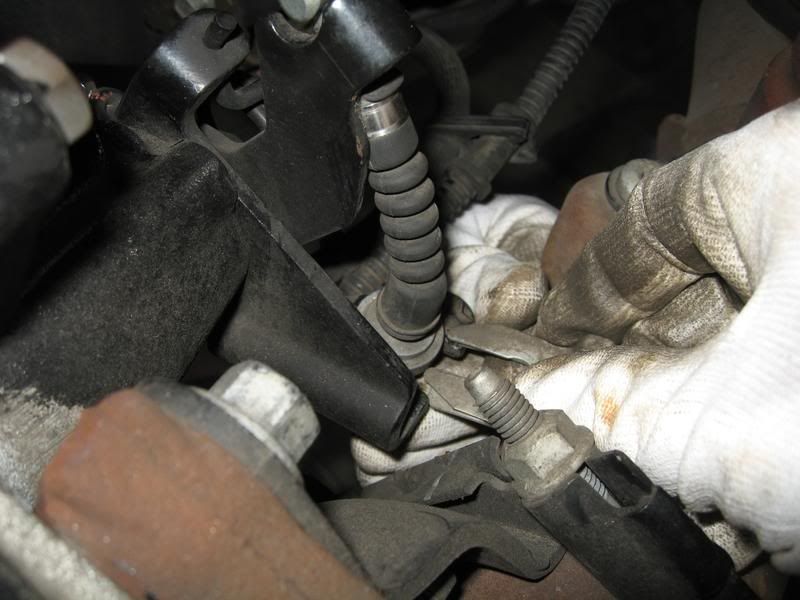
Starting with the Drivers side, remove the Parking Brake retaining clip. (Make sure the Parking Brake is disengaged)
Unhook the cable end and route it out of the factory LCA.
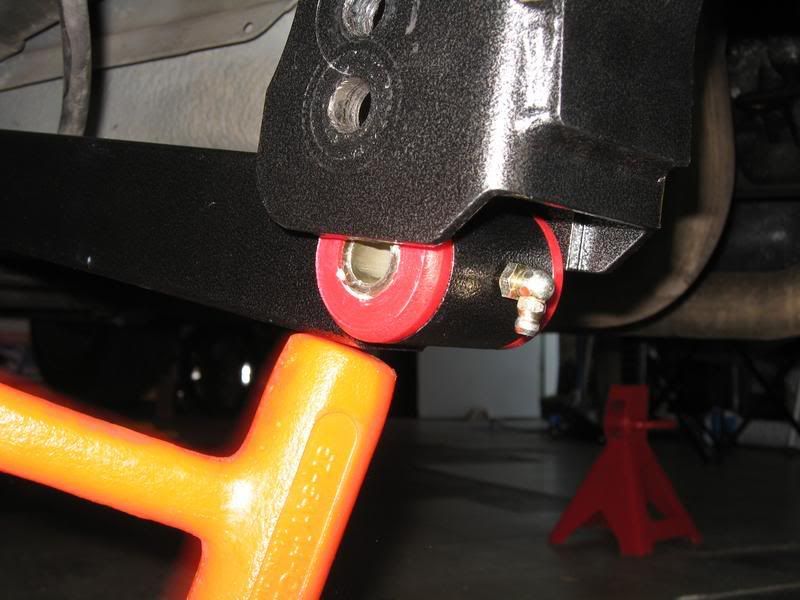
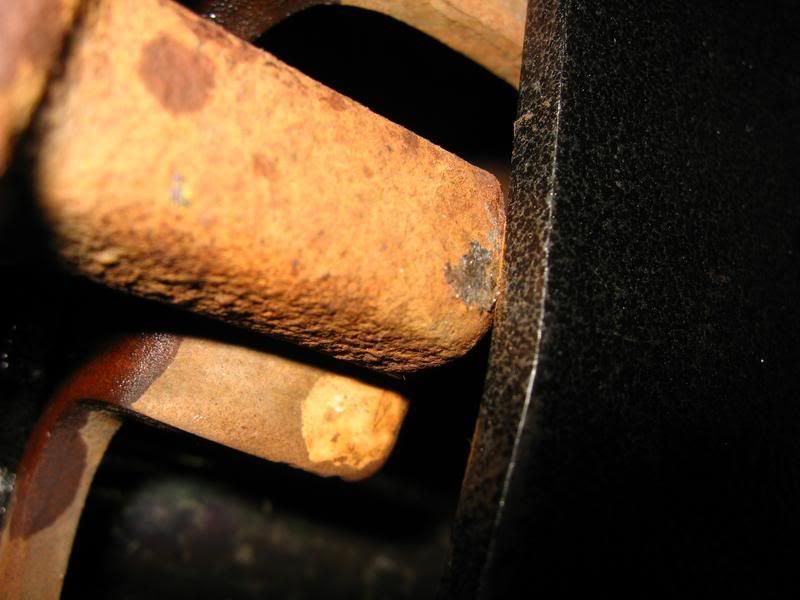
Reference pic of the factory LCA.
Starting at the forward LCA mounting bolt, break loose and remove.
Note: Clip nut stays attached to the frame, only the bolts gets removed.
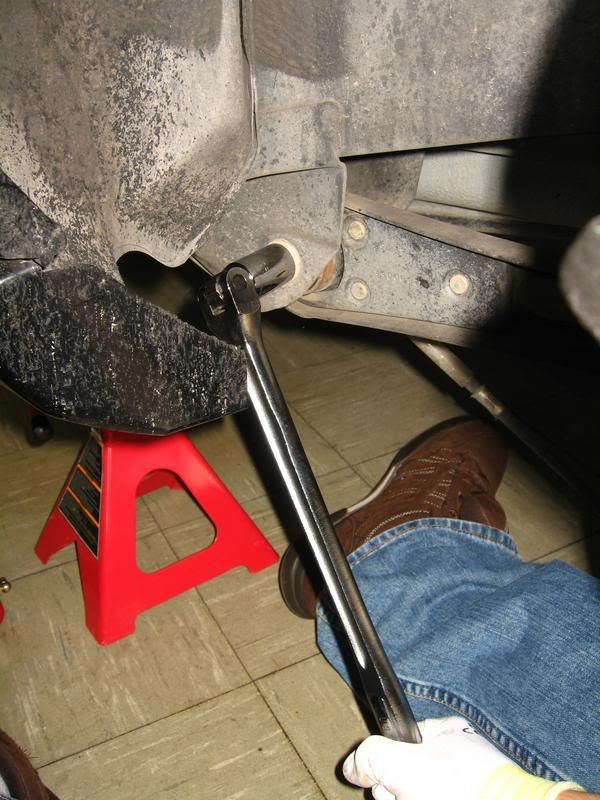
Break loose and remove the rear LCA mounting bolt. Remove LCA from the car and set aside.
Note: For those just swapping out the LCAs, skip the Relo-Bracket install below.
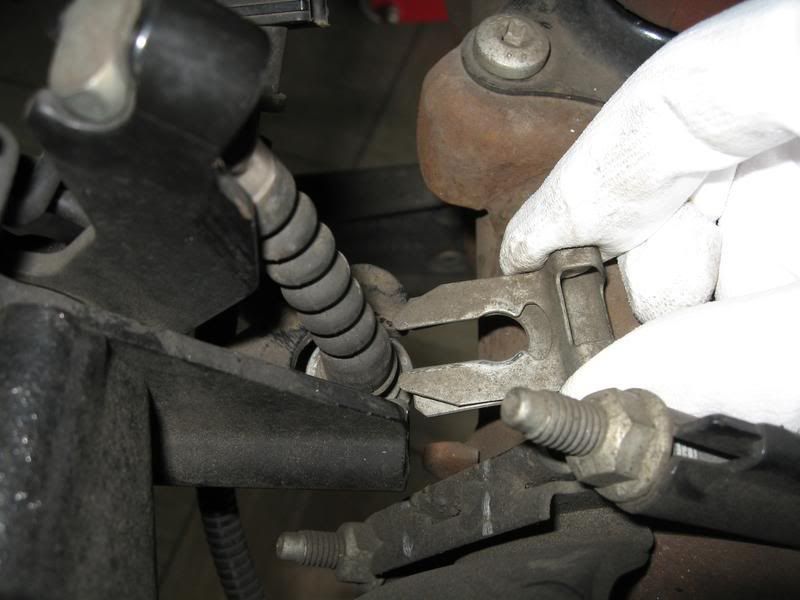
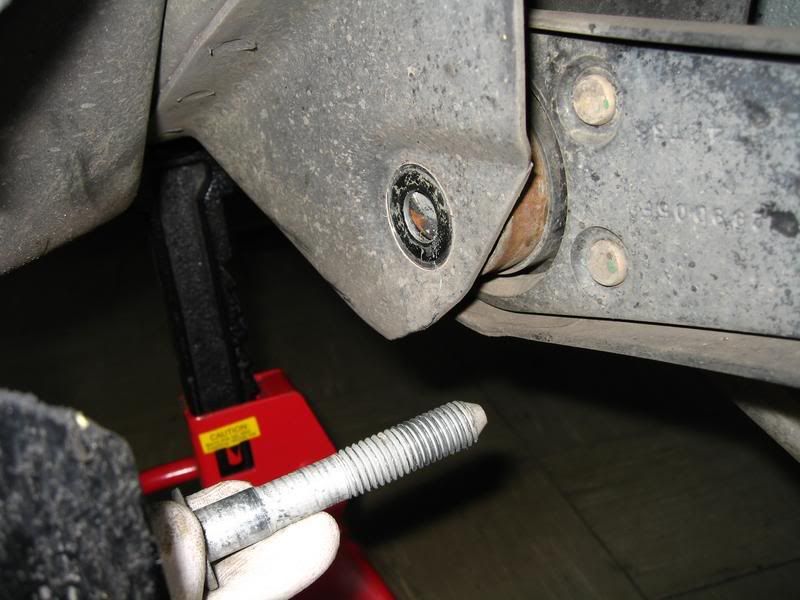
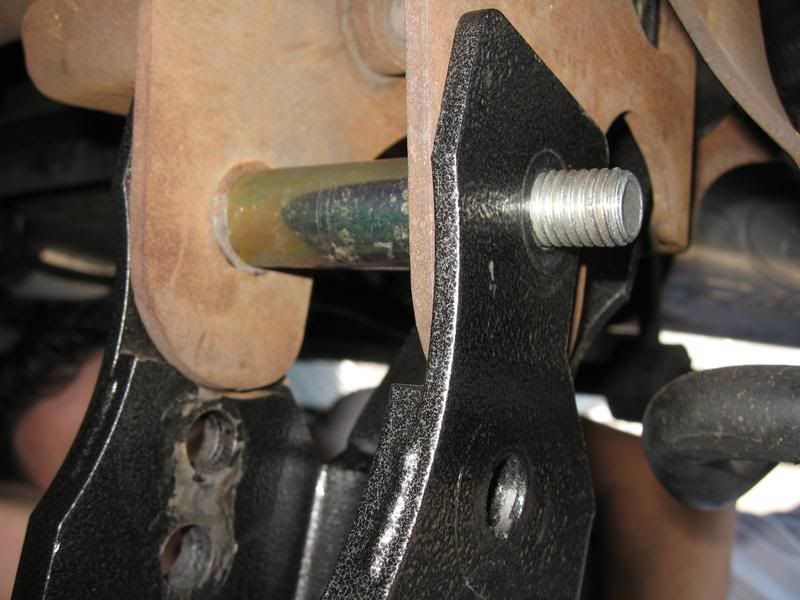
Pop the plastic cover off the Panhard Bar Drivers side mounting bolt.
Remove Panhard Bar mounting bolt.
Side-by-Side comparision
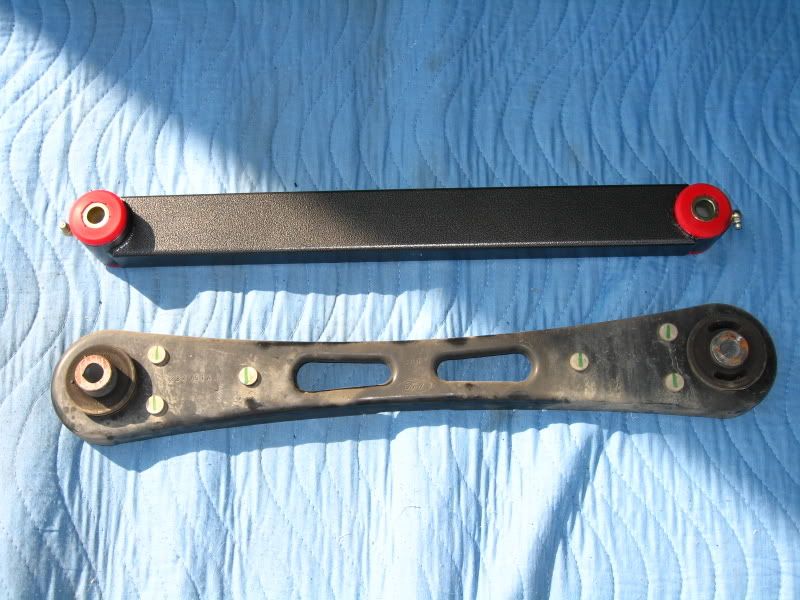
Notice the rear offset of the rear section of the LCA
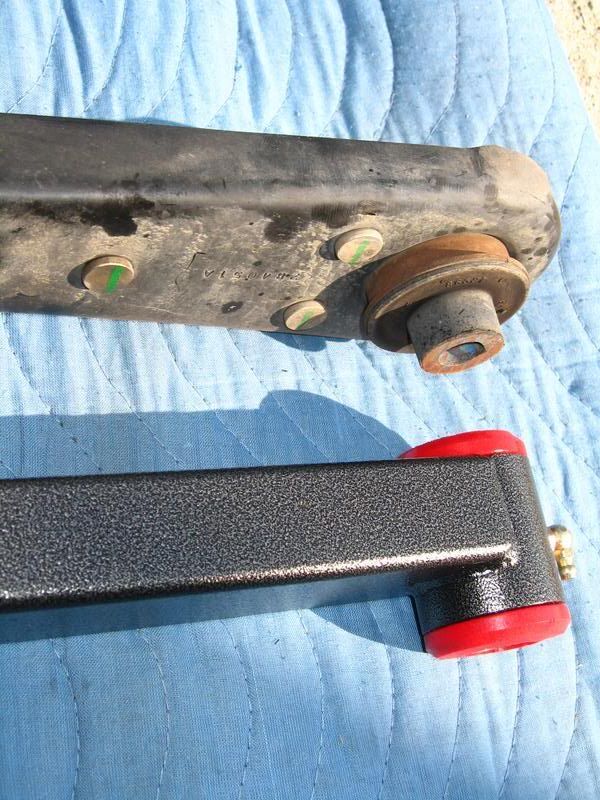
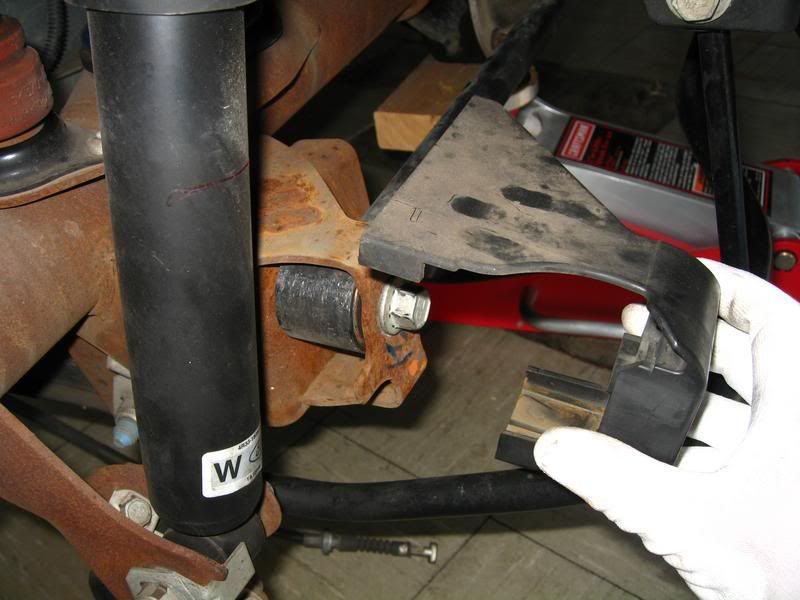
Relo-Bracket
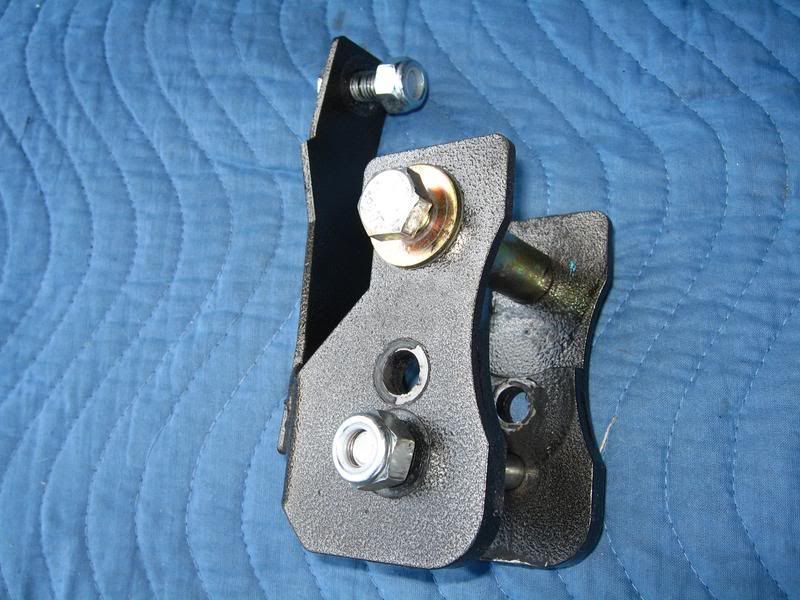
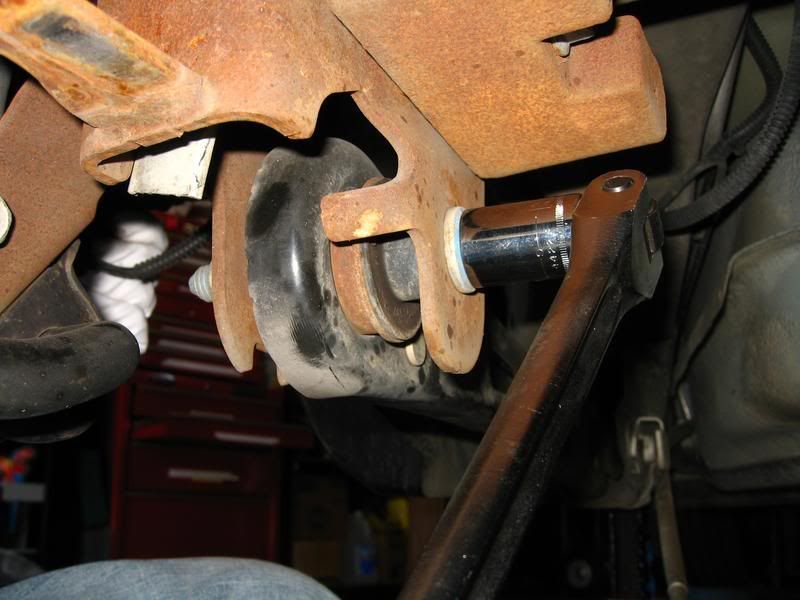
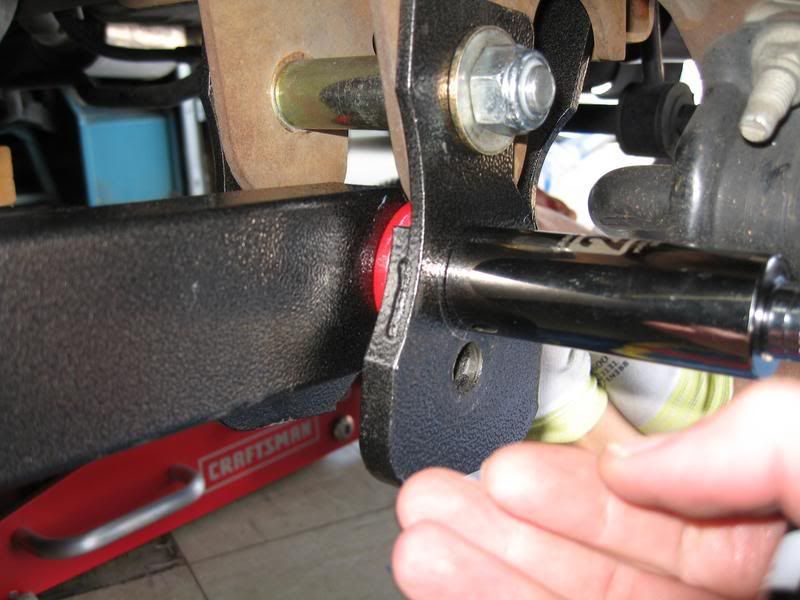
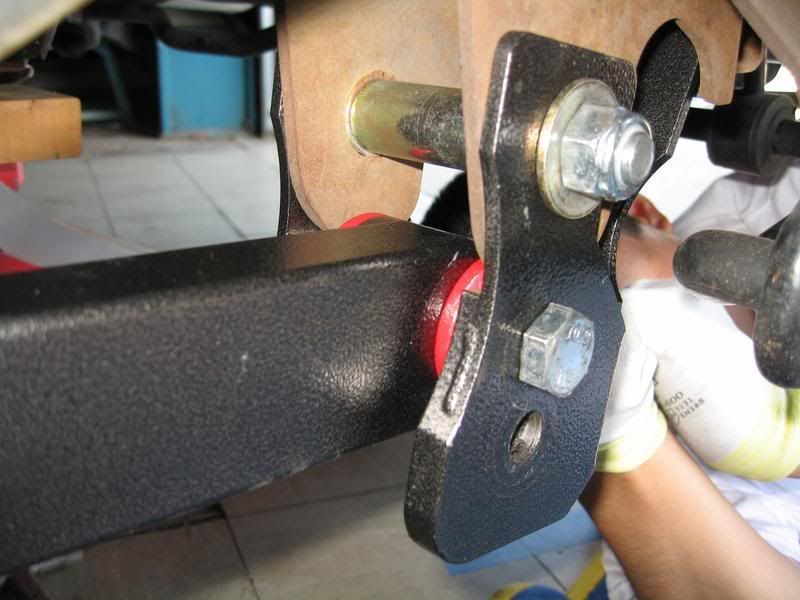
Position Relo-Bracket into place on the rear axle.
Note: Use a rubber mallet if necessary to position the bracket.

Install the 2 mounting bolts through the Relo-Bracket, but do not tighten until both bolts are in.

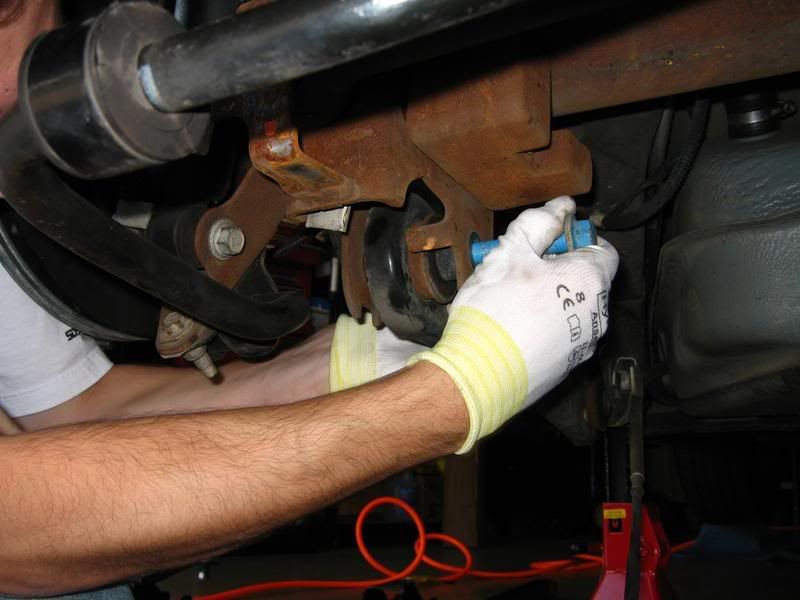
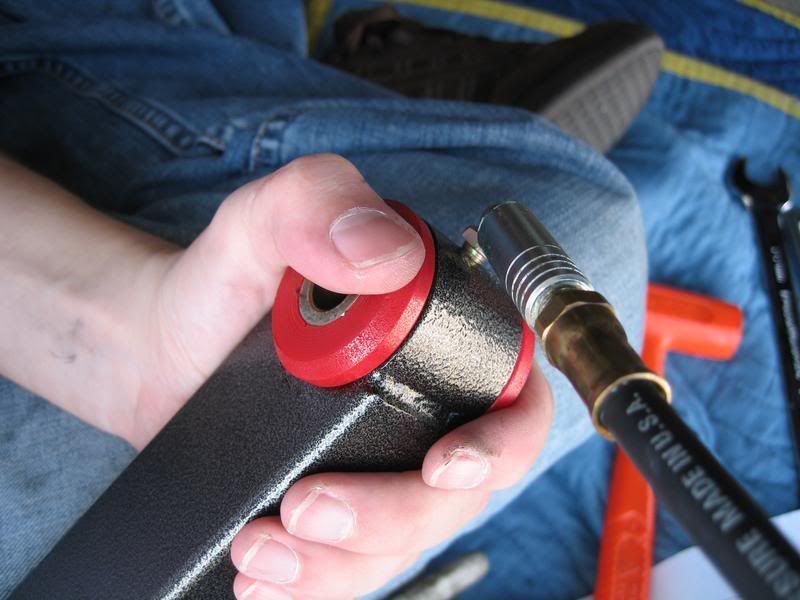
Grease both ends of LCA at this time (if equipped). Only 1 to 2 pumps are necessary, until a little squeeze out can be seen out from the bushing.
Use the excess grease and rub it over the external bushing surface to make installation easier.
Note: Orientate the grease fittings for easiest access for future lubing while on the vehicle.
Be sure to orientate the LCA so the narrow end is forward and the offset in the rear is pointing inward (just like the factory LCA).
Install forward mounting bolt, but do not tighten.
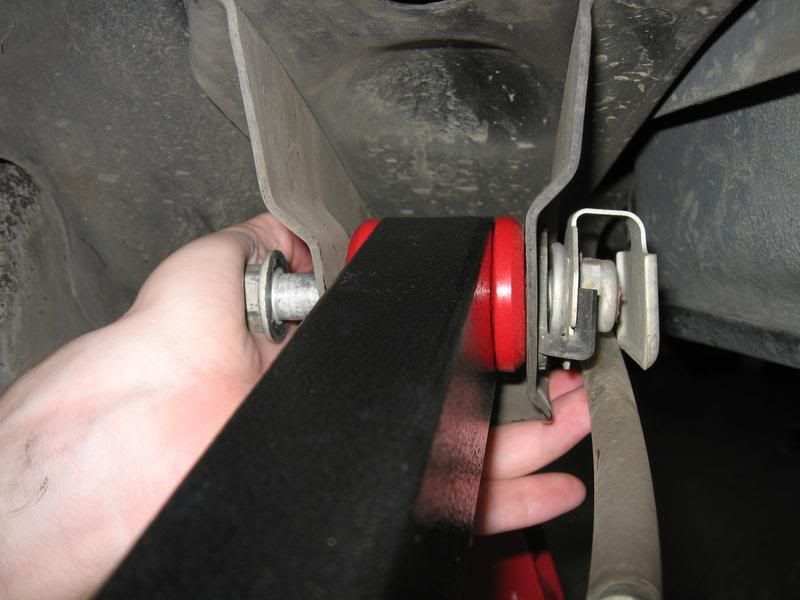
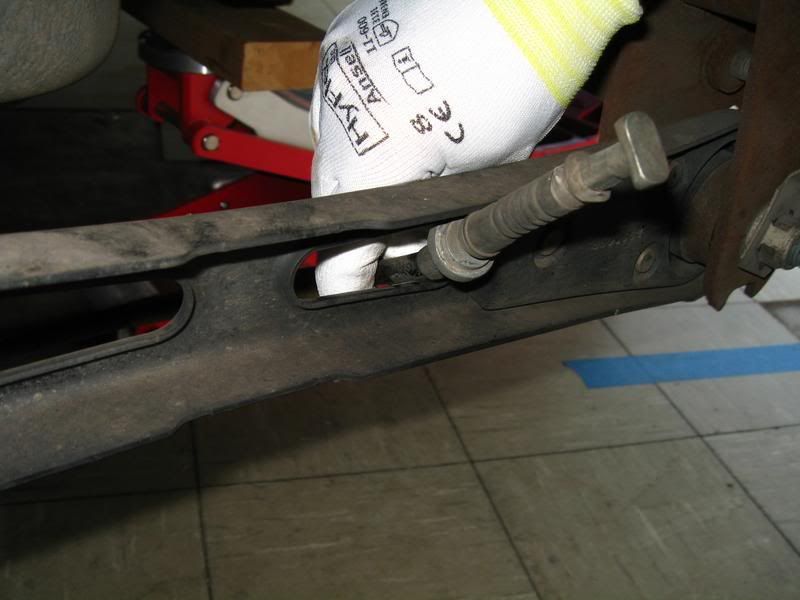
Swing up the rear of the LCA into the Relo-Bracket. If it doesn't align with the mounting hole, utilize a rubber mallet. If it's really stuck, use a floor jack (if you have an extra one).
Note on which hole to use; If at stock ride height or up to an inch drop (like the Steeda Ultralites), use the TOP hole. If you have more of an aggressive drop, you may want to consider using the LOWER hole.
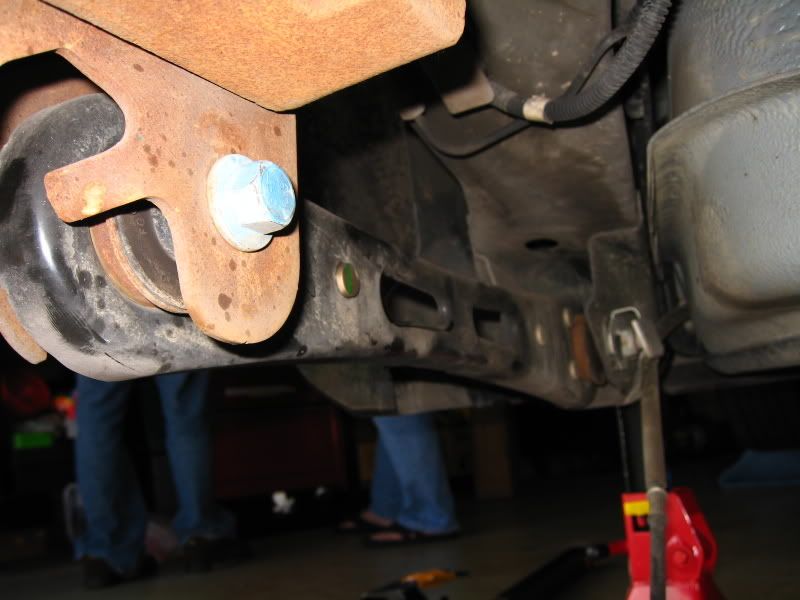
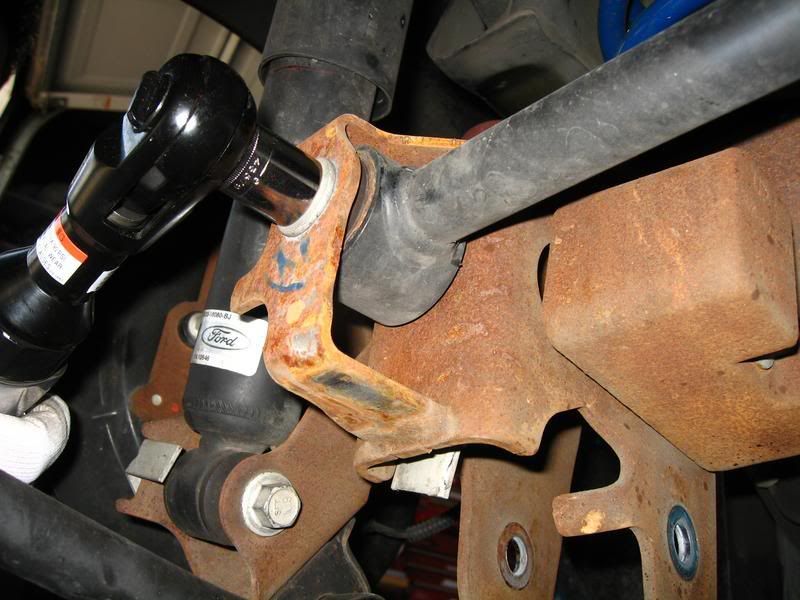
Install rear mounting bolt through LCA and Relo-Bracket and tighten.
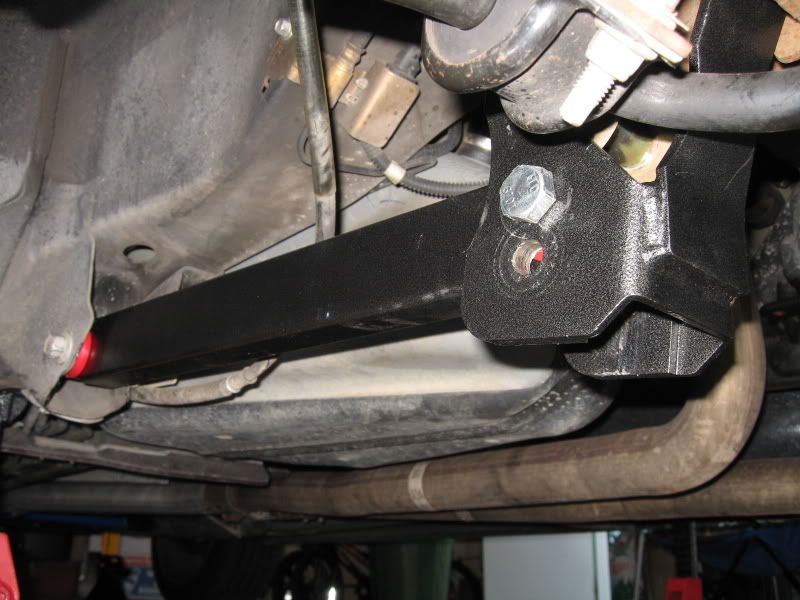
Torque all bolts (starting with the Relo-Bracket) to 130 lb-ft.
Note: Make sure the rear shock reference mark is at the correct position.
Re-install Panhard Bar bolt cover.
Re-attach Parking Brake cable and retaining clip. Tie wrap cable to side of LCA.
Note: If cable end is slacked after installation, just cycle the Parking Brake handle and it'll tighten up.
Repeat for Passenger side.
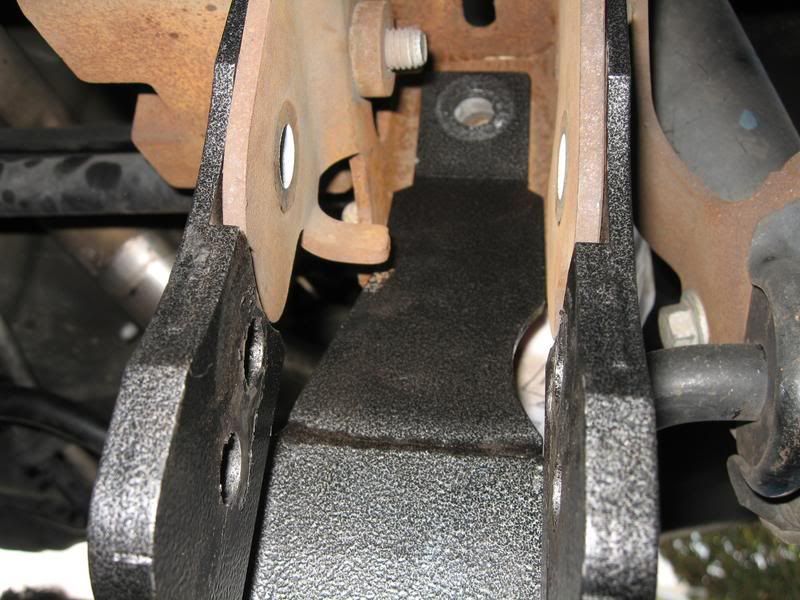
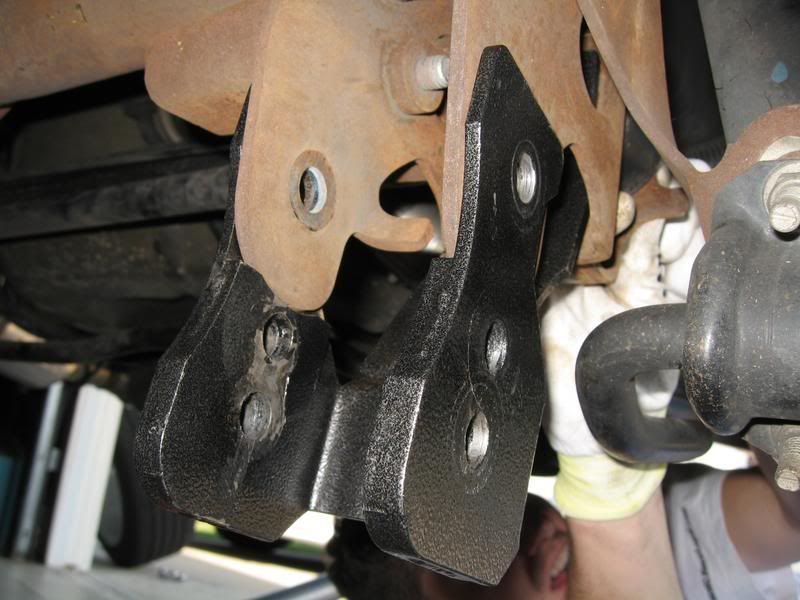
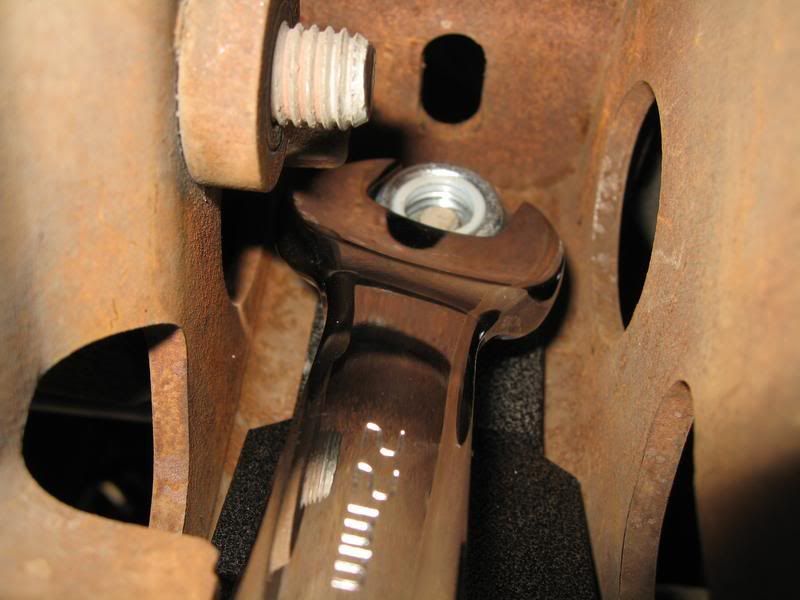
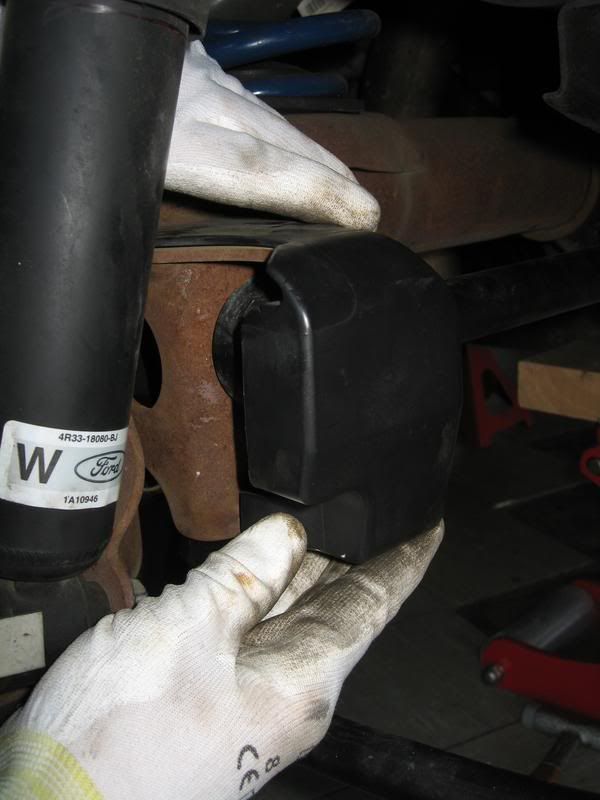
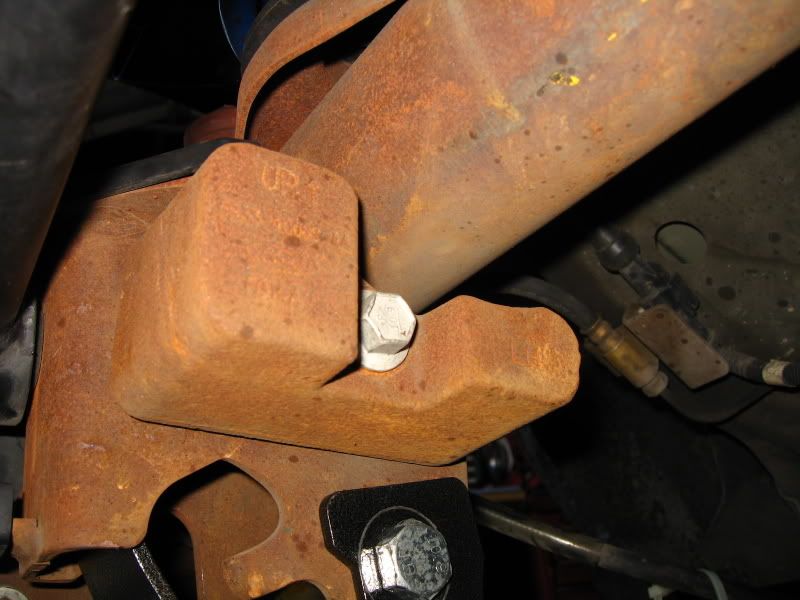
Note: Some S197 builds have what appears to be a NVH metal block attached to the rear axle. Although not a problem on the Drivers side, it was an issue on the Passengers side. It would not allow the Relo-Bracket to sit flush up against the axle mounting location (see pic below).
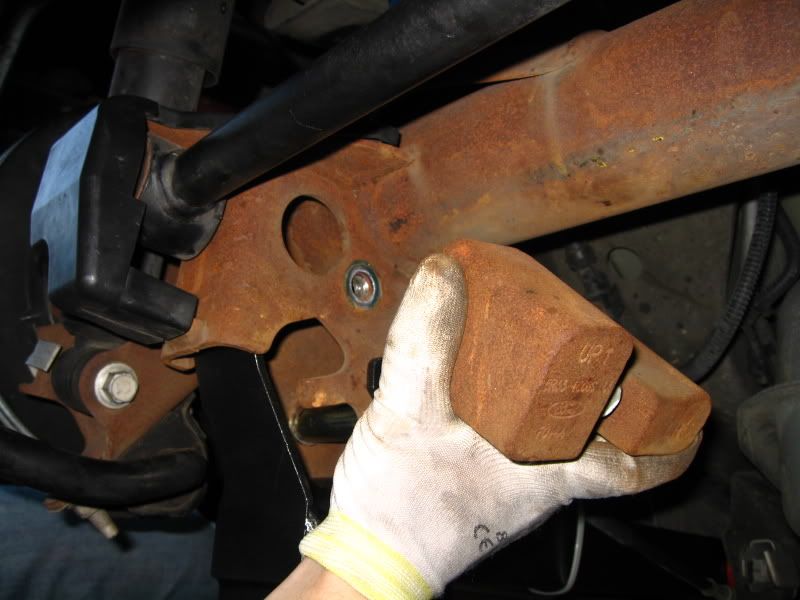
The decision was made to completely remove the blocks (both sides) to allow the installation of the Relo-Bracket. After an extended test drive, no NVH from the rear was detected.
(Drivers side)
After both LCAs are installed, re-install wheels and lower vehicle.
Installation complete!
Install Time: 2 Hours
Tools Required: Basic Metric tools, large wrenches (up to 22mm), torque wrench (up to 130 lb-ft)
This install was performed on my buddy's car, Leo06GT.
See BMRs website for info as to what functions the LCA and Relo-Brackets serve.
Tip by RUgoinUP
Note: Be sure to do one LCA side at a time. Otherwise the LCA's may not reach the relocation axle bracket upon re-installation.
If you already removed both LCA's, use a jack near the front of the axle housing (pumpkin) by the pinion flange, which will bring it close enough to work.
Procedure:
With the car on level ground, mark the rear shock relative to the protective outer sleeve.
Loosen the lug nuts on the rear wheels. Jack up the rear of the car and support it with jack stands. Remove both rear wheels.
Place floor jack under the rear axle housing and jack up the rear until the reference marks you made on the shock line up as if it were on the ground.
This procedure replicates the car in static, level state. Also required to be in this position when torquing all the associated bolts.
Starting with the Drivers side, remove the Parking Brake retaining clip. (Make sure the Parking Brake is disengaged)
Unhook the cable end and route it out of the factory LCA.
Reference pic of the factory LCA.
Starting at the forward LCA mounting bolt, break loose and remove.
Note: Clip nut stays attached to the frame, only the bolts gets removed.
Break loose and remove the rear LCA mounting bolt. Remove LCA from the car and set aside.
Note: For those just swapping out the LCAs, skip the Relo-Bracket install below.
Pop the plastic cover off the Panhard Bar Drivers side mounting bolt.
Remove Panhard Bar mounting bolt.
Side-by-Side comparision
Notice the rear offset of the rear section of the LCA
Relo-Bracket
Position Relo-Bracket into place on the rear axle.
Note: Use a rubber mallet if necessary to position the bracket.
Install the 2 mounting bolts through the Relo-Bracket, but do not tighten until both bolts are in.
Grease both ends of LCA at this time (if equipped). Only 1 to 2 pumps are necessary, until a little squeeze out can be seen out from the bushing.
Use the excess grease and rub it over the external bushing surface to make installation easier.
Note: Orientate the grease fittings for easiest access for future lubing while on the vehicle.
Be sure to orientate the LCA so the narrow end is forward and the offset in the rear is pointing inward (just like the factory LCA).
Install forward mounting bolt, but do not tighten.
Swing up the rear of the LCA into the Relo-Bracket. If it doesn't align with the mounting hole, utilize a rubber mallet. If it's really stuck, use a floor jack (if you have an extra one).
Note on which hole to use; If at stock ride height or up to an inch drop (like the Steeda Ultralites), use the TOP hole. If you have more of an aggressive drop, you may want to consider using the LOWER hole.
Install rear mounting bolt through LCA and Relo-Bracket and tighten.
Torque all bolts (starting with the Relo-Bracket) to 130 lb-ft.
Note: Make sure the rear shock reference mark is at the correct position.
Re-install Panhard Bar bolt cover.
Re-attach Parking Brake cable and retaining clip. Tie wrap cable to side of LCA.
Note: If cable end is slacked after installation, just cycle the Parking Brake handle and it'll tighten up.
Repeat for Passenger side.
Note: Some S197 builds have what appears to be a NVH metal block attached to the rear axle. Although not a problem on the Drivers side, it was an issue on the Passengers side. It would not allow the Relo-Bracket to sit flush up against the axle mounting location (see pic below).
The decision was made to completely remove the blocks (both sides) to allow the installation of the Relo-Bracket. After an extended test drive, no NVH from the rear was detected.
(Drivers side)
After both LCAs are installed, re-install wheels and lower vehicle.
Installation complete!
Last edited by TacoBill; Mar 11, 2008 at 02:57 PM. Reason: added note at top


Cobra Member
Joined: September 4, 2006
Posts: 1,202
Likes: 1
From: Nor-Cal
Great job as always Bill. Can you post a picture of the driver side panhard bar and the rear bolt for the LCA Bracket I am assuming they use two separate holes but from all the picture i see they use the same hole for the bracket and the Panhard bar is this the case?
Oh and I know that cannot be your car as dirty as it is underneath.
Richard
Oh and I know that cannot be your car as dirty as it is underneath.
Richard
Bullitt Member
Joined: August 13, 2007
Posts: 342
Likes: 0

Mach 1 Member
Joined: August 9, 2005
Posts: 952
Likes: 2
From: Chesapeake, Va.
This was timely "How To", I have some BMR relocation brackets sitting on the floor waiting to be installed. 
What is the purpose of marking the shocks? My relocation bracket instructions didn't have that step.
What is the purpose of marking the shocks? My relocation bracket instructions didn't have that step.

Legacy TMS Member
Joined: May 24, 2006
Posts: 7,409
Likes: 0
From: San Diego
Great job as always Bill. Can you post a picture of the driver side panhard bar and the rear bolt for the LCA Bracket I am assuming they use two separate holes but from all the picture i see they use the same hole for the bracket and the Panhard bar is this the case?
Oh and I know that cannot be your car as dirty as it is underneath.
Richard
Oh and I know that cannot be your car as dirty as it is underneath.
Richard
The purpose of marking the shock is to simulate the suspension being loaded exactly like it is when on the ground. The ford repair manual states you should do this when swapping LCA's. Necessary? who know's but it only takes an extra minute so why not.
Team Mustang Source
Joined: September 14, 2005
Posts: 3,477
Likes: 1
From: SoCal
looking at the pic it seems as though the stock LCA was fairly level. If that is so are the relo-brackets going to help much? I am under the impression that they are only or mainly for lowered cars > 1 inch
Legacy TMS Member
Joined: May 24, 2006
Posts: 7,409
Likes: 0
From: San Diego
Legacy TMS Member
Joined: August 7, 2006
Posts: 16,113
Likes: 789
From: In Boredom
I did my install on ramps. Thats why I asked about taking the tires off.
There is another style of bolt in relo brackets out there. With the other style you don't have to unbolt the panhard bar.
There is another style of bolt in relo brackets out there. With the other style you don't have to unbolt the panhard bar.
Ford Service Manual is pretty specific about this.
Mach 1 Member
Joined: August 9, 2005
Posts: 952
Likes: 2
From: Chesapeake, Va.
I installed my BMR relocation brackets today. Thanks again Bill, this post really helped during my install.
For anyone using the stock lower control arms you must use the bottom hole on the relocation bracket. The stock control arm will contact the BMR spacer long before it lines up with the top hole.
For anyone using the stock lower control arms you must use the bottom hole on the relocation bracket. The stock control arm will contact the BMR spacer long before it lines up with the top hole.
Legacy TMS Member
Joined: May 24, 2006
Posts: 7,409
Likes: 0
From: San Diego
I installed my BMR relocation brackets today. Thanks again Bill, this post really helped during my install.
For anyone using the stock lower control arms you must use the bottom hole on the relocation bracket. The stock control arm will contact the BMR spacer long before it lines up with the top hole.
For anyone using the stock lower control arms you must use the bottom hole on the relocation bracket. The stock control arm will contact the BMR spacer long before it lines up with the top hole.

Pretty Sweet Bill!
Can you post some shots of the completed work w/ the wheels back on, to show the difference in ground clearance w/ the new bracket?
TONS of speedbumps here in AZ, I usually go over them with only one side of the car...might hit the brackets if they're pretty low.
ALSO--how much clearance is there between the new brackets and the lip of the wheels? I'm running a 9.5" wheel so I'd like to see where the brackets are compared to the stock 18x8.5.
Thanks!
One other thing--what is the purpose of the relocation brackets? Just to bring the suspension geometry back to stock alignment after lowering? Does this aid launching or traction?
Obviously the boxed LCAs will be stronger and more resistant to torsion than the stock units, but I'm unsure about the function of the brackets.
Obviously the boxed LCAs will be stronger and more resistant to torsion than the stock units, but I'm unsure about the function of the brackets.