
Speed of Sound (SOS) switch plate install (w/pics & vid)


Speed of Sound (SOS) switch plate install (w/pics & vid)
I made the decision to swap out my Shaker 500 head unit with the latest Alpine DVD unit and also add a rear camera and a shift light. I wanted to be able to switch on/off the TR-7 video bypass, rear camera, and the Raptor shift light. I could have opted for some cheap toggles (which would've looked tacky), but instead found an awesome looking switch plate made by Speed of Sound.
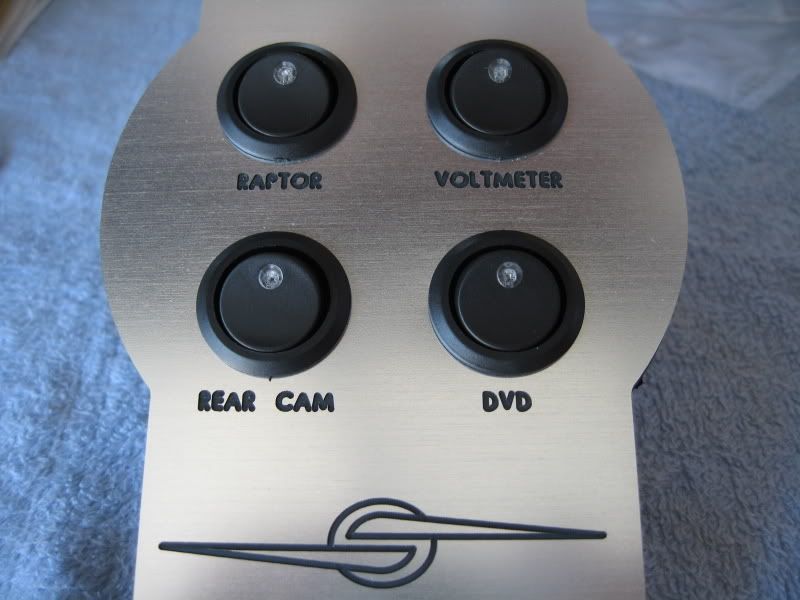
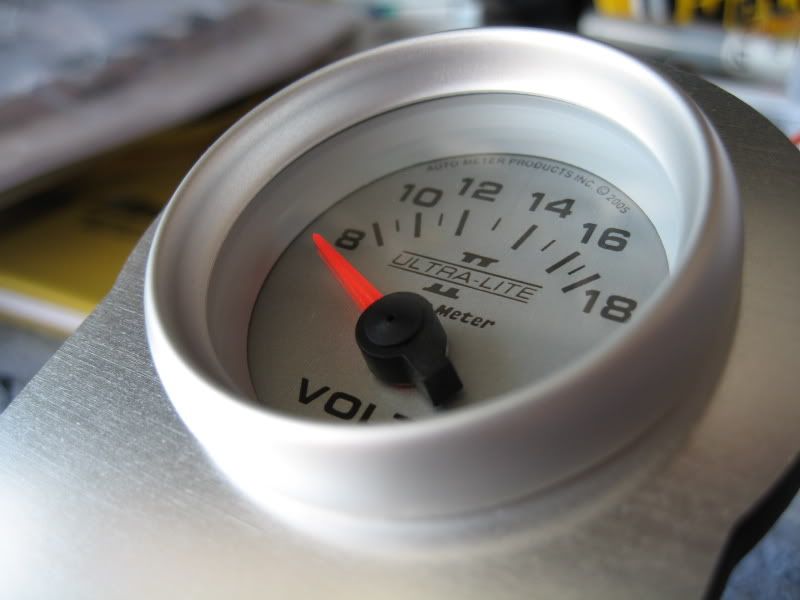
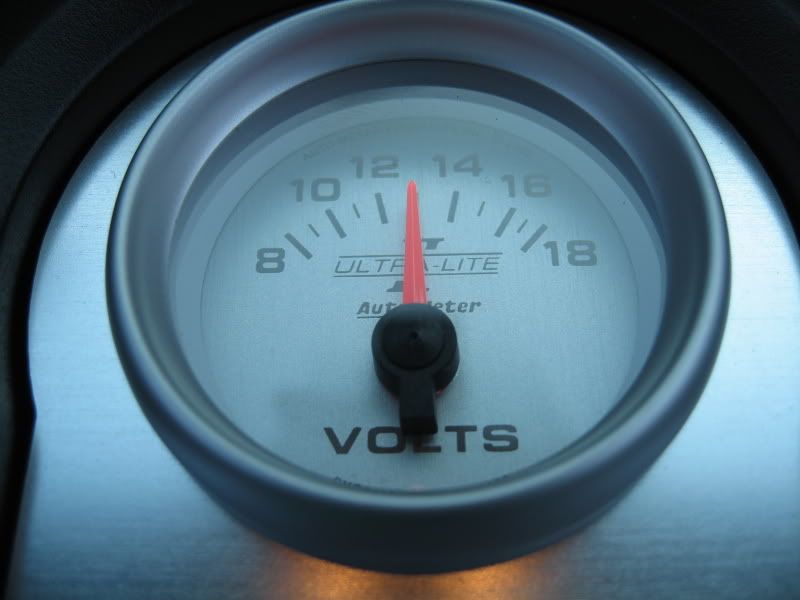
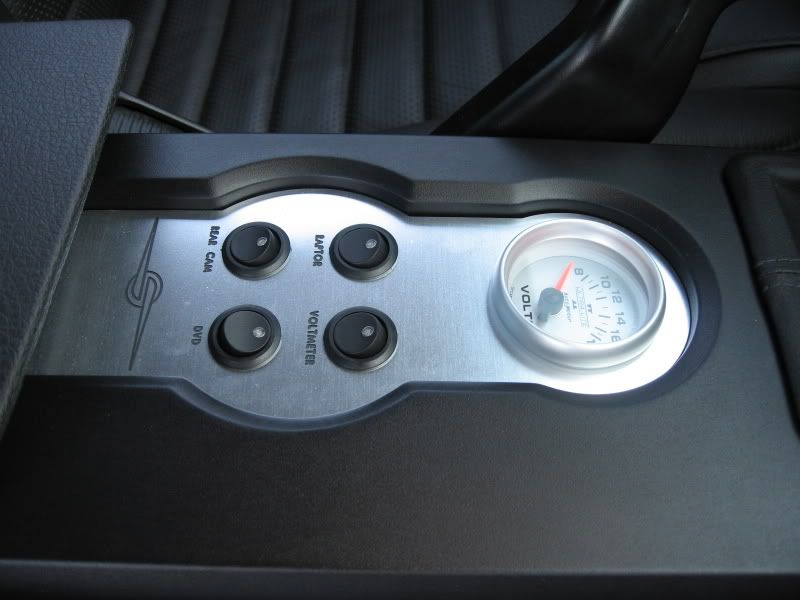
I ordered the 4 toggle switch layout with a 2 1/16" gauge opening for no particular reason other than I really like this layout. I chose an Auto Meter Ultra-Lite II Voltmeter gauge and it fit the bill perfectly.
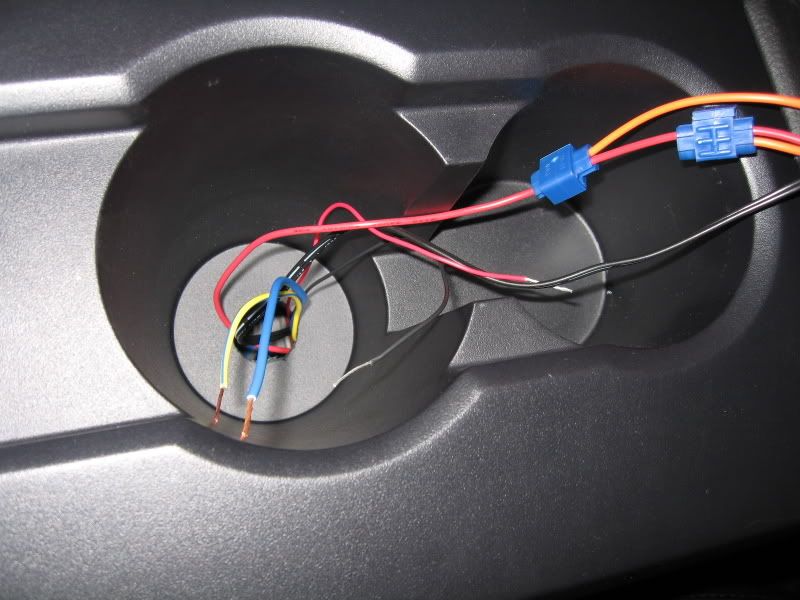
The SOS switch plate comes pre-wired with leads for easy connections. According to SOS, the switches and wires are sufficient for low-amperage (up to 15 amps maximum) applications. Any high-amperage applications will require heavier gauge wiring and relays.
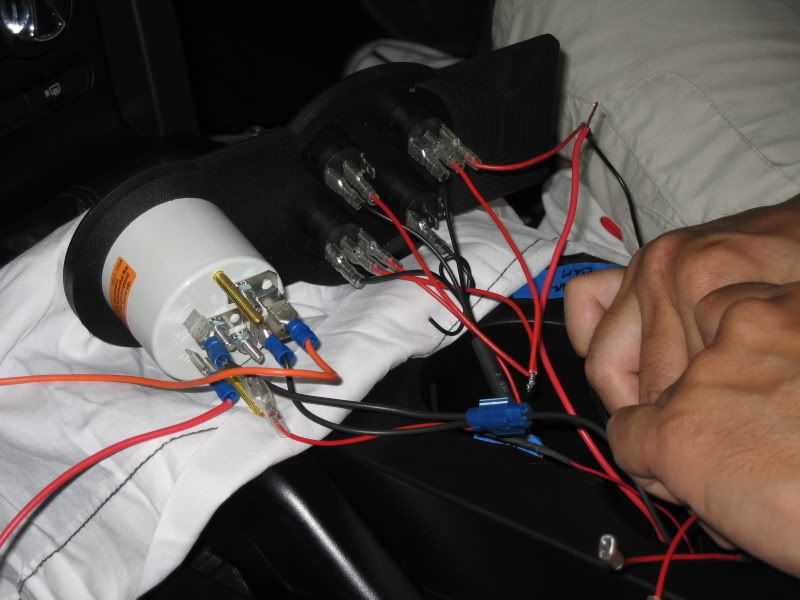
Each switch has 3 prongs and typically get wired this way:
BLACK: Connected to common vehicle ground (used to illuminate the switch's LED)
RED (center): Connected to either a constant 12V or switched 12V depending on your application
RED (opposite end on black): Connected to accessory circuit 12V in (In my case, Positive lead on Raptor, rear camera, and voltmeter)
Note: The Negative leads off the accessories get grounded to a common ground, NOT TO THE NEGATIVE LEAD ON THE SWITCH!
Switch panel

Auto Meter gauge
A Dremel was used to make a small hole in the bottom of the rear cup holder (after removal of the short cup base; pulls right out) to feed all the wires up to the switch panel.
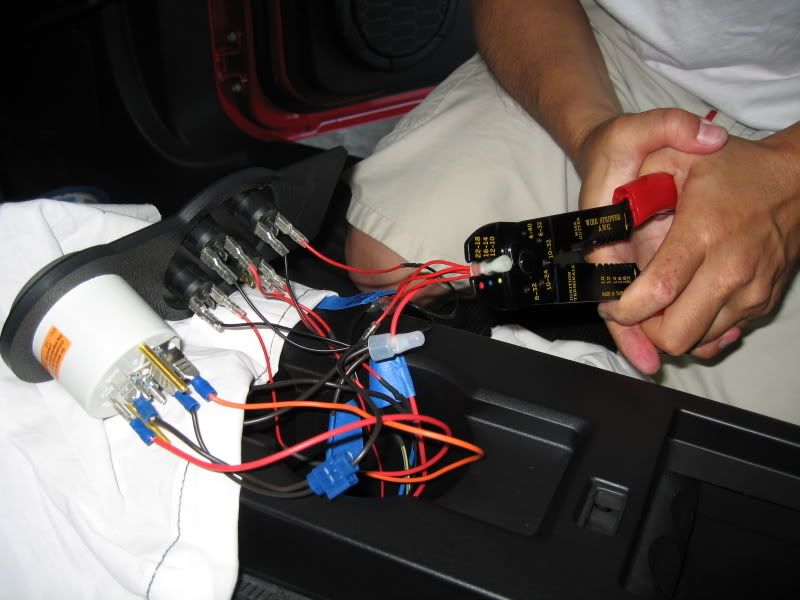
My mess
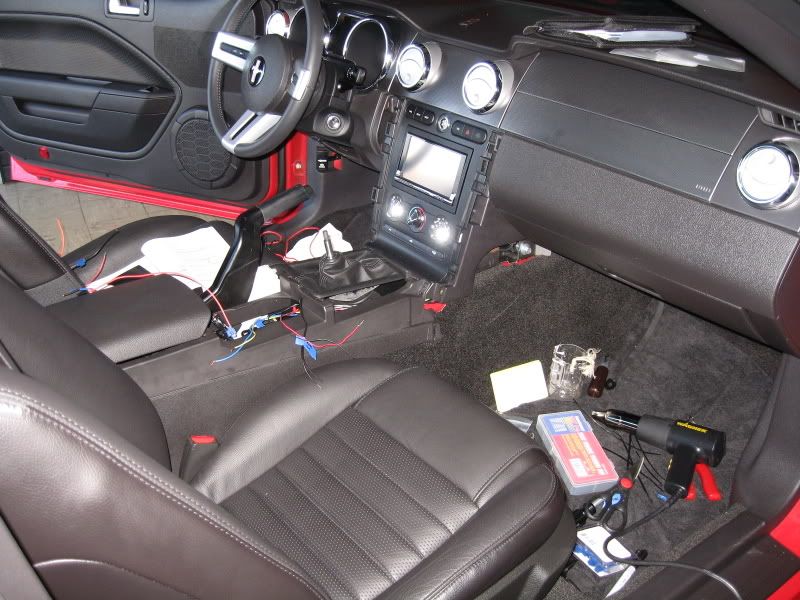
The wiring can get a bit confusing so it may be a good idea to tape off each accessory and label it. Key here is to take your time and do one wire at a time.
Tip: To make soldering, heat shrinking, or wire twisting task easier, disconnect the spade terminal from the switch.
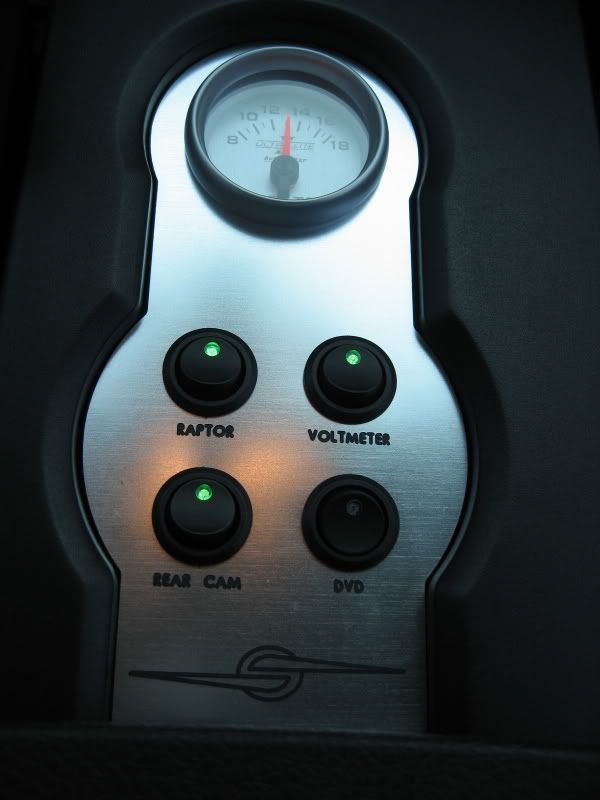
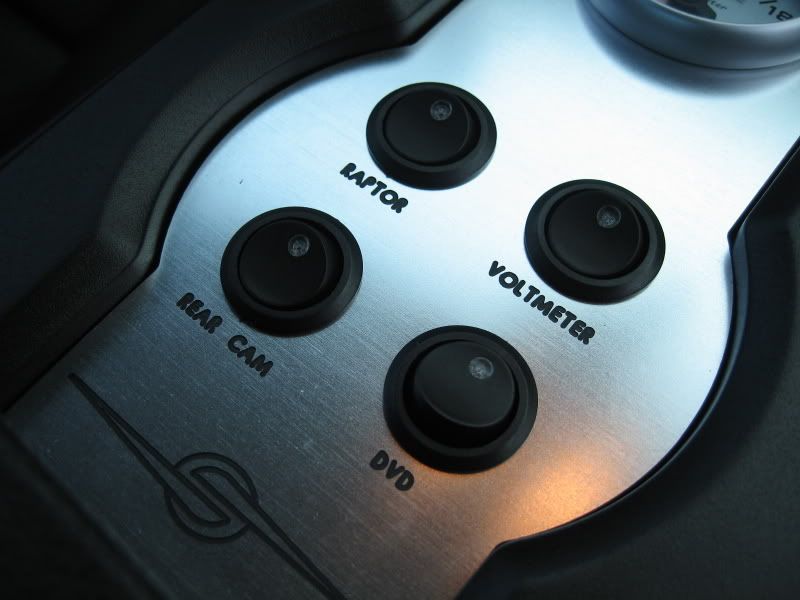
Each switch controls the Raptor shift light, rear camera, DVD video bypass, and the voltmeter.
Here are some pics and one video of the completed project.
Note: The reason why you don't see the DVD's LED switch illuminated is because the video bypass circuit that the switch interrupts is less than 12V (or is momentary). I removed the Negative terminal off this switch since it isn't needed.

I ordered the 4 toggle switch layout with a 2 1/16" gauge opening for no particular reason other than I really like this layout. I chose an Auto Meter Ultra-Lite II Voltmeter gauge and it fit the bill perfectly.
The SOS switch plate comes pre-wired with leads for easy connections. According to SOS, the switches and wires are sufficient for low-amperage (up to 15 amps maximum) applications. Any high-amperage applications will require heavier gauge wiring and relays.
Each switch has 3 prongs and typically get wired this way:
BLACK: Connected to common vehicle ground (used to illuminate the switch's LED)
RED (center): Connected to either a constant 12V or switched 12V depending on your application
RED (opposite end on black): Connected to accessory circuit 12V in (In my case, Positive lead on Raptor, rear camera, and voltmeter)
Note: The Negative leads off the accessories get grounded to a common ground, NOT TO THE NEGATIVE LEAD ON THE SWITCH!
Switch panel
Auto Meter gauge
A Dremel was used to make a small hole in the bottom of the rear cup holder (after removal of the short cup base; pulls right out) to feed all the wires up to the switch panel.
My mess
The wiring can get a bit confusing so it may be a good idea to tape off each accessory and label it. Key here is to take your time and do one wire at a time.
Tip: To make soldering, heat shrinking, or wire twisting task easier, disconnect the spade terminal from the switch.
Each switch controls the Raptor shift light, rear camera, DVD video bypass, and the voltmeter.
Here are some pics and one video of the completed project.
Note: The reason why you don't see the DVD's LED switch illuminated is because the video bypass circuit that the switch interrupts is less than 12V (or is momentary). I removed the Negative terminal off this switch since it isn't needed.
Last edited by TacoBill; Mar 14, 2008 at 02:58 PM. Reason: sp

Cobra Member
Joined: May 17, 2007
Posts: 1,201
Likes: 0
From: Texa$
I like this mod Bill, I like it a lot!
Of course I would have gone with black anodized but that’s a personal problem I have
Taking vacation must have been brutal for you not being able to knock out all these mods you have done since returning.......................
Of course I would have gone with black anodized but that’s a personal problem I have
Taking vacation must have been brutal for you not being able to knock out all these mods you have done since returning.......................
Thanks! I really like this functionality of this switch panel. 
I was on the fence between the brushed and black finish myself. Remember the poll I threw up a few weeks back? Just about everyone except for Leo voted for the brushed look in my interior, so since I liked both finishes, I went with the opinion of the masses. 
I was mentally preparing myself for this mod while I was in HI.
I was mentally preparing myself for this mod while I was in HI.

Cobra Member
Joined: May 17, 2007
Posts: 1,201
Likes: 0
From: Texa$

Member
Joined: September 25, 2005
Posts: 31
Likes: 0
Makes me want to dump my fox body and get an S197 just so I can get one of those! 
Great write up, Bill. We appreciate the time and effort to not only install our product, but also document and share the process with the rest of the Mustang community.
Great write up, Bill. We appreciate the time and effort to not only install our product, but also document and share the process with the rest of the Mustang community.
Legacy TMS Member
Joined: May 24, 2006
Posts: 7,410
Likes: 1
From: San Diego

Team Mustang Source
Joined: December 12, 2004
Posts: 5,801
Likes: 5
From: NorCal
Well never think about mods when you are HI!
I couldn't do that mod because I would have no place for my coffee.
As always Bill another great write up. I waiting for SOS to come out with a dual dash pod.
I couldn't do that mod because I would have no place for my coffee.
As always Bill another great write up. I waiting for SOS to come out with a dual dash pod.
Member
Joined: September 25, 2005
Posts: 31
Likes: 0
The dash pod project we're working on is going to be triple gauge unit, not a dual. Sorry. We feel two gauges just doesn't quite fill the center dash as nicely.

Thread
Thread Starter
Forum
Replies
Last Post
Mackitude
2010-2014 Mustang
6
Aug 13, 2015 01:05 PM