
FRPP X-Pipe install w/PICS and comparison video

Thread Starter
Legacy TMS Member
Joined: September 22, 2006
Posts: 781
Likes: 14
FRPP X-Pipe install w/PICS and comparison video
OK, I did a search to see if anyone else did a write up for the FRPP X-Pipe and I didn't see one (I admit, I didn't search that long) so I made one. This is the first write-up and video I ever made so go easy on the 
First I have to say thanks to Mark (Original_Sin) and Pete (Boomer) for their comments on their X-pips and of course TacoBill for the info on his O/R H-Pipe and awsome write-ups.
My Stang is similar to Marks and had only a Roushcharger and FRPP/Borla Stingers with everything else stock (It's just a GT, not an official Roush). I wanted to replace the stock H and had a few options in mind. First was the Magnaflow setup with high flow cats. A friend of mine has it with Steeda Axel-backs but for me it is just a tad "too" loud for me as an everyday driver. Next was the Pypes O/R H that TacoBill has and everytime I watched his comparison video I would have the credit card on the desk ready to go but on his advice if I didn't want louder it may not be the best option. Finally Mark came along with his post.
http://forums.bradbarnett.net/showthread.php?t=54867
This pretty much sold me since I have the same S/C and mufflers. So with all that being said I pulled the trigger and went with the FRPP X. It cost me a total of $140.18 drop shipped to my door and I was ready to go. I have never done any kind of work like this to a car but I decided to do the install myself with a friend after reading the instructions on line. In the spirit of TacoBill's write-ups, here it is.
For those who want the video without the read, scroll to the bottom. (difference not really noticable on tape)
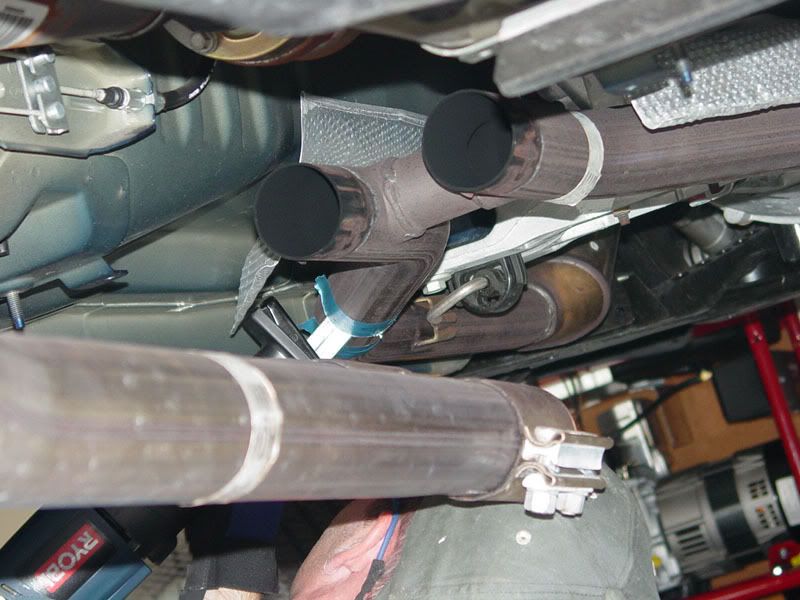
First raise the car up so you have plenty of room to move, especially to make the cuts. I decided to give myself plenty of room and put all four's on jack stands. Clear shot of the stock H.
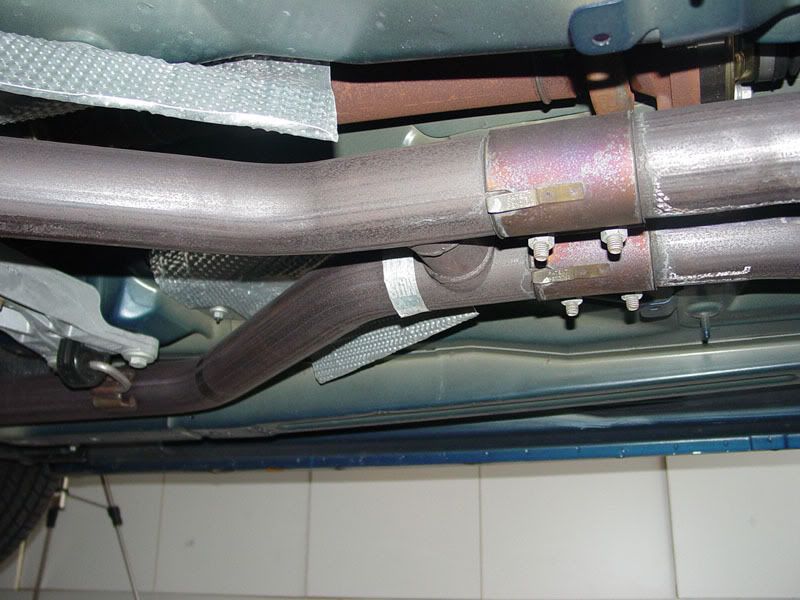
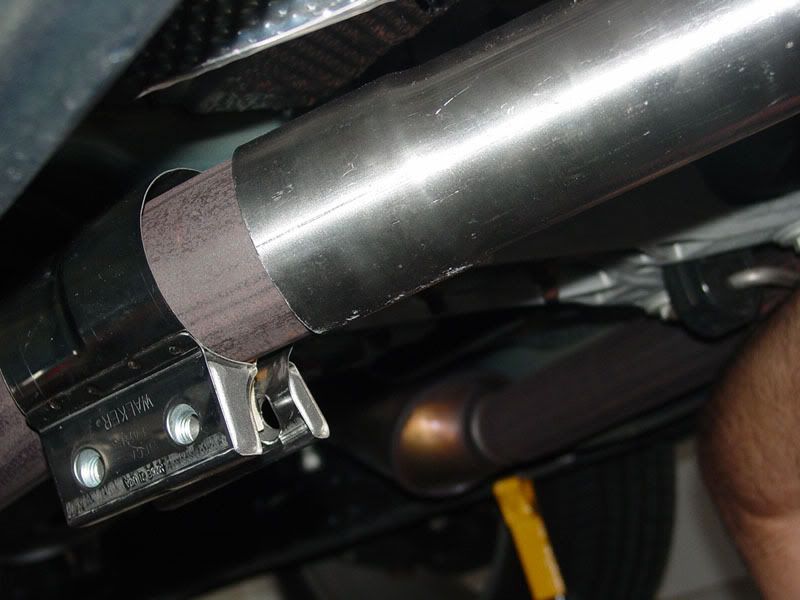
Next loosen up the 4 bolts on the clamps connecting the stock H to the mid section pipes.
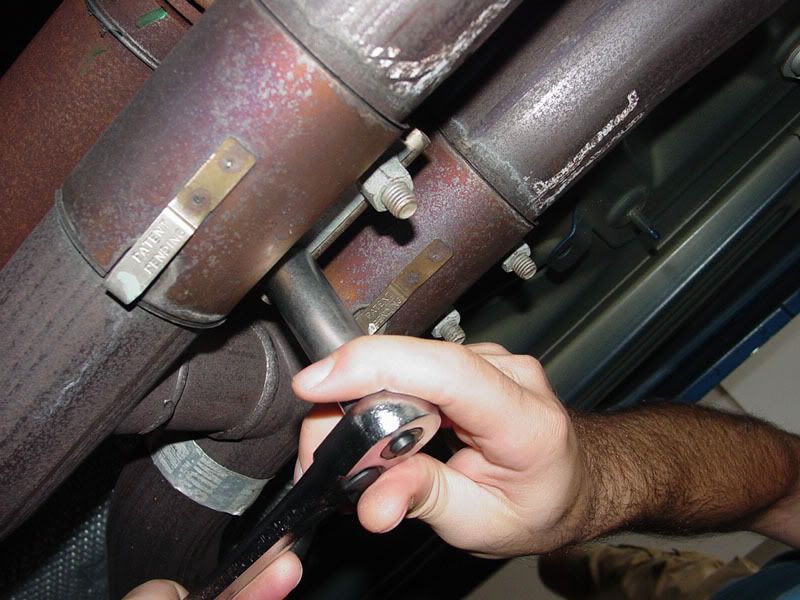
Next with a flat head screwdriver, lift the tab on each clamp that connects to the alignment rivet (on mine one of them wasn't connected).
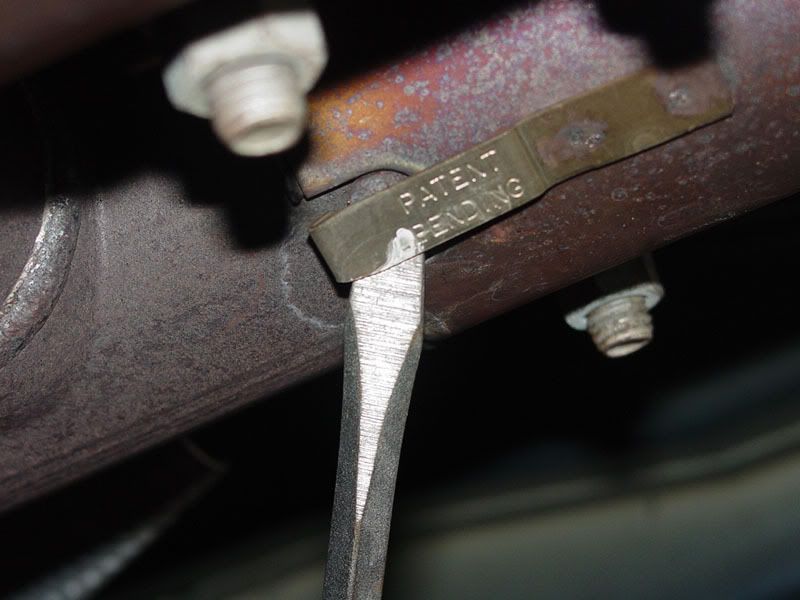
Once the tabs are lifted, work the mid section pipes off of the H-Pipe. For me this didn't take alot of effort as they came apart with just a little bit of "wiggling".
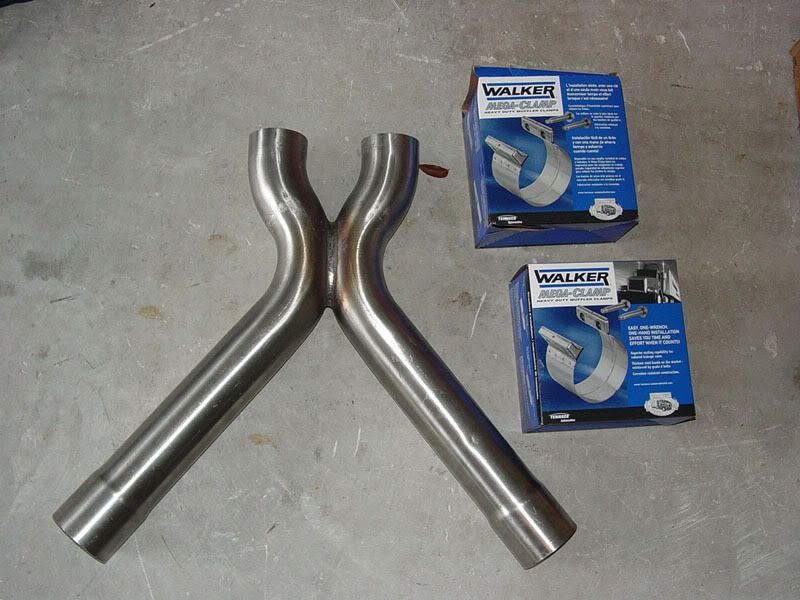
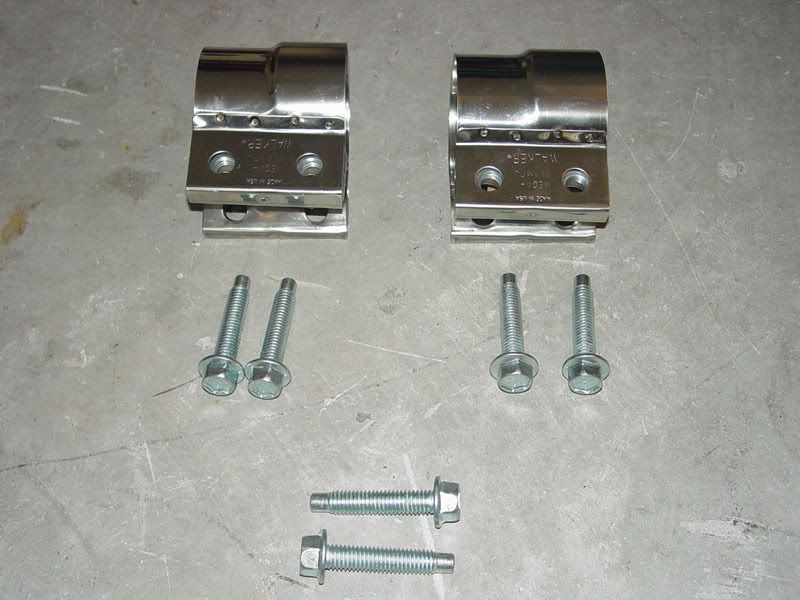
The X-pipe out of the box with the supplied clamps.
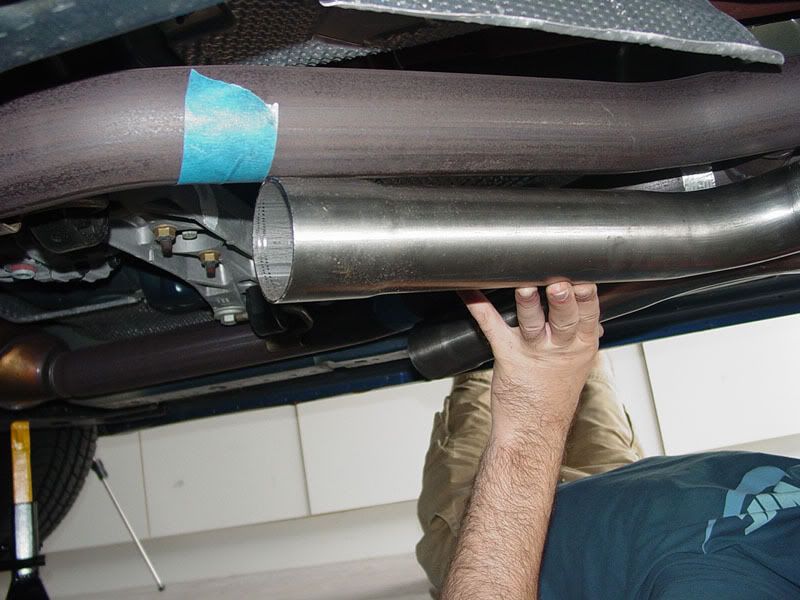
Next, line up the back part of the X-Pipe with the back part of the H-Pipe. With the back lined up, make sure the front part of the X is lined up with the H and mark where they meet with a peice of tape (you are going to need a friend for this part).
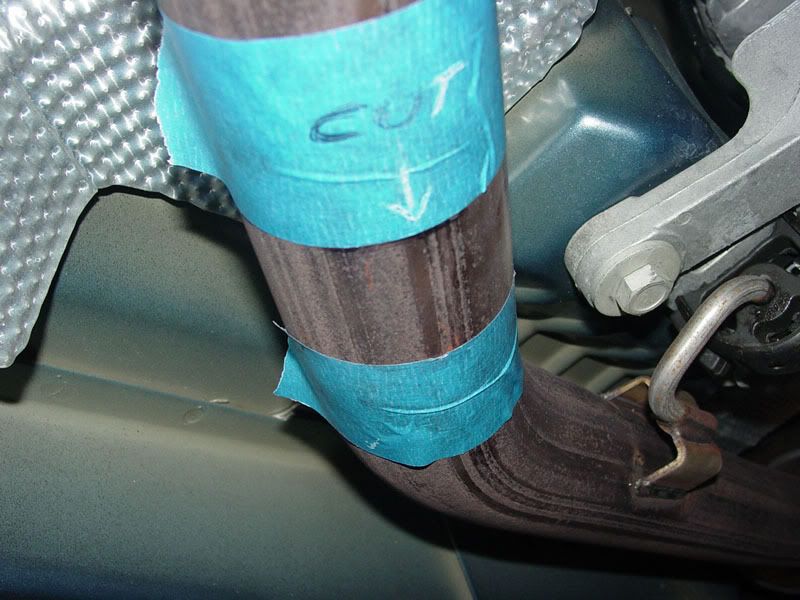
From the back edge of the tape (the edge closer to the rear) measure 1 inch and a half and mark the pipe (as you can see, a simple bic pen works)
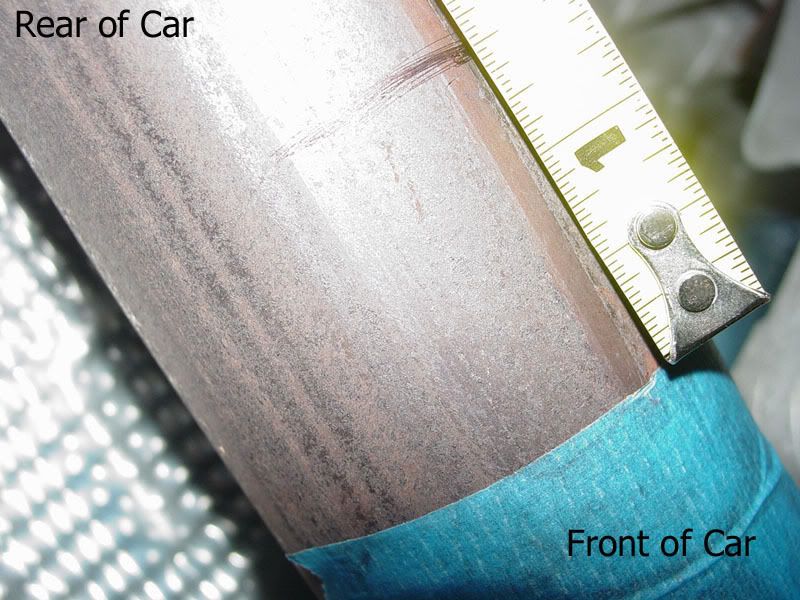
The mark you make is going to be your cut line. The 1.5 inch space is for the X to slip over the stock pipe. Use another peice of tape to clearly mark your cut line and mark CUT! Trust me on this, if I didn't look under the car when my friend was about to make the cut, he would have cut in the wrong place!
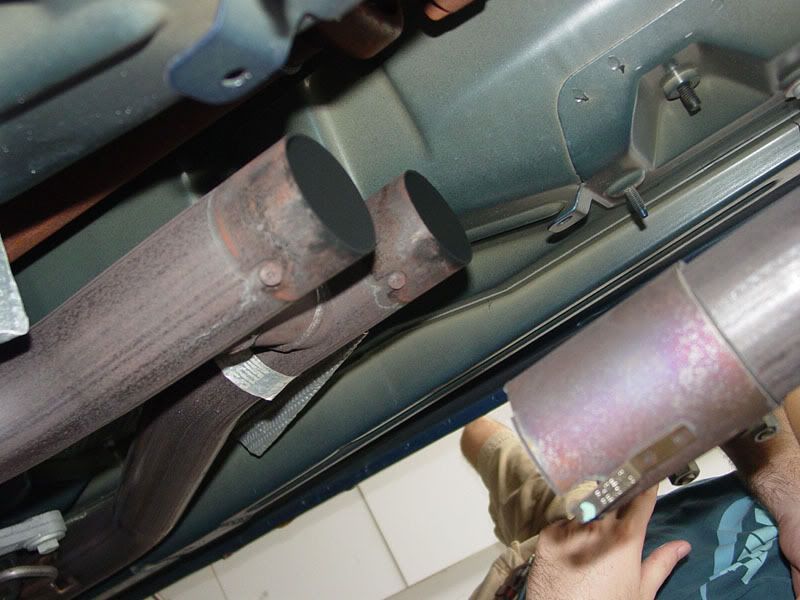
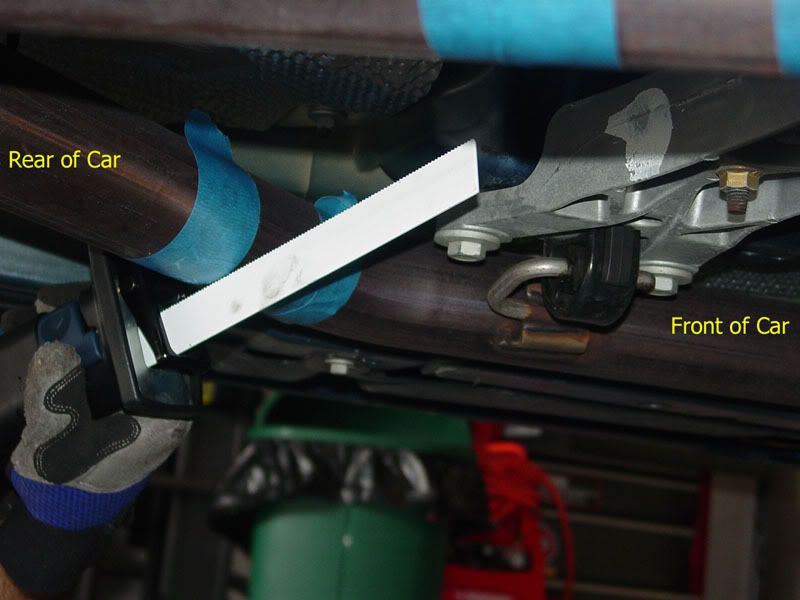
Once your cut lines are clearly marked, cut away. Obviously a power saw works much better here. Make sure your friend is supporting the H-Pipe while you make the 2nd cut, don't want it to drop down on his head. Don't forget your safety goggles!
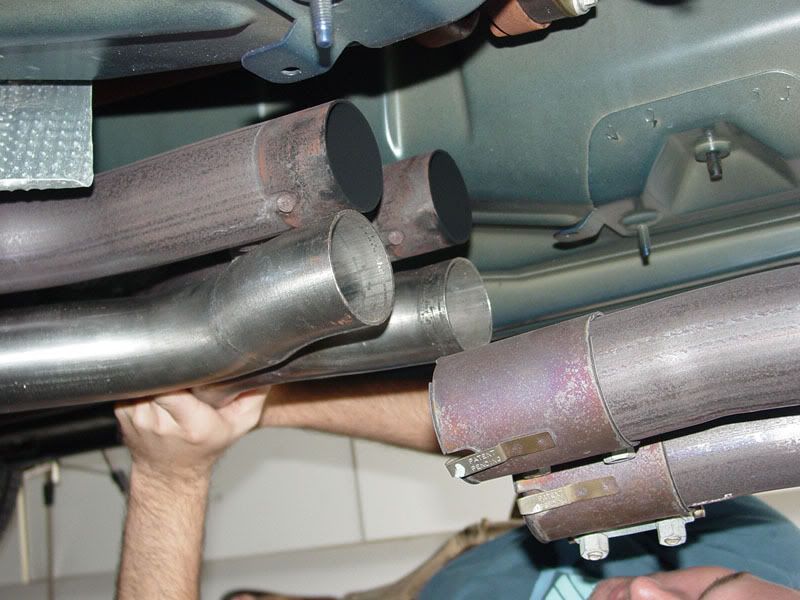
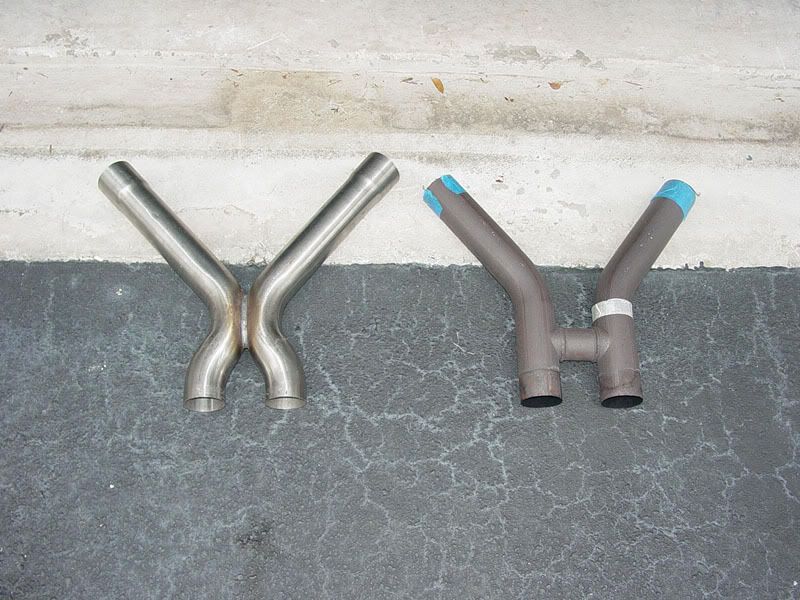
Side by side comparison of the X and H
Supplied clamps with 2 extra bolts
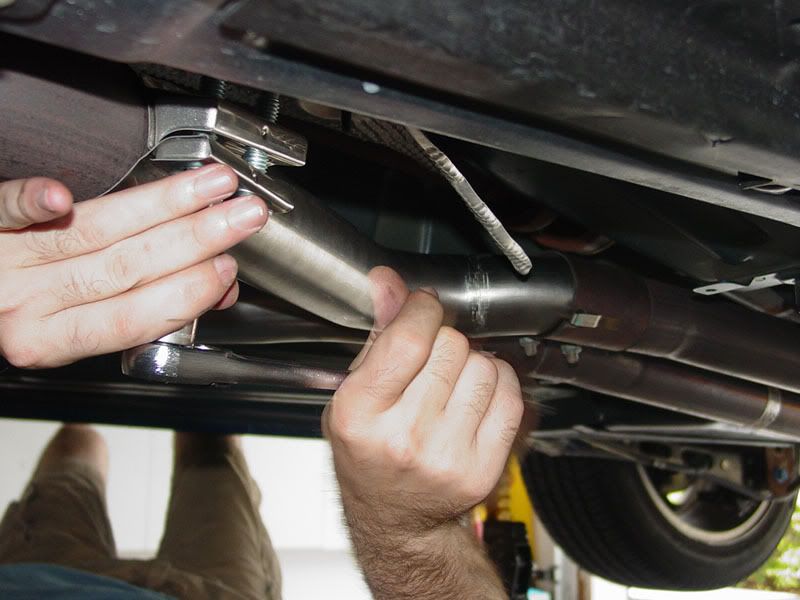
Text, take down any burs left over from the cuts with a file then slide the clamps over the stock pipe with the smaller end facing the cats. Slide one end of the X onto the stock pipe then slide the other end on. This requires a bit of wiggling as well as both ends of the X do not slide on evenly due to the angles.
At this point you are almost done. Slide the mid section pipe clamps over the back end of the X. For me this required a bit of wiggling also to get them both on. With all 4 clamps in place but not tight, have you or your friend go to the rear of the car and align the mufflers with the rear fascia (you need to do this while the mid section pipes are loose). Once your mufflers are straight, tighten up the mid section pipe clamps first.
Then tighten up the front clamps..
And you are done!

The install took us around 90 minutes. This could easily be done in under an hour if you have done stuff like this but I took my time and snapped pics along the way.
Now for the good stuff. First off, there is no added drone, in fact I swear at some rpms it almost sounds like there is less. At idle to me the car is quieter but while giving gas and WOT it is louder. The FRPP/Stinger sound is the same, just a bit more "aggressive" if you will. under power they sound a tad deeper and "growls" a little more.
Here is a comparison video of the FRPP/Stingers and stock H and FRPP/Stingers with the FRPP X. I can hear the difference I think but only because I know what it sounds like in person.
http://www.youtube.com/watch?v=oQOSNtb3XWY
Well, thats it, I hope this answers alot of questions I have seen on the forums about this pipe.
First I have to say thanks to Mark (Original_Sin) and Pete (Boomer) for their comments on their X-pips and of course TacoBill for the info on his O/R H-Pipe and awsome write-ups.
My Stang is similar to Marks and had only a Roushcharger and FRPP/Borla Stingers with everything else stock (It's just a GT, not an official Roush). I wanted to replace the stock H and had a few options in mind. First was the Magnaflow setup with high flow cats. A friend of mine has it with Steeda Axel-backs but for me it is just a tad "too" loud for me as an everyday driver. Next was the Pypes O/R H that TacoBill has and everytime I watched his comparison video I would have the credit card on the desk ready to go but on his advice if I didn't want louder it may not be the best option. Finally Mark came along with his post.
http://forums.bradbarnett.net/showthread.php?t=54867
This pretty much sold me since I have the same S/C and mufflers. So with all that being said I pulled the trigger and went with the FRPP X. It cost me a total of $140.18 drop shipped to my door and I was ready to go. I have never done any kind of work like this to a car but I decided to do the install myself with a friend after reading the instructions on line. In the spirit of TacoBill's write-ups, here it is.
For those who want the video without the read, scroll to the bottom. (difference not really noticable on tape)
First raise the car up so you have plenty of room to move, especially to make the cuts. I decided to give myself plenty of room and put all four's on jack stands. Clear shot of the stock H.
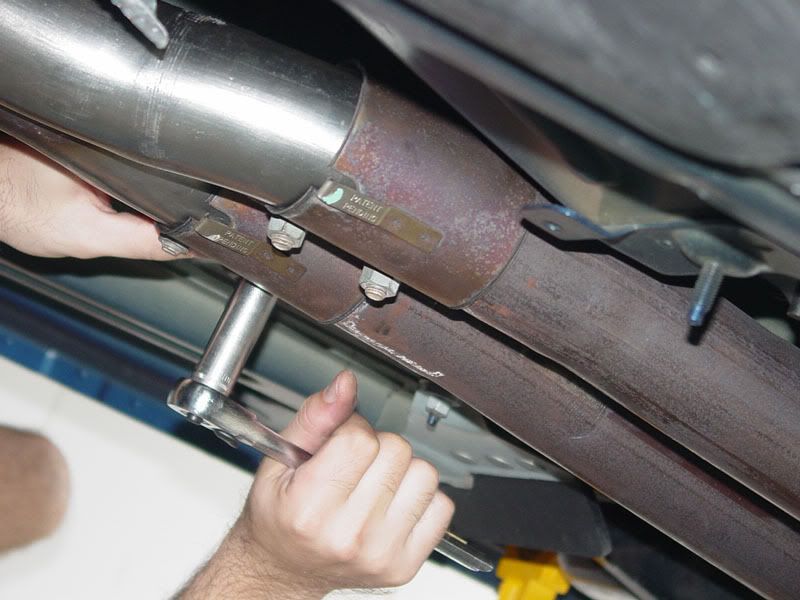
Next loosen up the 4 bolts on the clamps connecting the stock H to the mid section pipes.
Next with a flat head screwdriver, lift the tab on each clamp that connects to the alignment rivet (on mine one of them wasn't connected).
Once the tabs are lifted, work the mid section pipes off of the H-Pipe. For me this didn't take alot of effort as they came apart with just a little bit of "wiggling".
The X-pipe out of the box with the supplied clamps.
Next, line up the back part of the X-Pipe with the back part of the H-Pipe. With the back lined up, make sure the front part of the X is lined up with the H and mark where they meet with a peice of tape (you are going to need a friend for this part).
From the back edge of the tape (the edge closer to the rear) measure 1 inch and a half and mark the pipe (as you can see, a simple bic pen works)
The mark you make is going to be your cut line. The 1.5 inch space is for the X to slip over the stock pipe. Use another peice of tape to clearly mark your cut line and mark CUT! Trust me on this, if I didn't look under the car when my friend was about to make the cut, he would have cut in the wrong place!
Once your cut lines are clearly marked, cut away. Obviously a power saw works much better here. Make sure your friend is supporting the H-Pipe while you make the 2nd cut, don't want it to drop down on his head. Don't forget your safety goggles!
Side by side comparison of the X and H
Supplied clamps with 2 extra bolts
Text, take down any burs left over from the cuts with a file then slide the clamps over the stock pipe with the smaller end facing the cats. Slide one end of the X onto the stock pipe then slide the other end on. This requires a bit of wiggling as well as both ends of the X do not slide on evenly due to the angles.
At this point you are almost done. Slide the mid section pipe clamps over the back end of the X. For me this required a bit of wiggling also to get them both on. With all 4 clamps in place but not tight, have you or your friend go to the rear of the car and align the mufflers with the rear fascia (you need to do this while the mid section pipes are loose). Once your mufflers are straight, tighten up the mid section pipe clamps first.
Then tighten up the front clamps..
And you are done!
The install took us around 90 minutes. This could easily be done in under an hour if you have done stuff like this but I took my time and snapped pics along the way.
Now for the good stuff. First off, there is no added drone, in fact I swear at some rpms it almost sounds like there is less. At idle to me the car is quieter but while giving gas and WOT it is louder. The FRPP/Stinger sound is the same, just a bit more "aggressive" if you will. under power they sound a tad deeper and "growls" a little more.
Here is a comparison video of the FRPP/Stingers and stock H and FRPP/Stingers with the FRPP X. I can hear the difference I think but only because I know what it sounds like in person.
http://www.youtube.com/watch?v=oQOSNtb3XWY
Well, thats it, I hope this answers alot of questions I have seen on the forums about this pipe.
 I can't pull up the pictures, is it a catted x or just a direct fit to stock cat's? Still sound's awesome!
Thread Starter
Legacy TMS Member
Joined: September 22, 2006
Posts: 781
Likes: 14
Whoa, no idea what is up with the pictures. I just logged in now and noticed they are not showing. Let me see if I can fix this.
Edit: Just checked Angelfire, my pics are down for some reason. They are uploaded but not showing even when I am logged into my web shell. They where a little slow last night when I was uploading so maybe something is up. Sorry guys, hope they will be back up soon.
Edit: Just checked Angelfire, my pics are down for some reason. They are uploaded but not showing even when I am logged into my web shell. They where a little slow last night when I was uploading so maybe something is up. Sorry guys, hope they will be back up soon.
Thanks for the reference too!
Give PhotoBucket a try to host all your images. Works 100% of the time for me, and it's free!
Thread Starter
Legacy TMS Member
Joined: September 22, 2006
Posts: 781
Likes: 14
Thanks Bill. Yea looks like I am going to have to move over or something. Never had a problem before with Angelfire and actually some of my older stuff that is still on there shows up fine. It's just the images from last night. Got a ticket opened with them so hopefully soon, grrrrrrrr
Thread Starter
Legacy TMS Member
Joined: September 22, 2006
Posts: 781
Likes: 14
Well well, here is Lyco's response to the issue.
Reply:
Unfortunately, using the files stored in your webhosting account with
us on
another website that is not part of your hosting account, is no longer
allowed. This is called remote loading, or bandwidth theft.
Well, when I get home I will get the pics straigt and re-posted. Sorry gang.
Reply:
Unfortunately, using the files stored in your webhosting account with
us on
another website that is not part of your hosting account, is no longer
allowed. This is called remote loading, or bandwidth theft.
Well, when I get home I will get the pics straigt and re-posted. Sorry gang.
Lookin' good, Gary! Very detailed pics of the install, great job! 
Bullitt Member
Joined: November 6, 2005
Posts: 478
Likes: 0
Wow, so if I understand it correctly, the factory H-pipe is welded to the cats?? So that means that anyone changing the H-pipe has to cut the pipes, except for Taco Bill's case where his O/R H-pipes went all the way up to the exhaust manifold.
If that's the case, I did not know that. Great pics BTW.
If that's the case, I did not know that. Great pics BTW.
Thread Starter
Legacy TMS Member
Joined: September 22, 2006
Posts: 781
Likes: 14
http://www.steeda.com/products/magnaflow_xpipe_cats.php
Bassani's X in this link is an install like mine. Installs behind the stock cats (needs cutting)
http://www.steeda.com/products/bassani_xpipe.php
Thanks!

Thread
Thread Starter
Forum
Replies
Last Post
SMBJoshy
2010-2014 Mustang
2
Aug 16, 2015 02:48 PM
ustabawannab
Suspension, Brakes, and Tire Tech
5
Aug 5, 2015 08:32 PM