
K&N AirCharger CAI install


K&N AirCharger CAI install
*re-write*
K&N CAI install
63-2565
This K&N AirCharger kit does not require a tune and will provide you with a gain of 18-rwhp and 15-rwtq (reference Tech Article).
This install is pretty straight forward and shouldn’t take more than an hour to complete.
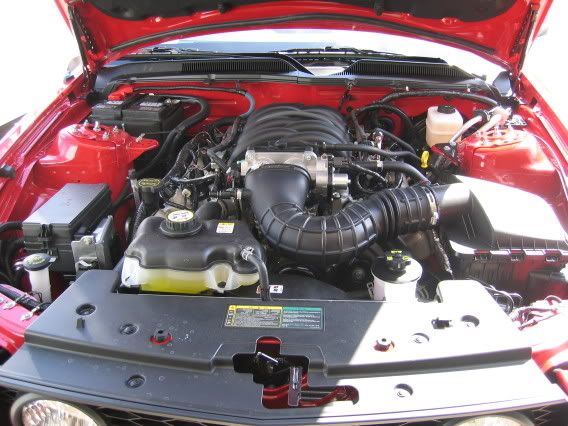
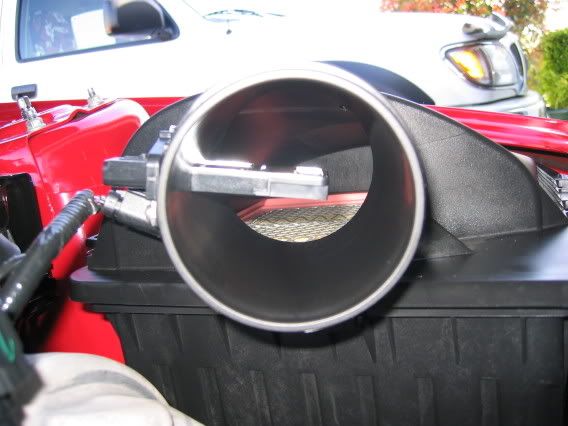
Stock set-up.
Remove the crankcase breather hose from the passenger side camcover by rotating the green locking tab. Loosen the hose clamp at the throttle body and at the factory air box. Note that both clamps are locked in via notches in the air duct. Once loose, just slip it over the notches.
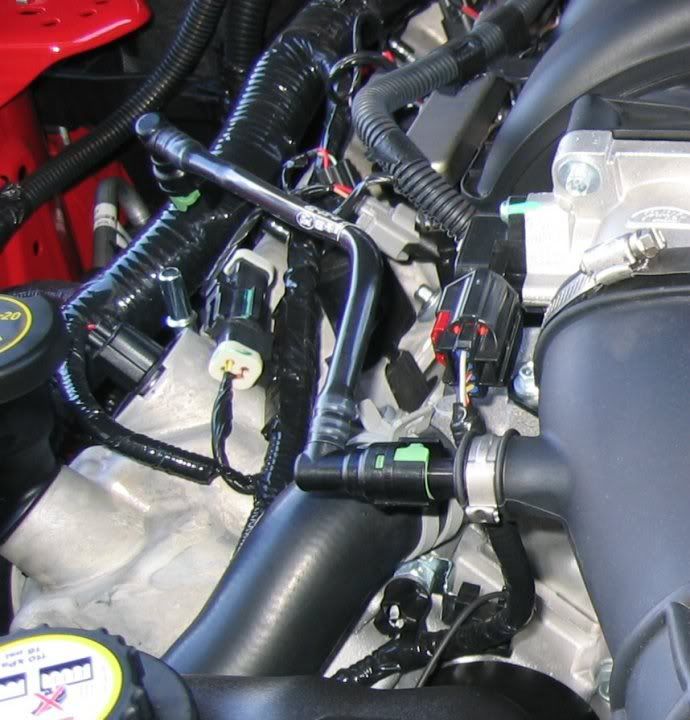

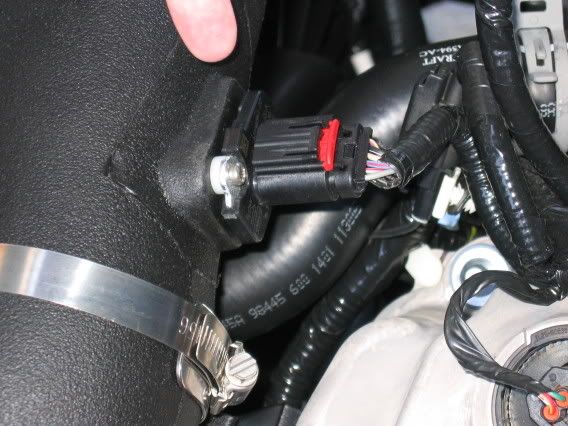
Once the air duct is removed, you’ll have a good view of the throttle body and MAF sensor. You can disconnect the MAF sensor plug at this time by sliding the red lock latch back.
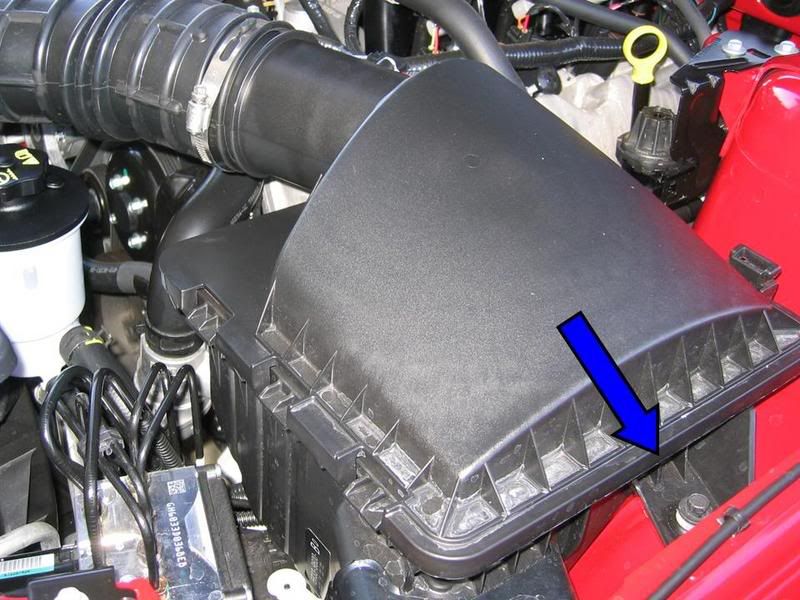
Remove the factory airbox by removing the mounting bolt.
Remove the 2 camcover bolts as shown. Once these bolts are loose, you’ll need to yank up on them pretty hard because of the rubber inserts.


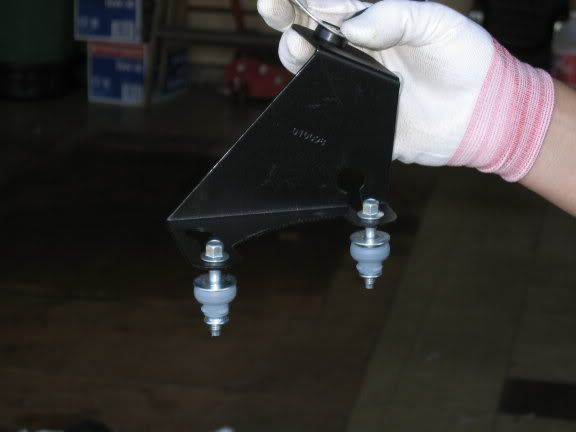
Assemble the air tube support saddle (per directions) to the black bracket and positions the 2 camcover bolts in it.
** Note: It has been brought to my attention that this particular bracket will NOT fit to the 2007 (and subsequent) camcover due to a redesign. Contact K&N to see if they can supply the correct bracket.

(At the time of write-up, I chose not to install the heatshield, but decided to install it when I did the Shaker)
At this point, assemble the supplied ‘L’ brackets to the heatshield and install it per the supplied directions.
Couple notes, installing the foam edge trim around the perimeter of the shield is a major pain. Sure you can just throw it on, but if you want it to come out show quality, forget it (main reason why I left it off, looks much cleaner without it).
The heatshield picks up one of the radiator shroud bolts. Re-installing this bolt can be another pain, just take your time and watch for cross-threading.
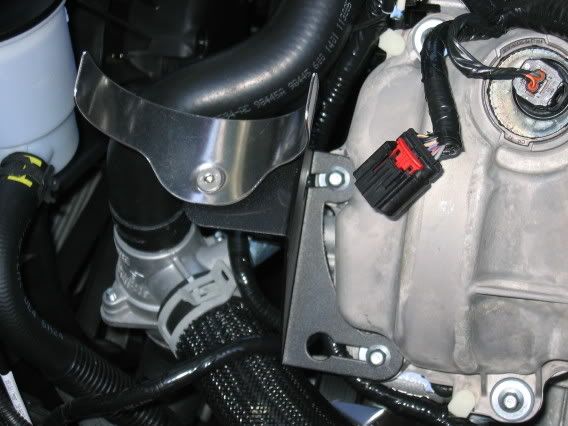
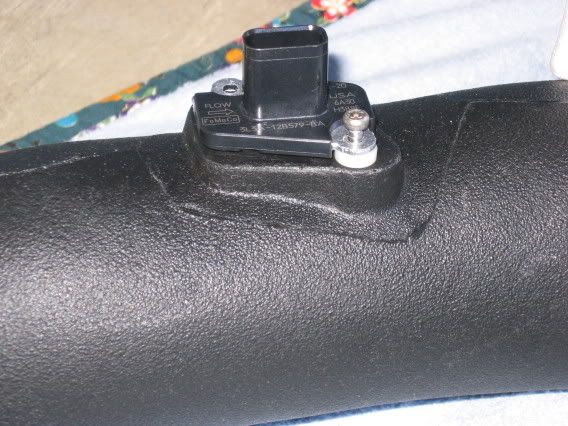
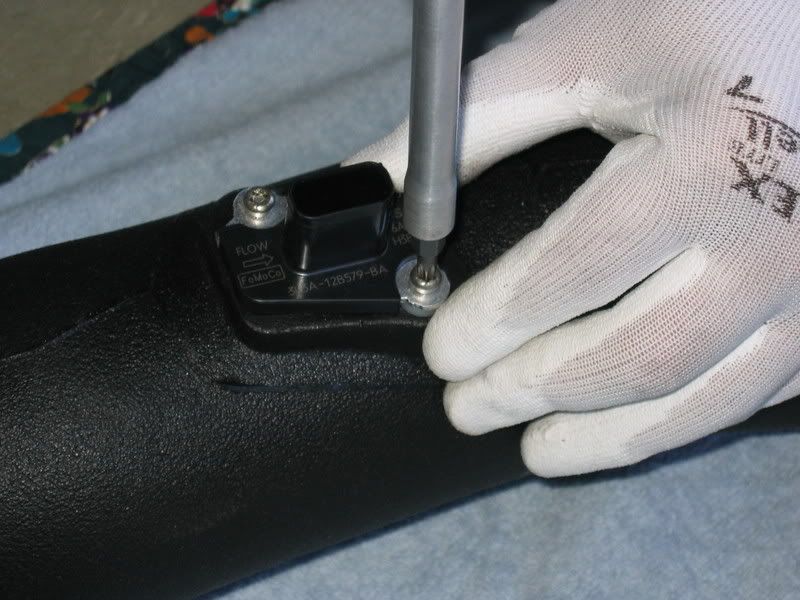
Carefully transfer the MAF sensor from the factory airbox to the K&N air tube.
Take note of the ‘Flow’ direction and transfer it exactly the same.

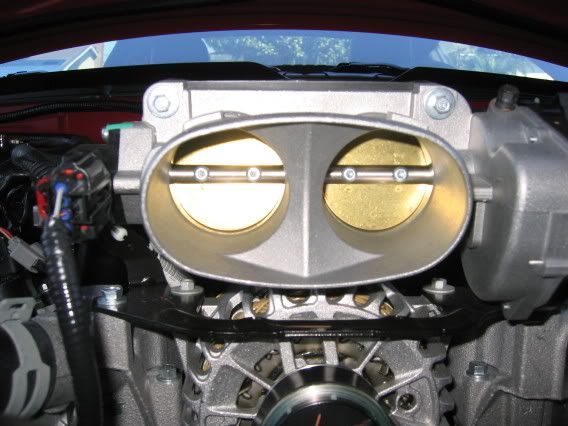
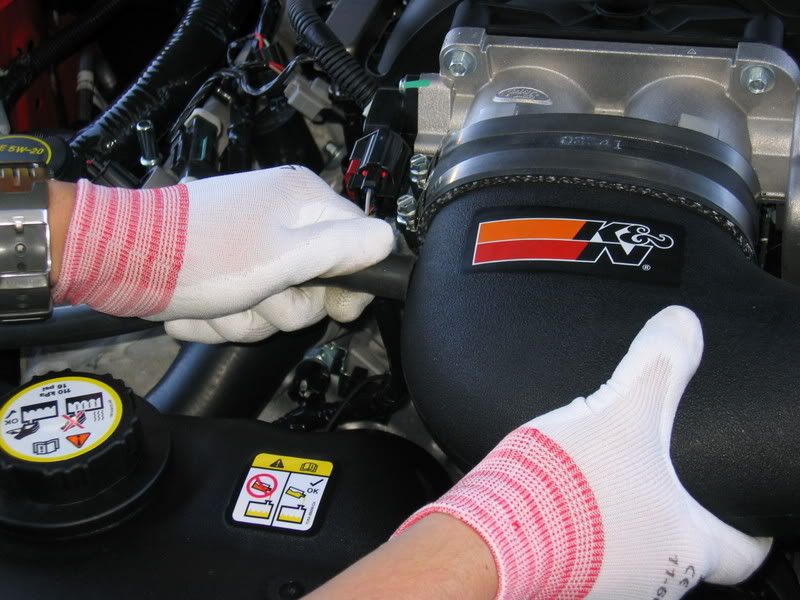
Install the silicone sleeve/hose onto the throttle body and position the 2 supplied clamps, keep them loose.
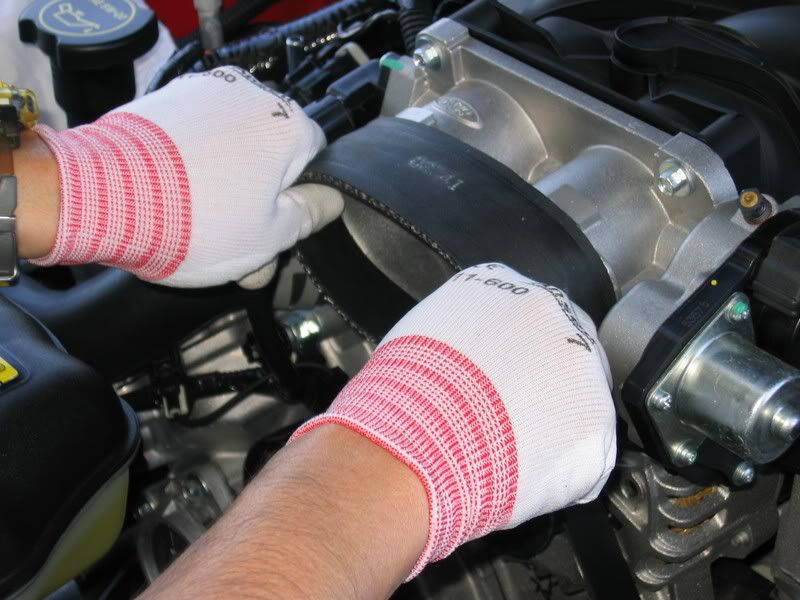
Slip the other supplied clamp over the air tube that will attach it to the saddle support and position it into the throttle body sleeve.
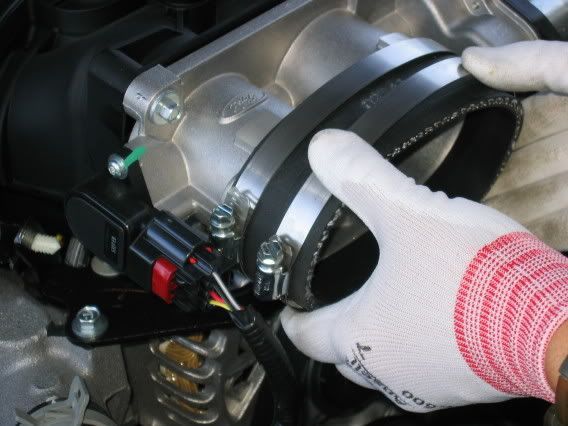
Once in position, tighten down the 3 hose clamps.
Note: Do not over tighten the hose clamps on the throttle body. If you do, the airtube will compress (remember it’s plastic) and may pop out (this is a bad thing).

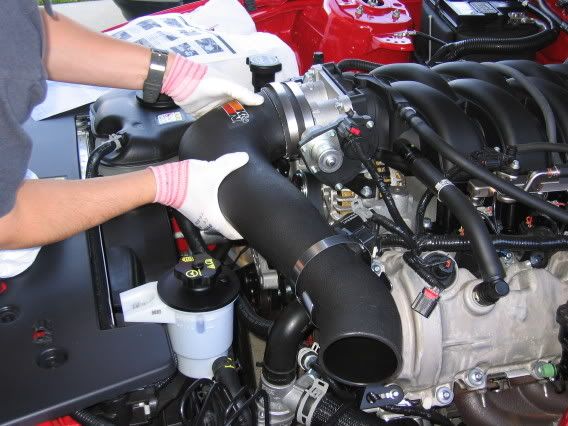


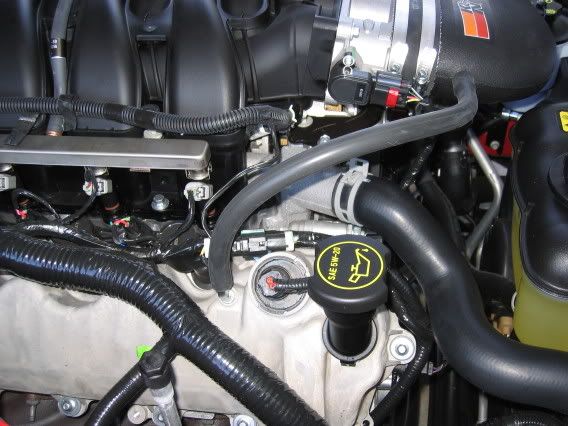
Install the supplied vent hose to the side of the airtube and the other end to the breather valve on the camcover.
Note: In the early release airtubes (incase you bought old stock or a used unit), the connector on the side of the airtube had a manufacturing defect. When molded, the hole was blocked or was too small. This will throw a CEL and cause the engine to not run right. If blocked, get a drill about the same size of the inside diameter and drill through the blockage. Make sure you remove all the plastic shavings when done.


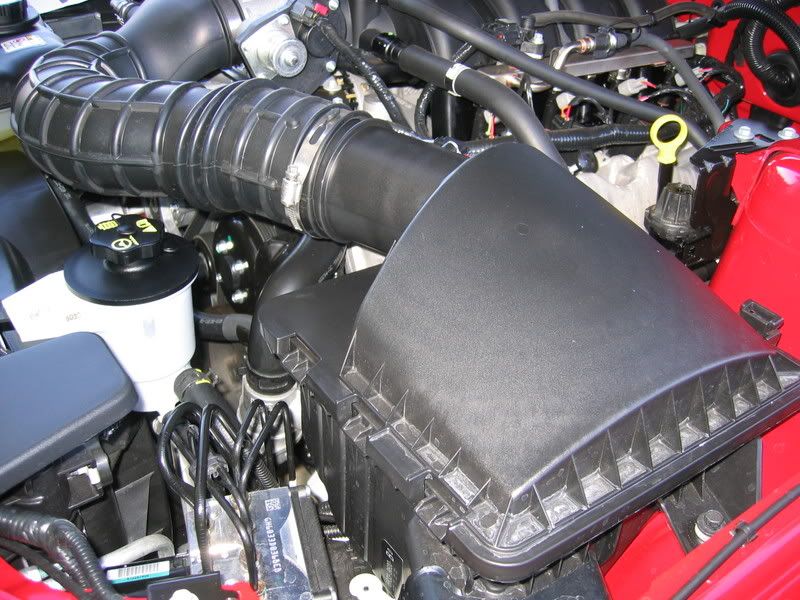
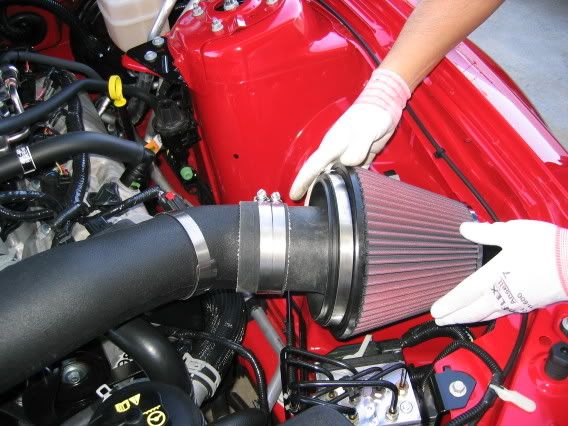
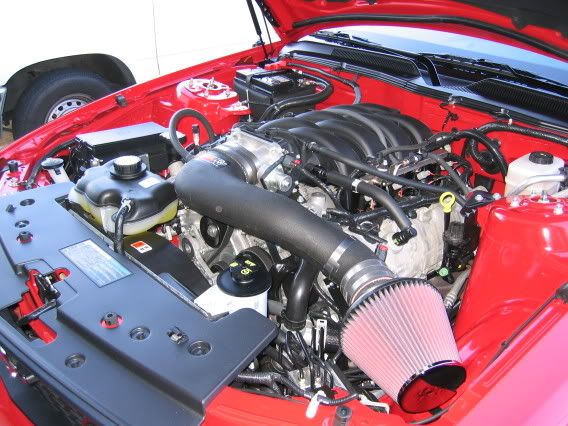
Install the cone air filter onto the adapter then install it onto the airtube.

Re-connect the MAF plug into the sensor.
Installation complete.


K&N CAI install
63-2565
This K&N AirCharger kit does not require a tune and will provide you with a gain of 18-rwhp and 15-rwtq (reference Tech Article).
This install is pretty straight forward and shouldn’t take more than an hour to complete.
Stock set-up.
Remove the crankcase breather hose from the passenger side camcover by rotating the green locking tab. Loosen the hose clamp at the throttle body and at the factory air box. Note that both clamps are locked in via notches in the air duct. Once loose, just slip it over the notches.
Once the air duct is removed, you’ll have a good view of the throttle body and MAF sensor. You can disconnect the MAF sensor plug at this time by sliding the red lock latch back.
Remove the factory airbox by removing the mounting bolt.
Remove the 2 camcover bolts as shown. Once these bolts are loose, you’ll need to yank up on them pretty hard because of the rubber inserts.
Assemble the air tube support saddle (per directions) to the black bracket and positions the 2 camcover bolts in it.
** Note: It has been brought to my attention that this particular bracket will NOT fit to the 2007 (and subsequent) camcover due to a redesign. Contact K&N to see if they can supply the correct bracket.
(At the time of write-up, I chose not to install the heatshield, but decided to install it when I did the Shaker)
At this point, assemble the supplied ‘L’ brackets to the heatshield and install it per the supplied directions.
Couple notes, installing the foam edge trim around the perimeter of the shield is a major pain. Sure you can just throw it on, but if you want it to come out show quality, forget it (main reason why I left it off, looks much cleaner without it).
The heatshield picks up one of the radiator shroud bolts. Re-installing this bolt can be another pain, just take your time and watch for cross-threading.
Carefully transfer the MAF sensor from the factory airbox to the K&N air tube.
Take note of the ‘Flow’ direction and transfer it exactly the same.
Install the silicone sleeve/hose onto the throttle body and position the 2 supplied clamps, keep them loose.
Slip the other supplied clamp over the air tube that will attach it to the saddle support and position it into the throttle body sleeve.
Once in position, tighten down the 3 hose clamps.
Note: Do not over tighten the hose clamps on the throttle body. If you do, the airtube will compress (remember it’s plastic) and may pop out (this is a bad thing).
Install the supplied vent hose to the side of the airtube and the other end to the breather valve on the camcover.
Note: In the early release airtubes (incase you bought old stock or a used unit), the connector on the side of the airtube had a manufacturing defect. When molded, the hole was blocked or was too small. This will throw a CEL and cause the engine to not run right. If blocked, get a drill about the same size of the inside diameter and drill through the blockage. Make sure you remove all the plastic shavings when done.
Install the cone air filter onto the adapter then install it onto the airtube.
Re-connect the MAF plug into the sensor.
Installation complete.


Bullitt Member
Joined: June 24, 2005
Posts: 311
Likes: 0
Re-read the article.
The K&N CAI develops only 8 hp of the total 18 hp gained, and only 8 ft-lb of the total 15 ft-lb of torque gained.
The remaining 10 hp and 7 ft-lb is produced by an aftermarket 91 octane tune.
The K&N CAI develops only 8 hp of the total 18 hp gained, and only 8 ft-lb of the total 15 ft-lb of torque gained.
The remaining 10 hp and 7 ft-lb is produced by an aftermarket 91 octane tune.
Tasca Super Boss 429 Member
Joined: January 4, 2006
Posts: 3,904
Likes: 32
With the MD Motorsports tune in place, the car picked up an additional 3 rwhp and 3 rwtq,
K&N AirCharger
Price: AirCharger (PN KNN-63-2565): $400.00 ($286.69 through Summit Racing)
Peak Horsepower: 279 (18hp gain)/(282 with SCT tune)
Re-read the article.


+1
Legacy TMS Member
Joined: October 2, 2006
Posts: 4,777
Likes: 16
From: Southeast Michigan
TacoBill: I appreciate the pics and write-up!!! 
Now that I see K&N wants you to transfer over your MAF sensor and expect the air transfer function to remain the same, I'm going to look elsewhere for a CAI kit The MAF sensor is calibrated with the housing and stock airbox/filter as a unit. If you change one or more of this combination, you're now depending on adaptive learning to do the job and its a bad idea when you go open loop. Chances are nothing bad will happen because of how much time is spent in open loop versus closed loop, but I'd very much prefer the correct air transfer function from the get-go!
Now that I see K&N wants you to transfer over your MAF sensor and expect the air transfer function to remain the same, I'm going to look elsewhere for a CAI kit
The MAF sensor is calibrated with the housing and stock airbox/filter as a unit. If you change one or more of this combination, you're now depending on adaptive learning to do the job and its a bad idea when you go open loop. Chances are nothing bad will happen because of how much time is spent in open loop versus closed loop, but I'd very much prefer the correct air transfer function from the get-go!
Cobra Member
Joined: November 23, 2004
Posts: 1,001
Likes: 0
I love mine, get the tune from Doug! I promis you will love it!!!! With just the few things I have listed I put down 295 hp, 314 ftlbs tq on a 108 deg day. I would put the heat shield on also. Nice write up.
Bullitt Member
Joined: June 24, 2005
Posts: 311
Likes: 0
Do you mean this?
With the MD Motorsports tune in place, the car picked up an additional 3 rwhp and 3 rwtq,
K&N AirCharger
Price: AirCharger (PN KNN-63-2565): $400.00 ($286.69 through Summit Racing)
Peak Horsepower: 279 (18hp gain)/(282 with SCT tune)
Re-read the article.
With the MD Motorsports tune in place, the car picked up an additional 3 rwhp and 3 rwtq,
K&N AirCharger
Price: AirCharger (PN KNN-63-2565): $400.00 ($286.69 through Summit Racing)
Peak Horsepower: 279 (18hp gain)/(282 with SCT tune)
Re-read the article.
through adjusting the computer with a modest 91-octane tune, the car's baseline was established at 271 rwhp and 289 rwtq."
"K&N AirCharger
Peak Horsepower: 279 (18hp gain)/(282 with SCT tune)
Peak Torque: 297 lb-ft (15-lb-ft gain)/(300 lb-ft with SCT tune)"
Thus, one can readily see from the above data that the overall gains from the K&N CAI and the 91-octane tune are 18 hp(279 - 261) and 15 ft-lb(297-282), that the SCT tune added another 3 hp and 3 ft-lb to this setup, and that the gains from the K&N are only 8 hp(279 - 271) and 8 ft-lb(297 -289).
Bottom line, it's an increase over stock.
To debate the number game any further is a moot point.
To debate the number game any further is a moot point.
GTR Member
Joined: January 26, 2006
Posts: 4,639
Likes: 0
From: Central Florida

Bullitt Member
Joined: June 24, 2005
Posts: 311
Likes: 0
Agree again. Attempting to disprove factual data is always a losing cause.
And FWIW, Horsepower TV installed a K&N AirCharger on an otherwise bone stock S197 Mustang, and got an additional 10 rwhp.
Mach 1 Member
Joined: June 28, 2006
Posts: 780
Likes: 0
From: Staten Island, NY
mine took 1 and 1/2 hours to install (it was 1 1/2 on the DOT, actually used a stopwatch ahahaha.) for the money, and the simplicity of the instally, id say it was worth every cent. im still running with the stock tune so its "real" power gain is still bottled up. but if your looking for a quick and easy way to free up a bit of horsepower and like someone said before you get that cool wipple sound with hittin the gas , then do it!
, then do it!
This one will last forever! (I wrote it on MS Word, then transferred it here!
 )
)

Thread
Thread Starter
Forum
Replies
Last Post
FromZto5
2010-2014 Mustang
61
Sep 30, 2015 05:28 AM
tj@steeda
2015 - 2023 MUSTANG
0
Sep 10, 2015 12:44 PM