
Am I putting this strut/spring together right?

Thread Starter
Legacy TMS Member
Joined: August 7, 2011
Posts: 5,246
Likes: 567
From: NC
Putting together my Koni Sport struts and Steeda Sport springs, with new "Gabriel" dust boots, FRPP bump stops, GT500 strut mounts, and Ford bottom-coil "sleeves"
The instructions from Koni show that the nut could be up to an M18, which I think means 18mm Metric, but the nut I have for the top of the strut is a 19mm.
So ... I'm not sure how much to tighten that nut.
Right now it's not that tight, it's as much as my regular socket would tighten it up.
Putting the socket back on it now it won't grab the nut at all, I'd need a deep socket, which I don't have.
Also, the instructions say something about using a wrench (?) to hold the strut rod in place while using a torque wrench to tighten the nut.
They say to use a torque wrench like this one to tighten the nut, a tool that I don't possess :

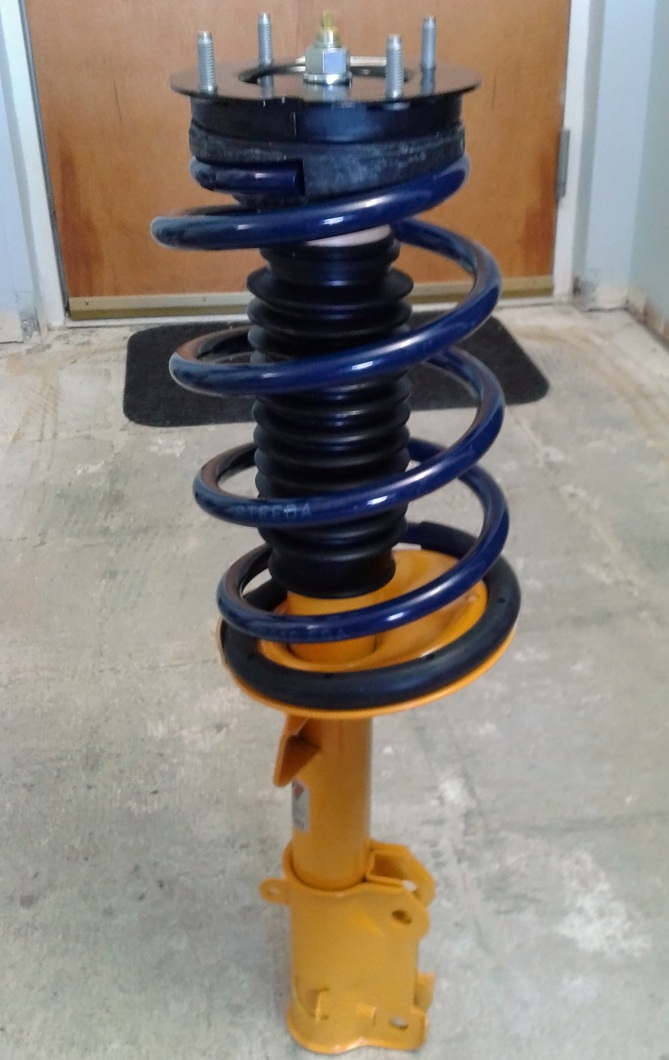
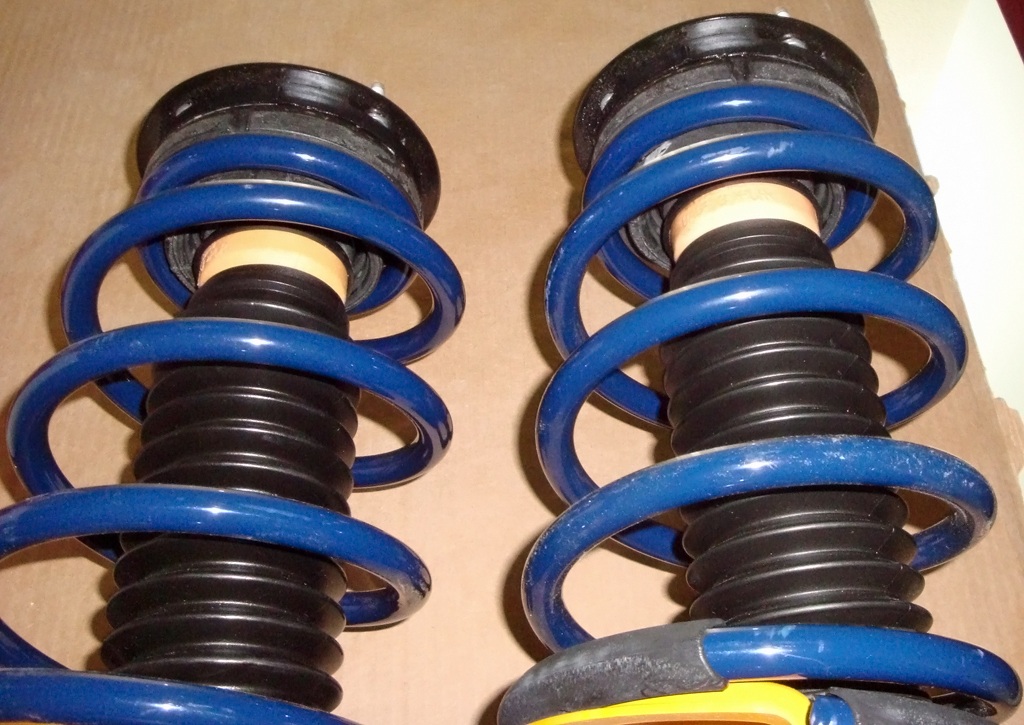
So this is how I started, that's as far into the dust boot that I could push the FRPP bump stop which is larger/wider than the "Gabriel" one that came with the boot :

And where I stopped, looking for some wisdom from you guys ...
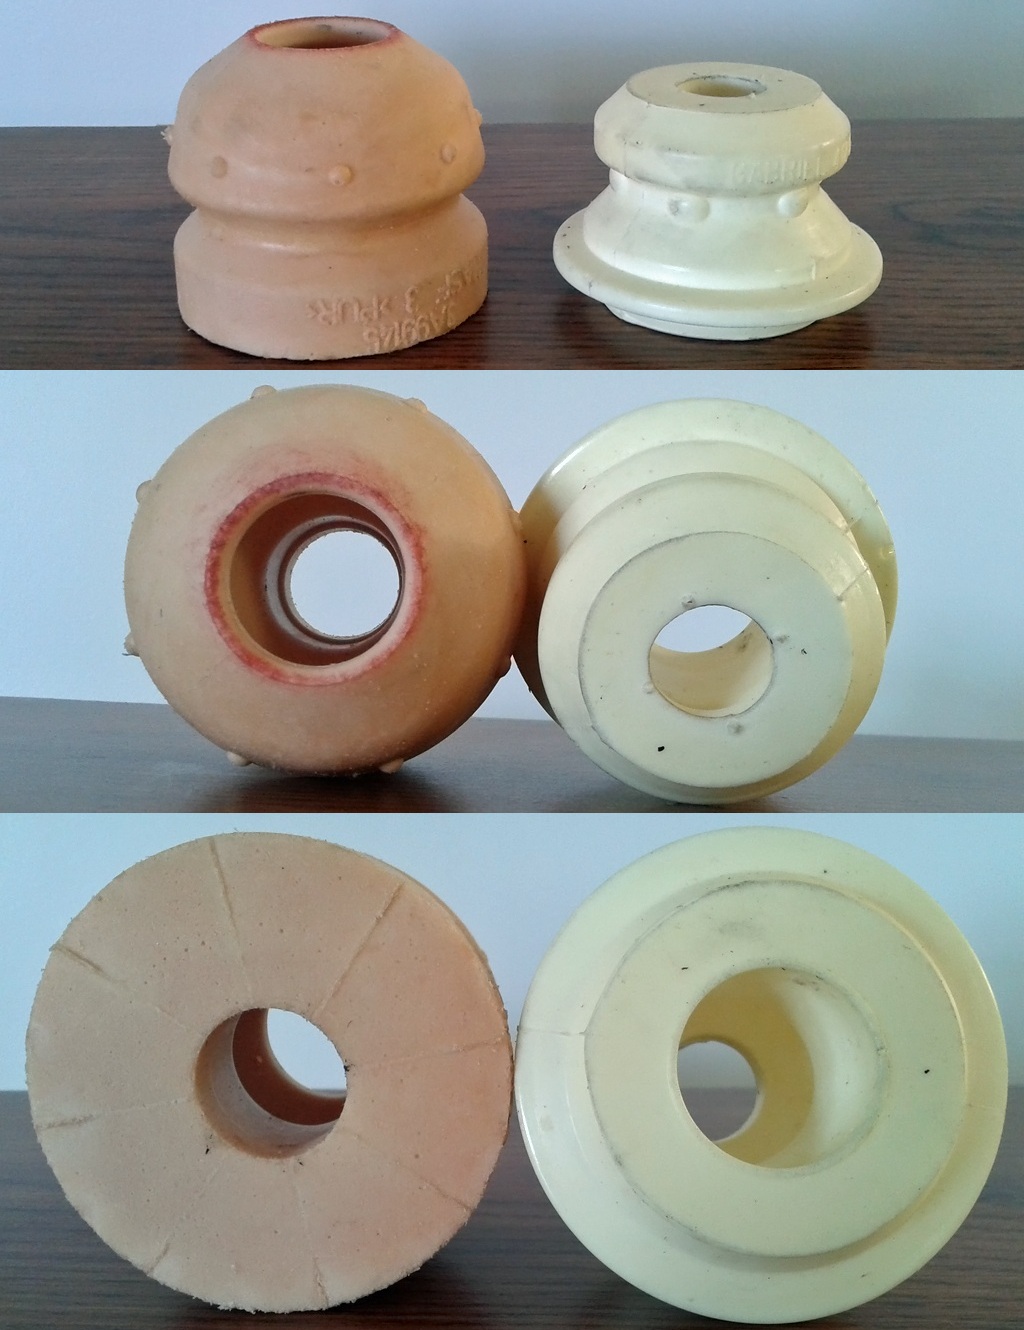
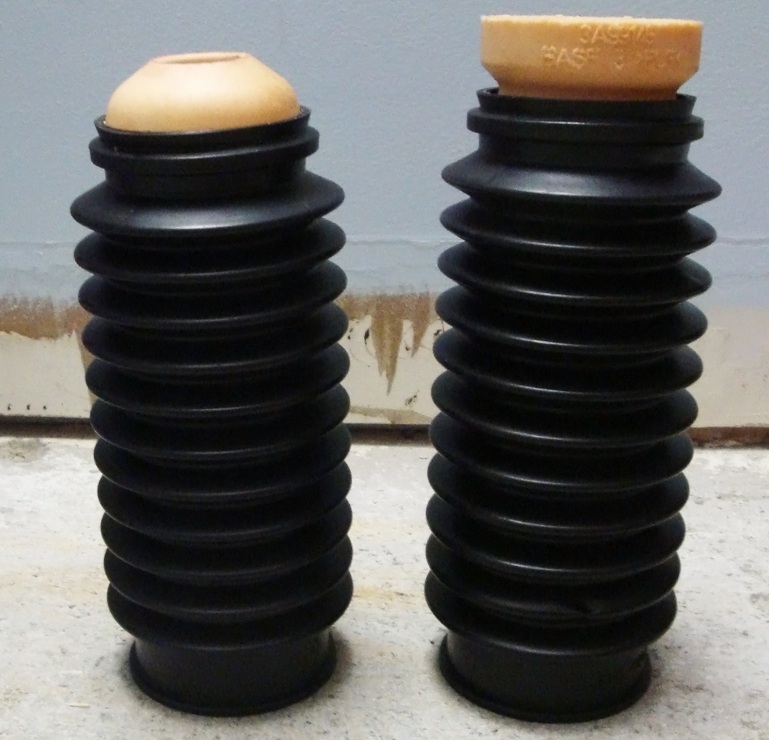
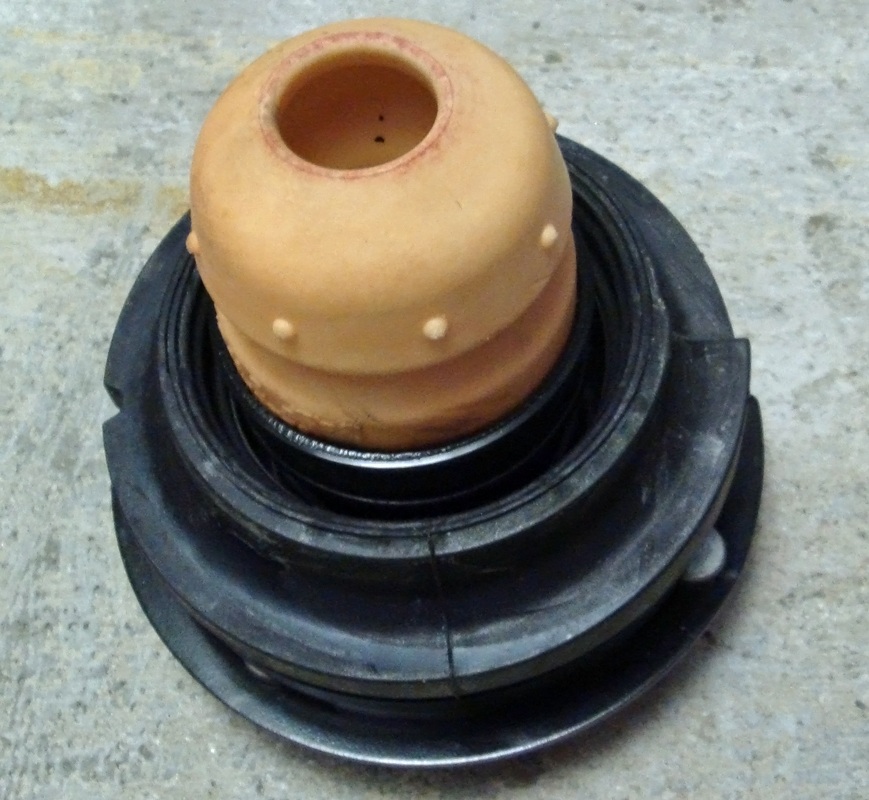
The new FRPP bump stop on the left, the Gabriel stop on the right :
The instructions from Koni show that the nut could be up to an M18, which I think means 18mm Metric, but the nut I have for the top of the strut is a 19mm.
So ... I'm not sure how much to tighten that nut.
Right now it's not that tight, it's as much as my regular socket would tighten it up.
Putting the socket back on it now it won't grab the nut at all, I'd need a deep socket, which I don't have.
Also, the instructions say something about using a wrench (?) to hold the strut rod in place while using a torque wrench to tighten the nut.
They say to use a torque wrench like this one to tighten the nut, a tool that I don't possess :
So this is how I started, that's as far into the dust boot that I could push the FRPP bump stop which is larger/wider than the "Gabriel" one that came with the boot :
And where I stopped, looking for some wisdom from you guys ...
The new FRPP bump stop on the left, the Gabriel stop on the right :
Last edited by Gabe; Apr 3, 2013 at 11:23 AM.

Shelby GT350 Member
Joined: May 6, 2012
Posts: 2,060
Likes: 0
From: Crofton MD
If possible I would just take a deep socket for a spark plug, if it will fit, take the rubber out and dremel out the inside a little so you can fit a 10mm deep through it and then tighten it that way, so that you can have the 10mm hold the top nut and still spin the bottom.
A Man Just Needs Some....
Joined: April 9, 2011
Posts: 17,125
Likes: 34
From: Louisiana
You have the nuts started obviously so the springs won't fly out. Take them to a shop somewhere and get someone to just crank down on them a little with an impact and a deep socket. You guys crack me up with torquing a strut bolt. Lol
Thread Starter
Legacy TMS Member
Joined: August 7, 2011
Posts: 5,246
Likes: 567
From: NC
Well, I just bought some ratcheting wrenches that I thought would be nice to have anyway, so I figured I'll use that to tighten it down as much as I can, then maybe use the cordless impact gun on it ...
Bullitt Member
Joined: October 6, 2011
Posts: 293
Likes: 0
not sure, but it sounds like you cant tighten that center nut down enough? perhaps because the strut rod/shaft spins when you try to tighten? If so...what you can do is get some channel locks and rubber hose or other material. I used thicker rubber door/window weather striping. It needs to have some give but can still be used to clamp down with. Use that material to wrap around the strut shaft and clamp down on it with channel locks to keep the shaft from spinning. The idea is not to score the shaft when you clamp down to hold it in place. Once held, you can tighten away on that nut...a cordless impact gun works great...especially if your doing it alone. Looks like you may have to push down the dust boot some to get the channel lock on there.
Last edited by ConeBoss; Apr 3, 2013 at 03:29 PM.
Thread Starter
Legacy TMS Member
Joined: August 7, 2011
Posts: 5,246
Likes: 567
From: NC
Couple of guys on a different forum mentioned that it looks like I have the bump stop upside down, that the pointy end should aim down ... anybody on here have any thoughts on that?

A Man Just Needs Some....
Joined: April 9, 2011
Posts: 17,125
Likes: 34
From: Louisiana
Didn't realize they were adjustable. Maybe an impact is a bad decision. Lol. Craftsman makes a ratchet set that had a straight through design. Just made like a sleeve type socket and ratchet set. Not sure what they call it. The top of your strut shaft should have either a hex head or an oblong head on it. You can find the right socket or wrench to hold back on the shaft.
Thread Starter
Legacy TMS Member
Joined: August 7, 2011
Posts: 5,246
Likes: 567
From: NC
Gabe - I found this on the AM site there is a cut away picture about half way down. Looks like the bumpstop should go the other way on the strut shaft.
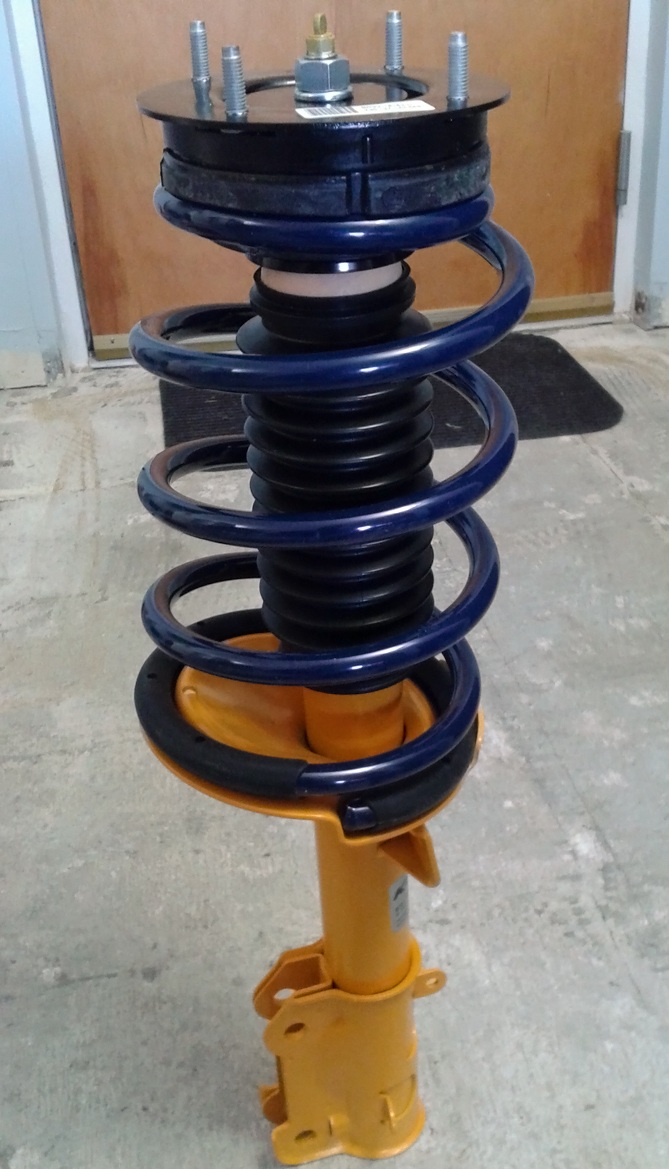
The following pic shows the way I had it (left) and the proper way for it to be installed (right).
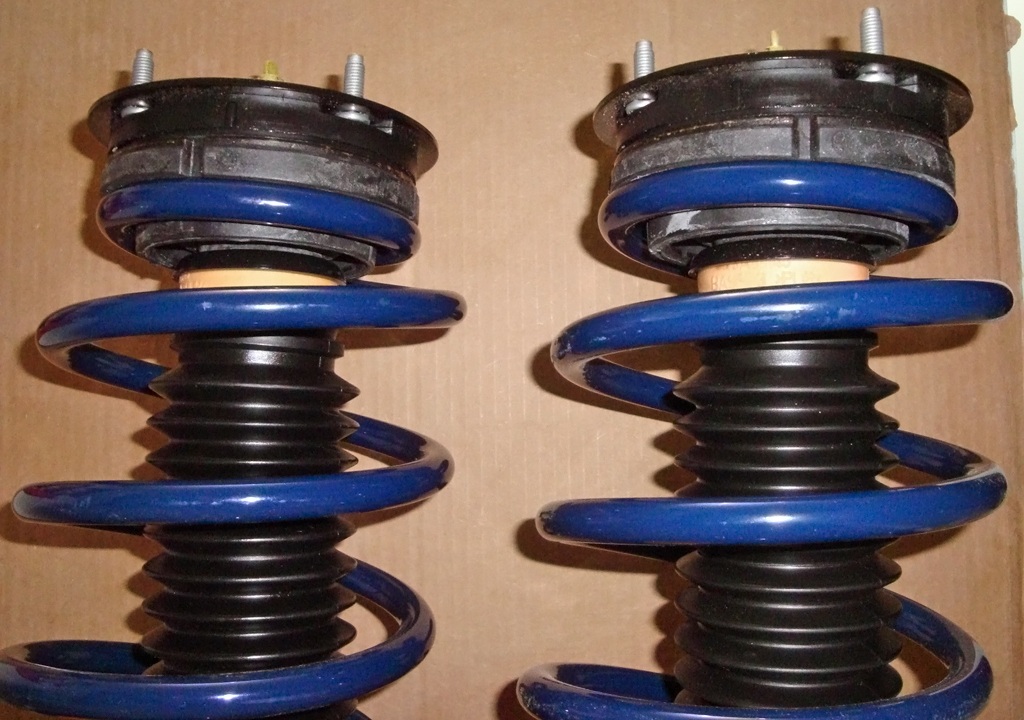
I like that the "proper" way also makes the dust boot longer, so it covers more of the strut rod.
This pic shows how the stop sits perfectly in the round seat of the underside of the GT500 mount:
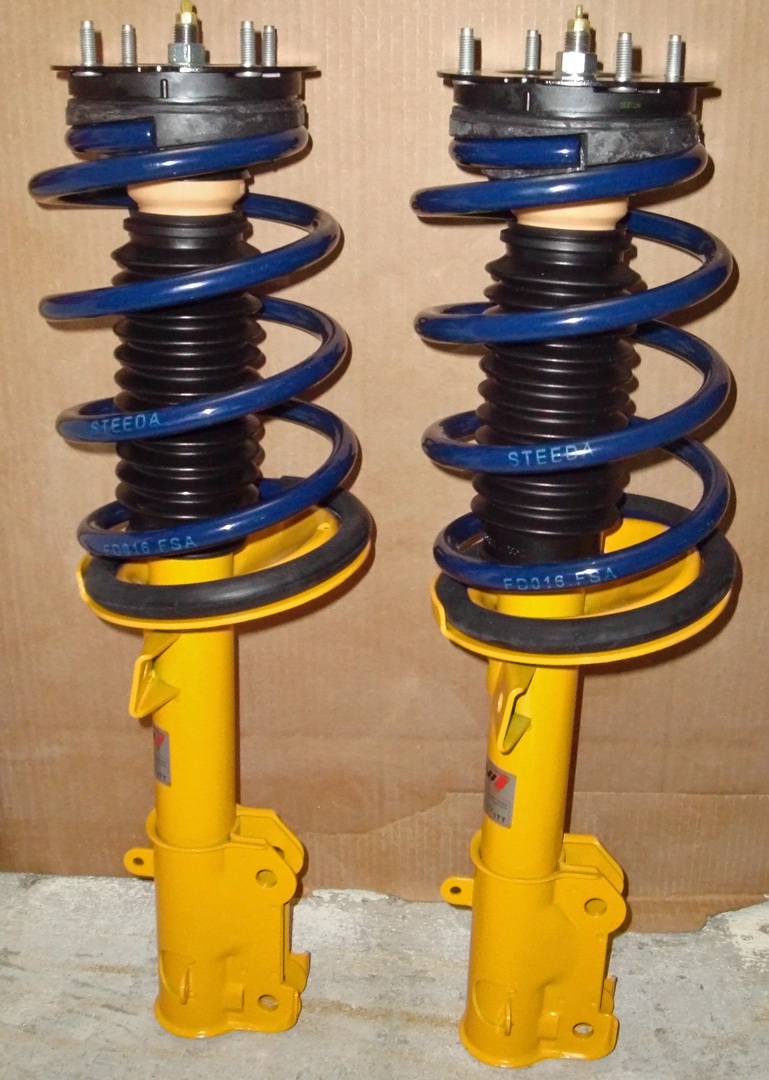
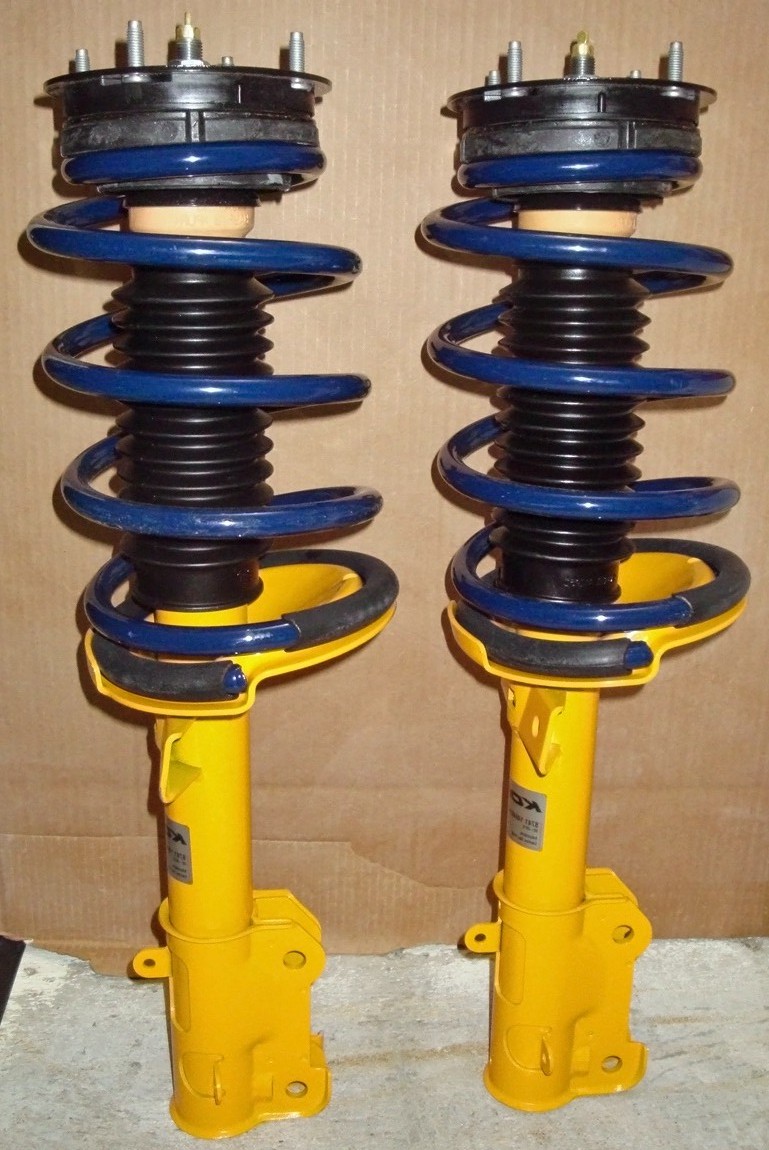
Following pics show the way the struts/mounts/springs look, as I have them finished.
- I used a ratcheting 19mm wrench for the nut and an 11mm socket with a ratchet on the strut rod to keep it from spinning. I tightened as hard as I could by hand. Theoretically I could use a regular torque wrench on the 11mm socket and torque it down. I think I'll attempt this tomorrow since I don't have my torque wrench with me right now.
Former Vendor
Joined: October 8, 2012
Posts: 759
Likes: 1
Looks good Gabe, I'm glad you decided to tackle this on your own. Its good experience, once you start modding it doesn't stop. Well... for me anyways. You say my thread on the other forums, I've gone thru countless suspensions trying to test them out.
Thread Starter
Legacy TMS Member
Joined: August 7, 2011
Posts: 5,246
Likes: 567
From: NC
Thanks Jay ... kinda wish that I got them installed already though ...

Thread Starter
Legacy TMS Member
Joined: August 7, 2011
Posts: 5,246
Likes: 567
From: NC
I got them together and that's all.
Did that last night.
Today I had Comcast/Xfinity come down to set me up for TV/Internet/Phone/Wi-Fi service, which took till after 1PM ... then lunch, a movie, plus the continued lack of motivation to do ANYTHING ... I have the car to work on, and I have my condo to work on, still remodeling it, only about half way done ...
But just recently broke up with the GF, been together for about 15 months, we were looking at rings last year ... now feeling kinda lost ... not really feeling like doing much ... haven't even been outside yet today ...
Team Mustang Source
Joined: June 17, 2012
Posts: 116
Likes: 0
From: West Central MN
I got them together and that's all.
Did that last night.
Today I had Comcast/Xfinity come down to set me up for TV/Internet/Phone/Wi-Fi service, which took till after 1PM ... then lunch, a movie, plus the continued lack of motivation to do ANYTHING ... I have the car to work on, and I have my condo to work on, still remodeling it, only about half way done ...
But just recently broke up with the GF, been together for about 15 months, we were looking at rings last year ... now feeling kinda lost ... not really feeling like doing much ... haven't even been outside yet today ...
Did that last night.
Today I had Comcast/Xfinity come down to set me up for TV/Internet/Phone/Wi-Fi service, which took till after 1PM ... then lunch, a movie, plus the continued lack of motivation to do ANYTHING ... I have the car to work on, and I have my condo to work on, still remodeling it, only about half way done ...
But just recently broke up with the GF, been together for about 15 months, we were looking at rings last year ... now feeling kinda lost ... not really feeling like doing much ... haven't even been outside yet today ...
Hang in there...I'm sure you'll find the right person out there..it just takes some time. Thanks for posting the pictures...it has already helped me get started on my suspension upgrades.
Wayne
Last edited by Senderofan; Apr 5, 2013 at 05:36 PM.
Team Mustang Source
Joined: June 17, 2012
Posts: 116
Likes: 0
From: West Central MN
Well...We mustang owners stick together and help each other when we can..no matter where we live on the map. Just wanted to let you know that it's true that "It's hard to keep a good man down!" Also...I want to make sure your Mustang isn't neglected from lack of attention . We'll need to see updated pictures once your install is complete.
Take Care,
Wayne
. We'll need to see updated pictures once your install is complete.Take Care,
Wayne
GT Member
Joined: December 27, 2011
Posts: 105
Likes: 0
From: Owings Mills, Maryland
Gabe, I used the FRPP Bump stops, pointed side down all the way. Slide the Gabriel dust boot wide side towards the bottom, the top lip of the Gabriel dust boot snaps into the bottom of the GT500 mount. Use Craftsman Max Axxess socket set for assembling strut.
http://www.craftsman.com/craftsman-1...2&blockType=G2
Avi
http://www.craftsman.com/craftsman-1...2&blockType=G2
Avi