New Homemade Splitter

 9/6/11, 09:19 PM
#22
Cobra R Member
Thread Starter
Yea, I thought about heading to a boating store but I have had no experience with this setup and was afraid I would not do it correctly. After I have the parts ordered I could look into it. The main part which I figure they would not have is where it attached to the splitter itself.
Last edited by 2012YellowBoss; 9/6/11 at 09:20 PM.
9/7/11, 09:05 PM
#23
Member

Join Date: May 25, 2011
Location: St. Joseph, MI
Posts: 43
Likes: 0
Received 0 Likes
on
0 Posts
Here are a few pictures of the front splitter from the front and side. If you look closely, you can see the spacer between the front air dam and the splitter. Also included a rear shot of the big-*** rear wing.
9/7/11, 09:09 PM
#24
Tasca Super Boss 429 Member
Join Date: December 18, 2010
Location: NorCal
Posts: 3,708
Likes: 0
Received 0 Likes
on
0 Posts
 9/7/11, 09:55 PM
#25
Cobra R Member
Thread Starter
Would be nice to do but not very street friendly  Like I said I have 1/4 inch with the 18's and I am going to experiment with putting in a sheet between the splitter and bumper cover. That is about as far as I plan for now, between the two it will be a half inch lower.
Like I said I have 1/4 inch with the 18's and I am going to experiment with putting in a sheet between the splitter and bumper cover. That is about as far as I plan for now, between the two it will be a half inch lower.
9/7/11, 10:04 PM
#26
Tasca Super Boss 429 Member
Join Date: December 18, 2010
Location: NorCal
Posts: 3,708
Likes: 0
Received 0 Likes
on
0 Posts
9/7/11, 10:09 PM
#27
Bullitt Member
Join Date: November 3, 2010
Posts: 454
Likes: 0
Received 0 Likes
on
0 Posts
BTW, is that a Boss or factory built racer? Looks more like the racer painted to look like a Boss that us Plebes buy for street use.
Last edited by phytrpilot; 9/7/11 at 10:15 PM.
9/7/11, 10:10 PM
#28
Cobra R Member
Thread Starter
9/7/11, 10:17 PM
#29
Tasca Super Boss 429 Member
Join Date: December 18, 2010
Location: NorCal
Posts: 3,708
Likes: 0
Received 0 Likes
on
0 Posts
We were next to either a 302S or 302R race car used in Grand Am/World Challenge; I can't remember which one, but I'm pretty sure it had the LS splitter. They said they could extend the LS splitter another 3 feet in front of the car and it wouldn't make a difference. But lowering it as far as the rules allowed did.
9/8/11, 07:34 AM
#30
Member
Join Date: May 25, 2011
Location: St. Joseph, MI
Posts: 43
Likes: 0
Received 0 Likes
on
0 Posts
Very nice Jeff. I'm guessing, without knowing the rigidity of the splitter, that you may need two more turn buckle braces toward the sides. I can envision some upward flexure. Love the 302s hood!
BTW, is that a Boss or factory built racer? Looks more like the racer painted to look like a Boss that us Plebes buy for street use.
BTW, is that a Boss or factory built racer? Looks more like the racer painted to look like a Boss that us Plebes buy for street use.
9/8/11, 08:18 AM
#31
Tasca Super Boss 429 Member
Join Date: December 18, 2010
Location: NorCal
Posts: 3,708
Likes: 0
Received 0 Likes
on
0 Posts
That's a Boss 302S designed for sprint races like World Challenge. The 302R is designed for longer endurance races like Grand Am. The 302S is the replacement for the FR500S that we saw at MMP.
Last edited by 5 DOT 0; 9/8/11 at 08:19 AM.
9/8/11, 08:33 AM
#32
Bullitt Member

Join Date: May 3, 2010
Location: So Cal
Posts: 430
Likes: 0
Received 0 Likes
on
0 Posts
Splitter looks great.
I know you already ordered the struts, but here's another source: http://aprperformance.com/index.php?...d=83&Itemid=44
I know you already ordered the struts, but here's another source: http://aprperformance.com/index.php?...d=83&Itemid=44
9/19/11, 06:28 PM
#33
Cobra R Member
Thread Starter
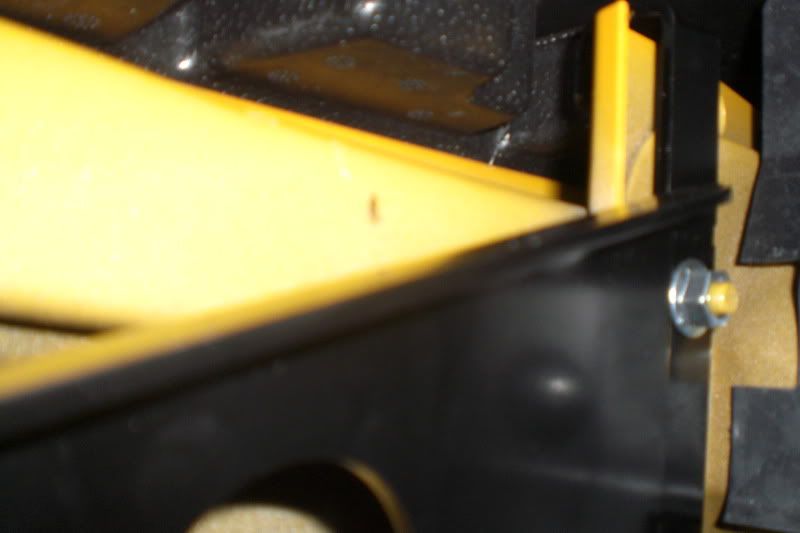
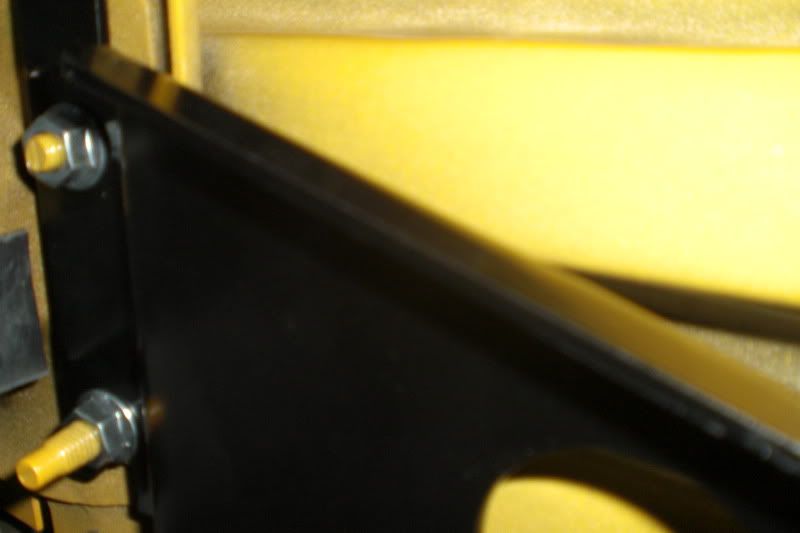
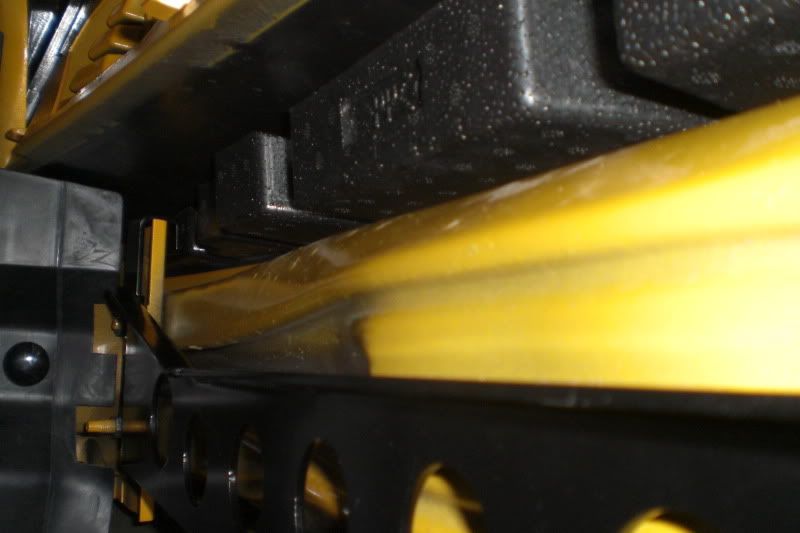
I did get the bracket installed, it is big and heavy. I did not follow the instructions, just pulled the grille and was able to slip it in there. You are suppose to take the bumper cover off, pull the foam and replace the two upper bolts. I was able to get the nuts started with my fingers and that was a good sign, so I went with it. Got two or three good turns of a wrench so they will hold fine, if I ever take the bumber cover off I will change them out.


9/19/11, 06:29 PM
#34
Cobra R Member
Thread Starter
Well I could not find what I needed and the shop said they would have too much time into making these, so I made a set myself. They came OK, could look better and I will need to re-do a few parts but they work. I still need to make a few fine adjustments tomorrow in the light but here are some pics.
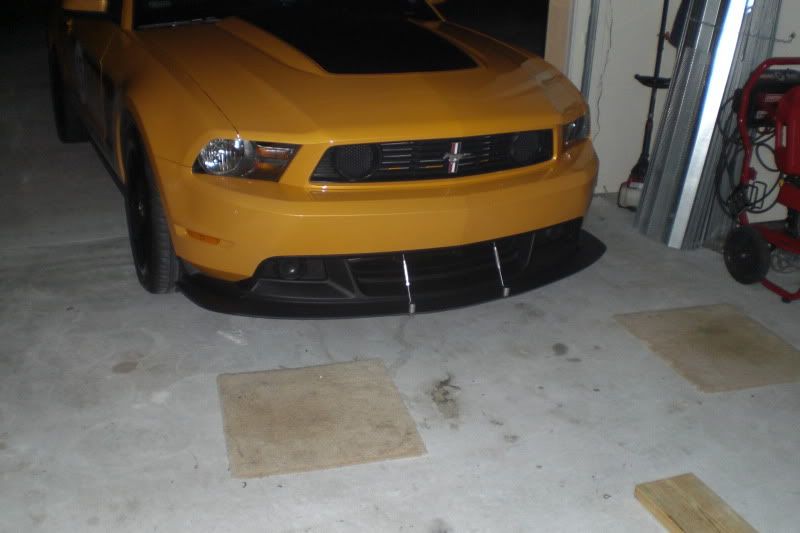
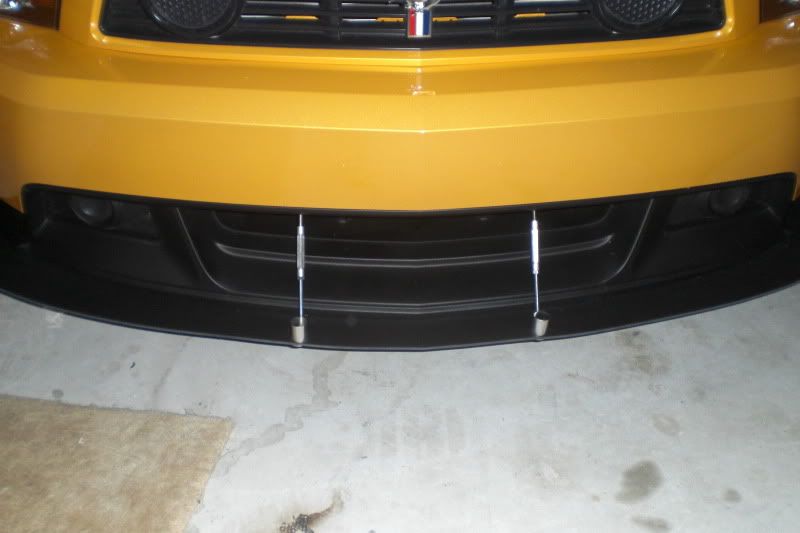
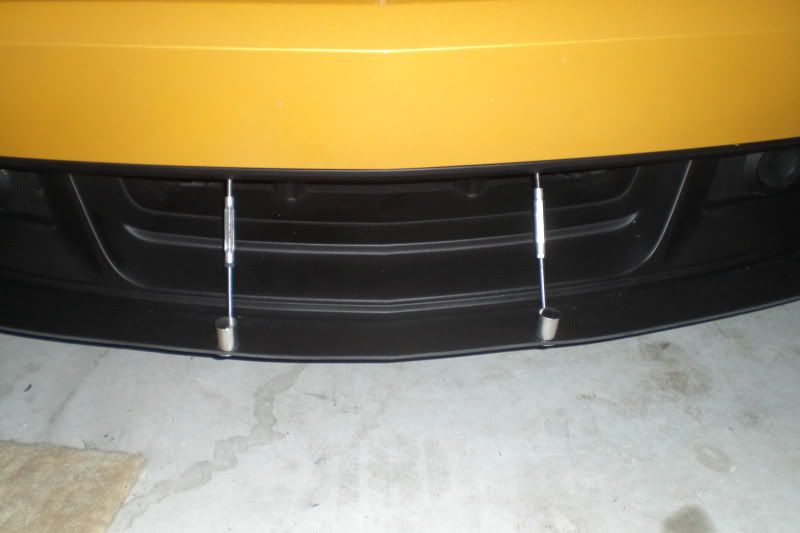
Made the ends from 1 inch round aluminum stock, and used threaded 1/4 rod for all the connections. I also will need to find two 1/4 nuts with left hand thread.
Made the ends from 1 inch round aluminum stock, and used threaded 1/4 rod for all the connections. I also will need to find two 1/4 nuts with left hand thread.
9/19/11, 06:30 PM
#35
Cobra R Member
Thread Starter
Just to give an idea of how I made the rods. I re-did a couple of the parts today since I was not happy with the fit.
I used the turn buckles, they thread left and right hand. When you turn the middle it pulls the splitter up or pushes it down. I used the aluminum stock cut into one inch pieces and 1/4 inch threaded rod. I drilled them out and added the threaded rod. The uppers have a rod on each end, top piece goes into the bracket from Ford racing and the bottom gets a nut to hold the loop eye of the turn buckle that I bent to about 45 degrees.
I replace the bottom rod on the turn buckle with a longer 1/4 threaded rod. Then drilled out the bottom round piece, straight down to go through the splitter and at an angle for the threaded rod. Tapped them out to 1/4-20 and put it all back together.


Cleaned up and ready to go

Installed


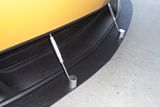
I made some fine adjustments and now I am fairly happy with the way they turned out, not perfect but they will work great.
I used the turn buckles, they thread left and right hand. When you turn the middle it pulls the splitter up or pushes it down. I used the aluminum stock cut into one inch pieces and 1/4 inch threaded rod. I drilled them out and added the threaded rod. The uppers have a rod on each end, top piece goes into the bracket from Ford racing and the bottom gets a nut to hold the loop eye of the turn buckle that I bent to about 45 degrees.
I replace the bottom rod on the turn buckle with a longer 1/4 threaded rod. Then drilled out the bottom round piece, straight down to go through the splitter and at an angle for the threaded rod. Tapped them out to 1/4-20 and put it all back together.


Cleaned up and ready to go

Installed


I made some fine adjustments and now I am fairly happy with the way they turned out, not perfect but they will work great.
Last edited by 2012YellowBoss; 9/19/11 at 06:38 PM.

Thread
Thread Starter
Forum
Replies
Last Post
tj@steeda
2015 - 2023 MUSTANG
0
9/16/15 06:44 PM
Evil_Capri
Mustang Motorsports
1
9/11/15 08:39 AM