Changed Base Gauge face to White
 1/8/13, 05:42 PM
#1
Bullitt Member
Thread Starter
Join Date: May 20, 2012
Location: Slidell La.
Posts: 259
Likes: 0
Received 0 Likes
on
0 Posts
Changed Base Gauge face to White
As the title states , it wasnt that hard just gotta take your time with the needles putting them back in and it seems like when you plug the cluster back in it re calibrates itself. After i took a ride into town and used the GPS speedometer app on my phone to check the Speedo and it was almost dead on maybe a mph or so at most so no worries there.

 [/IMG]

Only shot i have of before:

[/IMG]Only shot i have of before:
Last edited by Burke985; 1/8/13 at 05:51 PM.
 1/8/13, 06:41 PM
#2
Bullitt Member
How hard was it removing the needles, did you just pull them strait up and when you put them back on did you just line them up to zero ? I had read some ware you have to twist the needles to the right then pull up and some awkward way of putting them back on ?
Oh ya looks great and it's a nice mode for a base car.
Oh ya looks great and it's a nice mode for a base car.
1/8/13, 07:06 PM
#4
Bullitt Member
Thread Starter
Join Date: May 20, 2012
Location: Slidell La.
Posts: 259
Likes: 0
Received 0 Likes
on
0 Posts
How hard was it removing the needles, did you just pull them strait up and when you put them back on did you just line them up to zero ? I had read some ware you have to twist the needles to the right then pull up and some awkward way of putting them back on ?
Oh ya looks great and it's a nice mode for a base car.
Oh ya looks great and it's a nice mode for a base car.
I have a Note 2 and its called GPS speedometer in the play store works pretty well
Last edited by Burke985; 1/8/13 at 07:07 PM.
1/8/13, 07:17 PM
#6
Bullitt Member
Thread Starter
Join Date: May 20, 2012
Location: Slidell La.
Posts: 259
Likes: 0
Received 0 Likes
on
0 Posts
 1/9/13, 07:09 AM
#9
V6 Member

Join Date: February 18, 2012
Location: Baltimore
Posts: 92
Likes: 0
Received 0 Likes
on
0 Posts
I've been thinking about doing this for my base v6 daily driver (my '13 GT is premium). Is there anywhere I can specifically get the gauge faces or did you just happen to come across them on ebay as someone parted out?
1/9/13, 07:15 AM
#10
Bullitt Member
Roush has them for $25.00 on Ebay, there new take off's.
Here is the link, its still good http://www.ebay.com/itm/2010-2012-FO...60557322091%26
Here is the link, its still good http://www.ebay.com/itm/2010-2012-FO...60557322091%26
Last edited by rm2092; 1/9/13 at 07:17 AM.
 1/9/13, 09:10 AM
#13
Bullitt Member
Thread Starter
Join Date: May 20, 2012
Location: Slidell La.
Posts: 259
Likes: 0
Received 0 Likes
on
0 Posts
Thanks ,Yeah I didn't hate the base gauge face like the base steering wheel I was just looking to look at something different and for 25 bucks and about 30min it was worth it
1/9/13, 07:42 PM
#15
Bullitt Member
Thread Starter
Join Date: May 20, 2012
Location: Slidell La.
Posts: 259
Likes: 0
Received 0 Likes
on
0 Posts
Once you pop off the cover plate with the Air vent (which work your way from the top down) there's two little bolts that i don't remember what size, on each side of the top of the gauge pod. Un-Screw them and the bottom pops out. You must work it out from the top and then pull it toward the steering wheel. At that time you should be able to see the plug connection and the plug has a release clip on the bottom side just squeeze together and pull straight out. Now that its out you should be able to see the clips on the pod that are holding the plastic cover on. There's one more bolt screw on the pod itself on the bottom side that has to be removed to pop off the fac. Just work the clips so the face pops off once the screw is out. Now the scary part or at least it was for me. I actually used two butter knives to pop the needles off put one on each side and just applied equal pressure until it slid off , i just made sure the needles were lined up at zero when i popped them off.
Now that the needles are off you just take a pair of scissors and you will be able to see where to cut the base face plates off at the top in the Right and left hand corners on each side. Just do the same on the new face plate because the middle will not work with the base gauge pod. Now just take them off and put the new white face plates on and line them up with the pre cut out holes. The middle where the needle is has a little tab sticking out just press a little harder there so it snaps in. Now once the faces are lined up put the needles back in and make sure they are on zero on both sides. don't press too hard just get them on you don't wanna bend the pins in the center. Once you have everything lined up good carefully pop the plastic face back on. The face will apply pressure on the white gauge faces so they will not move any once the cover is popped back into place. Put the screw back in and your set. Bring it back to the car work it back in to place and plug it it. The gauge pod should whig out like you just tuned the car. Pop the bottom back in and line the top back up with the screw holes and put the screws back in and your done. POP the face plate back on and your good to go. That's about as detailed as i can explain it
Now that the needles are off you just take a pair of scissors and you will be able to see where to cut the base face plates off at the top in the Right and left hand corners on each side. Just do the same on the new face plate because the middle will not work with the base gauge pod. Now just take them off and put the new white face plates on and line them up with the pre cut out holes. The middle where the needle is has a little tab sticking out just press a little harder there so it snaps in. Now once the faces are lined up put the needles back in and make sure they are on zero on both sides. don't press too hard just get them on you don't wanna bend the pins in the center. Once you have everything lined up good carefully pop the plastic face back on. The face will apply pressure on the white gauge faces so they will not move any once the cover is popped back into place. Put the screw back in and your set. Bring it back to the car work it back in to place and plug it it. The gauge pod should whig out like you just tuned the car. Pop the bottom back in and line the top back up with the screw holes and put the screws back in and your done. POP the face plate back on and your good to go. That's about as detailed as i can explain it
1/15/13, 04:35 PM
#16
Bullitt Member
Join Date: December 11, 2012
Location: N'awlins/SoCal
Posts: 482
Likes: 0
Received 0 Likes
on
0 Posts
Where y'at, bra! Haha f'n miss my hometown. Out here in SoCal after Katrina flattened my house. Hope you guys are livin large down in the Big Greasy.
1/26/13, 03:03 PM
#17
Bullitt Member
Join Date: March 17, 2010
Location: Farmington Hills, MI
Posts: 383
Likes: 0
Received 0 Likes
on
0 Posts
Thanks for the eBay link! I just picked up these for my car. Even though I didn't really mind the standard gauge setup, I like the white faces better. Now I just need to wait until it warms up outside and this will be the first mod of the spring.
3/12/13, 04:54 PM
#18
Bullitt Member
Join Date: March 17, 2010
Location: Farmington Hills, MI
Posts: 383
Likes: 0
Received 0 Likes
on
0 Posts
This weekend I made the switch to the "new" gauges in the dash cluster. I LOVE the new look!
The OP pictures seemed to have been taken down, so here are my pictures:
The original gauge setup:

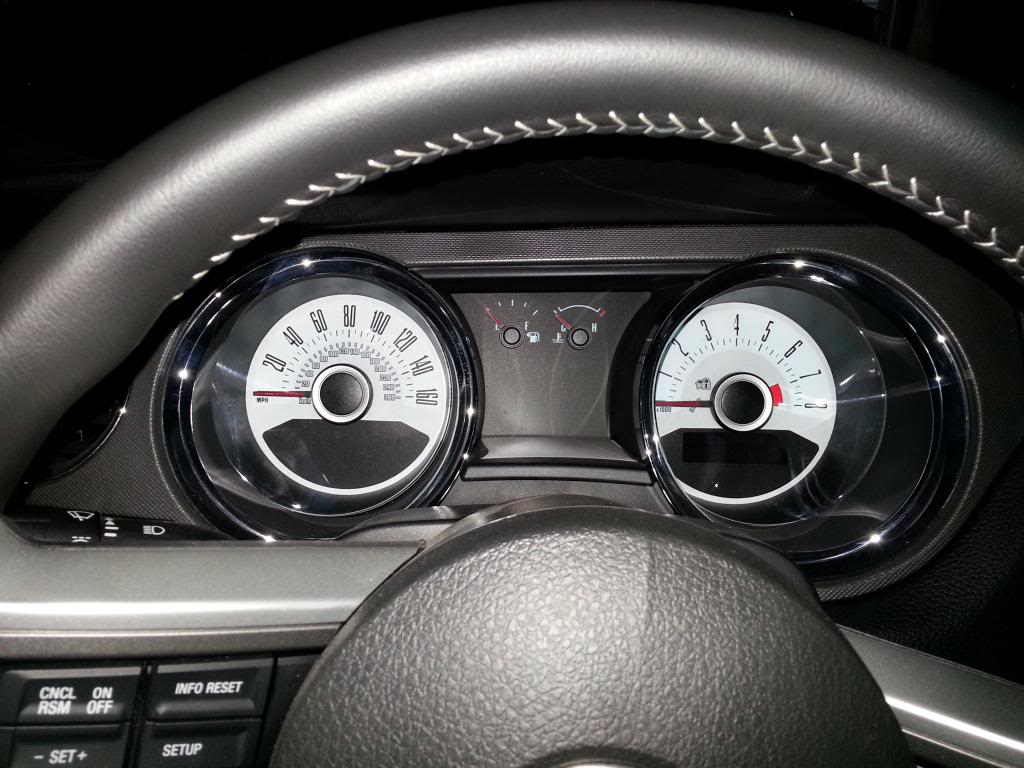
The new setup:
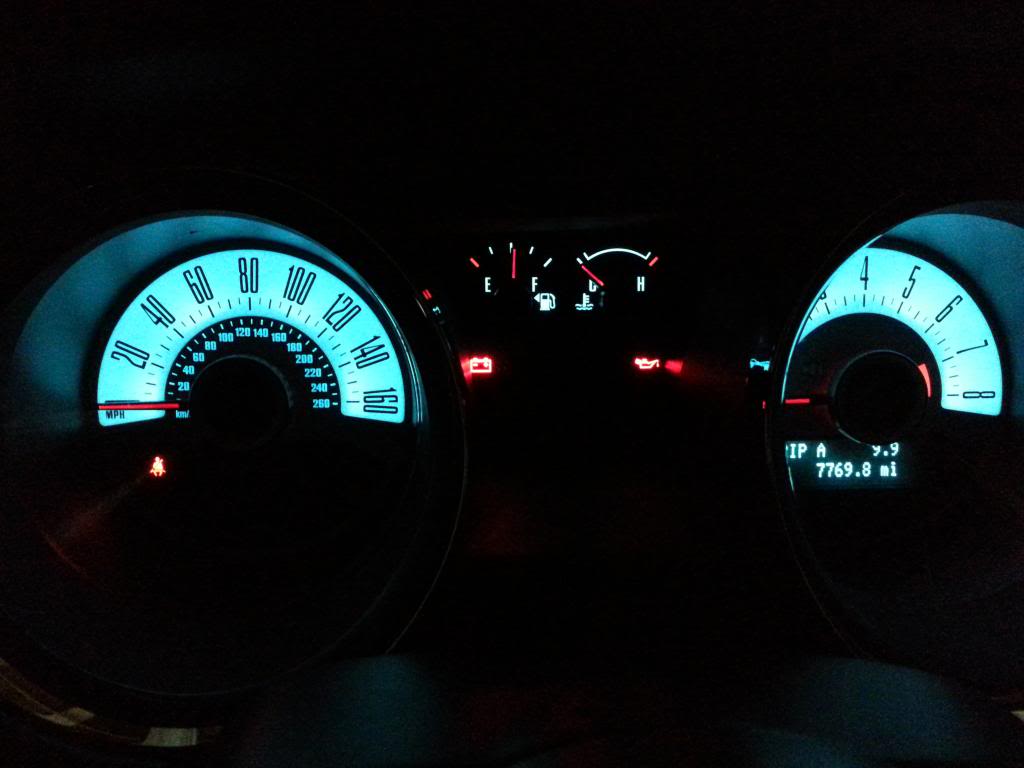
And the part I like the best, when lit up they have the Ice Blue color I love:
For anyone looking to make this simple mod, I highly recommend it. It was real easy to do and only took about 20 minutes to complete.
The OP pictures seemed to have been taken down, so here are my pictures:
The original gauge setup:
The new setup:
And the part I like the best, when lit up they have the Ice Blue color I love:
For anyone looking to make this simple mod, I highly recommend it. It was real easy to do and only took about 20 minutes to complete.
