
2013 Boss 302 complete system upgrade

Thread Starter
Cobra Member
Joined: February 13, 2011
Posts: 1,399
Likes: 0
From: Southern NH
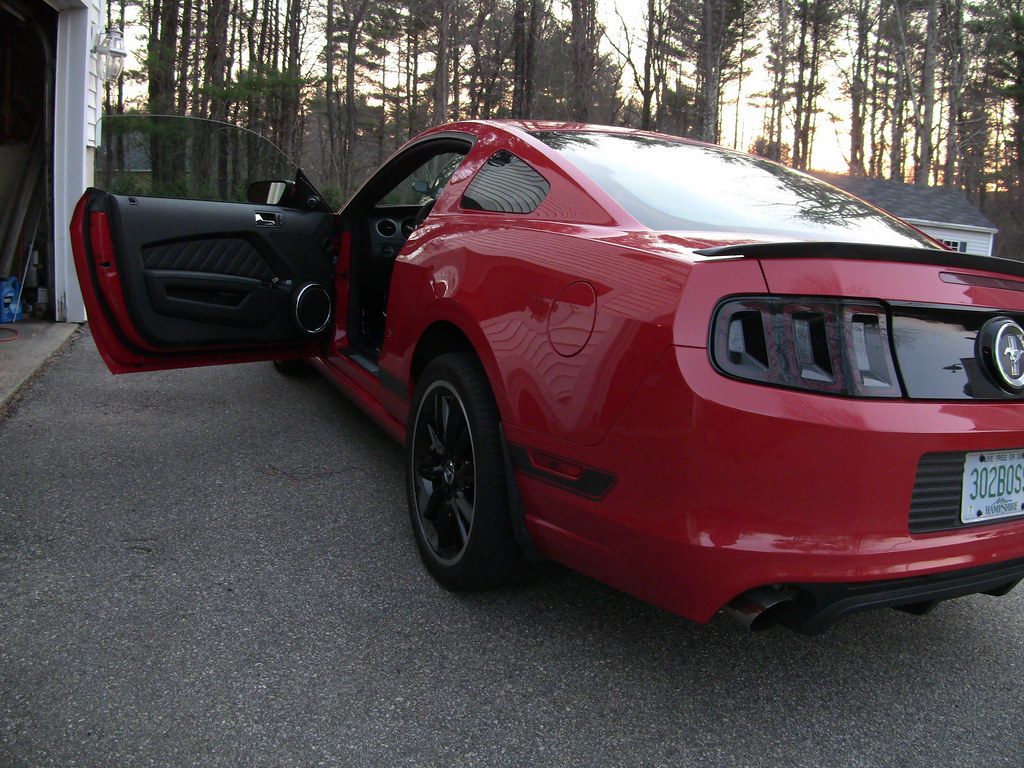
It's widely known that the OEM audio system in the 2012/2013 Boss Mustang is the cheapest and lowest quality available for a Mustang. Not knocking Ford for this, this model is touted as 'a race car with a license plate', so anyone who expects good tunes from the factory will be in for a big disappointment. The speakers are suitable for AM radio only, and the head unit lacks power. The sad part is, if you just replace all of the 6x8 speakers with any decent coaxial, you will quickly discover that the signal quality and lack of power requires a complete replacement of the head unit.
Once you know you need to replace the head unit, finding a replacement dash panel is required. I really wasn't too impressed with the appearance of the Metra & Scoche kits, and was glad to see the iDatalink Maestro kit hit the market. I was critical of the initial cost when this was released, but I got lucky and snagged the ADS-KIT-MUS1 and RR module for 249$ new/shipped from eBay. I couldn't be happier with the quality, fit and finish. Props to the manufacturer, iDatalink really impresses with their product line, engineering, web site, and attention to detail. The fact that we have 12v Guy here to answer questions and offer help and advice is a much appreciated bonus.
Since I had tried the incremental upgrade approach - replace all speakers - suck - add PAC Audio interface to feed amplifier - more suck, fail - it was time to go whole hog. So the time came to put together a list of components and materials. Since I had already installed an old, scratch that, *ancient* Yamaha 4ch amp to power the JL Audio coaxials, I already have the amp install kit installed. Now it's one inline fuse and wires run through the firewall from the pre-cut hole in the firewall thanks to the sound tube delete kit grommet. My arm is sore from patting myself on the back for running TWO power wires, as I knew I would be adding a second amp. I figured I could address the need for a 2nd fuse later (now if recommended), but at least that part is done.
Another reason my shoulder is sore, is that I came up with an innovative way to temporarily mount the amplifier in the trunk. I got some industrial strength tie wraps, and looped them around the rear deck and seat area. From those I was able to suspend the amp by running another set of tie wraps through the 4 corner mount holes of the amp through the loops created by the 1st set of tie wraps around the body panels. The beauty of this setup is that you can adjust the tension of the wraps as needed. A piece of foam can be wedged between the rear deck to prevent the amp from bouncing upward in event of a hard bump. This setup is also quite handy as you can snip the secondary set of ties to 'uninstall' the amp so you can make adjustments as needed, and then re-tie. I may copy the plywood and angle bracket setup shown in clucas build thread for my amps.
On a side note, using this old amp wasn't such a hot idea. After a few weeks use, one of the channels started to fail. As a side effect, Sync voice prompts ceased to function, even after yanking the battery cable and performing a factory reset. Once the faulty amp was removed, Sync functions returned.
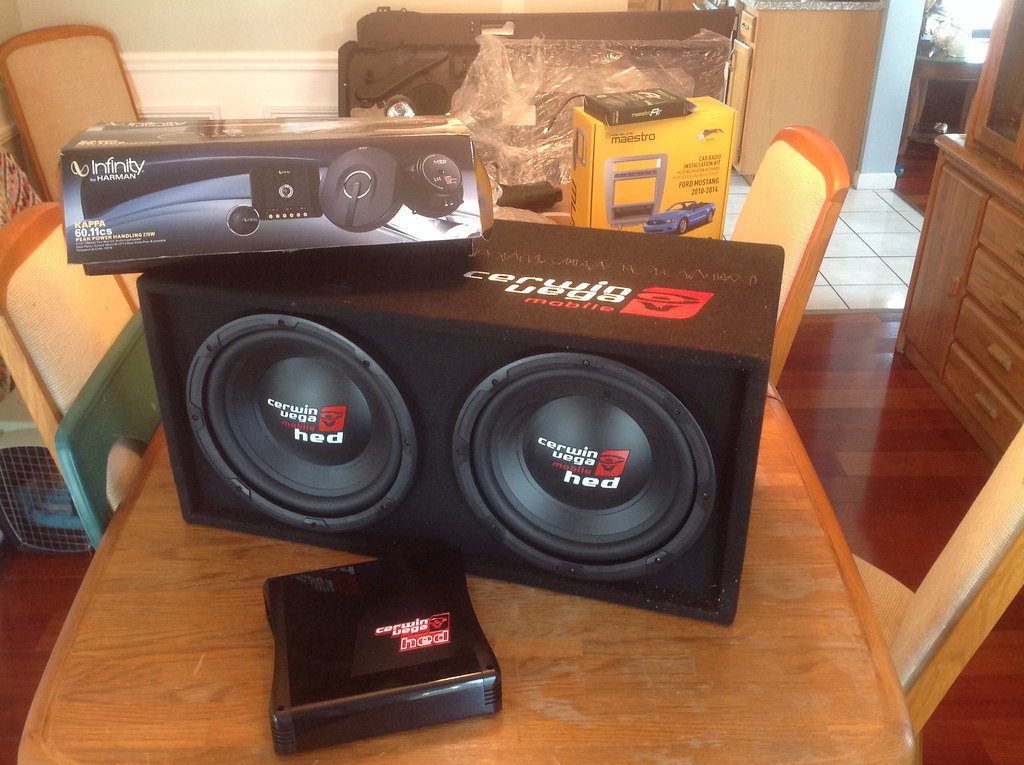
The equipment list (links provided for reference only, all gear purchased through Amazon, Parts-Express, or Ebay);
Kenwood DNX690HD
http://www.kenwoodusa.com/Car_Entert...ation/DNX690HD
iDatalink ADS-KIT-MUS1 & RR Module
http://maestro.idatalink.com/search/..._audio_id=8478
Crunch Audio DRA 1450.4 4x175w
http://www.sonicelectronix.com/pictu...ure_id=1300073
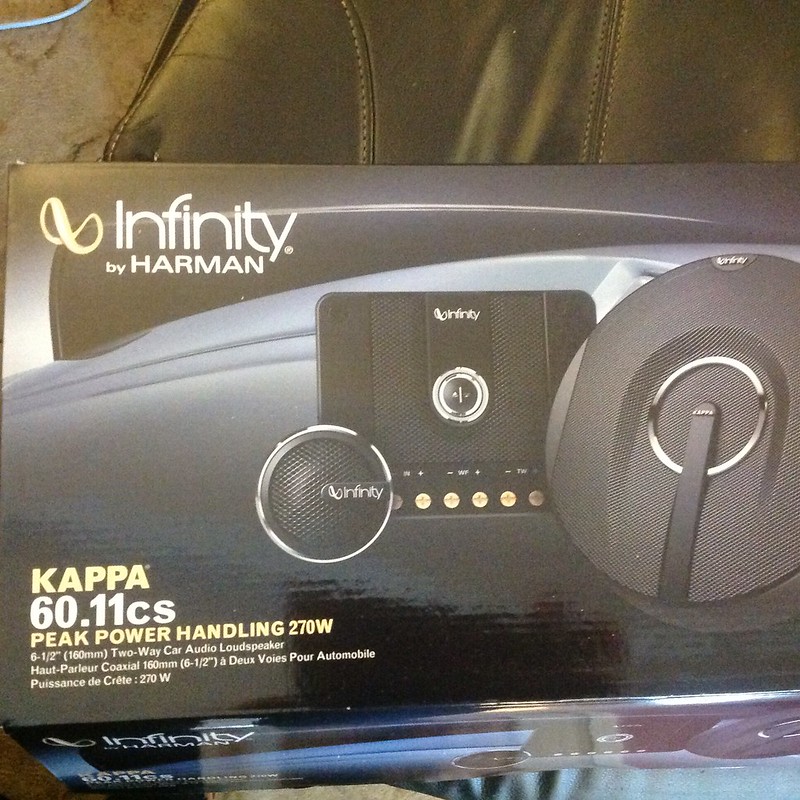
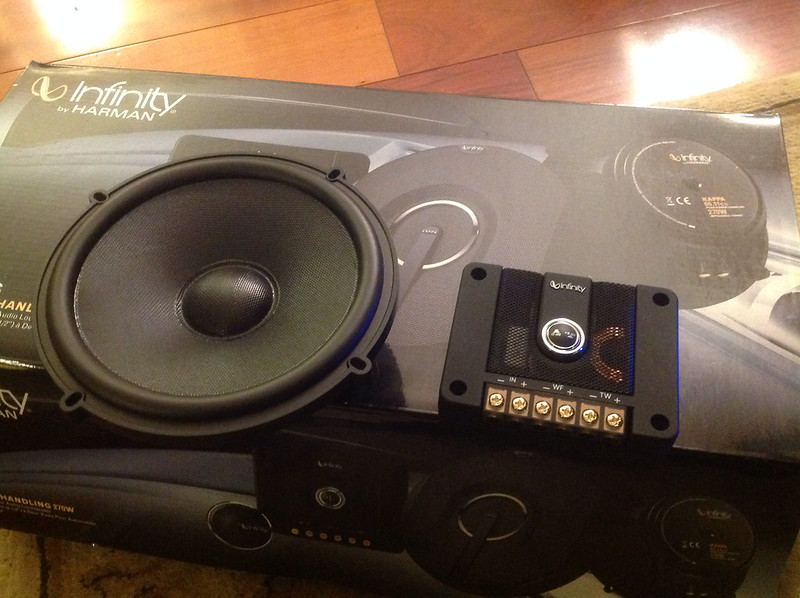
Infinity Kappa 6.5 60.11cs
http://www.sonicelectronix.com/pictu...&picture_id=-1
Dayton Audio RS-255-8
http://www.parts-express.com/dayton-...oofer--295-356
Cerwin Vega HEDBK212
http://www.sonicelectronix.com/item_...-HEDBK212.html
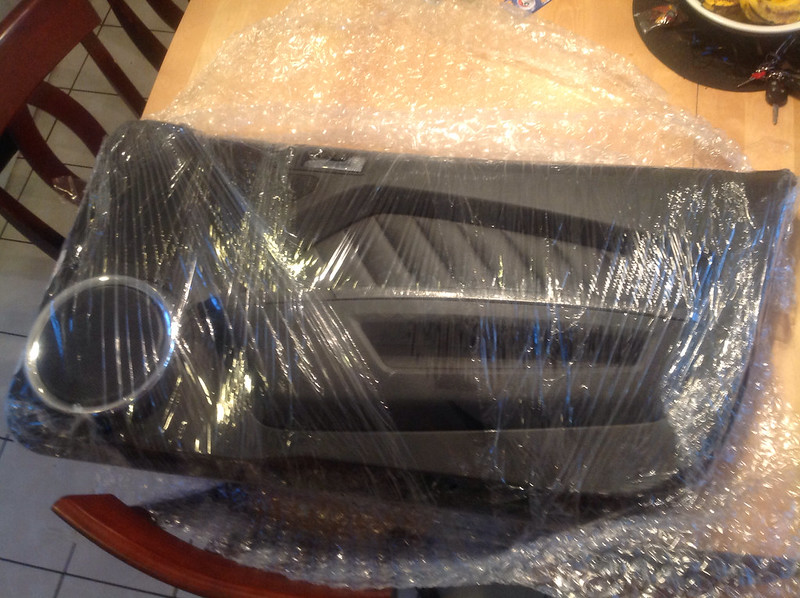
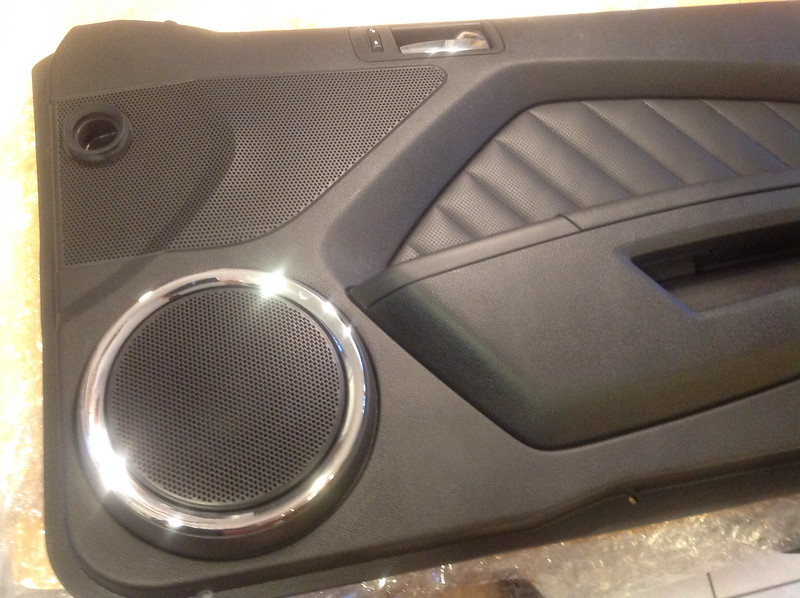
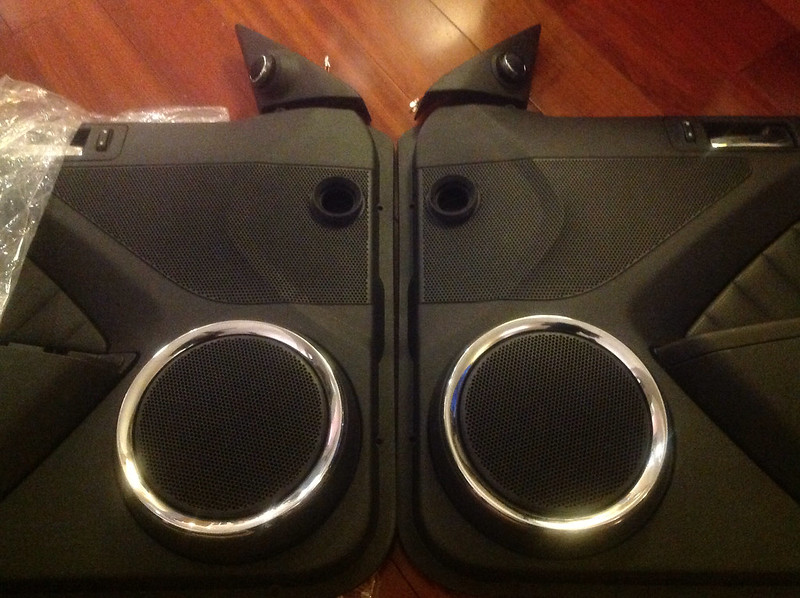
When I bought my Boss, I knew I would be upgrading the audio, so I purchased a pair of GT Premium door panels, complete with all hardware and switches.
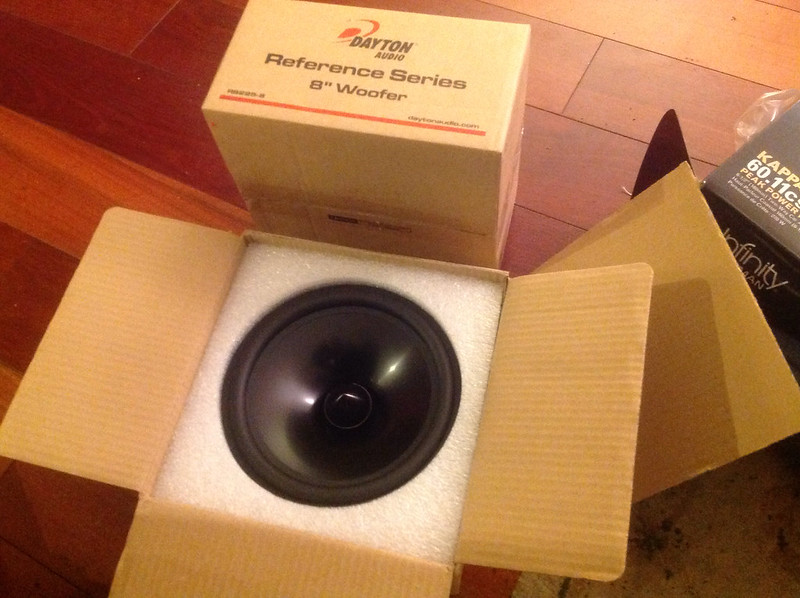
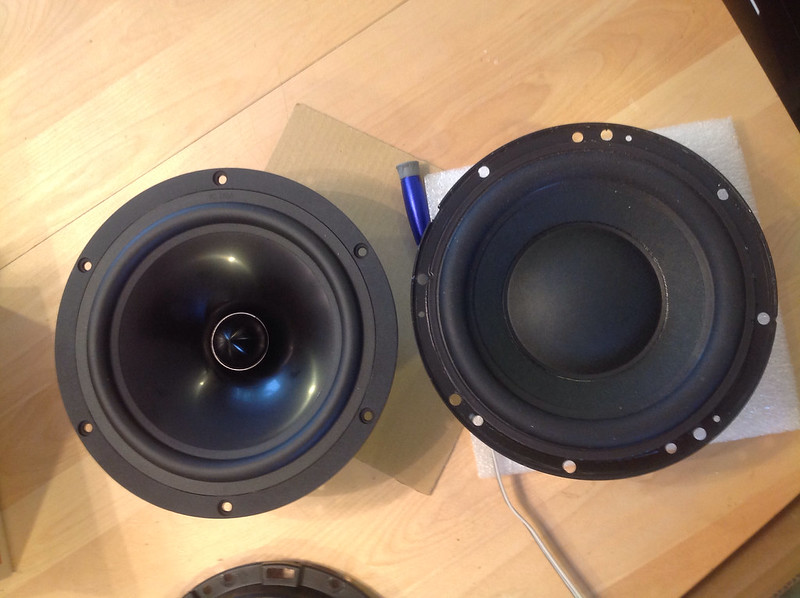
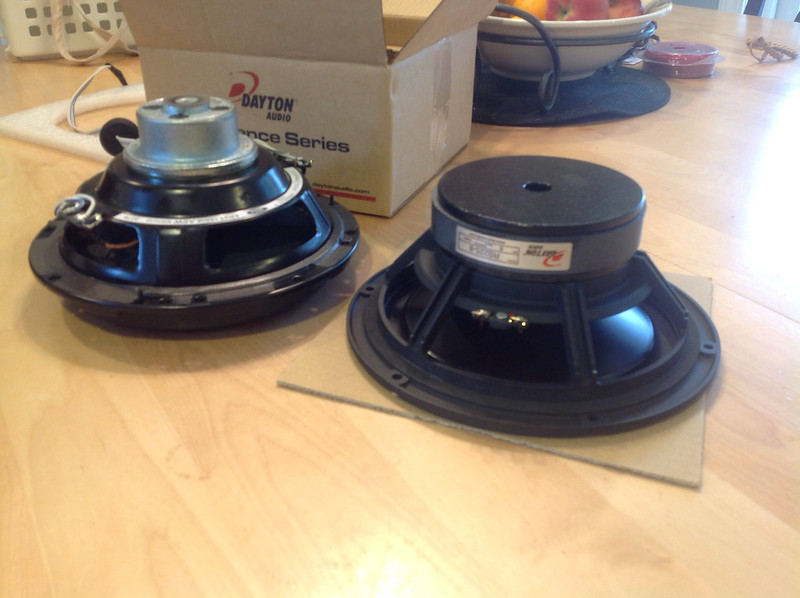
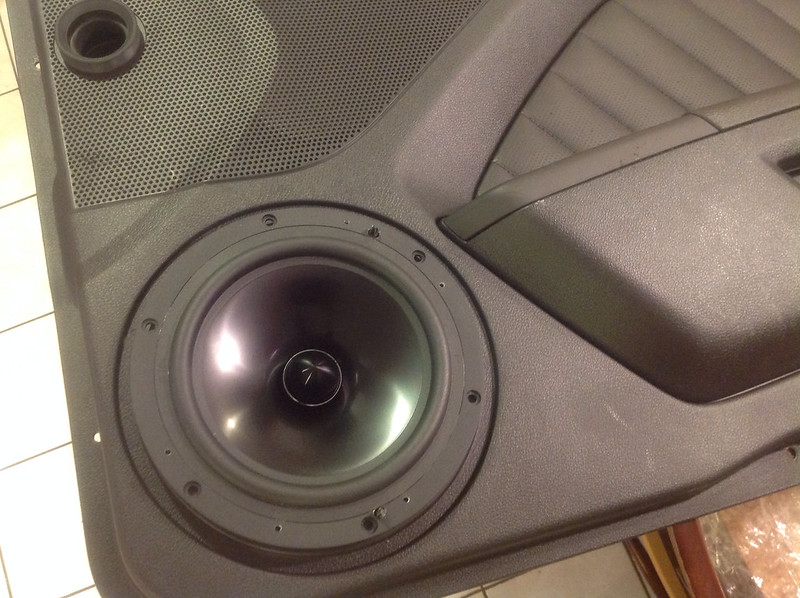
As I was having a hard time finding some JL ZR-800s for a decent price, I picked up a pair of Dayton Audio RS-255s. Great reviews and feedback on these, and I'm very happy with the pair of 10" Dayton Audio powered subwoofers, so I'm liking the brand so far.
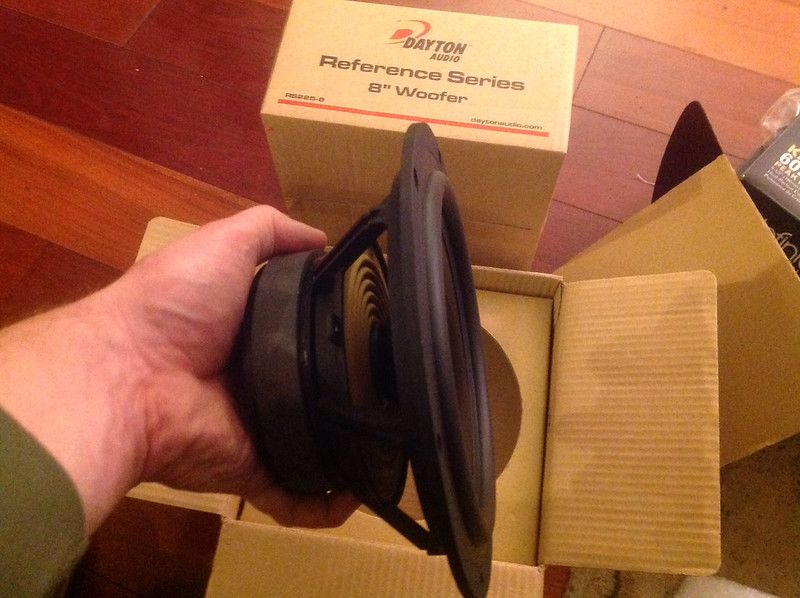
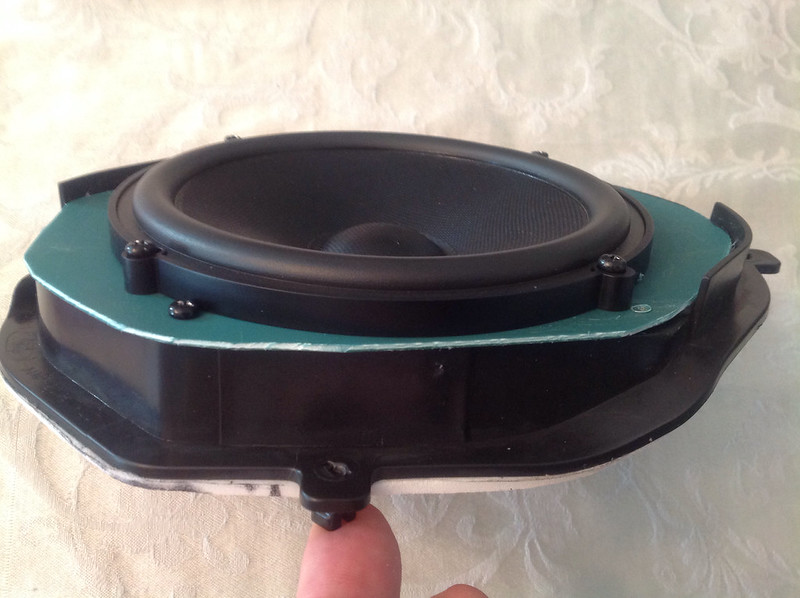
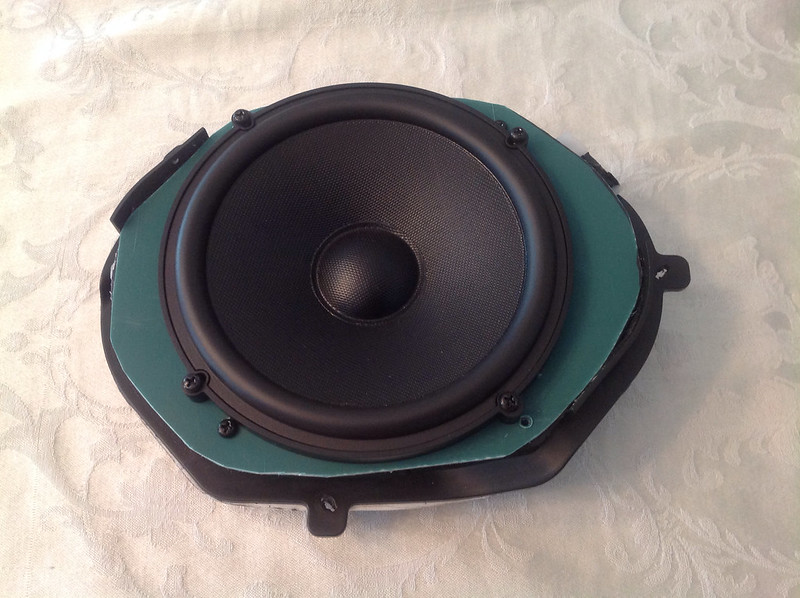
No comparison to the wimpy & cheap stock speaker.
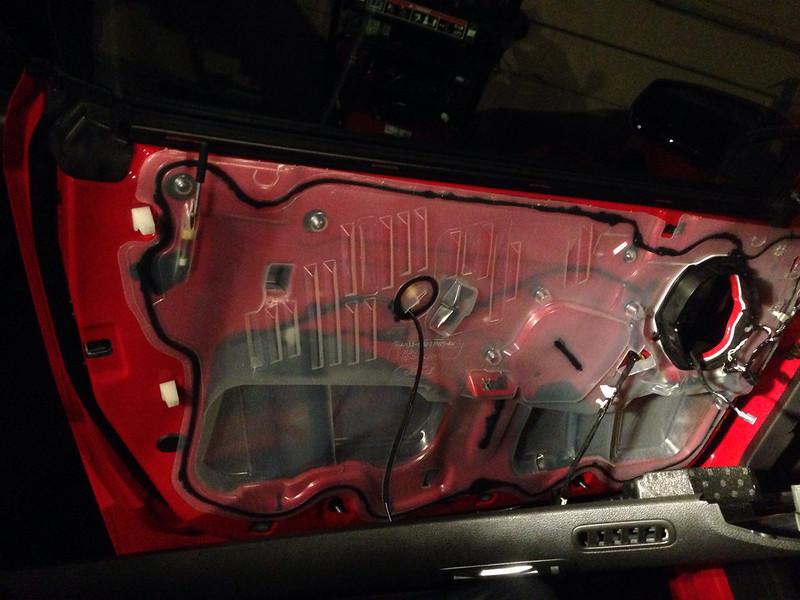
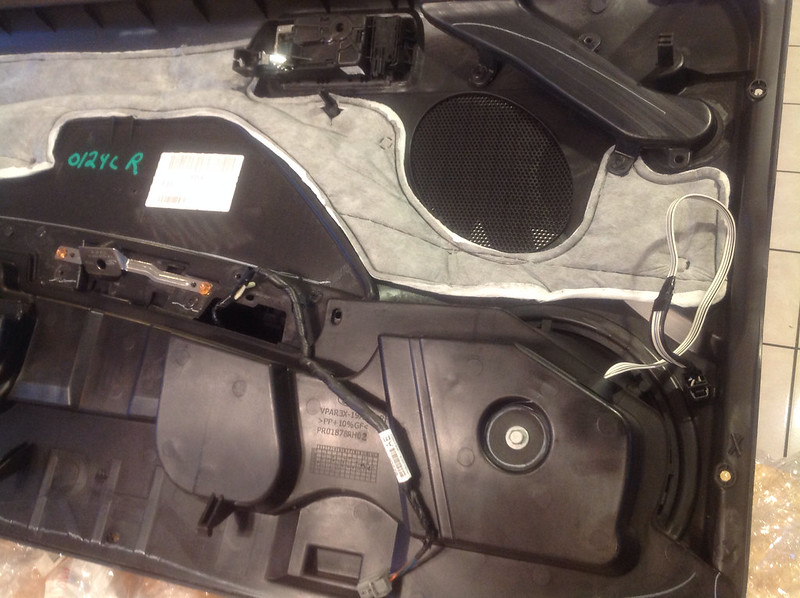
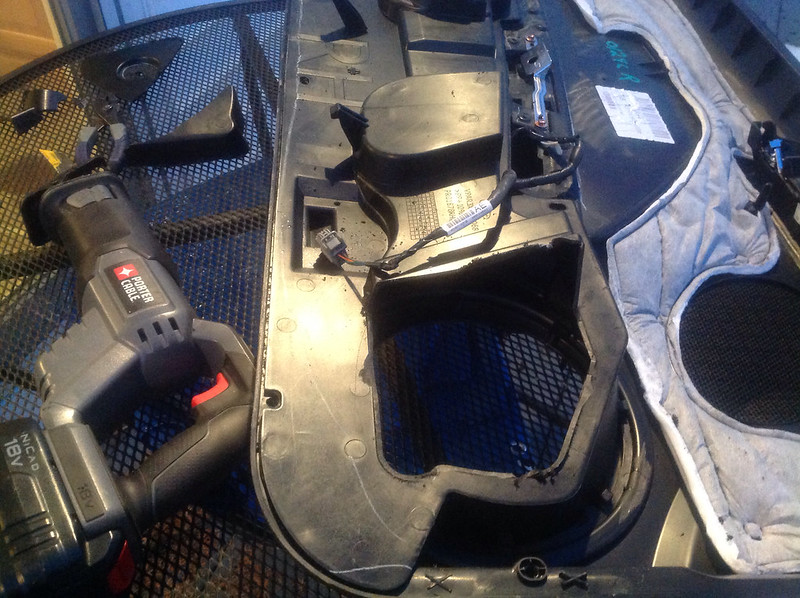
So the first order of business is to remove the stock door panels, remove the JL Audio coxials, and re-purpose the OEM speaker bracket to house the 6.5" Infinity driver. The problem using the bracket is that now there is open air space on either side. The solution was cut out material from a heavy duty storage tote. I had tried a small tote, but the plastic was brittle, but the bigger green tote lid was just right. Once I'm ready for final install, I will seal up the bracket surface & tote material with silicone adhesive.


As this post is already long, the component tweeter & Dayton woofer install will follow.
Once you know you need to replace the head unit, finding a replacement dash panel is required. I really wasn't too impressed with the appearance of the Metra & Scoche kits, and was glad to see the iDatalink Maestro kit hit the market. I was critical of the initial cost when this was released, but I got lucky and snagged the ADS-KIT-MUS1 and RR module for 249$ new/shipped from eBay. I couldn't be happier with the quality, fit and finish. Props to the manufacturer, iDatalink really impresses with their product line, engineering, web site, and attention to detail. The fact that we have 12v Guy here to answer questions and offer help and advice is a much appreciated bonus.
Since I had tried the incremental upgrade approach - replace all speakers - suck - add PAC Audio interface to feed amplifier - more suck, fail - it was time to go whole hog. So the time came to put together a list of components and materials. Since I had already installed an old, scratch that, *ancient* Yamaha 4ch amp to power the JL Audio coaxials, I already have the amp install kit installed. Now it's one inline fuse and wires run through the firewall from the pre-cut hole in the firewall thanks to the sound tube delete kit grommet. My arm is sore from patting myself on the back for running TWO power wires, as I knew I would be adding a second amp. I figured I could address the need for a 2nd fuse later (now if recommended), but at least that part is done.
Another reason my shoulder is sore, is that I came up with an innovative way to temporarily mount the amplifier in the trunk. I got some industrial strength tie wraps, and looped them around the rear deck and seat area. From those I was able to suspend the amp by running another set of tie wraps through the 4 corner mount holes of the amp through the loops created by the 1st set of tie wraps around the body panels. The beauty of this setup is that you can adjust the tension of the wraps as needed. A piece of foam can be wedged between the rear deck to prevent the amp from bouncing upward in event of a hard bump. This setup is also quite handy as you can snip the secondary set of ties to 'uninstall' the amp so you can make adjustments as needed, and then re-tie. I may copy the plywood and angle bracket setup shown in clucas build thread for my amps.
On a side note, using this old amp wasn't such a hot idea. After a few weeks use, one of the channels started to fail. As a side effect, Sync voice prompts ceased to function, even after yanking the battery cable and performing a factory reset. Once the faulty amp was removed, Sync functions returned.
The equipment list (links provided for reference only, all gear purchased through Amazon, Parts-Express, or Ebay);
Kenwood DNX690HD
http://www.kenwoodusa.com/Car_Entert...ation/DNX690HD
iDatalink ADS-KIT-MUS1 & RR Module
http://maestro.idatalink.com/search/..._audio_id=8478
Crunch Audio DRA 1450.4 4x175w
http://www.sonicelectronix.com/pictu...ure_id=1300073
Infinity Kappa 6.5 60.11cs
http://www.sonicelectronix.com/pictu...&picture_id=-1
Dayton Audio RS-255-8
http://www.parts-express.com/dayton-...oofer--295-356
Cerwin Vega HEDBK212
http://www.sonicelectronix.com/item_...-HEDBK212.html
When I bought my Boss, I knew I would be upgrading the audio, so I purchased a pair of GT Premium door panels, complete with all hardware and switches.
As I was having a hard time finding some JL ZR-800s for a decent price, I picked up a pair of Dayton Audio RS-255s. Great reviews and feedback on these, and I'm very happy with the pair of 10" Dayton Audio powered subwoofers, so I'm liking the brand so far.
No comparison to the wimpy & cheap stock speaker.
So the first order of business is to remove the stock door panels, remove the JL Audio coxials, and re-purpose the OEM speaker bracket to house the 6.5" Infinity driver. The problem using the bracket is that now there is open air space on either side. The solution was cut out material from a heavy duty storage tote. I had tried a small tote, but the plastic was brittle, but the bigger green tote lid was just right. Once I'm ready for final install, I will seal up the bracket surface & tote material with silicone adhesive.
As this post is already long, the component tweeter & Dayton woofer install will follow.
Last edited by ace72ace; Apr 13, 2014 at 03:17 PM. Reason: Replace photo links
Thread Starter
Cobra Member
Joined: February 13, 2011
Posts: 1,399
Likes: 0
From: Southern NH
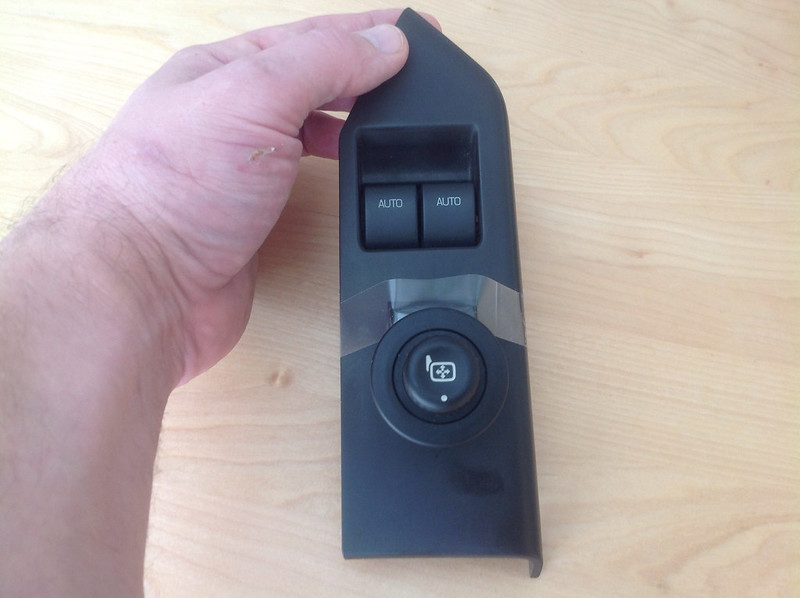
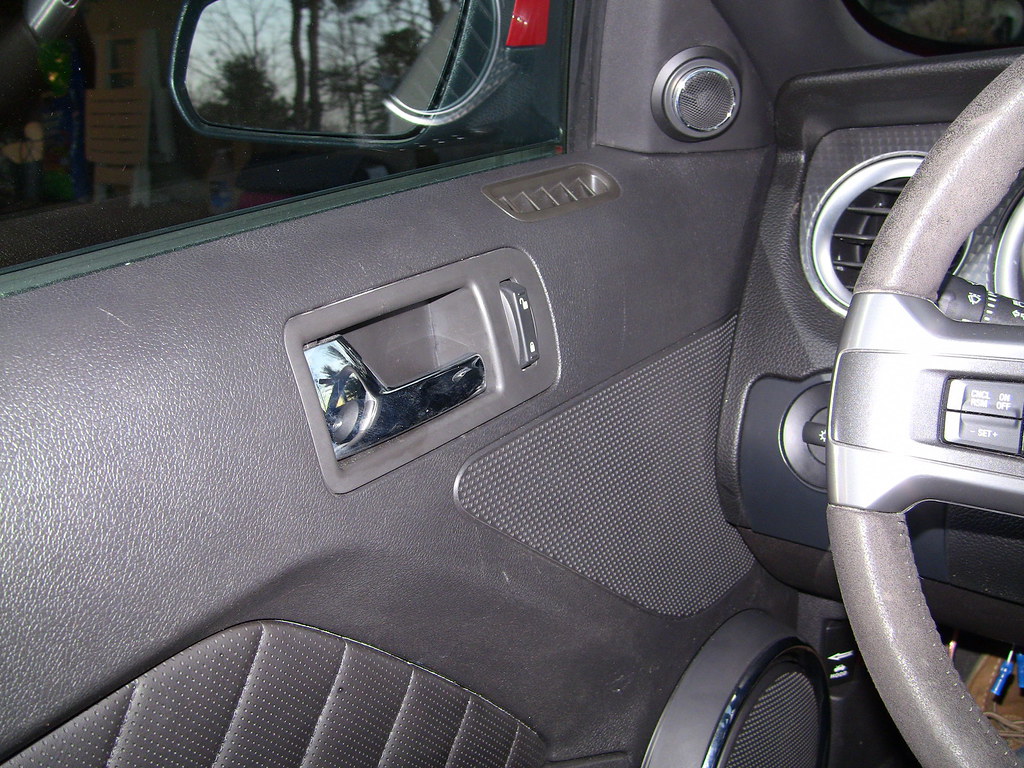
Component tweeter install & mirror switch relocation
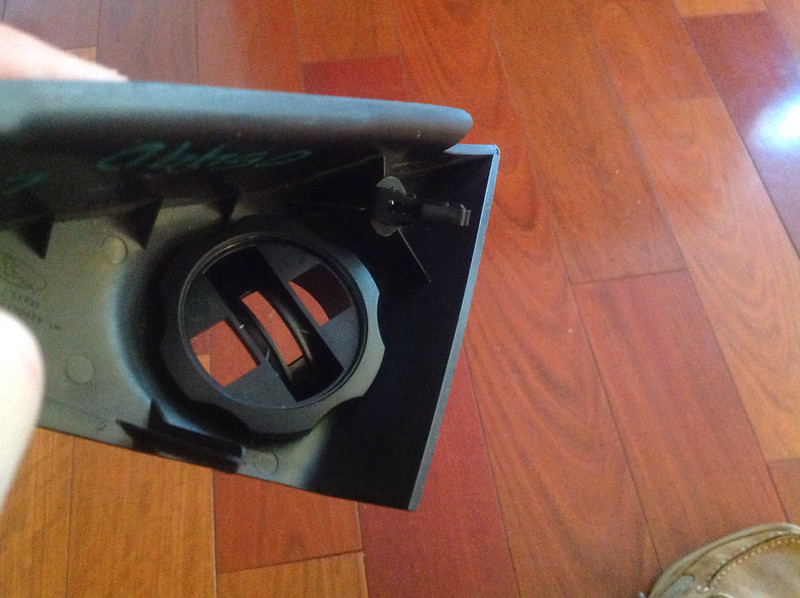
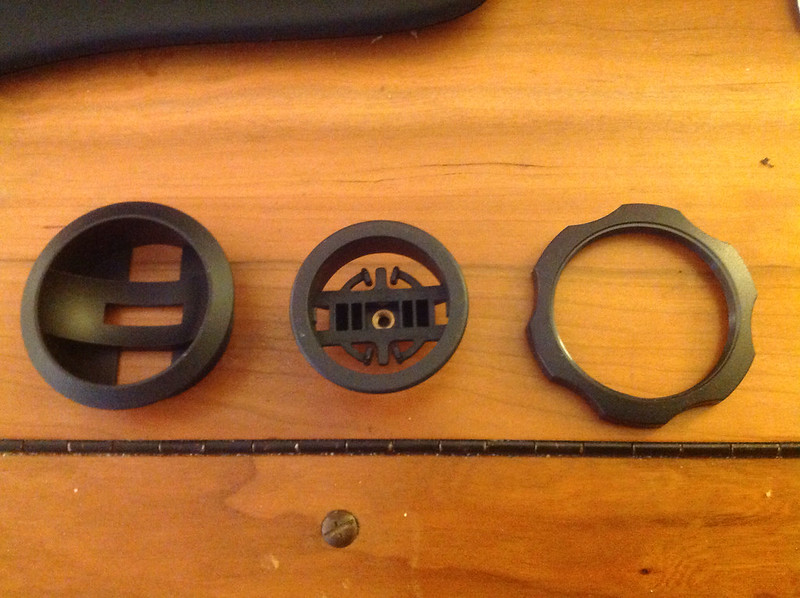
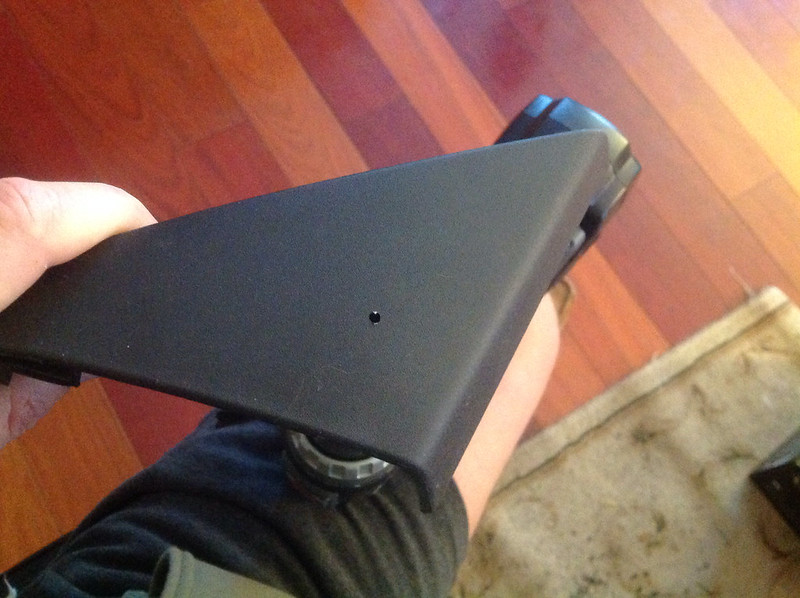
The sincerest form of flattery is imitation, and I saw this this installation tip in ColSaulTigh's build thread. Locating component tweeters up high is going to provide good separation, clarity, and tune-ability. As I had committed to not chopping up any original parts on my Boss Mustang, I purchased another set of the door panel trim pieces from eBay. I had called a Ford Parts dept, and was happy to find the used parts, as new cost is ~60ea.
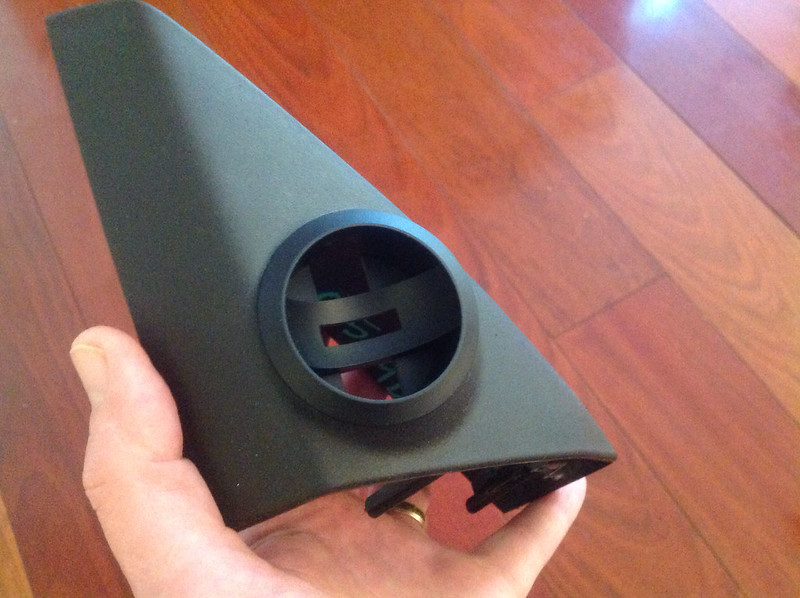
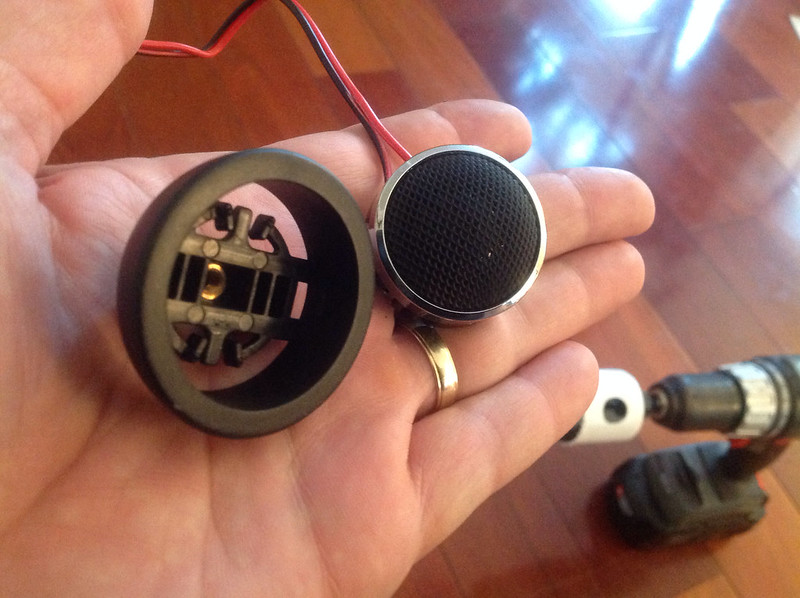
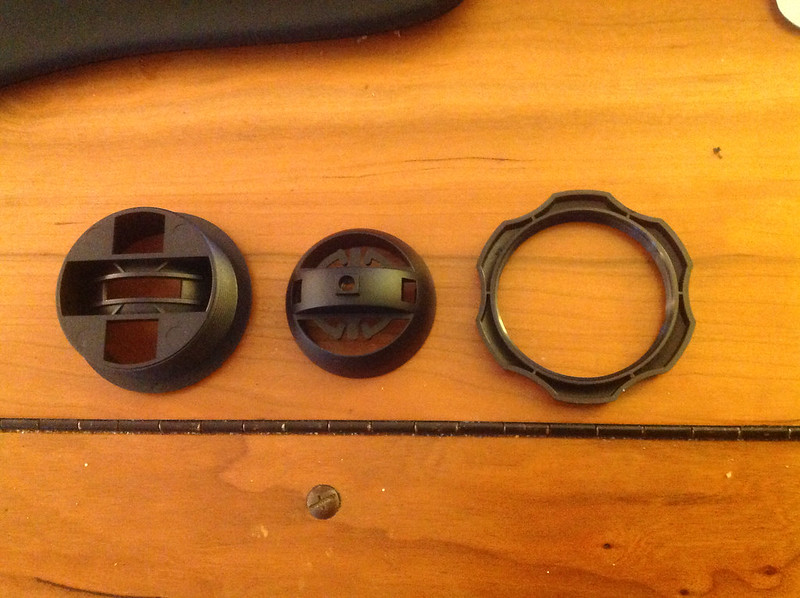
I can't say enough good things about the quality of the entire Infinity component speaker package. Not only is the mounting hardware plastic a perfect match for the Mustang interior, but also has a nifty bucket design that allows for a wide range of adjustment.
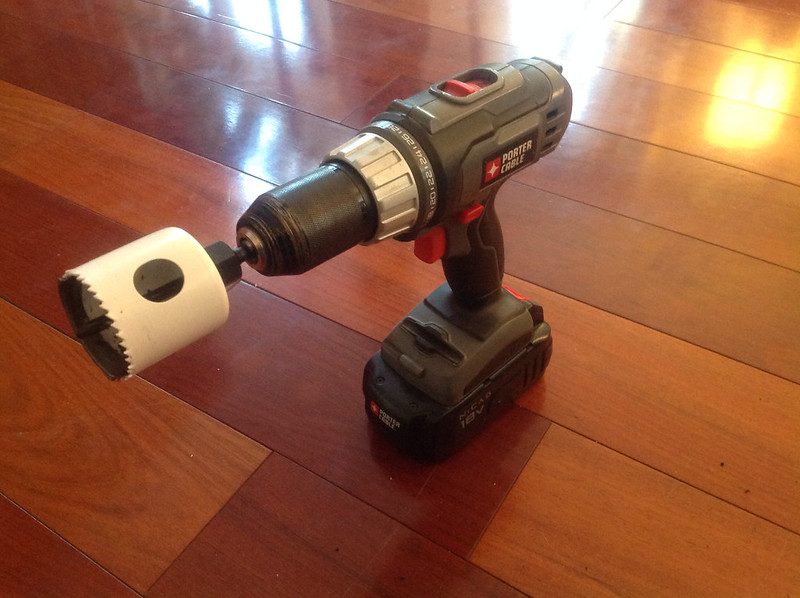
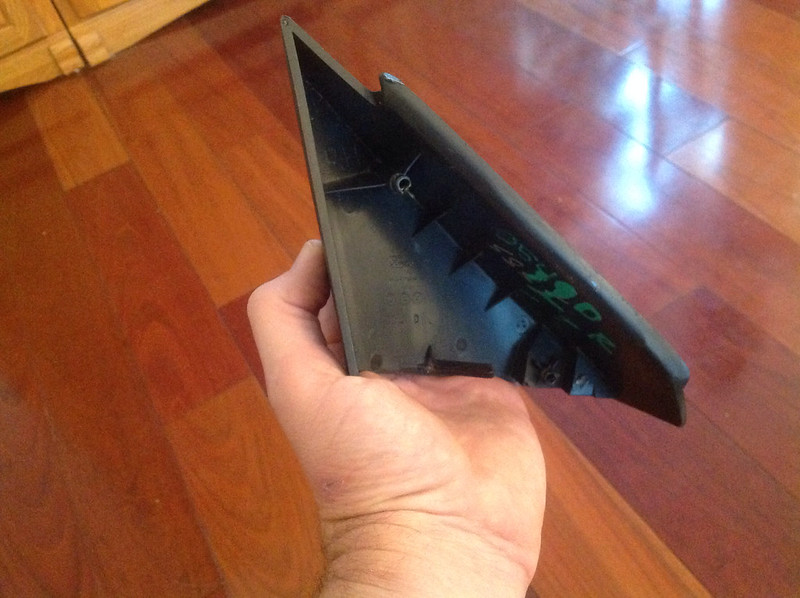
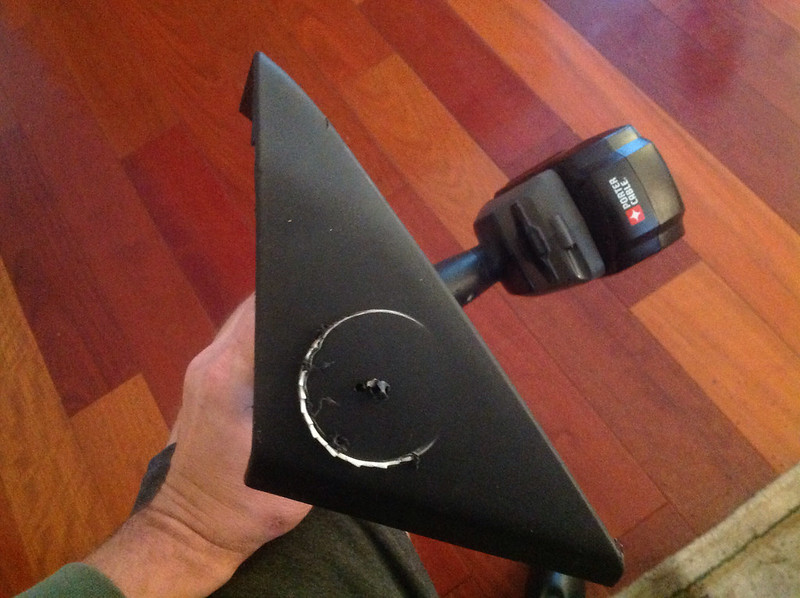
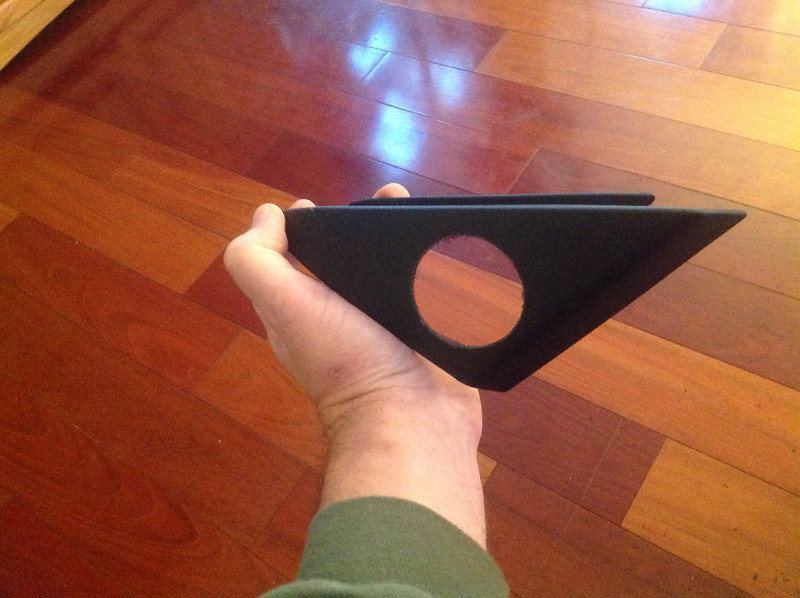
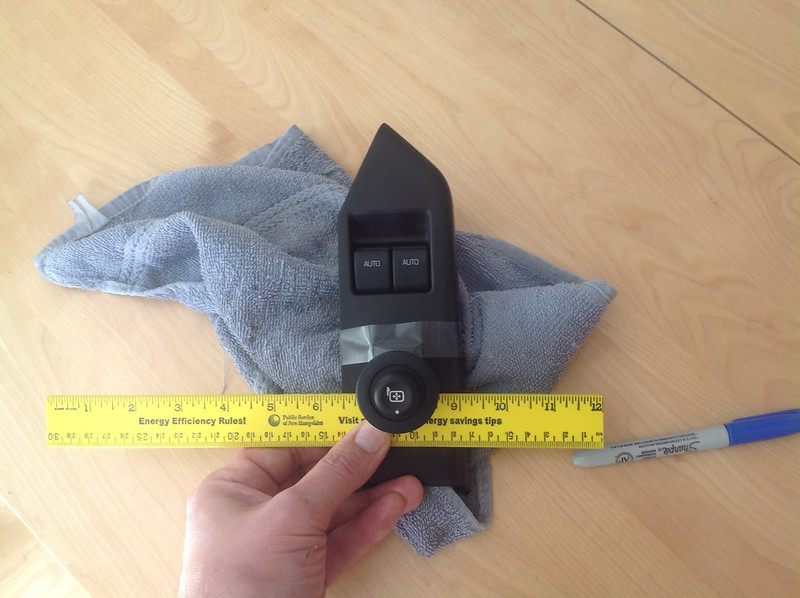
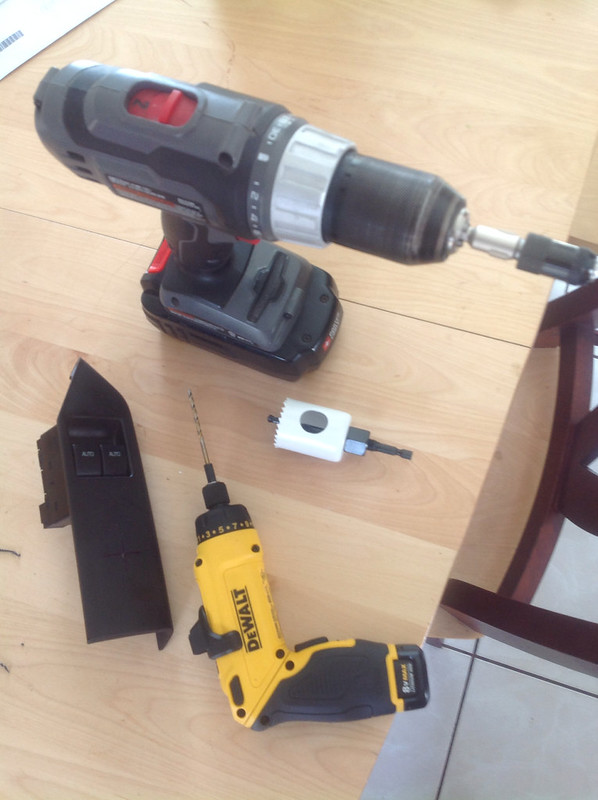
After measuring the diameter required for the mounting hardware, it was off to Lowe's to buy a hole saw, and then measure twice, drill, dress edges, and install after removing mirror switch.
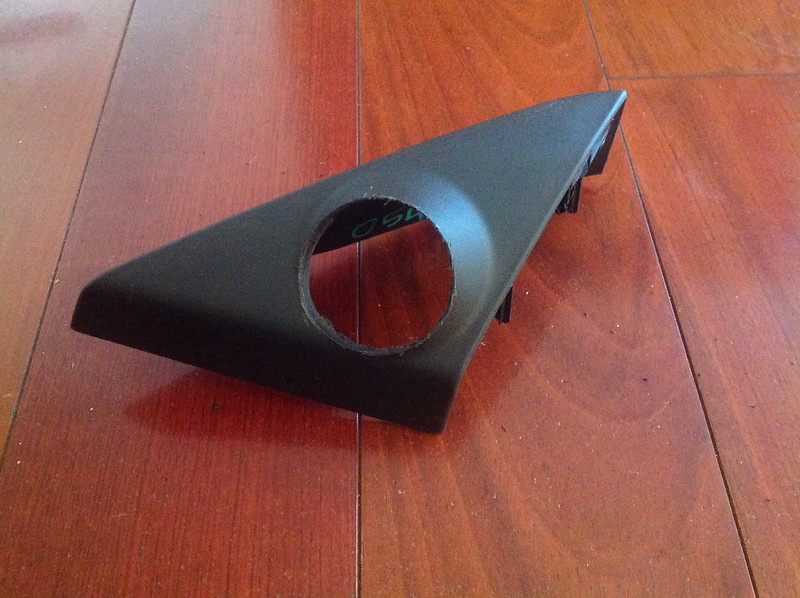
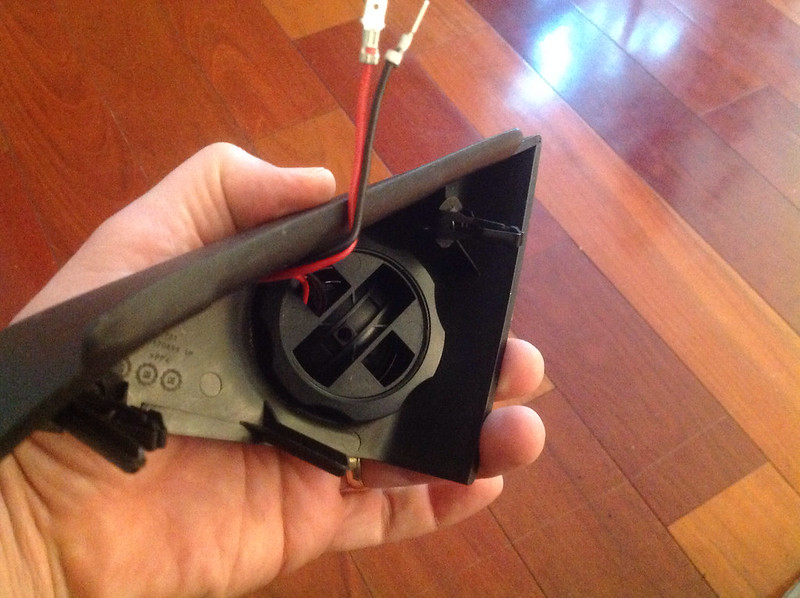
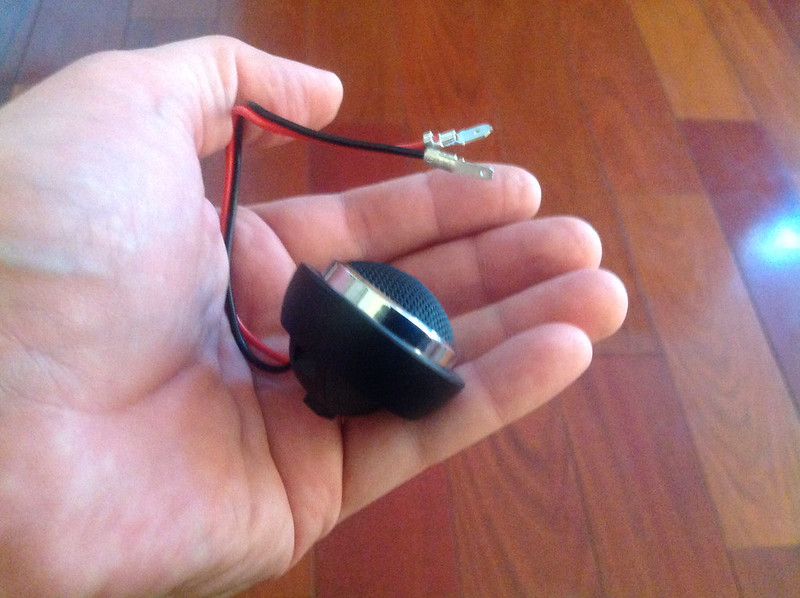
Now, onto the passenger side. Determine best mounting spot from back side of trim piece, drill pilot hole, use hole saw, dress edges, install mounting hardware.
I'm also glad these crossovers aren't as massive as the units shown in ColSaulTigh's build. Will be using heavy duty velcro to mount mine also.
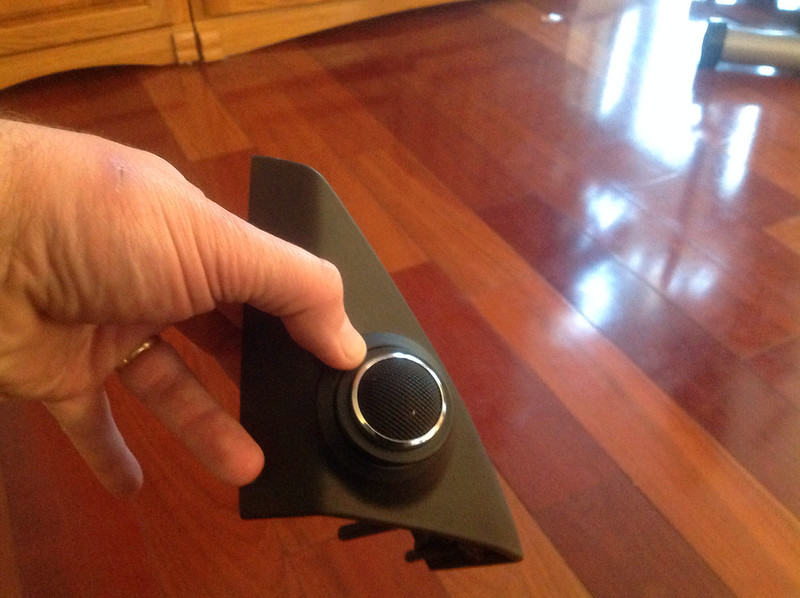
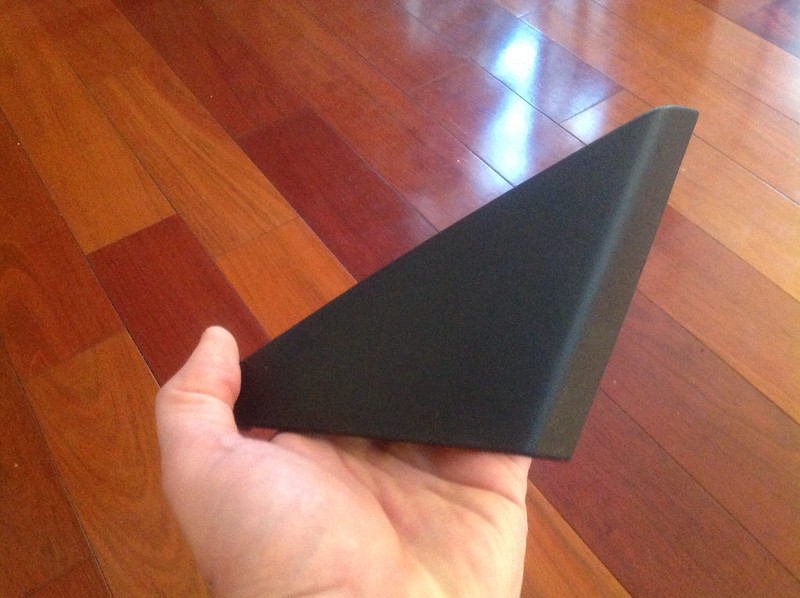
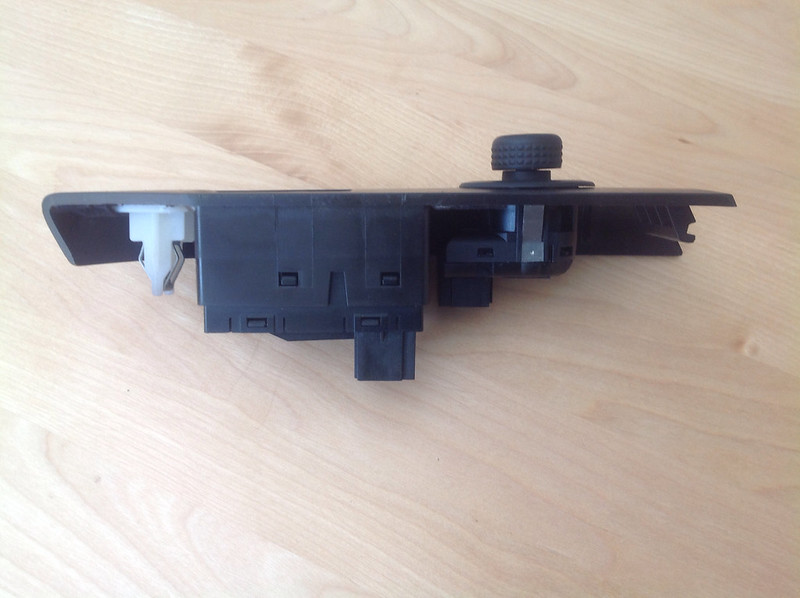
Now what to do with that power mirror switched that gave up it's home for the driver's side tweeter. What to do? Why buy another hole saw! Measure, align, drill, dress edges, test fit. Noticed after the fact the switch is upside down, the dot belongs on top.
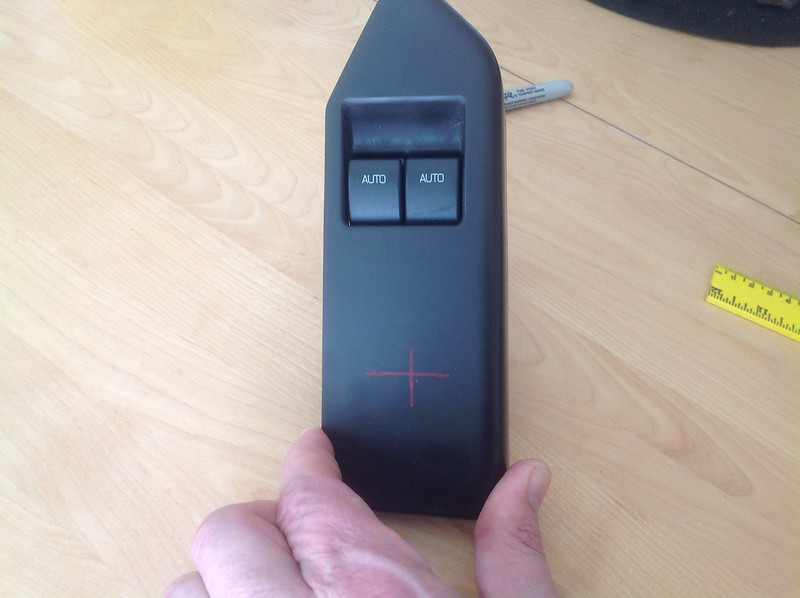
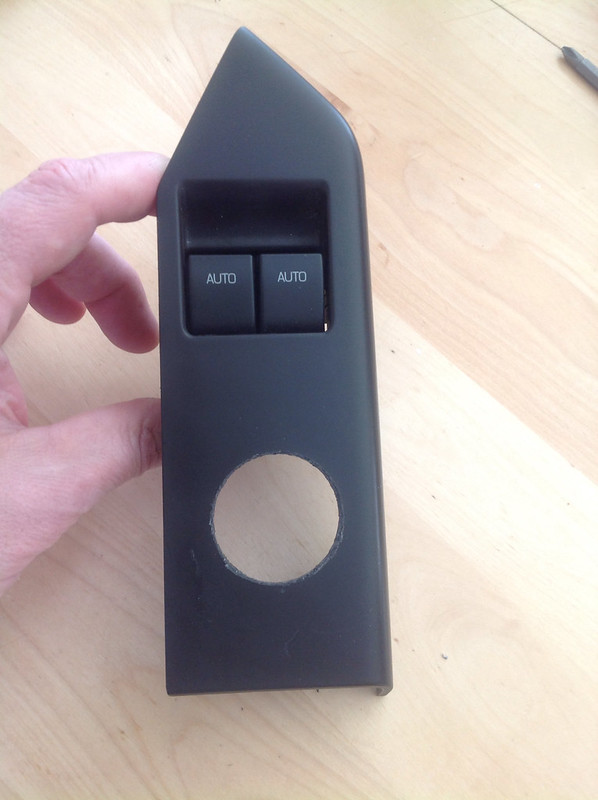
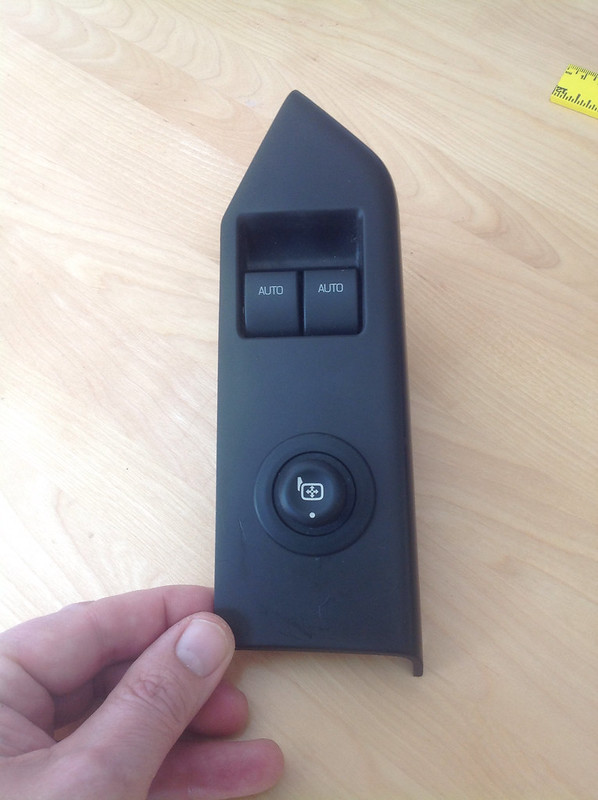
I will run a bead of silicone adhesive under the lip when I'm ready to button up the install.
I can't say enough good things about the quality of the entire Infinity component speaker package. Not only is the mounting hardware plastic a perfect match for the Mustang interior, but also has a nifty bucket design that allows for a wide range of adjustment.
After measuring the diameter required for the mounting hardware, it was off to Lowe's to buy a hole saw, and then measure twice, drill, dress edges, and install after removing mirror switch.
Now, onto the passenger side. Determine best mounting spot from back side of trim piece, drill pilot hole, use hole saw, dress edges, install mounting hardware.
I'm also glad these crossovers aren't as massive as the units shown in ColSaulTigh's build. Will be using heavy duty velcro to mount mine also.
Now what to do with that power mirror switched that gave up it's home for the driver's side tweeter. What to do? Why buy another hole saw! Measure, align, drill, dress edges, test fit. Noticed after the fact the switch is upside down, the dot belongs on top.
I will run a bead of silicone adhesive under the lip when I'm ready to button up the install.
Last edited by ace72ace; Apr 13, 2014 at 01:45 PM.
Thread Starter
Cobra Member
Joined: February 13, 2011
Posts: 1,399
Likes: 0
From: Southern NH
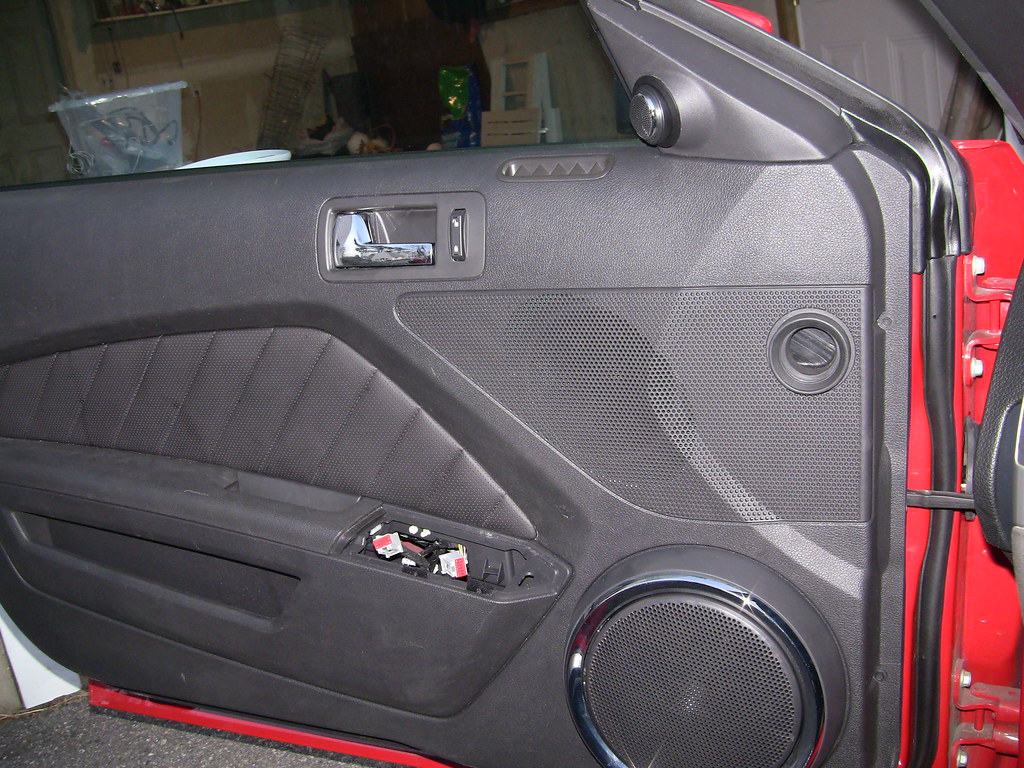
8" Woofer upgrade in GT Premium door panels
As the 2012/2013 Boss 302 door panels are identical to base V6/V8 Mustangs, they lack the 8" speakers underneath the 6x8 speakers. For good quality sound, I decided to get a pair of used GT Premium panels, as there was no way I was going hack up the original Boss panels. Sure it added $450 to the cost of the build, but I think it was worth it.
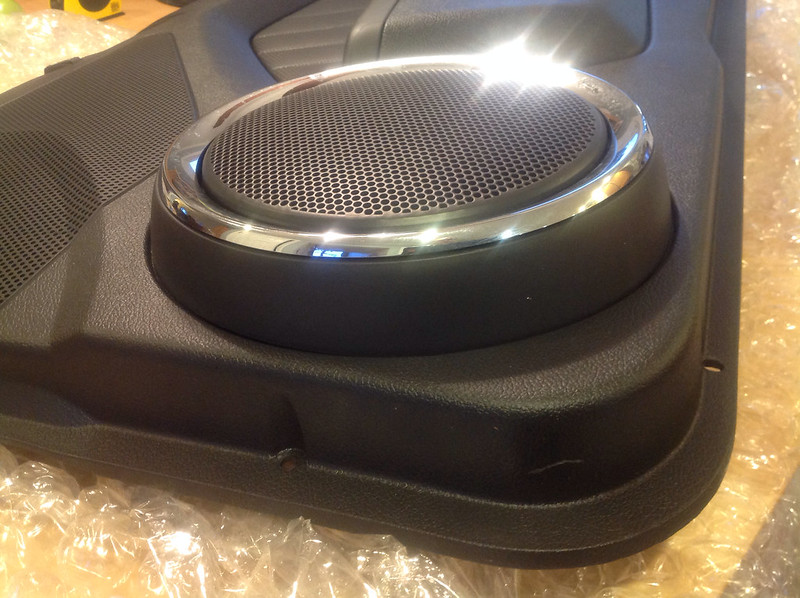
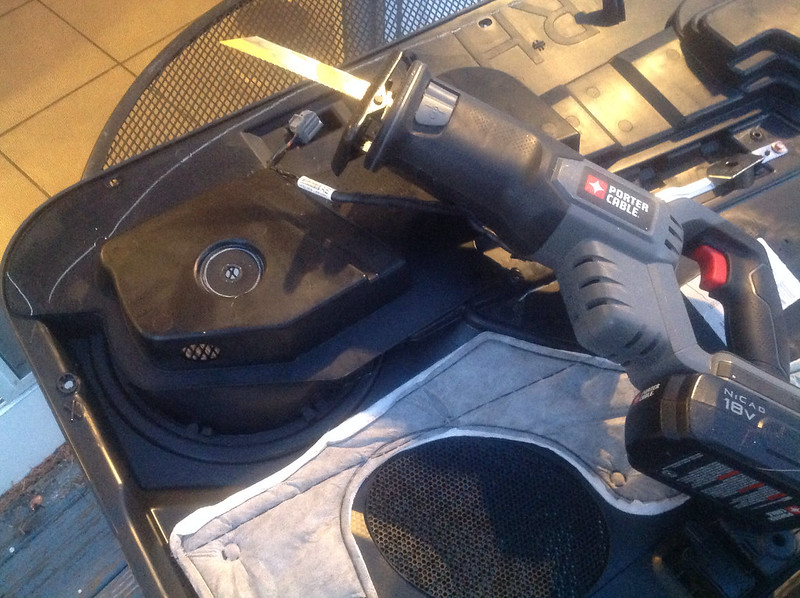
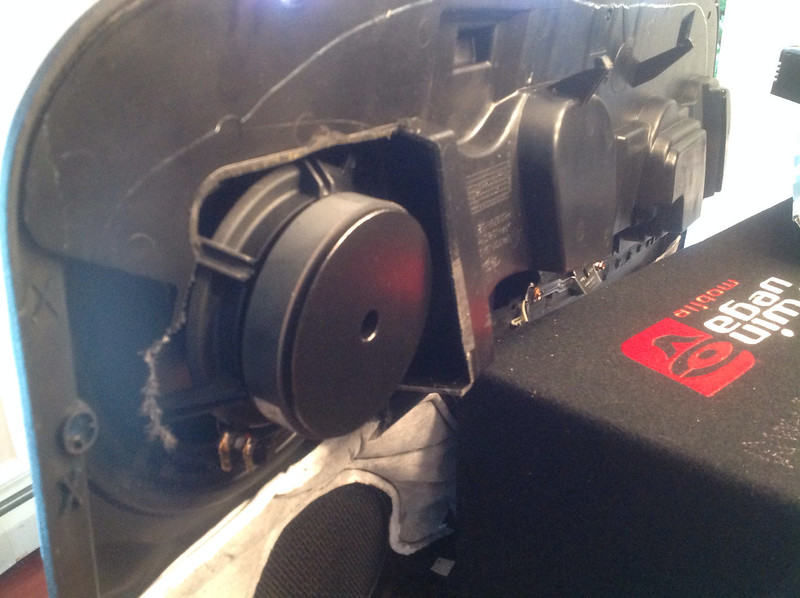
To get the Dayton 8 inchers to fit, there were 2 options, heat gun, or cut the rear enclosure to allow clearance for the MUCH BIGGER magnets. I started out trying to use the heat gun, but quickly determined that a) I didn't like the stench of the fumes, and b) by the time I melted it enough to allow clearance, I would have to repeat the process of test fitting over and over, so cutting the plastic was my choice. Since I'm also going to line the door panel skins and door body with GTMAT, I'm really not worried about a tight enclosure behind the new speaker. I am sure the stock enclosure was designed to wring out the most efficiency/loudness out of the wimpy stock speakers.
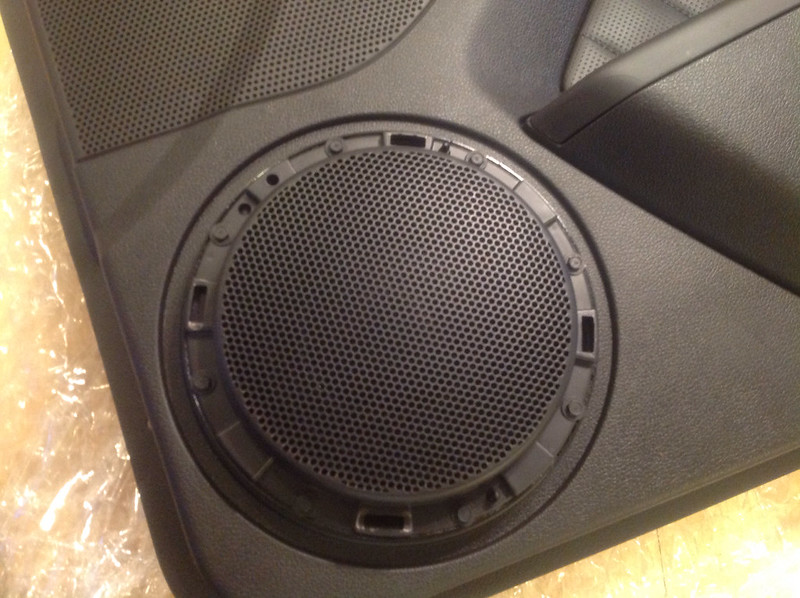
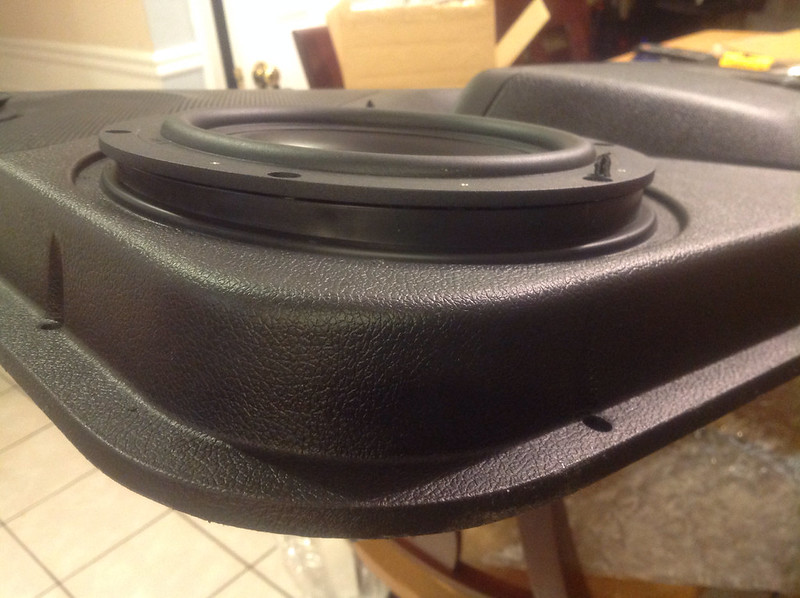
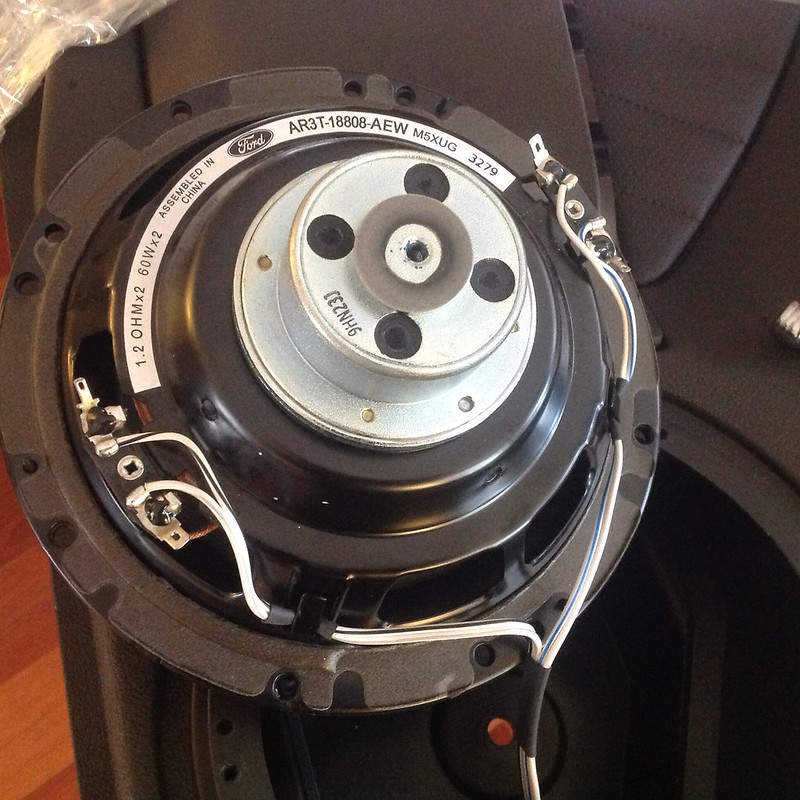
Notice that the stock speaker grille now sits a visibly higher over the replacement speaker that has the thicker metal. The grille cover is also not perfectly symmetrical, and the thinner edge is aligned up top for a flush mount with the factory speakers. As this is down by your ankles, you'll never really notice it unless you are looking for it. However if you rotate the cover so that the fatter side that had been on the bottom is now on the top, it still presents the clean, factory appearance that I'm looking for. You will only see the much bigger gap that exists on the bottom if the panel is off. Sitting in either seat inside the car, you will never see it. =)
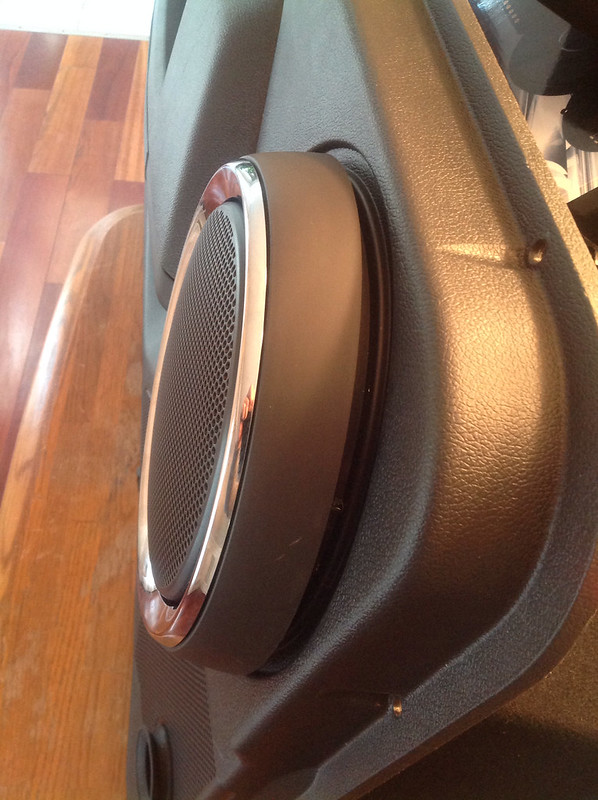

So the hard part is done, next up is to complete the GTMAT installation on the doors, extend the wiring for the power mirror switch, run the wires in for the woofers, and test fit everything.
To get the Dayton 8 inchers to fit, there were 2 options, heat gun, or cut the rear enclosure to allow clearance for the MUCH BIGGER magnets. I started out trying to use the heat gun, but quickly determined that a) I didn't like the stench of the fumes, and b) by the time I melted it enough to allow clearance, I would have to repeat the process of test fitting over and over, so cutting the plastic was my choice. Since I'm also going to line the door panel skins and door body with GTMAT, I'm really not worried about a tight enclosure behind the new speaker. I am sure the stock enclosure was designed to wring out the most efficiency/loudness out of the wimpy stock speakers.
Notice that the stock speaker grille now sits a visibly higher over the replacement speaker that has the thicker metal. The grille cover is also not perfectly symmetrical, and the thinner edge is aligned up top for a flush mount with the factory speakers. As this is down by your ankles, you'll never really notice it unless you are looking for it. However if you rotate the cover so that the fatter side that had been on the bottom is now on the top, it still presents the clean, factory appearance that I'm looking for. You will only see the much bigger gap that exists on the bottom if the panel is off. Sitting in either seat inside the car, you will never see it. =)
So the hard part is done, next up is to complete the GTMAT installation on the doors, extend the wiring for the power mirror switch, run the wires in for the woofers, and test fit everything.
Last edited by ace72ace; Apr 13, 2014 at 02:54 PM.

Bullitt Member
Joined: March 11, 2013
Posts: 326
Likes: 22
From: Houston, Tx.
wow, i thought keeping the backside of the door panel plastic helped the woofer - basically acting like an enclosure for it.
i think the base model radio is amazing once you change out the speakers.
i bought some gt500 door panels and wired them up to an aftermarket amp and they are tied into the rear channels and tuned real nicely thru the amp so that the bass is not distorted even at its highest volume, just great clarity, i used a small amp small enough that it fits up in the dash above the driver side kick panel for a stealthy factory-like install. then since my gt500 door panels had ambient lighting, i went ahead and added the rest of the ambient lighting to the car. came out great.
then my audio content comes from my ipad mini using the same mount in the "temporary tablet mod" post.
Last edited by DeeJayTJ; Apr 7, 2014 at 08:42 AM.
Mach 1 Member
Joined: April 3, 2012
Posts: 971
Likes: 144
From: Indy
Thanks for taking the time to put this together. Looks like an awesome install, and those Infiniti's components are beauts.
Are you going to put anything behind your woofer to make sure you dont get water in there?
Looking forward to seeing the rest of the install, and getting your over all impressions of your system.
Are you going to put anything behind your woofer to make sure you dont get water in there?
Looking forward to seeing the rest of the install, and getting your over all impressions of your system.
Thread Starter
Cobra Member
Joined: February 13, 2011
Posts: 1,399
Likes: 0
From: Southern NH
Yes, the door panel has an enclosure for the stock woofer. But since I am lining the whole door with GTMAT, I'm turning the whole door into an enclosure. Sounds like you have your panels setup just how you like them.
I really appreciate how sturdy and tough these panels are. Gone are the days of vinyl covered wafer board. The electrical connectors for all the switches are easy to work with as well.
I really appreciate how sturdy and tough these panels are. Gone are the days of vinyl covered wafer board. The electrical connectors for all the switches are easy to work with as well.
GT Member
Joined: June 8, 2013
Posts: 100
Likes: 3
I copied this install and put my tweets in the mirror trim panels as well. Relocating the mirror control is easy. Just extend 2 wires. Looks stock. I changed the door subs to 6.5 inch woofers that are 2 ohm from pioneer. I left the doors sound tube alone. These things really sound awesome. I added an amp and sub. Done.
Thread Starter
Cobra Member
Joined: February 13, 2011
Posts: 1,399
Likes: 0
From: Southern NH
I'm in software support 12v Guy, so I can see the extra efforts you have put into trying to support your customers. I esp liked the hand drawn pdf you posted a while back, that was part of what convinced me that your product was worth the money (in addition to the + feedback here).
You don't bargain hunt for the best plastic surgeon for your nose job, or brain surgeon if you need a life saving operation. Yeah I'm stretching the metaphorical boundary here comparing health issues to a material thing... But for some of us, there's something really special about finally being able to put together that car audio system you always wanted. I get 'made fun of' by the 'BECAUSE RACECAR' crowd for upgrading the audio system in a Boss Mustang. Well until my younger 2 kids are out of college while the older 2 are almost out/finishing, I simply can't afford the expense to track my Boss until many years from now. So the compromise as a good weather driver is to have GOOD TUNES.
We can't relive the days of the single Pioneer 'super tuner' with the big circle tuner dial, and 2 6x9s in the rear deck of the Chevy Nova back in High School, but it's sure satisfying to try!
When I opened the dash panel kit, and felt the quality of the plastic in my own hands, I realized it's worth the money. All you have to do is press one of the outer preset buttons for Climate and Rear Defrost to know it's a quality piece.
My monoprice 15' rca cables arrive tomorrow, and then the remaining tasks are;
Finish the dynamat sound deadener in the pass side door, remove the rear deck speakers, mount the second amp, run the new wiring from the head unit to the back, add 2nd set of speaker wires to front doors, replace dash trim panel, and install head unit, test & tune levels & frequencies.
Figure about another 10hrs to complete. More pix on the way...
Thread Starter
Cobra Member
Joined: February 13, 2011
Posts: 1,399
Likes: 0
From: Southern NH
So much for free hosting bandwidth quota... I'll resize the images, cut down a few duplicate shots and edit the links to another host in a day or 2 when I'm ready to post my next update later today or tom. [Edit - images are back up with smaller versions]
Last edited by ace72ace; Apr 13, 2014 at 03:18 PM.
Thread Starter
Cobra Member
Joined: February 13, 2011
Posts: 1,399
Likes: 0
From: Southern NH
Progress update
Over the past weekend I was able to sort out all the wiring harness connections from the Kenwood head unit to Maestro RR module. Had to look at the wiring diagram to sort out the various connections from one harness to the other, and solder together the required wires. Assuming I made the proper connections with the RR module (it includes 2 sets of 3 wires, which I assume one is for the T harness, and one for the ADS-KIT-MUS1), all that was left to get head unit ready to go in the dash was to;
Unscrew the shift **** (if you have an automatic, find the procedure for 6AT)
Pull out the center console assembly from the main console to allow access to the lower bolts on the OEM dash trim panel - disconnect left side switch connector under console - traction control/trunk release
Unscrew the trim panel bolts
Pull panel away from dash
Disconnect OEM 8 pin harness wiring connection from the lower right hand side of the panel
Remove the 4 bolts that secure the OEM head unit to the dash
Pull head unit forward so you can reach behind the unit and first disconnect the antenna cable from the bottom middle/right rear side of the head unit. Doing so allows you easier access to remove the remaining 2 wiring harness connections from the bottom/middle section of the unit, and the bottom/left.
Head unit ready for removal - Make sure you hit eject before uninstalling to remove any CD you may have inside. FYI - once you disconnect the OEM dash panel, if you start your car with it disconnected, it will blast the fan to max speed on defrost mode by default. It's easy enough to reconnect the panel by plugging in the 8 pin jack again while unbolted from the dash to avoid the max fan blast defrost effect.
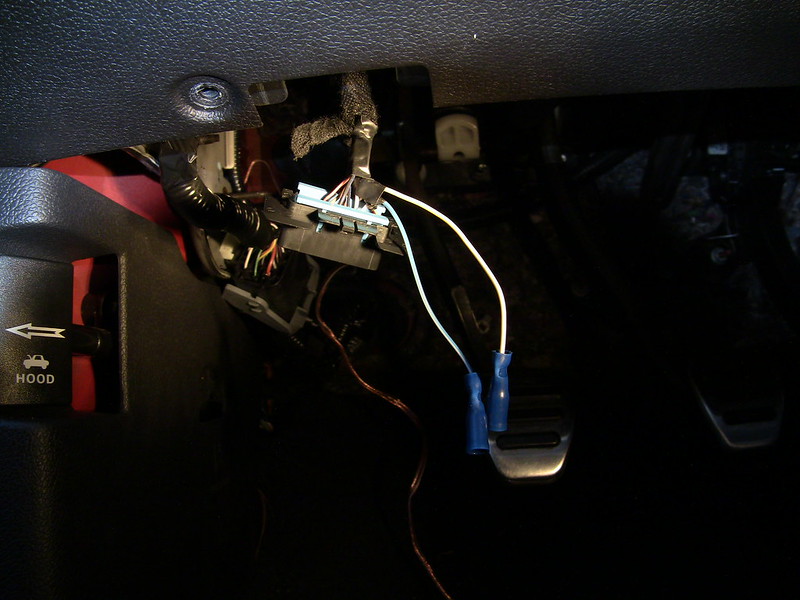
This left the ODB2 & Sync wire splices. The ODB2 connector is under the dash by your left knee, slightly to the right of due south from the headlamp switch. There is a bolt on the underside of the dash near the connector, leave it be, it's only there to secure the dash to the dash support structure. You can pry the connector from the dash with a short flat blade screwdriver leveraged behind the plastic, pushing it toward the firewall.
Once free, cut back an inch or 2 of the cloth electrical tape to expose the required wires.
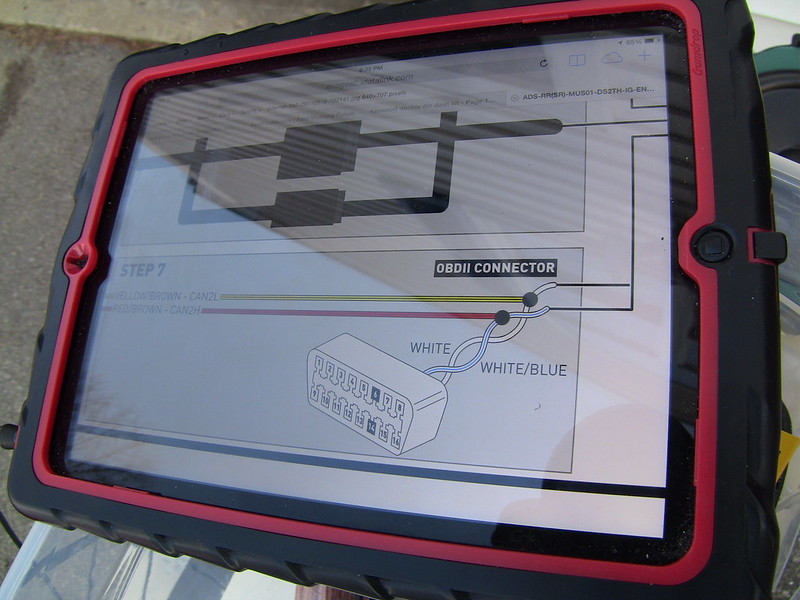

I harvested 2 small sections of wire from the spare harness connector from the Maestro RR kit to splice into the ODB2 wires. I used a razor knife to trim away about 1/4 inch of insulation on each wire to allow the spare length of wire to wrap around the exposed section, and then apply solder.
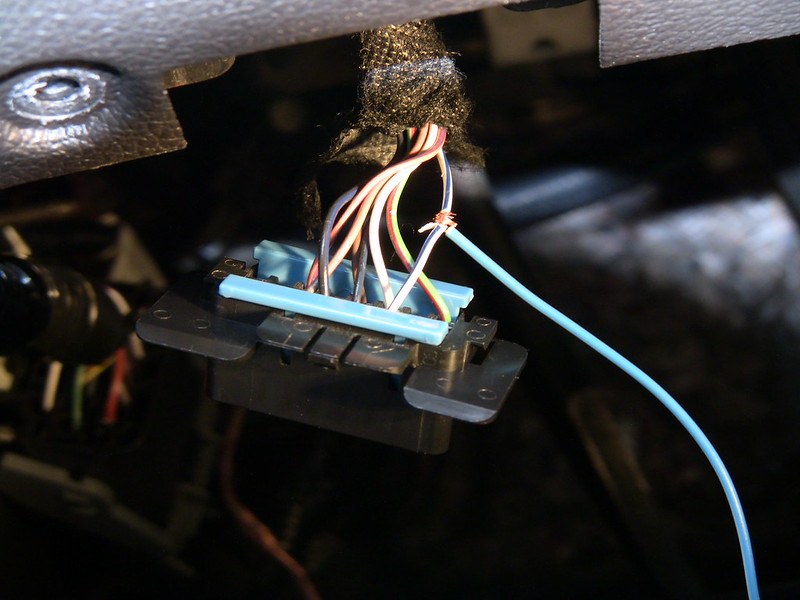
Once I had a good solder, I wrapped a small piece of electrical tape around the Y shaped splice. Because of the shape of the extra wire splice, it would be extremely difficult to do the traditional wrap below the area, and stretch over the soldered area technique. So I just got the tape behind the splice, gave it a stretch over the exposed solder splice and gave it one more wrap around. Here you can see the floppy tape end while I preparing the 2nd solder. A pair of hemostats is a great tool to position the 2nd wire for the next splice.
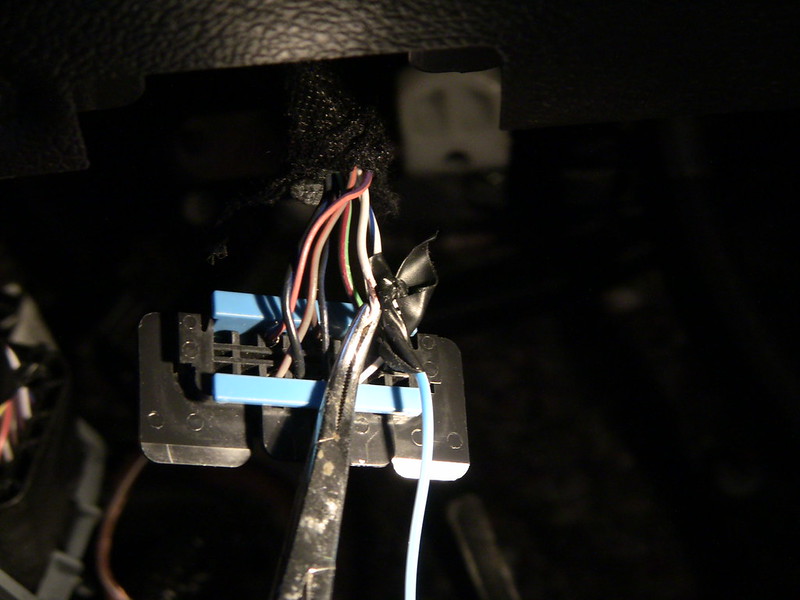
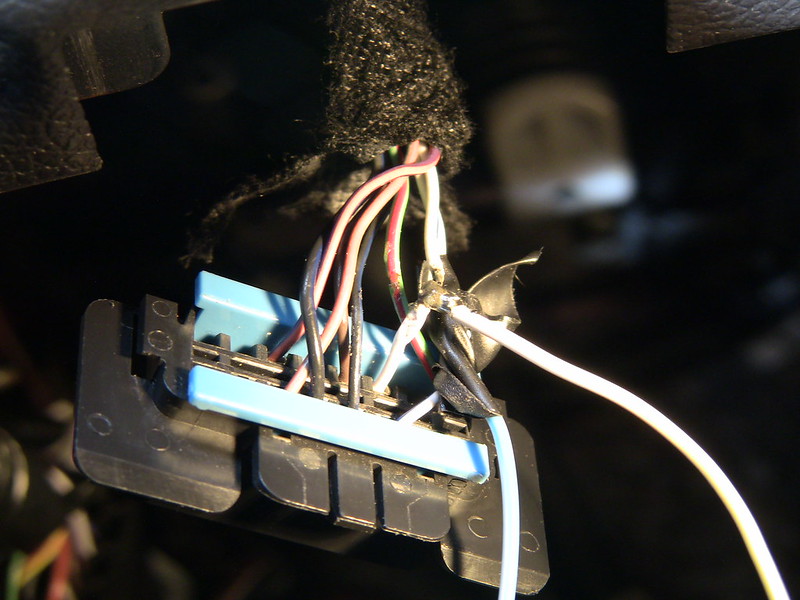
Another wrap around the white wire, and then a good tight wind and stretch over the wire bundle. On the other end I crimped a female bullet connection should I end up having (KNOCK WOOD) any kind of warranty issue, that requires me to pull the head unit. I will perform the same splice of the Sync wire as soon as I can figure out how to release the wiring harness connection from the back of the Sync module behind the glove box.
Unscrew the shift **** (if you have an automatic, find the procedure for 6AT)
Pull out the center console assembly from the main console to allow access to the lower bolts on the OEM dash trim panel - disconnect left side switch connector under console - traction control/trunk release
Unscrew the trim panel bolts
Pull panel away from dash
Disconnect OEM 8 pin harness wiring connection from the lower right hand side of the panel
Remove the 4 bolts that secure the OEM head unit to the dash
Pull head unit forward so you can reach behind the unit and first disconnect the antenna cable from the bottom middle/right rear side of the head unit. Doing so allows you easier access to remove the remaining 2 wiring harness connections from the bottom/middle section of the unit, and the bottom/left.
Head unit ready for removal - Make sure you hit eject before uninstalling to remove any CD you may have inside. FYI - once you disconnect the OEM dash panel, if you start your car with it disconnected, it will blast the fan to max speed on defrost mode by default. It's easy enough to reconnect the panel by plugging in the 8 pin jack again while unbolted from the dash to avoid the max fan blast defrost effect.
This left the ODB2 & Sync wire splices. The ODB2 connector is under the dash by your left knee, slightly to the right of due south from the headlamp switch. There is a bolt on the underside of the dash near the connector, leave it be, it's only there to secure the dash to the dash support structure. You can pry the connector from the dash with a short flat blade screwdriver leveraged behind the plastic, pushing it toward the firewall.
Once free, cut back an inch or 2 of the cloth electrical tape to expose the required wires.
I harvested 2 small sections of wire from the spare harness connector from the Maestro RR kit to splice into the ODB2 wires. I used a razor knife to trim away about 1/4 inch of insulation on each wire to allow the spare length of wire to wrap around the exposed section, and then apply solder.
Once I had a good solder, I wrapped a small piece of electrical tape around the Y shaped splice. Because of the shape of the extra wire splice, it would be extremely difficult to do the traditional wrap below the area, and stretch over the soldered area technique. So I just got the tape behind the splice, gave it a stretch over the exposed solder splice and gave it one more wrap around. Here you can see the floppy tape end while I preparing the 2nd solder. A pair of hemostats is a great tool to position the 2nd wire for the next splice.
Another wrap around the white wire, and then a good tight wind and stretch over the wire bundle. On the other end I crimped a female bullet connection should I end up having (KNOCK WOOD) any kind of warranty issue, that requires me to pull the head unit. I will perform the same splice of the Sync wire as soon as I can figure out how to release the wiring harness connection from the back of the Sync module behind the glove box.
Thread Starter
Cobra Member
Joined: February 13, 2011
Posts: 1,399
Likes: 0
From: Southern NH
Spent the last few days finishing up the speaker install in the doors. It's kind of funky in that the combination of the component speakers plus the 8 inch woofers require each speaker to be installed in 3 separate locations, door panel, door, & A pillar trim piece.
So the existing speaker wire that had powered the old 6x8s will now drive the woofers, and I needed to run an additional wire to the crossover for the Infinity components. Put Velcro on the door panels, mounted the crossovers, routed all the wires, and mounted the 6.5" driver in the factory bracket to the door panel.
Unfortunately, some of the plastic tabs that go into the square hole had broken off during previous remove and reinstall, so just trying to secure the speaker to the door would fail because the screw would not have the other side of the plastic tab to expand against the hole. If you've seen what the factory bracket looks like you would know what I mean. But a few tie wraps did the trick for the Infinity woofers.
The mounting hardware behind the A pillar trim panel tweeters require the door panel to be installed as one hole is in the door, an the lower one is actually part of the door panel. After the test fit of the panel on the door to verify clearance of the crossover and new wiring, it's time to reconnect the door pull cable. Ford did a good job with an easy to install design, where the cable end bullet drops into the assembly and the green plastic behind it easily fits into the assembly collar.
The door panel is secured to the door by 2 sets of fasteners. 2 torx flat head bolts, one behind the door pull handle trim piece, and one behind the armrest trim panel. Each pop off with a flat blade screw driver. 7mm perimeter bolts, 2 ea on either side and 3 down the bottom. You can see the white plastic female parts in this shot of the door;
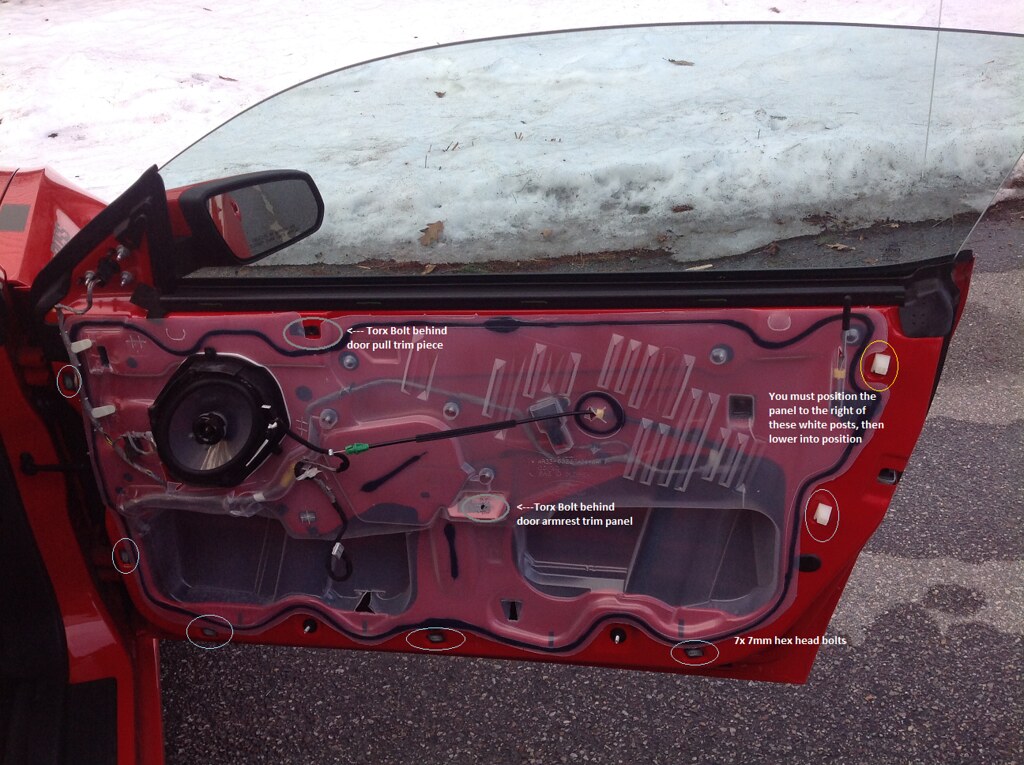
The trick to reattaching the door panel is to position the panel slightly to the outer edge of each door so that you clear those big while plastic posts that provide the screw hole for the 2 outer door panel screws. There are raised sections of molded plastic on the under side of the panel, that are meant to align with the white posts. So if you align the panel for re-installation, and just drop it straight down, these raised bumps behind the panel will hit those white posts and hang up on top of them, and not align. Once you have the outer edges that clear the raised white posts, loosely install both torx bolts, allowing you wiggle room to position the remaining bolts. Once they are all centered in their respective holes, tighten up the torx bolts and the remaining 7mm bolts. Dont' forget to position the wiring harness cables on each side to reconnect to the power window and door lock switches.
For this install I re-positioned the drivers power mirror switch to the arm rest trim panel. You can loosen the connector from the harness by cutting the electrical tape, but there are 2 wires that you must lengthen by about 30". Once I had spliced in and soldered the added section, I tested the switch operation, then taped it all up. After I finish testing all connections and fine tuning the sound, I may or may not re-install the the plastic vapor barrier.

Here you can see a better view of those pesky out screw posts that make the door panel re-install tricky.
Before;

After;
Yes, I can see the extra piece of GTMAT poking out from under the panel, I may put a piece of reflective tape on there, or remove it later.


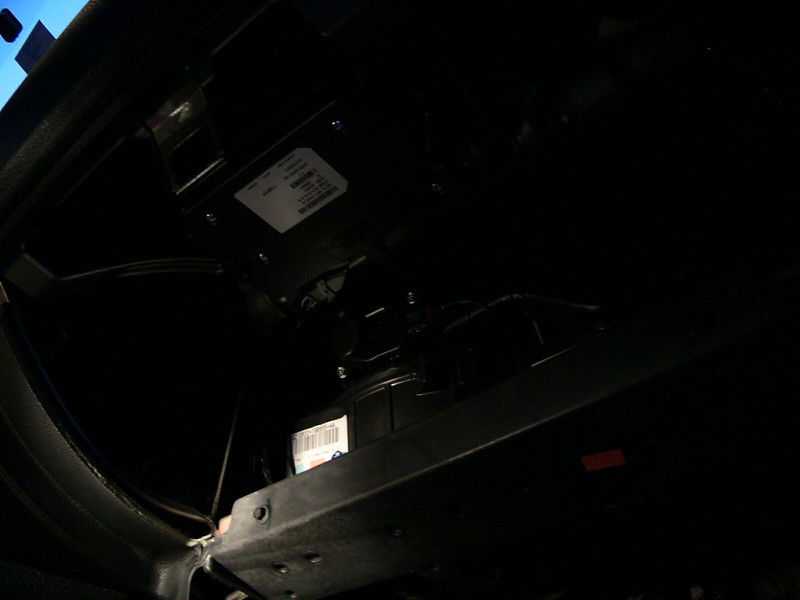
Glove box still removed as I have yet to splice in the blue sync wire for the Maestro module.
I'm pleased with the finished result, it has the factory look I wanted to maintain. It will look a lot better once I clean it up and put some 303 protectant on it. Man the flash makes the panel look like crap, kinda like your own face under florescent lighting...
Today I will button up the hardware, and then run all the speaker wire under the dash, then through the center console then into the trunk. I was going to reuse the existing RCA jacks, but I have a matched set of nice monoprice 15' cables, so I'll yank the old ones out and install the new set. Then I can get the head unit in, and make the final connections and begin testing for proper phase and polarity for all the speakers. Then the final step will be to remove the trunk trim near the tail lights to fit the massive Cerwin Vega daul 12" subwoofer box. I can fit the box in so it lays flat with the drivers pointing up, but I think if I remove the trim panels, I will have enough clearance to rotate the box so the drivers are facing forward.
So the existing speaker wire that had powered the old 6x8s will now drive the woofers, and I needed to run an additional wire to the crossover for the Infinity components. Put Velcro on the door panels, mounted the crossovers, routed all the wires, and mounted the 6.5" driver in the factory bracket to the door panel.
Unfortunately, some of the plastic tabs that go into the square hole had broken off during previous remove and reinstall, so just trying to secure the speaker to the door would fail because the screw would not have the other side of the plastic tab to expand against the hole. If you've seen what the factory bracket looks like you would know what I mean. But a few tie wraps did the trick for the Infinity woofers.
The mounting hardware behind the A pillar trim panel tweeters require the door panel to be installed as one hole is in the door, an the lower one is actually part of the door panel. After the test fit of the panel on the door to verify clearance of the crossover and new wiring, it's time to reconnect the door pull cable. Ford did a good job with an easy to install design, where the cable end bullet drops into the assembly and the green plastic behind it easily fits into the assembly collar.
The door panel is secured to the door by 2 sets of fasteners. 2 torx flat head bolts, one behind the door pull handle trim piece, and one behind the armrest trim panel. Each pop off with a flat blade screw driver. 7mm perimeter bolts, 2 ea on either side and 3 down the bottom. You can see the white plastic female parts in this shot of the door;
The trick to reattaching the door panel is to position the panel slightly to the outer edge of each door so that you clear those big while plastic posts that provide the screw hole for the 2 outer door panel screws. There are raised sections of molded plastic on the under side of the panel, that are meant to align with the white posts. So if you align the panel for re-installation, and just drop it straight down, these raised bumps behind the panel will hit those white posts and hang up on top of them, and not align. Once you have the outer edges that clear the raised white posts, loosely install both torx bolts, allowing you wiggle room to position the remaining bolts. Once they are all centered in their respective holes, tighten up the torx bolts and the remaining 7mm bolts. Dont' forget to position the wiring harness cables on each side to reconnect to the power window and door lock switches.
For this install I re-positioned the drivers power mirror switch to the arm rest trim panel. You can loosen the connector from the harness by cutting the electrical tape, but there are 2 wires that you must lengthen by about 30". Once I had spliced in and soldered the added section, I tested the switch operation, then taped it all up. After I finish testing all connections and fine tuning the sound, I may or may not re-install the the plastic vapor barrier.
Here you can see a better view of those pesky out screw posts that make the door panel re-install tricky.
Before;
After;
Yes, I can see the extra piece of GTMAT poking out from under the panel, I may put a piece of reflective tape on there, or remove it later.
Glove box still removed as I have yet to splice in the blue sync wire for the Maestro module.
I'm pleased with the finished result, it has the factory look I wanted to maintain. It will look a lot better once I clean it up and put some 303 protectant on it. Man the flash makes the panel look like crap, kinda like your own face under florescent lighting...
Today I will button up the hardware, and then run all the speaker wire under the dash, then through the center console then into the trunk. I was going to reuse the existing RCA jacks, but I have a matched set of nice monoprice 15' cables, so I'll yank the old ones out and install the new set. Then I can get the head unit in, and make the final connections and begin testing for proper phase and polarity for all the speakers. Then the final step will be to remove the trunk trim near the tail lights to fit the massive Cerwin Vega daul 12" subwoofer box. I can fit the box in so it lays flat with the drivers pointing up, but I think if I remove the trim panels, I will have enough clearance to rotate the box so the drivers are facing forward.
GT Member
Joined: August 7, 2013
Posts: 156
Likes: 1
From: Atlanta
You're making good progress. I think you'll find that unless you seal off the trunk from the cabin that you will really lose bass by facing the subs forward. You will want to face the subs towards the tail lights for the best sound, otherwise you will get cancellation that will affect your sound.
Keep up the good work on it.
Keep up the good work on it.
Thread Starter
Cobra Member
Joined: February 13, 2011
Posts: 1,399
Likes: 0
From: Southern NH
You're making good progress. I think you'll find that unless you seal off the trunk from the cabin that you will really lose bass by facing the subs forward. You will want to face the subs towards the tail lights for the best sound, otherwise you will get cancellation that will affect your sound.
Keep up the good work on it.
Keep up the good work on it.
GT Member
Joined: August 24, 2013
Posts: 102
Likes: 0
I'll take your word for it, but that will still require me to rotate the box so I will try it facing rearward as you suggested for my initial testing. I really just want to see the head unit power up for the first time once connected. Kinda like building your own PC all from parts and crossing your fingers to get POST on your first power on...
Cheers,
Thread Starter
Cobra Member
Joined: February 13, 2011
Posts: 1,399
Likes: 0
From: Southern NH
I'm not going to go too crazy troubleshooting the Sync issue if I have to return this head unit because of the faulty GPS unit... The pic of the GPS female jack in the radio looks like someone just yanked the unit out of their dash, breaking off the top part where the locking tab should be - it's broken off on mine =\
Last edited by ace72ace; Apr 22, 2014 at 09:19 AM.
