
My 10-12 to 13-14 front end swap with pictures.

Thread Starter
Mach 1 Member
Joined: January 25, 2011
Posts: 1,075
Likes: 1
From: Ville Platte, Louisiana
My 10-12 to 13-14 front end swap with pictures.
Here are the parts and pictures I have compiled. I am using the Tasca Parts website, you can also use Autonation White Bear Lake as those sites are almost identical in price and function. I purchased my parts from Autonation, I bought the bumper and hood local but all the rest came from Autonation. Great customer service and awesome prices. Tasca has great prices as well. Either one will be perfect to use. For anyone local to Houston Tx there is an Autonation dealership there as well and they will match the internet prices for White Bear Lake and you can avoid shipping costs. For you gents wanting to swap from teh 13-14 to the 10-12 you need to find a car that has the HID headlights. There are mounting tabs on the 10-12 headlights that hold the upper portion of the bumper. You wont be able to mount the bumper without these so you will have to swap everything including headlight or buy some aftermarket (Raxiom) headlights that support the HID's. Sorry to be the bearer of bad news. This will turn most guys off from this swap as most love the 13-14 headlights. And for you 10-12 guys converting you will have to cut the tabs off your headlights for the 13-14 bumper to fit. So get a dremel and get to cutting. Pics below.
http://www.tascaparts.com/auto-parts...nts-front-scat
Bumper Cover: DR3Z17D957ABPTM. Basic GT bumper (same on all models except the GT500). No panels or inserts for the fog lights. Those can be found on Ebay or the websites above. I did not need them since they were already in the bumper I purchased locally along with the grills.
Grill Reinforcement: DR3Z8A200AA. You have to have this to mount aftermarket or factory grills. Also the foglights mount to this. This part snaps to the back of the upper part of the bumper and then the grill snaps to this piece.
Closure Panel: DR3Z8C371A. This holds the entire top portion of the bumper to the radiator support. If you don't have this piece nothing lines up. You have to drill 2 holes in your upper radiator support for this to mount properly. I lined everything up and drill 2 small pilot holes. There are 2 small holes on either side of the panel where the tabs are. The pilot holes kept my 11/32nds drill bit from "walking" as I drilled the actual holes. After that everything snapped into place and the lower portion mounts to the End Covers. This is the scariest part of the conversion but it really isn't that bad.
End Covers Left and Right: (Right) DR3Z8C391B (Left) DR3Z8C391A. The lower portion of the Closure Panel mounts to these, they are mounted to the vertical supports on the radiator support on either side of the radiator.
Splitter and Lower Shield:Regular GT Splitter, DR3Z17D957AA. If you get this one you will need this lower shield, DR3Z17626B.
If you decide to get the Boss-GT/CS Splitter, DR3Z17626BA (expensive) you will need this lower shield, BR3Z17626A.
Upper Shield: DR3Z8C291AA.
You should not need the Absorber or the Impact bar if you are doing a direct swap, but if you need the part numbers for the 13-14 here they are.
Absorber: DR3Z17C882A
Impact Bar: BR3Z17757B
Pictures and descriptions below:
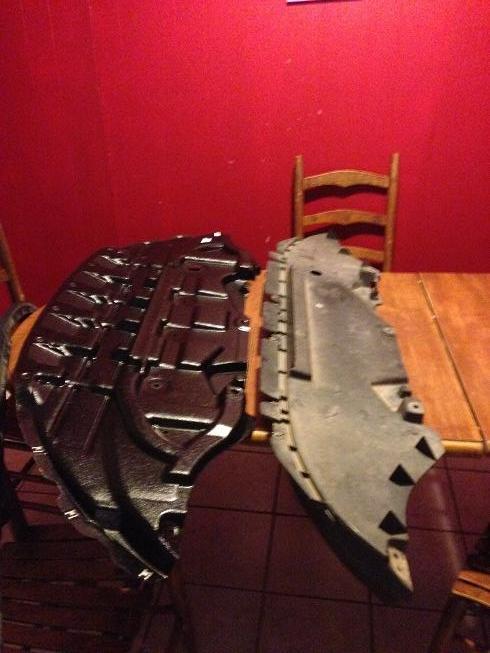
Comparison of the Lower Shields:
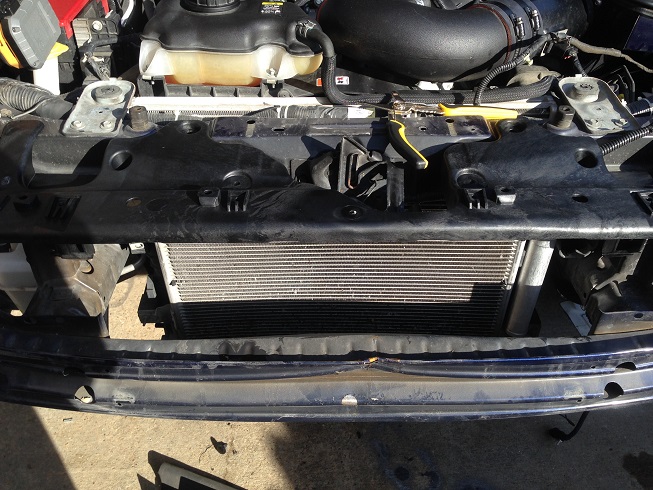
Radiator Covers: Driver side need holes marked and drilled, passenger must be trimmed for the End Cover to mount.
Holes that are already behind the radiator cover. The End Covers have tabs that line up perfectly with these holes and one of the holes is for a bolt that holds the end cover.
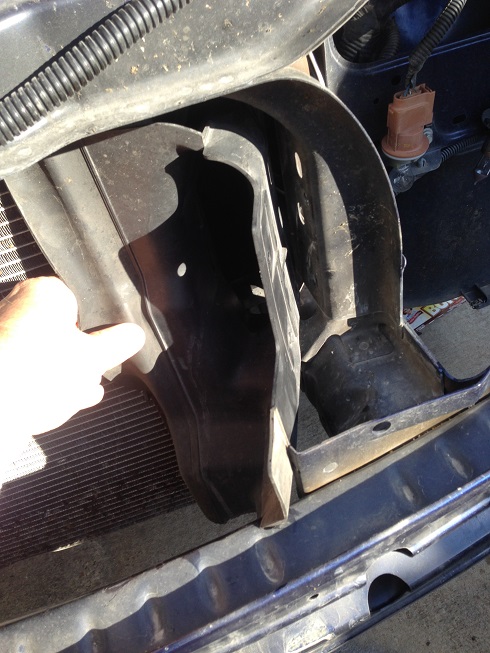
End Covers Mounted:
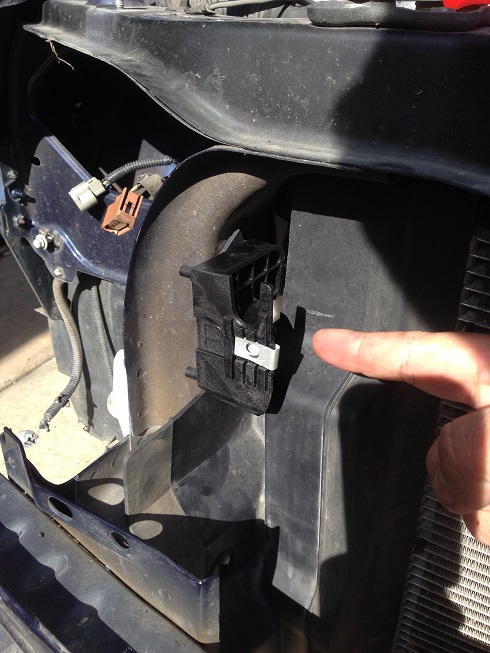
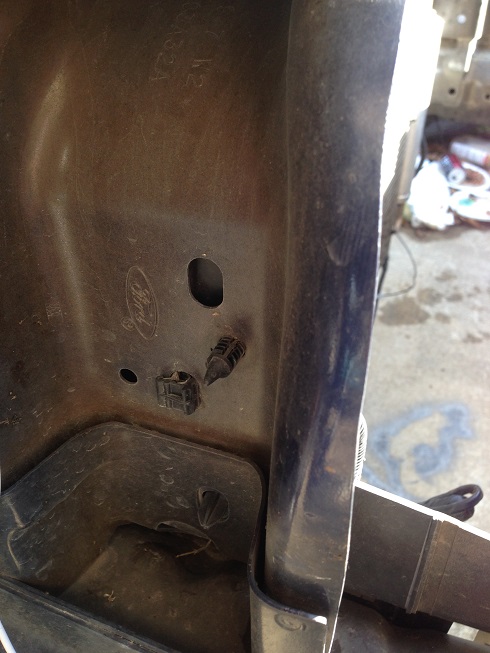
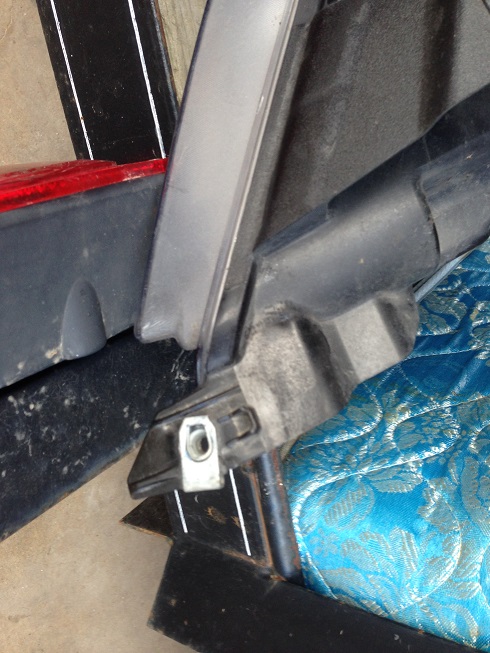
Hole for the top of the Closure Panel.

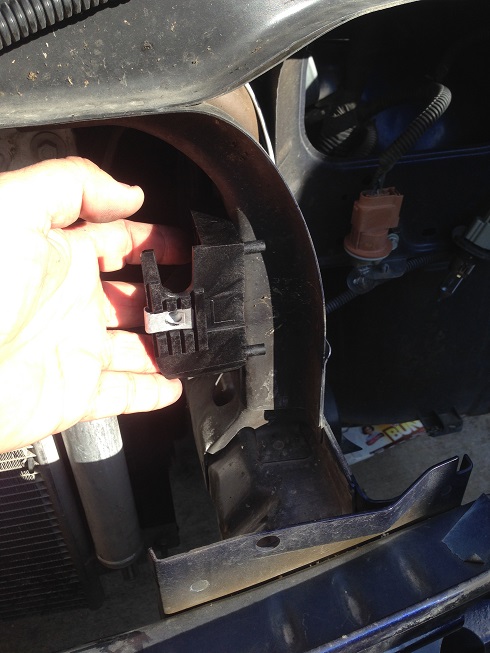
Tab on the Closure Panel that snaps into the hole you drilled.
Closure Panel Mounted. Snaps up top into the holes you drilled and bolts to the End Covers underneath, there are also alignment pins that sit on the end covers.
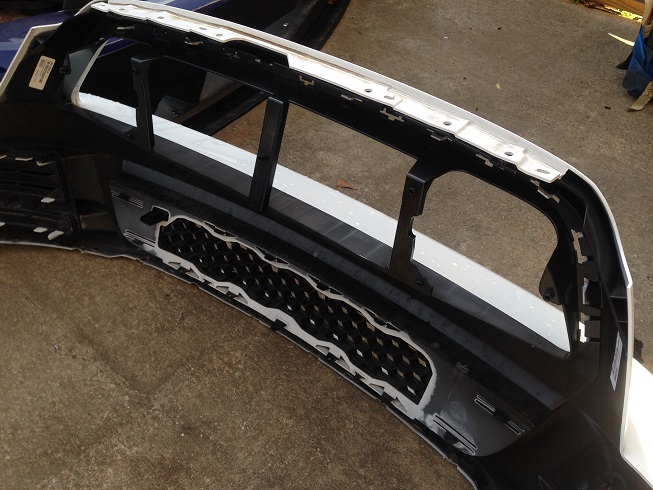
Grill Reinforcement mounted to the backside of the bumper cover.
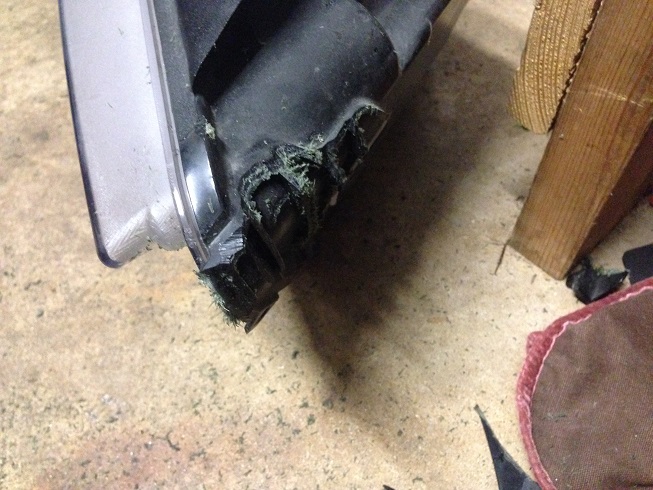
Tabs on the headlights that have to be cut.
Ouch! I hate cutting stuff.
I hope all this helps. I can answer any questions you have. This will not be for the faint of heart but it really wasn't that bad. I freaking love it! Can't wait till its all painted and back on the road again!
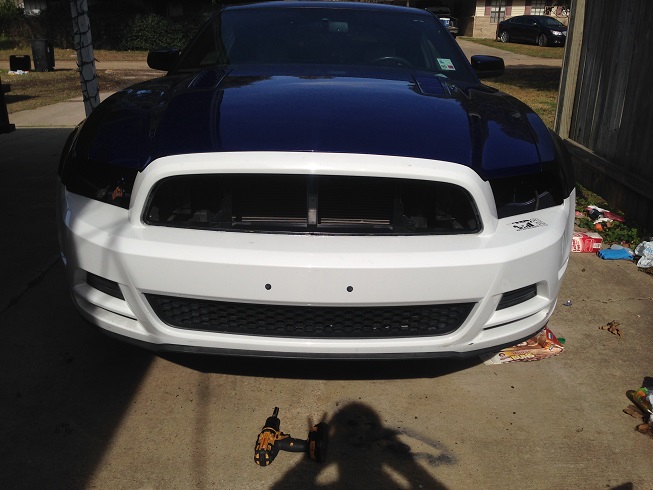
Everything test fitted and ready to head to the body shop! (please excuse the mess, dogs tore up my trash because my son left the bag outside on the ground instead of in the can, he was in the process of picking it all up as I was working)
http://www.tascaparts.com/auto-parts...nts-front-scat
Bumper Cover: DR3Z17D957ABPTM. Basic GT bumper (same on all models except the GT500). No panels or inserts for the fog lights. Those can be found on Ebay or the websites above. I did not need them since they were already in the bumper I purchased locally along with the grills.
Grill Reinforcement: DR3Z8A200AA. You have to have this to mount aftermarket or factory grills. Also the foglights mount to this. This part snaps to the back of the upper part of the bumper and then the grill snaps to this piece.
Closure Panel: DR3Z8C371A. This holds the entire top portion of the bumper to the radiator support. If you don't have this piece nothing lines up. You have to drill 2 holes in your upper radiator support for this to mount properly. I lined everything up and drill 2 small pilot holes. There are 2 small holes on either side of the panel where the tabs are. The pilot holes kept my 11/32nds drill bit from "walking" as I drilled the actual holes. After that everything snapped into place and the lower portion mounts to the End Covers. This is the scariest part of the conversion but it really isn't that bad.
End Covers Left and Right: (Right) DR3Z8C391B (Left) DR3Z8C391A. The lower portion of the Closure Panel mounts to these, they are mounted to the vertical supports on the radiator support on either side of the radiator.
Splitter and Lower Shield:Regular GT Splitter, DR3Z17D957AA. If you get this one you will need this lower shield, DR3Z17626B.
If you decide to get the Boss-GT/CS Splitter, DR3Z17626BA (expensive) you will need this lower shield, BR3Z17626A.
Upper Shield: DR3Z8C291AA.
You should not need the Absorber or the Impact bar if you are doing a direct swap, but if you need the part numbers for the 13-14 here they are.
Absorber: DR3Z17C882A
Impact Bar: BR3Z17757B
Pictures and descriptions below:
Comparison of the Lower Shields:
Radiator Covers: Driver side need holes marked and drilled, passenger must be trimmed for the End Cover to mount.
Holes that are already behind the radiator cover. The End Covers have tabs that line up perfectly with these holes and one of the holes is for a bolt that holds the end cover.
End Covers Mounted:
Hole for the top of the Closure Panel.
Tab on the Closure Panel that snaps into the hole you drilled.
Closure Panel Mounted. Snaps up top into the holes you drilled and bolts to the End Covers underneath, there are also alignment pins that sit on the end covers.
Grill Reinforcement mounted to the backside of the bumper cover.
Tabs on the headlights that have to be cut.
Ouch! I hate cutting stuff.
I hope all this helps. I can answer any questions you have. This will not be for the faint of heart but it really wasn't that bad. I freaking love it! Can't wait till its all painted and back on the road again!
Everything test fitted and ready to head to the body shop! (please excuse the mess, dogs tore up my trash because my son left the bag outside on the ground instead of in the can, he was in the process of picking it all up as I was working)
Thread Starter
Mach 1 Member
Joined: January 25, 2011
Posts: 1,075
Likes: 1
From: Ville Platte, Louisiana

FR500 Member
Joined: May 22, 2014
Posts: 3,574
Likes: 118
From: Rockaway, NJ
Currently a Corvette Owner!
Joined: December 16, 2011
Posts: 2,003
Likes: 48
From: Las Vegas, Nevada


Member
Joined: July 15, 2018
Posts: 3
Likes: 0
Hi RobDis,
thanks for the instructions and details provided.
I'm about to do the same swap on my 2011 V6 but to be honest, I'm a bit confused as to what I need to buy.
Once I opened the link you provided with all the parts, ****, I got lost.
I have fog lights on my car atm so I know I have to buy those to fit onto the new bumper. I need the front and back plastic part into which the actual lights go into, right?
Will the screws, pins, etc. that I have on my pumper now be enough and fit the new bumper or do I need to buy additional ones?
Is it my browser or are there some pictures missing or I can't see them in your thread?
Kind regards,
Alex
Mach 1 Member
Joined: August 22, 2014
Posts: 545
Likes: 47
From: Vermont
Pic must of expired, i had them saved somewhere, you will need the back part of the grill the holds the fog lights in but you should be able to reuse the screws from your old grill, 90% of your hardware can be reused but there are some parts like the lip on the front need new screws, as you wont have that hardware.
Member
Joined: July 15, 2018
Posts: 3
Likes: 0
Oh, ok. Thank you!
I looked at all the parts and figured it would be quite an expensive conversion (didn't know one needs so many additional parts outside the bumper and grilles). I think I'll go for a GT bumper swap instead.
I looked at all the parts and figured it would be quite an expensive conversion (didn't know one needs so many additional parts outside the bumper and grilles). I think I'll go for a GT bumper swap instead.

Thread
Thread Starter
Forum
Replies
Last Post
Diode Dynamics
Vendor Showcase
3
Jun 12, 2018 03:26 PM
awoychosky123
'10-14 Exterior Modifications
3
Aug 18, 2015 08:30 AM
Mackitude
2010-2014 Mustang
1
Aug 17, 2015 04:14 PM