
How-To: Lower diffuser fascia & GT500 mud flap install

Thread Starter
GTR Member
Joined: September 28, 2009
Posts: 6,284
Likes: 1
How-To: Lower diffuser fascia & GT500 mud flap install
For my first mod, I decided to pick this up. Here's a breakdown of parts/cost:
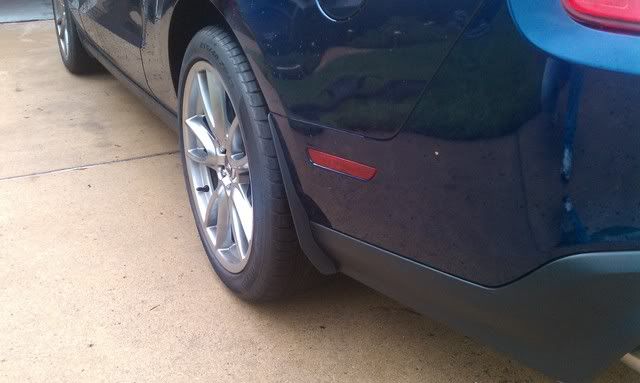
AR3Z16A550AA - Mudflap, L - $27.13 list
AR3Z16A500AB - Mudflap, R - $27.13 list
AR3Z17F828AA - Fascia, lower rear diffuser style - $150.00 list
Parts will be here tomorrow, but I will update this with installation instructions and pictures on the car. Stay tuned.
AR3Z16A550AA - Mudflap, L - $27.13 list
AR3Z16A500AB - Mudflap, R - $27.13 list
AR3Z17F828AA - Fascia, lower rear diffuser style - $150.00 list
Parts will be here tomorrow, but I will update this with installation instructions and pictures on the car. Stay tuned.

Bullitt Member
Joined: July 23, 2010
Posts: 414
Likes: 0
From: SW-Florida
Steve:
Please post some pics when completed... I'm looking into the exact some mods for mine! Could you also comment on the difficulty installing the diffuser style rear facia?
Thanks in advance!
Please post some pics when completed... I'm looking into the exact some mods for mine! Could you also comment on the difficulty installing the diffuser style rear facia?
Thanks in advance!
Thread Starter
GTR Member
Joined: September 28, 2009
Posts: 6,284
Likes: 1
I had a friend pick this up for me today while I was at work. Depending on how I feel later, I may try and tackle it tonight. I pulled up the Roush installation instructions for their rear diffuser, and it says 3 hours of installation. We'll see if that's true.


Cobra R Member
Joined: March 12, 2004
Posts: 1,560
Likes: 0
From: Orange County, CA
I've seen a few how-to guides for the fascia but I don't want to bother searching for 'em  Mud flaps should be a no brainer since they use OE fender lip screws.
Edit: These Roush instructions are very thorough.
Mud flaps should be a no brainer since they use OE fender lip screws.Edit: These Roush instructions are very thorough.
Last edited by Adam; Sep 25, 2010 at 02:53 AM.
Thread Starter
GTR Member
Joined: September 28, 2009
Posts: 6,284
Likes: 1
I've seen a few how-to guides for the fascia but I don't want to bother searching for 'em Mud flaps should be a no brainer since they use OE fender lip screws.
Edit: These Roush instructions are very thorough.
Mud flaps should be a no brainer since they use OE fender lip screws.Edit: These Roush instructions are very thorough.
Mach 1 Member
Joined: April 22, 2010
Posts: 608
Likes: 1
From: Detroit
From the Ford Accessories Store:
Splash Guards, Molded, Rear Pair
Part Number: AR3Z-16A550-AC
Part only: $45.36
Part w/ installation: $82.86
Thread Starter
GTR Member
Joined: September 28, 2009
Posts: 6,284
Likes: 1
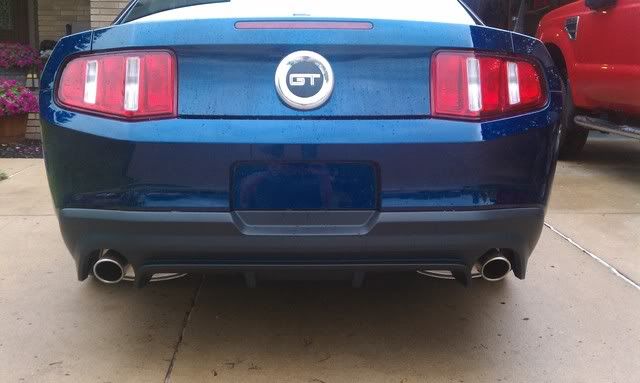
Just got done with the install. The Roush installation instructions were pretty good to follow, and if I had to do another, could probably do it in 90 min or less. Very happy with the results, and pictures will be up shortly.


Thread Starter
GTR Member
Joined: September 28, 2009
Posts: 6,284
Likes: 1
Some things to note:
- I did end up taking the rear wheels off. This made the three screws easier to get to on each side, and with it up on jack stands, doing the clip removal underneath (2 on each side, two in the center, and two on the "straps" on the back) much easier to get to.
- Roush tells you to take the taillights off. I did, but didn't see much benefit in that.
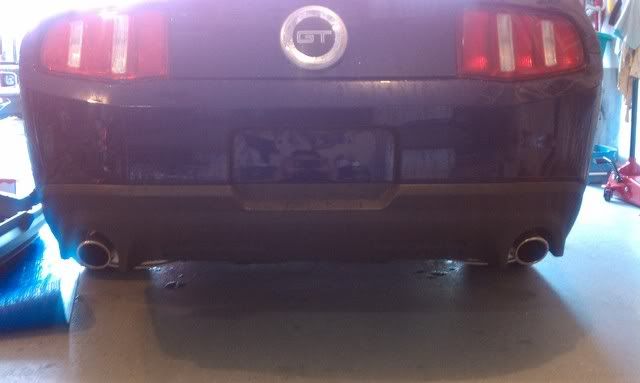
- Also, there are two larger push pins up in the back center portion of the diffuser that need to be addressed. I didn't see this mentioned in the instructions, but they are just inside the mufflers, and have a large push pin holding them in place. If you see the diffuser off the car, it's very obvious.
- The biggest pain I had was separating the diffuser from the bumper. Most of the clips slid out, but the ones right at the license plate area were a real PITA to remove. Some careful persuasion got them out. Snapping it back together takes a clever touch to get it in place.
- Overall, it took me 2 hours to do it by myself. I took my time since this is the first time I've torn into the car. I ended up breaking the white W-clips from the factory diffuser, but they are cheap to replace.
- I did end up taking the rear wheels off. This made the three screws easier to get to on each side, and with it up on jack stands, doing the clip removal underneath (2 on each side, two in the center, and two on the "straps" on the back) much easier to get to.
- Roush tells you to take the taillights off. I did, but didn't see much benefit in that.
- Also, there are two larger push pins up in the back center portion of the diffuser that need to be addressed. I didn't see this mentioned in the instructions, but they are just inside the mufflers, and have a large push pin holding them in place. If you see the diffuser off the car, it's very obvious.
- The biggest pain I had was separating the diffuser from the bumper. Most of the clips slid out, but the ones right at the license plate area were a real PITA to remove. Some careful persuasion got them out. Snapping it back together takes a clever touch to get it in place.
- Overall, it took me 2 hours to do it by myself. I took my time since this is the first time I've torn into the car. I ended up breaking the white W-clips from the factory diffuser, but they are cheap to replace.


Thread Starter
GTR Member
Joined: September 28, 2009
Posts: 6,284
Likes: 1
And yes, a set of 4" tips would look wonderful in there.
Bullitt Member
Joined: July 23, 2010
Posts: 414
Likes: 0
From: SW-Florida
Steve:
Looks great! Congrats on the install!
Did you purchase them online from Ford? I am searching on Fordparts.com and FordAccessories.com, but it won't return any results with the mudflap part #'s... any idea?
Also, do you need to have the GT500 diffuser, or will the flaps work with the "regular" GT lower facia?
Thanks,