When you click on links to various merchants on this site and make a purchase, this can result in this site earning a commission. Affiliate programs and affiliations include, but are not limited to, the eBay Partner Network.
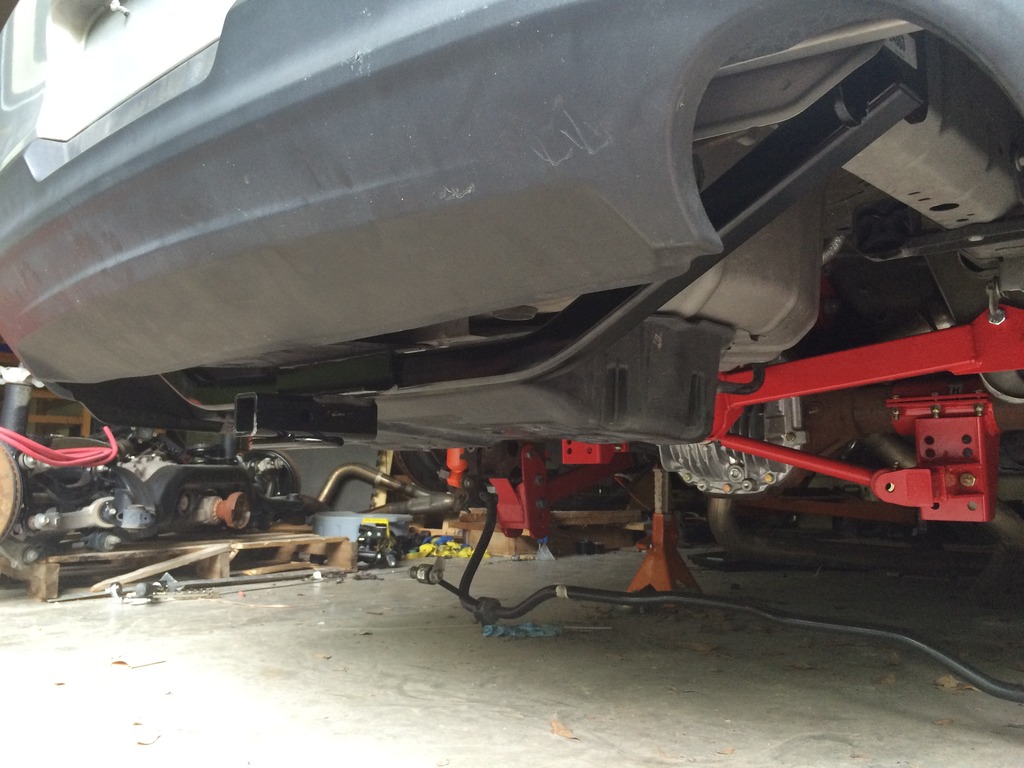
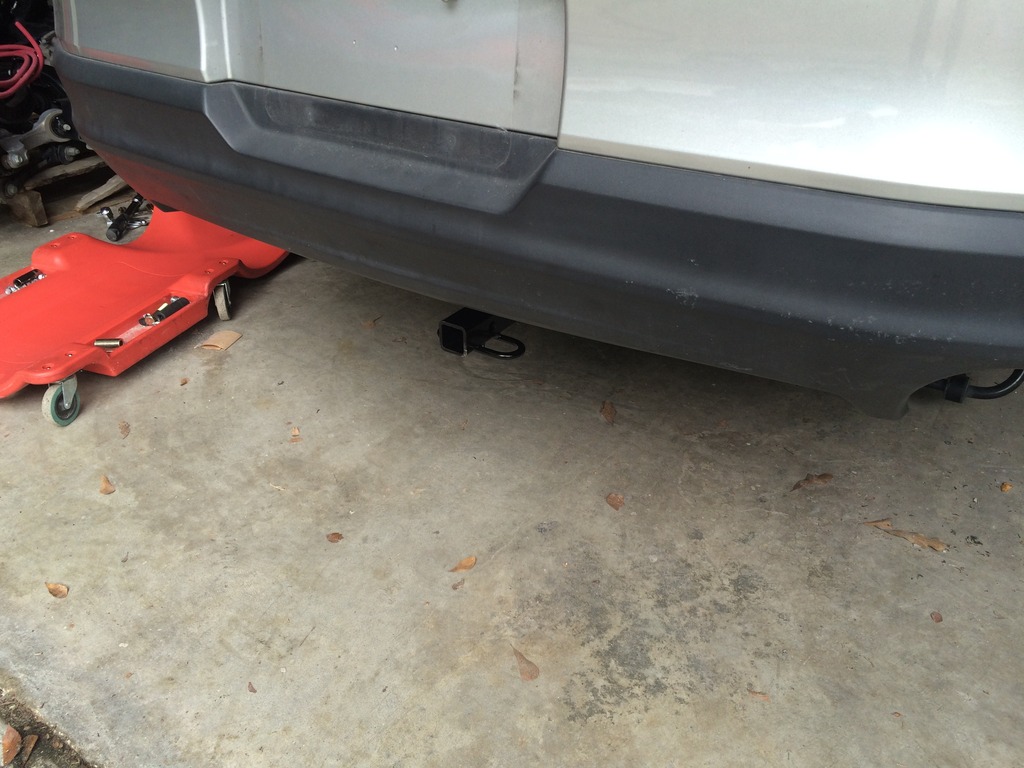
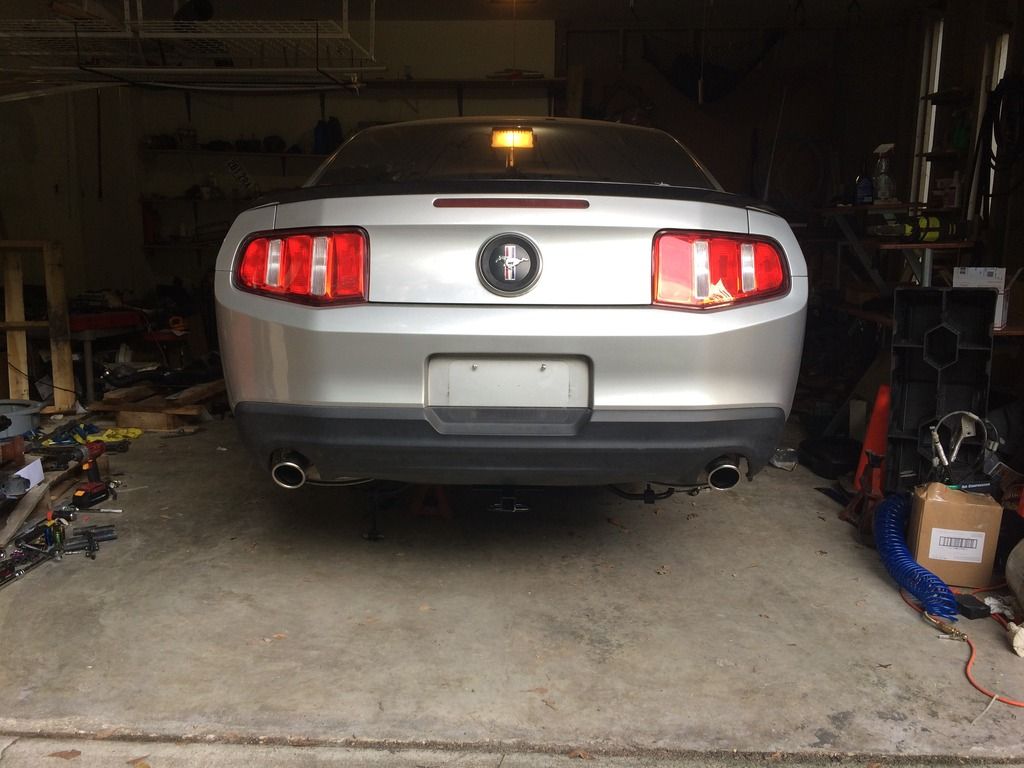
I got a draw-tite hitch and installed it last week. I plan to use it to tow a small trailer with wheels, tires and tools for track duty. It should also come in handy for towing motorcycles, and large tools or car parts. It's just under 20 pounds which is the lightest I found and compatible with the GT/CS valence and even 10-12 GT500 exhaust. It was an easy install, and while not exactly beautiful, it's not a huge eye sore and at least it's very functional. I had to sell my truck among other things to help pay for this swap so this was somewhat of a necessity.
I've been working on the suspension quite a lot now and I have the Watt's link out and the stock UCA back in. Again, my installed but never used BMR Watt's link and BMR UCA w/ bracket are both for sale if anyone's interested.
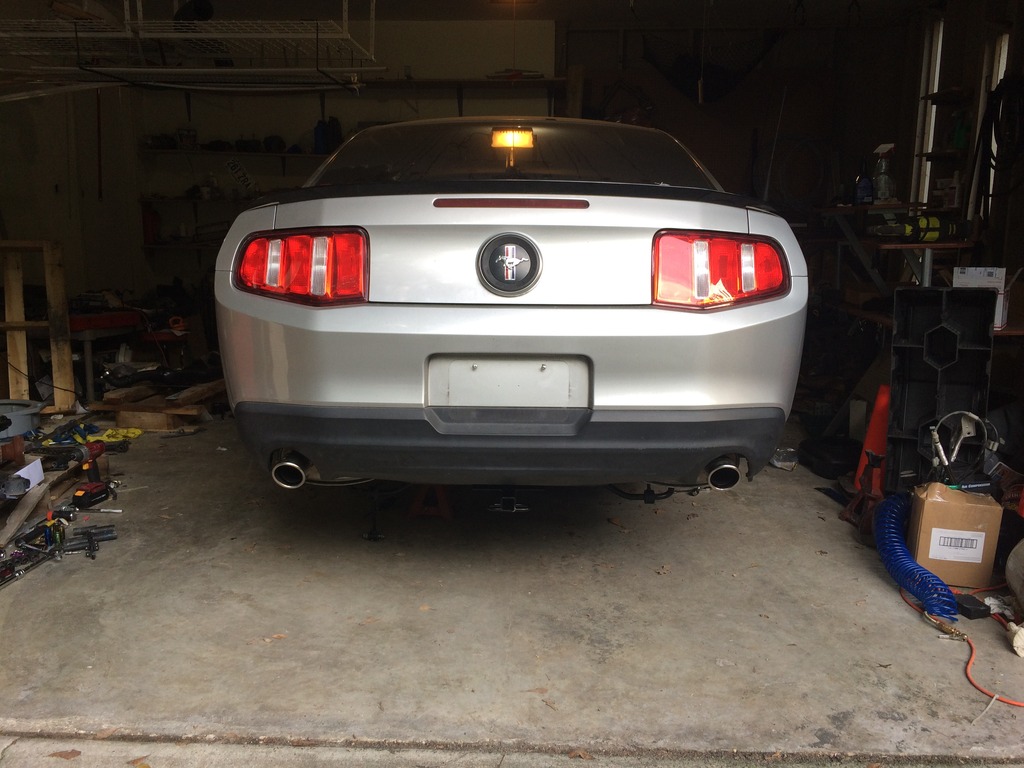
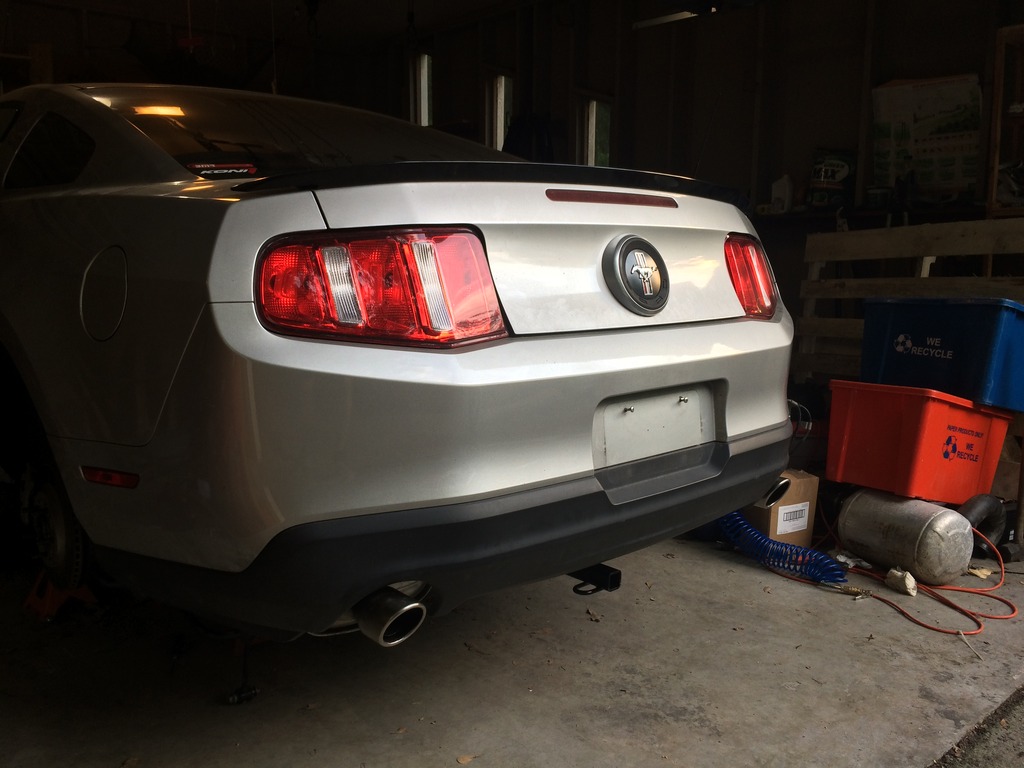
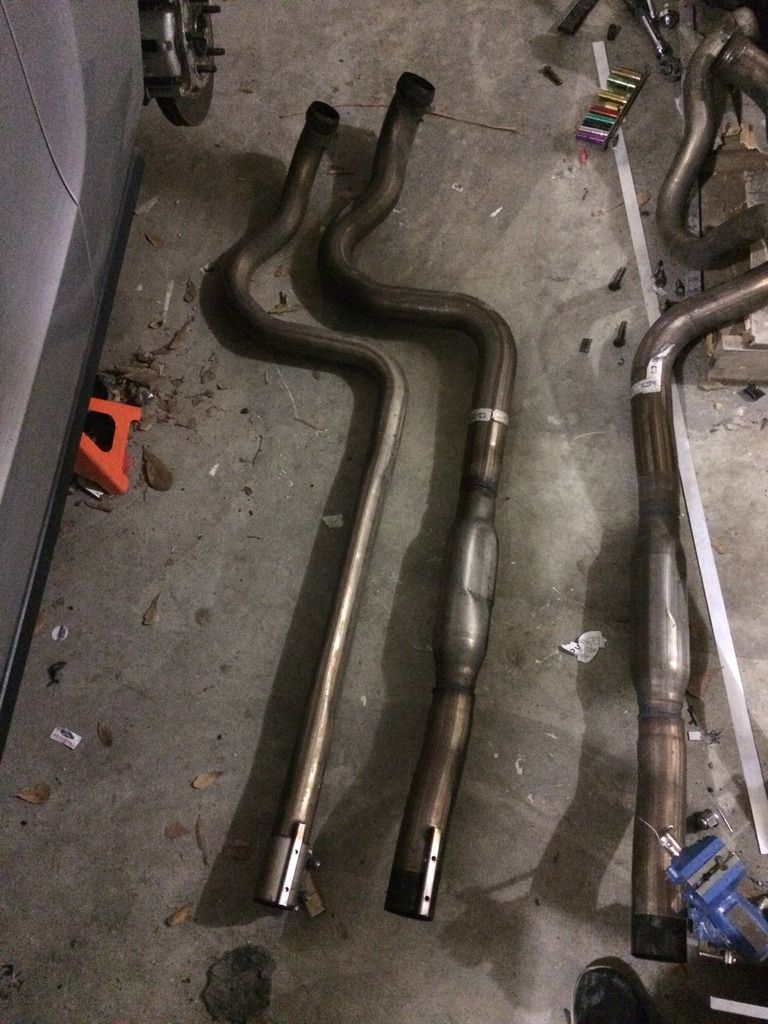
I'm running very low on money to finish this up, so instead of an aftermarket catback I bought an 11-12 Coyote take off and H pipe for 150 bucks. This catback is 2.75" while my stock V6 catback is only 2.25". Here are the two side by side:
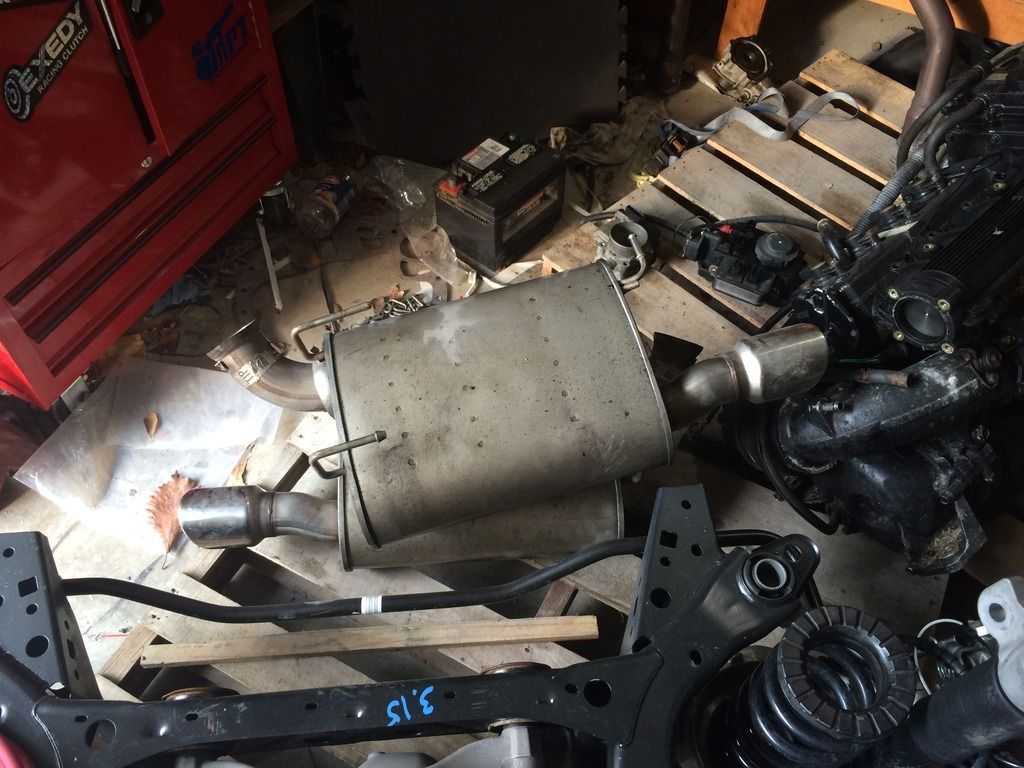
The exhaust tips are the same size as the V6 tips (at least the manual V6, the auto V6 has different mufflers) but in my opinion they look a little less aggressive being chrome and rounded. The V6 tips look like smaller versions of the GT500 tips to my eye but this is no big deal. I doubt I'll have this setup forever so I'm not bothered by it, plus it still looks just fine.
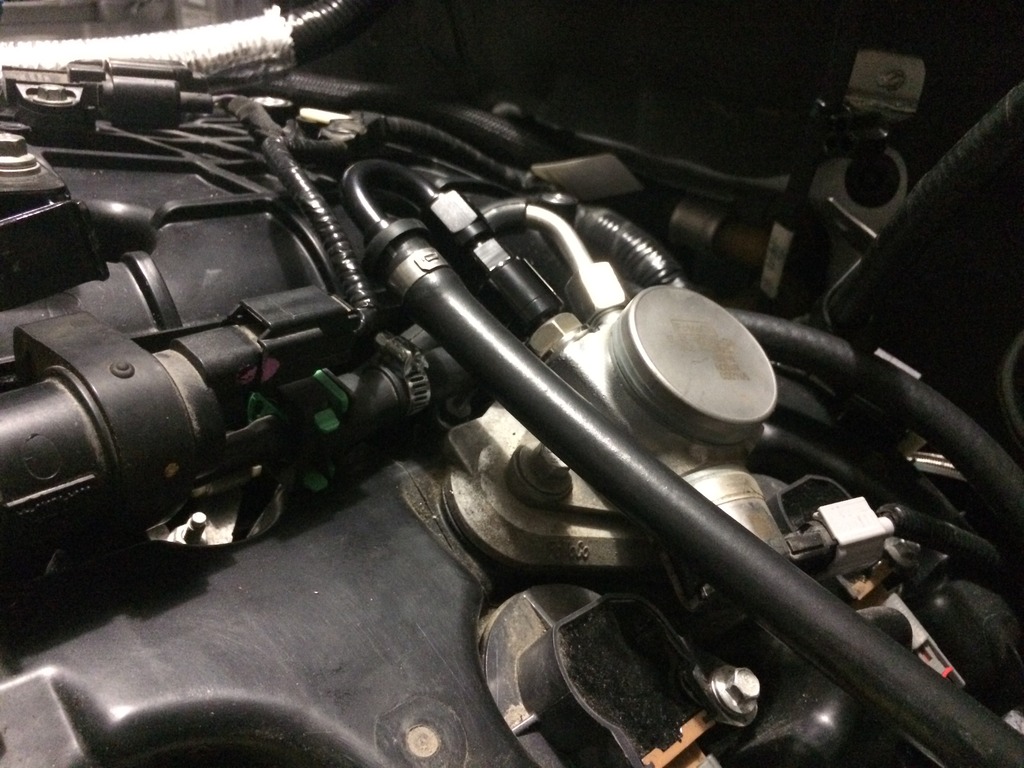
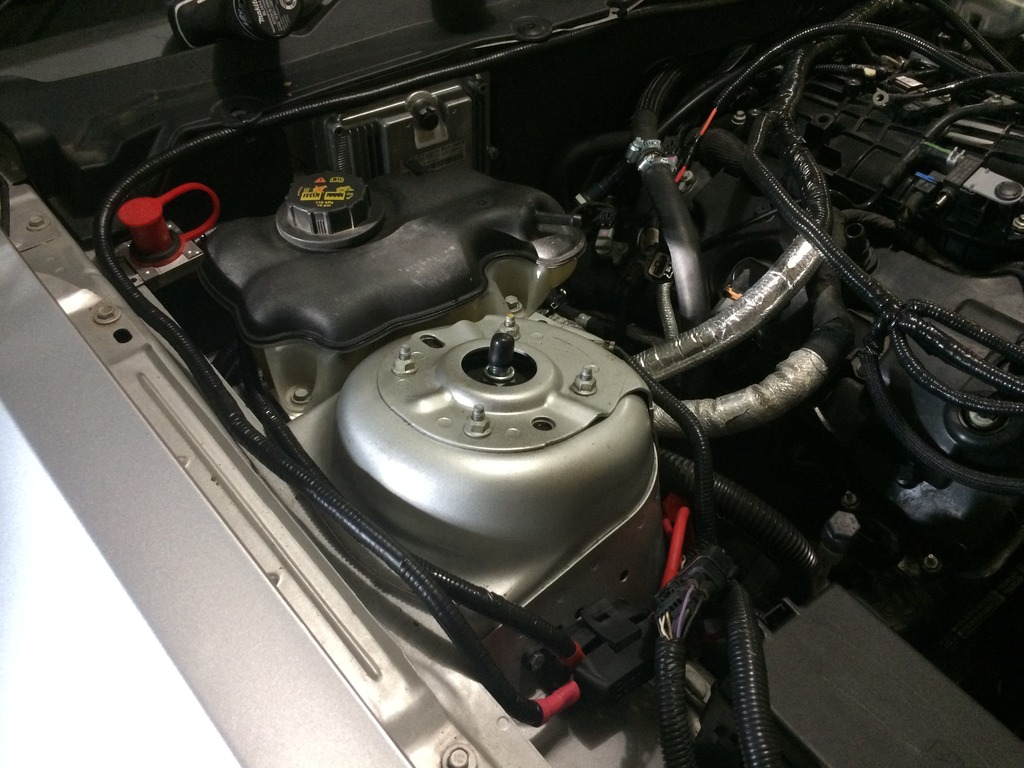
I also got the fuel line done from the stock V6 hard line to the EcoBoost's HPFP. This line should only be under ~65 psi so I used Fragola 8000 series Push-Lite -6 AN fittings and hose with Russell 3/8" SAE to -6AN adapters. This should be more than adequate for the application and is about half the weight of your typical braided stainless fuel hose. It also seems to be a pretty common choice for people with high power running E85 in the GT500 community. Hopefully I do not need a fuel pressure regulator and return line, from what I'm told, the stock fuel pump regulates pressure mechanically, but it wouldn't be hard to add if this doesn't work out. Still, this line cost me about 100 bucks in materials to make (granted I have some leftover hose) so I'm really hoping I don't have to spend even more on it.
When are you planning on trying to convert the IRS? I'm REAL interested in that. I was just waiting for someone else to go first.
Seems to me you'd need to make the IRS frame narrower (fabricate a whole new frame?), modify the body to accept the IRS, and having shorter half-shafts made.
The only thing that I see that we may have going for us is that the S197 was originally designed to have an IRS.
I would like to get that done within the next year but right now I'm just focused on getting the car running. I think the easiest way to do it would be to modify the subframe to fit the chassis since it's already about the right size. I might try something like this that could be bolted and welded to the existing frame rails:
Nice progress Gator, I'm impressed with what you have done so far....it's not easy.
I'm going to remove my water-to-air heat exchanger up front and replace it with an air-to-air heat exchanger. The idea is to air-cool the air first then use chilled water from my trunk mounted tank to chill the air. My IAT were pretty high with the setup I have now, another issue is I'm sucking hot air from the engine bay for the motor which makes it even worse. I believe the air is stacking in the engine bay which could be a problem for you too. There's plenty of openings up front for air to enter but there's not much room for air to leave. The Shelby and GT hood have heat extractors, this allows the air somewhere to go once it comes through the grill. My advice to you is try and create a cold air intake so air is drawn from the fender like other air intakes for our cars. High IATs will kill your performance, the turbos just heat it up even more.
I'm going to create a baffle around my air filter so that air is drawn from the fender, I'm also considering a new hood to allow heated air to easily flow through. Although I like the stock hood I'll probably go with a small cowl hood or switch over to a GT hood.
Nice looking fuel line, FYI NHRA requires stainless steel braided. If you want to run in the ecoboost battles they follow NHRA guidelines and they could reject your car because of this. To be honest I highly doubt they would notice and I wouldn't worry about it, but I just though I would mention it.
How did you attach the fuel line down in the fender? Did you use a barbed quick connect or did you just clamp the fuel line over the quick connect that was already there? At first I clamped my line over the factory fitting, after cutting off the original fuel line of course. This wasn't adequate although I didn't have any issues with it. I ended up re-doing this properly after I had that fuel leak at the other end of the hose.
I'm sure you bought a barbed quick-connector for the other end and clamped it on, I just wanted to make sure. After the fuel leak I had I'm much more careful with that.
I got a draw-tite hitch and installed it last week. I plan to use it to tow a small trailer with wheels, tires and tools for track duty. It should also come in handy for towing motorcycles, and large tools or car parts. It's just under 20 pounds which is the lightest I found and compatible with the GT/CS valence and even 10-12 GT500 exhaust. It was an easy install, and while not exactly beautiful, it's not a huge eye sore and at least it's very functional. I had to sell my truck among other things to help pay for this swap so this was somewhat of a necessity.
I've been working on the suspension quite a lot now and I have the Watt's link out and the stock UCA back in. Again, my installed but never used BMR Watt's link and BMR UCA w/ bracket are both for sale if anyone's interested.
I'm running very low on money to finish this up, so instead of an aftermarket catback I bought an 11-12 Coyote take off and H pipe for 150 bucks. This catback is 2.75" while my stock V6 catback is only 2.25". Here are the two side by side:
The exhaust tips are the same size as the V6 tips (at least the manual V6, the auto V6 has different mufflers) but in my opinion they look a little less aggressive being chrome and rounded. The V6 tips look like smaller versions of the GT500 tips to my eye but this is no big deal. I doubt I'll have this setup forever so I'm not bothered by it, plus it still looks just fine.
I also got the fuel line done from the stock V6 hard line to the EcoBoost's HPFP. This line should only be under ~65 psi so I used Fragola 8000 series Push-Lite -6 AN fittings and hose with Russell 3/8" SAE to -6AN adapters. This should be more than adequate for the application and is about half the weight of your typical braided stainless fuel hose. It also seems to be a pretty common choice for people with high power running E85 in the GT500 community. Hopefully I do not need a fuel pressure regulator and return line, from what I'm told, the stock fuel pump regulates pressure mechanically, but it wouldn't be hard to add if this doesn't work out. Still, this line cost me about 100 bucks in materials to make (granted I have some leftover hose) so I'm really hoping I don't have to spend even more on it.
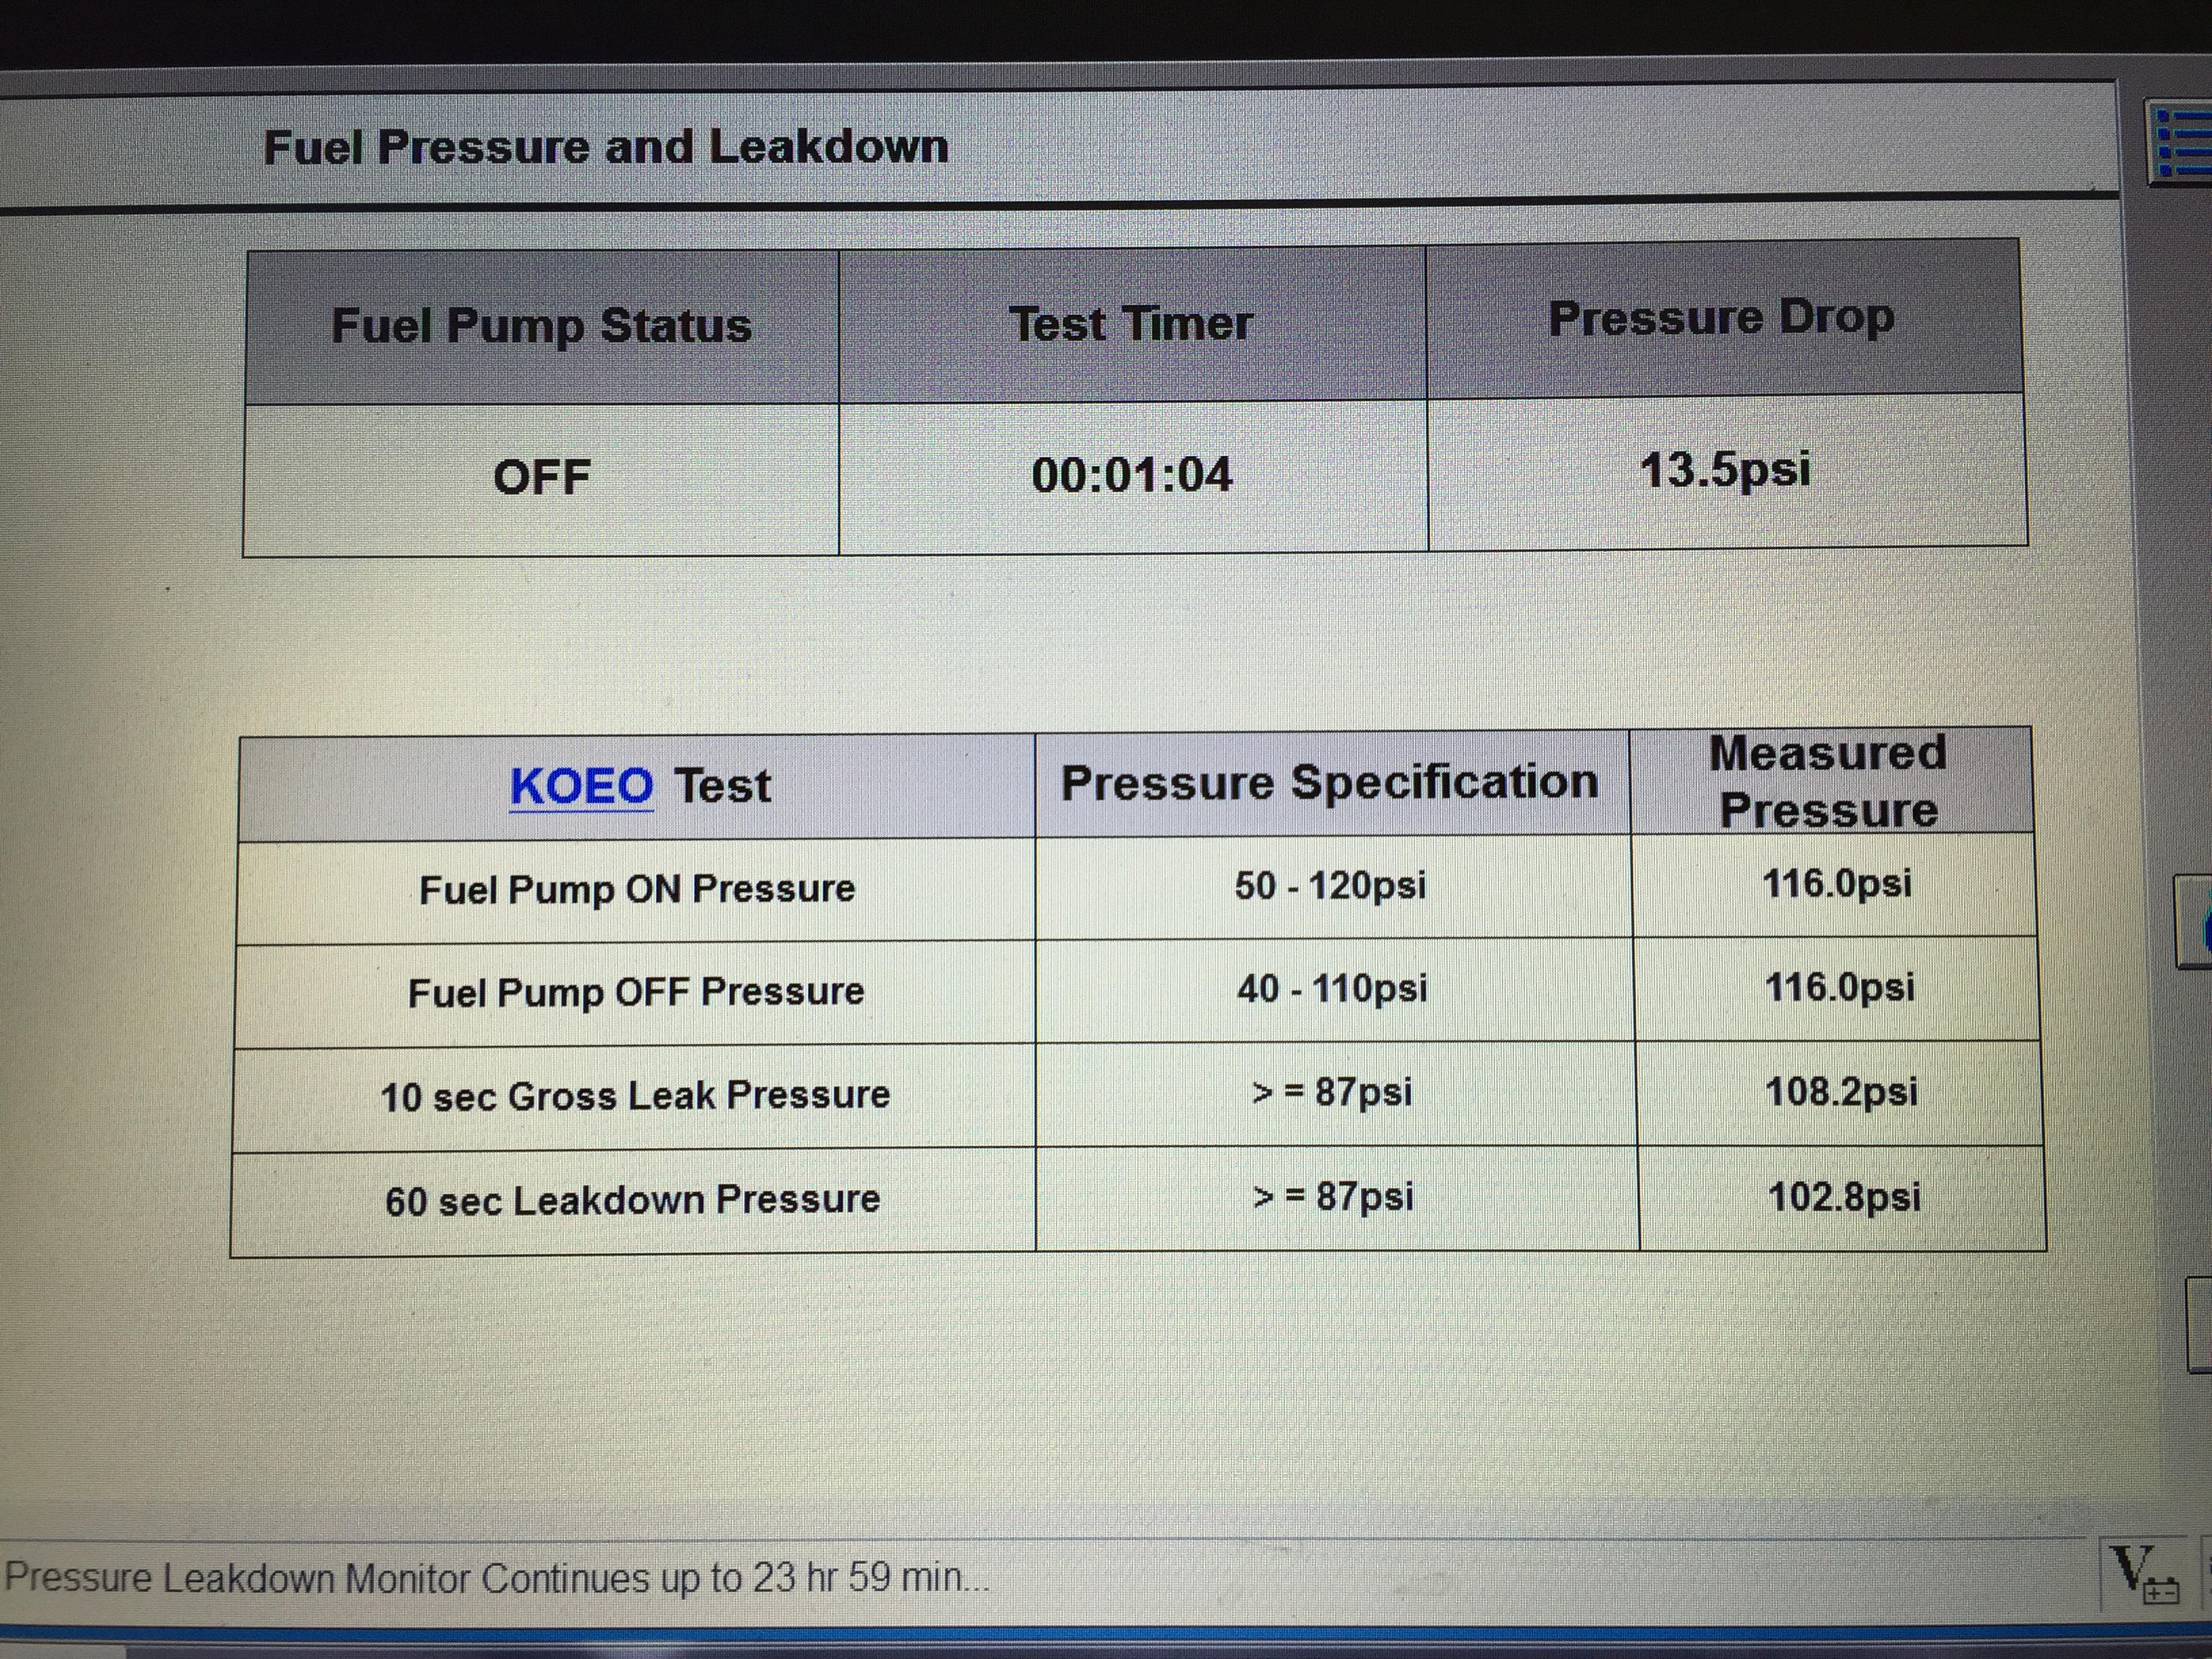
Not sure what proper pressure is on the earlier year 3.5 eco but my '15 was 116 psi. It can go as high as 120 psi.
Wow that's 2x what my 2012 engine was running at, even the control pack says 55 psi I believe.
Here is my 2015 Test with IDS. I will do a test on my 2011 to see what it shows.
The 2015 showed 116.0 PSI. It also showed the number could not be less than 87 PSI after a 10 Second Gross Leak Test and same after 60 second test. Mine never went below 102.8 PSI.
IDS can do the test for up to 24 hours.
How did you attach the fuel line down in the fender? Did you use a barbed quick connect or did you just clamp the fuel line over the quick connect that was already there? At first I clamped my line over the factory fitting, after cutting off the original fuel line of course. This wasn't adequate although I didn't have any issues with it. I ended up re-doing this properly after I had that fuel leak at the other end of the hose.
I'm sure you bought a barbed quick-connector for the other end and clamped it on, I just wanted to make sure. After the fuel leak I had I'm much more careful with that.
Yes, I have push lock AN hose ends and SAE quick disconnects on both sides. Fuel line is one thing I definitely don't want to cheap out on haha.
Not sure what proper pressure is on the earlier year 3.5 eco but my '15 was 116 psi. It can go as high as 120 psi.
Cool project, watching the build
The control pack instructions say 55psi so that's what I'm aiming for right now. Of course if I have to change it I will. Either way, this hose is rated for 250psi so it shouldn't be a problem.
This is from the control pack instruction manual:
" - Set regulator to maintain 50-55 psi delta fuel pressure across injector (50-55 psi at fuel rail with engine off)
- Use only AN type fuel fitting to interface with OEM fuel rail
- Fuel pressure regulator must have reference to manifold vacuum Fuel pump requirements: 155L/Hr minimum at 55psi"
I've been working a lot this last month and even cleaned my garage (which took about a week sadly), so I haven't had much time to get work done on the car. But I still have some new progress to report.
First off I got tires. I'm still on a budget with this car so I went with Hankook Ventus V12 Evo2s. I couldn't find anything better for less than 250 a tire. They're actually the same tires I had before, just bigger, so I already know what to expect from them. I'm going with 18x10 square stance so the size is 275-40-18, which unfortunately is not a very common size and limits the options quite a bit.
I painted my wheels gloss black and mounted the tires. The finish is by no means perfect but this is not a show car and I really don't care if it looks perfect. I'm pretty happy with how it turned out.
Finally, I put all the wheels on and lowered it onto ramps and axle stands to see how she sits. Of course the springs are brand new and the car isn't at full weight yet, so it should sit a bit lower when it's done. With that in mind, I absolutely love it. Seeing it like this really motivates me to get this thing done so I can drive it. Unfortunately the axle is noticeably off center even now and I won't have time to try the IRS conversion for quite a while, so I went ahead and ordered a new Panhard rod. Luckily these things are inexpensive, hold value really well, and sell very quickly on the used market (everybody wants a low mustang lol) so I'm not too concerned with buying one as a temporary fix.
I've definitely been slacking on the YouTube stuff, but I have another video update. I'm going with a new one-take and no editing format, because even halfway decent post-production takes a ridiculous amount of time that I just don't have right now.
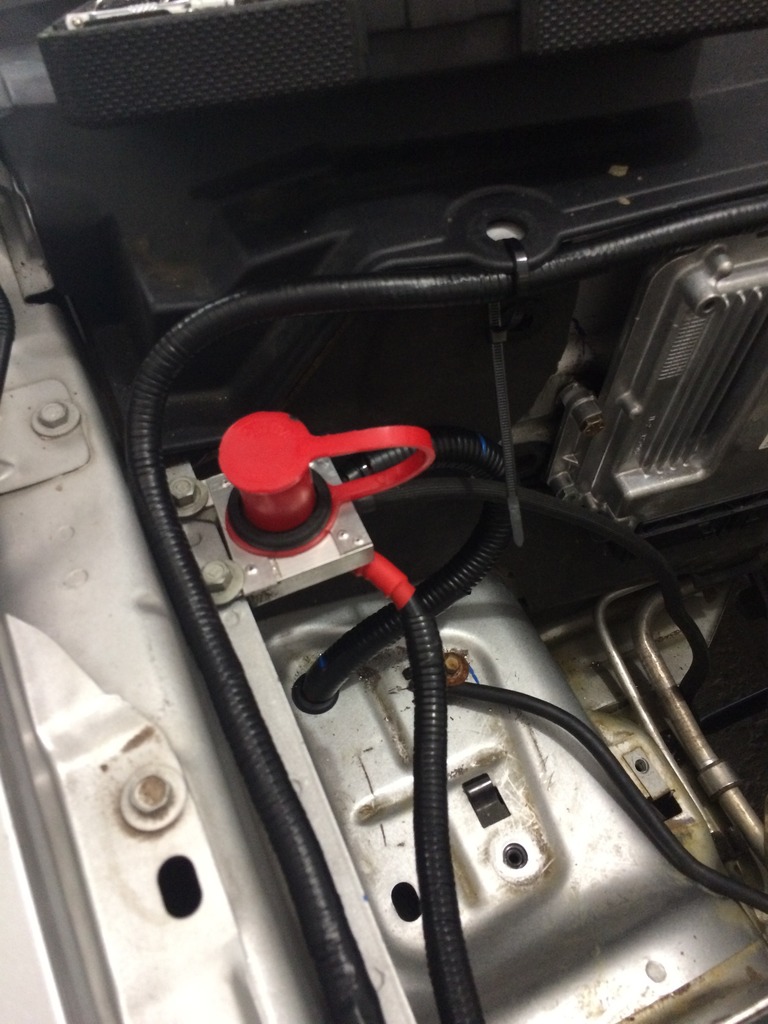
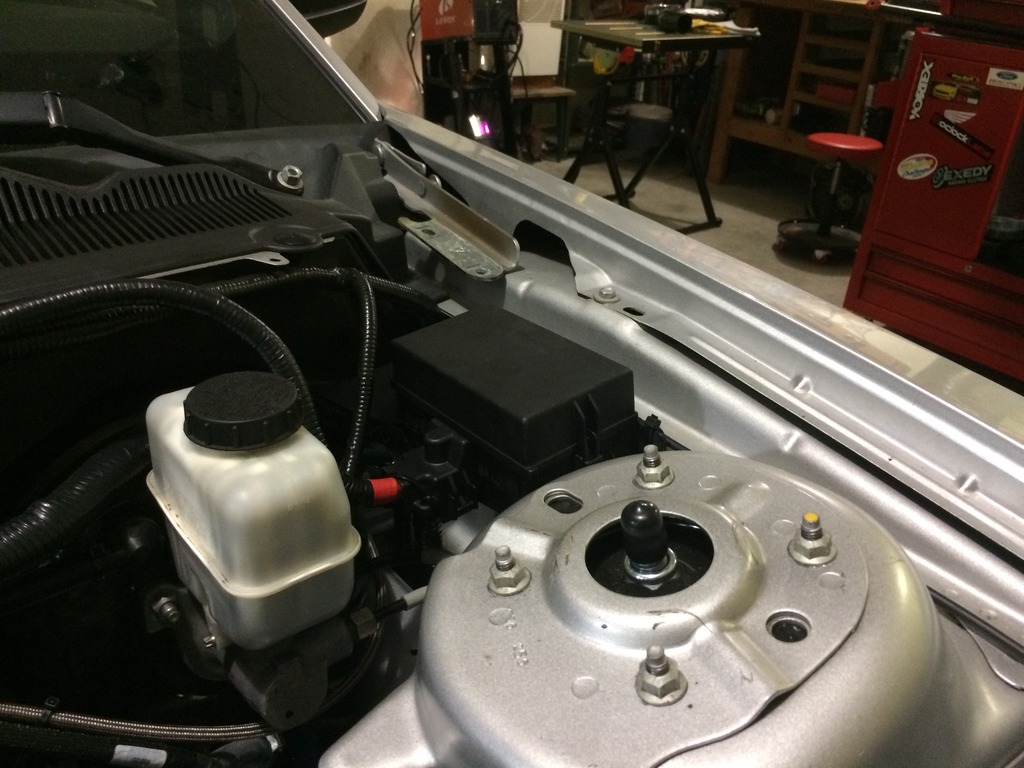
I've got most of the battery wiring figured out now, I just have to clean it up a bit. I have a positive terminal under the hood wired to the battery in the trunk, the starter, and a 250A ANL fuse that is serving as somewhat of a distribution block for the other electronics (alternator, EPAS, and both fuse boxes). I made some aluminum brackets for the coolant tank, and finished up most of the coolant plumbing. There's a bit more wiring to be done still, plus finishing up the intercooler piping, and the exhaust. But I finally feel like the end is in sight!
I should be finishing up the wiring this weekend, but I made a quick video update a few days ago as well. I'll update the thread soon too once I have the wiring done.
I give you a ton of credit for doing this project in your garage by yourself.
Any ETA on when you expect to fire up the engine?
Thanks! I'm hoping to start it up for the first time within the week, and have it on the road within two (knock on wood). The to-do list is definitely getting shorter, but I'm pretty much down to my least favorite part now (intercooler piping) which I'm admittedly procrastinating a little bit, and exhaust which I won't be doing myself.
 6/13/16, 08:25 AM