When you click on links to various merchants on this site and make a purchase, this can result in this site earning a commission. Affiliate programs and affiliations include, but are not limited to, the eBay Partner Network.
Since I'm pulling out my wood steering wheel before I sell my car, I decided to do a write-up (with pics) on the removal. Some people won't agree with all the steps I'm listing, but this is the way I did it. I'm not a mechanic so take that for what it's worth. This is just a guide. You should use Ford's service manual to ensure you do this correctly. Think about it... messing with an airbag can be dangerous.
1. Loosen the 5/16" nut and disconnect the negative lead of the battery.
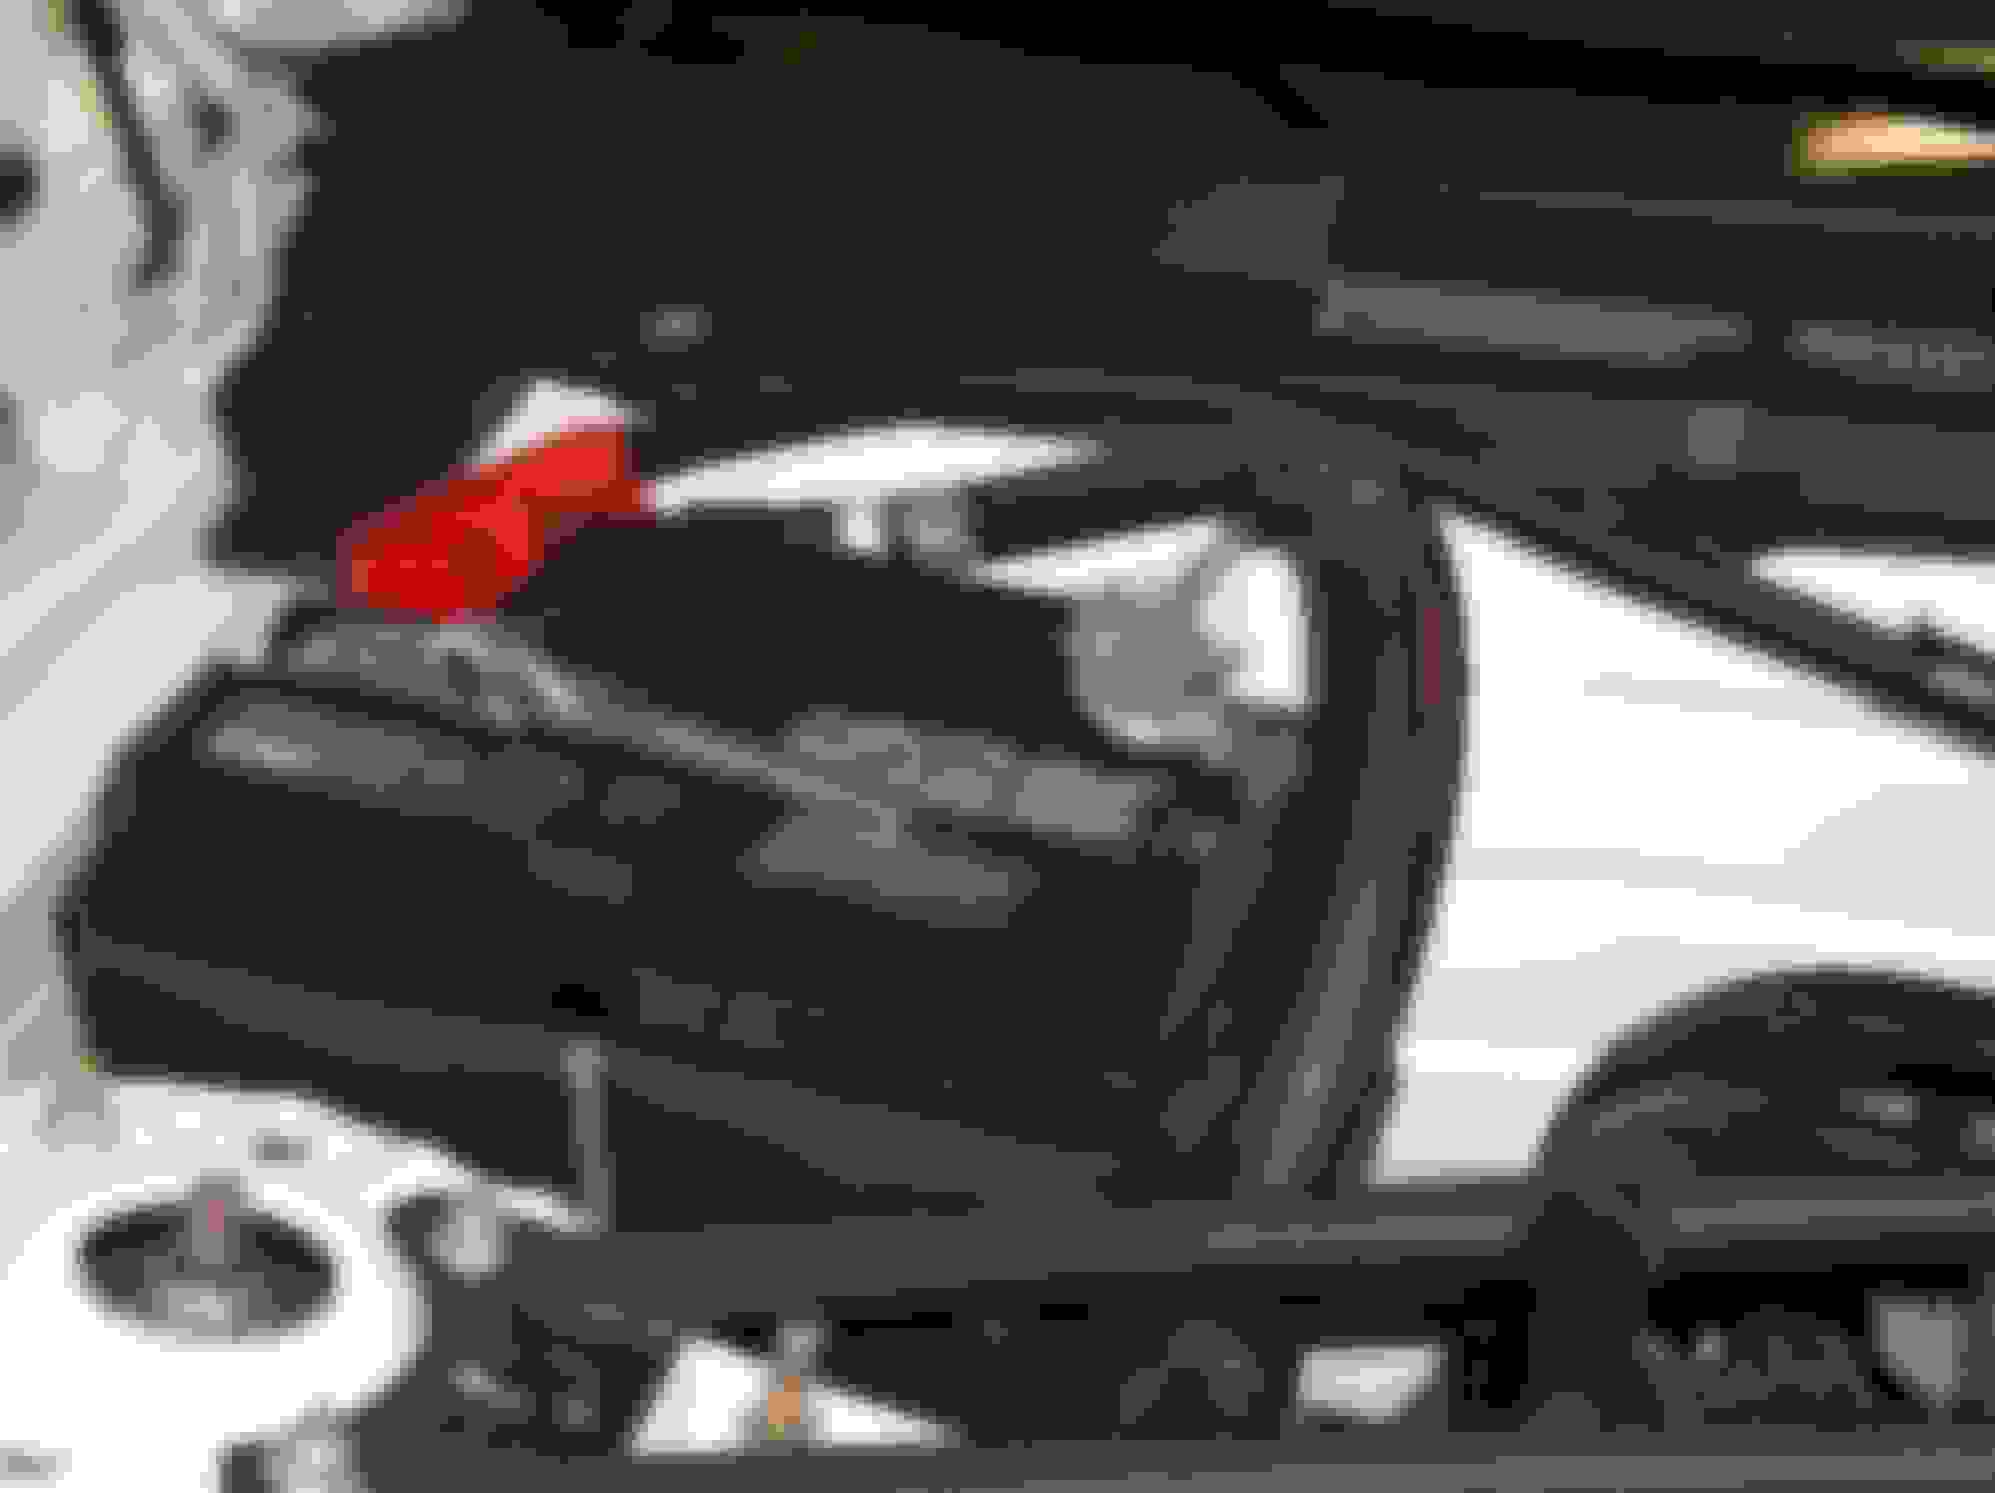
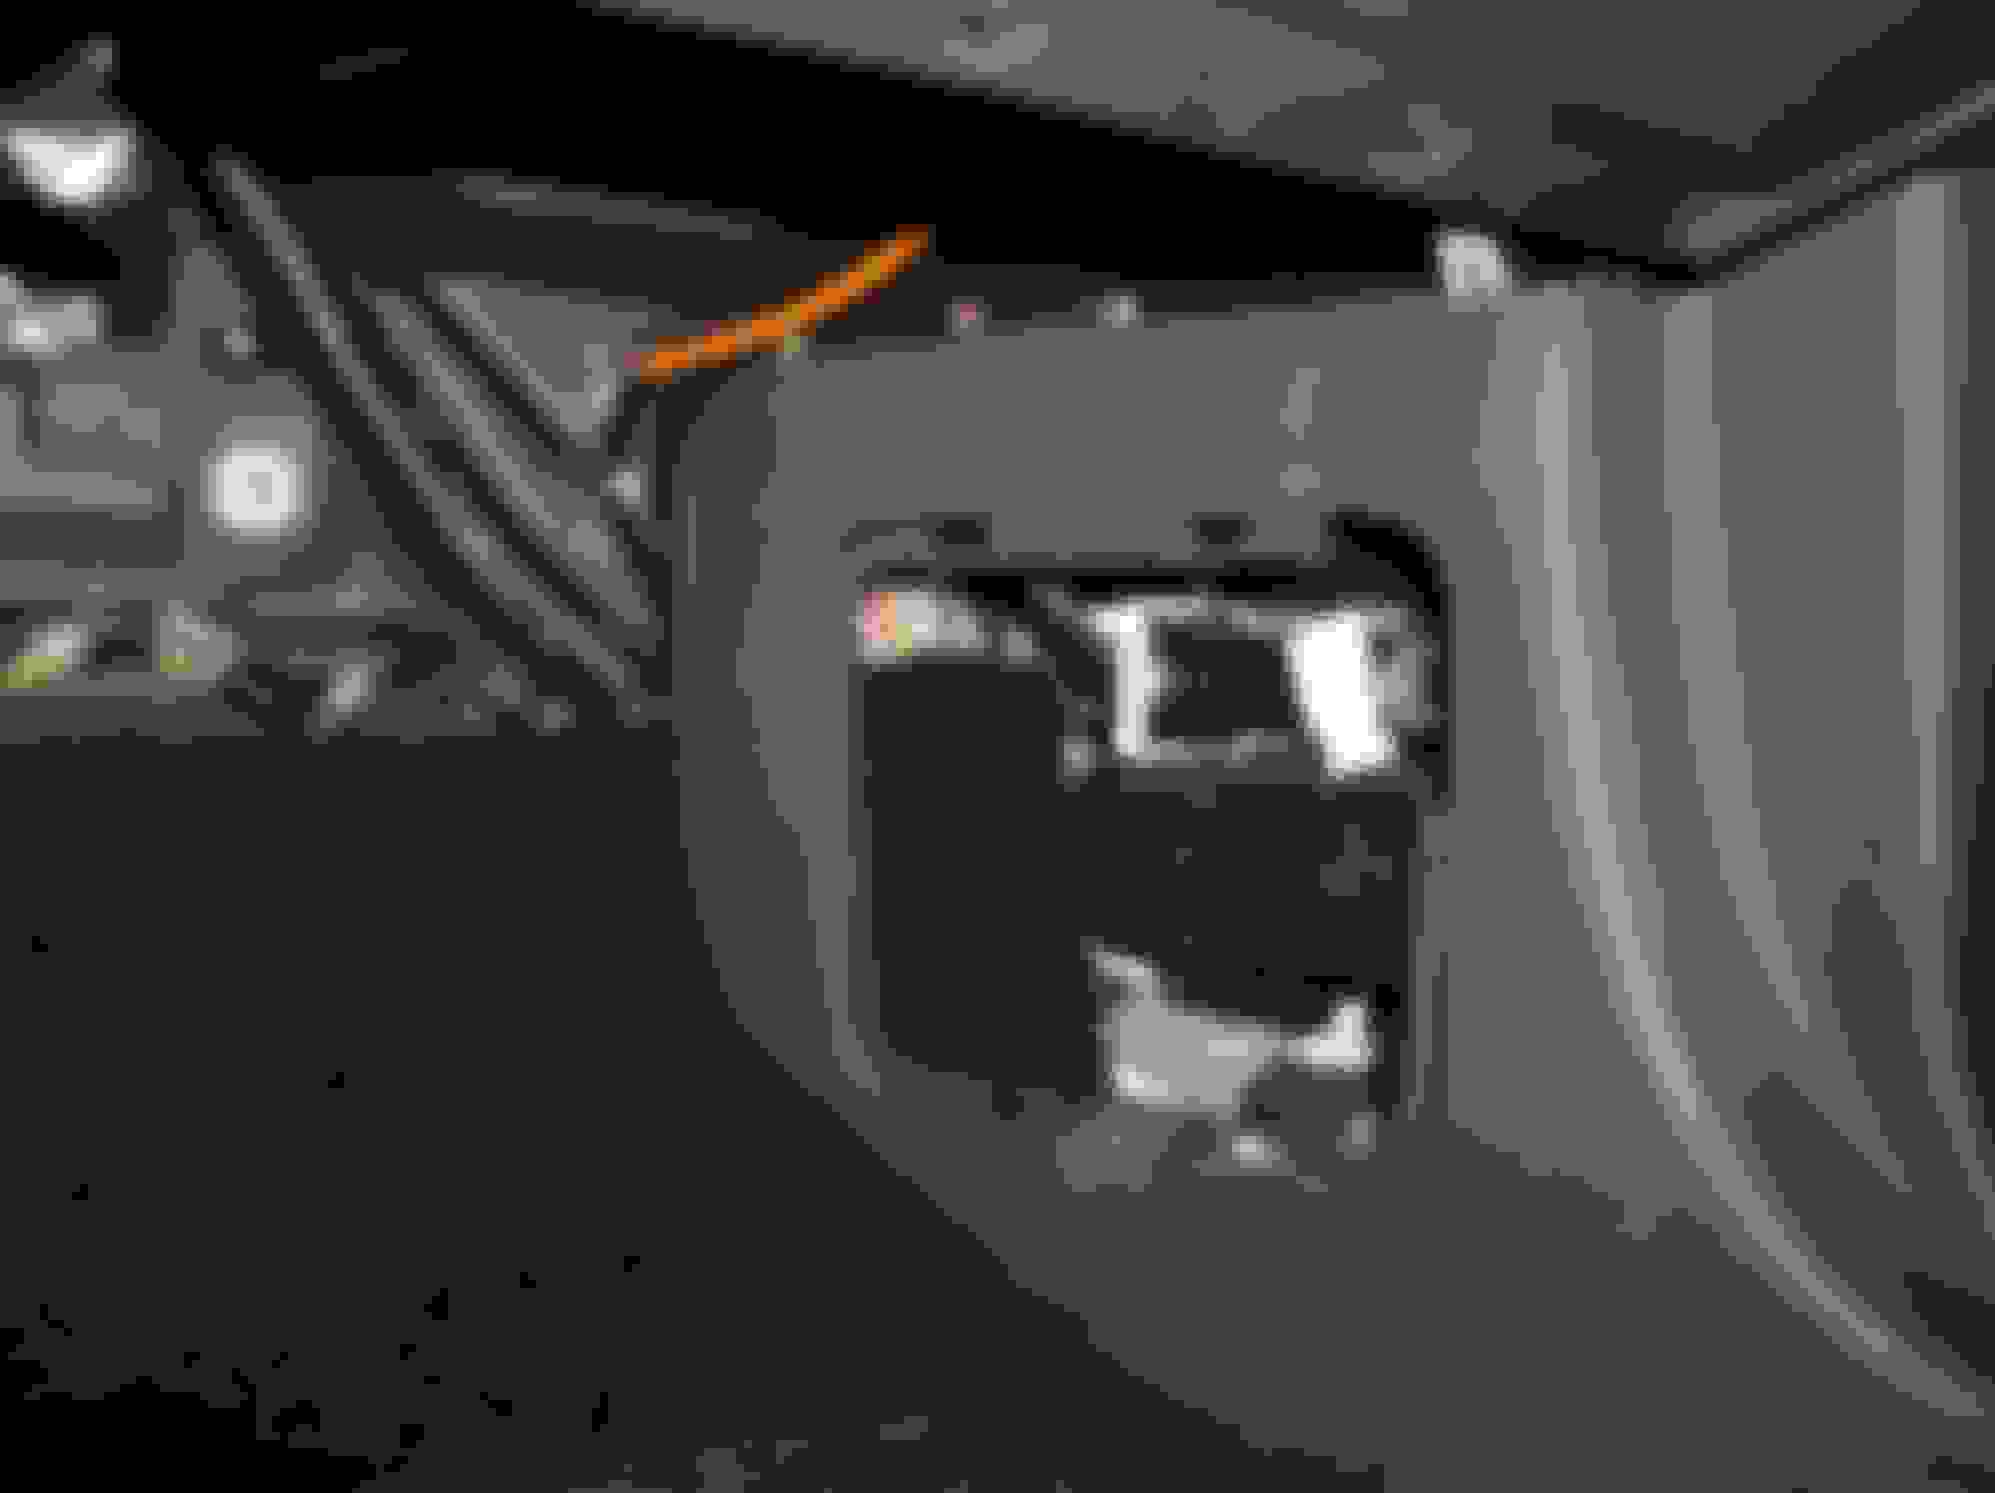
2. Remove the access door from the passenger side kick panel.
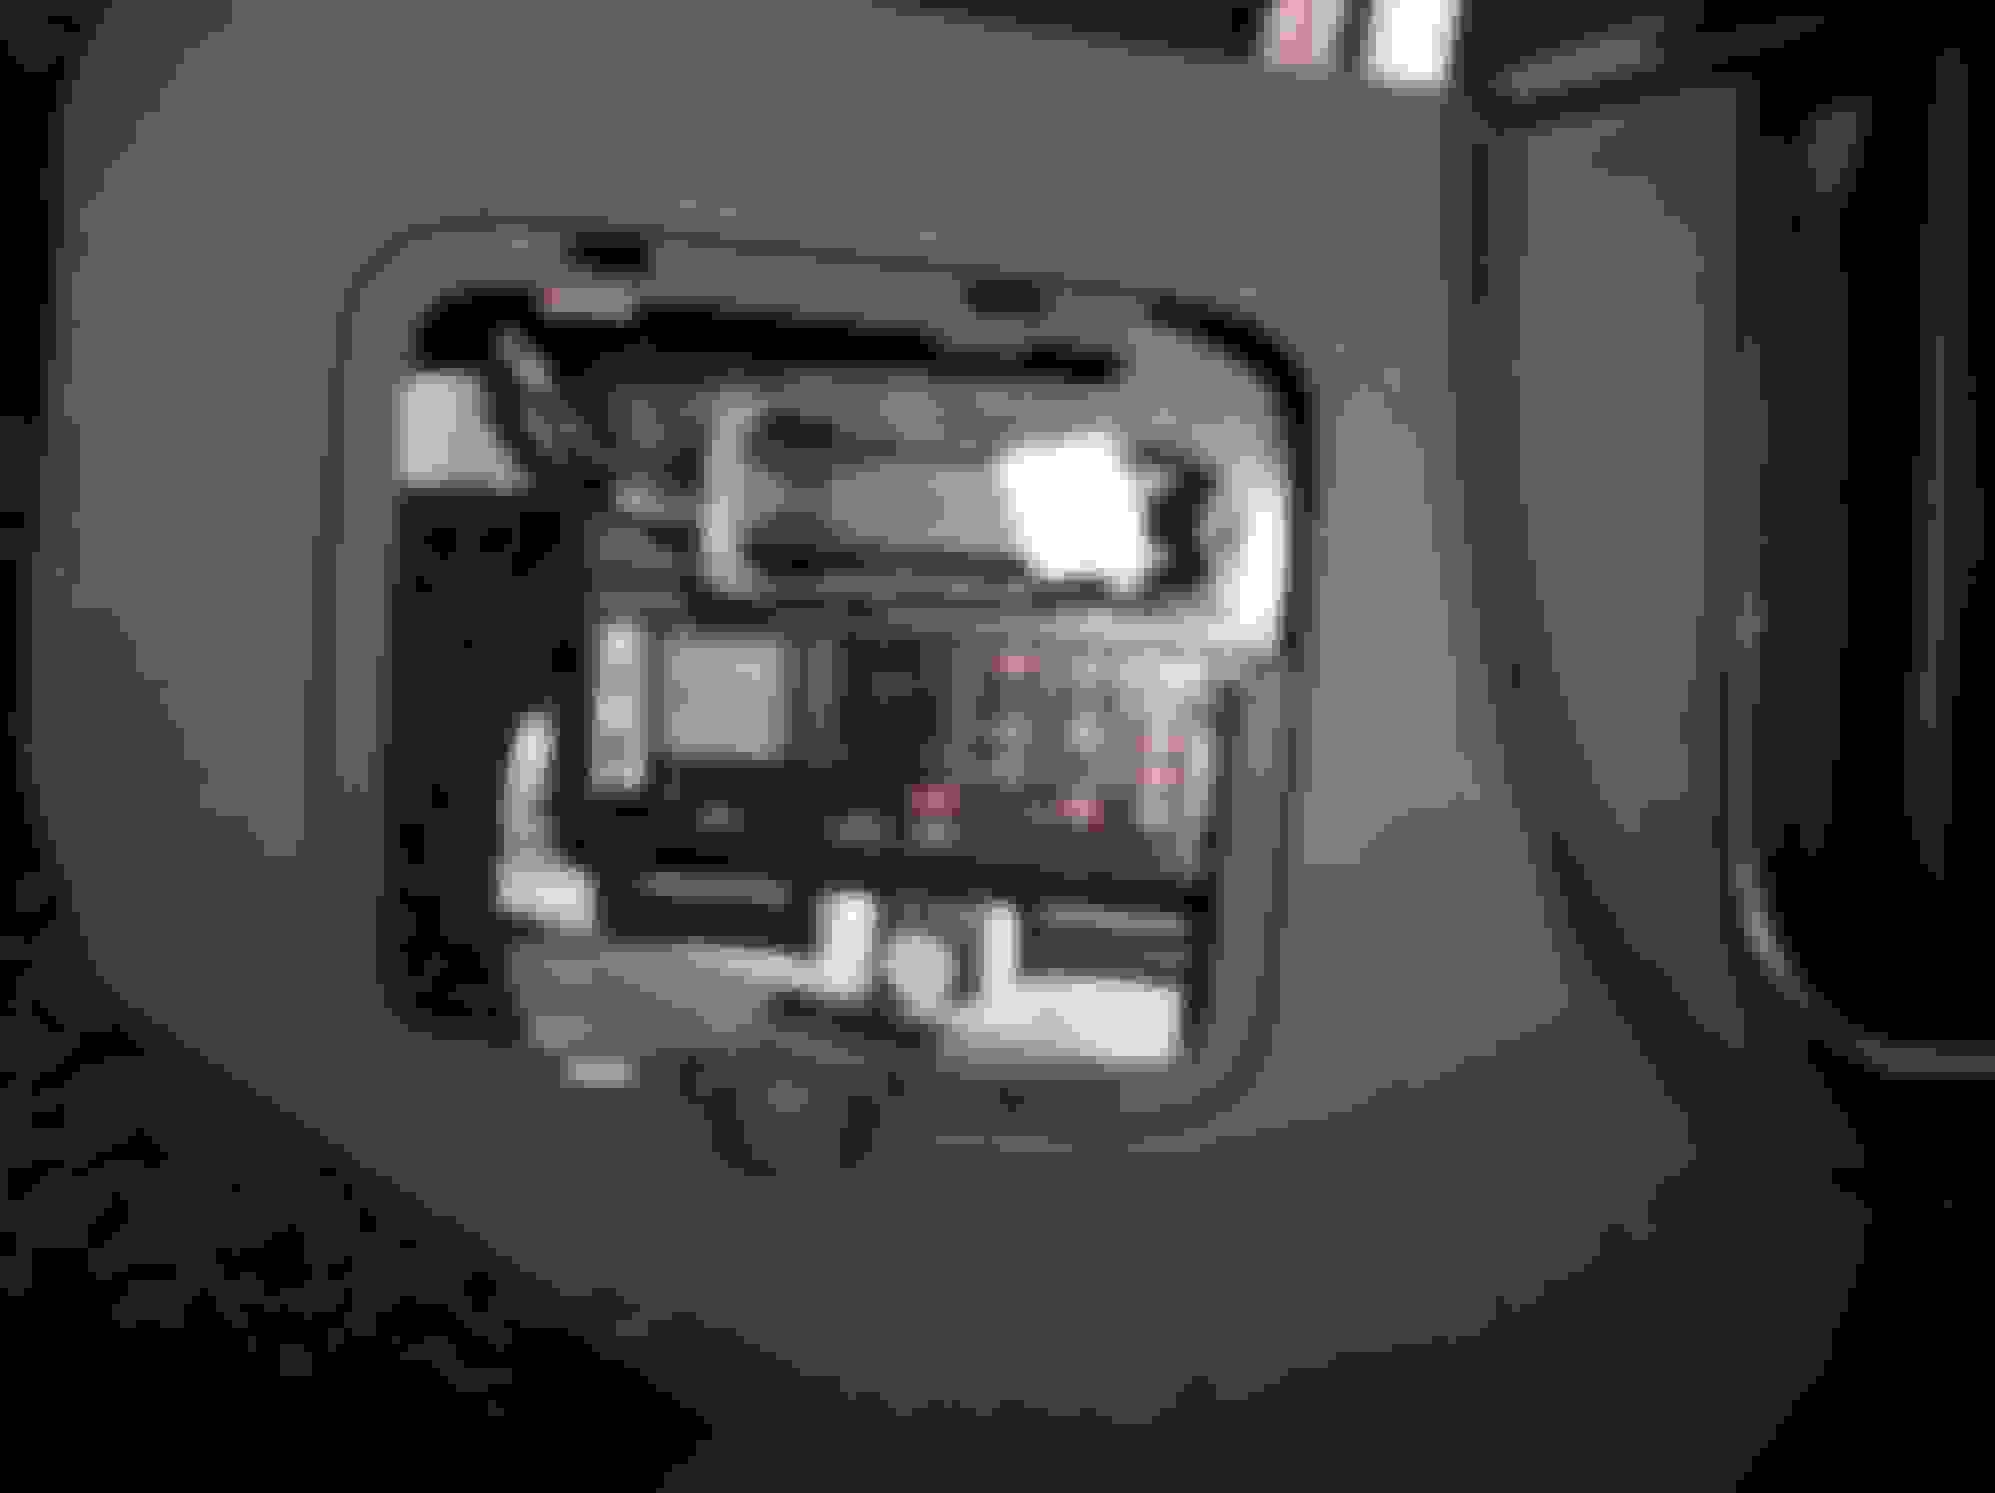
3. Remove the cover from the Smart Junction Box.
- There are tabs/clips on the front (left side in the pic) and back sides that hold the cover in place.
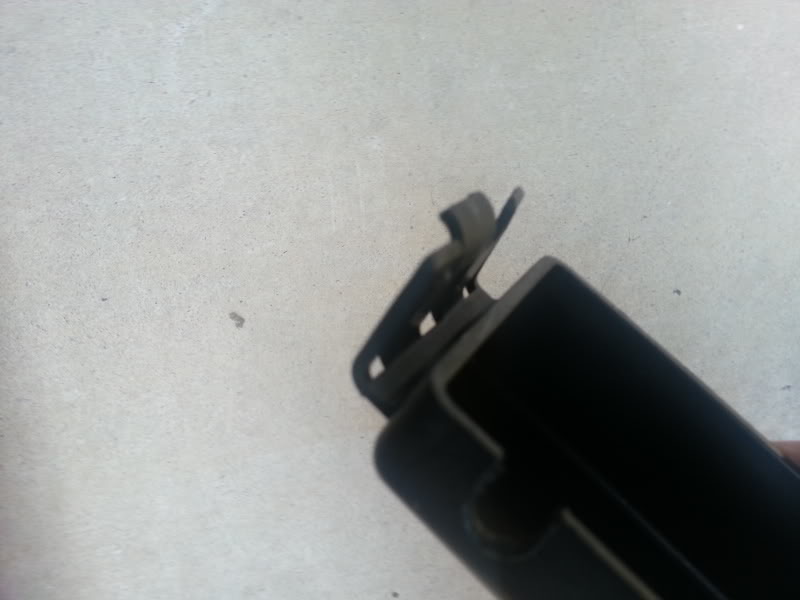
4. Pull the airbag fuse. F2-17
5. Pop out the little covers on the back sides of the left & right spokes.
6. Remove the 5/16" bolt on each side.
- These are the bolts that actually hold the airbag in place.
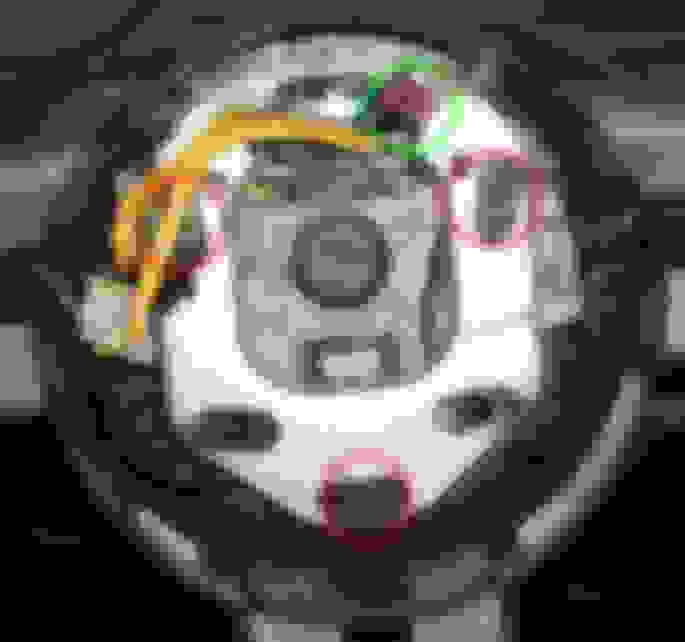
7. Pull the airbag away from the wheel.
- See the black metal tabs with a hole in each one? That's where the bolts were.
- That's all that's holding the airbag in place so once you remove the bolts you can just pull it out.
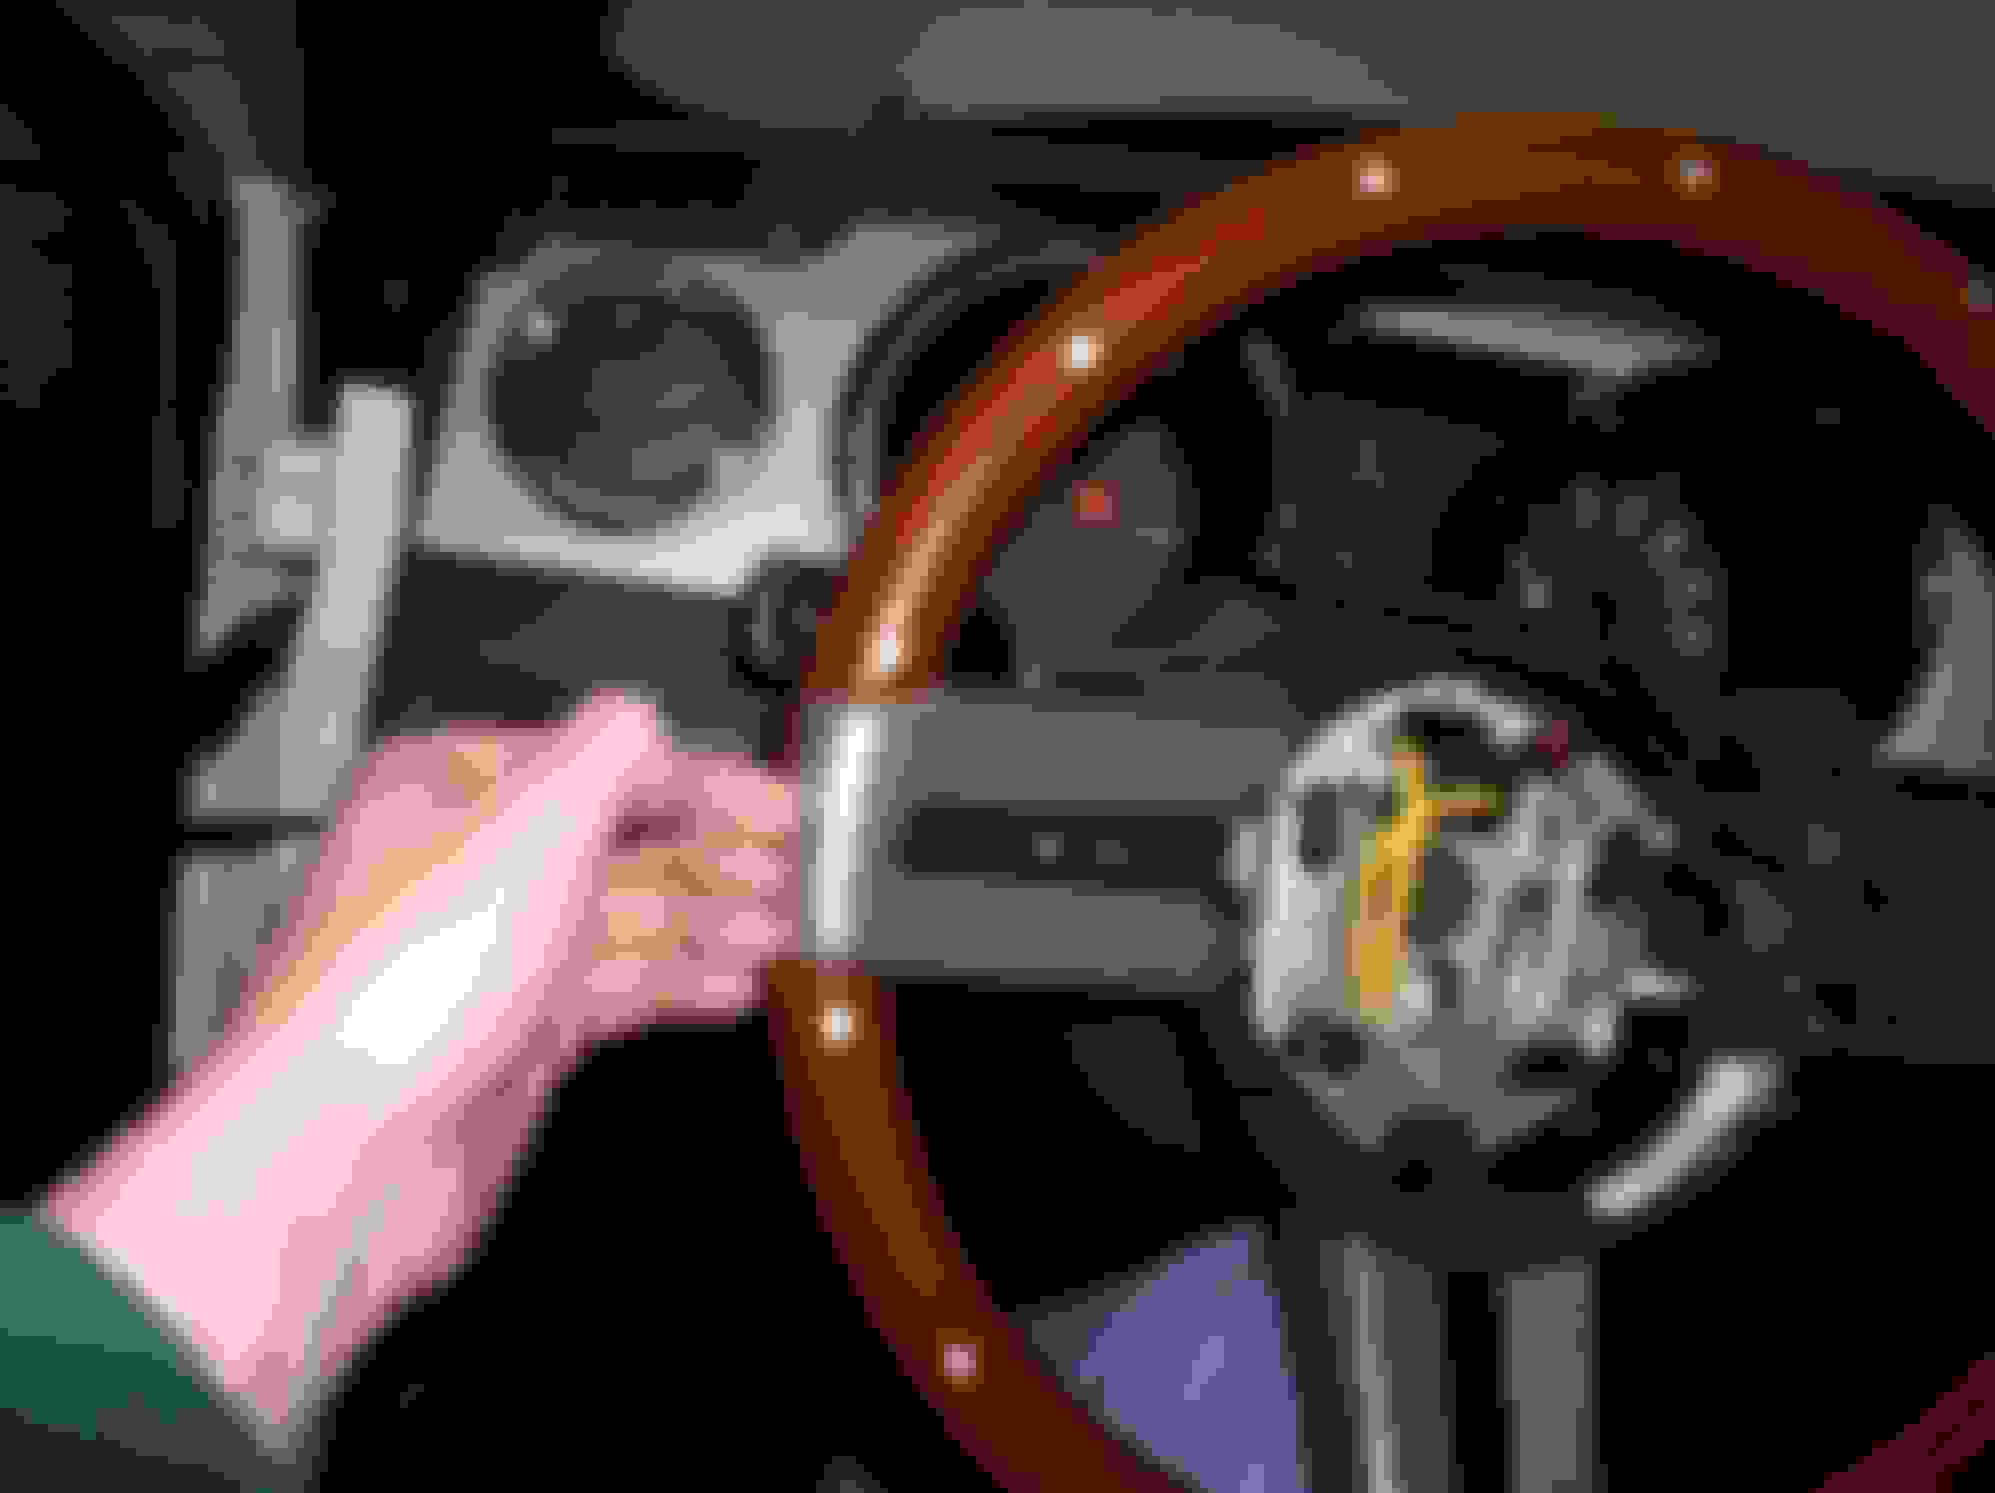
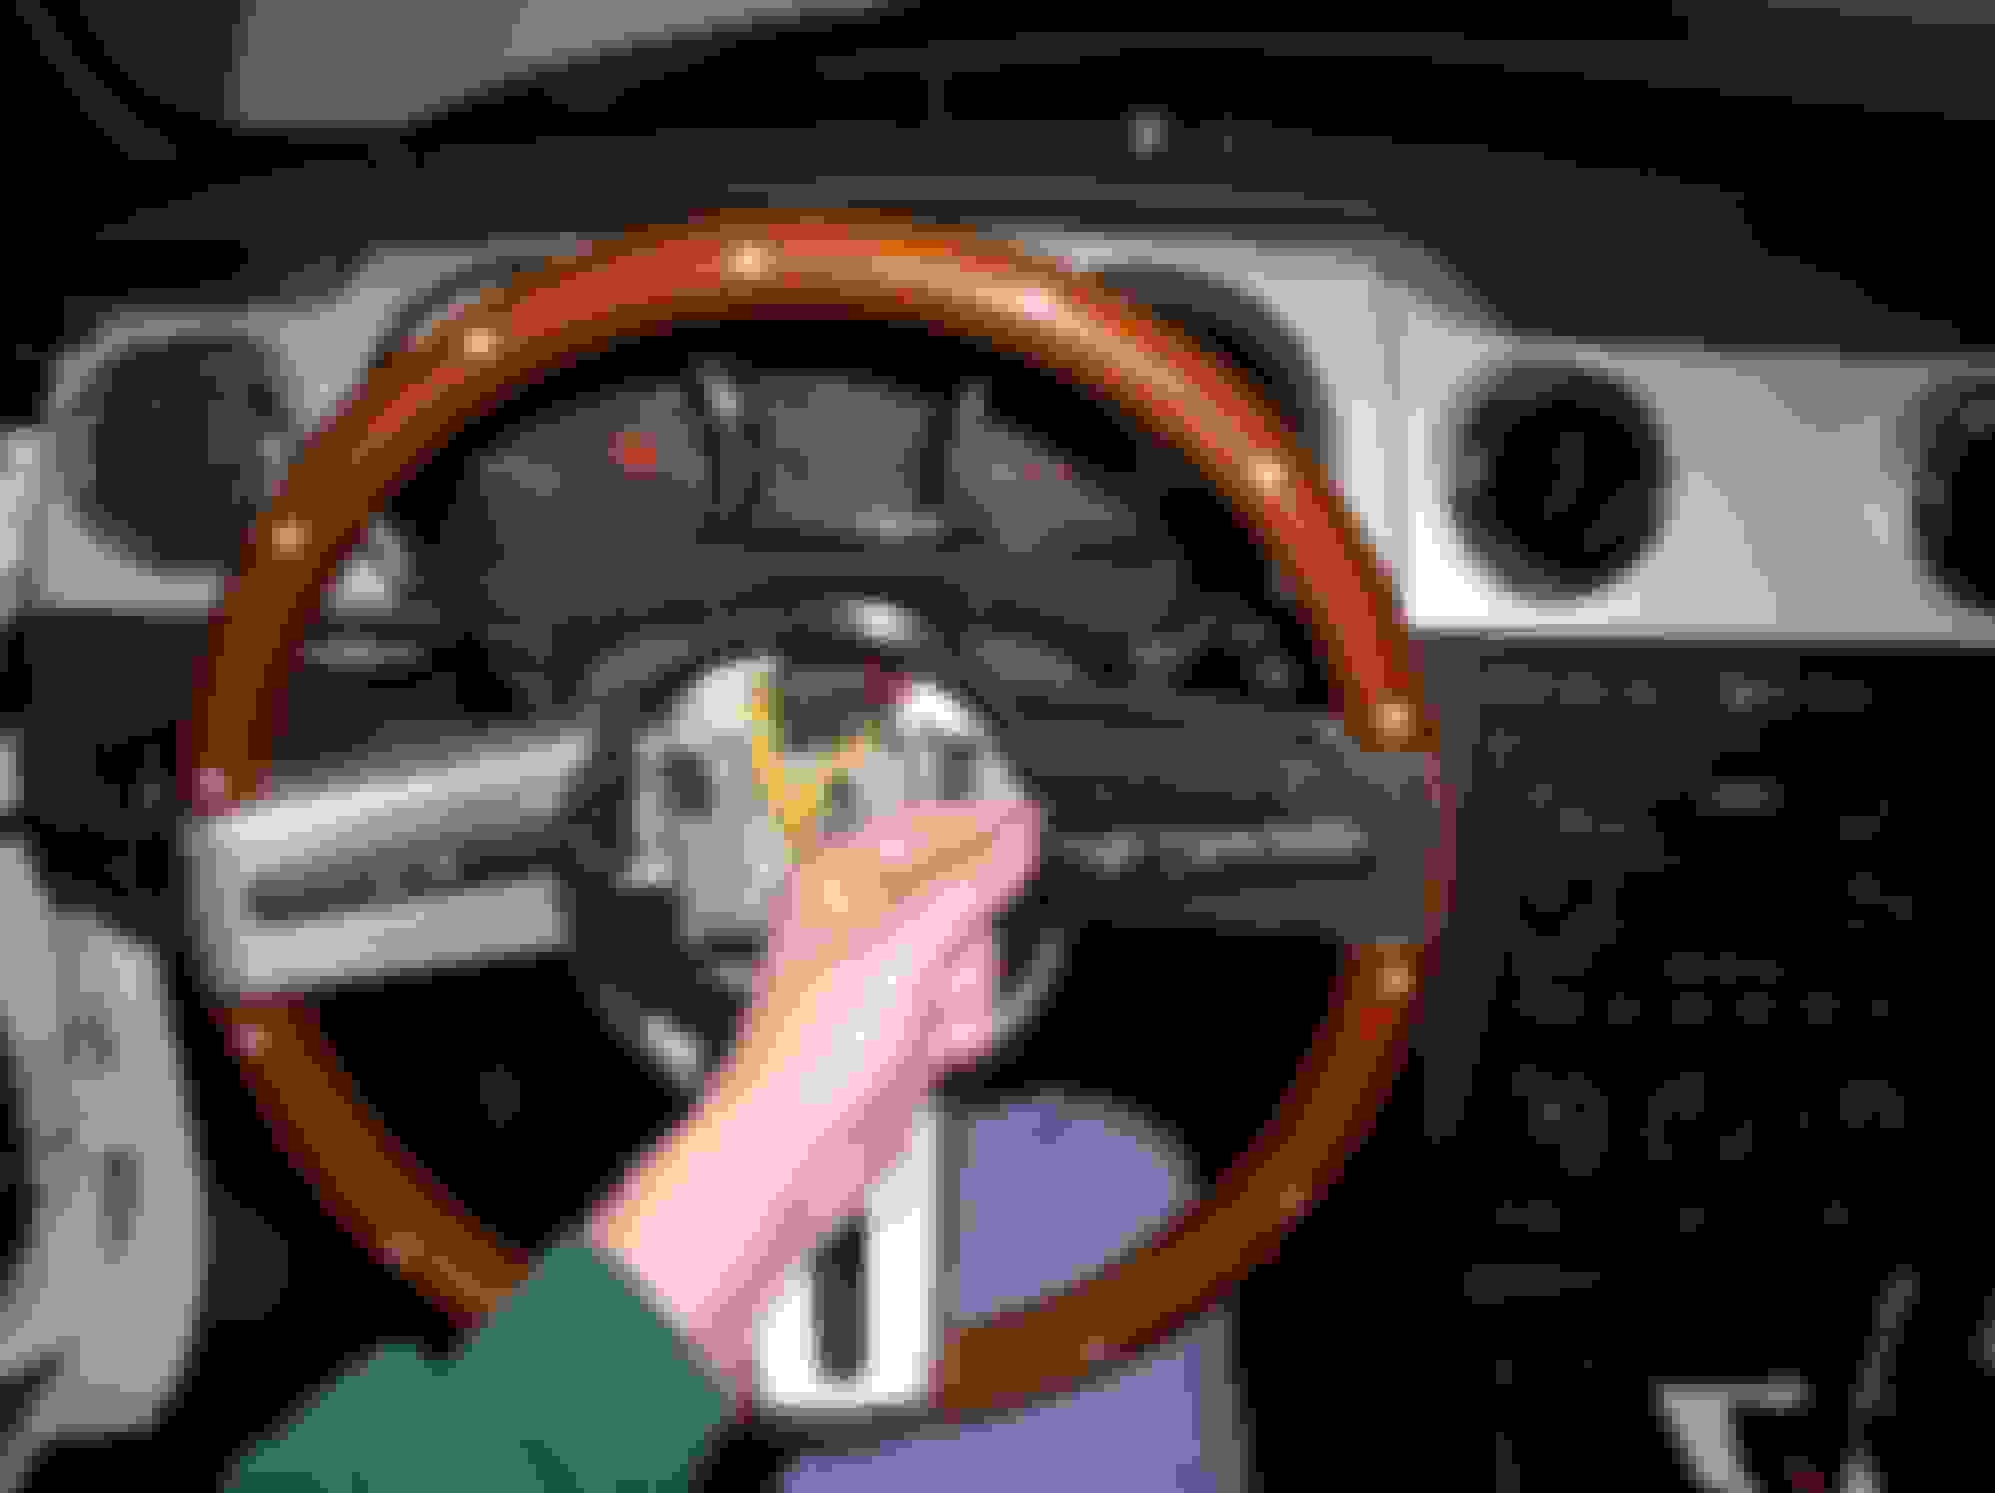
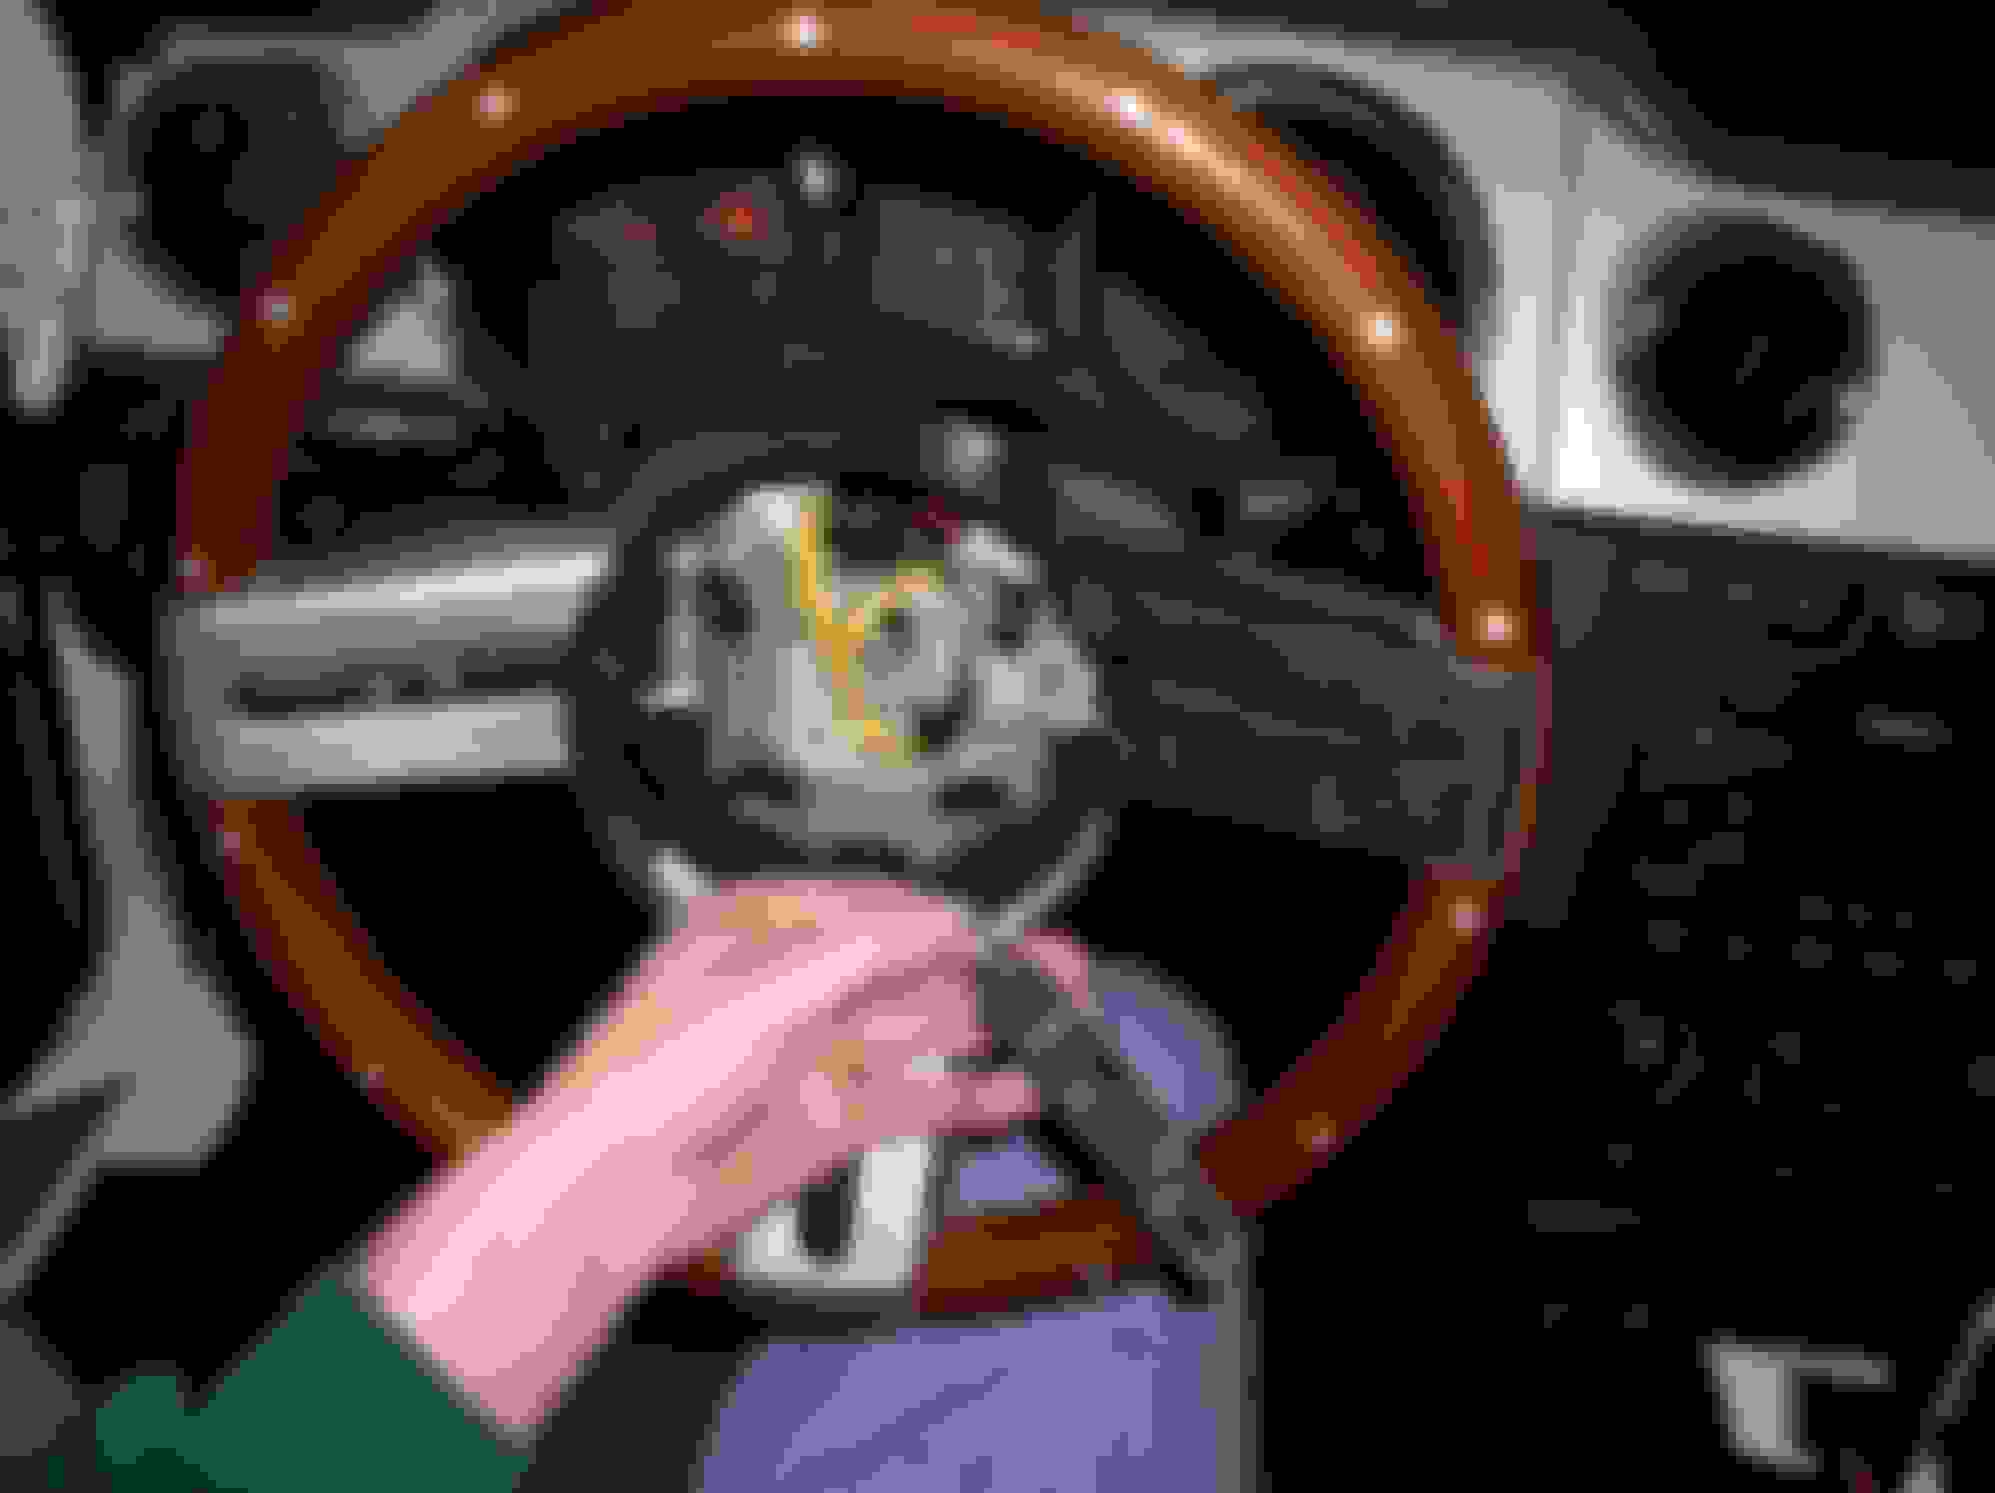
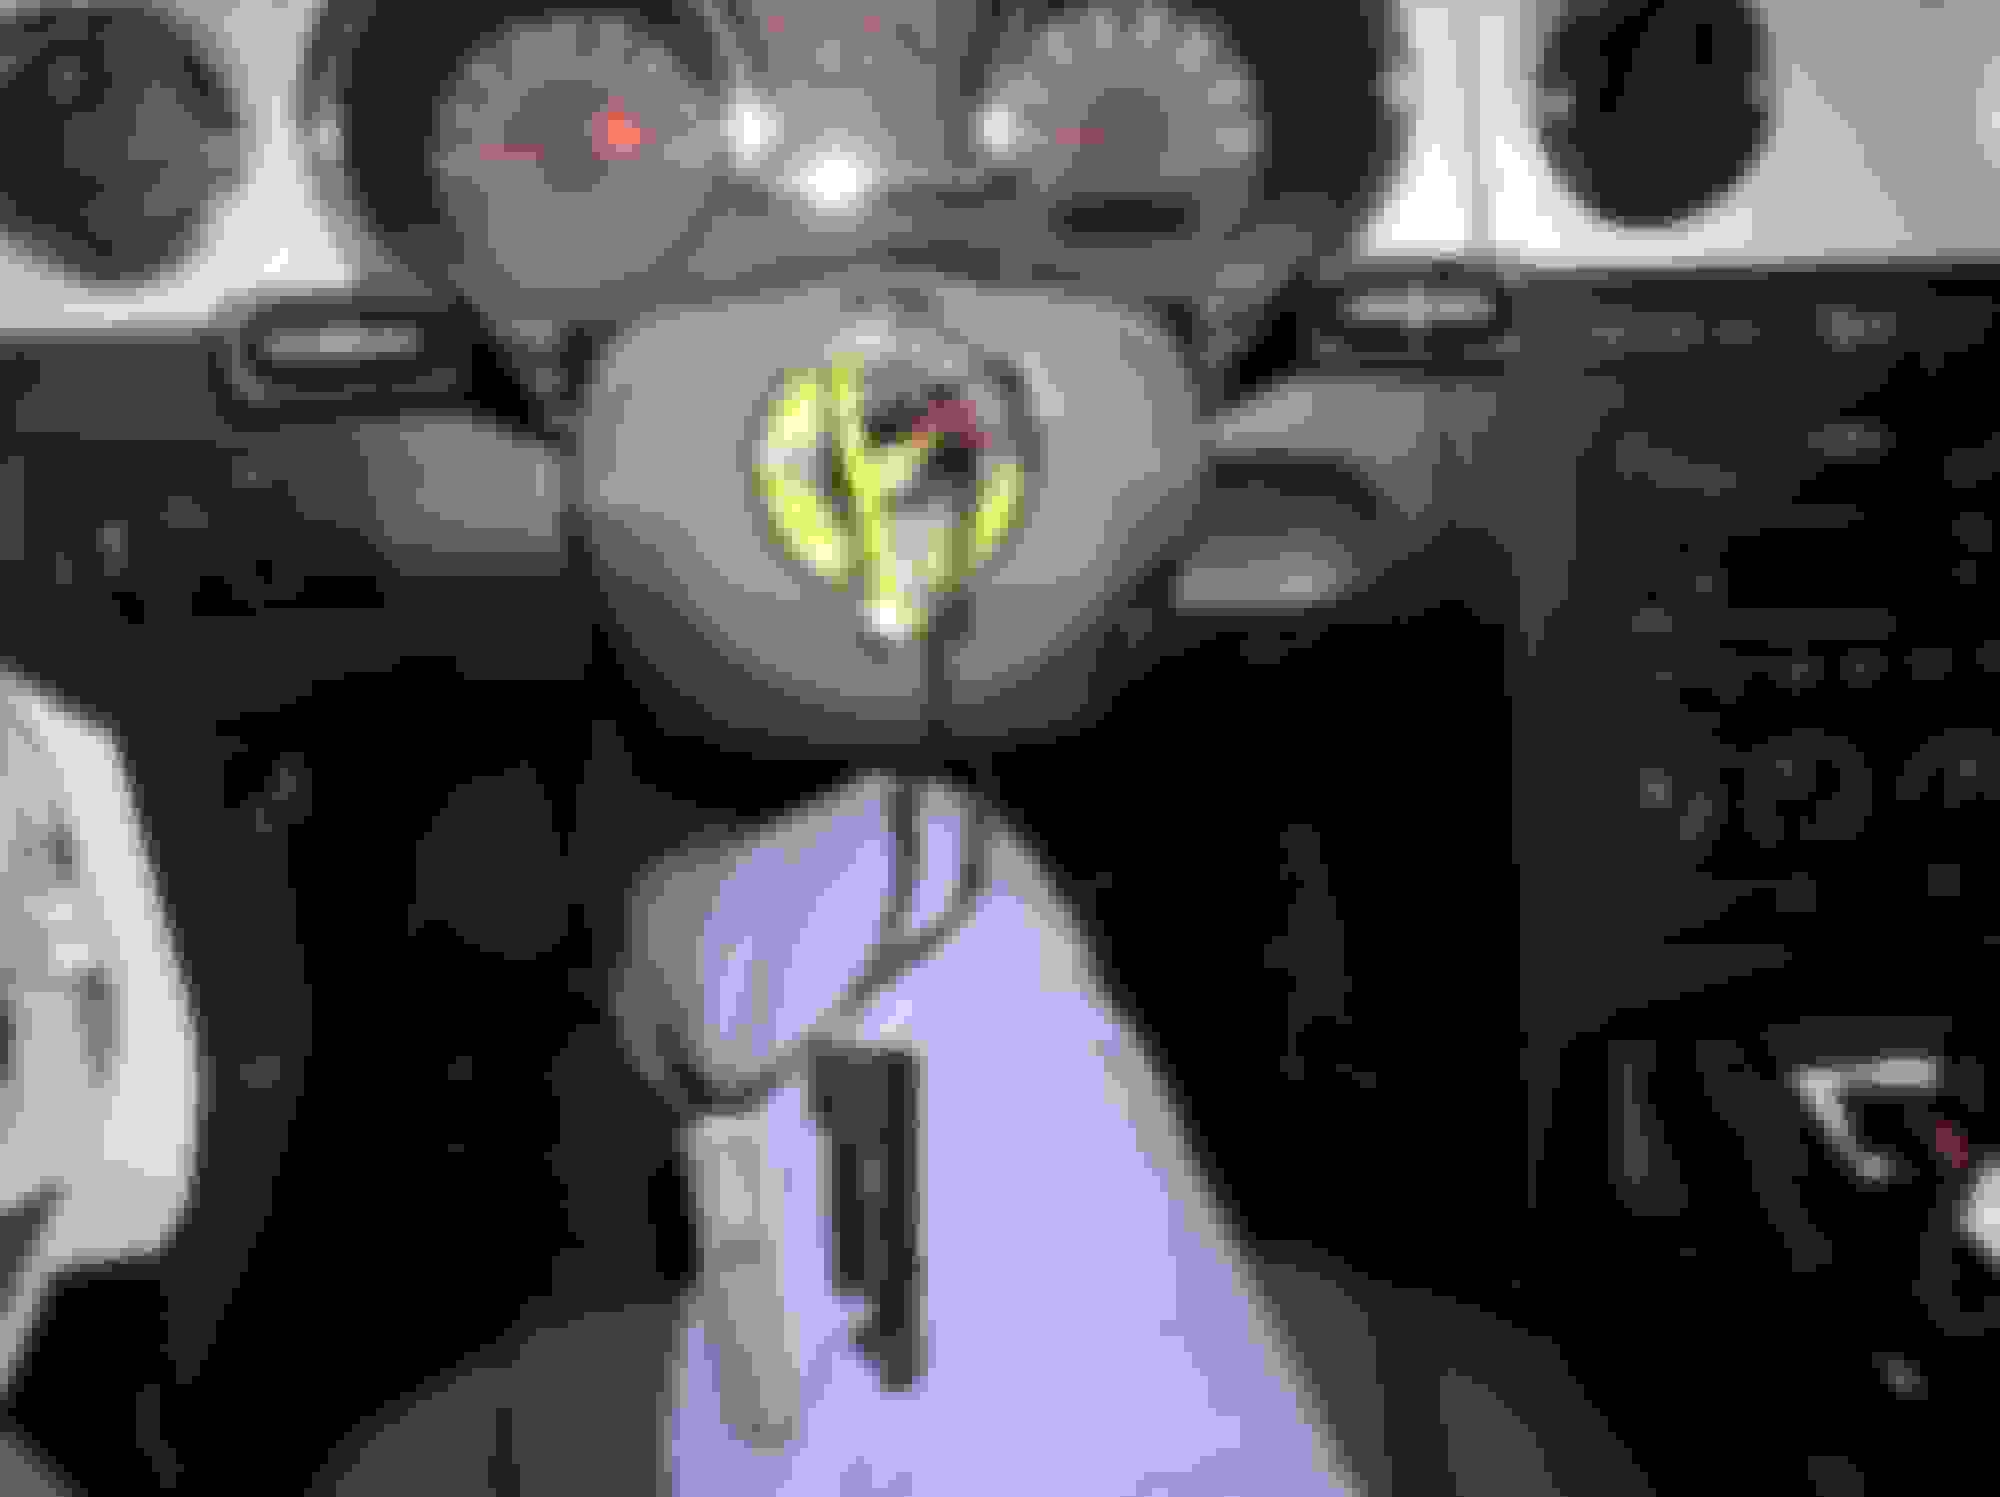
8. Disconnect the clockspring electrical connectors. (the wires with the yellow sleeves on them)
- Squeeze the tabs on the sides of the connectors to release them.
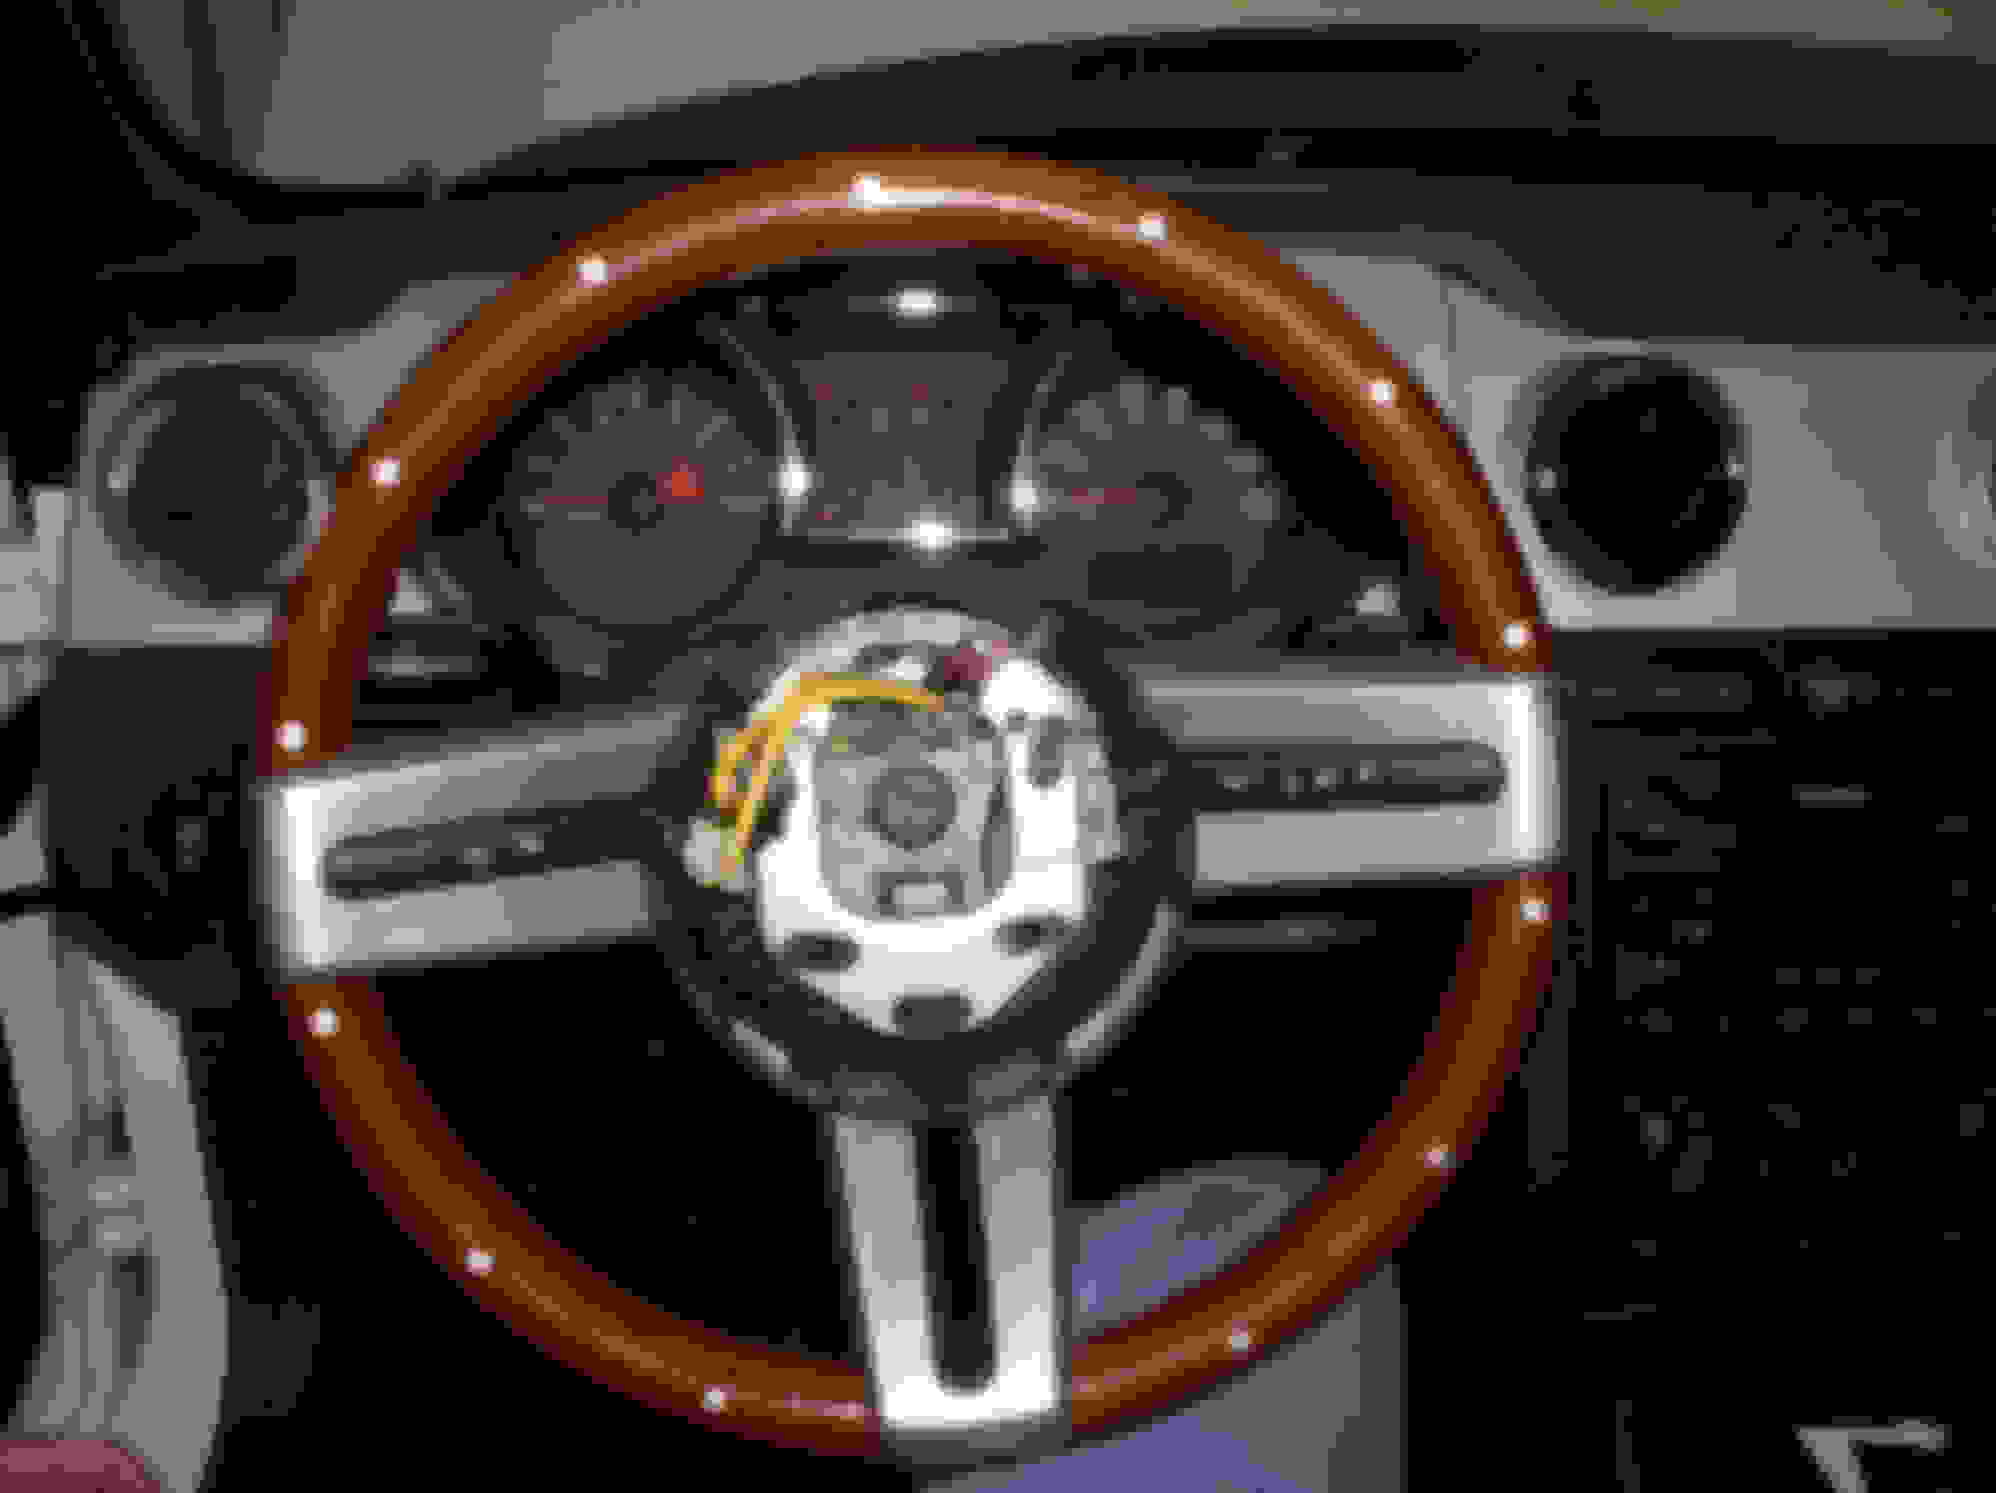
Airbag removed:
NOTE: You can skip steps 9-14 then simply unplug this single connector for the cruise, horn lead and horn ground if you'd rather remove the other parts after the wheel is off.
(you'll probably have to swap several parts from your old wheel to your new one)
I couldn't get the connector out even though I had it out for the initial swap 2 years ago. [IMG] [/IMG]
(EDIT 9/15/2016: There should be a picture here showing the connector I'm referring to but after 8 1/2 years, I've forgotten what pictures I used before or which connector it is. Sorry!)
9. Remove the left & right inserts by pulling on the edges. (sides or end)
- It was easiest for me to pull on the ends instead of the sides simply because the wood wheel has more of a gap there than the leather one.
The inserts (and the cruise control buttons) have plastic tabs that are in tight holes in the thick black rubber underneath.
The tabs don't "snap" into anything so they'll just slowly come out of the rubber. [IMG] [/IMG]
(EDIT 9/15/2016: Again there should be a picture here.)
10. Remove the cruise control buttons the same way. They also have tabs going into the rubber.
11. Remove the three T30 torx bolts from the horn plate. (red circles)
12. Pull the dark red connector off of the tab on the horn plate. (green circle)
13. Remove the T20 torx screw in the pink connector. (red circle)
14. Pull the black cruise control wires from the white retainers. (green circles)
15. Remove the 15/16" steering wheel bolt from the center of the wheel.
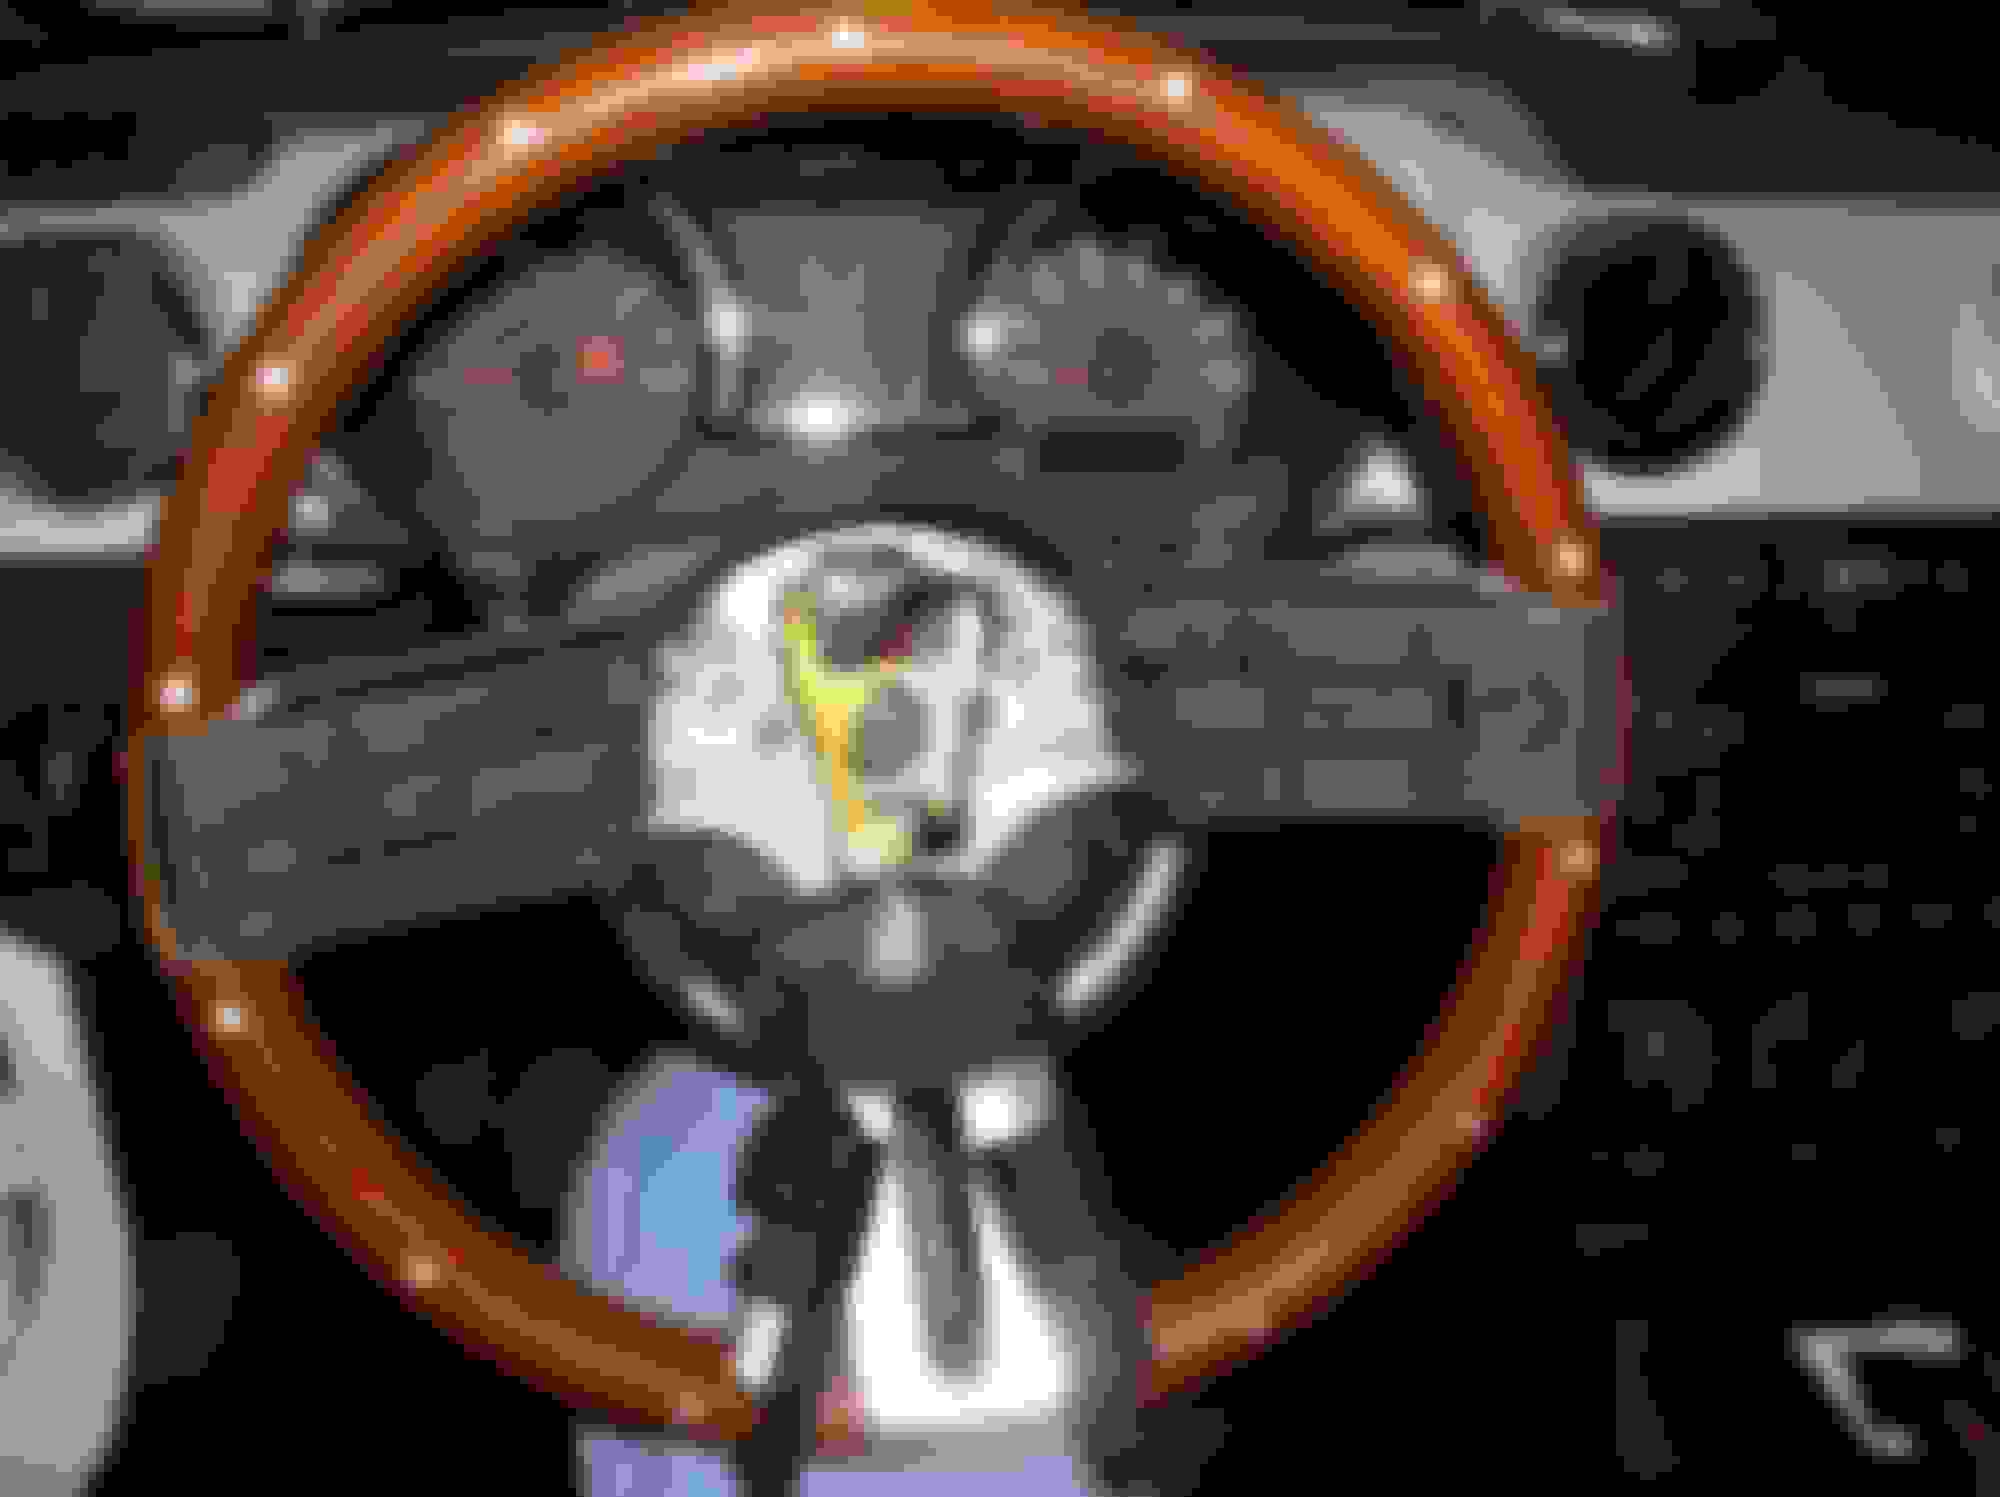
16. Remove the steering wheel.
If anyone has any questions, corrections, or something they think should be added, please let me know.
Thanks to garyb900 for the pic of the SJB fuse diagram and to TacoBill for all the great write-ups he's done.
EDIT 9/15/2016: It took a lot longer than I expected to get the pictures back up and I was in a hurry so I apologize if this "How To" isn't as good as it was the first time.
Thanks for the "how-to"!
One question: what's the best way to enure the new steering wheel is correctly centered? Are there any markings to show you the "straight ahead" position?
It only goes on one way so that wouldn't be a problem.
The electrical plug for the airbag wires lines up in an opening in the wheel and the bolt centers it up.
Great write up! the whole procedure looks pretty straight forward.
BTW, why did you need to remove your cruise control buttons?
The wires run through the center of the wheel so the cruise either had to be removed or unplugged. It was easier to pop out the buttons than unplug them.
Hey, Bill. Ever thought about making your own website just for write-ups?
Here's a Jeep example: http://www.stu-offroad.com/index.asp
I'm not sure if he gets his stuff and only posts on one website (www.jeepsunlimited.com) or not, but his site is well known on all the Jeep forums I've been to.
3. Remove the cover from the Smart Junction Box.
- There are tabs/clips on the front (left side in the pic) and back sides that hold the cover in place.
...
Ok...Im about to shoot my car. I cant get the goofy lid off.
Where are these tabs? Im hitting and pushing on everything and its
not budging.
Great write up! I replaced my steering wheel today with a Grant wheel from Summit Racing (picked it up on clearance for less than $120). The hardest part was getting the cover off the SJB.
 2/2/08, 08:11 PM


 You give me too much credit!