
WebElectric Sequentials installed - pics & vid


WebElectric Sequentials installed - pics & vid
Just received my WebElectric Sequentials yesterday. I got the whole plug and play harness, no cutting or splicing of wires were necessary with this kit.
Install time was under 1 hour. Could have been quicker, but I was in no rush and took time out to take pics of the install.
Hope some of these pics answer your questions about installing the sequentials.
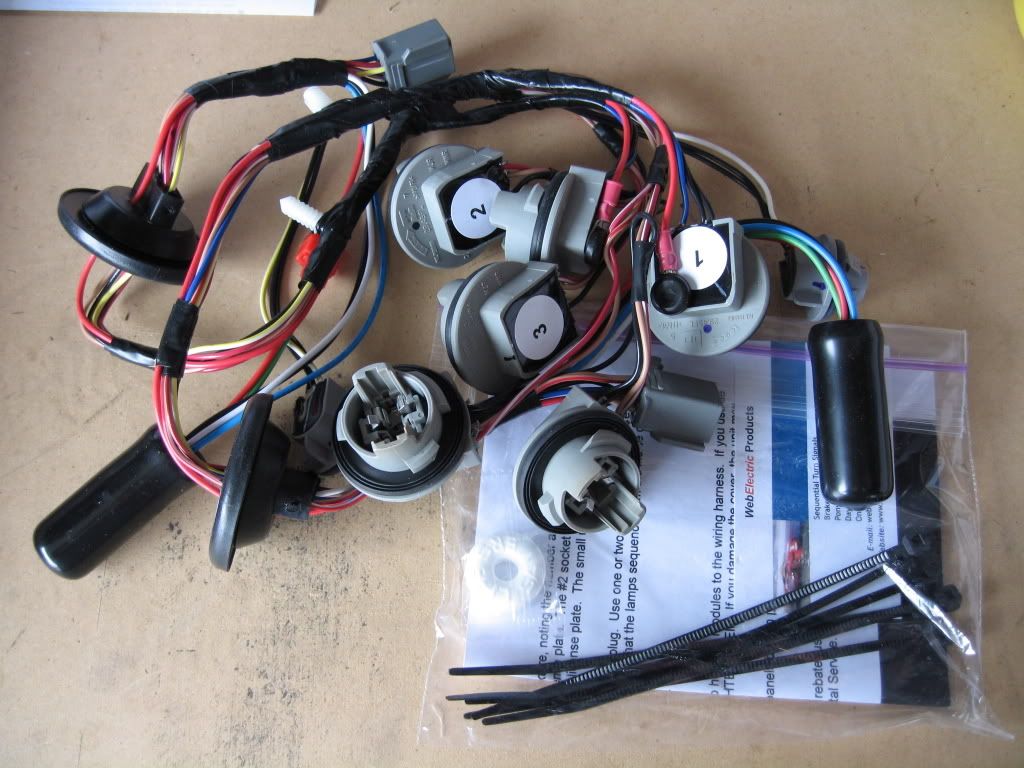
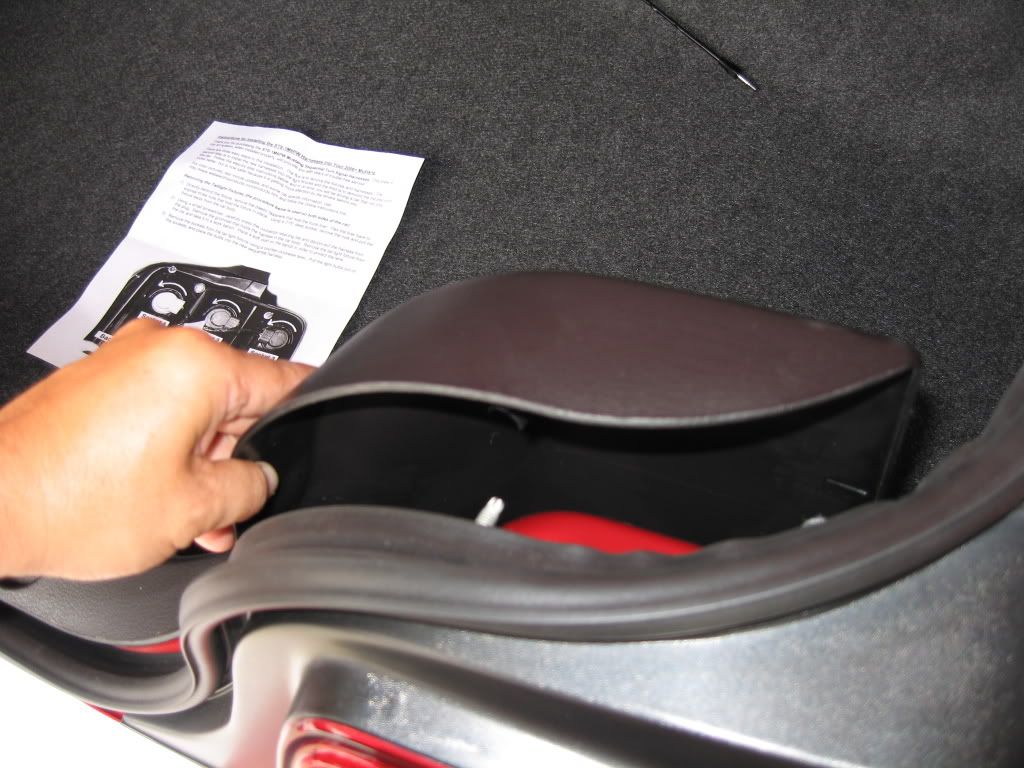
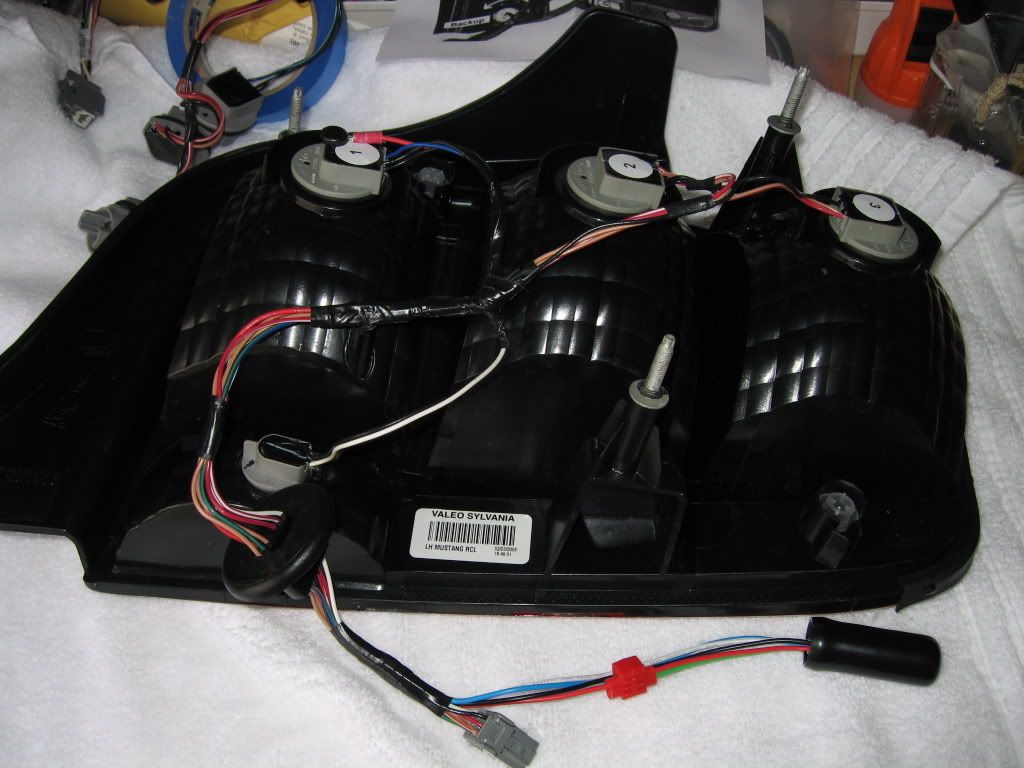
OUT OF THE BOX - 2 SEPERATE HARNESSES, ZIP-TIES, AND INSTRUCTIONS.
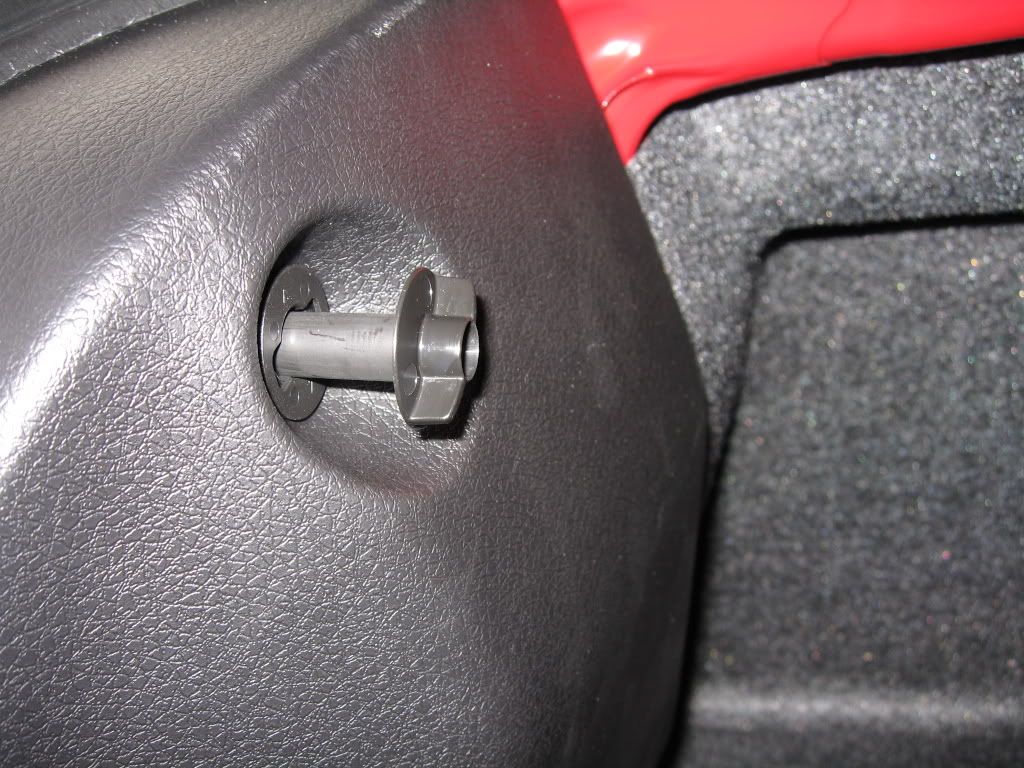
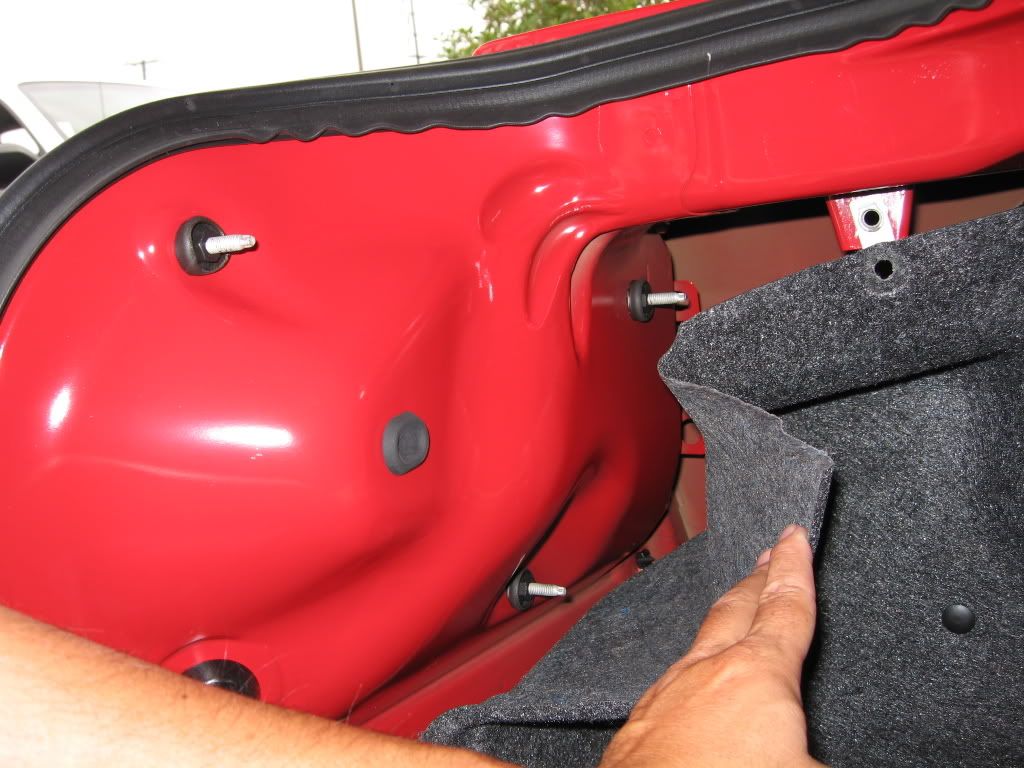
REAR TRUNK PANEL REMOVAL: UNSCREW THE 2 (1 EA SIDE) PLASTIC FASTENERS.
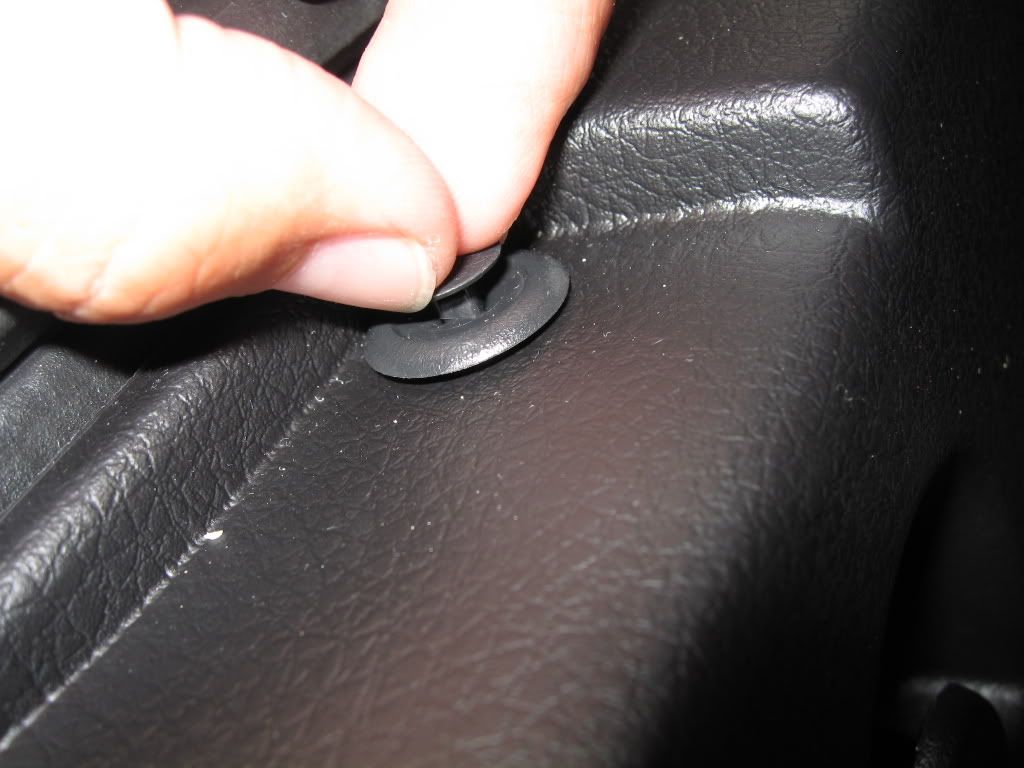
REMOVE THE 4 PLASTIC RETAINERS (2 EA SIDE) BY PULLING UP ON THE CENTER PART.
GENTLY PULL BACK THE REAR PANEL. THE CENTER SECTION AROUND THE TRUNK LATCH MUST BE PULLED UP AND OVER.
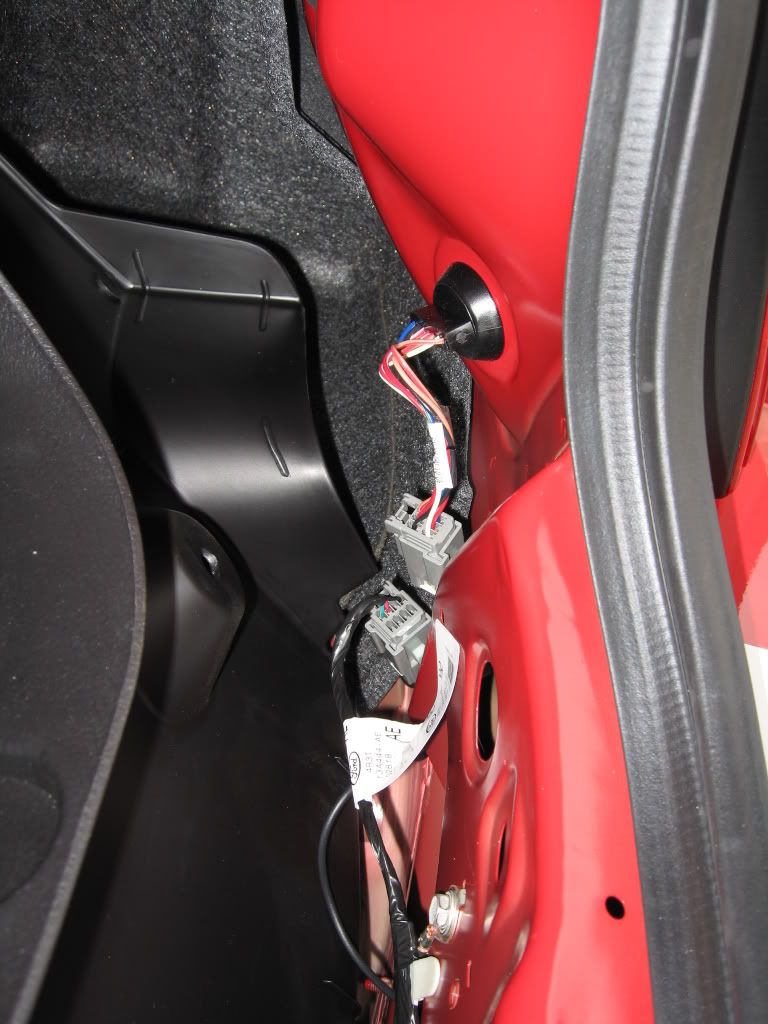
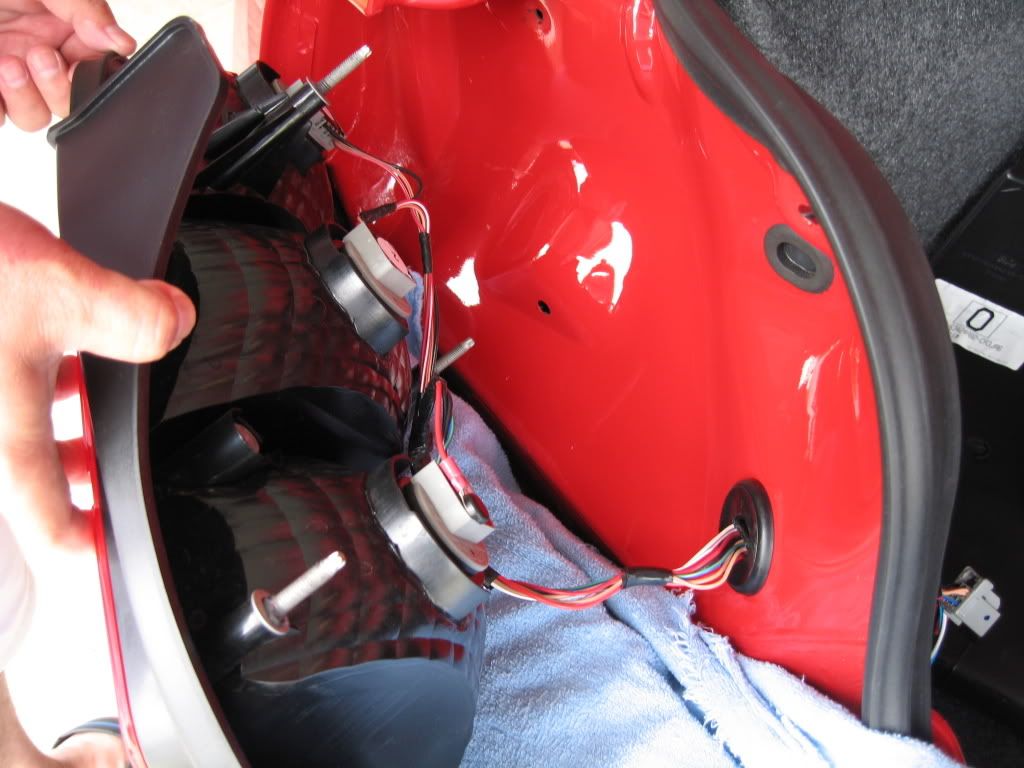
STOCK WIRE HARNESS EXPOSED.
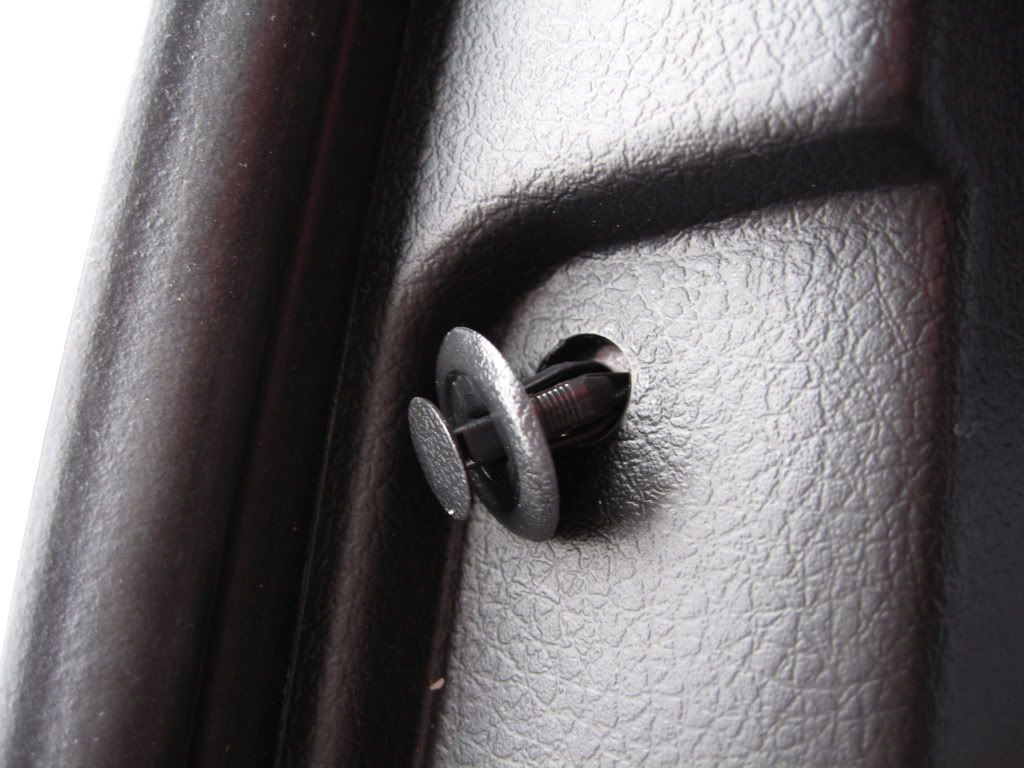
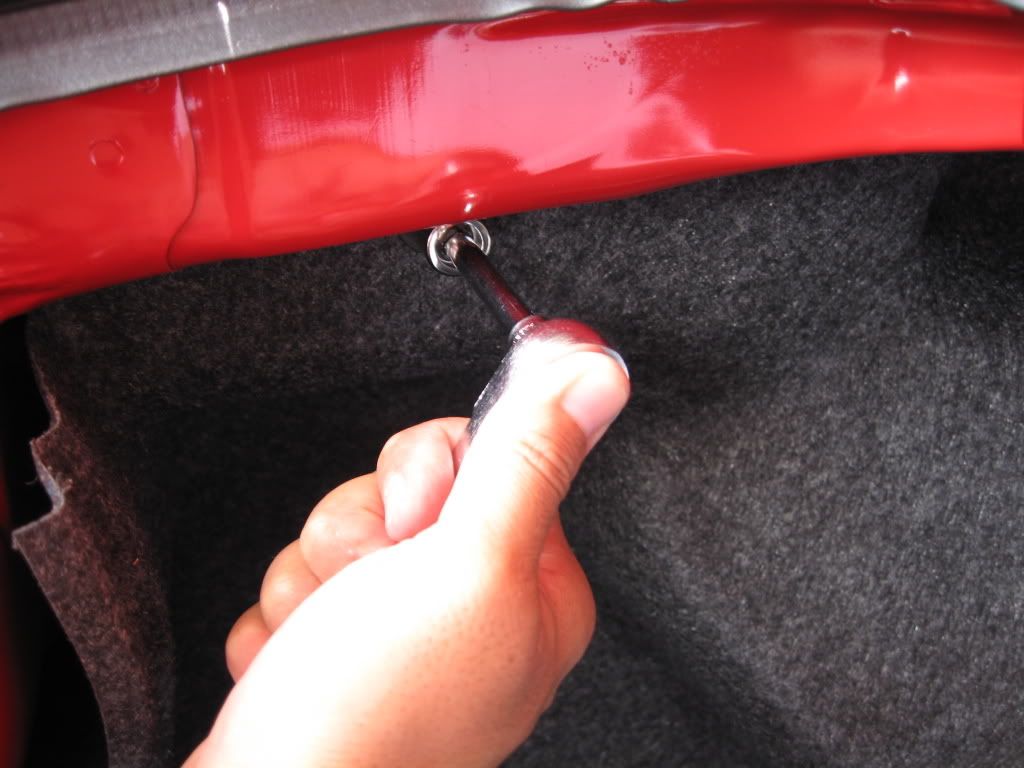
REMOVE THE UPPER 2 BOLTS (1 EA SIDE) THAT HOLD THE CARPET UP AT THE REAR. MAY NOT BE NECESSARY, BUT MAKES ACCESS TO THE OUTBOARD NUTS MUCH EASIER.
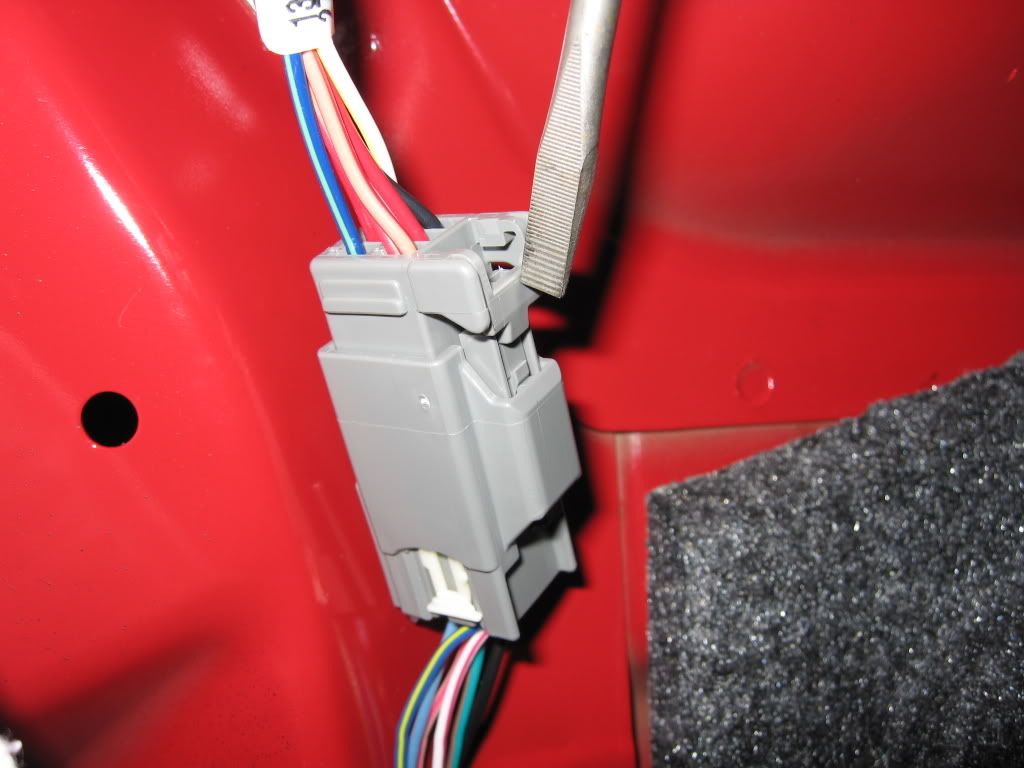
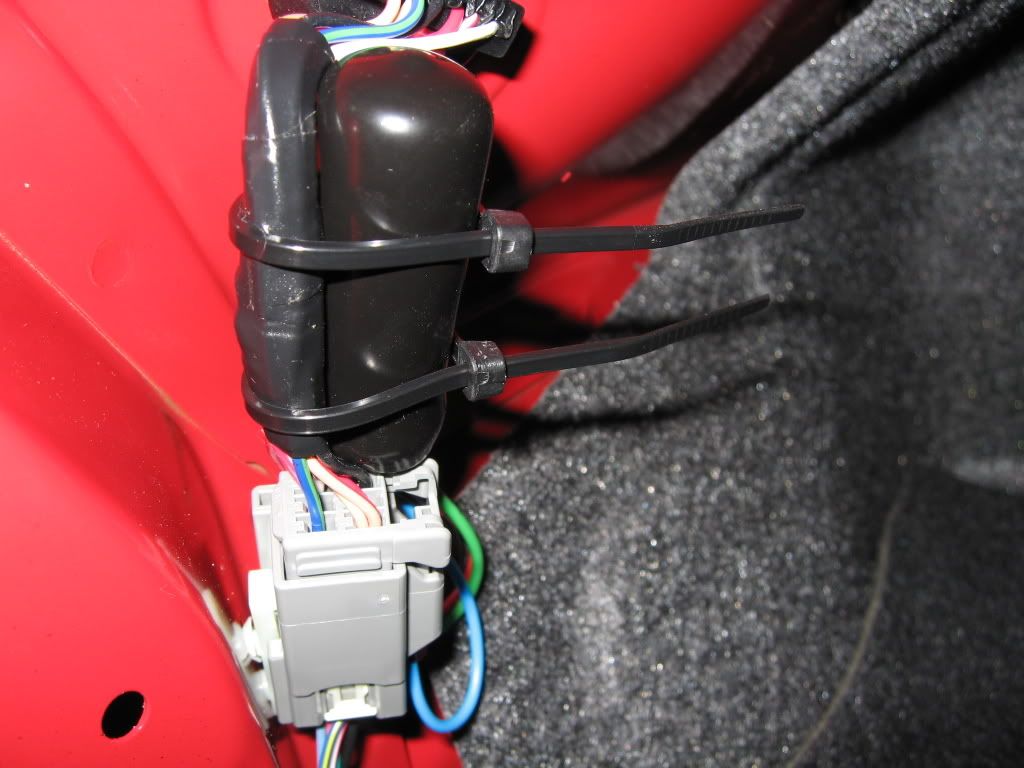
UNPLUG THE MAIN HARNESS PLUG BY PRESSING DOWN ON THE RELEASE TAB.
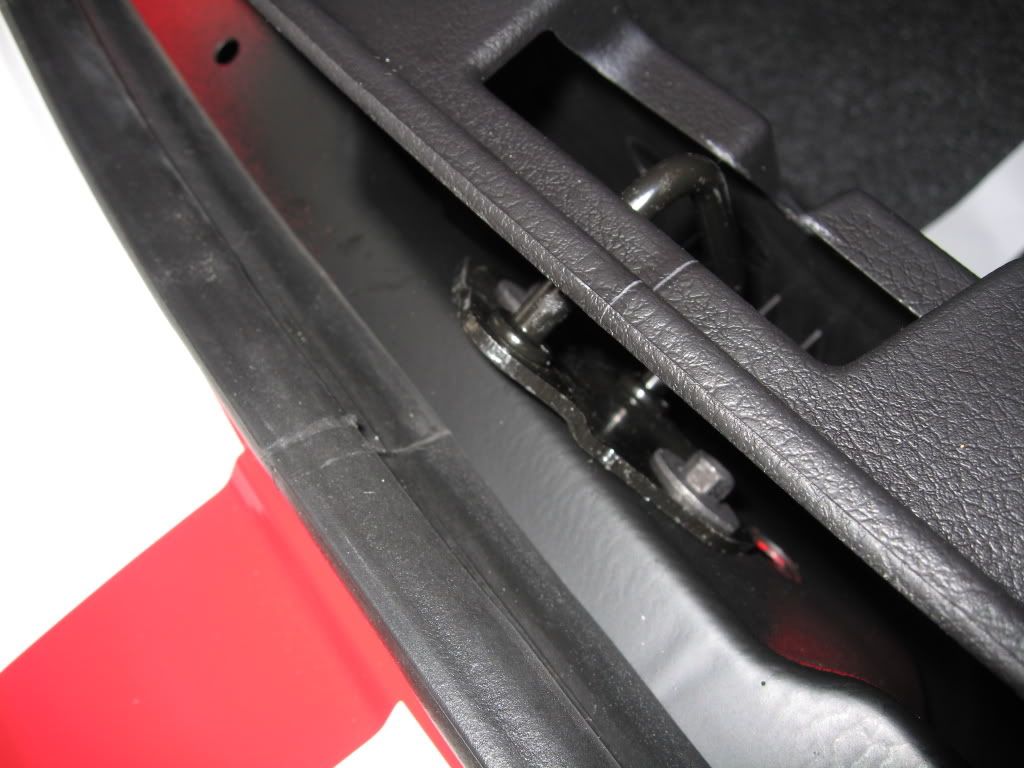
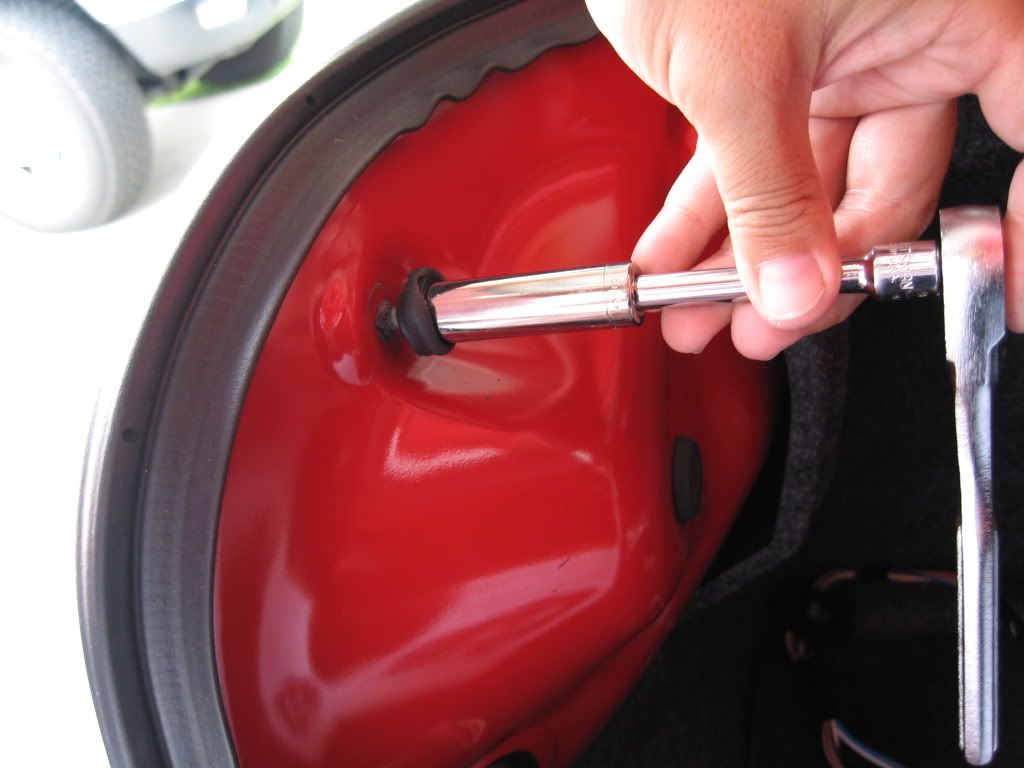
REMOVE THE 6 NUTS (3 EA SIDE) THAT HOLD THE LIGHT ASSEMBLY TO THE BODY. THERE WERE SOME WEAK LOOKING RUBBER SEALS (IF YOU CAN CALL THEM THAT) AROUND EACH OF THE NUTS THAT PRETTY MUCH FALL OFF WHEN REMOVING THE NUTS. I THREW THEM AWAY.
Edit: Thanks to Pony_Ride for this suggestion..
I do have a possible revision to the webelectrics sequential tail light install instructions. You mentioned throwing away the rubber material (grommits?) from the 6 bolts (3 on each side) that attach the lens assembly to the body. This material is used to prevent water leakage into the trunk. When I installed my sequentials, I used plummers putty on the re-install since the rubber material is basically useless after you remove the lens assembly. This is an important step for those of us up in rain country (WA).
PULL BACK THE LENS ASSEMBLY, CAREFUL NOT TO LET THE STUDS HIT THE PAINT.
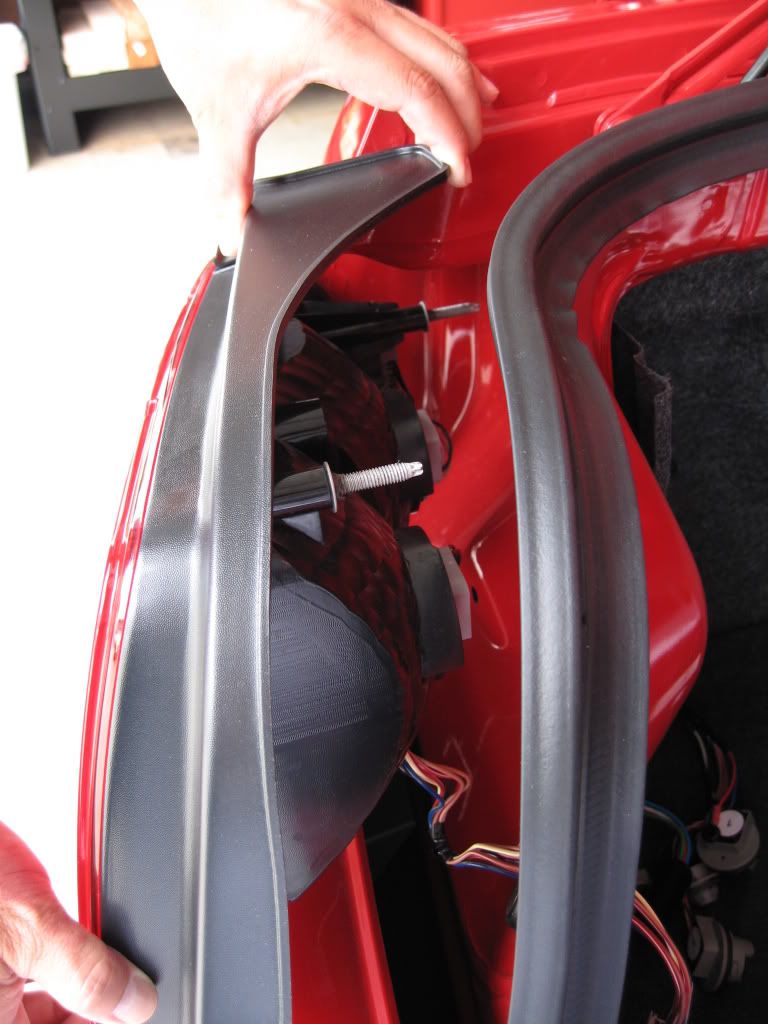
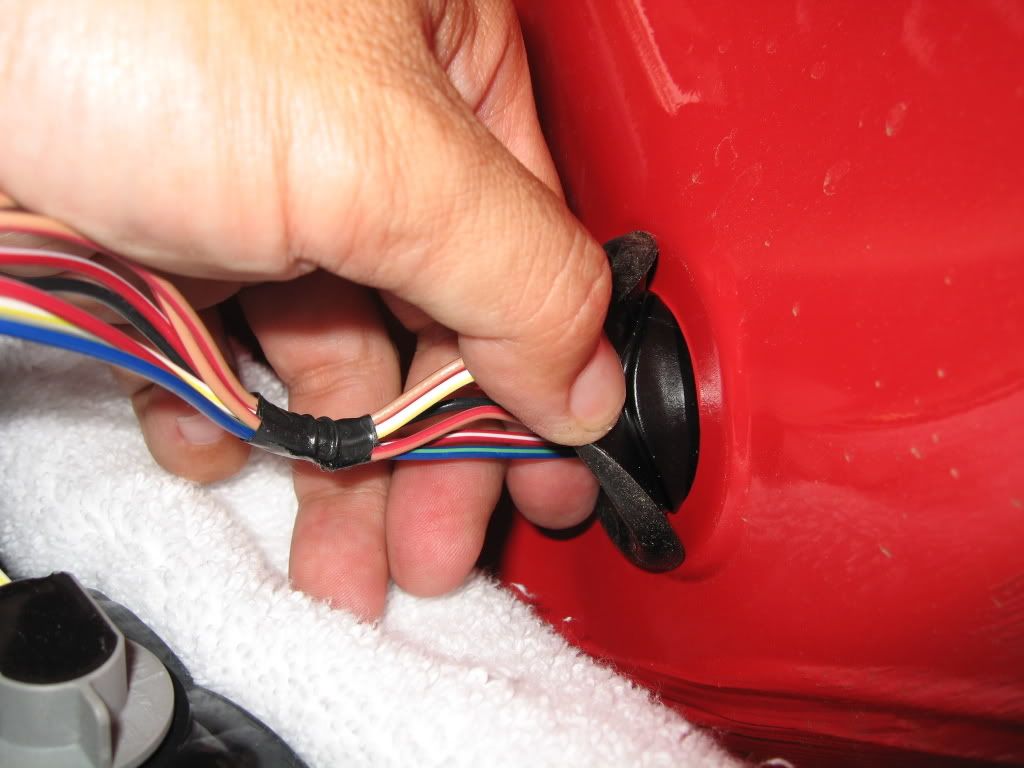
GENTLY PEEL THE GROMMET AWAY FROM THE BODY.
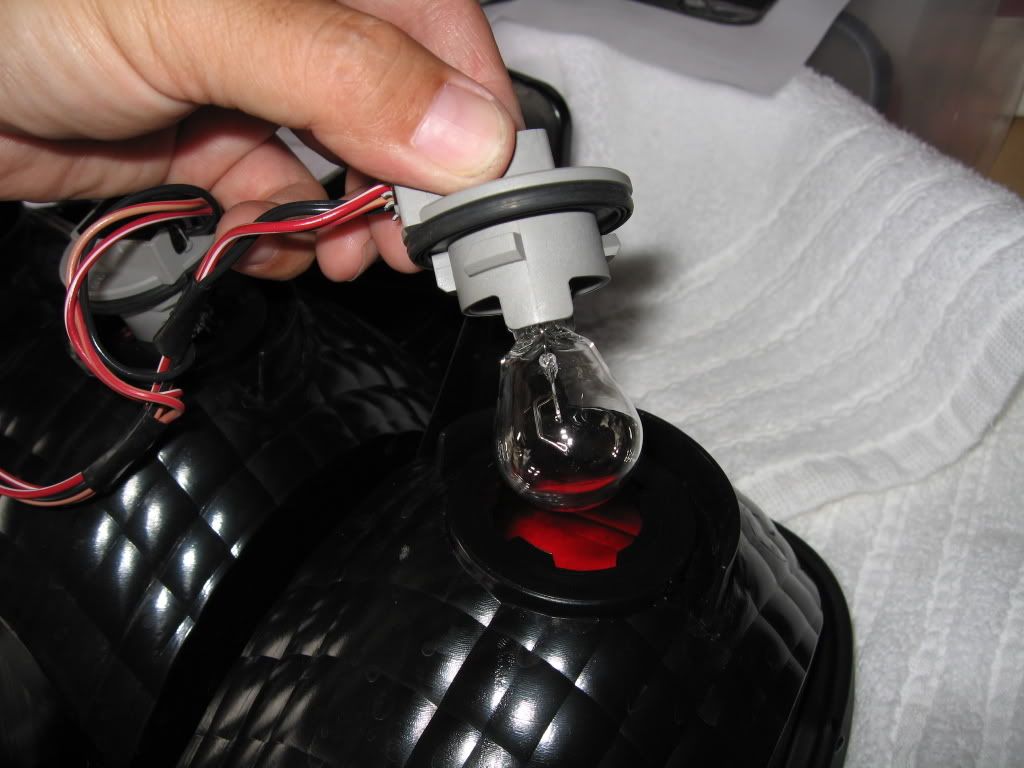
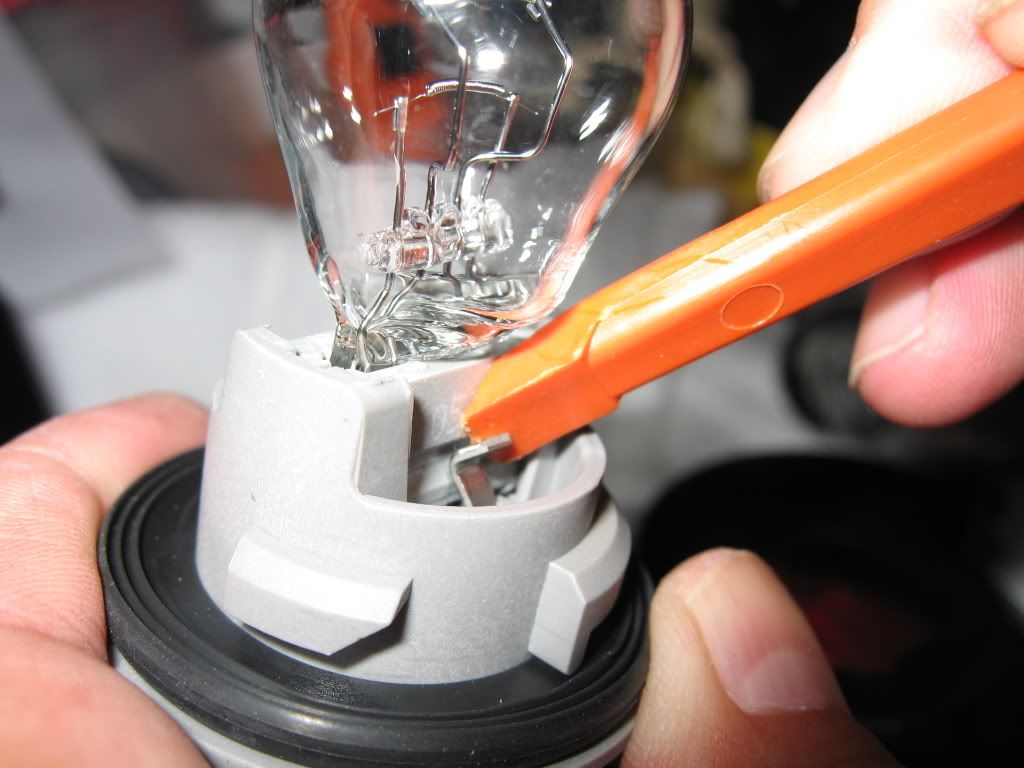
PER THE DIRECTIONS, ROTATE EACH BULB SOCKET COUNTER-CLOCKWISE TO RELEASE THEM FROM THE LENS ASSEMBLY. EACH OF THE BULBS (EXCEPT REVERSE) HAS A RETAINER ON EACH SIDE THAT MUST BE PULLED SLIGHTLY APART TO RELEASE THE BULB (I HEARD YOU CAN WIGGLE THEM OUT TOO).
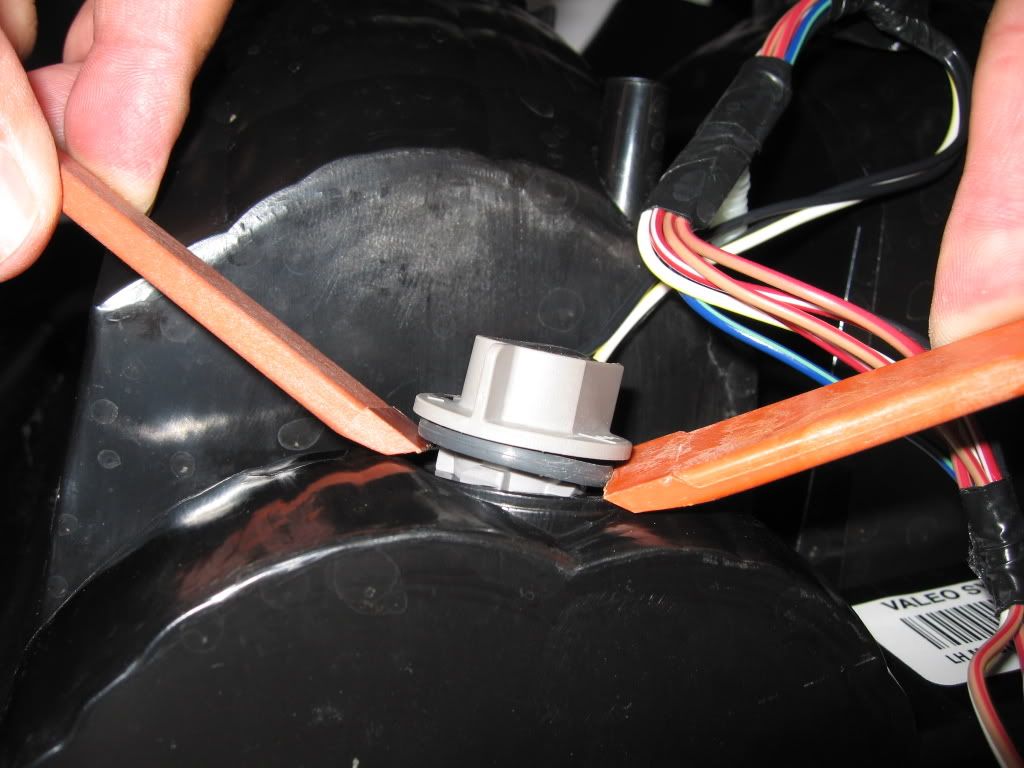
THE REVERSE SOCKETS WERE A BIT MORE DIFFICULT TO REMOVE. I HAD TO PRY THEM UP; CAREFUL NOT TO DAMAGE THE O-RING.
HARNESS INSTALLED COMPLETE TO LENS ASSEMBLY.
RE-INSTALL LENS ASSEMBLY AND CONNECT THE HARNESS PLUG. PER THE DIRECTIONS, SECURE THE SEQUENTIAL RELAY TO THE WIRE HARNESS WITH THE SUPPLIED ZIP-TIES, BUT DO NOT OVER TIGHTEN THEM.
NOW SIT BACK AND ENJOY YOUR FREE (INCLUDED) LIFESAVER MINT!

Sequentials in action (VIDEO)
Install time was under 1 hour. Could have been quicker, but I was in no rush and took time out to take pics of the install.
Hope some of these pics answer your questions about installing the sequentials.
OUT OF THE BOX - 2 SEPERATE HARNESSES, ZIP-TIES, AND INSTRUCTIONS.
REAR TRUNK PANEL REMOVAL: UNSCREW THE 2 (1 EA SIDE) PLASTIC FASTENERS.
REMOVE THE 4 PLASTIC RETAINERS (2 EA SIDE) BY PULLING UP ON THE CENTER PART.
GENTLY PULL BACK THE REAR PANEL. THE CENTER SECTION AROUND THE TRUNK LATCH MUST BE PULLED UP AND OVER.
STOCK WIRE HARNESS EXPOSED.
REMOVE THE UPPER 2 BOLTS (1 EA SIDE) THAT HOLD THE CARPET UP AT THE REAR. MAY NOT BE NECESSARY, BUT MAKES ACCESS TO THE OUTBOARD NUTS MUCH EASIER.
UNPLUG THE MAIN HARNESS PLUG BY PRESSING DOWN ON THE RELEASE TAB.
REMOVE THE 6 NUTS (3 EA SIDE) THAT HOLD THE LIGHT ASSEMBLY TO THE BODY. THERE WERE SOME WEAK LOOKING RUBBER SEALS (IF YOU CAN CALL THEM THAT) AROUND EACH OF THE NUTS THAT PRETTY MUCH FALL OFF WHEN REMOVING THE NUTS. I THREW THEM AWAY.
Edit: Thanks to Pony_Ride for this suggestion..
I do have a possible revision to the webelectrics sequential tail light install instructions. You mentioned throwing away the rubber material (grommits?) from the 6 bolts (3 on each side) that attach the lens assembly to the body. This material is used to prevent water leakage into the trunk. When I installed my sequentials, I used plummers putty on the re-install since the rubber material is basically useless after you remove the lens assembly. This is an important step for those of us up in rain country (WA).
PULL BACK THE LENS ASSEMBLY, CAREFUL NOT TO LET THE STUDS HIT THE PAINT.
GENTLY PEEL THE GROMMET AWAY FROM THE BODY.
PER THE DIRECTIONS, ROTATE EACH BULB SOCKET COUNTER-CLOCKWISE TO RELEASE THEM FROM THE LENS ASSEMBLY. EACH OF THE BULBS (EXCEPT REVERSE) HAS A RETAINER ON EACH SIDE THAT MUST BE PULLED SLIGHTLY APART TO RELEASE THE BULB (I HEARD YOU CAN WIGGLE THEM OUT TOO).
THE REVERSE SOCKETS WERE A BIT MORE DIFFICULT TO REMOVE. I HAD TO PRY THEM UP; CAREFUL NOT TO DAMAGE THE O-RING.
HARNESS INSTALLED COMPLETE TO LENS ASSEMBLY.
RE-INSTALL LENS ASSEMBLY AND CONNECT THE HARNESS PLUG. PER THE DIRECTIONS, SECURE THE SEQUENTIAL RELAY TO THE WIRE HARNESS WITH THE SUPPLIED ZIP-TIES, BUT DO NOT OVER TIGHTEN THEM.
NOW SIT BACK AND ENJOY YOUR FREE (INCLUDED) LIFESAVER MINT!
Sequentials in action (VIDEO)

GTR Member
Joined: January 26, 2006
Posts: 4,639
Likes: 0
From: Central Florida
They look great, Bill! And, as always, a great write-up!
Definitely easier than Meter4It's Sequential/Chase kit. But it isn't his fault... why they "potted" the sockets starting in 2006 is beyond me.
It's really not that hard, though, all you have to do is add 1 wire to 1 existing stock socket. Here's some pics and a couple videos.
I don't mean to hijack your thread, but what a perfect place for everybody to compare the differences between the two kits!
Team Mustang Source Legacy Member
Joined: September 2, 2004
Posts: 1,679
Likes: 5
From: Las Vegas
I put my WebElectric Products harnesses in my car last nigt too. Didn't take any pics though.
I had previously installed their splice-in kit on my '05, and it wasn't much harder.
Very good write-up, and great close-up pics.
I had previously installed their splice-in kit on my '05, and it wasn't much harder.
Very good write-up, and great close-up pics.

Bullitt Member
Joined: November 6, 2005
Posts: 478
Likes: 0
Excellent write-up Bill!!!
I installed mine about a month ago. 2 additional notes worh mentioning.
When you take off the 3 nuts that holds the taillamp assemblies in, the black rubber gasket is nothing more than putty that's been formed into a gasket shape when the nuts were tightened. I threw them away and made a washer-like ring with plumbers putty. When you tighten the nut, the putty mushrooms out the same way. The putty is there to prevent any water from getting in the trunk from behind the taillamp assembly.
Make sure you test the lamps before you screw the tailamp assembly back in....that includes the taillamps that come on w/the headlights. I tested the sequentials only and when I put everything back together again (including the trunk trim) I noticed the inside taillamp was now not working on the right side. As luck would have it, it was on the more difficult right side where the shaker subwoofer was. The bulb was not burned out, but the bulb was not making a good contact with the new socket. After removing it and reinserting it, it's been working fine.
Love those sequentials.
Thanks guy! If you know me, I'm just doin' my thing. 
If you find a video clip of the CDC's you can compare them to mine (video link, post #1).
Which do I recommend? Well, let me see... I say WebElectric!
Very good points.
It would have to be a good amount of water directed behind the taillight assembly for any of it to leak past the studs, but I understand not taking a chance and just use some putty under the nuts.
And yes, it's a good idea to test out the sequentials befure buttoning everything down. I forgot to mention that.
I have the Shaker 500, so I have no idea how much additional work is involved in working around the 1000 sub box.
Originally Posted by 05retro
Do they operate at about the same speed as CDC's? Which would be recommended?
Which do I recommend? Well, let me see... I say WebElectric!
Originally Posted by steevr
... 2 additional notes worth mentioning.
... The putty is there to prevent any water from getting in the trunk from behind the taillamp assembly.
Make sure you test the lamps before you screw the tailamp assembly back in...
... The putty is there to prevent any water from getting in the trunk from behind the taillamp assembly.
Make sure you test the lamps before you screw the tailamp assembly back in...
It would have to be a good amount of water directed behind the taillight assembly for any of it to leak past the studs, but I understand not taking a chance and just use some putty under the nuts.
And yes, it's a good idea to test out the sequentials befure buttoning everything down. I forgot to mention that.
I have the Shaker 500, so I have no idea how much additional work is involved in working around the 1000 sub box.


Originally Posted by fordcrazy
what is the cost of this kit ????
you did a awesome job , on the install step by step
you did a awesome job , on the install step by step
Harness kits range from $139 to $179 depending if you want a keep your OEM haness or return it for a $40 refund.
Splice-in kits are available for your 05 for $89 (not for 2006+).
I got the $179 kit as I'll keep my OEM harness as a backup.
Check out WebElectric here.
Awesome look, one of the first things I'm going to do when I get my new one! The one I put on My 2000 Gt wasn't as easy as this one. I had to splice but I used two small harness out of a salvage yard and kept the orig. Nice Job thanks for the video!
See you at Knott's next Year?
See you at Knott's next Year?

V6 Member
Joined: November 8, 2005
Posts: 73
Likes: 0
Splice-in kits are available for your 05 for $89 (not for 2006+).
Did I miss something? I have the WebElectric splice in sequentials on my 2006 GT. Also, check for WebElectrics on eBay...I guess they are still there.
Did I miss something? I have the WebElectric splice in sequentials on my 2006 GT. Also, check for WebElectrics on eBay...I guess they are still there.
GT Member
Joined: July 31, 2004
Posts: 148
Likes: 0
Wow, things change quickly. My 2006 GT needed an Allen wrench for
the plastic bolt instead of the easy finger/thumb screw. I also tried to
get behind the trunk carpet and ripped it on the right side. I just made
another hole and was able to put the plastic bolt through.
I practically tore up that bolt getting it off. Also -- the "reverse" lights
came out easily after turning them counter-clockwise. No prying needed
on those.
Your pictures helped me immensely and I can say Thank you very much.
Now I'm gonna tackle the Granitelli CAI since I tore up the rubber on
the MRT Cold Air I had. We'll find out for sure which one gives more HP.
Currently I have 287 to wheels and after I get the Granitelli installed I'll
get a re-tune and let you all know.

Legacy TMS Member
Joined: May 24, 2006
Posts: 7,410
Likes: 1
From: San Diego
Installed my CDC sequetials today. I love them they're freakin sweet. They move at the same speed as Bill's and look the same except it doesnt have the black rubbery part. FYI if you have the shaker 1000 it's a PITA to remove the top screw furtherest to the right. You don't have to remove the shaker sub but like I said it was a PITA.
Will post pics later in the week along with my CDC hood strut install and my MGW pieces.
Will post pics later in the week along with my CDC hood strut install and my MGW pieces.

