
Painting my Calipers with the G2 kit.

Legacy TMS Member
Joined: October 8, 2005
Posts: 12,395
Likes: 29
From: Medina county, OH
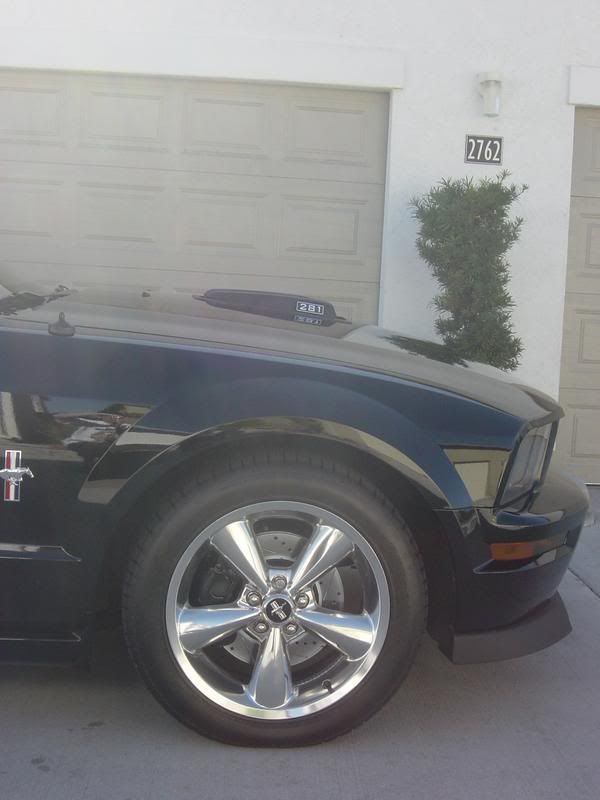
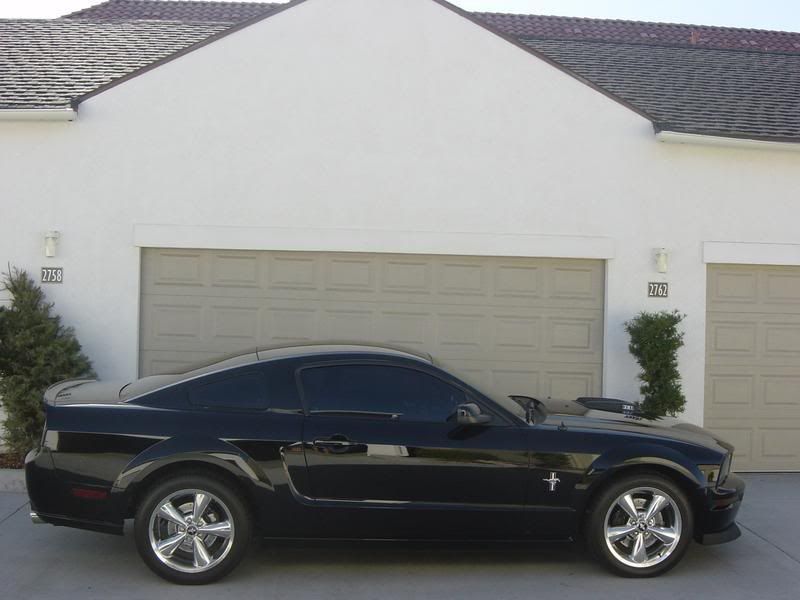
I used the G2 kit. As previously stated, it comes with a cleaner. I did mine when the car was only 5 days old so the calipers were pretty clean. The first 5 months after I got the car, I used it as a daily driver but then I got transfered into the city and now I only drive it on weekends.
The G2 kit is brushed on and to be honest, it could not be any easier. I have got to be the world's worst painter and these came out perfect. I was worried about brush strokes being visible but the paint smoothed out very nicely as it dried. You won't be able to see any brush strokes.
After the paint was dry, I applied a set of calliper decals I had purchased from http://www.xnonmods.com
Here are some pictures:

Be sure to post some pix!

Team Mustang Source
Joined: September 16, 2005
Posts: 1,705
Likes: 2
From: Yatta-Abba, AL
Figures. It's raining here (yesterday & Today). I have the G-2 kit, Car is in the air. Even though I am garaged, it still seems to damp to paint. Oh well, looks like another coat of Wheel Wax for the Fan Blades. (Just roll them in the house) oh yeah, when the wifie is out, of course........
Team Mustang Source
Joined: June 19, 2004
Posts: 6,840
Likes: 2
From: Phoenixville, PA
Thread Starter
Legacy TMS Member
Joined: May 24, 2006
Posts: 7,410
Likes: 1
From: San Diego
Well I finished painting my calipers so now here's a poor attempt at a TacoBill style write-up.
Before I start let me say it took me 4 1/2 hours total. Keep in mind that included cleaning my brake calipers and my cars a daily driver. I also did three coats. So without further ado....
The kit comes with:
Paint
Paint reactor
A paint brush (Go buy some different ones)
Brake Cleaner
***If your car is a daily driver I recommend using a wire brush to get as much brake dust of as possible.***
Pic of the Box.

First step is getting the jacking the car up on all fours.
I used jackstands for the front and a floor jack for the rear.


After removing the wheels I sprayed my calipers down with Brake Cleaner included in the kit and scrubbed them with a wire brush. As you can see in the pic below they look almost like new after cleaning.


Now were ready to mix the paint and reactor. (Before doing this make sure you've already masked or covered anything you don't want to get paint on.)


Now the fun part, painting.

Now here are some pics right after painting. G2 recommends letting the paint dry for 2hours before reinstalling wheels. So I'll be sure to take more pics of what they look like dried and of course with the wheels on.
BTW-The huge chunks of paint you see missing from the center of my rotors is a mystery to me. It's an issue I'll be taking up with Rotorpros tomorrow.


Well as promised here's some pics of the finished product. For the full gallery click on the link in my sig.


Before I start let me say it took me 4 1/2 hours total. Keep in mind that included cleaning my brake calipers and my cars a daily driver. I also did three coats. So without further ado....
The kit comes with:
Paint
Paint reactor
A paint brush (Go buy some different ones)
Brake Cleaner
***If your car is a daily driver I recommend using a wire brush to get as much brake dust of as possible.***
Pic of the Box.
First step is getting the jacking the car up on all fours.
I used jackstands for the front and a floor jack for the rear.
After removing the wheels I sprayed my calipers down with Brake Cleaner included in the kit and scrubbed them with a wire brush. As you can see in the pic below they look almost like new after cleaning.
Now were ready to mix the paint and reactor. (Before doing this make sure you've already masked or covered anything you don't want to get paint on.)
Now the fun part, painting.
Now here are some pics right after painting. G2 recommends letting the paint dry for 2hours before reinstalling wheels. So I'll be sure to take more pics of what they look like dried and of course with the wheels on.
BTW-The huge chunks of paint you see missing from the center of my rotors is a mystery to me. It's an issue I'll be taking up with Rotorpros tomorrow.
Well as promised here's some pics of the finished product. For the full gallery click on the link in my sig.

Team Mustang Source
Joined: October 12, 2004
Posts: 502
Likes: 0
From: Tampa, FL
A different tweak!
OK, yes, I did mine in red because the color looks good on darker color cars. But I added a twist to the normal plot - I also painted the rotor hats!
I followed the sequence recommended above: bought the G2 kit; got the car up on jack stands, wheels off and cleaned the rotors one afternoon. Then the next morning I got out there early and painted all four calipers in succession putting on 3 coats. At that point, the calipers looked like they had more than enough paint on them; but I still had about 1/3 of the paint remaining.
So I painted the rotor hats ala RotorPros! I didn't mask the rotor face above the pad line because I thought the pads would do the cleanup for me afterwards - and they did! As noted by others, the supplied brush is crappy - it began losing its bristles during the second coat. I also used an artist's brush that was about half size to get into the various crevices and corners. Also, lacquer thinner is your friend! I used that to clean up various spills and ribbles during the painting process.
The painting session took about 3 hours so I spent the afternoon installing rocker stripes that had coincidentally arrived the day before. That job is much easier with the wheels off too. The following morning I installed the XenonMods decals on the front calipers, put the wheels back on and got the car back to the ground. Here are pics of the results.
Legacy TMS Member
Joined: October 7, 2006
Posts: 2,701
Likes: 1
From: Monrovia, CA

Bullitt Member
Joined: May 30, 2005
Posts: 419
Likes: 0
Yes, Ford stopped them; but I think there is a way around it. They can't sell you a decal that says mustang but if you go to the custom decal page, you can put together anything you want in your choice of fonts. So, although they can't sell you a "Mustang" decal, they can sell you a decal that has the letters "M" "u" "s" "t" "a" "n" "g".
Last edited by odiaz; Mar 20, 2008 at 03:40 PM.
Legacy TMS Member
Joined: October 8, 2005
Posts: 12,395
Likes: 29
From: Medina county, OH
I used the G2 kit last spring, and by the end of summer I have several chips on a couple of calipers..... ?? Don't know why, I cleaned, prepped, and painted as directed. Got another kit coming now, will put another full coat on all 4 calipers.
