
Lowered my 2008 GT rear .... with pics ....

Thread Starter
Mach 1 Member
Joined: June 22, 2013
Posts: 580
Likes: 101
From: the beautiful "Shenandoah Valley of Virginia"
Lowered my 2008 GT rear .... with pics ....
We just bought our 2008 GT in June 2013 and while we love it,we have both (that would be "Wife Unit" and I) remarked about the excessive fender gap at the top of the rear tire as compared to the front. We also noted the rake front to rear, we think it looks better more level and I have shown her many pics of others on the forums.
Last night just after midnight I bid on some Roush rear springs, I wasn't willing to go but so high ..... but I did drive a bidder up. I also wasn't willing to spend $123.99 on rear springs for an inch.
I have cut springs before where it could be done safely and I have used clamps in some cases because it was a good place, and I have bought new before. I have a '92 T-bird Sport with chopped JJJJ Sport springs, 1 coil in front and 5/8 (technical term for "half way between a half and three quarters") coil in back, and it's level and about 1-3/4" lower (different spring rates and suspension movement) I did that in 2007. I know a cut spring has a increase in spring rate as the wire is just as stiff except there less of it to give, and it gives along the entire length as loaded until coil bind, which is why progressives have closer coils that stack up and the remainder are all that's left like a shorter and stiffer spring. I also know about fatter versus thinner coils and coil diameter and the different end styles.
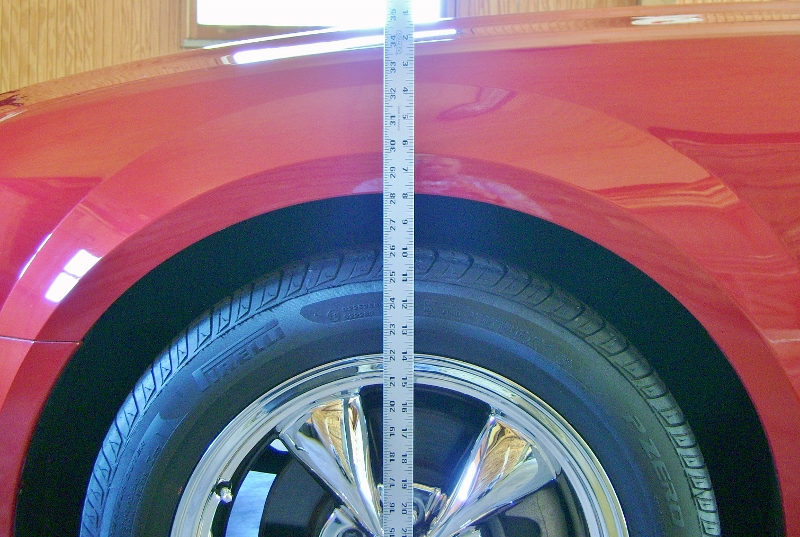
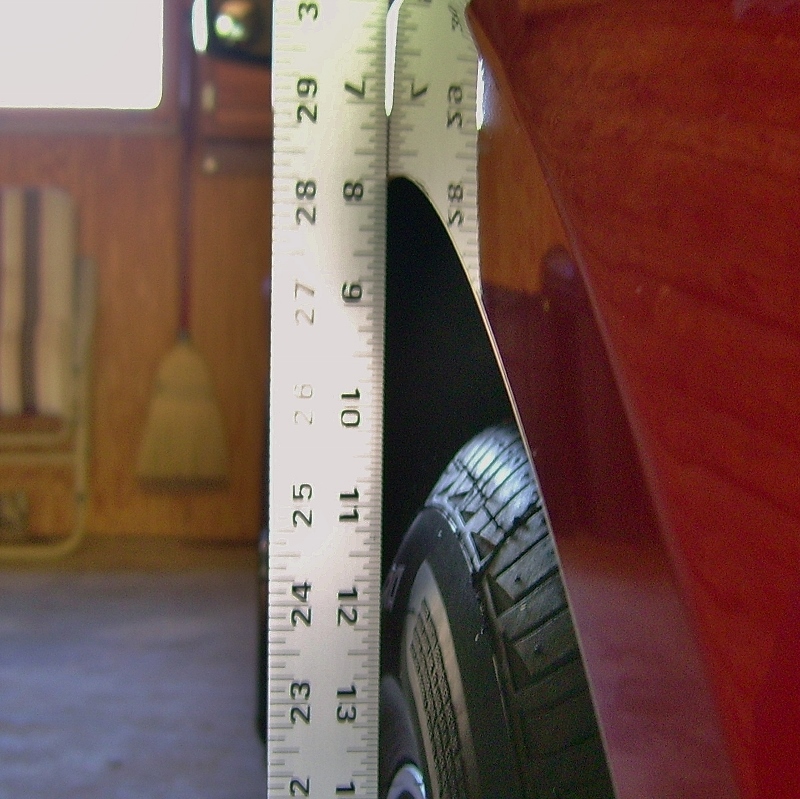
Today I did all that one must do to safely remove and cut and reinstall our 2008 Mustang GT's rear springs. This morning before I started I again measured the distance at each fender opening from carport to top of fender arch at maximum, fronts were 28-1/4" and rears were 29-3/8".
My goal was to eliminate at least 3/4" in the rear and not need a panhard bar change.
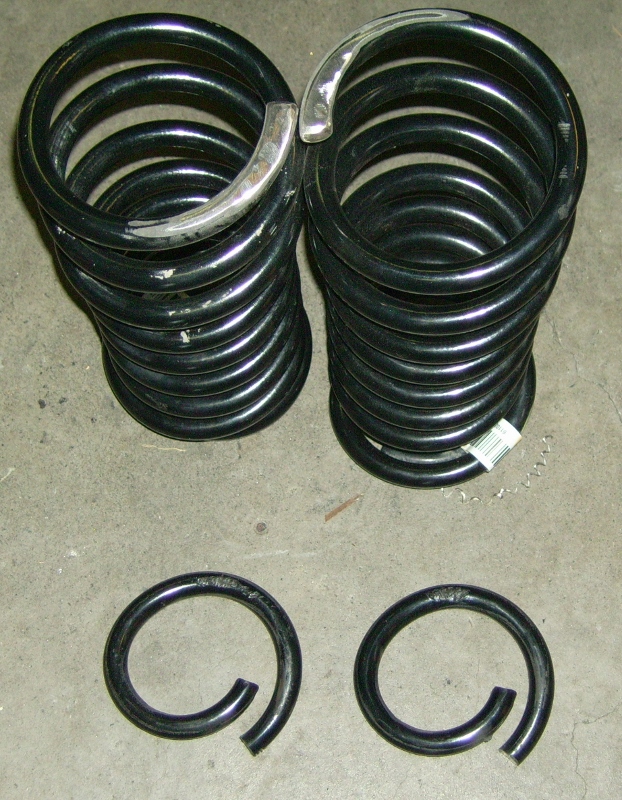
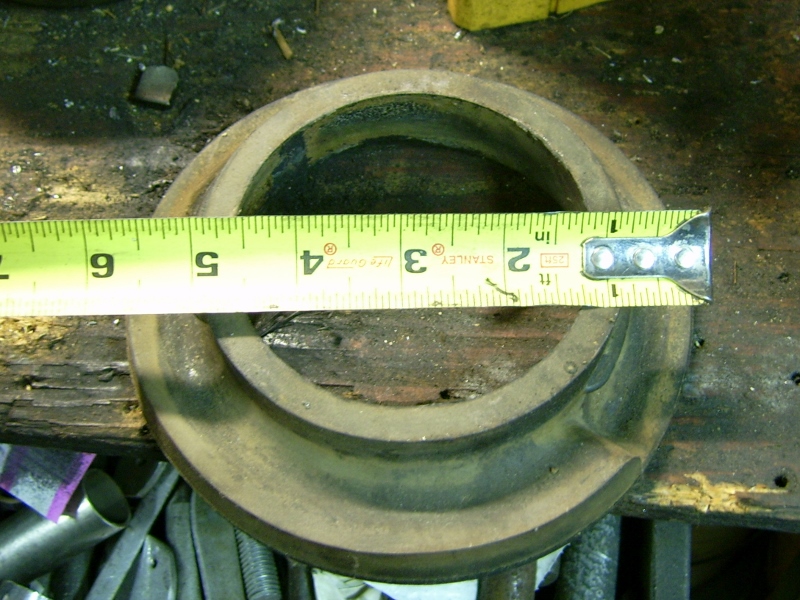
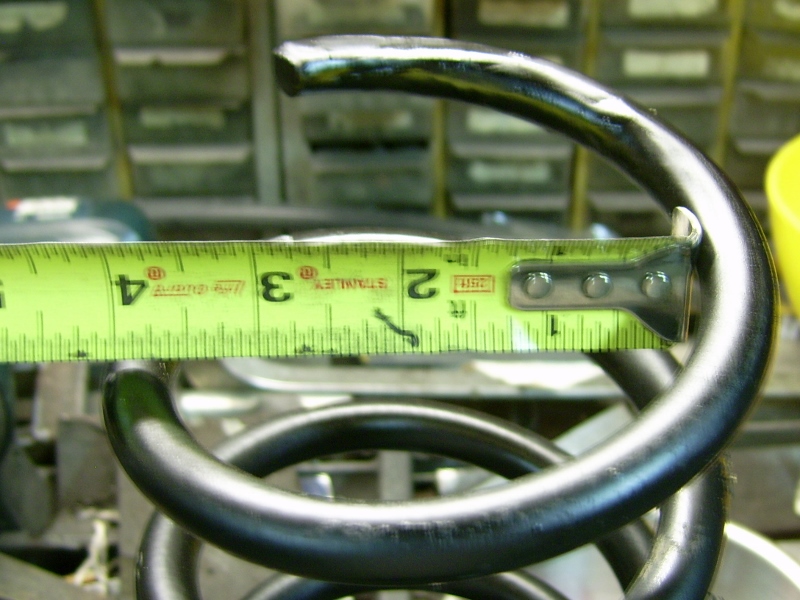
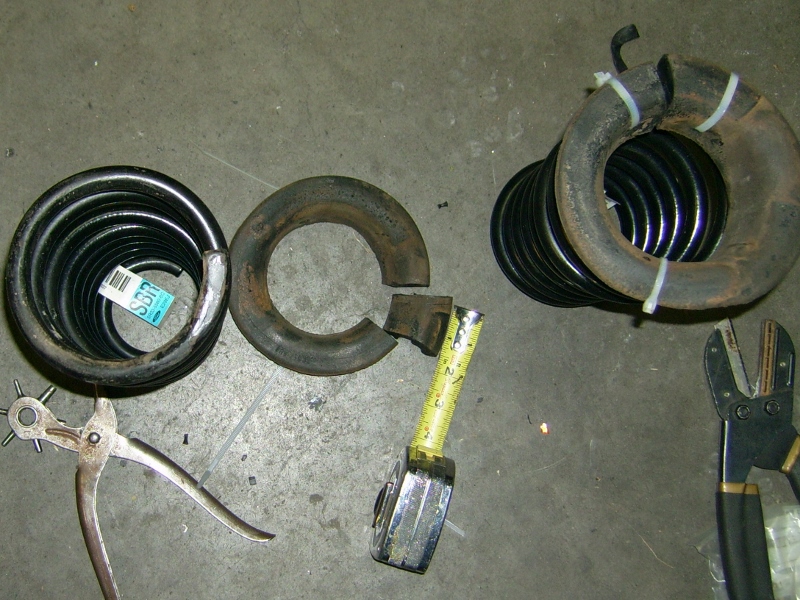
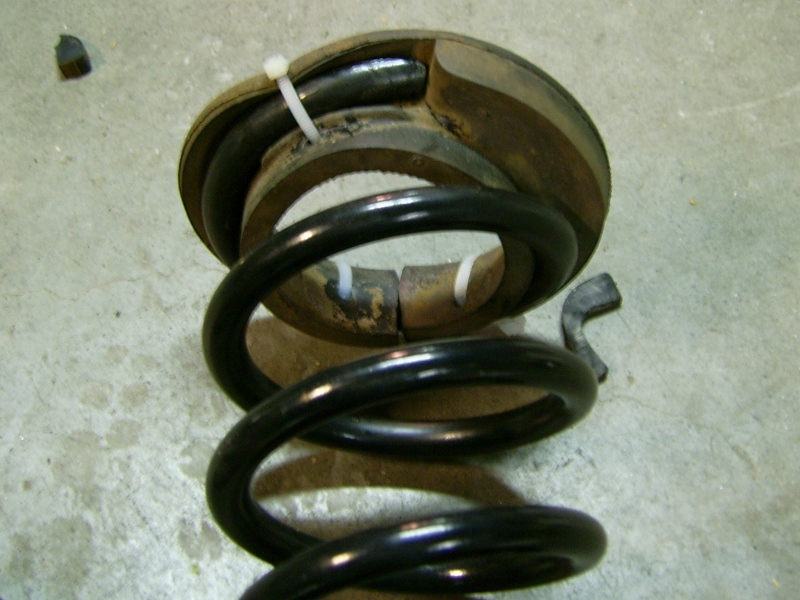
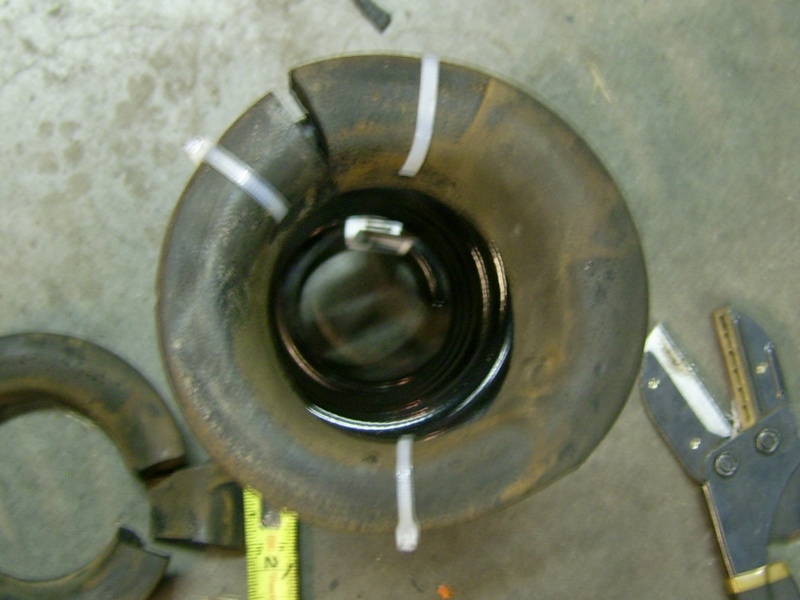
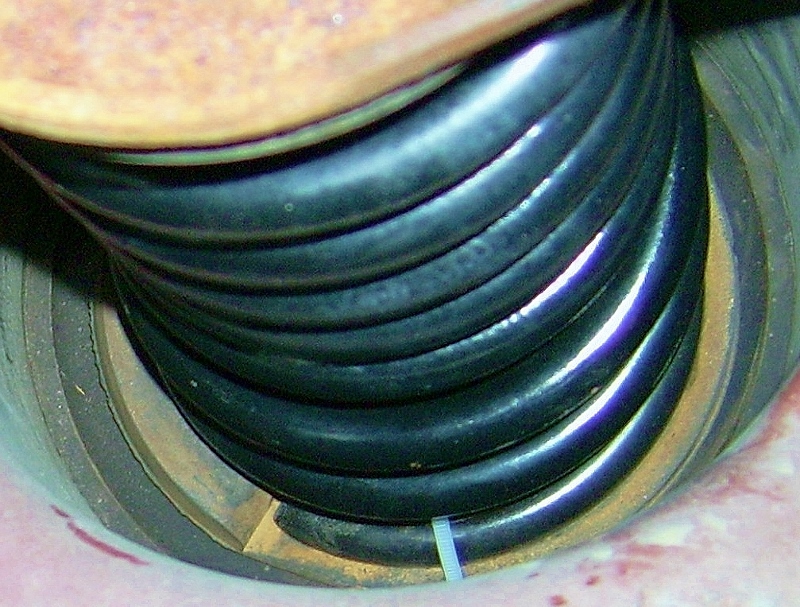
I cut using a Dremel with a fibreglass HD cut-off wheel, the wheel shows minimal wear. I read of people worried about heat .... and often resist the urge tpo respond. The spring end last half inch got a little bit warm, but not even uncomfortably so, the cut is so small and narrow and weighed against the mass of the spring, does not get the steel hot. I cut one full coil off the top end of the coils plus an inch which was where I marked using a 1" wide rule against the spring end.
I did then slightly bevel and smooth the cut off ends and round the edges, and after pics, paint was aplied. These are now just under 13-1/2" long total length.
After I was finished, I took a short drive and then I measured again in the same spot on the carport, and I am glad I did not cut more!
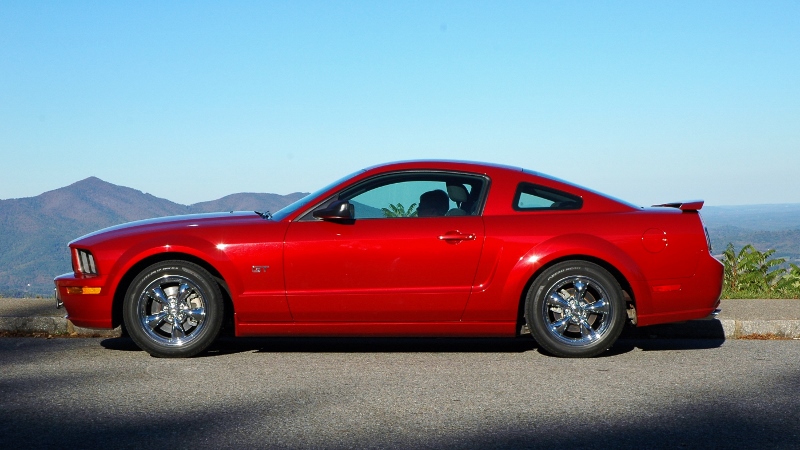
 Imagine my surprise to find that now all four fender tops, front and rear, are each 28-1/4" from the floor. All 4 the same, and just a hint of rake along the lower edge of the rocker panels.
(I only posted left side pics, I have all 4 though.)
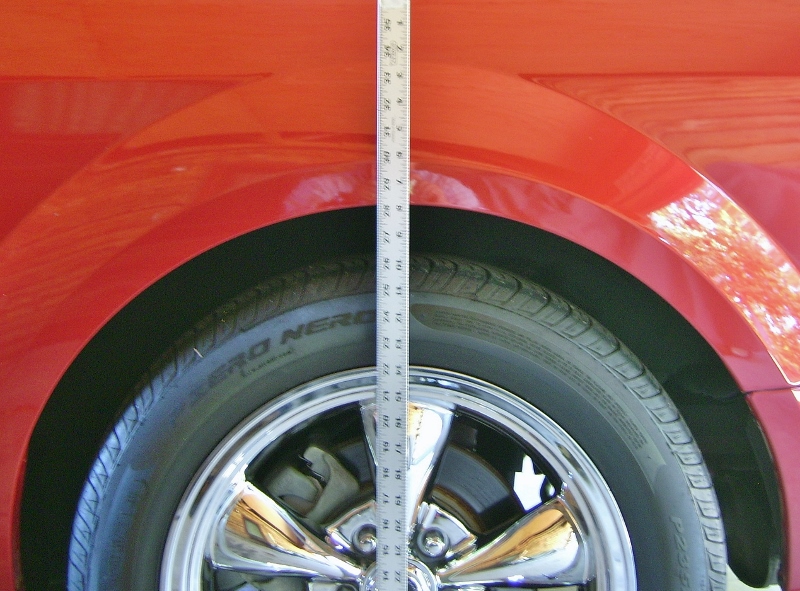
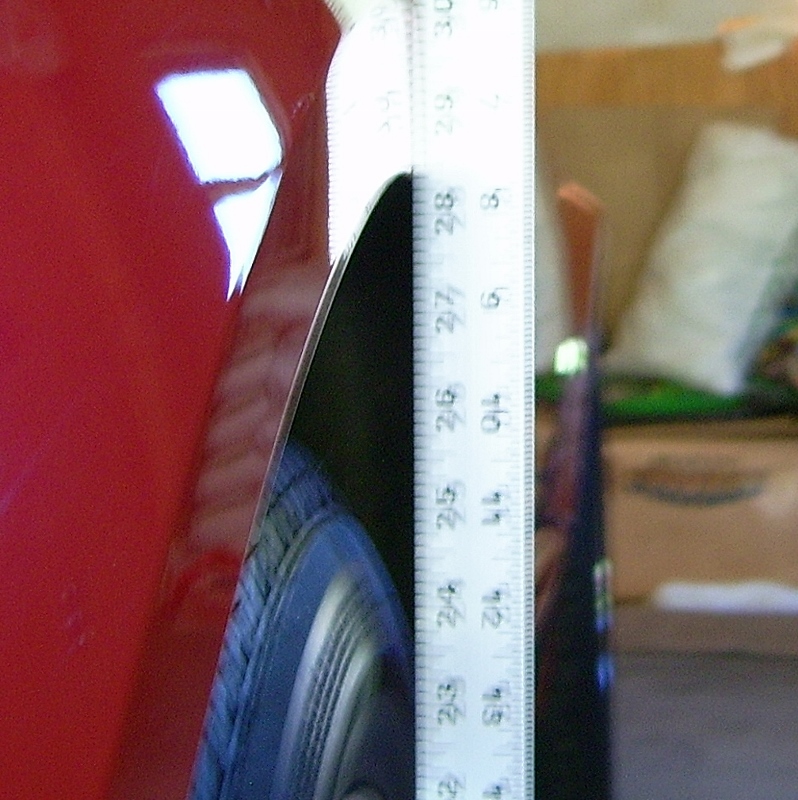
I was curious to see if I needed to work any on the panhard bar, had decided if within 1/4" I'ld leave it alone .... with a straight edge from fender down to tire sidewall bulge (rear tires at 33 psi) the gap to upper sidewall is "ever so near the same" (even if pic is fuzzy). Not "within 1/4" .... just call it 1/4" on both sides.
Before (well, it was a pic same spot back in June, before stripes):

After:

I think it looks great, certainly worth the time spent and $$$ saved which is like "earnings" as opposed to what I would have done had I won that bid last night ....

Last night just after midnight I bid on some Roush rear springs, I wasn't willing to go but so high ..... but I did drive a bidder up. I also wasn't willing to spend $123.99 on rear springs for an inch.
I have cut springs before where it could be done safely and I have used clamps in some cases because it was a good place, and I have bought new before. I have a '92 T-bird Sport with chopped JJJJ Sport springs, 1 coil in front and 5/8 (technical term for "half way between a half and three quarters") coil in back, and it's level and about 1-3/4" lower (different spring rates and suspension movement) I did that in 2007. I know a cut spring has a increase in spring rate as the wire is just as stiff except there less of it to give, and it gives along the entire length as loaded until coil bind, which is why progressives have closer coils that stack up and the remainder are all that's left like a shorter and stiffer spring. I also know about fatter versus thinner coils and coil diameter and the different end styles.
Today I did all that one must do to safely remove and cut and reinstall our 2008 Mustang GT's rear springs. This morning before I started I again measured the distance at each fender opening from carport to top of fender arch at maximum, fronts were 28-1/4" and rears were 29-3/8".
My goal was to eliminate at least 3/4" in the rear and not need a panhard bar change.
I cut using a Dremel with a fibreglass HD cut-off wheel, the wheel shows minimal wear. I read of people worried about heat .... and often resist the urge tpo respond. The spring end last half inch got a little bit warm, but not even uncomfortably so, the cut is so small and narrow and weighed against the mass of the spring, does not get the steel hot. I cut one full coil off the top end of the coils plus an inch which was where I marked using a 1" wide rule against the spring end.
I did then slightly bevel and smooth the cut off ends and round the edges, and after pics, paint was aplied. These are now just under 13-1/2" long total length.
After I was finished, I took a short drive and then I measured again in the same spot on the carport, and I am glad I did not cut more!
Imagine my surprise to find that now all four fender tops, front and rear, are each 28-1/4" from the floor. All 4 the same, and just a hint of rake along the lower edge of the rocker panels. (I only posted left side pics, I have all 4 though.)
I was curious to see if I needed to work any on the panhard bar, had decided if within 1/4" I'ld leave it alone .... with a straight edge from fender down to tire sidewall bulge (rear tires at 33 psi) the gap to upper sidewall is "ever so near the same" (even if pic is fuzzy). Not "within 1/4" .... just call it 1/4" on both sides.
Before (well, it was a pic same spot back in June, before stripes):
After:
I think it looks great, certainly worth the time spent and $$$ saved which is like "earnings" as opposed to what I would have done had I won that bid last night ....
Last edited by tbear853; Aug 5, 2021 at 10:50 AM.
Thread Starter
Mach 1 Member
Joined: June 22, 2013
Posts: 580
Likes: 101
From: the beautiful "Shenandoah Valley of Virginia"
a follow up:
On 10-19-13 I decided to double check my side to side centering with a level and plumb. I was pretty sure it was OK but I had already (before even yesterday) decided if I found it off much, instead of an adjustablle PHB, I'd just move the stock hole a little bit on one end (example being that if one side had been 1/4" more or less than the other, 1/8" movement would correct it).
I placed a level across the spoiler top and found it level, checked carport floor and it was level under rear bumper, so I hung a short string with weight from each fender top at center and measured from string to tire sidewall .... driver's side just a hair under 3/8" but over 5/16" (about 11/32"), passenger side right on 3/8" mark (12/32") and that's "pretty darn close" to being the same.
I guess that the yard stick pictured was closer to 1/4" each side because the bottom of the yardstick was against the sidewall which appearantly had less bulge at 33 psi .... less than 3/8" bulge anyway so that yardstick was angled inward from fender lip some little bit.

Thread Starter
Mach 1 Member
Joined: June 22, 2013
Posts: 580
Likes: 101
From: the beautiful "Shenandoah Valley of Virginia"
Thanks much!
We put 256 miles on it today, mostly on Blue Ridge Parkway ..... and it's not a smooth road but in short spurts. Lots of heaves and dips 'cause it's just an old road. Springs holding up OK though, may devise some sort of better seat for the top part that will sit on top and support first part of that open coil better.
Thread Starter
Mach 1 Member
Joined: June 22, 2013
Posts: 580
Likes: 101
From: the beautiful "Shenandoah Valley of Virginia"
Today (10-22-13) while delivering parts I had some time to think (some parts runs are out into the county and last an hour or more) and suddenly I recalled a bunch of 89-97 Thunderbird rear spring rubbers I had in a box, and they have a built in ramp and step to seat a coil with open ends.
I got home after work, pulled the Mustang around onto ramps, jacked and set frame on padded stands, and removed ramps and undid lower shock bolts and eased axle down with jack and removed the coils I had cut a few days ago. No permanent bends yet and we drove them over 250 miles Sunday alone on a not smooth roadway.
Mustang springs are about 3.5" ID, the T-Bird springs in a 89-97 Thunderbird rear are about 4" ID, the rubber snap into the coils. I modified them a bit .... cut a section out where the two tie wraps are closest. I then reinstalled the springs with the pigtail part of top towards rear of car, centered in spring seat with new T-Bird rubber between spring and Mustang Rubber with center bumper.
Where immediately before todays "spring seat rubber" mod the top of the rear fender arches were 28.25" from floor, afterwards they were nearer 28.5" .... a gain of just under 1/4". That's still a good full inch below where they were and that's OK. I was looking through pictures from Sunday, with camera gear and tripod and tool kit and stuff in trunk, the rear was maybe 1/4" low anyway?
Last edited by tbear853; Oct 22, 2013 at 07:16 PM.
Thread Starter
Mach 1 Member
Joined: June 22, 2013
Posts: 580
Likes: 101
From: the beautiful "Shenandoah Valley of Virginia"
I was talking to a buddy recently that was asking if I knew a way to just slightly lower his '07 Mustang in the rear. I suggested cutting the rear coils, he was shocked. He said he had talked to another fellow who advised against it. Like I, he just wants to take a little rake out of his '07. I sent him a link to here.
I cut these rear coils in 2013, here it is 2020 and the car still sits the same. Rides same as OEM too. I'd do it with him, but he's a good ways away. I don't see mention of it, but I did trim about 3/4" off the bump stops too.
Here in Summer 2021, still doing well. No sagging or other issues.
I cut these rear coils in 2013, here it is 2020 and the car still sits the same. Rides same as OEM too. I'd do it with him, but he's a good ways away. I don't see mention of it, but I did trim about 3/4" off the bump stops too.
Here in Summer 2021, still doing well. No sagging or other issues.
Last edited by tbear853; Aug 5, 2021 at 10:36 AM.

Thread
Thread Starter
Forum
Replies
Last Post