
Journal: MY American Racing LT Header install, day by day


V6 Member
Joined: December 14, 2006
Posts: 98
Likes: 0
Hi Lowe,
Making good progress there! I see you got 6 of the 8 bolts in, well, this is where you'll find that you may have a problem getting all 8 in!
I could get 7 bolts in, but the 8th was impossible - no matter how I tried and which bolt was the last, it wouldn't work. That's when I enlarged the holes slightly to give them some tolerance on the fit. Went on straight away once I'd done that.
Hopefully you won't get the same issue, but just thought I'd give a heads up
Thread Starter
Mach 1 Member
Joined: December 18, 2004
Posts: 669
Likes: 0
Monday I had to watch the season finale of Heroes, so I didn't work of the headers.
May 22
After Stig's warning above, I was ready for a challenge today. Sorry for no pics, but I really just put back everything I previously took apart.
I started by installing by hand the remaining bolts on the drivers side. Fortunately for me, all 8 went in w/o any problems. The lower rear most bolt is a little tricky to reach, put it lined up fine. So I then proceeded to remove them one at a time, applied anti-seize, and reinstalled. As with any torque procedure, I started tightening from the middle out, and to 3 levels of thightness. There was no way for me to get a torque wrench in there, so my calibrated wrist got them right around 25-30 ft/lbs.
I then put the motor mount bracket back on the block, and reattached the steering linkage (at least the bottom end part). I didn't feel like being a contortionist at the time to put those 2 10mm nuts back on the inside of the firewall for the steering shaft bracket, so those will be next.
Reinistalled the one top nut for the motor mount bracket, and I was finally able to lower the floor jack. Everything is good. Oh yeah, don't forget to put the oil dip stick tube back on. I almost forgot about it. The tube does rest hard against the header flange, but the mounting tab and the tube itself are flexible enough to be tightened down w/o any issues.
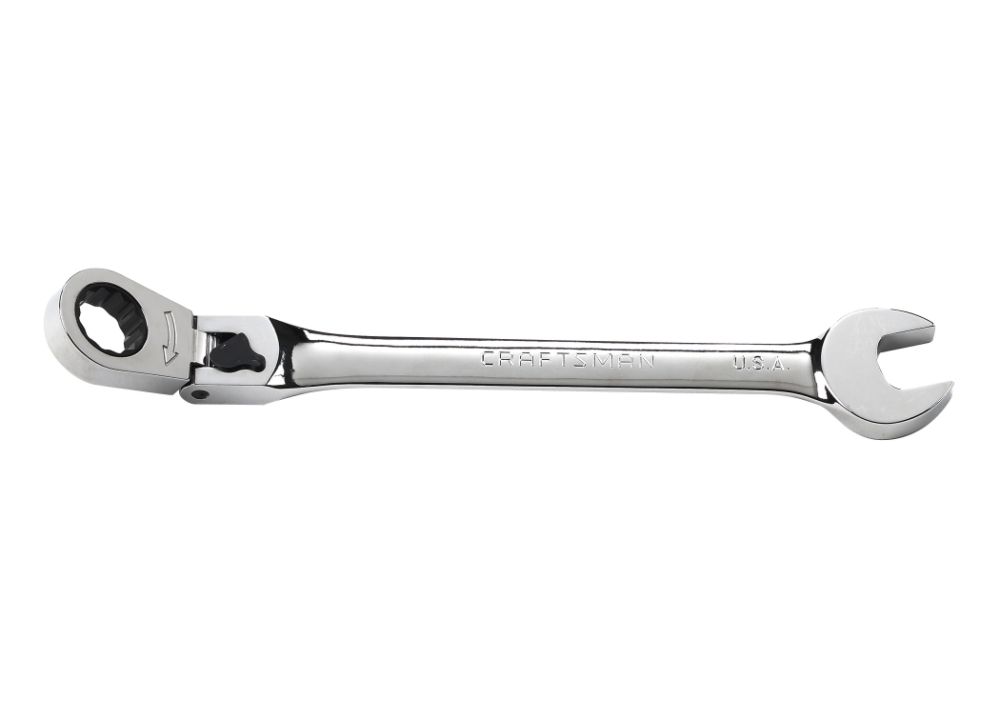
I don't know where the time went. That was the fastest 2 hrs on the project so far! Next up passenger side! I will post this pic. I don't how I would have done it w/o this "Craftsman 1/2 in. Locking Flex Ratcheting Combination Wrench". I bought ($22 at Sears) the 1/2" size b/c I liked how more snug it fits than the 13mm (the actual bolt size):
Time spent:2 hrs Total on project: 10 hrs
May 22
After Stig's warning above, I was ready for a challenge today. Sorry for no pics, but I really just put back everything I previously took apart.
I started by installing by hand the remaining bolts on the drivers side. Fortunately for me, all 8 went in w/o any problems. The lower rear most bolt is a little tricky to reach, put it lined up fine. So I then proceeded to remove them one at a time, applied anti-seize, and reinstalled. As with any torque procedure, I started tightening from the middle out, and to 3 levels of thightness. There was no way for me to get a torque wrench in there, so my calibrated wrist got them right around 25-30 ft/lbs.
I then put the motor mount bracket back on the block, and reattached the steering linkage (at least the bottom end part). I didn't feel like being a contortionist at the time to put those 2 10mm nuts back on the inside of the firewall for the steering shaft bracket, so those will be next.
Reinistalled the one top nut for the motor mount bracket, and I was finally able to lower the floor jack. Everything is good. Oh yeah, don't forget to put the oil dip stick tube back on. I almost forgot about it. The tube does rest hard against the header flange, but the mounting tab and the tube itself are flexible enough to be tightened down w/o any issues.
I don't know where the time went. That was the fastest 2 hrs on the project so far! Next up passenger side! I will post this pic. I don't how I would have done it w/o this "Craftsman 1/2 in. Locking Flex Ratcheting Combination Wrench". I bought ($22 at Sears) the 1/2" size b/c I liked how more snug it fits than the 13mm (the actual bolt size):
Time spent:2 hrs Total on project: 10 hrs
 But I don't wanna rush him.
Mach 1 Member
Joined: December 14, 2004
Posts: 876
Likes: 1
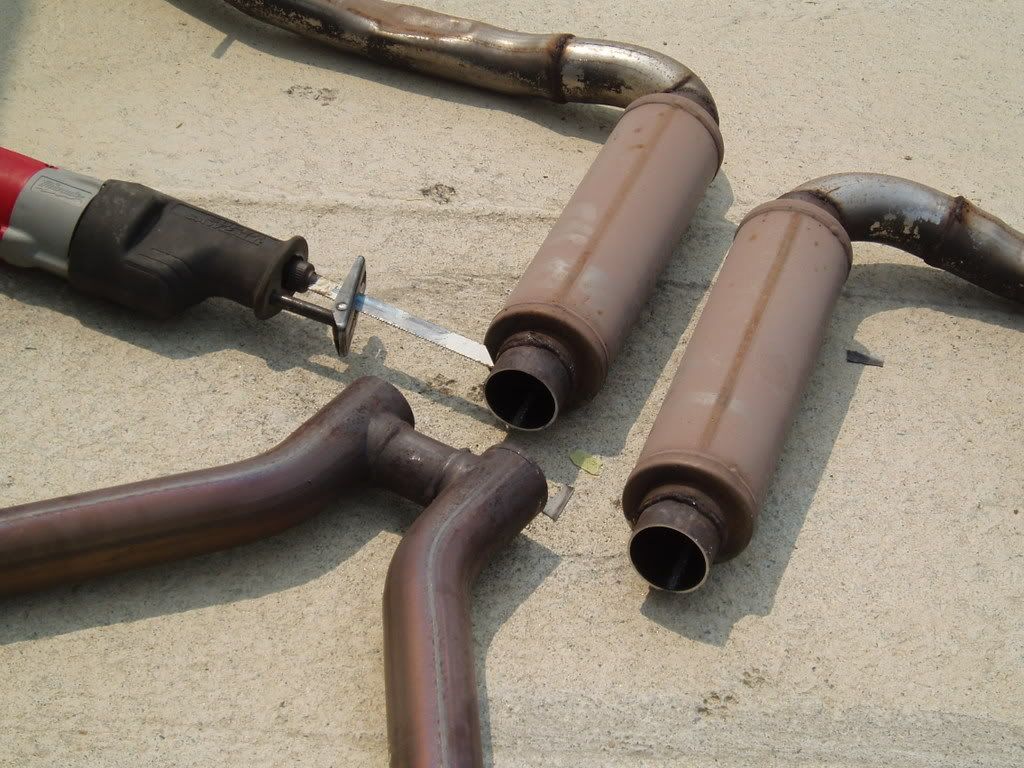
Great write up! I was lucky with my installation, One of my renters is a master mechanic and he did the ARH LT's install. I had already removed the Vortech supercharger and charge cooler and braided hoses and radiator hoses,valve covers and battory tray. He then proceeded to jack car and place the jack stands, I went inside the house to eat and came back out and he had everything loose, he took the starter off,disconected the sensors,loosened the side exhaust,before I could start taking pictures he had both maniflods off the engine. he then finished removing the header studs. pulled the exhaust out from under the car, my mufflers were welded to the exhaust so I had to use a saw zaw and cut it into. had to get a pair of 2 1/2 inch muffler clamps, later on I'm going to take it to a muffler place and have it welded at the mufflers and h-pipe. I took pictures,I'll post them later in the week. after he finished the ARH LT's install, he started the cams removal, I was able to take plenty of pictures during it also, but man is this guy fast.removing the valve springs tomarrow. I'll up-date when he finishes the valve springs installation. I have learned so much ,by working with him. the installation of the ARH LT's took about 4 1/2 hrs,from start to finish.
Mach 1 Member
Joined: December 14, 2004
Posts: 876
Likes: 1


Thread Starter
Mach 1 Member
Joined: December 18, 2004
Posts: 669
Likes: 0
May 28
Passenger side.
My wife left town w/ the camera so, sorry no pics.
With the Memorial Day weekend behind us, I actually did get under the car again Monday. Started off pretty frustrating. For the first 4 hours of the day, I fought w/ getting everything on the passenger side in place. One of the issues, was one of the tubes was contacting the stud for the motor mount. Turn out the main problem was the engine was not raised up enough with the jack. I got lucky and repositioned the jack (while having a loose motor mount) and was able to get some good lift on the engine. It really made getting things in there much easier.
Removing the stock manifold, starter, and motor mount bracket was no problem. One thing I noticed while trying to get the header in the first time, was that the front and rear most bolts on top were going to be a tight fit due to the slots in the header flange. I could get one or the other started, but not both together. Having that in mind, and since I pulled the header out anyway, I busted out the Dremel to open thing up a little, just on the outer most edges of those front and rear most slots on top.
After the readjustment at mid day, the new header went in, with gaskets in place, in about 15 mins. Got all the bolts in place (even the front and rear most slotted ones), and added the anti-sieze for kicks. Reinstalled motor mount bracket. Be sure to install the bracket before the starter. It's just easier that way. Starter is a suprizingly easy install too. 2 wires, 3 10mm bolts, and it's done. Someone mentioned difficulty in getting the upper starter bolt started. Do it from the top (w/ battery and tray removed), very easy.
All that's left is the H-pipe. I was just thinking (uh-oh) I might should have left the header bolts loose to get a little play at the collectors when it comes time to line things up. That's tonights adventure. Who knows, maybe I'll get lucky....riiiiiight. Anyhow, those headers sure look sweet (or is it "sick") under there.
Time spent:8 hrs (4 completly wasted ) Total on project: 18 hrs
Passenger side.
My wife left town w/ the camera so, sorry no pics.
With the Memorial Day weekend behind us, I actually did get under the car again Monday. Started off pretty frustrating. For the first 4 hours of the day, I fought w/ getting everything on the passenger side in place. One of the issues, was one of the tubes was contacting the stud for the motor mount. Turn out the main problem was the engine was not raised up enough with the jack. I got lucky and repositioned the jack (while having a loose motor mount) and was able to get some good lift on the engine. It really made getting things in there much easier.
Removing the stock manifold, starter, and motor mount bracket was no problem. One thing I noticed while trying to get the header in the first time, was that the front and rear most bolts on top were going to be a tight fit due to the slots in the header flange. I could get one or the other started, but not both together. Having that in mind, and since I pulled the header out anyway, I busted out the Dremel to open thing up a little, just on the outer most edges of those front and rear most slots on top.
After the readjustment at mid day, the new header went in, with gaskets in place, in about 15 mins. Got all the bolts in place (even the front and rear most slotted ones), and added the anti-sieze for kicks. Reinstalled motor mount bracket. Be sure to install the bracket before the starter. It's just easier that way. Starter is a suprizingly easy install too. 2 wires, 3 10mm bolts, and it's done. Someone mentioned difficulty in getting the upper starter bolt started. Do it from the top (w/ battery and tray removed), very easy.
All that's left is the H-pipe. I was just thinking (uh-oh) I might should have left the header bolts loose to get a little play at the collectors when it comes time to line things up. That's tonights adventure. Who knows, maybe I'll get lucky....riiiiiight. Anyhow, those headers sure look sweet (or is it "sick") under there.
Time spent:8 hrs (4 completly wasted
) Total on project: 18 hrs


Mach 1 Member
Joined: December 14, 2004
Posts: 876
Likes: 1
No , I had to go everywhere to find an compression adapter,but I couldn't find one so I went to a ford dealer and bought a spark plug for an 05 and cut the end off and hollowed it out ,then took a galvenized pipe and had it welded on and screwed a air fitting on it, I'll take a picture of it in a little while. so now I'm waiting for the guy to get off work to start the install on the springs,going to work in to the night till finished. I'll let everyone know how it went.
Thread Starter
Mach 1 Member
Joined: December 18, 2004
Posts: 669
Likes: 0
May 29
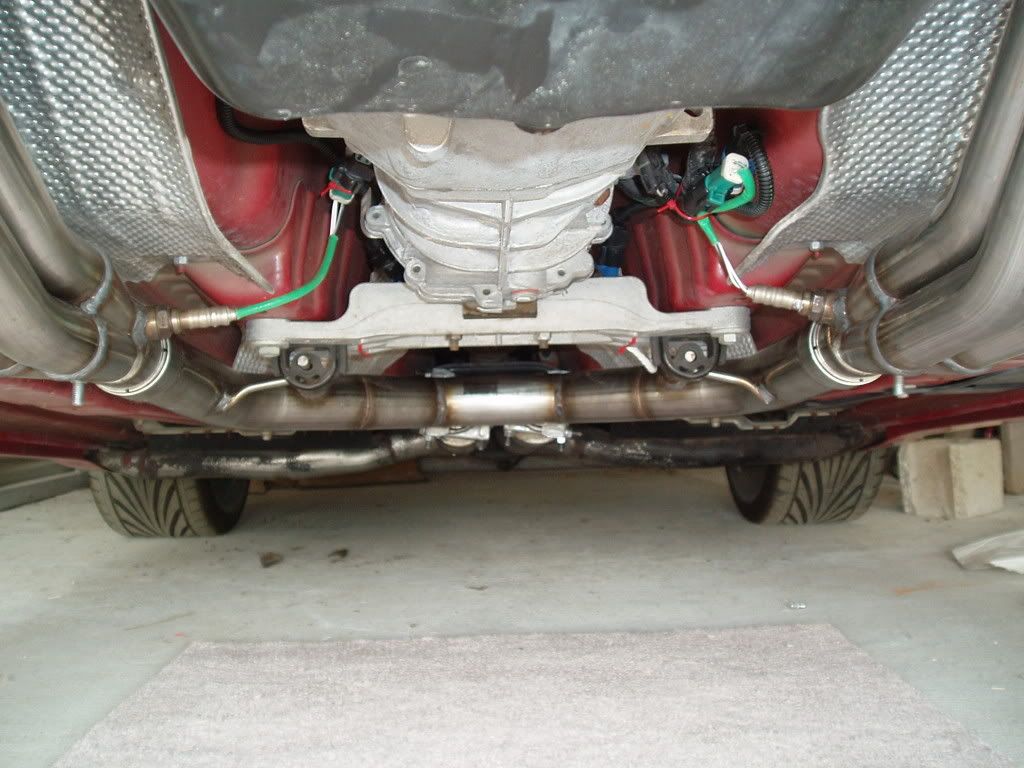
Thanks for posting those pics James, especially since my camera is still outta town. Looking at your pics, mine doesn't look too far from yours. I noticed my hangers stick out thru the mounts unevenly and about as far as yours, so maybe I'm closer than I think.
I was able to get the H-pipe on the headers, and the hangers in the brackets, but I couldn't get the H-pipe to slide up as far as I'd like. Luckily, I did NOT have to loosen the headers to get it to go on. The H-pipe didn't line up perfectly with the collectors, but it was only about 1/2 inch off. I also flared the H-pipe's sloted end a little bit more to get it over the collectors a little easier.
I'm stuck tho, 'cause I couldn't move the H-pipe up far enough on the header collectors for the tail pipes to line up with the back of the H-pipe. After trying to muscle it on, and pounding it w/ a hammer/block of wood, I gave up. I needed to install the CMCV DPs anyway (they are included in the new tune for the headers, etc), so I left the bottom of the car and headed for the intake.
At least I finished the deletes install. Although one of the injectors would NOT come off w/ the fuel rail. It would always pop of the rail, and spill gas all over the place. Eventually, it came off once I gave it some "individual attention", then I popped it back onto the rail and everything was fine. I was suprized to see a fair amount of motor oil on the plates and in the intake. Not sure what's up w/ that.
Anyway, I spent about an hour wrestling w/ the H-pipe. I think I'll try to clamp it down to the headers, tie up the loose end to the tranny mount, and tie up the tail pipes, then take to an exhaust or nearby speed shop to raise it up high, and reset the exhaust pieces. Besides, it will be real fun driving it around with no mufflers, just headers into those hi-flow cats and H-pipe.
Tonight; battery, those 2 steering column 10mm nuts on the internal side of the firewall, the 4 O2 sensors, tie-up loose exhaust pieces, tune, fire it up (I hope)! BTW, do we have to trim off the little green tabs on the front O2 sensor connectors to get it to fit in the extension cables??
Time spent:1 hr Total on project: 19 hrs
Thanks for posting those pics James, especially since my camera is still outta town. Looking at your pics, mine doesn't look too far from yours. I noticed my hangers stick out thru the mounts unevenly and about as far as yours, so maybe I'm closer than I think.
I was able to get the H-pipe on the headers, and the hangers in the brackets, but I couldn't get the H-pipe to slide up as far as I'd like. Luckily, I did NOT have to loosen the headers to get it to go on. The H-pipe didn't line up perfectly with the collectors, but it was only about 1/2 inch off. I also flared the H-pipe's sloted end a little bit more to get it over the collectors a little easier.
I'm stuck tho, 'cause I couldn't move the H-pipe up far enough on the header collectors for the tail pipes to line up with the back of the H-pipe. After trying to muscle it on, and pounding it w/ a hammer/block of wood, I gave up.
I needed to install the CMCV DPs anyway (they are included in the new tune for the headers, etc), so I left the bottom of the car and headed for the intake.At least I finished the deletes install. Although one of the injectors would NOT come off w/ the fuel rail. It would always pop of the rail, and spill gas all over the place.
Eventually, it came off once I gave it some "individual attention", then I popped it back onto the rail and everything was fine. I was suprized to see a fair amount of motor oil on the plates and in the intake. Not sure what's up w/ that.Anyway, I spent about an hour wrestling w/ the H-pipe. I think I'll try to clamp it down to the headers, tie up the loose end to the tranny mount, and tie up the tail pipes, then take to an exhaust or nearby speed shop to raise it up high, and reset the exhaust pieces. Besides, it will be real fun driving it around with no mufflers, just headers into those hi-flow cats and H-pipe.
Tonight; battery, those 2 steering column 10mm nuts on the internal side of the firewall, the 4 O2 sensors, tie-up loose exhaust pieces, tune, fire it up (I hope)! BTW, do we have to trim off the little green tabs on the front O2 sensor connectors to get it to fit in the extension cables??
Time spent:1 hr
Total on project: 19 hrs