
BMR Swaybar Delete Kit Install
 2/11/07, 10:49 AM
#1
GTR Member
Thread Starter
Join Date: January 26, 2006
Location: Central Florida
Posts: 4,639
Likes: 0
Received 0 Likes
on
0 Posts
BMR Swaybar Delete Kit Install
I've had my swaybar off for quite awhile now, so I decided to break down and get the BMR Swaybar Delete kit that replaces the heavy stock radiator support. For those who do not know, the stock support also has to be able to take the forces acting on it from the swaybar. So, if the swaybar is removed, this big, heavy support isn't needed any more. After removing the swaybar and replacing the support, there is a weight savings of almost 30 lbs.
First, I jacked up the nose and put the car safely on jack stands. If you are removing the swaybar you'll probably want to take off the front tires for more access, but this isn't necessary if you are just changing the radiator support.
SWAYBAR REMOVAL
I didn't take any pictures when I removed the swaybar, but it's very easy. Basically, there are six nuts that have to be removed. Four of them are on the radiator support shown here:
 This also shows the difference between the two supports.
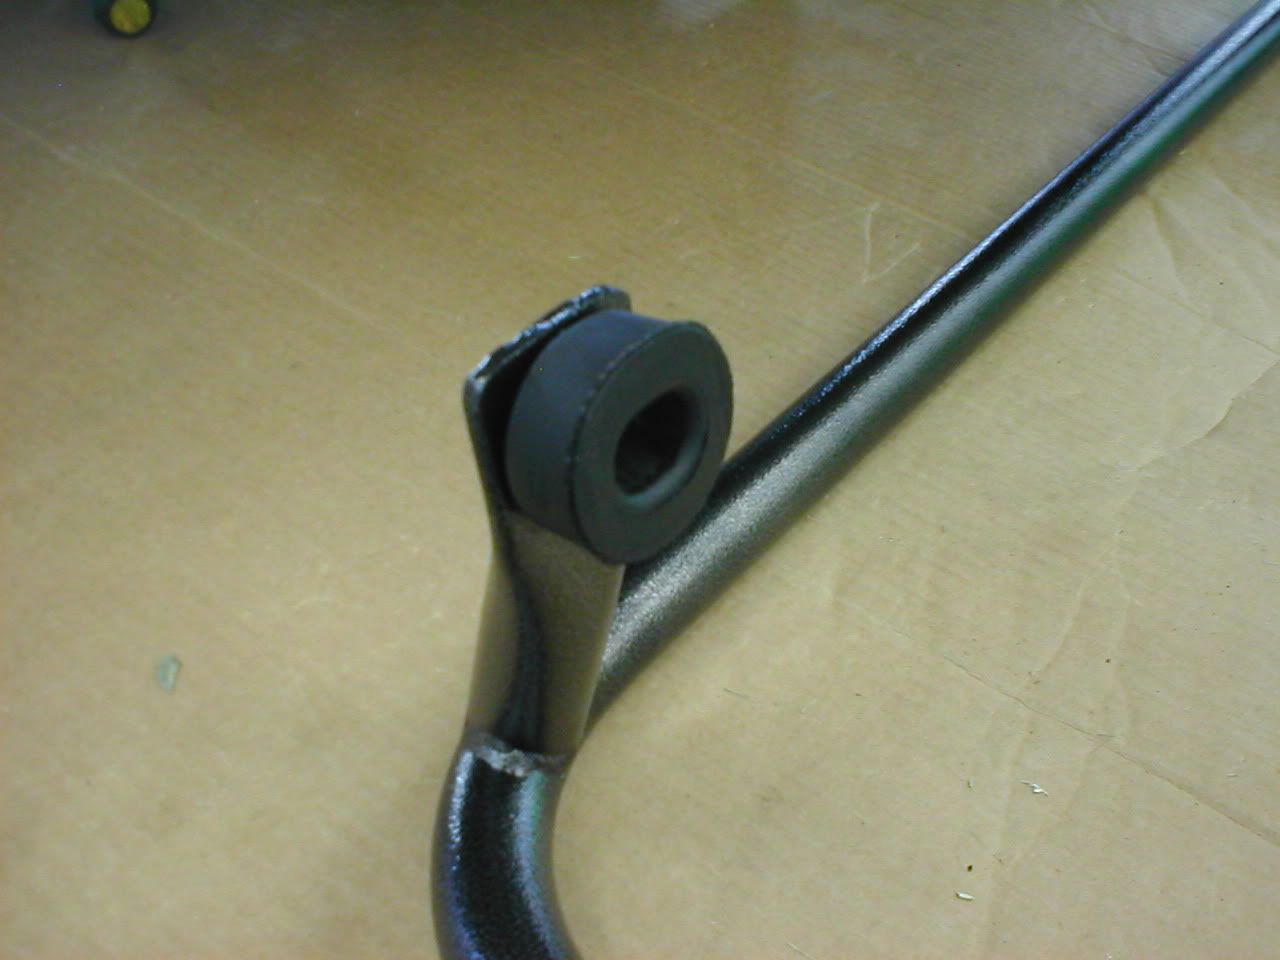
The other two nuts that have to be removed hold the swaybar end links to the strut assemblies:
 Thank you, TacoBill, for the pic!
After those six nuts are removed, the swaybar and the end links will come right off the car.
PLASTIC PROTECTOR REMOVAL
 Seven little bolts must be removed and this piece will drop right down. Close your eyes if you are under this when you pull it down... a lot of trapped dirt will probably come down as well.
STOCK RADIATOR SUPPORT REMOVAL
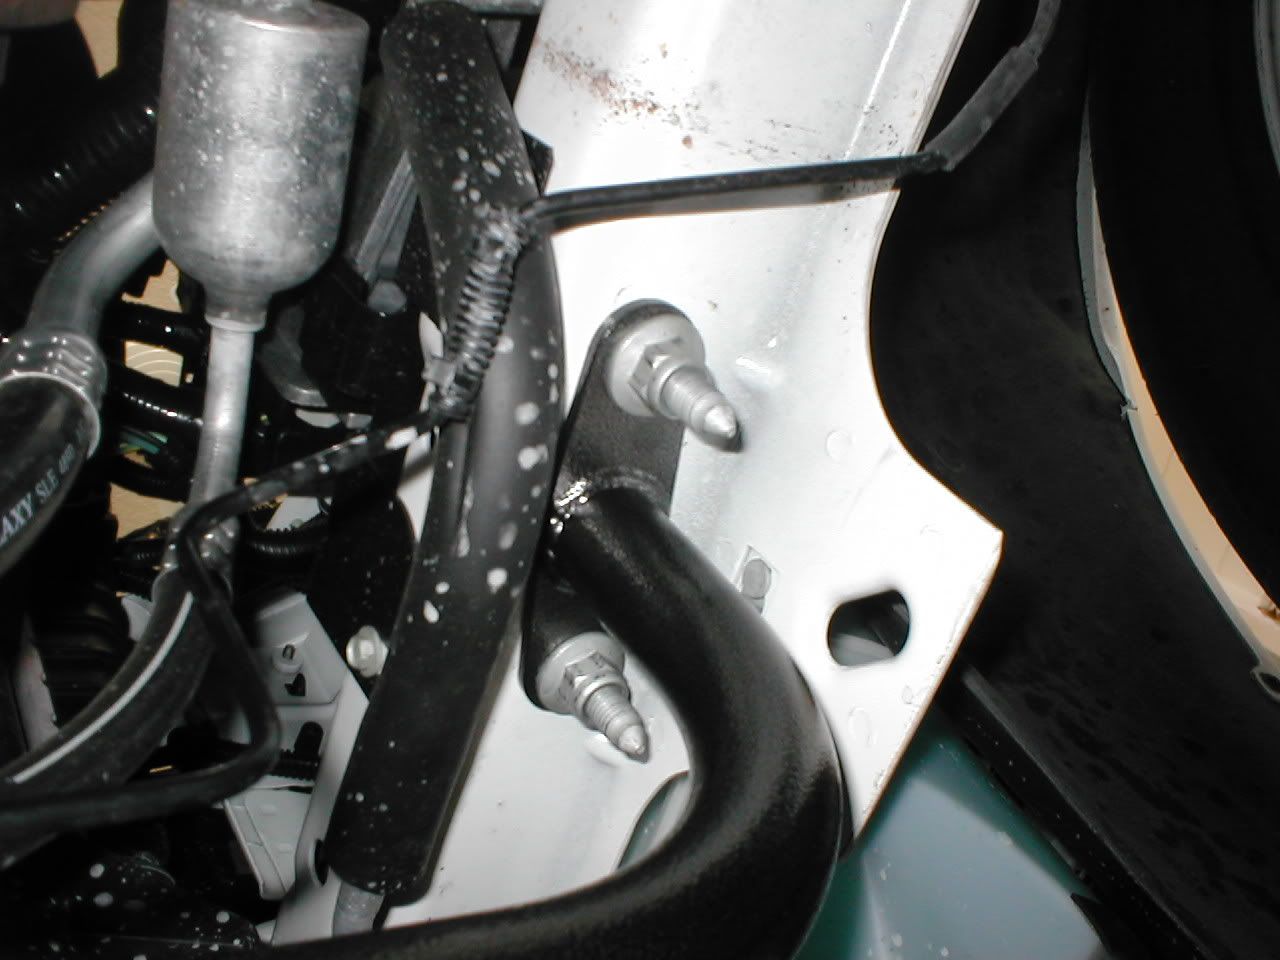
The first thing that should be done is to remove everything that is connected to the stock support. This is best shown in this picture:
 The yellow circles show the clips that hold the brake line. Just pop the brake line out of the clips. The blue circle shows where the A/C line bracket attaches. Remove the nut and then remove the bracket from the stud. There is also a wire tie holding the power steering line shown in this picture:
 It's kinda blurry, but I just cut the wire tie. I'm not sure why it's even there.
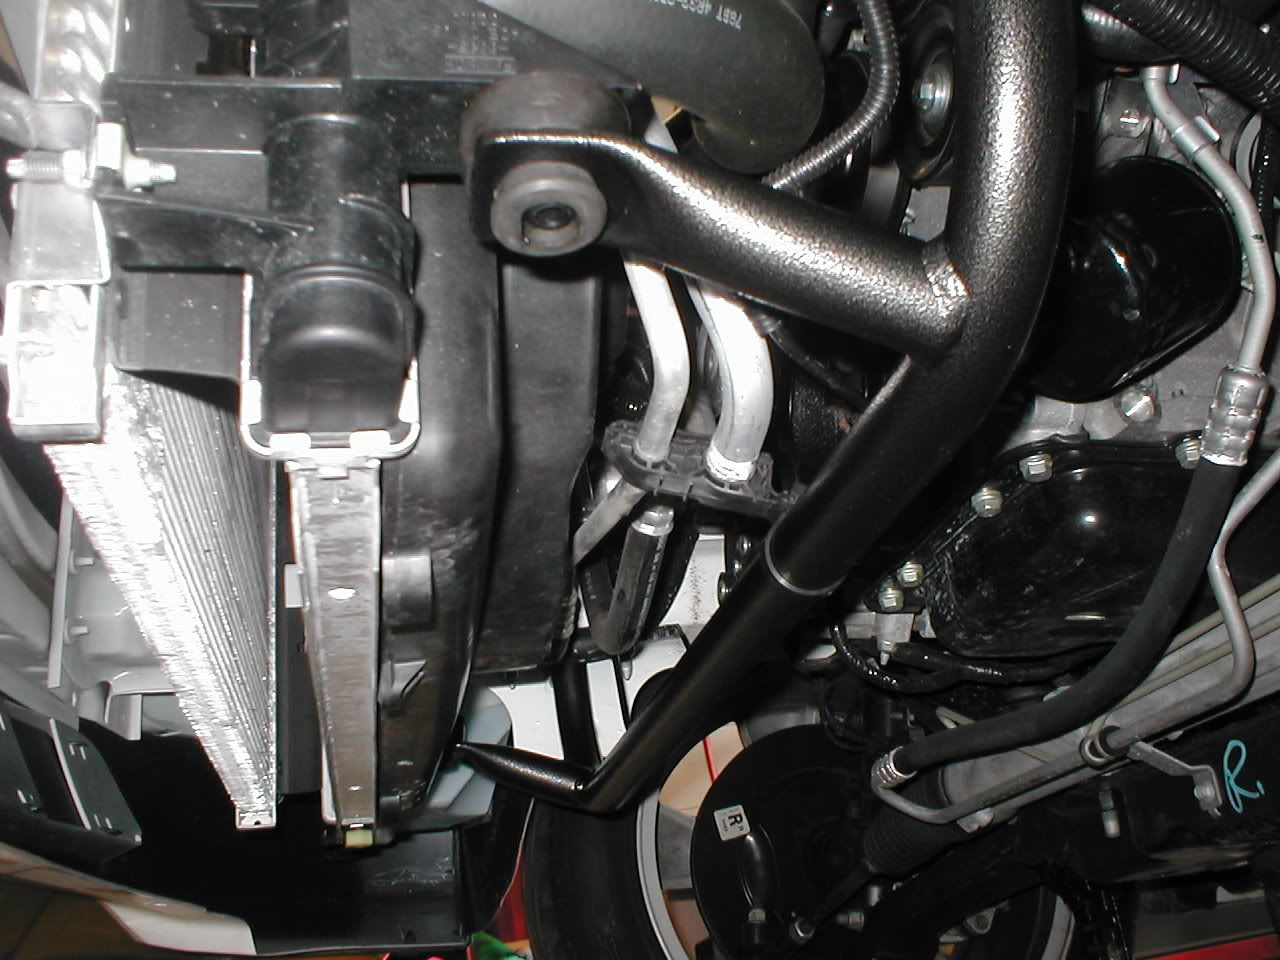
 Next, loosen the four nuts that attach the radiator support to the frame. Do not remove them at this time because the radiator will come right down with the support.
This is what happens when you start to loosen the four nuts:

 The top radiator supports prevent the radiator from going up, left, right, forward, and backwards... but not down, so the radiator has to be supported:
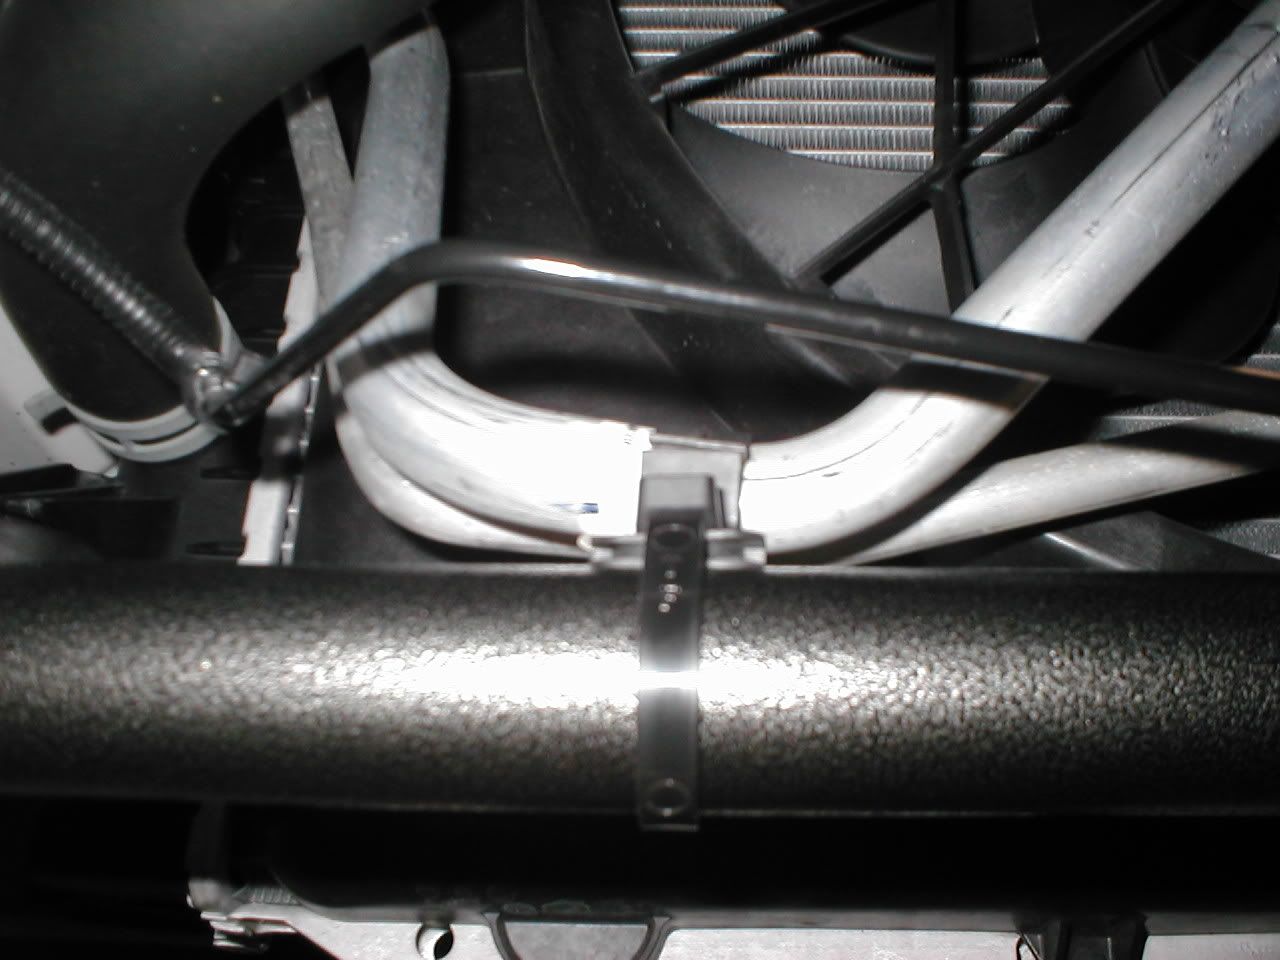
 I just used a jackstand. It worked perfectly.
Now that the radiator is supported, you can fully remove the four nuts and drop the radiator support down and out from under the car.
PARTS SWAP
There's nothing much to do here... just move the rubber over from the stock support over to the BMR support:

BMR SUPPORT INSTALLATION
Couldn't be easier. Line up the four studs and make sure the radiator is in the two rubber pieces, and mount it back to the car:


After the nuts are started, you can get the jack stand out of the way that is supporting the radiator. The torque for these four nuts is 85 lb/ft.
FINISHING UP
For the price, you would think they would include wire ties to re-connect the plastic piece to the new support, but they don't. Here are the extra things I did:

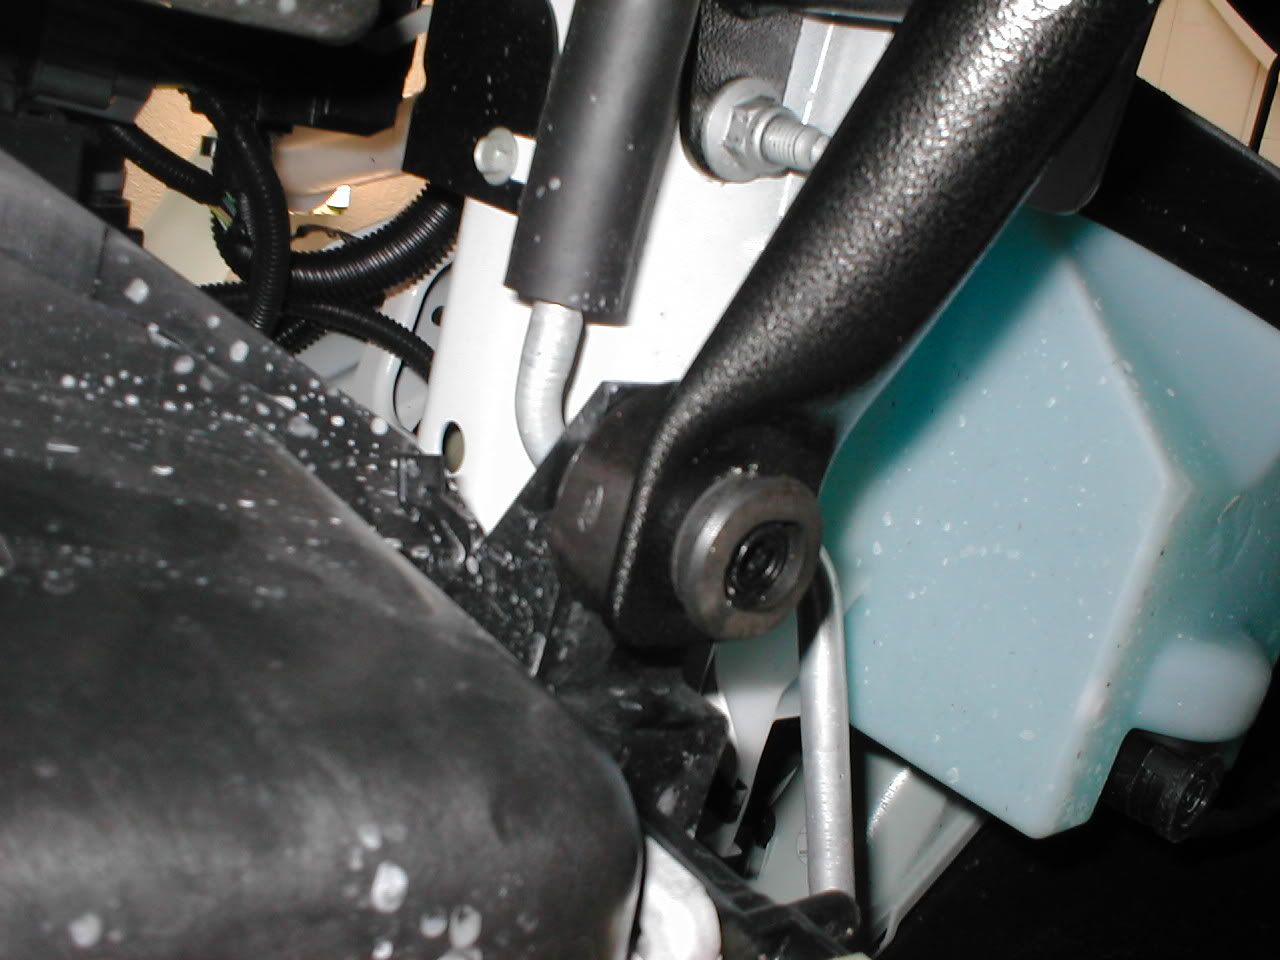
 I used a thick wire tie to connect the A/C line bracket to the BMR support. It was held on by that nut to the stock radiator support, but this holds it just as well.
 Re-install the four bolts that hold the plastic piece to the bumper. The rear is held to the BMR support with three wire ties.
 You'll find this rubber isolator on the brake line toward the passenger side of the car. The brake line ran close to the stock support, and this kept it from hitting. It's not needed any more, so I moved it to the center of the brake line where it now comes close to the BMR support. The center wire tie that hold the plastic piece to the BMR support also goes around the brake line. I could have pulled the brake line tight against the support, but I didn't want the brake line to eventually wear through from vibration, so that's why I put that rubber isolator there. (No, I didn't bend the brake line like that... that's how it is.)
 Here's a shot of the three wire ties used to hold the plastic piece. They hold it just as good as the 3 little bolts did.
WEIGHT DIFFERENCE BETWEEN THE TWO SUPPORTS?
This should explain it perfectly:


First, I jacked up the nose and put the car safely on jack stands. If you are removing the swaybar you'll probably want to take off the front tires for more access, but this isn't necessary if you are just changing the radiator support.
SWAYBAR REMOVAL
I didn't take any pictures when I removed the swaybar, but it's very easy. Basically, there are six nuts that have to be removed. Four of them are on the radiator support shown here:
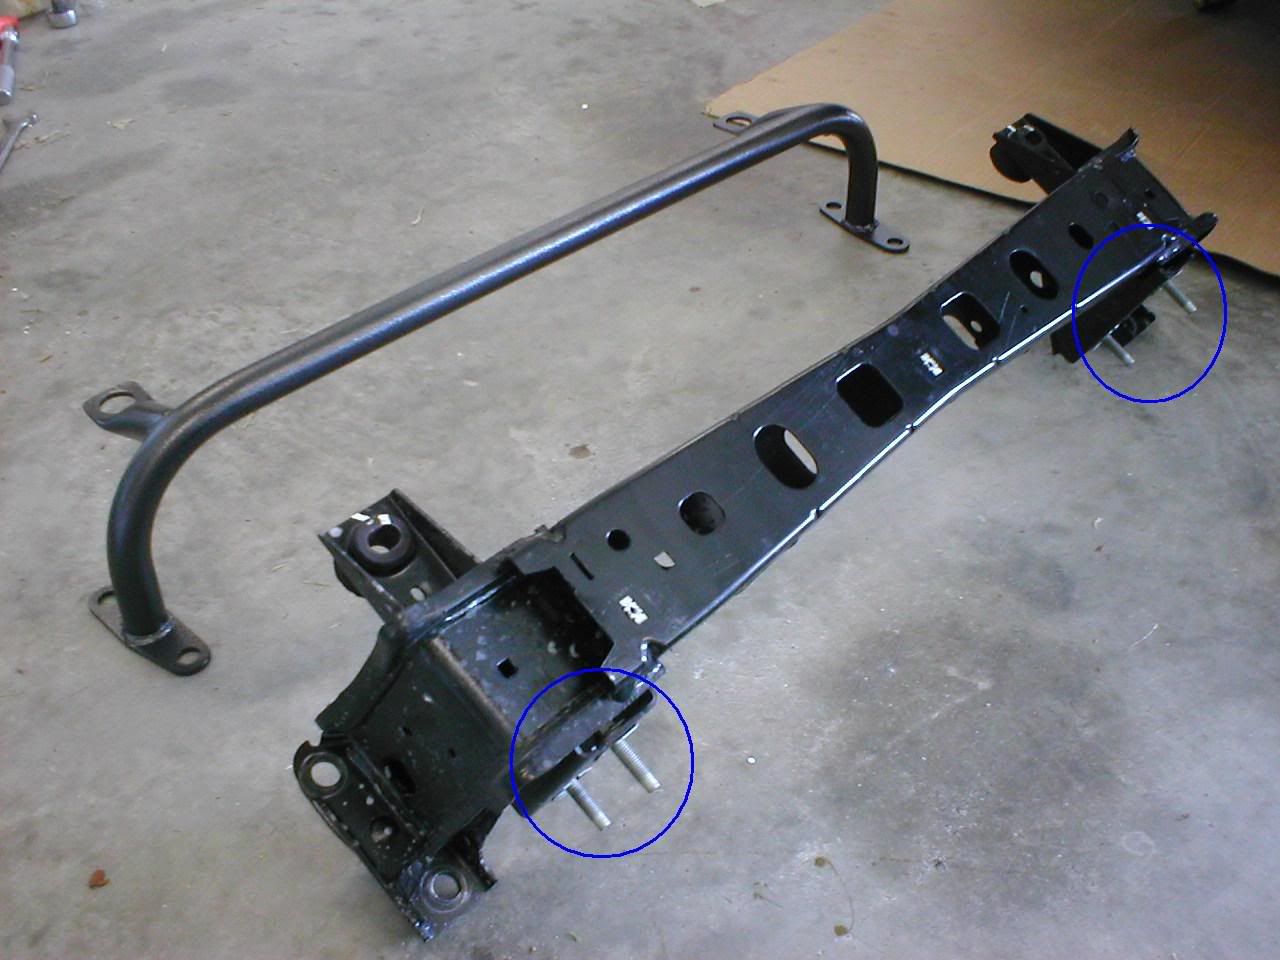 This also shows the difference between the two supports.
The other two nuts that have to be removed hold the swaybar end links to the strut assemblies:
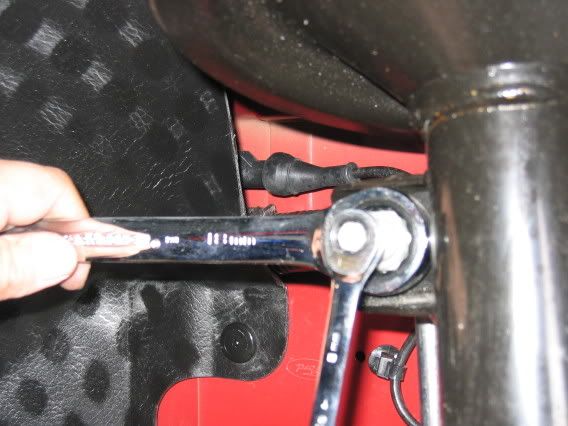 Thank you, TacoBill, for the pic!
After those six nuts are removed, the swaybar and the end links will come right off the car.
PLASTIC PROTECTOR REMOVAL
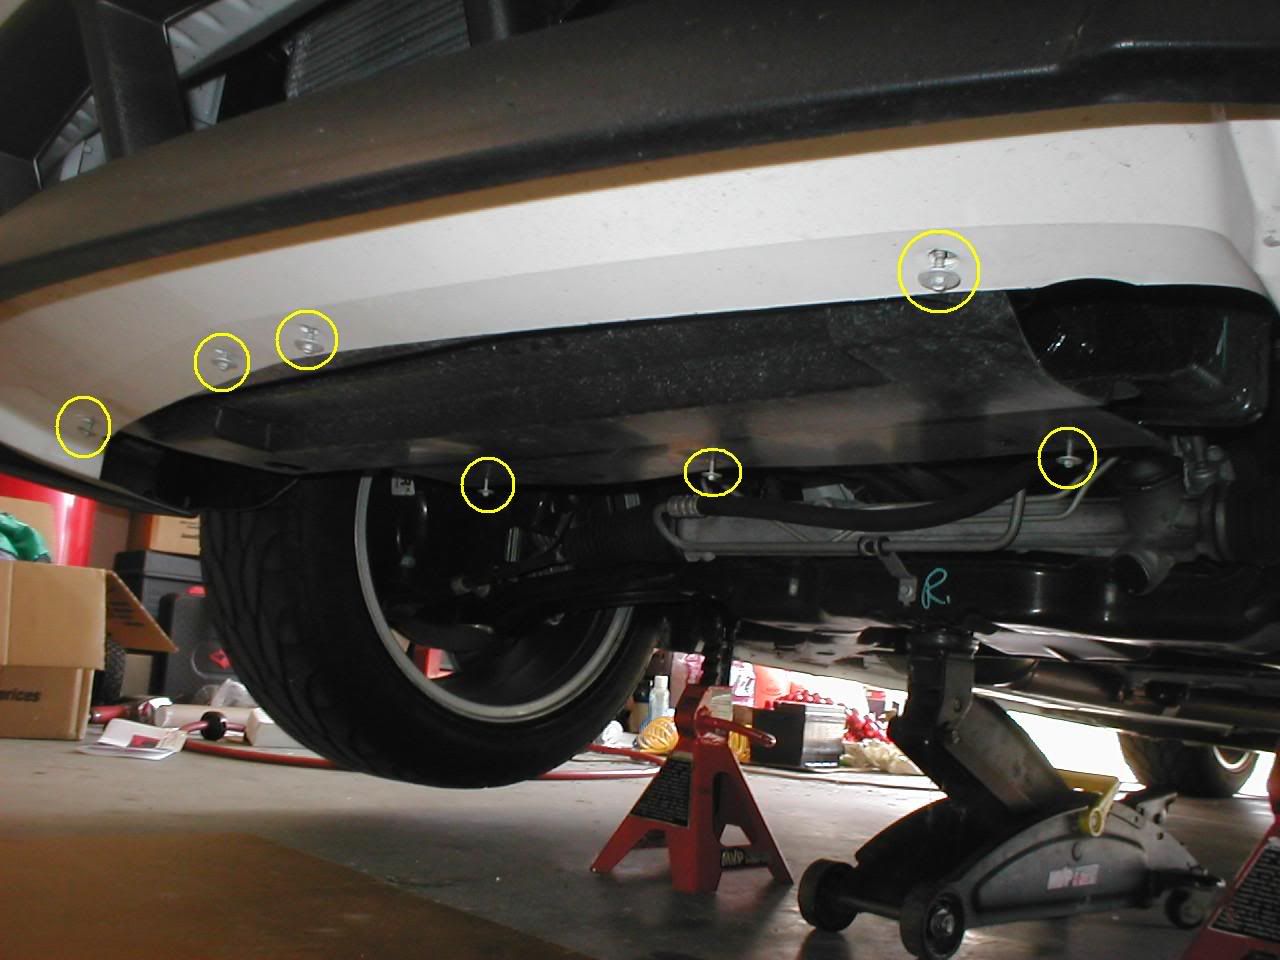 Seven little bolts must be removed and this piece will drop right down. Close your eyes if you are under this when you pull it down... a lot of trapped dirt will probably come down as well.
STOCK RADIATOR SUPPORT REMOVAL
The first thing that should be done is to remove everything that is connected to the stock support. This is best shown in this picture:
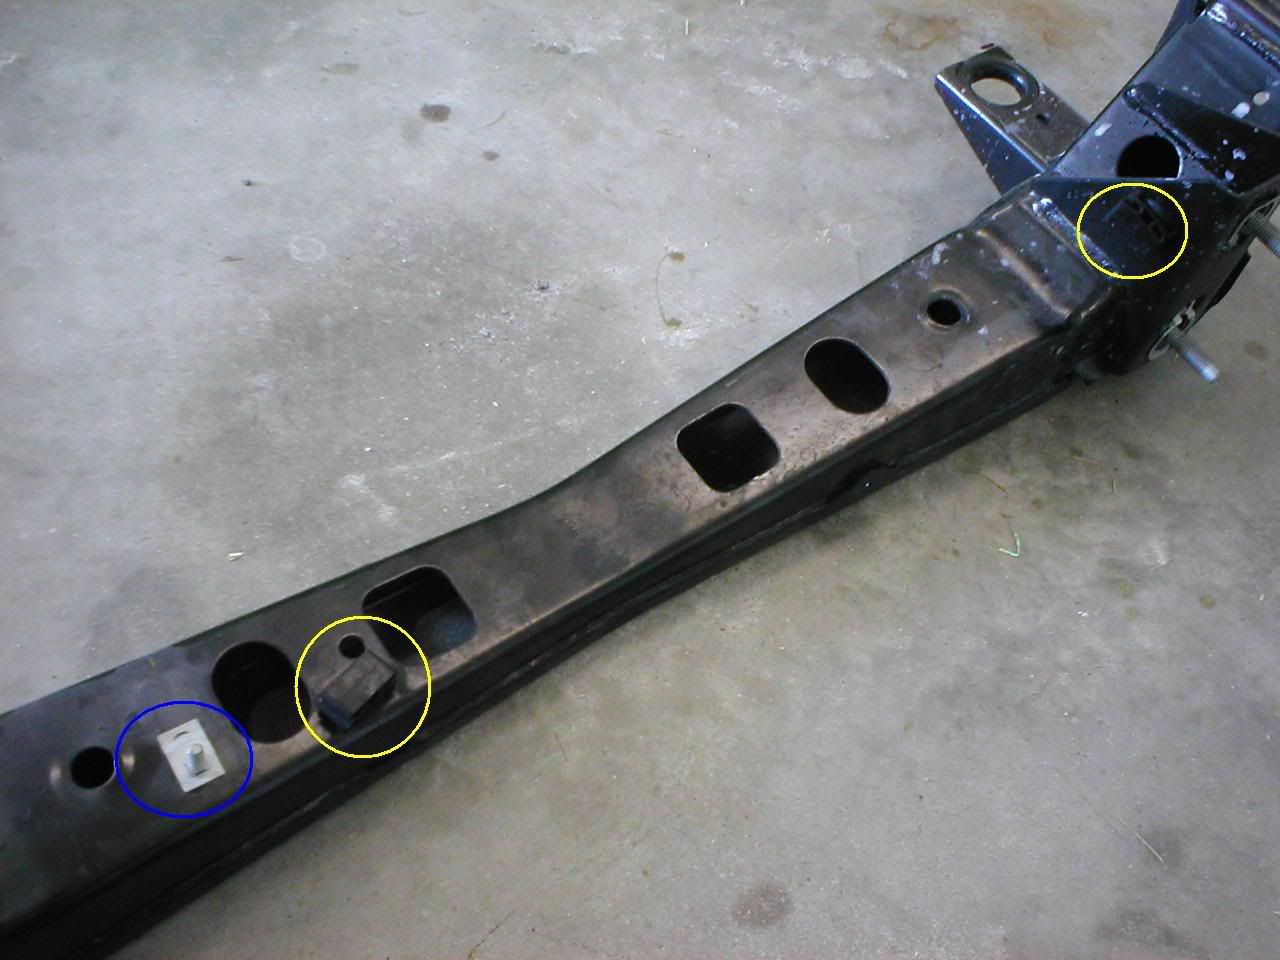 The yellow circles show the clips that hold the brake line. Just pop the brake line out of the clips. The blue circle shows where the A/C line bracket attaches. Remove the nut and then remove the bracket from the stud. There is also a wire tie holding the power steering line shown in this picture:
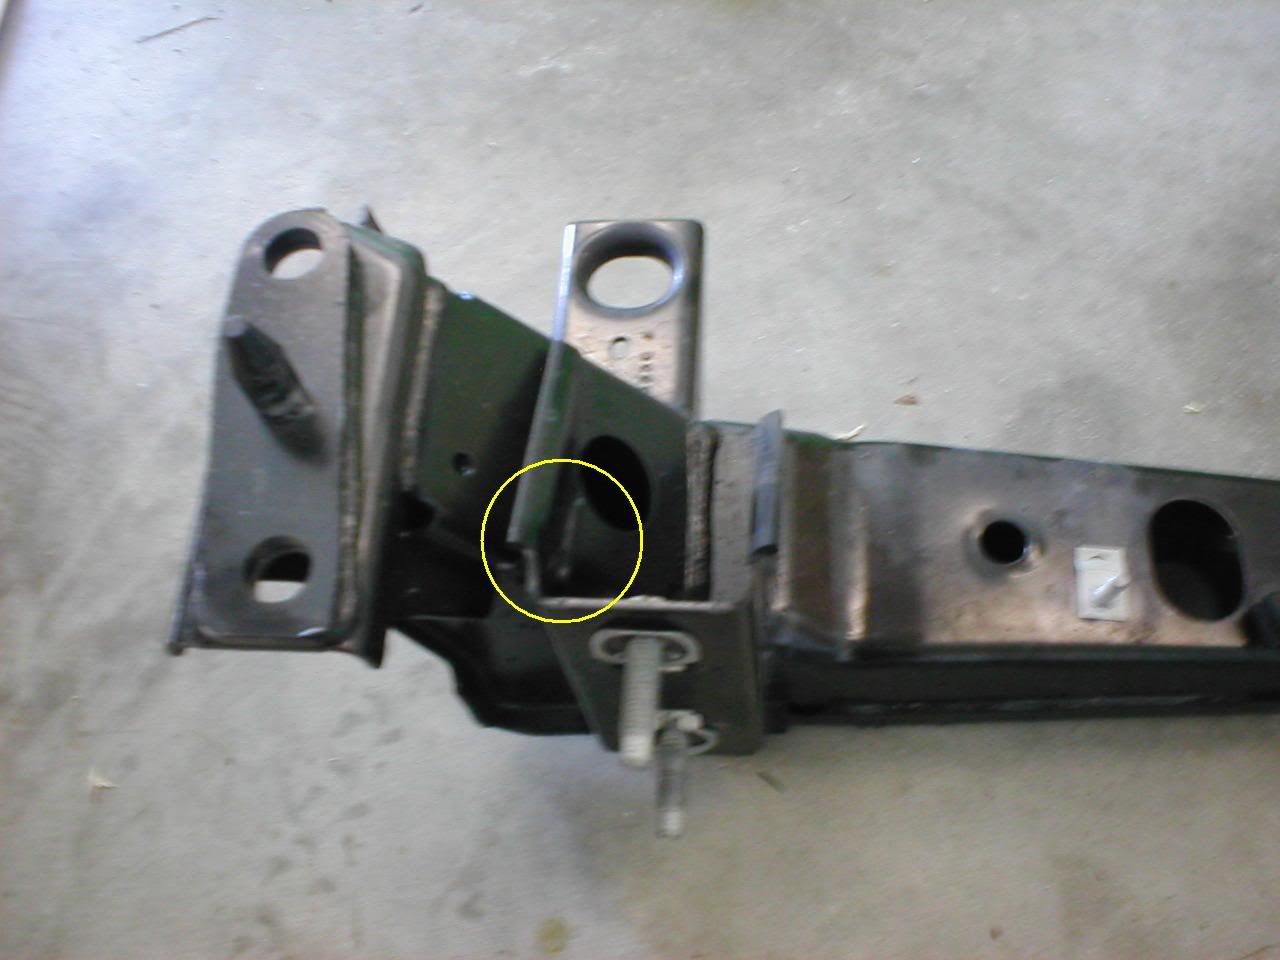 It's kinda blurry, but I just cut the wire tie. I'm not sure why it's even there.
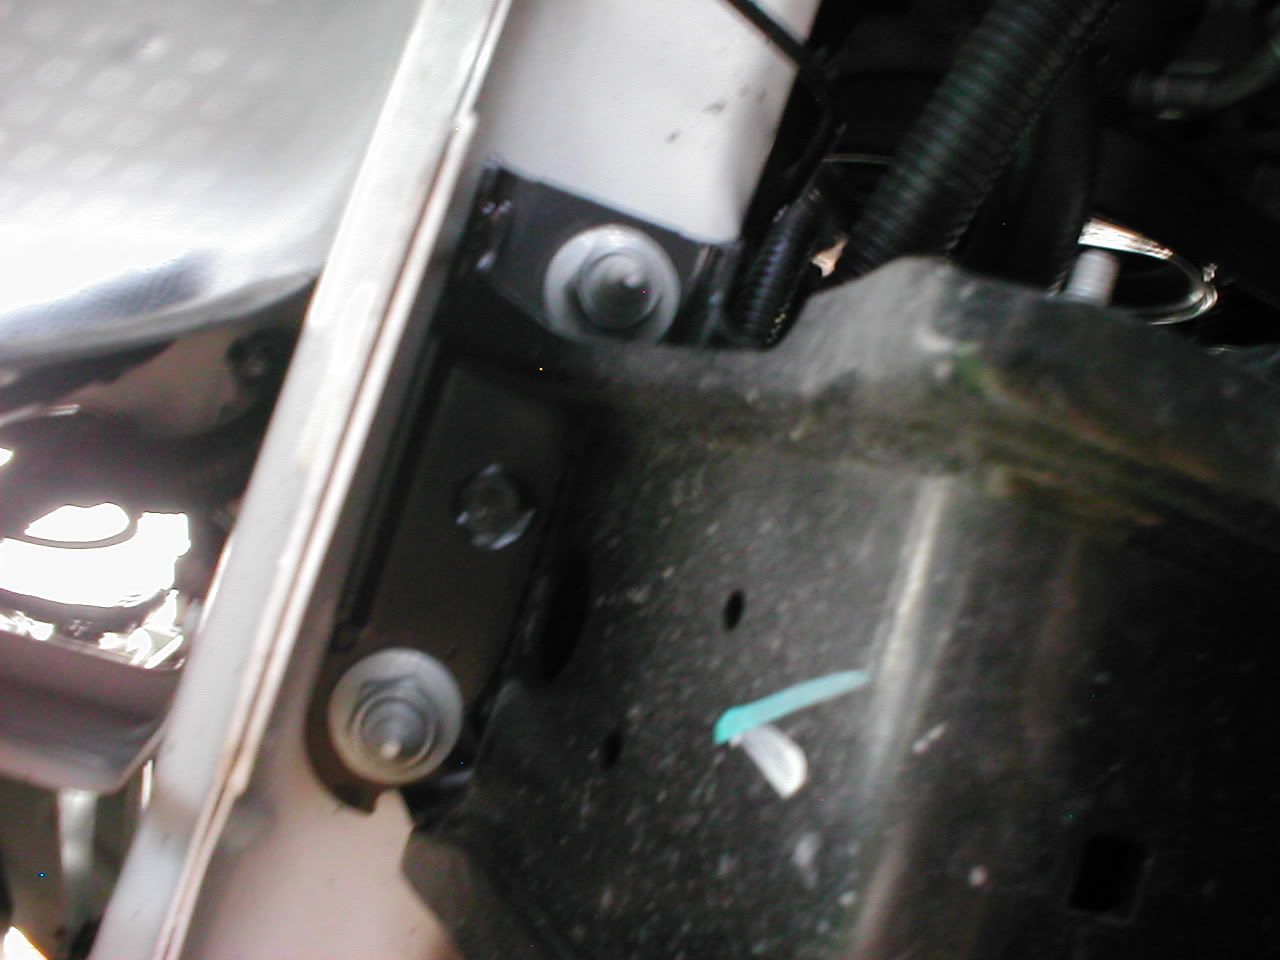 Next, loosen the four nuts that attach the radiator support to the frame. Do not remove them at this time because the radiator will come right down with the support.
This is what happens when you start to loosen the four nuts:
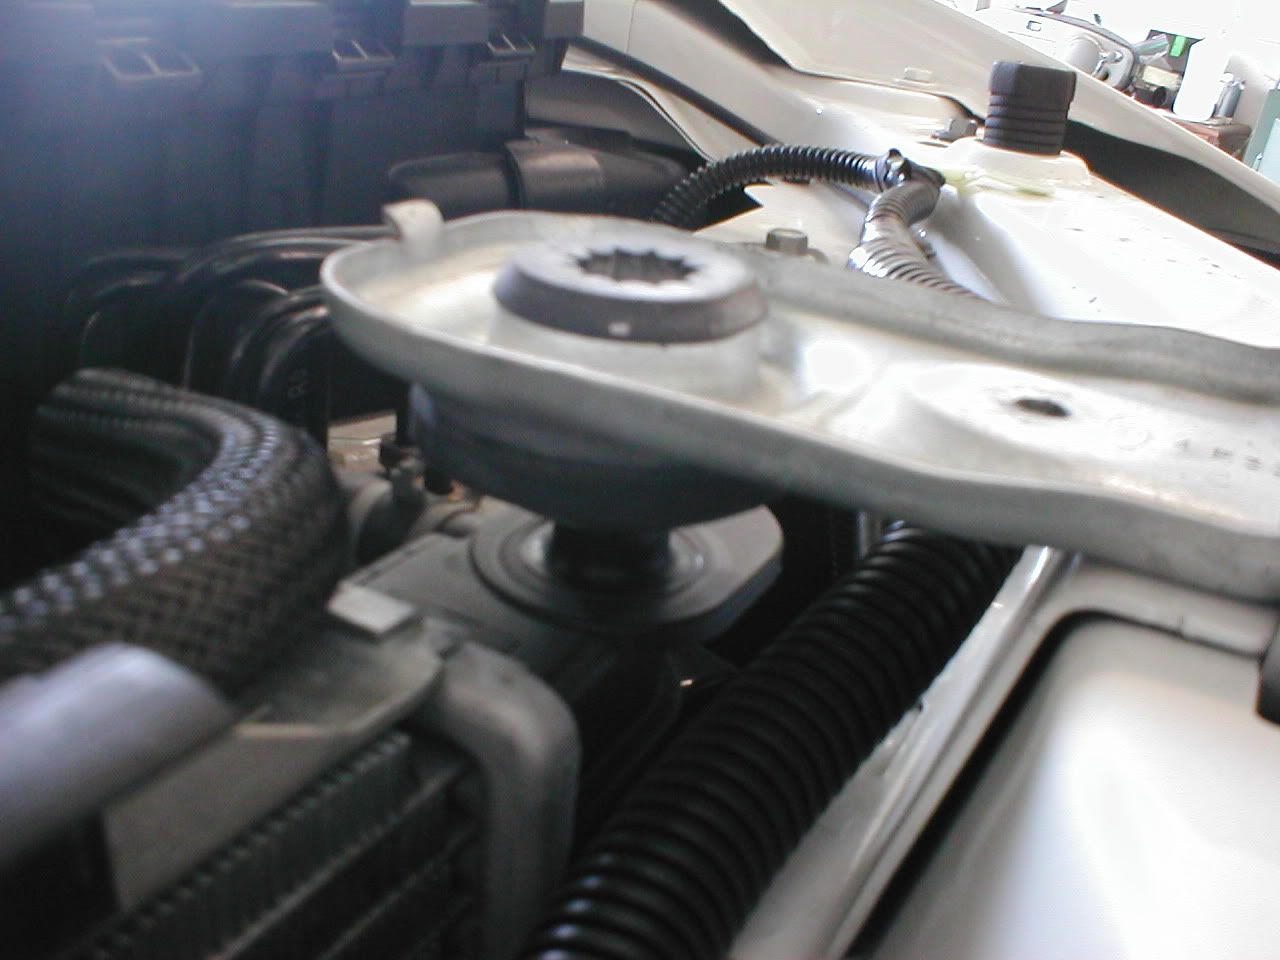
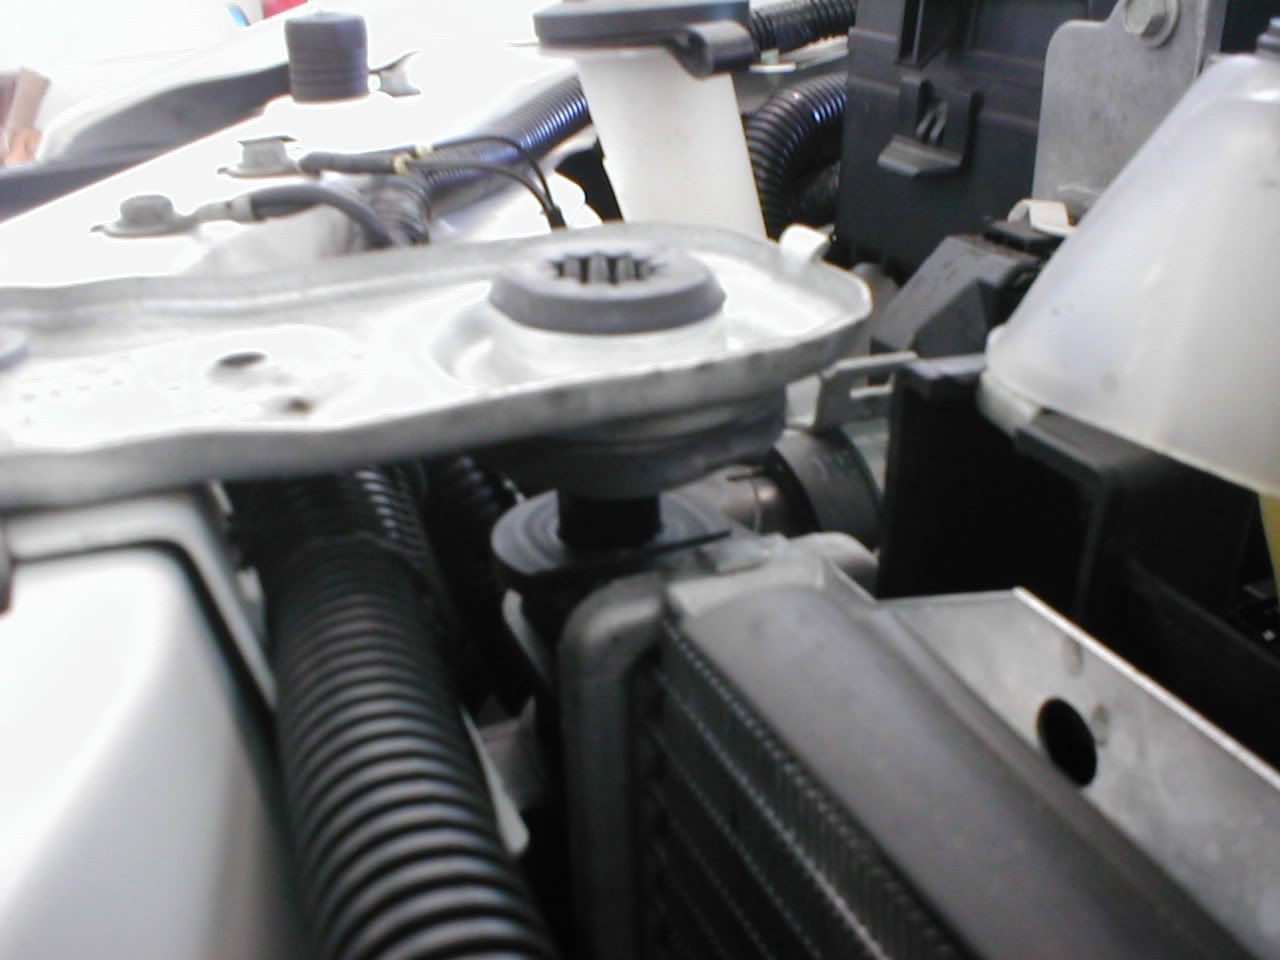 The top radiator supports prevent the radiator from going up, left, right, forward, and backwards... but not down, so the radiator has to be supported:
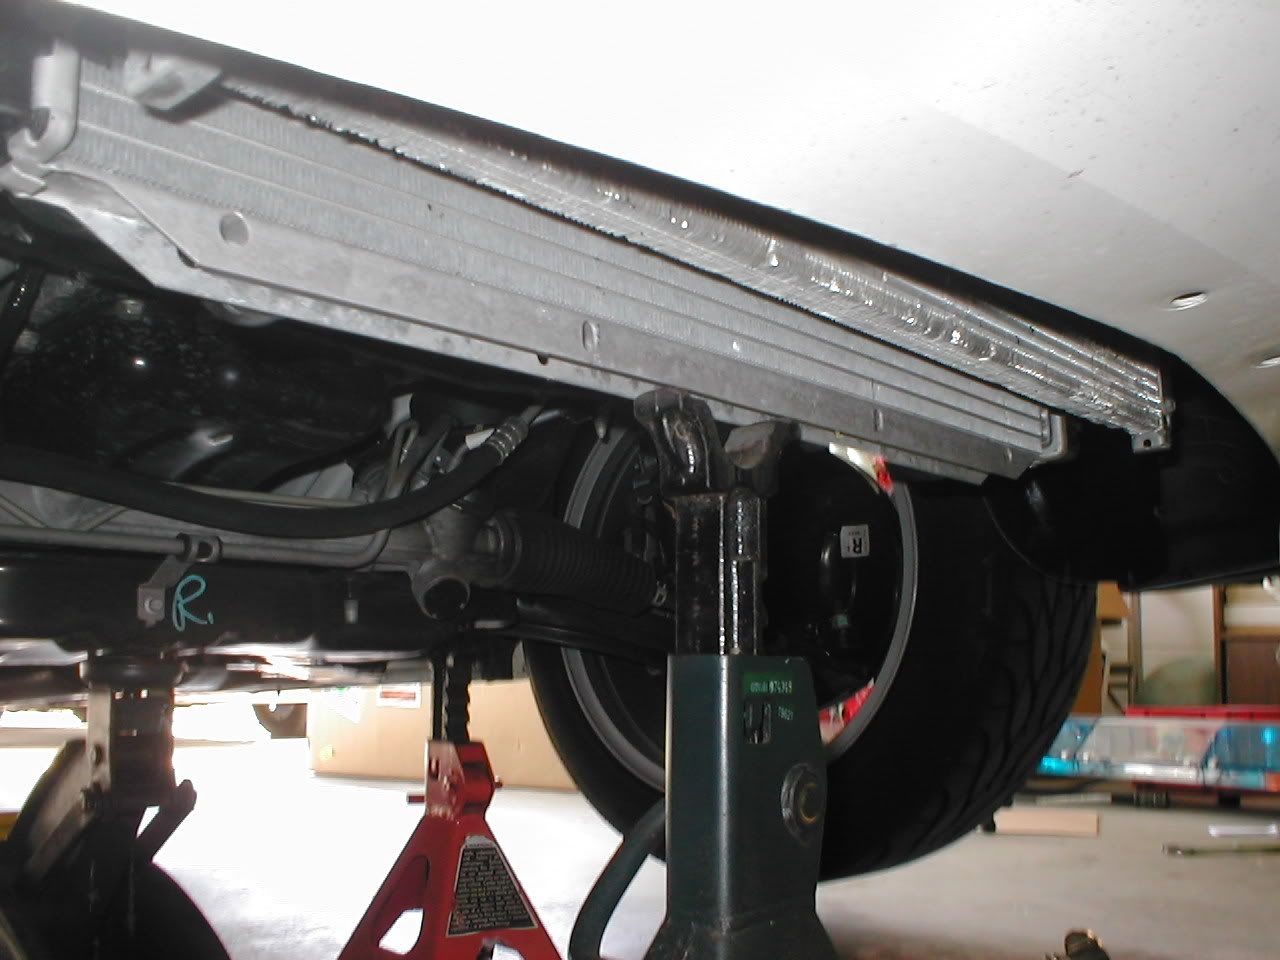 I just used a jackstand. It worked perfectly.
Now that the radiator is supported, you can fully remove the four nuts and drop the radiator support down and out from under the car.
PARTS SWAP
There's nothing much to do here... just move the rubber over from the stock support over to the BMR support:
BMR SUPPORT INSTALLATION
Couldn't be easier. Line up the four studs and make sure the radiator is in the two rubber pieces, and mount it back to the car:
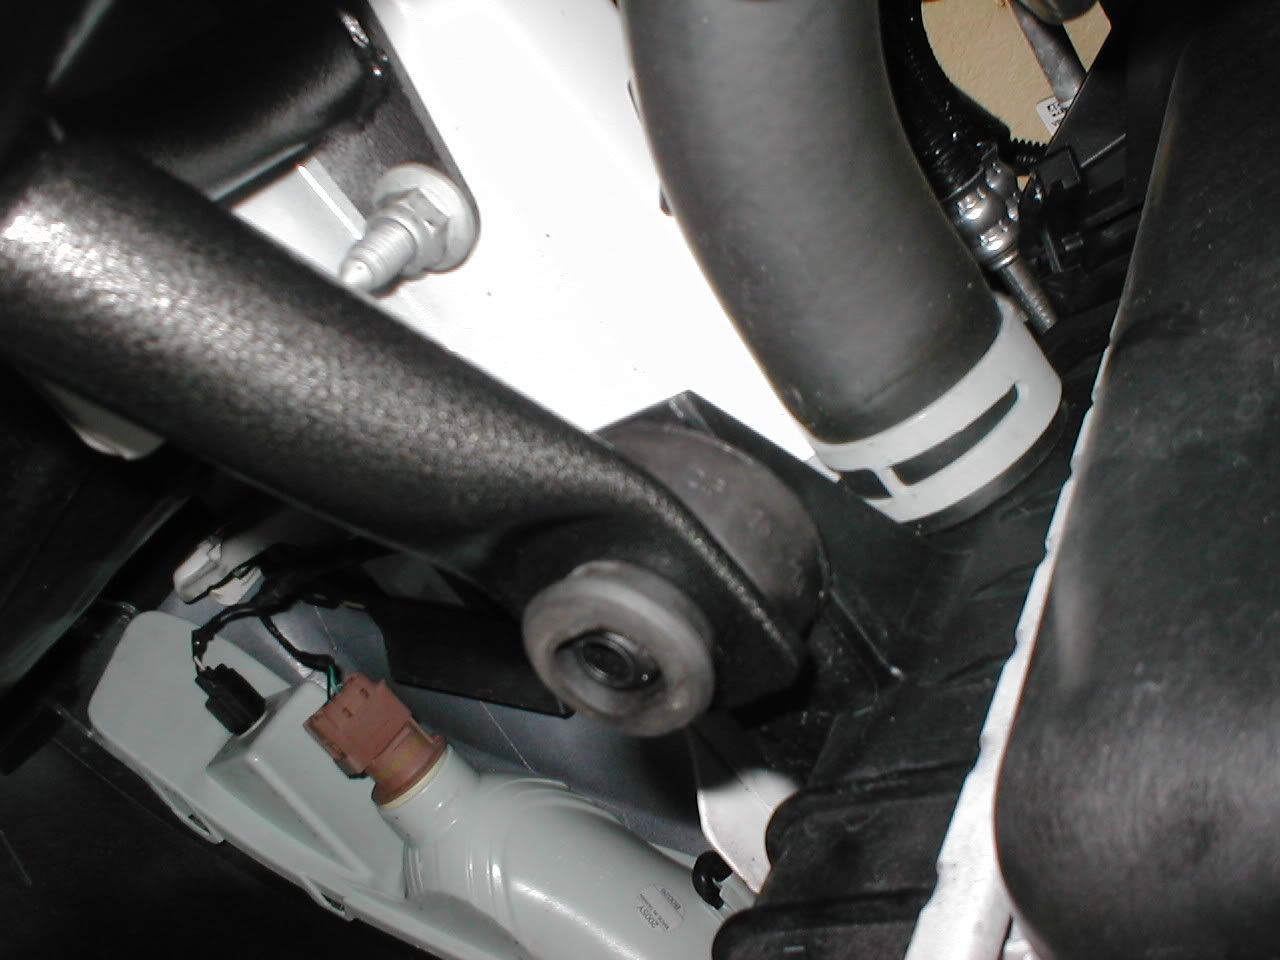

After the nuts are started, you can get the jack stand out of the way that is supporting the radiator. The torque for these four nuts is 85 lb/ft.
FINISHING UP
For the price, you would think they would include wire ties to re-connect the plastic piece to the new support, but they don't. Here are the extra things I did:
 I used a thick wire tie to connect the A/C line bracket to the BMR support. It was held on by that nut to the stock radiator support, but this holds it just as well.
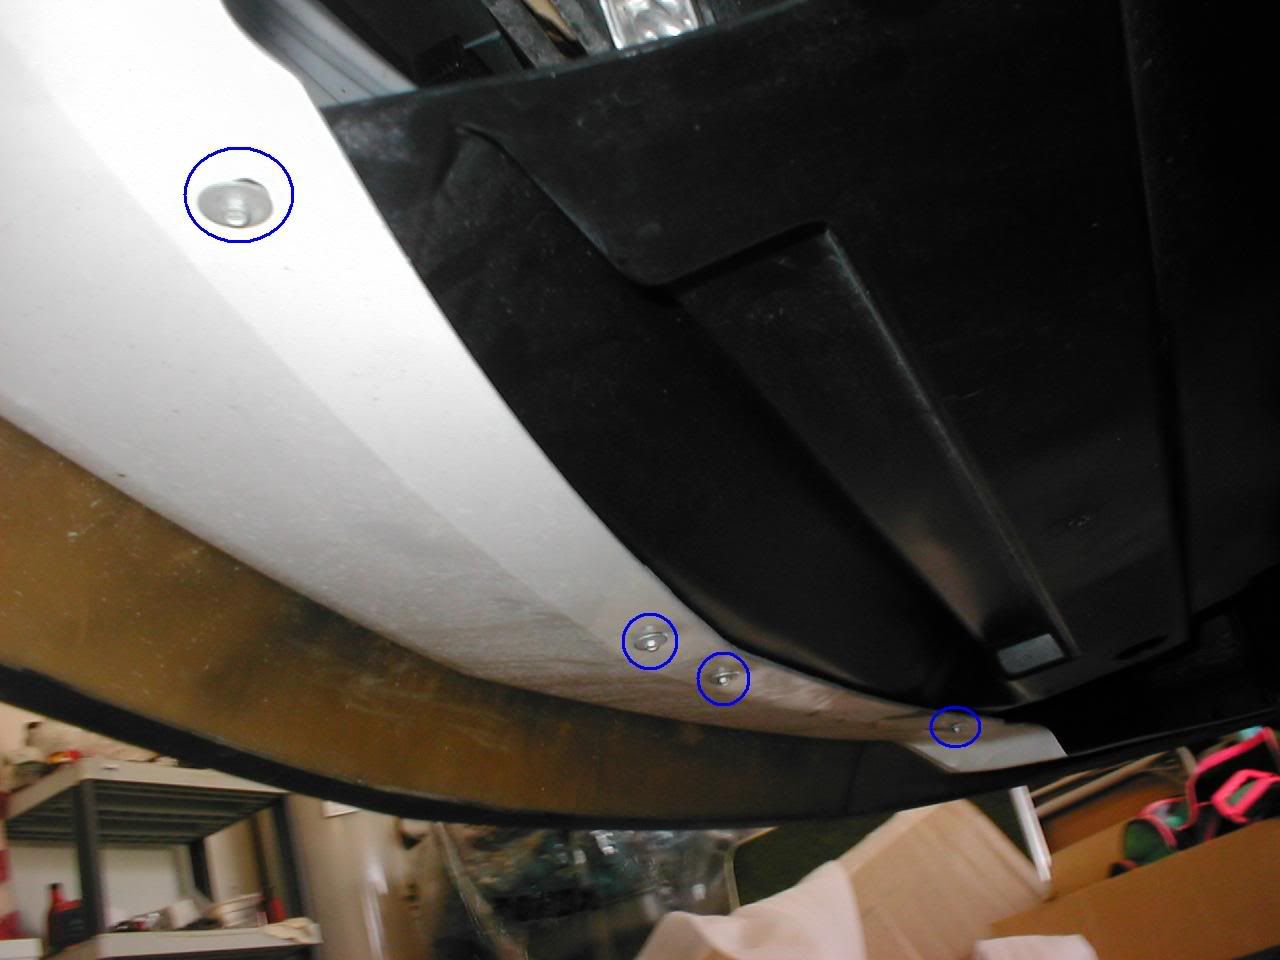 Re-install the four bolts that hold the plastic piece to the bumper. The rear is held to the BMR support with three wire ties.
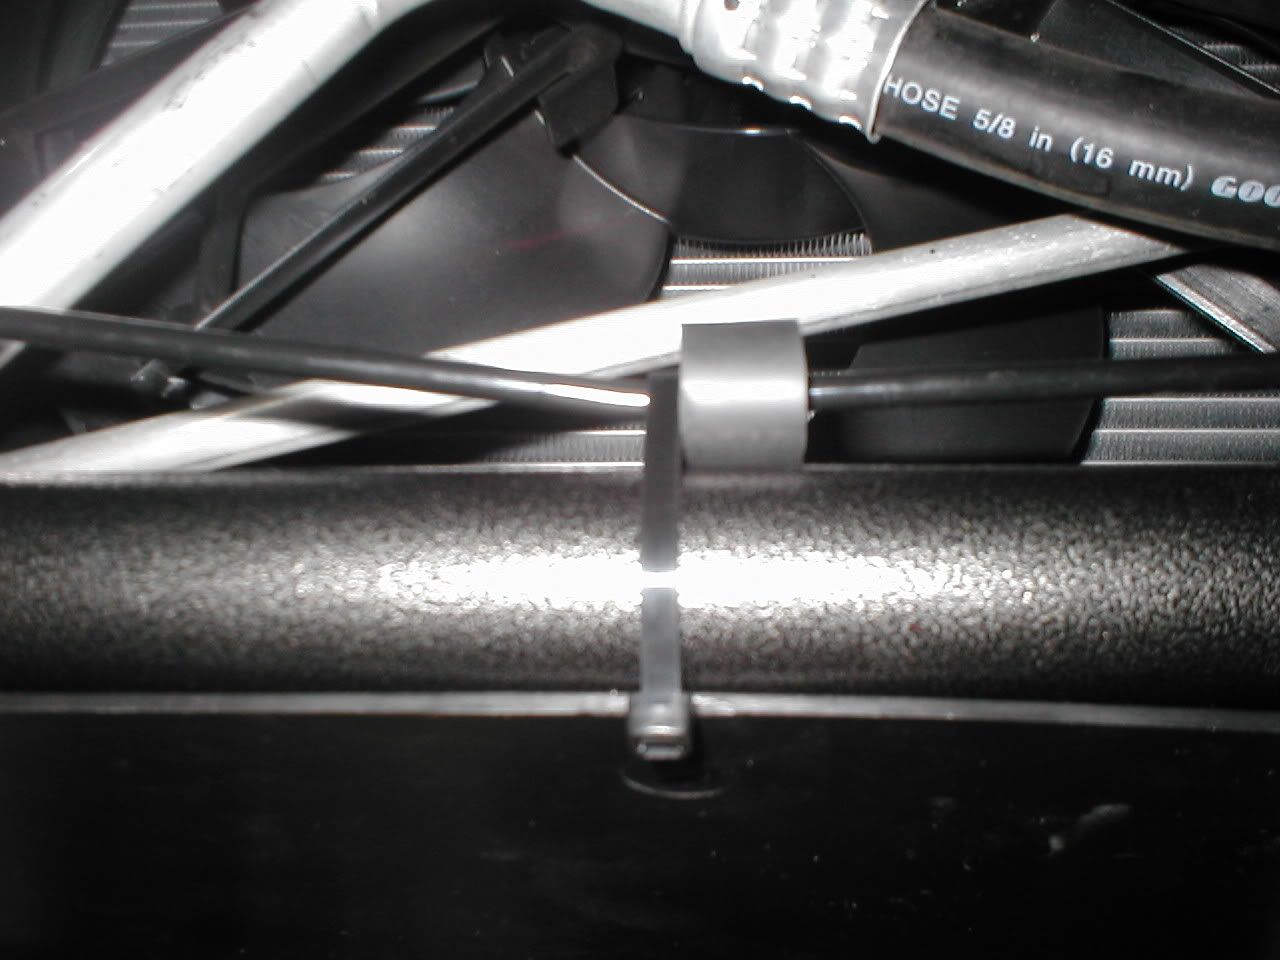 You'll find this rubber isolator on the brake line toward the passenger side of the car. The brake line ran close to the stock support, and this kept it from hitting. It's not needed any more, so I moved it to the center of the brake line where it now comes close to the BMR support. The center wire tie that hold the plastic piece to the BMR support also goes around the brake line. I could have pulled the brake line tight against the support, but I didn't want the brake line to eventually wear through from vibration, so that's why I put that rubber isolator there. (No, I didn't bend the brake line like that... that's how it is.)
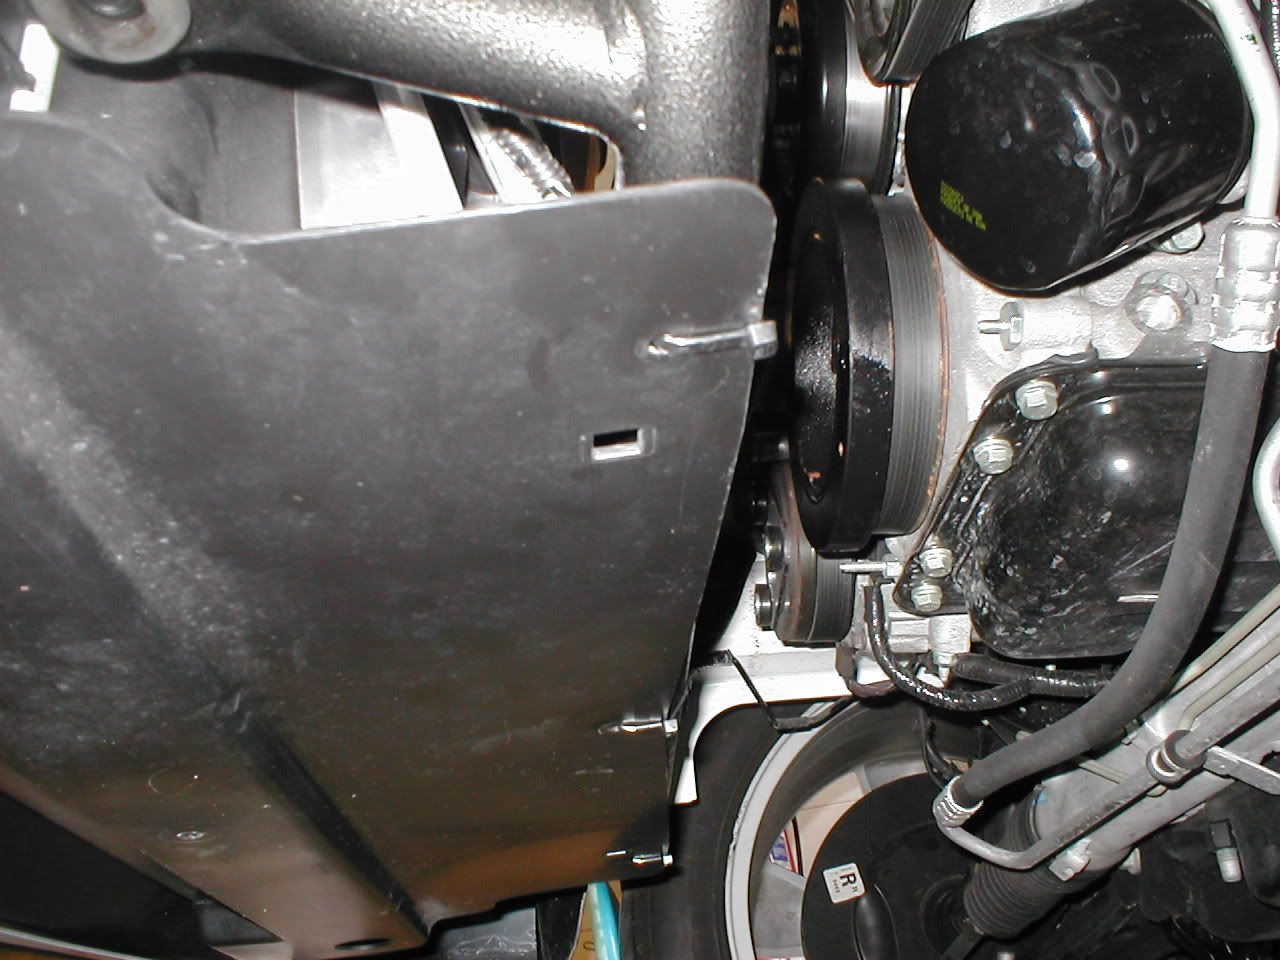 Here's a shot of the three wire ties used to hold the plastic piece. They hold it just as good as the 3 little bolts did.
WEIGHT DIFFERENCE BETWEEN THE TWO SUPPORTS?
This should explain it perfectly:

 2/12/07, 09:44 AM
#4
89Trooper, How does the car handle now since deleting the swaybar? I have been thinking of doing this mod as well and am curious about the difference in ride quality.
2/12/07, 11:16 AM
#5
GTR Member
Thread Starter
Join Date: January 26, 2006
Location: Central Florida
Posts: 4,639
Likes: 0
Received 0 Likes
on
0 Posts
As far as ride quality, it actually improves since each side is now truely an independant suspension. Before, if one wheel hit a bump, that wheel raised up and it torqued the swaybar and forces were transferred to the frame - and then to the driver. Now, each side acts on it's own and the ride feels better.
2/12/07, 11:45 AM
#6
Cobra Member
Join Date: March 30, 2005
Posts: 1,122
Likes: 0
Received 0 Likes
on
0 Posts
Nice write up. Only comment I have is UPR has the same piece for 1/2 the price of BMR http://www.uprproducts.com/shopping/shopexd.asp?id=1121
2/12/07, 12:18 PM
#8
GTR Member
Thread Starter
Join Date: January 26, 2006
Location: Central Florida
Posts: 4,639
Likes: 0
Received 0 Likes
on
0 Posts
Nice write up. Only comment I have is UPR has the same piece for 1/2 the price of BMR http://www.uprproducts.com/shopping/shopexd.asp?id=1121

Yeah, that's Granatelli's support... and a great price!
2/12/07, 12:19 PM
#9
GTR Member
Thread Starter
Join Date: January 26, 2006
Location: Central Florida
Posts: 4,639
Likes: 0
Received 0 Likes
on
0 Posts
2/12/07, 12:22 PM
#10
GT Member

Join Date: November 11, 2006
Posts: 125
Likes: 0
Received 0 Likes
on
0 Posts
2/12/07, 12:30 PM
#11
Legacy TMS Member
Join Date: August 14, 2005
Location: Spangdahlem Air Base Germany
Posts: 1,217
Likes: 0
Received 0 Likes
on
0 Posts
I took off my sway bar for about a month to try it out and I couldn't feel the difference...and I drive pretty hard and cut some corners. Decided to get the Rad support as well. Got the GMS one from UPR for $79.99 shipped.
2/12/07, 01:46 PM
#12
GTR Member
Thread Starter
Join Date: January 26, 2006
Location: Central Florida
Posts: 4,639
Likes: 0
Received 0 Likes
on
0 Posts
Just ordered it today? Let us know how it compares to the BMR install.
2/12/07, 02:01 PM
#13
GT Member
Join Date: November 11, 2006
Posts: 125
Likes: 0
Received 0 Likes
on
0 Posts
No.. Chromemoly tubing is much stronger then Mild steel tubing and is lighter in that it requires a smaller or thinner wall to be just as strong.
Notice how the stock K member is stamped steel and the tubular units are tubular and can still save 20lbs off stock and those use mild steel.
Using chromemoly is limited because of the added cost, but its the best.
Most 10 point roll cages you will see are made out of chromemoly because it allows them to use a lighter tubing yet be just as strong as the bigger/heavier mild steel tubing.
2/12/07, 02:04 PM
#14
GTR Member
Thread Starter
Join Date: January 26, 2006
Location: Central Florida
Posts: 4,639
Likes: 0
Received 0 Likes
on
0 Posts
No.. Chromemoly tubing is much stronger then Mild steel tubing and is lighter in that it requires a smaller or thinner wall to be just as strong.
Notice how the stock K member is stamped steel and the tubular units are tubular and can still save 20lbs off stock and those use mild steel.
Using chromemoly is limited because of the added cost, but its the best.
Most 10 point roll cages you will see are made out of chromemoly because it allows them to use a lighter tubing yet be just as strong as the bigger/heavier mild steel tubing.
2/12/07, 02:27 PM
#15
Mach 1 Member
Join Date: February 8, 2007
Posts: 596
Likes: 0
Received 0 Likes
on
0 Posts
 2/12/07, 02:41 PM
#16
Legacy TMS Member
Join Date: May 24, 2006
Location: San Diego
Posts: 7,409
Likes: 0
Received 0 Likes
on
0 Posts
2/12/07, 02:44 PM
#17
GTR Member
Thread Starter
Join Date: January 26, 2006
Location: Central Florida
Posts: 4,639
Likes: 0
Received 0 Likes
on
0 Posts

and... thanks!
2/12/07, 02:44 PM
#18
Good to hear about the handling diffs I feel better doing the mod now having read this thread.
2/12/07, 02:44 PM
#19

