
Restoring fender shrouds write-up

Thread Starter
Member
Joined: October 12, 2004
Posts: 48
Likes: 0
From: Metairie
Restoring fender shrouds write-up
-I did this a couple years back(2003) and found the photos to it so i figured I'd do a write up.
-Fresh shrouds from Ford in 2003(the last year they sold em) were going for $170 which seemed excessive to me at the time and I deceided to revitalize them myself with about $20 worth of products and some time.
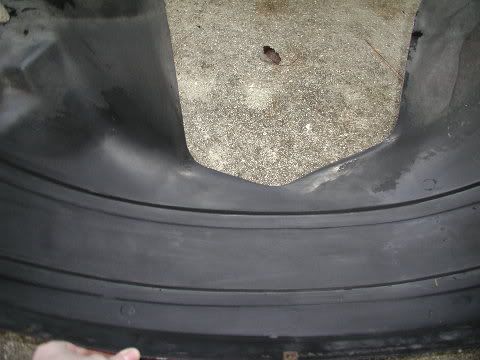
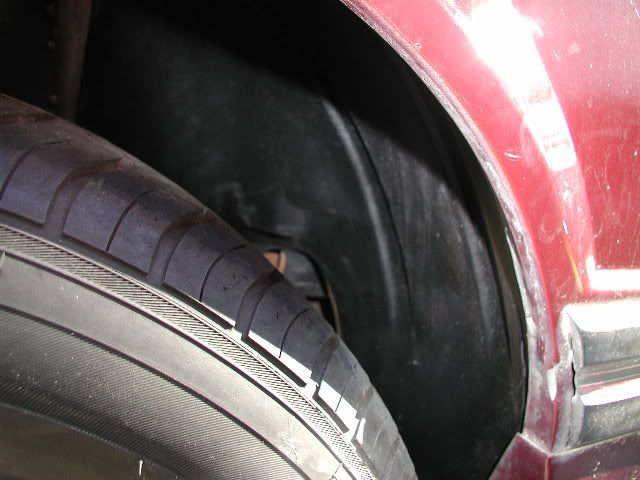
-First off my fender shrouds are OEM and have had overspray, tar, and nicks all over them. This is what i started with:

You can see where the tar has been caked on for awhile......actually the car go repainted in 94' and some of this tar has overspray on it!
After some careful consideration I had to remove the tar without scuffing up the plastic and so i chose to do the following:
Step 1: Removing the fender shroud is MUCH easier without the wheel in the way for obvious reasons. It can be done without moving the wheel out and just jacking the car up to create clearance between the top of the tire and the fender. There are clips that secure the shroud to the frame and screws that secure the outboard edge to the fender lip. Remove these screws with the proper phillips screwdriver and remove the clips with one of those fancy clip remover tools.....or as most of us do it...with the needlenose pliers we have lying around. Be warned though!!! Removing with needlenose pliers might result in damaged clips which cannot be used and you will need to purchase a few new ones at about $1 a pop. After all retaining clips are removed you should be able to wiggle the shroud out.
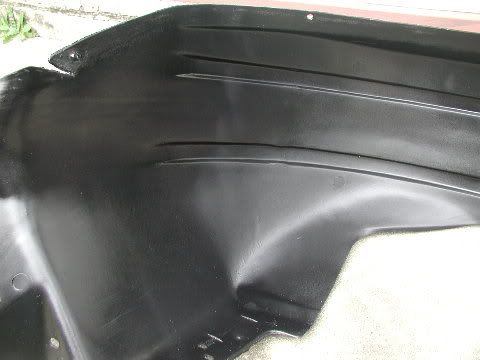
Step 2: Using gasoline(it was about $1.20/gal at the time) I massaged the shroud with some paper towels making sure to wear gloves and a mask until all the little "nuggets" came loose. I used about 10 sheets of paper towels and about half a gallon of gas. This is what it looked like just after the rub:
Notice how the tar is all gone and the plastic itself is unscuffed from abrasive substances/brushes and the color is still even.
Step 3: It's time to sandpaper!!!! I used 800 Grit(i think it was the finest i could find at the time) and LIGHTLY scrubbed the surface. I did this evenly for about 15 mins making sure that i could see the very tiny scrape marks up close but at a distance they were invisible.
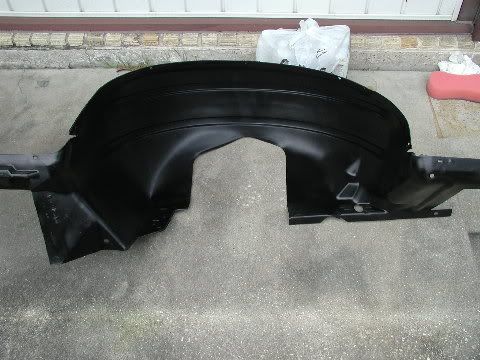
Step 4: Using a "Flexible" paint since the shroud will flex at times you should lightly coat the fender shroud evenly until it is barely covered. Let it sit in warmer weather for about 20-40mins. This is what my first coat looked like:
Apply 2-3 or even 4 more light coats as desired making sure to evenly coat the plastic and avoid spraying excess in corners or tiered areas to prevent clumping.
Step 5: Sit back and enjoy your fresh new fender shroud that you just saved $100 bucks on!
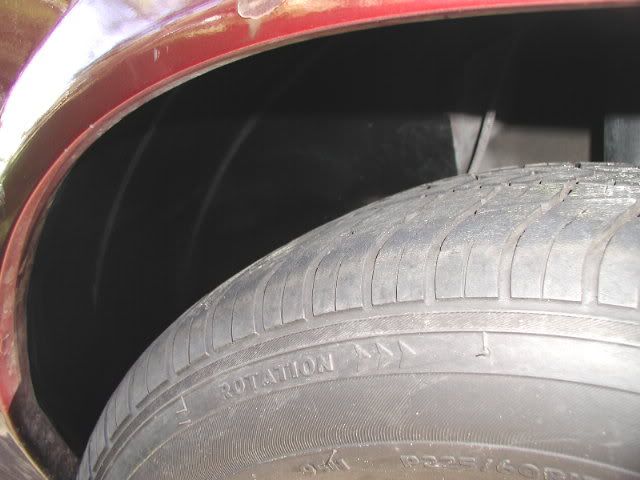
You can reinstall the opposite of the way you uninstalled it but I would seriously recommend taking off the wheel this time to prevent damaging your freshly painted shroud. You wouldn't believe how much of a difference it makes! Especially on an older vehicle. This is what mine looked like re-installed:
Cheers!
-Fresh shrouds from Ford in 2003(the last year they sold em) were going for $170 which seemed excessive to me at the time and I deceided to revitalize them myself with about $20 worth of products and some time.
-First off my fender shrouds are OEM and have had overspray, tar, and nicks all over them. This is what i started with:
You can see where the tar has been caked on for awhile......actually the car go repainted in 94' and some of this tar has overspray on it!
After some careful consideration I had to remove the tar without scuffing up the plastic and so i chose to do the following:
Step 1: Removing the fender shroud is MUCH easier without the wheel in the way for obvious reasons. It can be done without moving the wheel out and just jacking the car up to create clearance between the top of the tire and the fender. There are clips that secure the shroud to the frame and screws that secure the outboard edge to the fender lip. Remove these screws with the proper phillips screwdriver and remove the clips with one of those fancy clip remover tools.....or as most of us do it...with the needlenose pliers we have lying around. Be warned though!!! Removing with needlenose pliers might result in damaged clips which cannot be used and you will need to purchase a few new ones at about $1 a pop. After all retaining clips are removed you should be able to wiggle the shroud out.
Step 2: Using gasoline(it was about $1.20/gal at the time) I massaged the shroud with some paper towels making sure to wear gloves and a mask until all the little "nuggets" came loose. I used about 10 sheets of paper towels and about half a gallon of gas. This is what it looked like just after the rub:
Notice how the tar is all gone and the plastic itself is unscuffed from abrasive substances/brushes and the color is still even.
Step 3: It's time to sandpaper!!!! I used 800 Grit(i think it was the finest i could find at the time) and LIGHTLY scrubbed the surface. I did this evenly for about 15 mins making sure that i could see the very tiny scrape marks up close but at a distance they were invisible.
Step 4: Using a "Flexible" paint since the shroud will flex at times you should lightly coat the fender shroud evenly until it is barely covered. Let it sit in warmer weather for about 20-40mins. This is what my first coat looked like:
Apply 2-3 or even 4 more light coats as desired making sure to evenly coat the plastic and avoid spraying excess in corners or tiered areas to prevent clumping.
Step 5: Sit back and enjoy your fresh new fender shroud that you just saved $100 bucks on!
You can reinstall the opposite of the way you uninstalled it but I would seriously recommend taking off the wheel this time to prevent damaging your freshly painted shroud. You wouldn't believe how much of a difference it makes! Especially on an older vehicle. This is what mine looked like re-installed:
Cheers!
I need to do this. 
Mach 1 Member
Joined: May 26, 2004
Posts: 920
Likes: 0
From: Baton Rouge, LA
Chris, don't you have to do this again?
Also, before you ever take that car to a shop to get worked on b/c you don't have a tool, let me know. Joey has a lot of tools left over from building the Cobra kit car that he might let you borrow.
Also, before you ever take that car to a shop to get worked on b/c you don't have a tool, let me know. Joey has a lot of tools left over from building the Cobra kit car that he might let you borrow.
Bullitt Member
Joined: March 15, 2008
Posts: 381
Likes: 0
From: St. Louis
I did something very similar when I did the front brakes on my black GT. Didn't end up painting them tho - just spayed them a few times with tire shine and they look brand new. Its amazing how much better it makes the whole wheel well look.
Thanks for posting!
Thanks for posting!
Mach 1 Member
Joined: May 26, 2004
Posts: 920
Likes: 0
From: Baton Rouge, LA
Step 2: Using gasoline(it was about $1.20/gal at the time) I massaged the shroud with some paper towels making sure to wear gloves and a mask until all the little "nuggets" came loose. I used about 10 sheets of paper towels and about half a gallon of gas. This is what it looked like just after the rub:
Please, do not smoke while doing this step.
Thank You!

Thread
Thread Starter
Forum
Replies
Last Post
austin101385
'10-14 Shelby Mustangs
3
Oct 2, 2015 01:00 PM