Pieced together brake cooling '13/'14 Mustang
 9/5/13, 11:54 AM
#1
Shelby GT350 Member
Thread Starter
Pieced together brake cooling '13/'14 Mustang
For anyone interested, I pieced together the brake duct cooling that Ford Racing offers for ~$375+ for around $180 (could do it for a bit less if you buy less ducting, I bought extra to ensure I have plenty)
Right bezel is DR3Z17E810BA (22.94 from Tousley Ford)
Left bezel is DR3Z17E811BA (22.68 from Tousley Ford)
Backing plates from Blowfish Racing~$75: Backing Plates
Ducting ~$65:
Took me a while to locate everything, so if anyone else is trying to piece this together as well, figured I'd pass along the info. If I remember I'll post a couple pictures once I finish my install
Last edited by dmichaels; 9/5/13 at 11:57 AM.

 9/5/13, 12:46 PM
#4
Shelby GT350 Member
Thread Starter
That's what forums are for though in my opinion - offering new ideas to fellow enthusiasts. Happy I can contribute once in a while
9/5/13, 08:45 PM
#5
Bullitt Member
Join Date: March 12, 2013
Location: San Tan Valley AZ
Posts: 281
Likes: 0
Received 0 Likes
on
0 Posts
Great info buddy, i was looking at that too. Perfect upgrade to eliminate brake fade and extend brake life. What i would do is invest in some nice drilled and slotted rotors along with some nice pads. the car would be a beast!
9/5/13, 09:33 PM
#6
Bullitt Member
Join Date: September 8, 2012
Location: Toronto
Posts: 233
Likes: 0
Received 0 Likes
on
0 Posts
Dmichaels, thanks for putting this list together. I was just recently looking into this but couldn't find the backing plates ... until now. Thank you
Any thoughts on routing the intakes up to the grill area where the fogs are or scabbing up a mount near the lower grille? Not sure how much room there is to route the tubing. Reason i'm asking is because i have the fogs where the bezels mount and don't want to lose them.
As said already, another reason this forum is great!!
9/6/13, 07:11 AM
#7
Shelby GT350 Member
Thread Starter
Dmichaels, thanks for putting this list together. I was just recently looking into this but couldn't find the backing plates ... until now. Thank you
Any thoughts on routing the intakes up to the grill area where the fogs are or scabbing up a mount near the lower grille? Not sure how much room there is to route the tubing. Reason i'm asking is because i have the fogs where the bezels mount and don't want to lose them.
As said already, another reason this forum is great!!
Any thoughts on routing the intakes up to the grill area where the fogs are or scabbing up a mount near the lower grille? Not sure how much room there is to route the tubing. Reason i'm asking is because i have the fogs where the bezels mount and don't want to lose them.
As said already, another reason this forum is great!!
Alternate ducting inlets
Also one note - there is some discussion on another forum about the bezel PN's listed in my original post regarding whether they have the flange off the back or not. Seems like they definitely have the duct inlet opening, but unclear about a rear flange for the ducting. I have an order in now, should get the parts next week and I can then personally confirm at that point.
9/6/13, 07:17 AM
#8
Shelby GT350 Member
Thread Starter
A good set of pads makes an enormous difference too. I've been driving with my Pagic RS56's in the rear as daily driver pads and I got the fronts bedded nicely. Car stops much better with improved pedal feel as well. Seems like a good street setup so far
9/6/13, 07:39 AM
#9
Banned

Join Date: July 4, 2012
Location: Washington, DC
Posts: 2,983
Likes: 0
Received 0 Likes
on
0 Posts
Wow.. You're actually making me consider this for a Future mod. I do like this kit.
also saw this, I think you linked to it.
http://jlttruecoldair.com/ZenCart/in...roducts_id=567
would be difficult for me to cut up my California Special grilles and not destroy them though.
also saw this, I think you linked to it.
http://jlttruecoldair.com/ZenCart/in...roducts_id=567
would be difficult for me to cut up my California Special grilles and not destroy them though.
9/6/13, 08:25 AM
#10
Shelby GT350 Member
Thread Starter
Wow.. You're actually making me consider this for a Future mod. I do like this kit.
also saw this, I think you linked to it.
http://jlttruecoldair.com/ZenCart/in...roducts_id=567
would be difficult for me to cut up my California Special grilles and not destroy them though.
also saw this, I think you linked to it.
http://jlttruecoldair.com/ZenCart/in...roducts_id=567
would be difficult for me to cut up my California Special grilles and not destroy them though.
Happy to inspire new modifications!
9/6/13, 12:38 PM
#11
Bullitt Member
Join Date: September 8, 2012
Location: Toronto
Posts: 233
Likes: 0
Received 0 Likes
on
0 Posts
If you have fog lights in the lower corners, you could utilize the below. I thought about this too... decided to go with the fog bezels instead since I do not have fog lights in those locations now
Alternate ducting inlets
Also one note - there is some discussion on another forum about the bezel PN's listed in my original post regarding whether they have the flange off the back or not. Seems like they definitely have the duct inlet opening, but unclear about a rear flange for the ducting. I have an order in now, should get the parts next week and I can then personally confirm at that point.
9/6/13, 06:02 PM
#12
Shelby GT350 Member
Thread Starter
The tubing is very light. And you could easily clamp 3" ducting onto 2.5" flange. Just take out the metal coil from the silicone tubing for a couple inches and you can clamp into smaller opening. I was 50/50 between the two options for inlets
9/7/13, 08:03 AM
#14
Shelby GT350 Member
Thread Starter
9/8/13, 09:36 AM
#15

I had been thinking this might be a future upgrade but I was also looking at relocating the fog lights (Raxiom) and putting in a Modern Billet Black Retro Grille. Their lower grille is just an overlay so I wonder if you can just cut another hole through that. I've also thought about going with the Roush grilles since the flow better but didn't know if it made that much of a difference.
9/18/13, 05:25 PM
#16
Shelby GT350 Member
Thread Starter
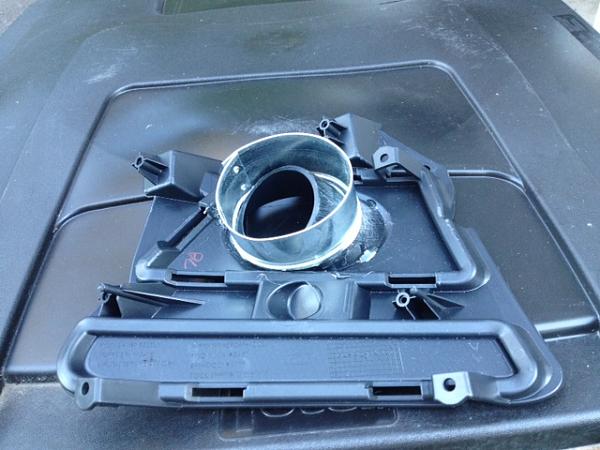
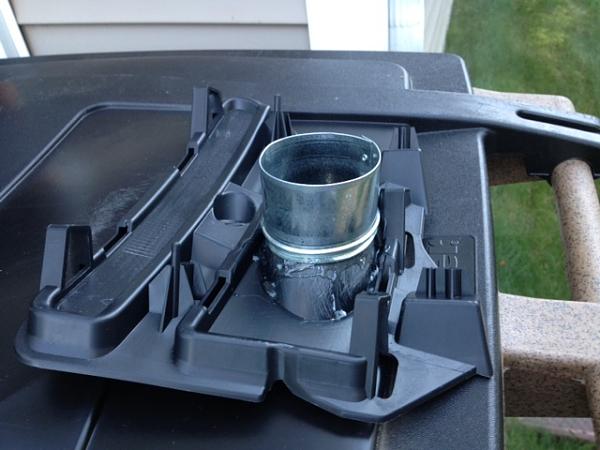
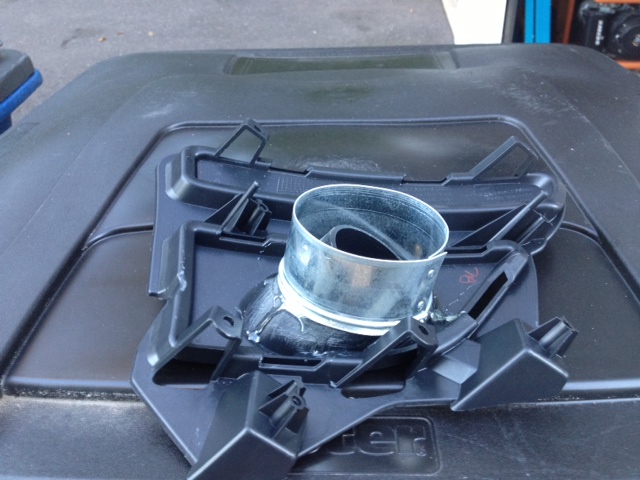
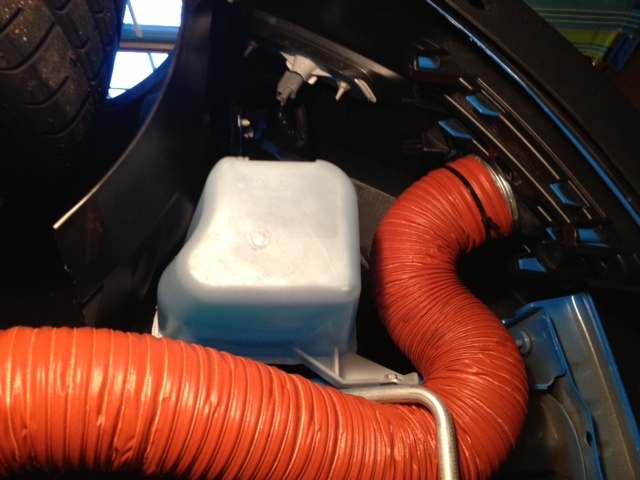
Finished installation. Had to get some small extensions to attach to the bezels as they didn't come with an adequate attachment feature on the rear to connect the ducting to. I bought 3" diameter HVAC ducting and "shaped" it into a slight oval to better attach to the back of the bezels. Then bonded it with epoxy. It seems quite secure... I used 1500psi epoxy, hopefully it holds up without issue.
Now some pictures
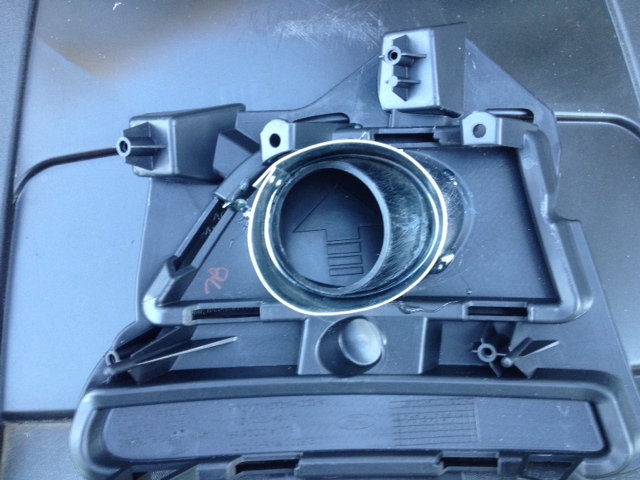
Bezel with my added inlet extension
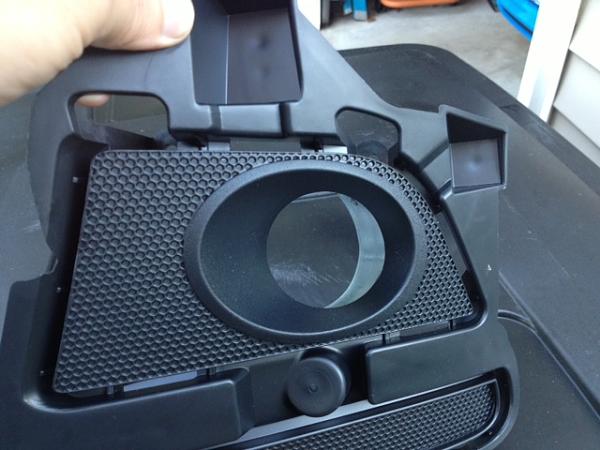


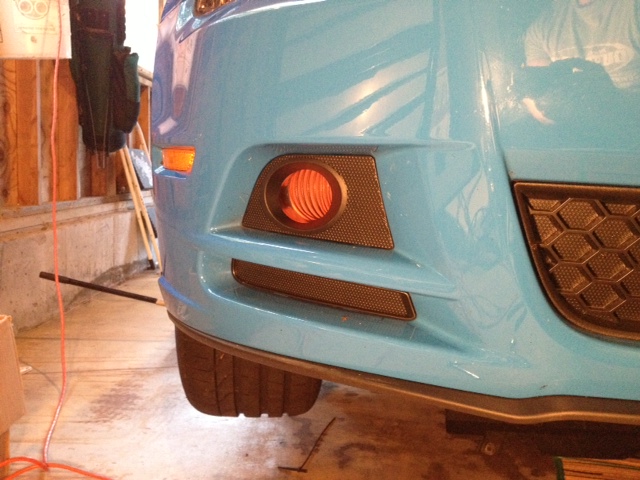
Installed front view

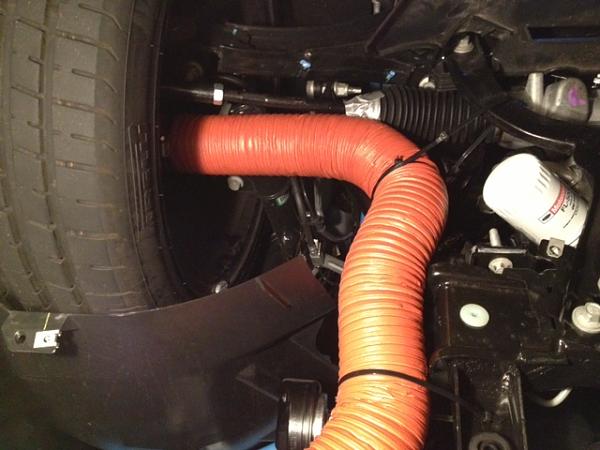
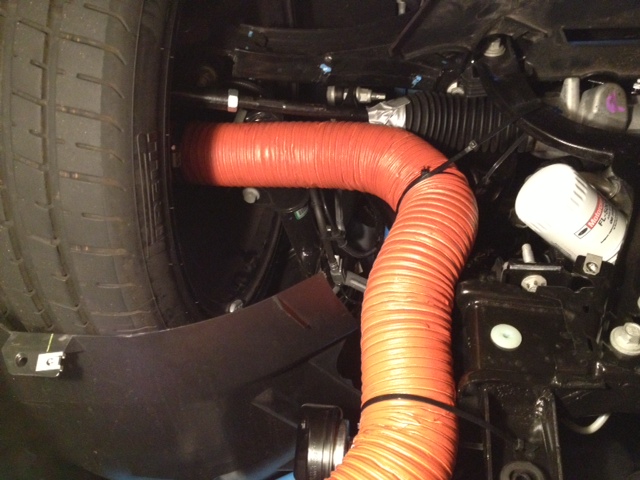
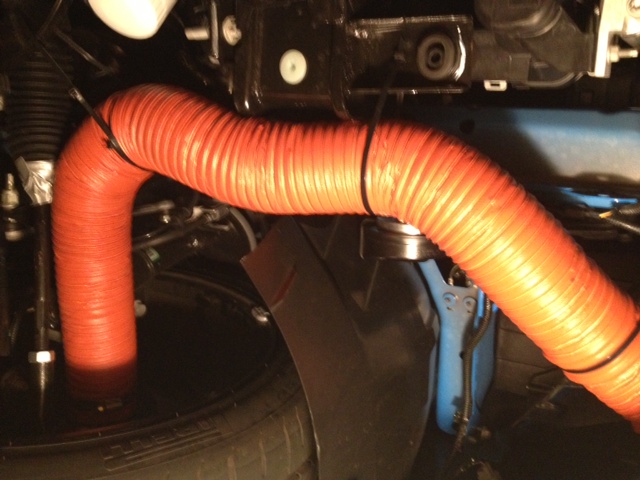
Passenger side routing
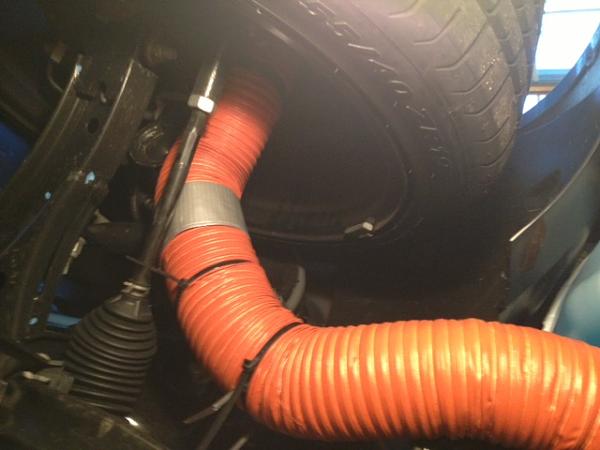

Drivers side routing

Now some pictures
Bezel with my added inlet extension


Installed front view
Passenger side routing

Drivers side routing


 9/20/13, 01:57 PM
#18
Bullitt Member
Join Date: September 9, 2011
Location: Madison, WI
Posts: 383
Likes: 0
Received 0 Likes
on
0 Posts
I see that yourrubbing a bit on the tie rod. I can tellyou from experience that it will wear out the hose over time. The Duct tape you added won�t stop thewear. Ask me how I know J I realized the hose was a bit too long so itsagged. You can try cutting a little ata time until you get the right length.
9/20/13, 02:36 PM
#19
Shelby GT350 Member
Thread Starter
I see that yourrubbing a bit on the tie rod. I can tellyou from experience that it will wear out the hose over time. The Duct tape you added won�t stop thewear. Ask me how I know J I realized the hose was a bit too long so itsagged. You can try cutting a little ata time until you get the right length.
12/23/13, 06:04 PM
#20
Shelby GT350 Member
Thread Starter
Little update - I got to test this out and the setup worked brilliantly.
Have had it on since ~Sept timeframe with some daily driving, and no issues at all. Granted I haven't driven the car much as the weather got colder, but its held together wonderfully and performed flawlessly during some track driving. Brakes stayed much cooler, although it's a bit of an apples to oranges comparison as the test track was more of a momentum track than the other one I went to where the brakes got roasted. Will have a bunch more testing done in 2014 though!!
Have had it on since ~Sept timeframe with some daily driving, and no issues at all. Granted I haven't driven the car much as the weather got colder, but its held together wonderfully and performed flawlessly during some track driving. Brakes stayed much cooler, although it's a bit of an apples to oranges comparison as the test track was more of a momentum track than the other one I went to where the brakes got roasted. Will have a bunch more testing done in 2014 though!!