Write-up: installing a separate clutch fluid reservoir
#1
Write-up: installing a separate clutch fluid reservoir
Separating the clutch fluid from the brake fluid, a quick and fairly easy "mod", mostly a good idea for cars that get autocrossed, raced on road courses, or just driven hard especially in hot weather.
Separating the fluids means the clutch fluid will no longer get hot from the brake fluid working through it, and vice-a-versa.
There are a couple of ways to do this, I chose the more complex way.
Most people will re-use the stock manual-trans brake fluid reservoir and just cap off the "nipple" that normally feeds fluid to the clutch.
That would require a certain type of cap that won't be eaten away by the corrosive brake fluid, and personally I thought it wouldn't look as clean as using the auto-trans cars' brake fluid reservoir, which doesn't have the nipple on it.
The parts I used:
- Pontiac GTO clutch fluid reservoir, about $17 shipped off eBay.
Part # 92065790 LINK
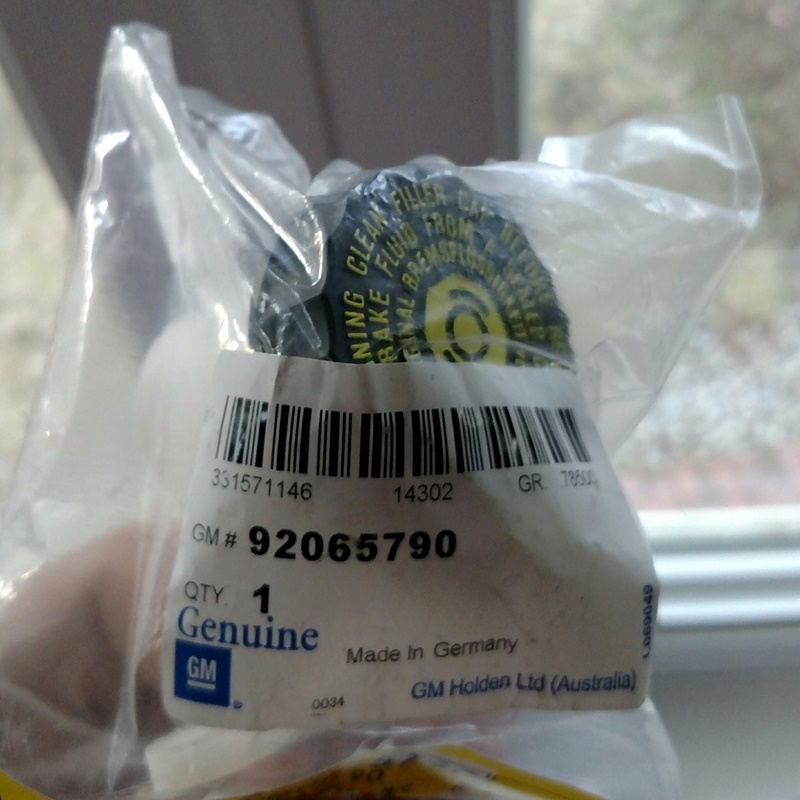
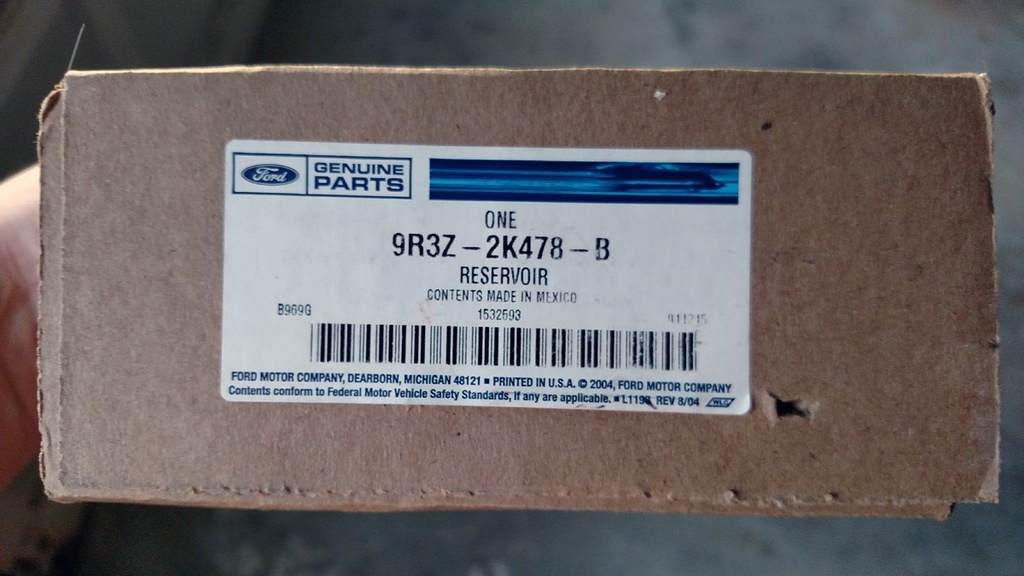
- Automatic cars OEM brake fluid reservoir, I ordered it from Autonation Ford (formerly Tousley) for about $43 + shipping. Part # 9R3Z-2K478-B LINK
- Amsoil DOT4 brake fluid. I have a Preferred Customer account with Amsoil so I buy direct from them for almost wholesale prices, shipped right to the house. I recommend this for anybody that wants Amsoil products, it's only $20/yr to sign up.
The itself swap is pretty simple, you remove the clutch fluid hose from the back of the stock brake fluid reservoir and install it onto the new clutch fluid small reservoir, then find a place for the reservoir.
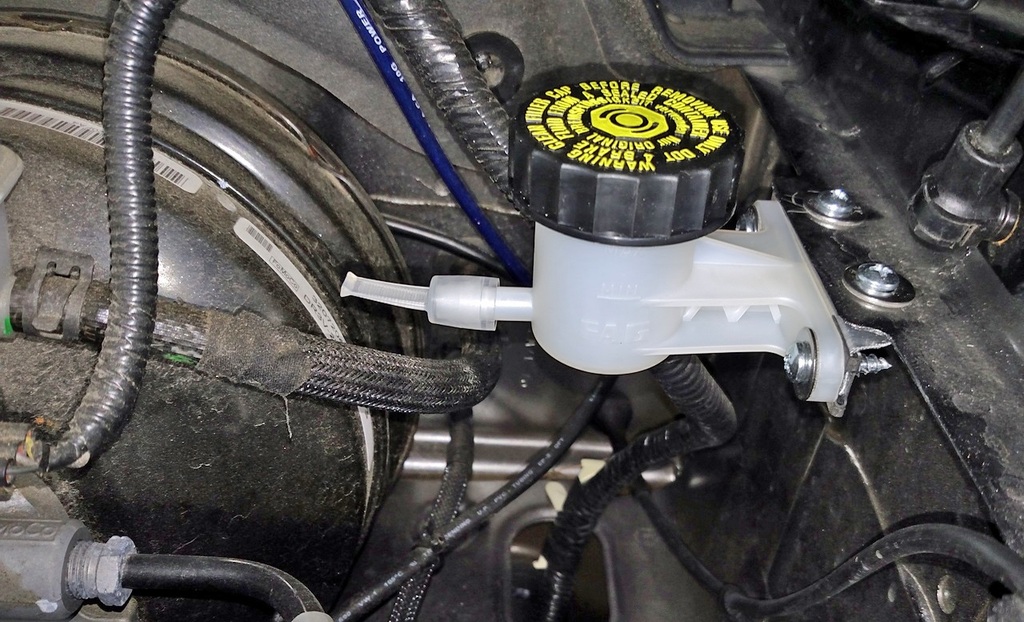
I happened to see a pic on facebook where a guy made up his own bracket that allowed the mounting of the reservoir to the holes normally used for the sound tube bracket, so I copied that idea and made up my own bracket for that spot.
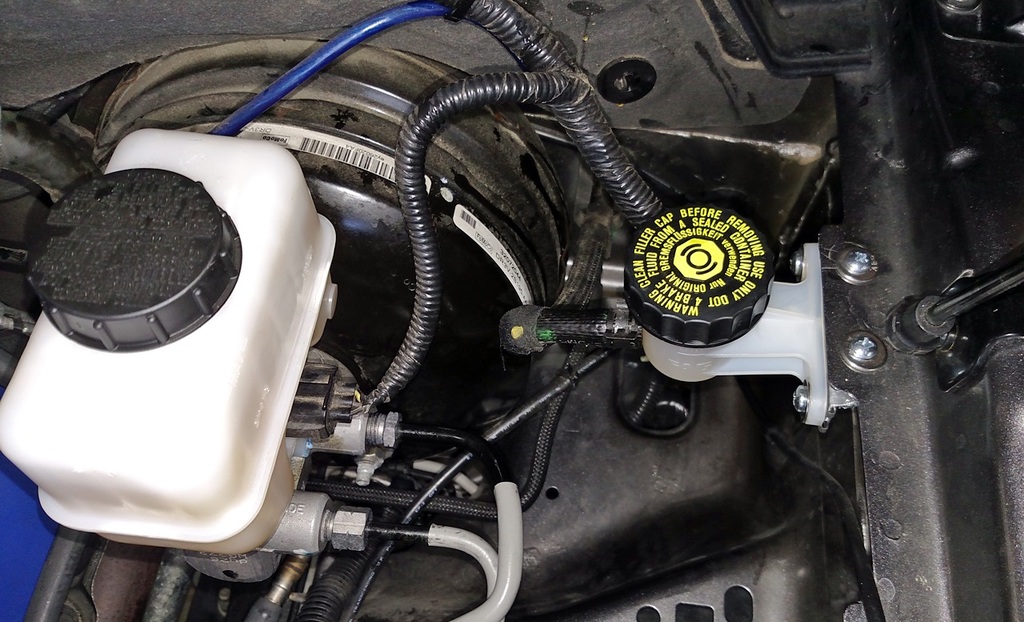
Here's the clutch fluid reservoir installed:
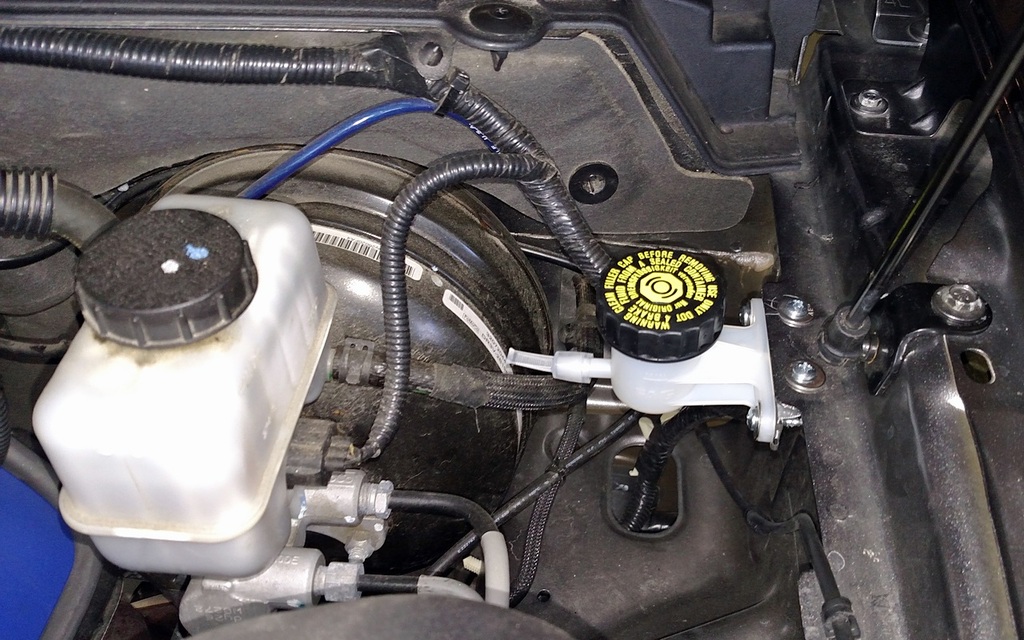
And the stock reservoir with the clutch fluid line still attached :
The hardest part of the job is swapping out the brake fluid reservoirs, and this is actually an optional item, since most guys just use some EPDM caps to cap off the nipple on the reservoir.
A pic of the stock reservoir with the clutch fluid nipple:
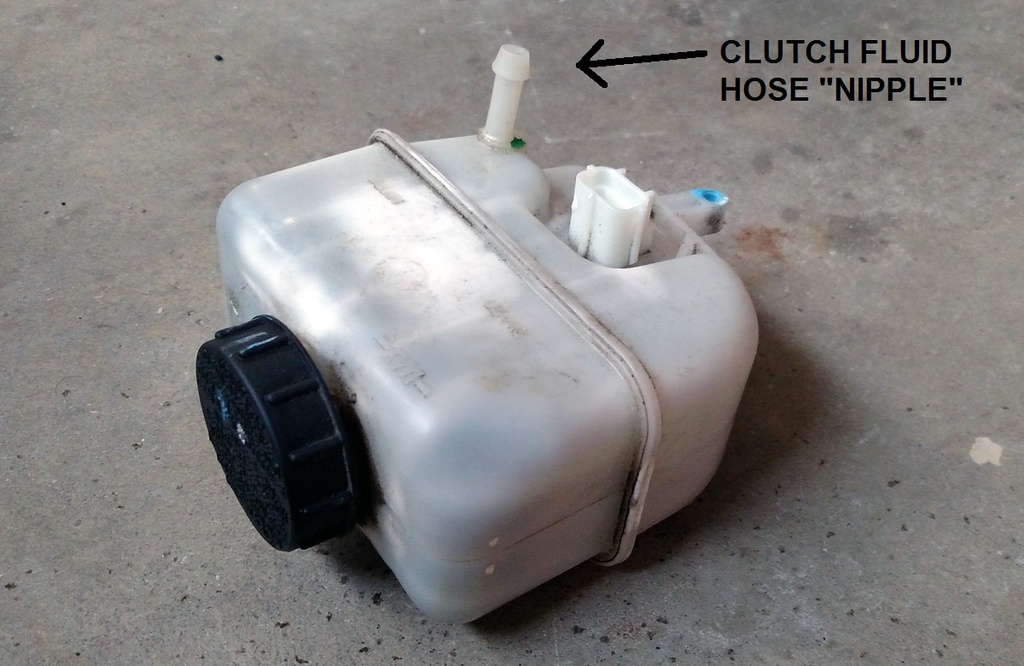
When you remove the clutch fluid line from the stock brake fluid reservoir, leave the reservoir cap fully tightened, since the vacuum with the cap on keeps the leakage from the clutch fluid nipple to a minimum. Once you remove the cap, fluid pours out.
Removing the stock brake fluid reservoir was a bit tricky, especially since it's the first time I did one.
I used a cheap Harbor Freight fluid transfer pump to suck out as much brake fluid out of the reservoir as possible.
Some fluid stayed in, so I put a bunch of rags under the reservoir, removed the stud that goes through/under the reservoir, and pried it up out of the master cylinder and out of the 2 o-rings that seal it in.
It popped out, me prying up front and rear under it, the o-rings stayed in their holes, then I removed them since the new reservoir came with 2 new ones.
The stock reservoir with the o-rings I'm mentioning:
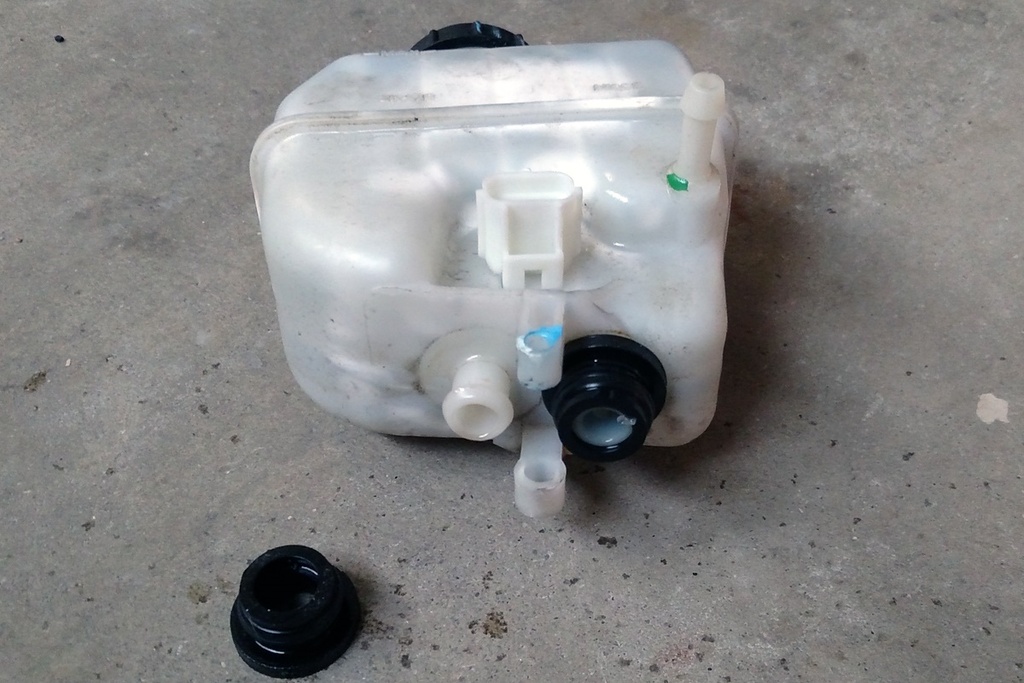
I had to install the new o-rings in the master cylinder holes first, and then push down the new reservoir.
Trying to push down the reservoir with the o-rings pre-installed on it, the o-rings were getting deformed and not popping into their holes in the master cylinder.
So I got the reservoir in, re-installed the stud/bolt under it, re-connected the sensor wiring, and topped off the fluid.
Done.
I put about 150 miles on the car today after the work above, and no issues.
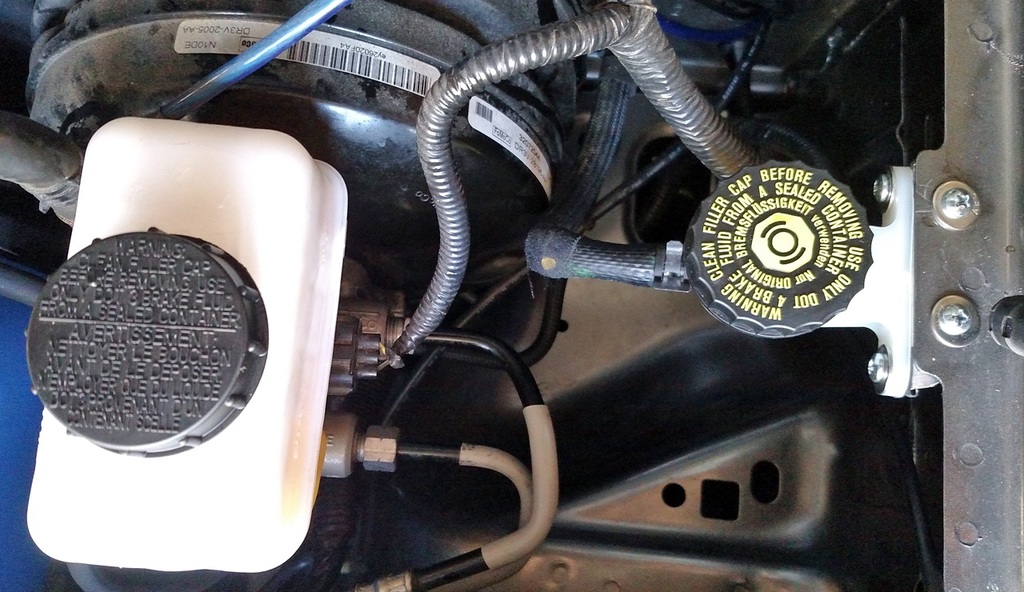
The final set-up:
Separating the fluids means the clutch fluid will no longer get hot from the brake fluid working through it, and vice-a-versa.
There are a couple of ways to do this, I chose the more complex way.
Most people will re-use the stock manual-trans brake fluid reservoir and just cap off the "nipple" that normally feeds fluid to the clutch.
That would require a certain type of cap that won't be eaten away by the corrosive brake fluid, and personally I thought it wouldn't look as clean as using the auto-trans cars' brake fluid reservoir, which doesn't have the nipple on it.
The parts I used:
- Pontiac GTO clutch fluid reservoir, about $17 shipped off eBay.
Part # 92065790 LINK

- Automatic cars OEM brake fluid reservoir, I ordered it from Autonation Ford (formerly Tousley) for about $43 + shipping. Part # 9R3Z-2K478-B LINK

- Amsoil DOT4 brake fluid. I have a Preferred Customer account with Amsoil so I buy direct from them for almost wholesale prices, shipped right to the house. I recommend this for anybody that wants Amsoil products, it's only $20/yr to sign up.
The itself swap is pretty simple, you remove the clutch fluid hose from the back of the stock brake fluid reservoir and install it onto the new clutch fluid small reservoir, then find a place for the reservoir.
I happened to see a pic on facebook where a guy made up his own bracket that allowed the mounting of the reservoir to the holes normally used for the sound tube bracket, so I copied that idea and made up my own bracket for that spot.
Here's the clutch fluid reservoir installed:

And the stock reservoir with the clutch fluid line still attached :

The hardest part of the job is swapping out the brake fluid reservoirs, and this is actually an optional item, since most guys just use some EPDM caps to cap off the nipple on the reservoir.
A pic of the stock reservoir with the clutch fluid nipple:

When you remove the clutch fluid line from the stock brake fluid reservoir, leave the reservoir cap fully tightened, since the vacuum with the cap on keeps the leakage from the clutch fluid nipple to a minimum. Once you remove the cap, fluid pours out.
Removing the stock brake fluid reservoir was a bit tricky, especially since it's the first time I did one.
I used a cheap Harbor Freight fluid transfer pump to suck out as much brake fluid out of the reservoir as possible.
Some fluid stayed in, so I put a bunch of rags under the reservoir, removed the stud that goes through/under the reservoir, and pried it up out of the master cylinder and out of the 2 o-rings that seal it in.
It popped out, me prying up front and rear under it, the o-rings stayed in their holes, then I removed them since the new reservoir came with 2 new ones.
The stock reservoir with the o-rings I'm mentioning:

I had to install the new o-rings in the master cylinder holes first, and then push down the new reservoir.
Trying to push down the reservoir with the o-rings pre-installed on it, the o-rings were getting deformed and not popping into their holes in the master cylinder.
So I got the reservoir in, re-installed the stud/bolt under it, re-connected the sensor wiring, and topped off the fluid.
Done.
I put about 150 miles on the car today after the work above, and no issues.
The final set-up:


#4
Thanks guys
So far I'm not really noticing a difference.
The clutch pedal seems to be a tiny bit stiffer, but that might just be that I hadn't driven the car in a bit.
I'm planning on doing the stainless steel braided clutch fluid line this week, which supposedly really makes a difference.
We'll see.
So far I'm not really noticing a difference.
The clutch pedal seems to be a tiny bit stiffer, but that might just be that I hadn't driven the car in a bit.
I'm planning on doing the stainless steel braided clutch fluid line this week, which supposedly really makes a difference.
We'll see.
#6
McLeod stainless steel braided clutch line is now installed, and after about 400 pedal pumps I finally have a firm pedal again.
Can't drive the car since the intake tube is out getting hydro dipped, but hopefully that will be done this week so I can finally see what's the difference with this line installed.
Can't drive the car since the intake tube is out getting hydro dipped, but hopefully that will be done this week so I can finally see what's the difference with this line installed.
#8
#9
I have the same McLeod braided SS clutch line. You won't feel a difference unless you track your car and get the fluid extremely hot. The clutch pedal will remain firmer after the fluid gets hot.
Just as a sidenote, I did the stop tech braided stainless steel brake lines with Motul 660 fluid. Can't wait to see how that helps things out on the track on March 26.
Just as a sidenote, I did the stop tech braided stainless steel brake lines with Motul 660 fluid. Can't wait to see how that helps things out on the track on March 26.
Thread
Thread Starter
Forum
Replies
Last Post


