
CMCV Delete Plate install (with pics)


CMCV Delete Plate install (with pics)
Steeda (Ford Racing) Charge Motion Control Valve delete plate installation
I obtained these delete plates from Tillman Speed at a great price.
First, let's some of these acronyms out of the way.
CMCV (Charge Motion Control Valve) Delete
CMDP (Charge Motion Delete Plates)
CMRC (Charge Motion Runner Controls) Delete
... are pretty much the same thing.
Before beginning this installation, you must already have a tune that compensates for the CMDP's. If you don't, you will get a Check Engine light or worse, the car will go into Fail Safe Mode.
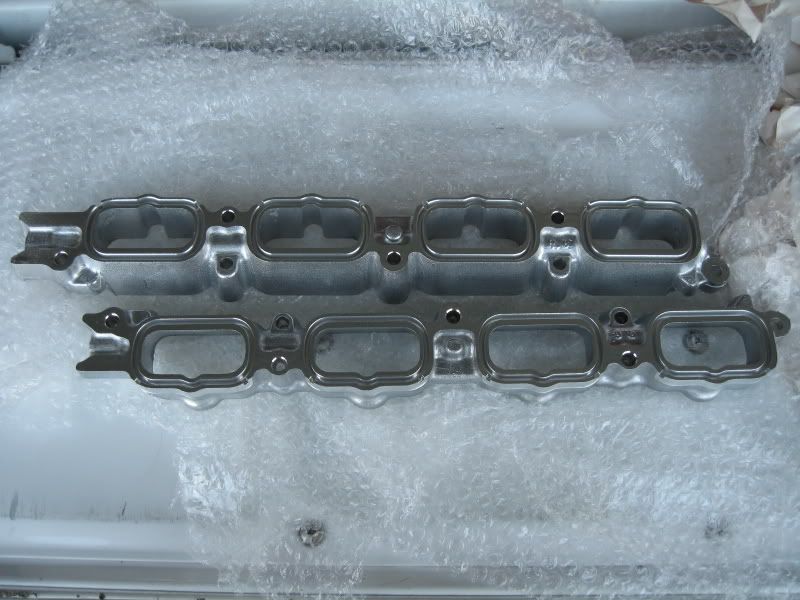
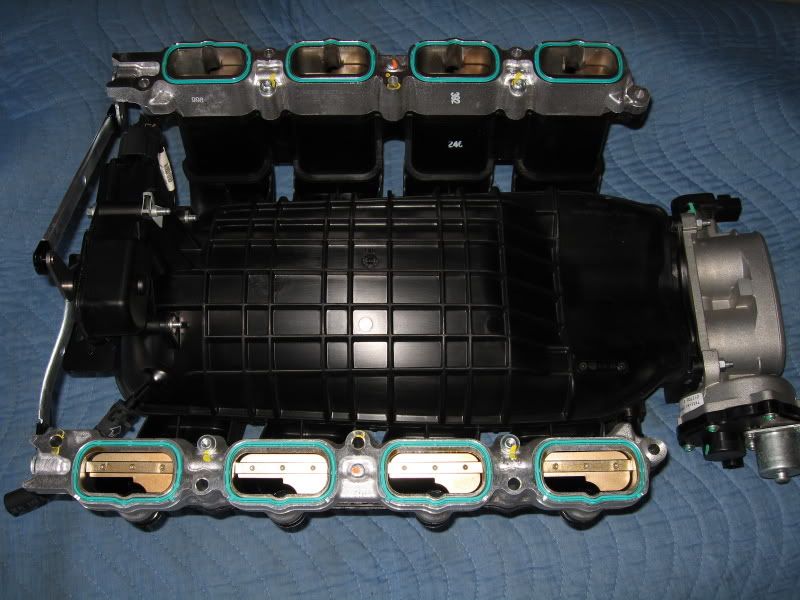
CMDP's out from the box. They are identical to the OEM CMCV's with the exception of the valves.
Note: Each delete runner is marked 'L' or 'R'; just like the OEM runners.

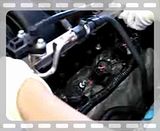
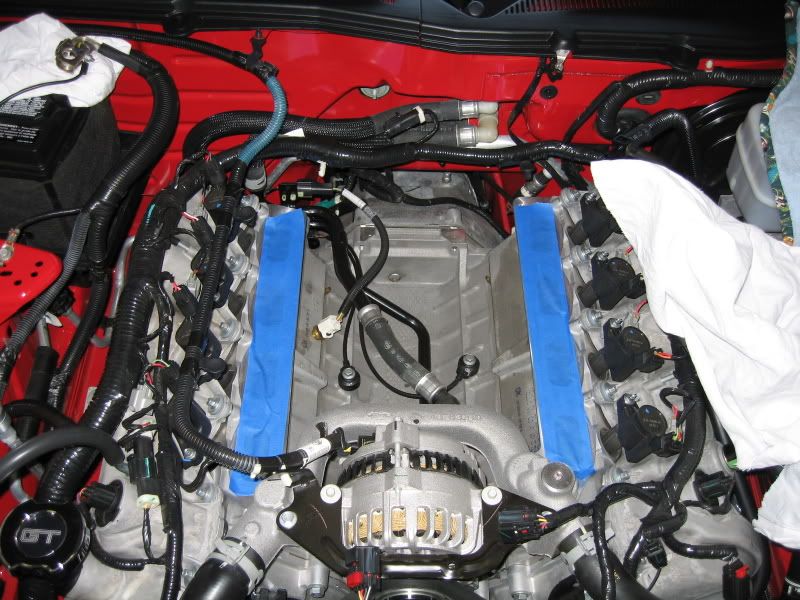
Baseline pictures

Passenger side
Drivers side
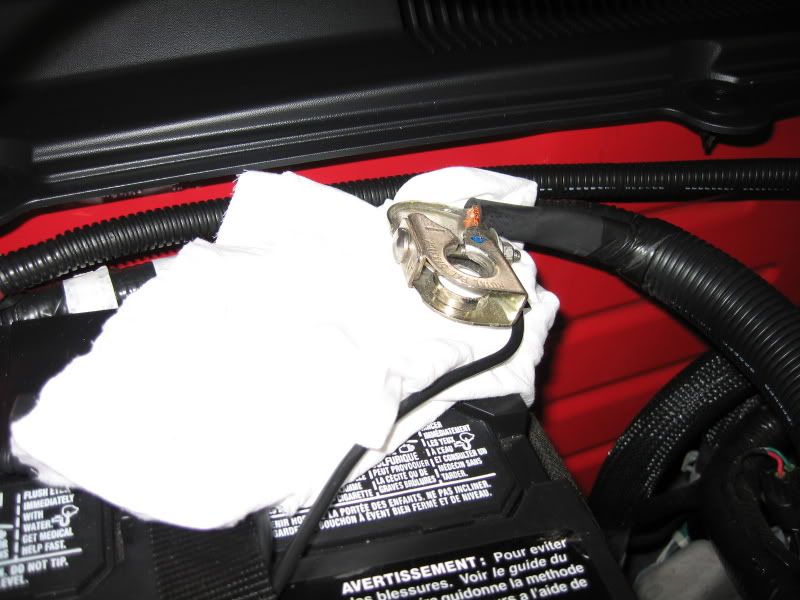
1. Disconnect the 'negative' side of the battery. Why? It's especially important to cut battery power when unplugging and plugging back in electrical connections to eliminate any electrical surges. It's just safe to do and only takes 15 seconds.
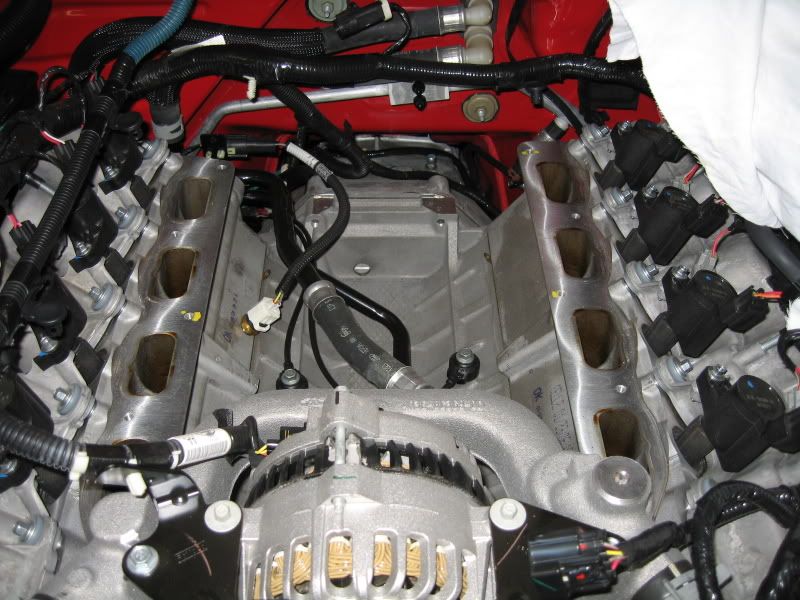
2. If you have the means, use compressed air to blow the area of the intake to remove any dirt and debris. If unable to blow the area clean, use caution when removing the intake manifold to avoid any debris from falling into the intake ports of the heads.
Picture note: I was installing the underdrive pulleys at the same time, so that's why you see additional parts in the engine bay removed.
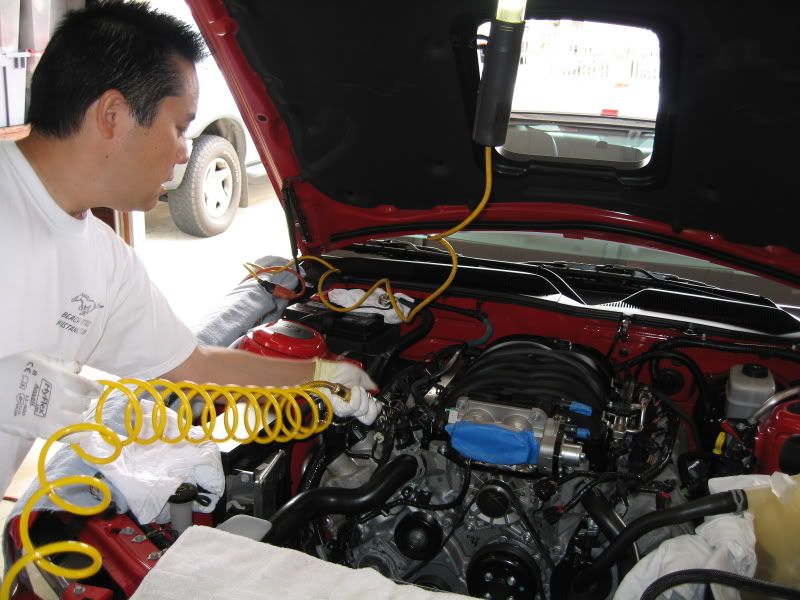
3. If you haven't already done so, remove the factory airbox or CAI.

Note: Don't forget to unplug the Mass Air Flow Sensor from the intake air tube by sliding the red lock lever back.

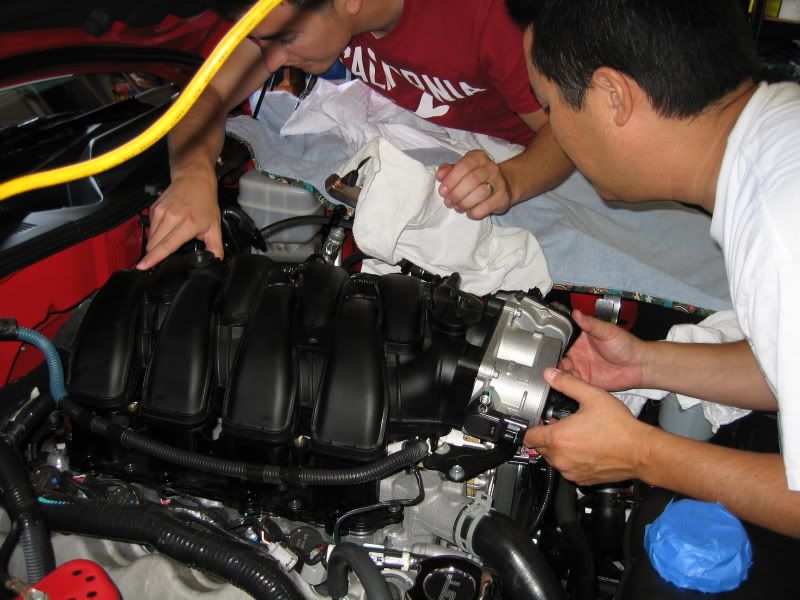
4. Disconnect the all the electrical connections to the throttle body and intake manifold.
Throttle Position Sensor: slide the red lock lever back
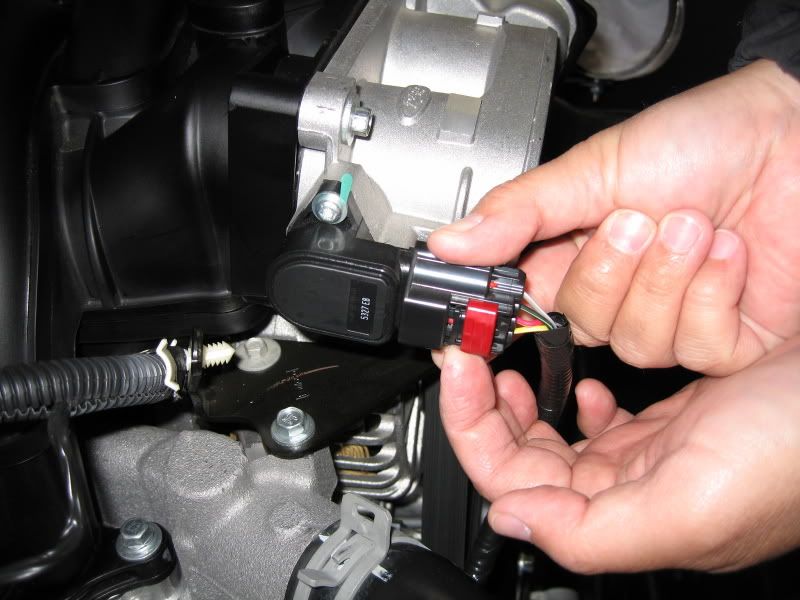
Electronic Throttle Body Electrical Controller: slide the red lock lever back

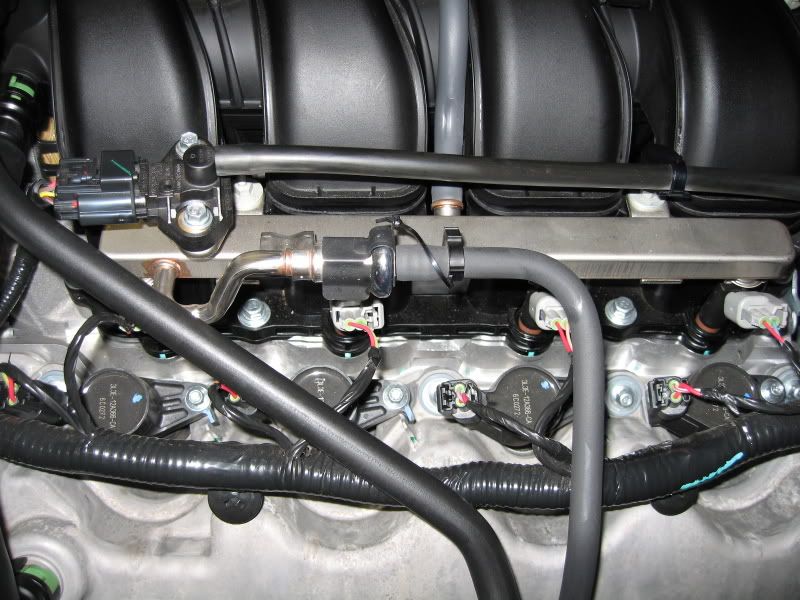
Electrical plug from the Drivers side fuel rail: press the lock lever down to release
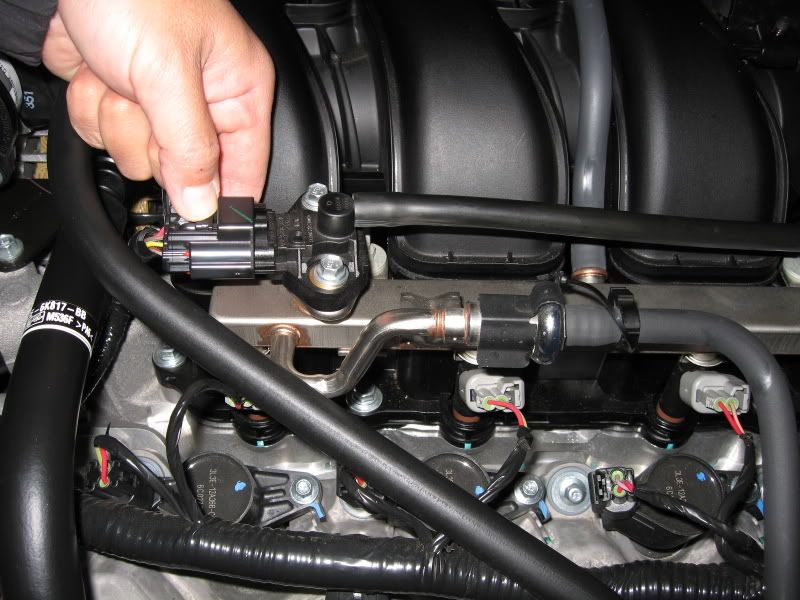
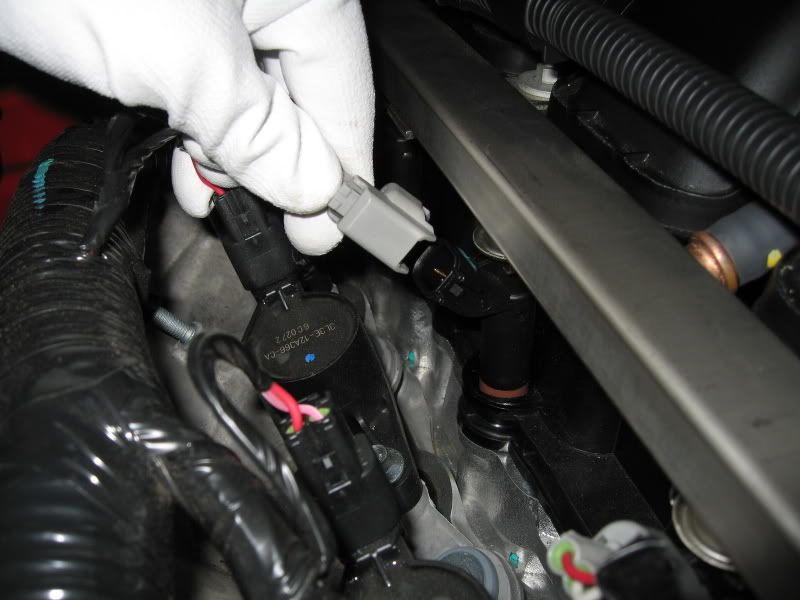
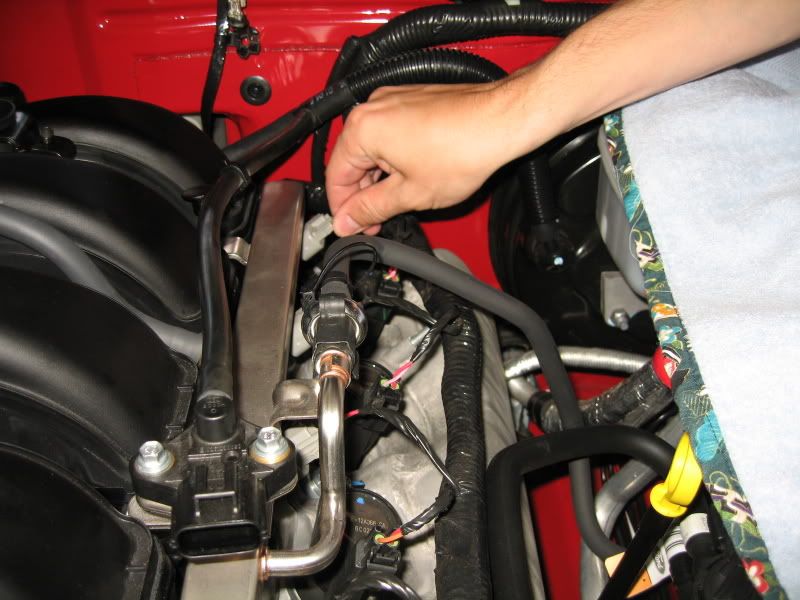
Electrical plug from the rear of the Charge Motion Control Valve (near the firewall): lift up on the lock lever to release
Fuel injector electrical connectors (4 each side): press the lock lever down to release
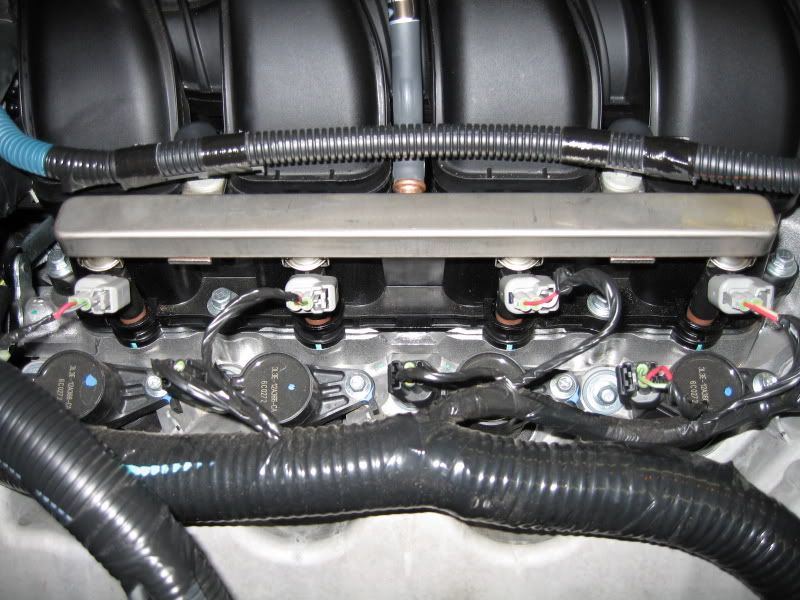
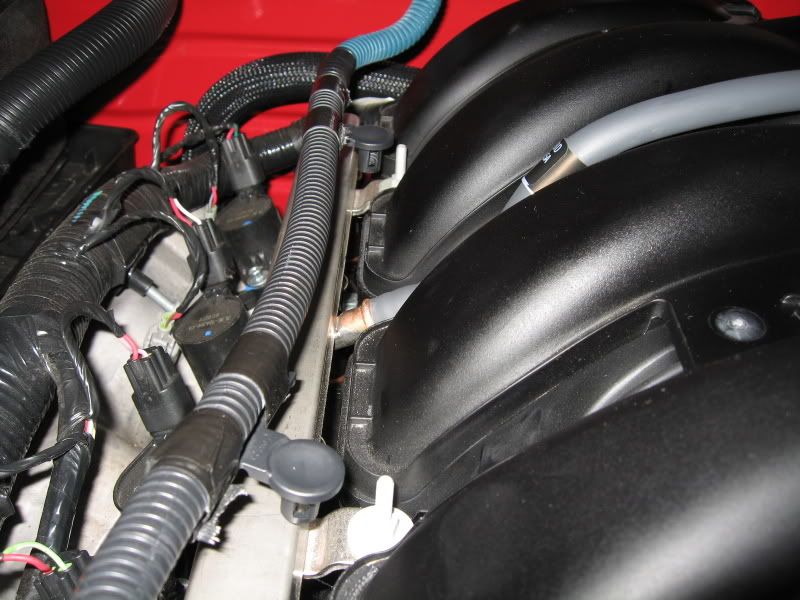
5. Lift off the circular wire bundle support clips off from the fuel rail studs, both sides.
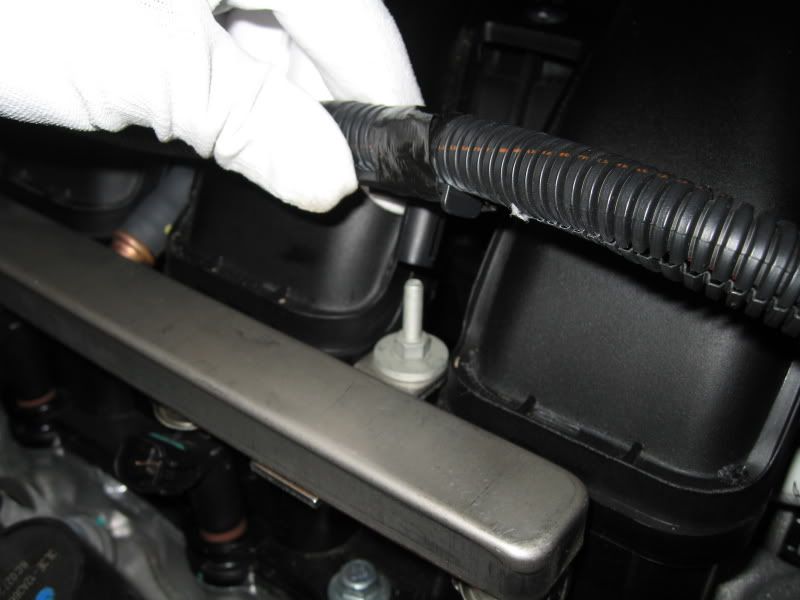
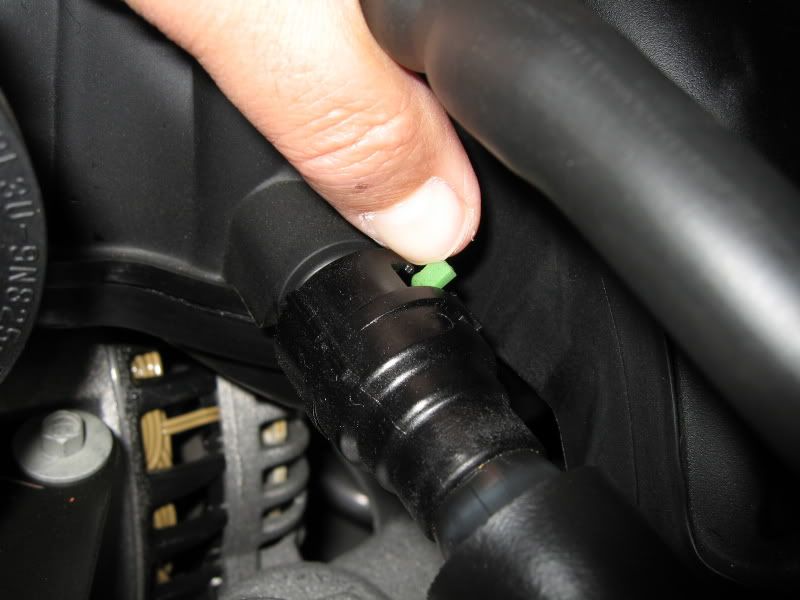
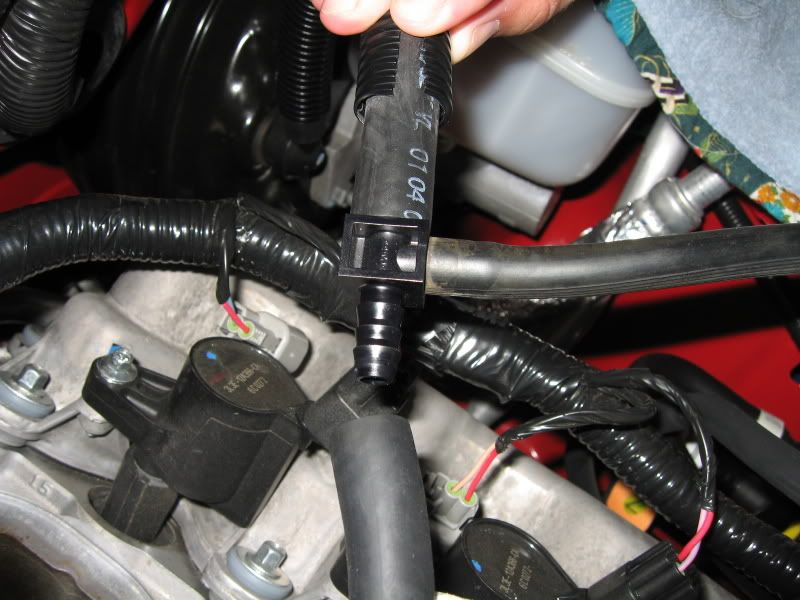
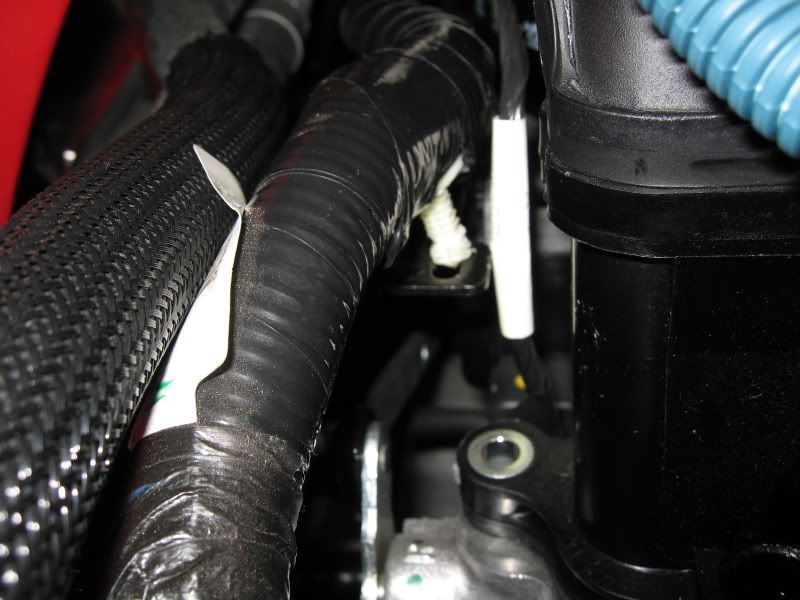
6. Remove the 2 vacuum lines from the front Drivers side of the intake.
For the upper line (the one with the white clip), grasp the connector and twist off the vacuum hose.

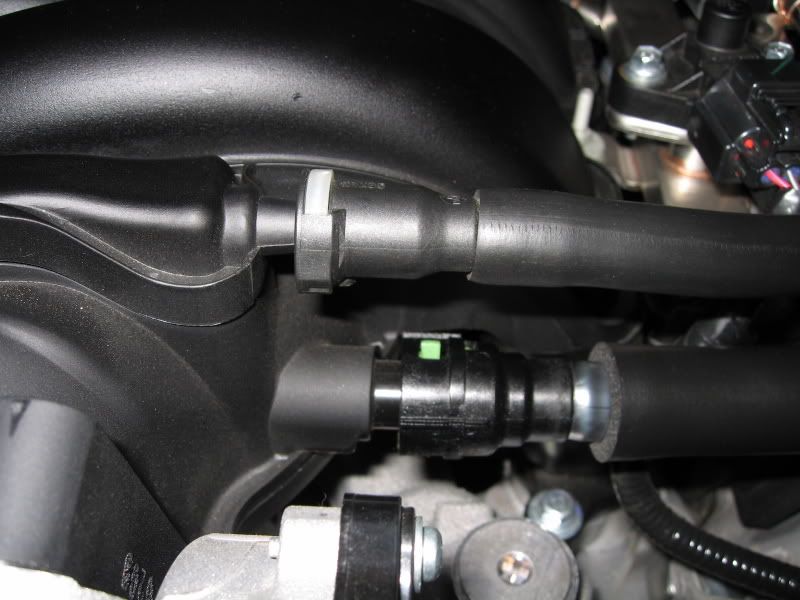
For the lower line, slide the green release lever to the side and pull to disconnect. If you can't get the angle to pull it off, you can disconnect it from the camcover, then unclip it from the intake.

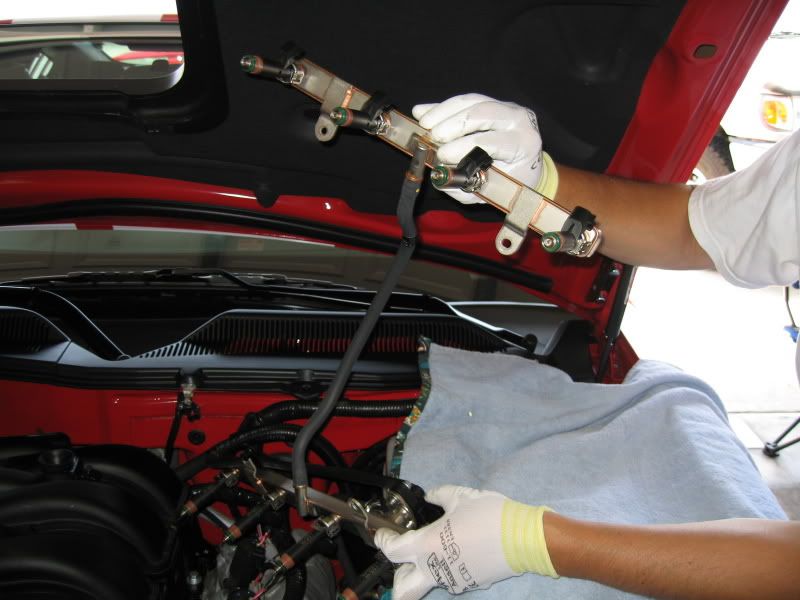
7. Remove the 4 studs that attach the fuel rail to the manifold (2 each side, reference step 5).
8. Lift off the fuel rails. Grasp each end of the fuel rail and firmly pull straight up. All 4 injectors will pop up from the Charge Motion Plate.
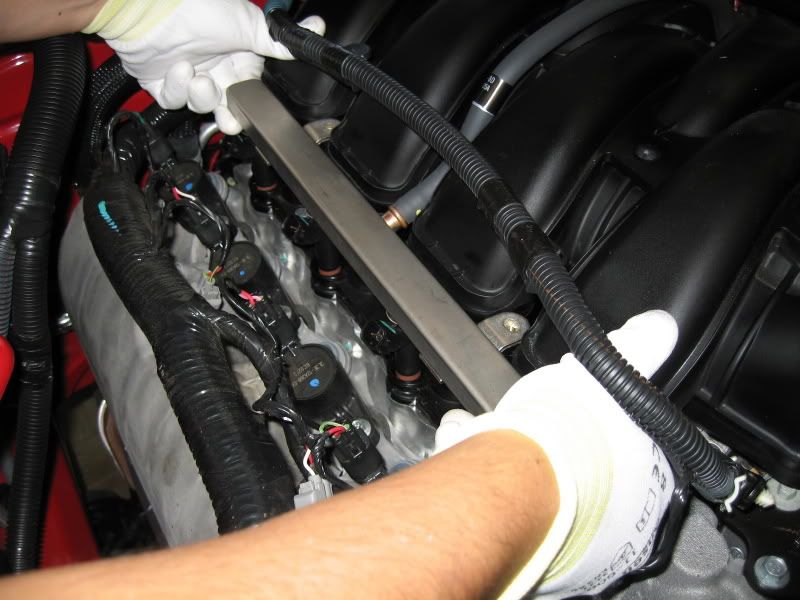

Carefully lift the Passenger side fuel rail (with injectors attached) up and over to the Drivers side, then move both fuel rails clear of the intake manifold. I laid some clean rags over the injectors to protect them.
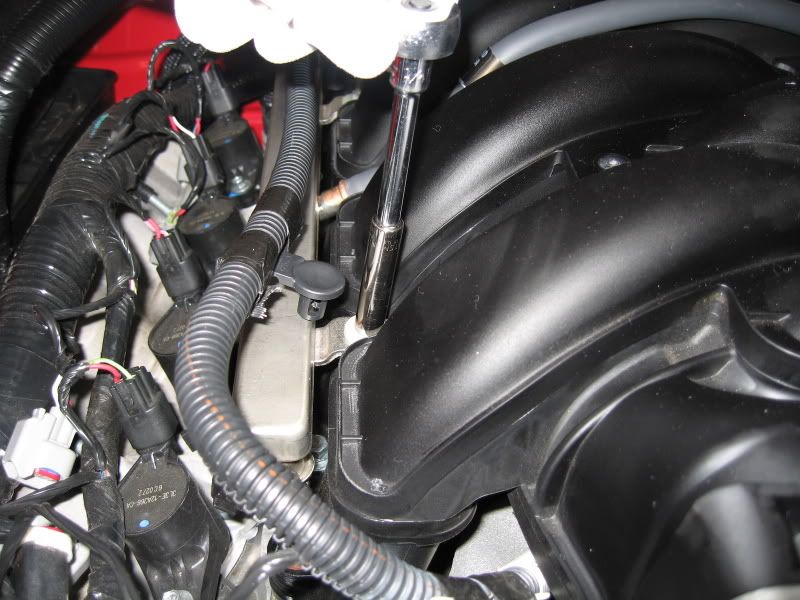
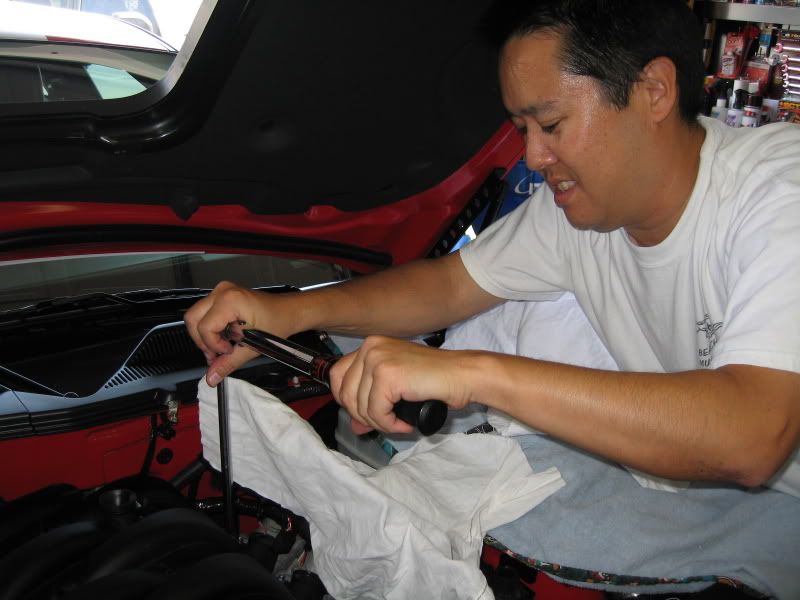
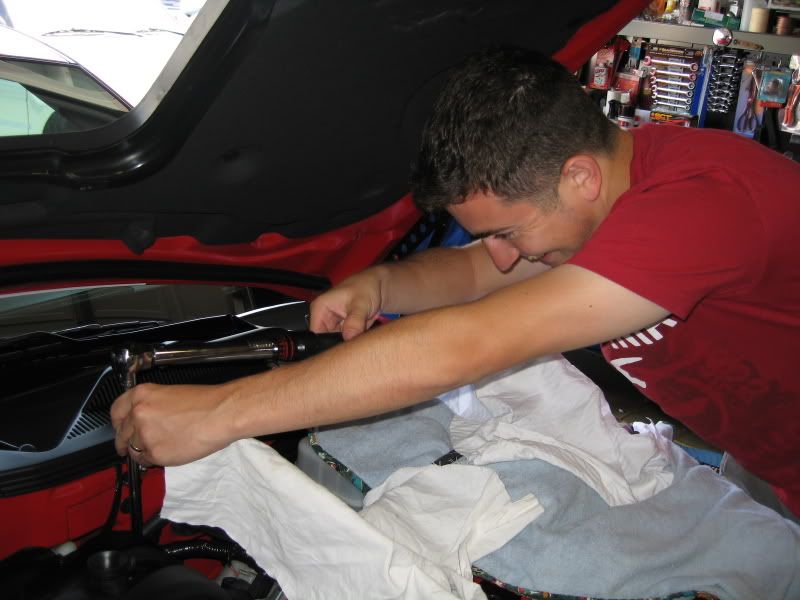
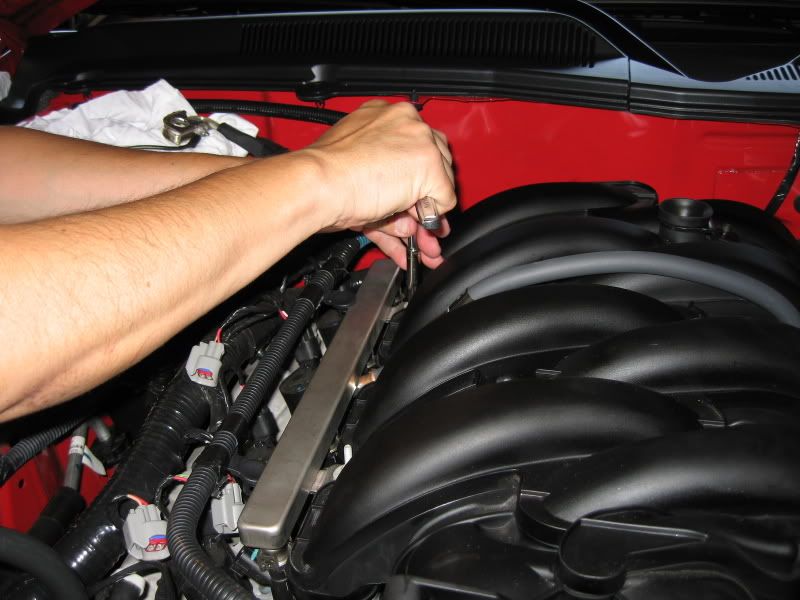
9. Remove the 10 bolts the hold the manifold down (5 each side). The bolts are fairly long in length.

Note: The rear Drivers side bolt is actually a stud. Remove it the same way as the other bolts.
Note: There're 2 hidden bolts (1 each side) towards the center of the manifold, which are located under the fuel line that connected the 2 fuel rails together. Once completely loose, a magnet retrieval tool will aid in lifting it out from in-between the runners.
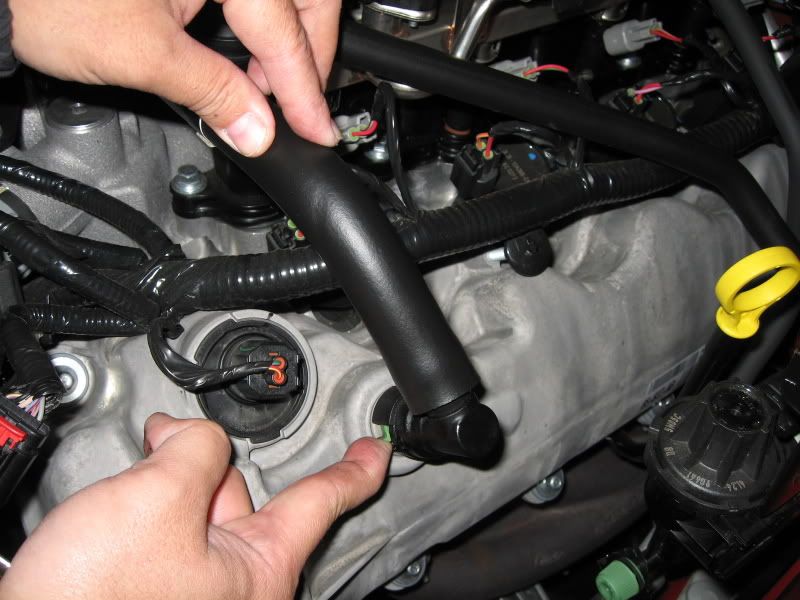
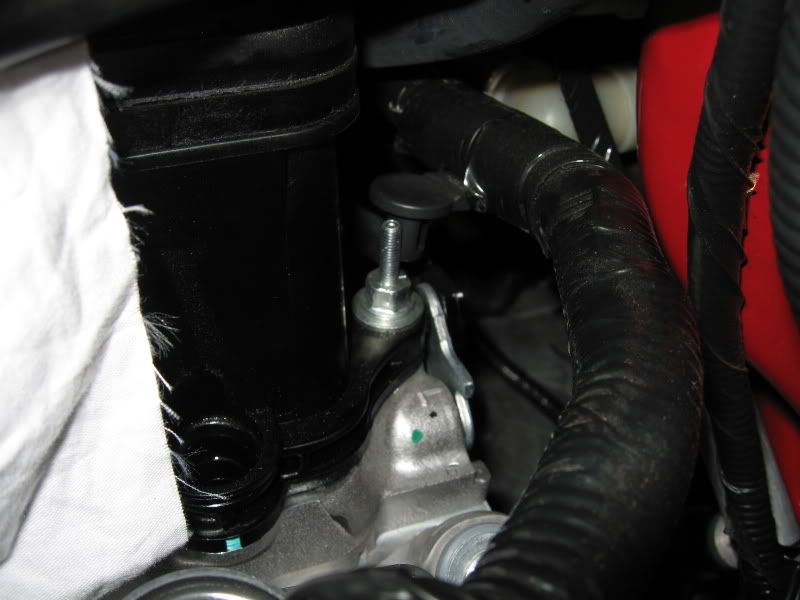
10. Disconnect the vacuum hose from the rear of the Charge Motion assembly from the T-fitting.
Continued on Post 2
I obtained these delete plates from Tillman Speed at a great price.
First, let's some of these acronyms out of the way.
CMCV (Charge Motion Control Valve) Delete
CMDP (Charge Motion Delete Plates)
CMRC (Charge Motion Runner Controls) Delete
... are pretty much the same thing.
Before beginning this installation, you must already have a tune that compensates for the CMDP's. If you don't, you will get a Check Engine light or worse, the car will go into Fail Safe Mode.
CMDP's out from the box. They are identical to the OEM CMCV's with the exception of the valves.
Note: Each delete runner is marked 'L' or 'R'; just like the OEM runners.
Baseline pictures
Passenger side
Drivers side
1. Disconnect the 'negative' side of the battery. Why? It's especially important to cut battery power when unplugging and plugging back in electrical connections to eliminate any electrical surges. It's just safe to do and only takes 15 seconds.
2. If you have the means, use compressed air to blow the area of the intake to remove any dirt and debris. If unable to blow the area clean, use caution when removing the intake manifold to avoid any debris from falling into the intake ports of the heads.
Picture note: I was installing the underdrive pulleys at the same time, so that's why you see additional parts in the engine bay removed.
3. If you haven't already done so, remove the factory airbox or CAI.
Note: Don't forget to unplug the Mass Air Flow Sensor from the intake air tube by sliding the red lock lever back.
4. Disconnect the all the electrical connections to the throttle body and intake manifold.
Throttle Position Sensor: slide the red lock lever back
Electronic Throttle Body Electrical Controller: slide the red lock lever back
Electrical plug from the Drivers side fuel rail: press the lock lever down to release
Electrical plug from the rear of the Charge Motion Control Valve (near the firewall): lift up on the lock lever to release
Fuel injector electrical connectors (4 each side): press the lock lever down to release
5. Lift off the circular wire bundle support clips off from the fuel rail studs, both sides.
6. Remove the 2 vacuum lines from the front Drivers side of the intake.
For the upper line (the one with the white clip), grasp the connector and twist off the vacuum hose.
For the lower line, slide the green release lever to the side and pull to disconnect. If you can't get the angle to pull it off, you can disconnect it from the camcover, then unclip it from the intake.
7. Remove the 4 studs that attach the fuel rail to the manifold (2 each side, reference step 5).
8. Lift off the fuel rails. Grasp each end of the fuel rail and firmly pull straight up. All 4 injectors will pop up from the Charge Motion Plate.
Carefully lift the Passenger side fuel rail (with injectors attached) up and over to the Drivers side, then move both fuel rails clear of the intake manifold. I laid some clean rags over the injectors to protect them.
9. Remove the 10 bolts the hold the manifold down (5 each side). The bolts are fairly long in length.
Note: The rear Drivers side bolt is actually a stud. Remove it the same way as the other bolts.
Note: There're 2 hidden bolts (1 each side) towards the center of the manifold, which are located under the fuel line that connected the 2 fuel rails together. Once completely loose, a magnet retrieval tool will aid in lifting it out from in-between the runners.
10. Disconnect the vacuum hose from the rear of the Charge Motion assembly from the T-fitting.
Continued on Post 2
Last edited by TacoBill; Mar 13, 2008 at 08:15 AM. Reason: sp
Continued from Post 1
11. Not mentioned anywhere is this push-in fastener that supports a wire harness that's attached to the Charge Motion motor bracket (passenger side). It's a pain to pull out; needle nose pliers will help.
12. The intake manifold is ready to be removed. Carefully lift the manifold out and set it upside down on a workbench (or equivalent).
13. I put some tape over the intake ports to eliminate any chances of dirt or debris from falling into the intake ports.
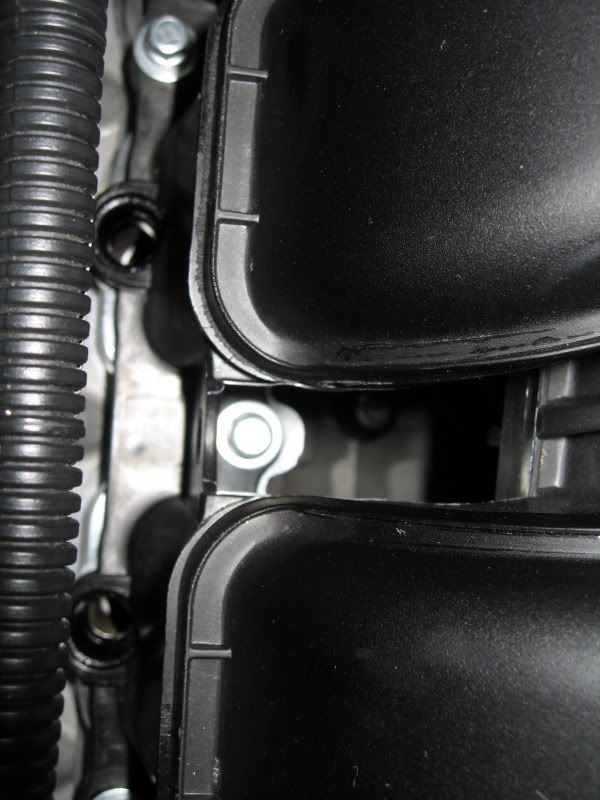
14. Remove the 3 silver bolts that hold the Charge Motion motor to the back of the intake manifold.
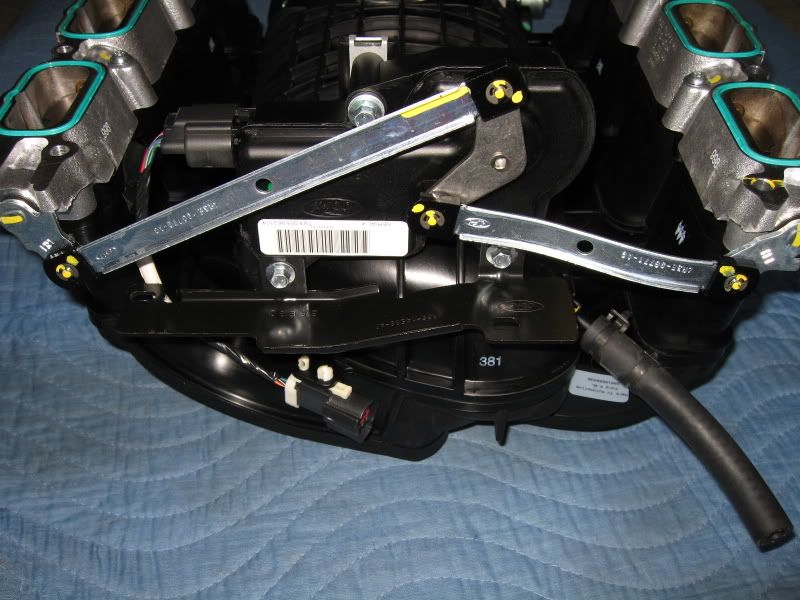
15. Using a #30 Torx bit, remove the 4 screws (2 on each plate) that attach the plate to the manifold.
16. Remove the whole motor and 2 plates as one unit and set aside.
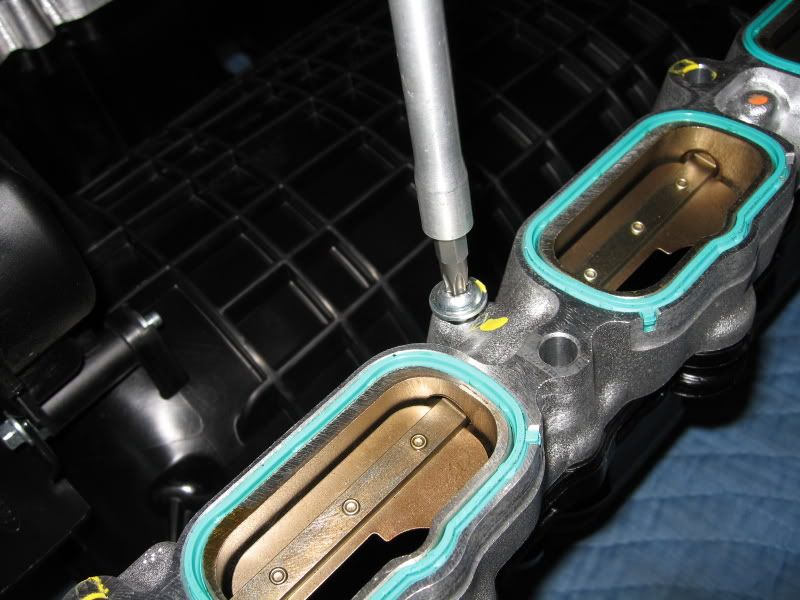
Clean off and lay the new delete plates next to the OEM plates (take note of the L/R stampings)
Carefully lift up each green seal and install into the new plate one at a time.
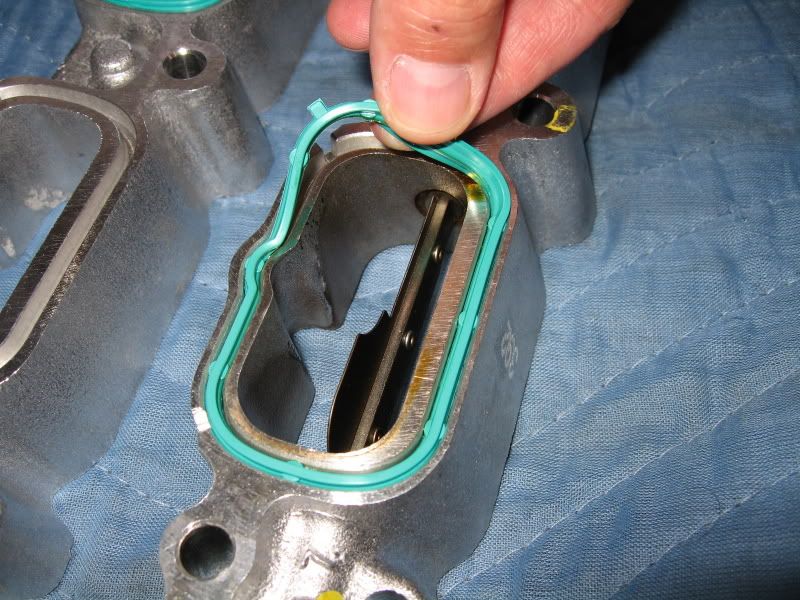
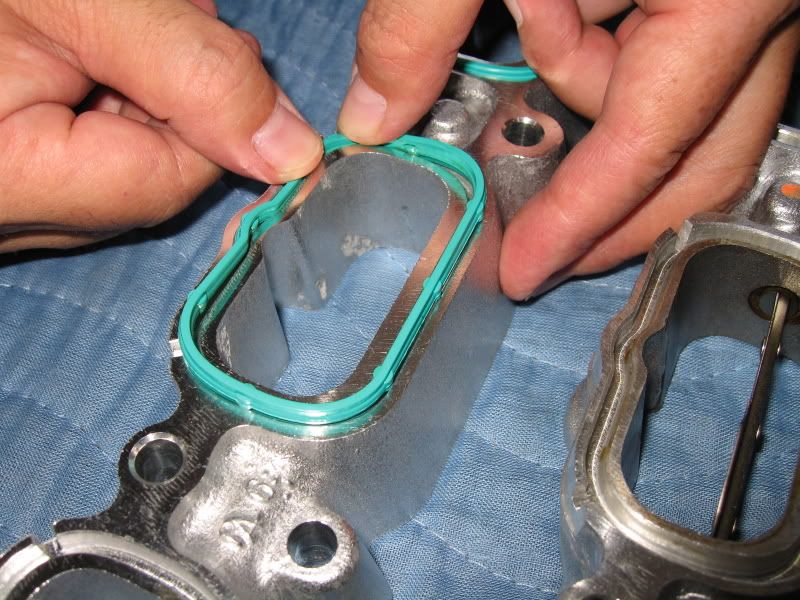
17. Once all the green seals are in place, I cleaned off the opposite side once more before placing the delete plate back on the manifold.
Even with the 2 Torx screws back in, there's considerable movement of the plates. Do your best to align all the injector hole openings to that from the manifold as well as the mounting holes.
I tightened down the Torx screws until I felt the seals compress onto the manifold. Careful not to over tighten them.

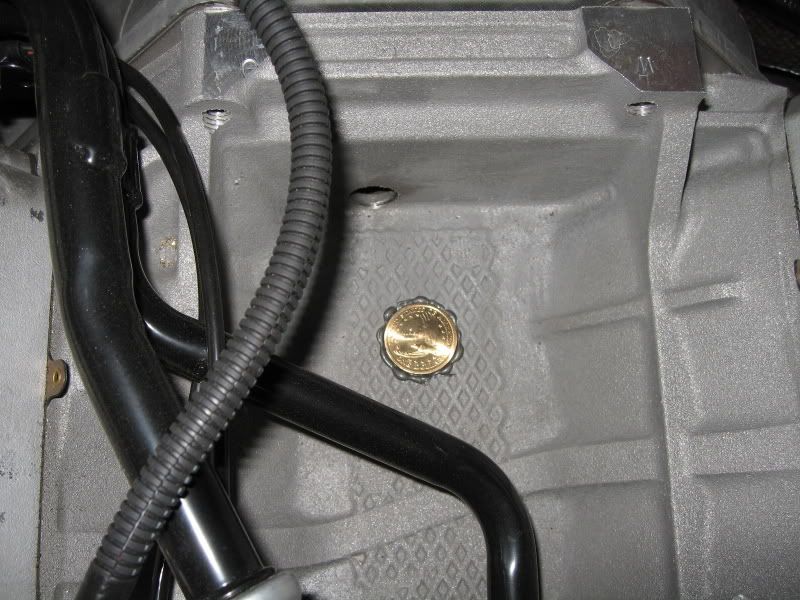
Just for kicks, I tacked down a Sacagewea Dollar coin on top of the block for fun, Eagle side up, of course. I can honestly say now, no matter what happens to my engine, it'll always be worth a buck!
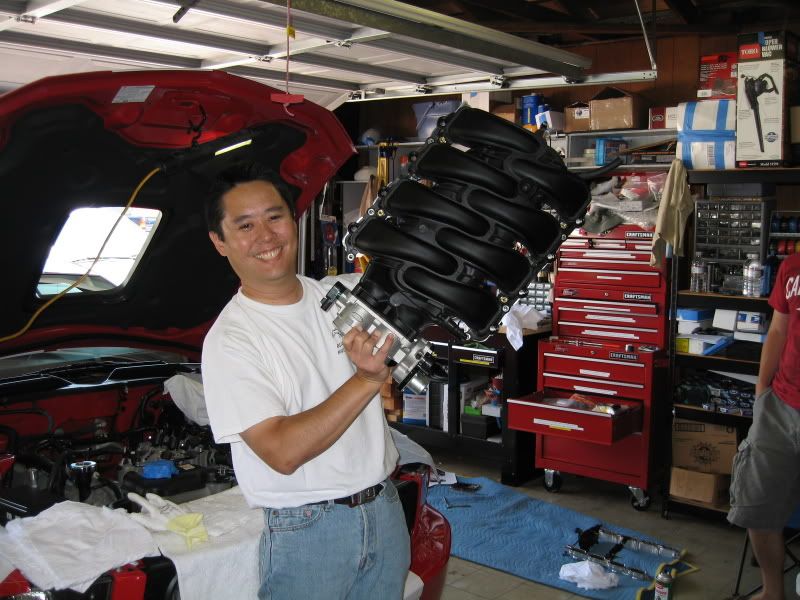
Yes, I am the Manifold King.
18. Remove the protective tape from step 13 and clean off the mating surface of the block. I used brake cleaner to remove any oil and fuel residues. Make sure the surface is dry before putting the manifold back on. I'm not sure how the green seals will react to the brake cleaner (nor do I want to find out).
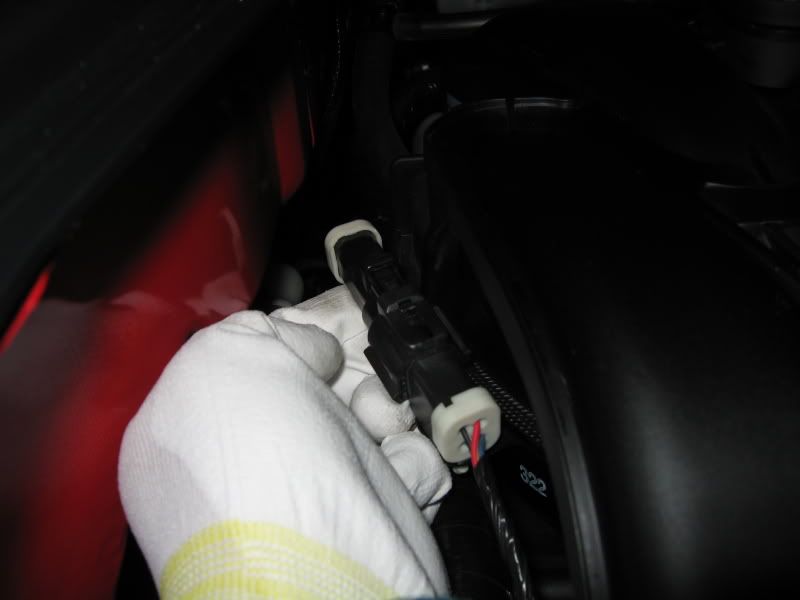
Note: I chose to leave off the Charge Motion motor altogether since Doug's tune deactivates it.
Note: Since the motor electrical plug is no longer used, I zip tied it to the conduit against the firewall.
Carefully lower the manifold back on top of the block.

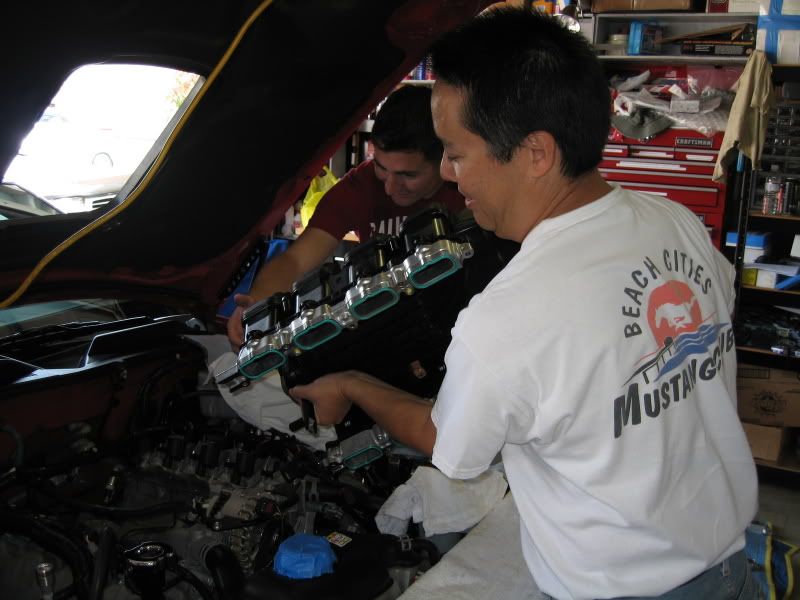
19. Once the manifold is in position, drop the mounting bolts in place and snug them up.
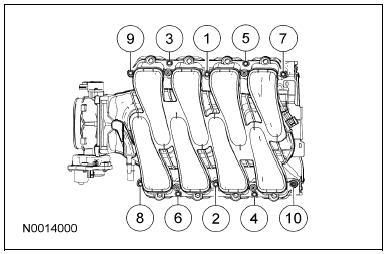
Follow the proper torque sequence and torque them to 89 lb-in.
Thanks to my brother-in-law, Kevin and buddy, Leo, for giving me a hand in torquing the bolts down as my lower back was killing me at this point.
20. Re-install the fuel rails and push the injectors back down into the manifold/delete plate.
21. Re-connect all the electrical plugs removed from step 4 and vacuum hoses from steps 6 and 10. Also, re-install the factory airbox (or CAI).

22. Re-attach the Negative battery terminal and flash the PCM with the new tune.
23. Before starting the engine, ensure you have all the electrical connectors and vacuum lines plugged back in. Clear the engine bay of any tools and rags before starting.
Note: Let it idle while you inspect each injector for fuel leaks or any other issues. If there's an issue, shut down the engine immediately and fix the issue.
Note: Make sure you don't have a Check Engine light either. If you do, go over all the electrical connections and vacuum lines to make sure they're positively engaged. Last possible cause could be the tune, in which case I would attempt to re-flash the PCM.
Installation complete!
11. Not mentioned anywhere is this push-in fastener that supports a wire harness that's attached to the Charge Motion motor bracket (passenger side). It's a pain to pull out; needle nose pliers will help.
12. The intake manifold is ready to be removed. Carefully lift the manifold out and set it upside down on a workbench (or equivalent).
13. I put some tape over the intake ports to eliminate any chances of dirt or debris from falling into the intake ports.
14. Remove the 3 silver bolts that hold the Charge Motion motor to the back of the intake manifold.
15. Using a #30 Torx bit, remove the 4 screws (2 on each plate) that attach the plate to the manifold.
16. Remove the whole motor and 2 plates as one unit and set aside.
Clean off and lay the new delete plates next to the OEM plates (take note of the L/R stampings)
Carefully lift up each green seal and install into the new plate one at a time.
17. Once all the green seals are in place, I cleaned off the opposite side once more before placing the delete plate back on the manifold.
Even with the 2 Torx screws back in, there's considerable movement of the plates. Do your best to align all the injector hole openings to that from the manifold as well as the mounting holes.
I tightened down the Torx screws until I felt the seals compress onto the manifold. Careful not to over tighten them.
Just for kicks, I tacked down a Sacagewea Dollar coin on top of the block for fun, Eagle side up, of course. I can honestly say now, no matter what happens to my engine, it'll always be worth a buck!
Yes, I am the Manifold King.
18. Remove the protective tape from step 13 and clean off the mating surface of the block. I used brake cleaner to remove any oil and fuel residues. Make sure the surface is dry before putting the manifold back on. I'm not sure how the green seals will react to the brake cleaner (nor do I want to find out).
Note: I chose to leave off the Charge Motion motor altogether since Doug's tune deactivates it.
Note: Since the motor electrical plug is no longer used, I zip tied it to the conduit against the firewall.
Carefully lower the manifold back on top of the block.
19. Once the manifold is in position, drop the mounting bolts in place and snug them up.
Follow the proper torque sequence and torque them to 89 lb-in.
Thanks to my brother-in-law, Kevin and buddy, Leo, for giving me a hand in torquing the bolts down as my lower back was killing me at this point.
20. Re-install the fuel rails and push the injectors back down into the manifold/delete plate.
21. Re-connect all the electrical plugs removed from step 4 and vacuum hoses from steps 6 and 10. Also, re-install the factory airbox (or CAI).
22. Re-attach the Negative battery terminal and flash the PCM with the new tune.
23. Before starting the engine, ensure you have all the electrical connectors and vacuum lines plugged back in. Clear the engine bay of any tools and rags before starting.
Note: Let it idle while you inspect each injector for fuel leaks or any other issues. If there's an issue, shut down the engine immediately and fix the issue.
Note: Make sure you don't have a Check Engine light either. If you do, go over all the electrical connections and vacuum lines to make sure they're positively engaged. Last possible cause could be the tune, in which case I would attempt to re-flash the PCM.
Installation complete!
Last edited by TacoBill; Mar 13, 2008 at 08:10 AM. Reason: sp
Team Mustang Source
Joined: December 12, 2004
Posts: 5,801
Likes: 5
From: NorCal
WOW, a busy weekend with the mods Bill. You are the TMS hero when it comes to how-to's. Another great visual adventure with TacoBill! 
Now give us some driving impressions after the CMDP and UDP's.
Now give us some driving impressions after the CMDP and UDP's.
Team Mustang Source
Joined: January 29, 2004
Posts: 6,730
Likes: 3

Well I will definitely have to do this at the same time as the CAI/tune
When I take apart a lot of connections I always put a smidge of blue masking tape on the disconnected part, so its easy to spot if I forgot to hook something back up.
Nice writeup as always


Cobra Member
Joined: November 10, 2005
Posts: 1,003
Likes: 0
 When they build ships for the US Navy they always put a silver dollar under the main mast for luck... I this brings you good luck as well my friend!
 Great write-up as usual.


Legacy TMS Member
Joined: January 9, 2005
Posts: 6,982
Likes: 6
From: New Carlisle, Ohio (20 miles north of Dayton)
Bill,
I am always in awe of the quality and clarity of your write ups on your installs. I don't know what you do for a living but you should write all of the "how to do" or "how to assemble" instructions for everything put in a box in this country and from overseas. Nothing short of just an awesome write up.
Scott
I am always in awe
of the quality and clarity of your write ups on your installs. I don't know what you do for a living but you should write all of the "how to do" or "how to assemble" instructions for everything put in a box in this country and from overseas. Nothing short of just an awesome write up. Scott
Bullitt Member
Joined: November 16, 2006
Posts: 434
Likes: 0
From: Knoxville, TN
Great write-up.
Just a note to add: when disconnecting the Electronic Throttle Body Electrical Controller and the Throttle Position Sensor, make sure you pull the red lock lever back ALL the way and be very careful when doing this.
I have heard many stories of the red clip breaking and then there is no way to reconnect the sensors as it will not stay in place.
Legacy TMS Member
Joined: May 24, 2006
Posts: 7,409
Likes: 0
From: San Diego
This should answer most your questions. If not do a search there are numerous threads on delete plates.
http://forums.bradbarnett.net/showth...=delete+plates
http://forums.bradbarnett.net/showth...=delete+plates