
MGW Shifter Installation (with pics and videos)


MGW Shifter Installation (with pics and videos)
EDIT: 10/23/07
PLEASE SEE POST 40 FOR KEY CHANGES REGARDING THE INSTALLATION OF THE MGW SHIFTER.
INSTALLATION DIRECTIONS BELOW NOW REFLECT CHANGES OUTLINED IN POST 40.
EDIT: 03-10-08
SEE POST 61 FOR SPECIAL INSTRUCTIONS FOR THOSE WITH THE AMBIENT LIGHTING OPTION.
ALSO, NOTE REVISED SHIFTER HANDLE BLOCK AND SOPPRT ROD CLAMP.
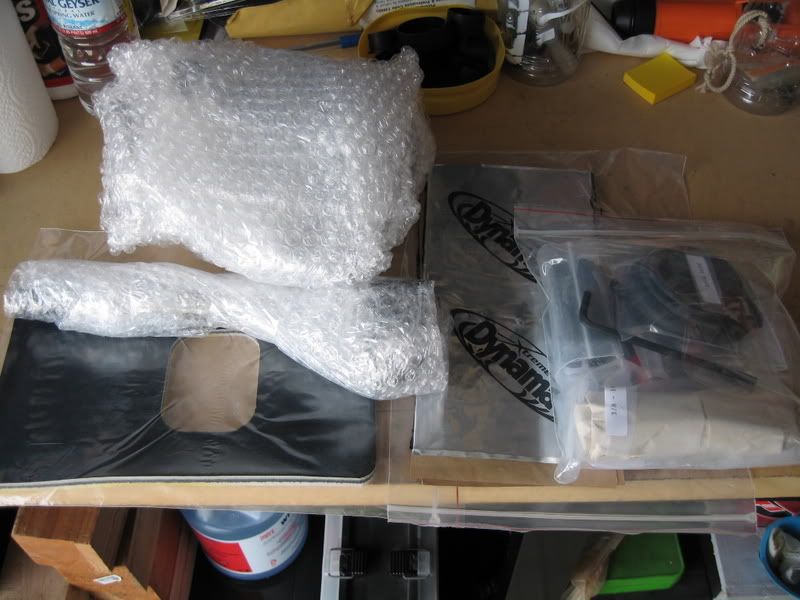
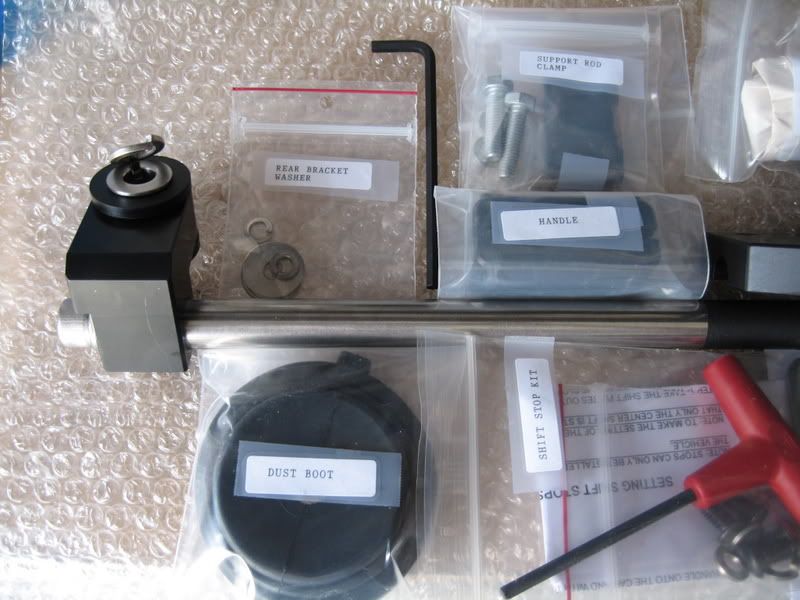
Received the shifter kit from MGW. Well packaged and all parts protected for safe shipping. Each component of the kit is well labeled for easy identification.
Package contents:
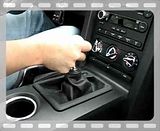
1. Shift **** removal & leather boot.
Pull down on the leather boot where it meets the shifter ****. It�s on fairly tight, but once you get it to peel away, the rest comes off easily.
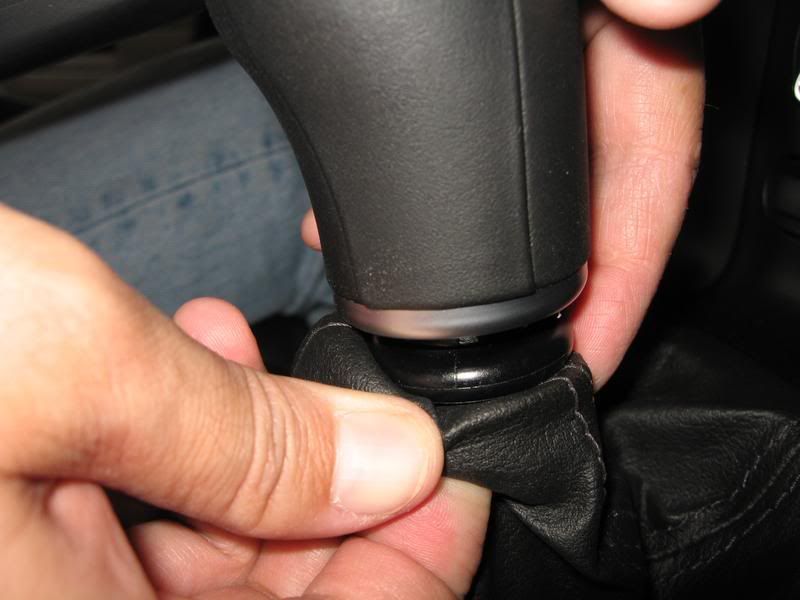
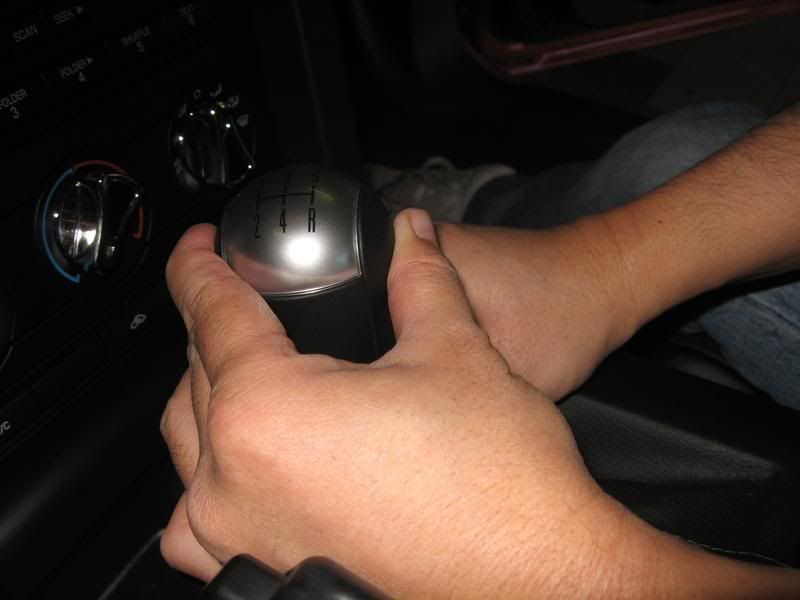
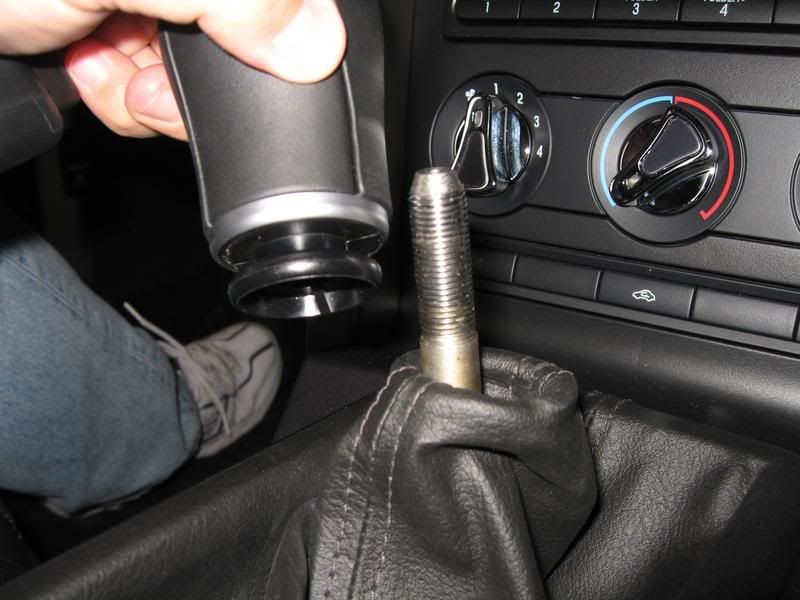
Once the **** is off, the leather boot simply unsnaps away from the center console with minimal effort.
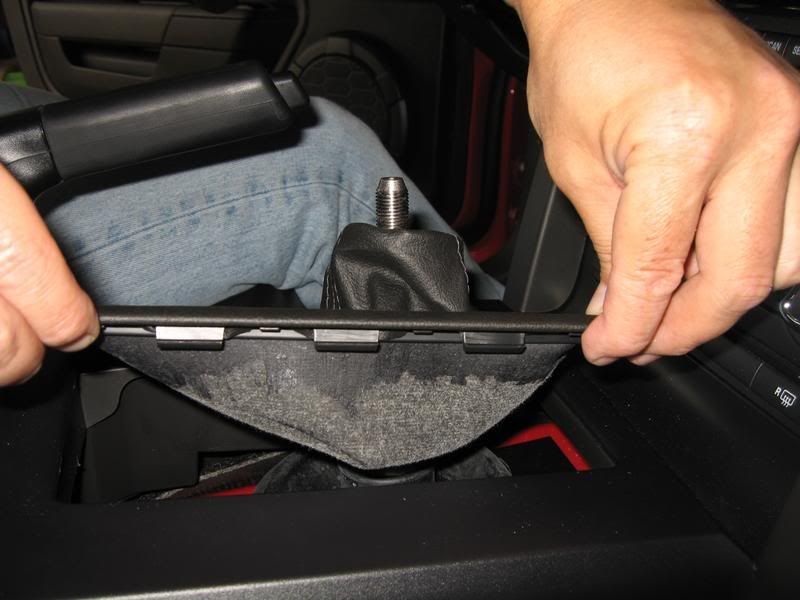
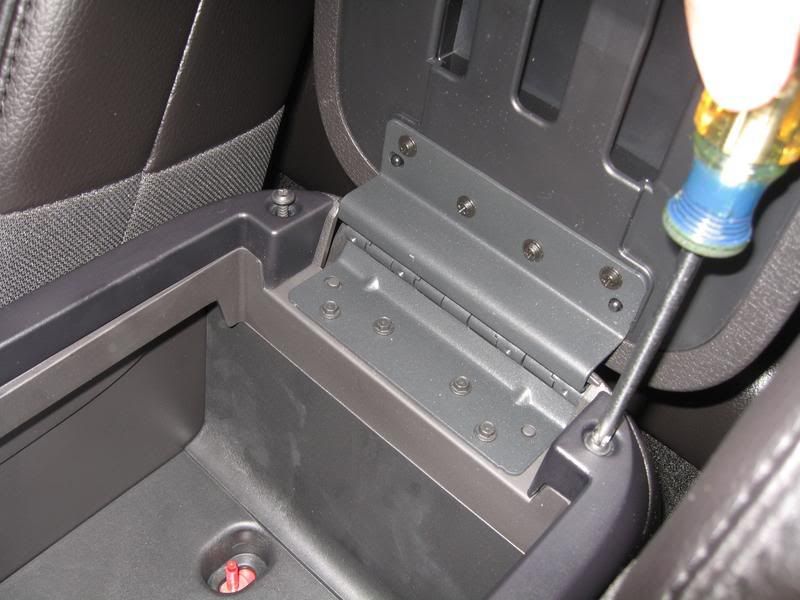
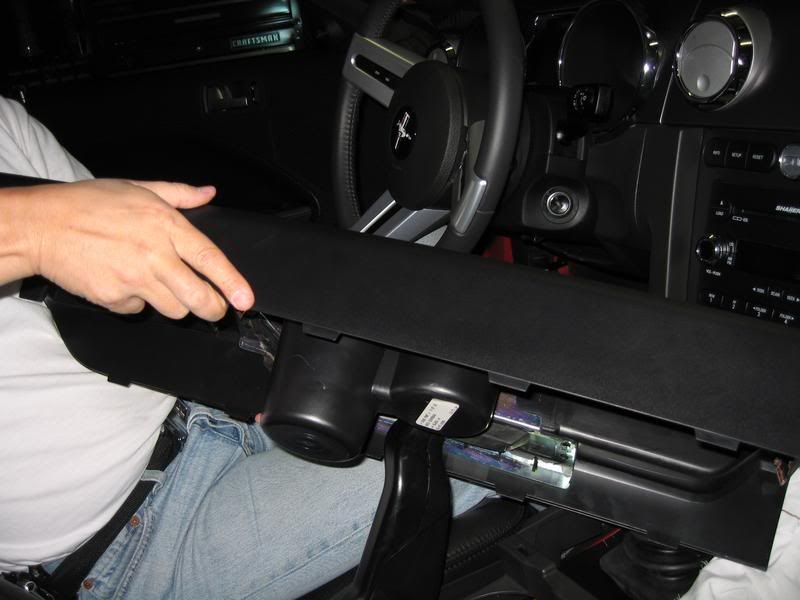
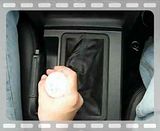
2. Remove center console.
Open the center armrest to access the (2) Phillip screws.
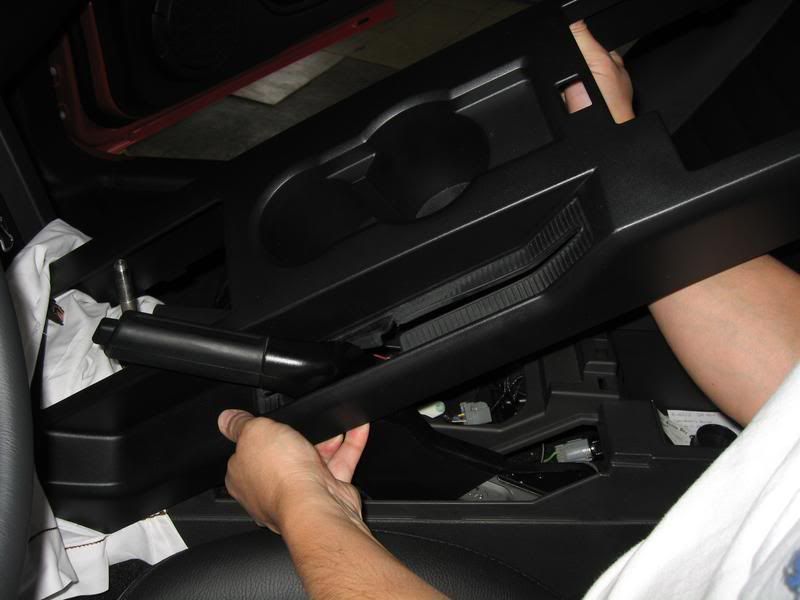
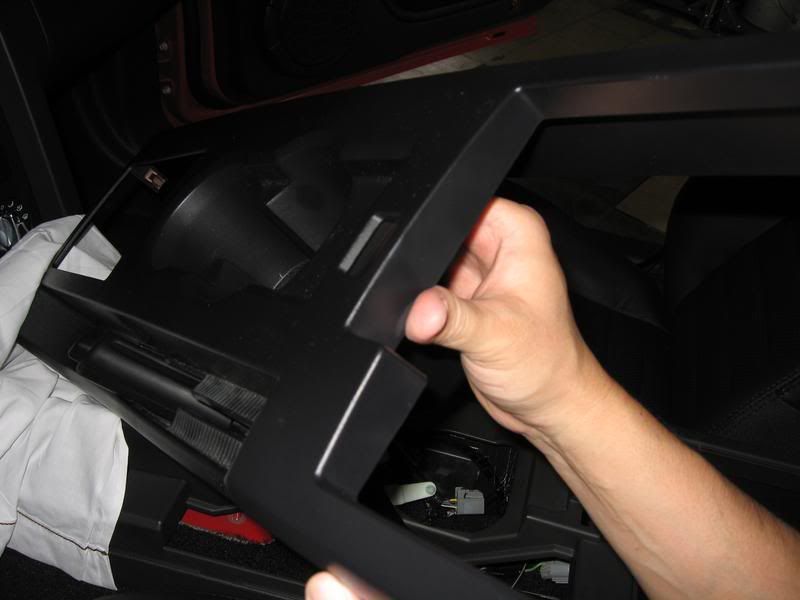
Carefully lift up on the rear section of the console to release the push-in clips near the shifter opening.
Once free, angle the console around the e-brake handle (must be in the UP position). Use caution to avoid scratching any of the cosmetic plastic trim pieces near the center dash.
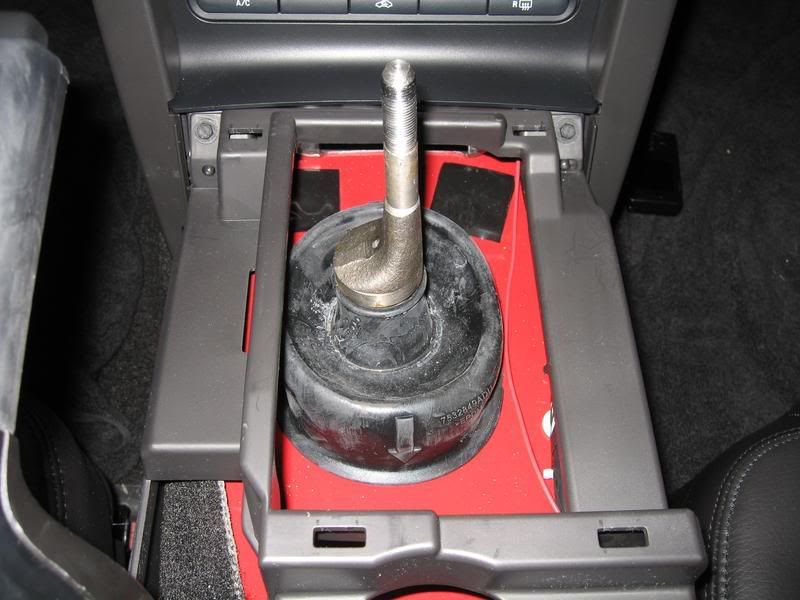
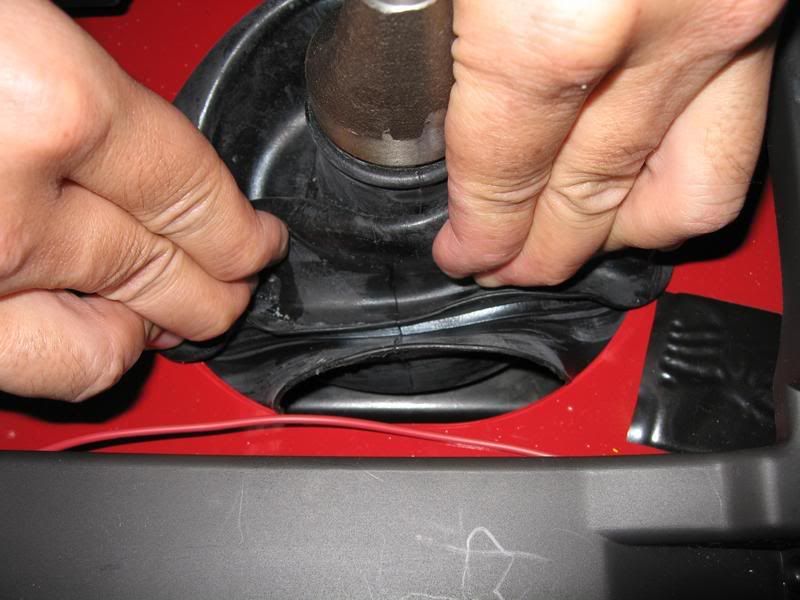
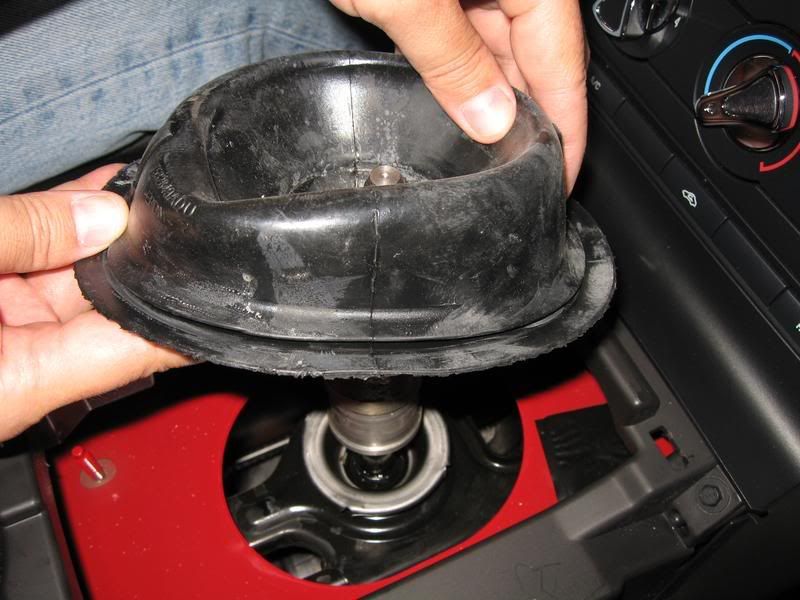
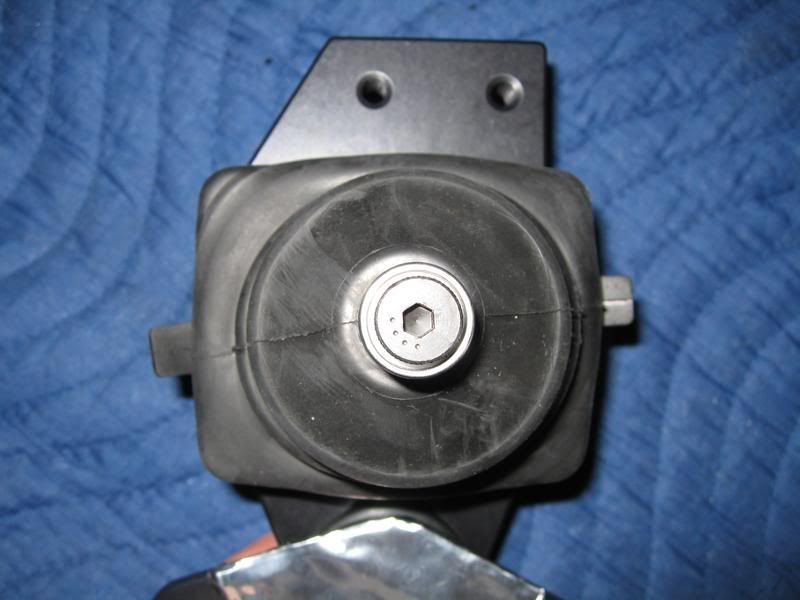
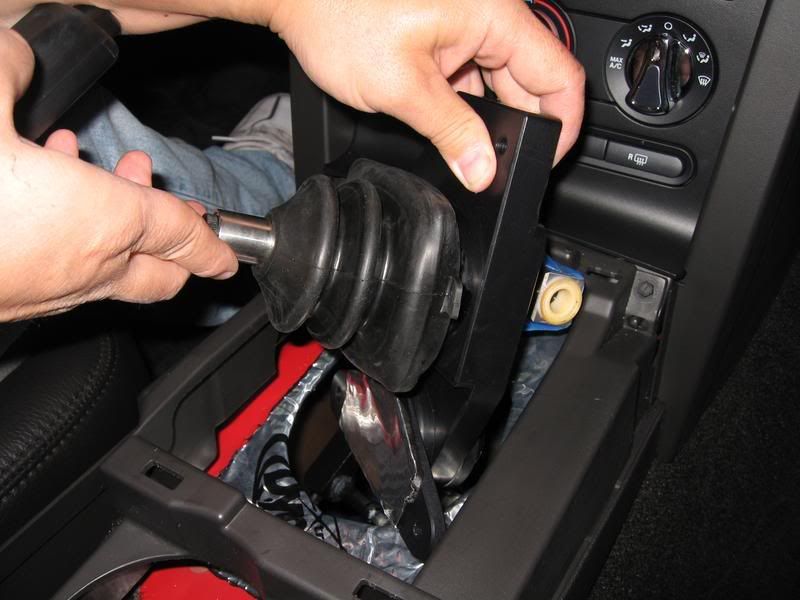
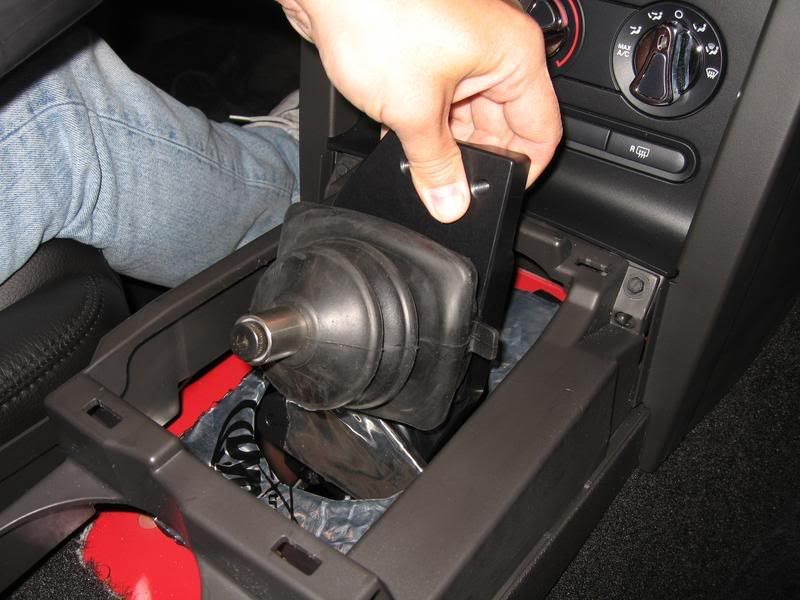
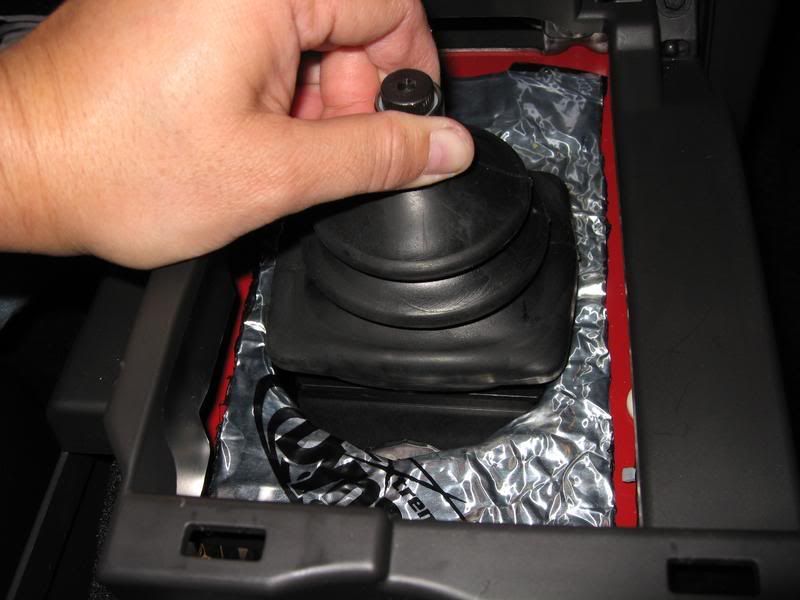
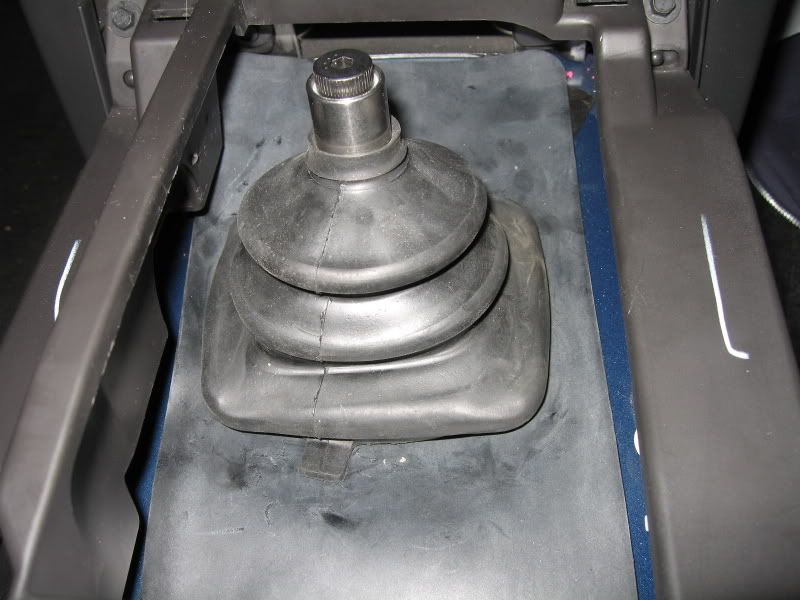
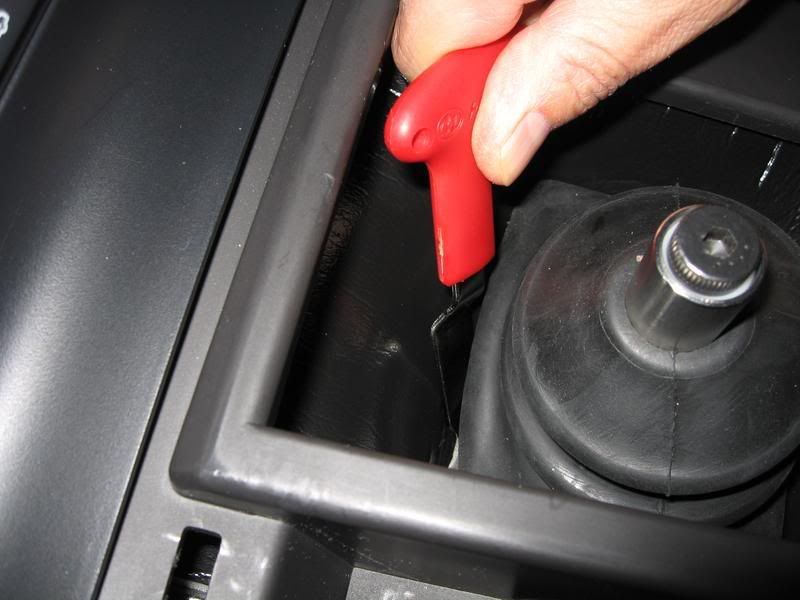
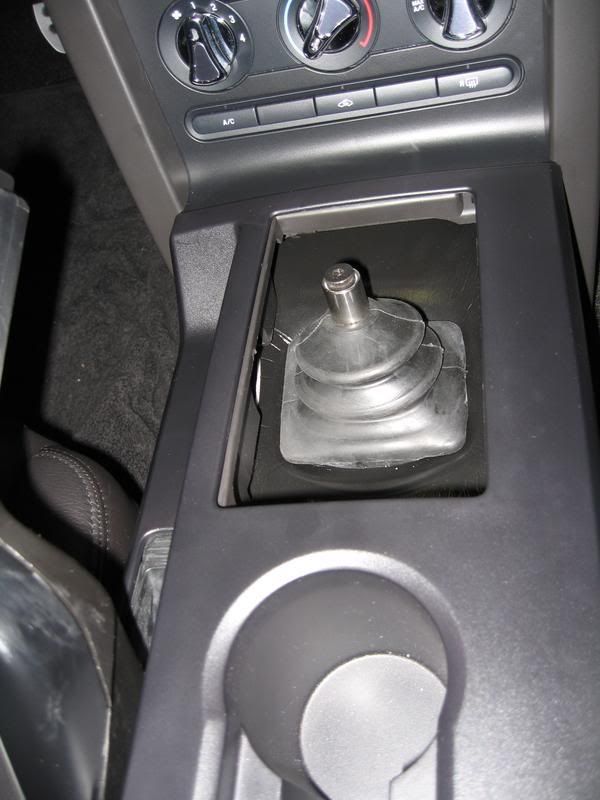
3. Remove dust boot.
Simply peel away at the edges of the rubber dust boot until it�s free from the shifter assembly.
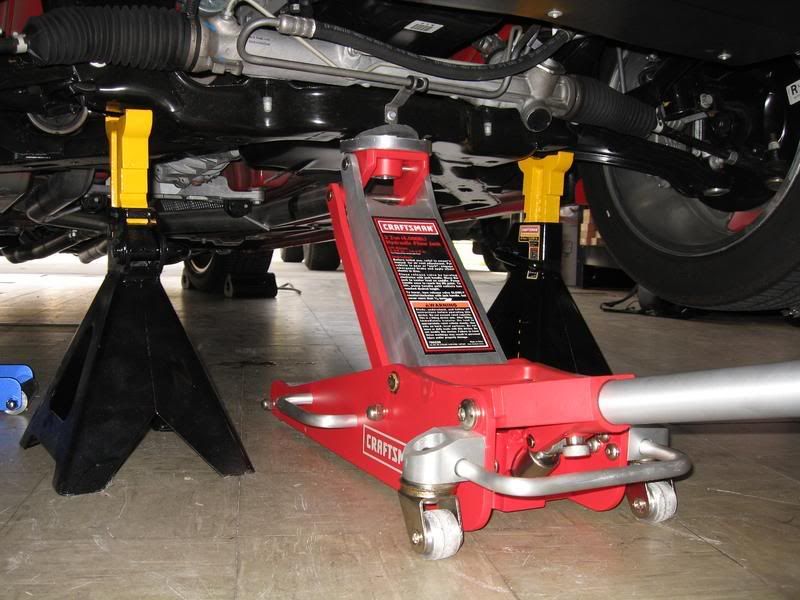
4. Jack up car.
Use your preferred method to achieve this. If using a hydraulic floor jack, ALWAYS, ALWAYS use jack stands for your safety.
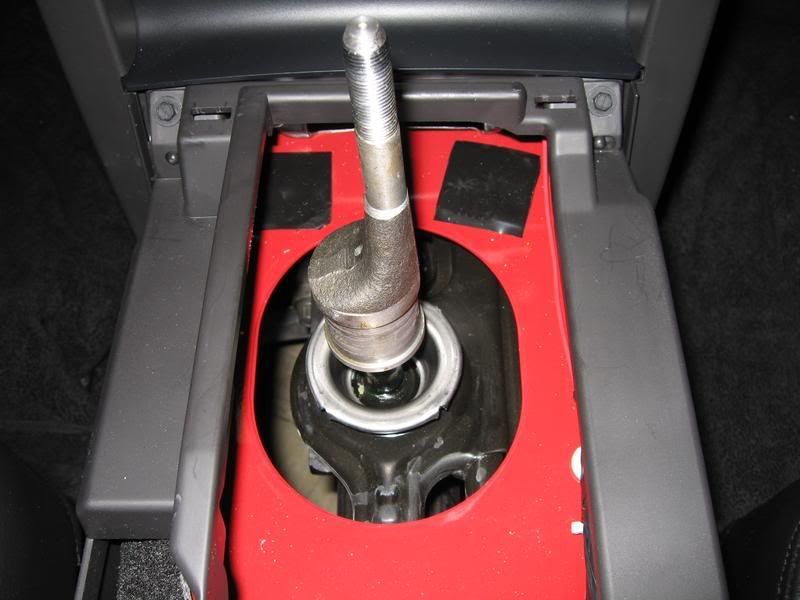
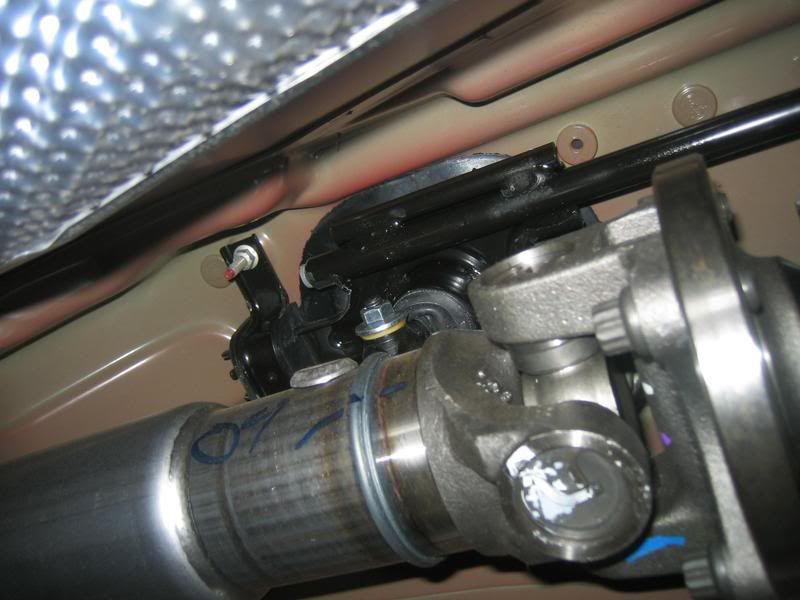
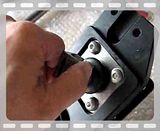
5. Remove 13mm (This and all subsequent mm sizes will be the socket/wrench size) lock nut from trans link arm to shifter linkage. Save nut.
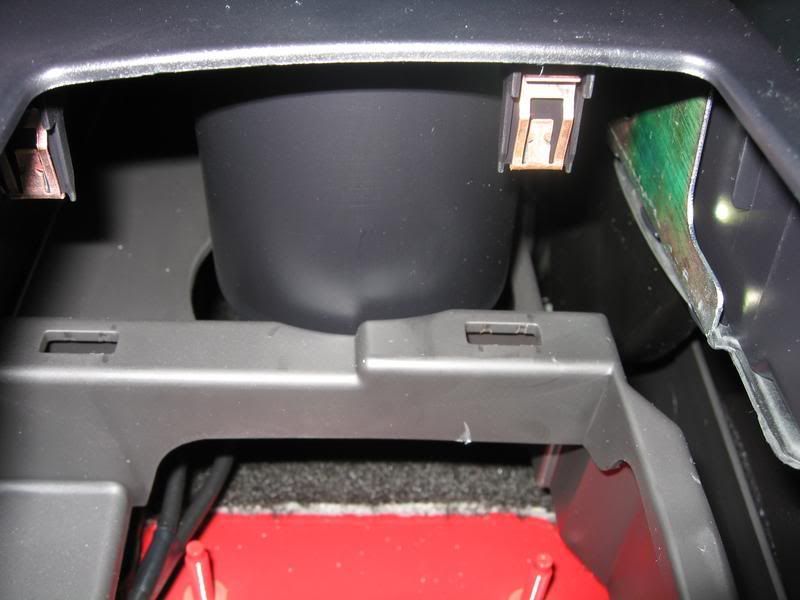
6. Remove (2) 10mm nuts from rear threaded studs (use deep socket).
7. Pull down on shifter to clear threaded studs (2 metal clips may fall).
In my case, only 1 metal retaining clip was installed on the Drivers side from the factory.
Pulling the shifter down can be a little stubborn because of this clip, so be firm at freeing it away from the studs.
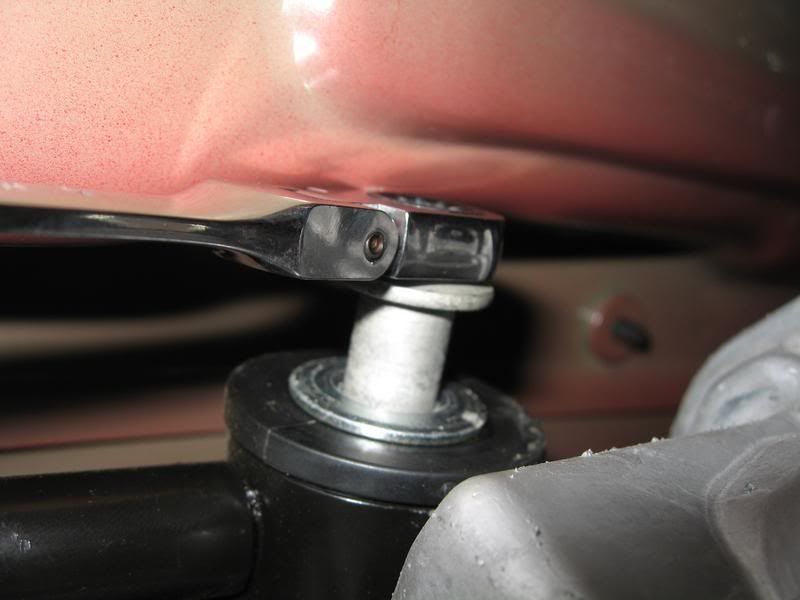
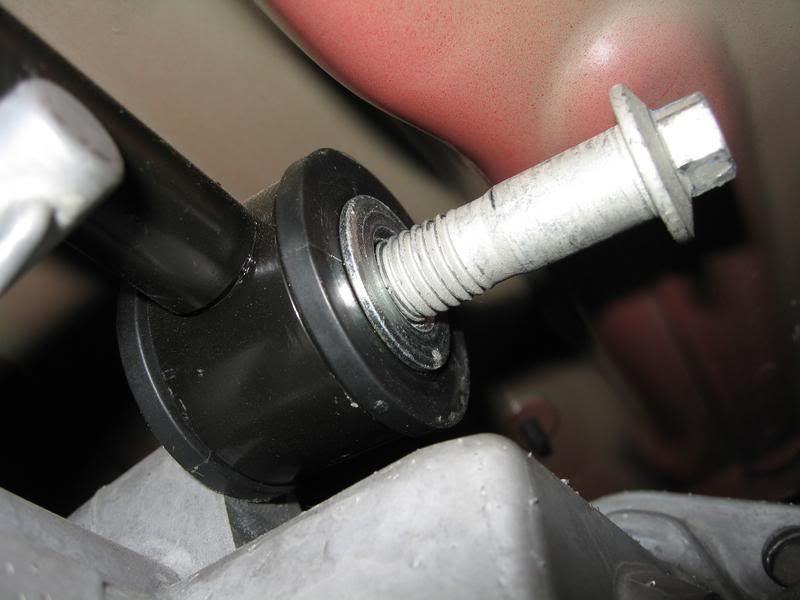
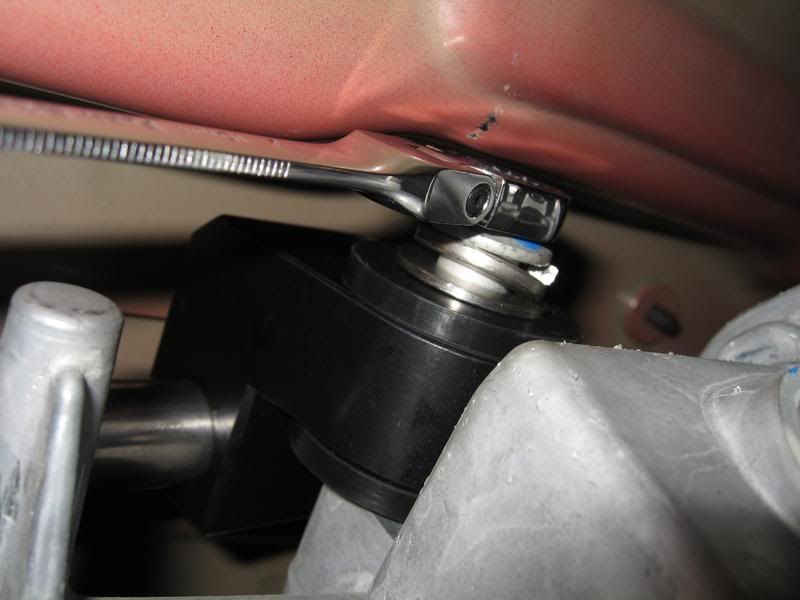
8. Remove 10mm bolt from forward part of trans link arm to trans. Save bolt.
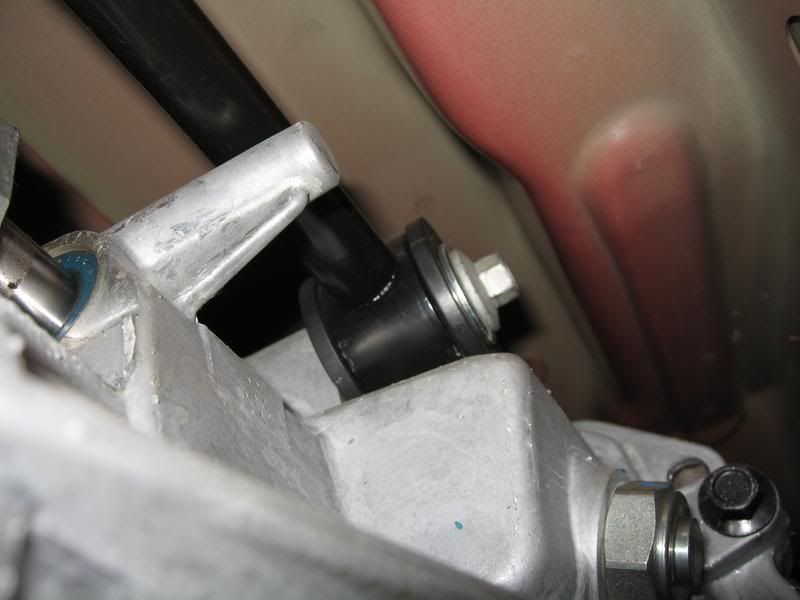
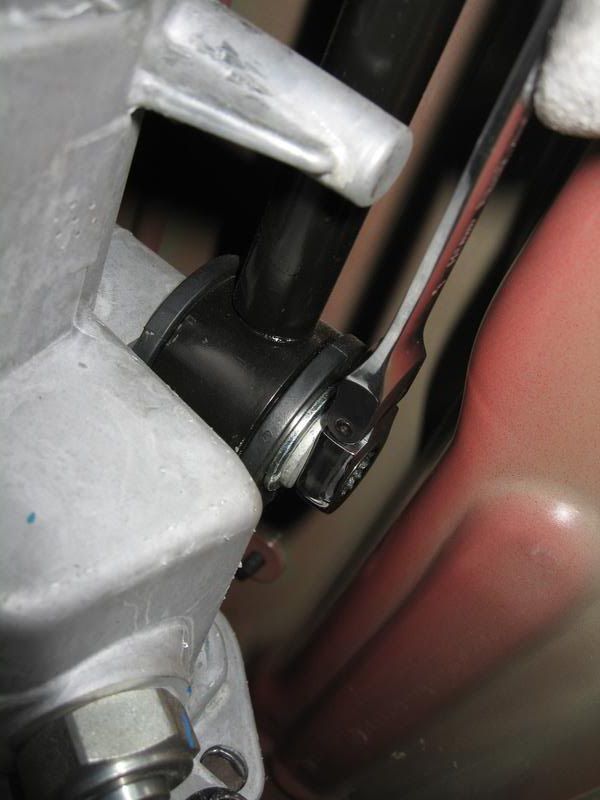
One small issue I encountered with the type of ratcheting wrench I used was that the head of the wrench hit the tunnel as I was unscrewing it. Being non-reversible (unless you flip it), I had no choice but to muscle it out. It wasn�t a big deal, but just making note of it.
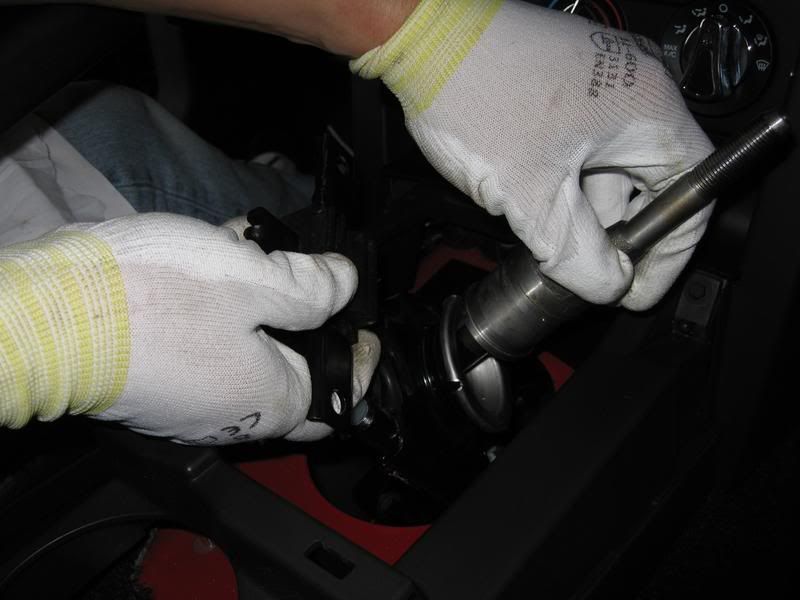
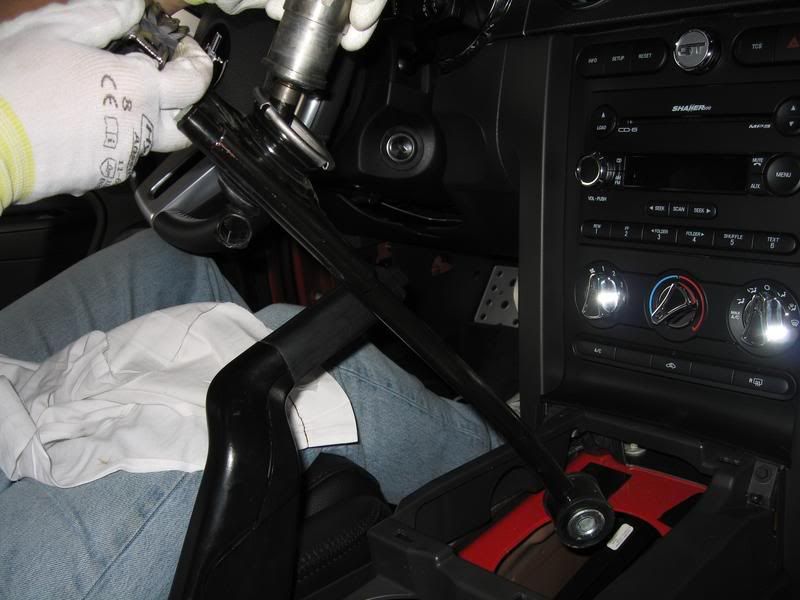
9. Remove shifter from inside of car.
Note: MGW�s instructions has you remove the rear bracket of the shifter to facilitate to removal of the shifter from inside the car. I left it on and was still able to free it from the car using a little finesse.
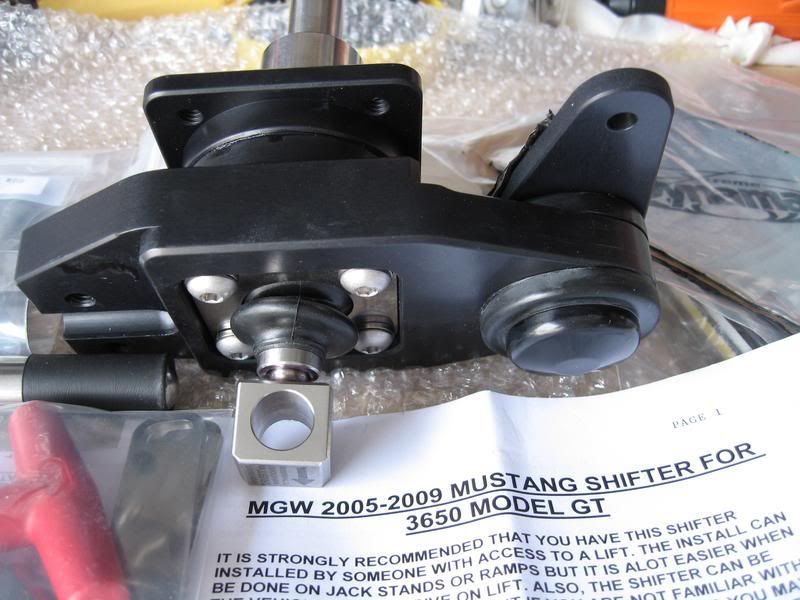
Side by side comparison.

10. SKIP (10/23/07)
11. SKIP (10/23/07)
MGW includes new blue bushings in the shifter block.
(Continued on Post 2)
PLEASE SEE POST 40 FOR KEY CHANGES REGARDING THE INSTALLATION OF THE MGW SHIFTER.
INSTALLATION DIRECTIONS BELOW NOW REFLECT CHANGES OUTLINED IN POST 40.
EDIT: 03-10-08
SEE POST 61 FOR SPECIAL INSTRUCTIONS FOR THOSE WITH THE AMBIENT LIGHTING OPTION.
ALSO, NOTE REVISED SHIFTER HANDLE BLOCK AND SOPPRT ROD CLAMP.
Received the shifter kit from MGW. Well packaged and all parts protected for safe shipping. Each component of the kit is well labeled for easy identification.
Package contents:
Install Procedure
1. Shift **** removal & leather boot.
Pull down on the leather boot where it meets the shifter ****. It�s on fairly tight, but once you get it to peel away, the rest comes off easily.
Once the **** is off, the leather boot simply unsnaps away from the center console with minimal effort.
2. Remove center console.
Open the center armrest to access the (2) Phillip screws.
Carefully lift up on the rear section of the console to release the push-in clips near the shifter opening.
Once free, angle the console around the e-brake handle (must be in the UP position). Use caution to avoid scratching any of the cosmetic plastic trim pieces near the center dash.
3. Remove dust boot.
Simply peel away at the edges of the rubber dust boot until it�s free from the shifter assembly.
4. Jack up car.
Use your preferred method to achieve this. If using a hydraulic floor jack, ALWAYS, ALWAYS use jack stands for your safety.
5. Remove 13mm (This and all subsequent mm sizes will be the socket/wrench size) lock nut from trans link arm to shifter linkage. Save nut.
6. Remove (2) 10mm nuts from rear threaded studs (use deep socket).
7. Pull down on shifter to clear threaded studs (2 metal clips may fall).
In my case, only 1 metal retaining clip was installed on the Drivers side from the factory.
Pulling the shifter down can be a little stubborn because of this clip, so be firm at freeing it away from the studs.
8. Remove 10mm bolt from forward part of trans link arm to trans. Save bolt.
One small issue I encountered with the type of ratcheting wrench I used was that the head of the wrench hit the tunnel as I was unscrewing it. Being non-reversible (unless you flip it), I had no choice but to muscle it out. It wasn�t a big deal, but just making note of it.
9. Remove shifter from inside of car.
Note: MGW�s instructions has you remove the rear bracket of the shifter to facilitate to removal of the shifter from inside the car. I left it on and was still able to free it from the car using a little finesse.
Side by side comparison.
10. SKIP (10/23/07)
11. SKIP (10/23/07)
MGW includes new blue bushings in the shifter block.
(Continued on Post 2)
Last edited by TacoBill; Mar 10, 2008 at 09:13 AM.
(Continued from Post 1)
12. SKIP (10/23/07)
13. SKIP (10/23/07)
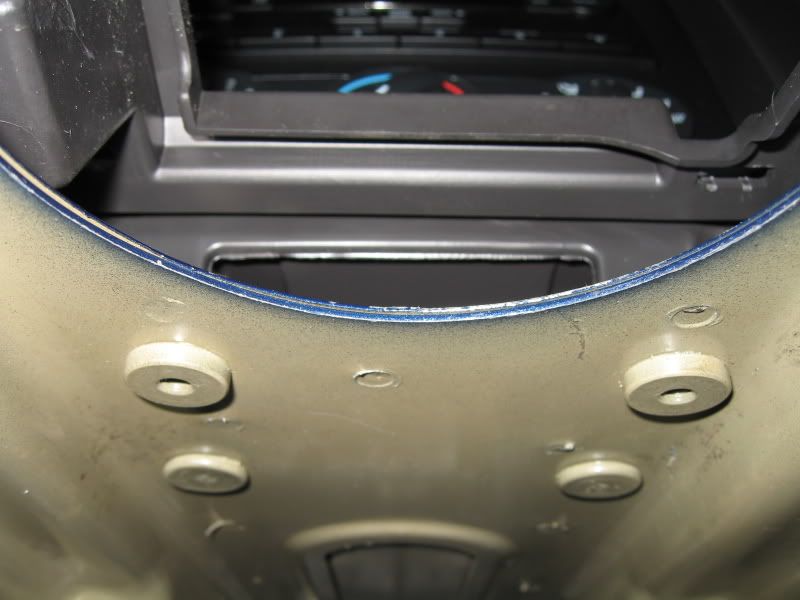
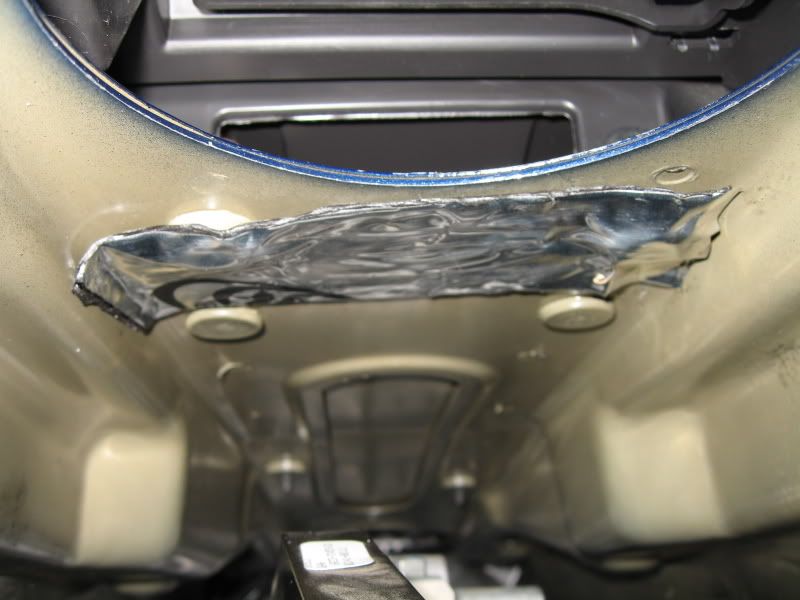
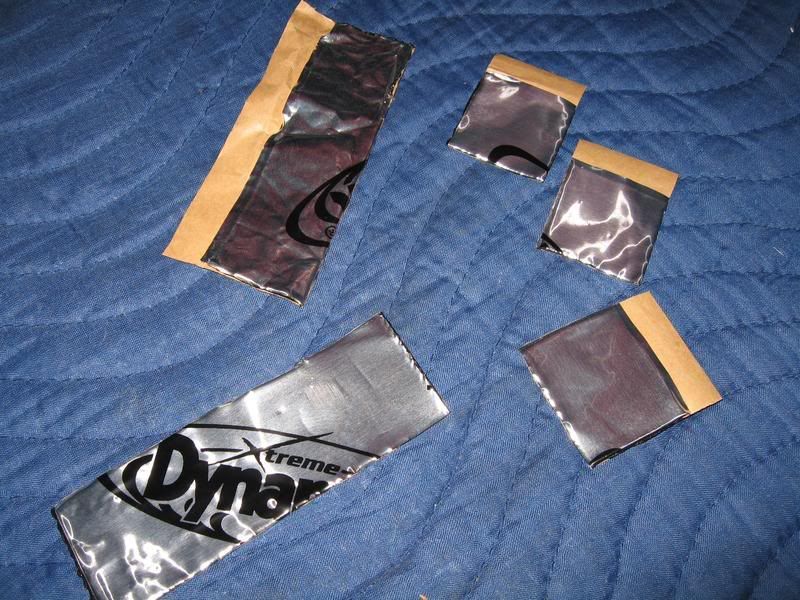
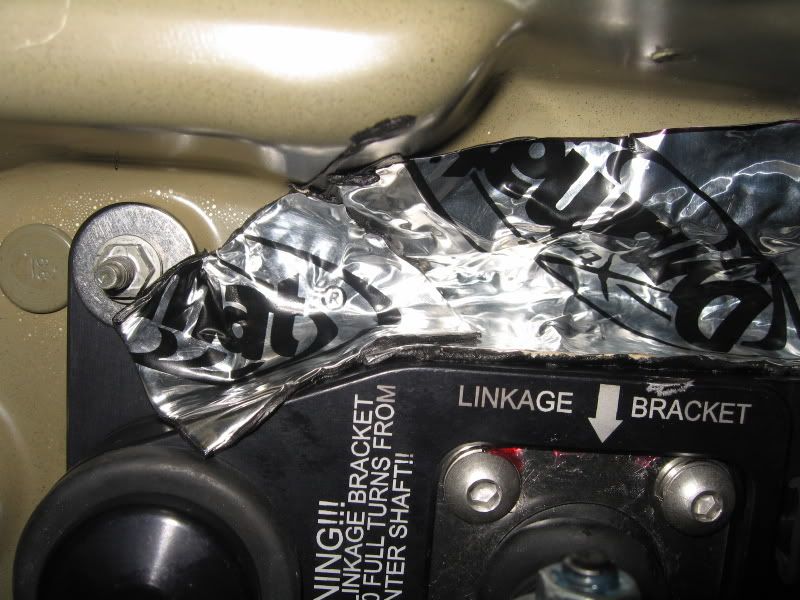
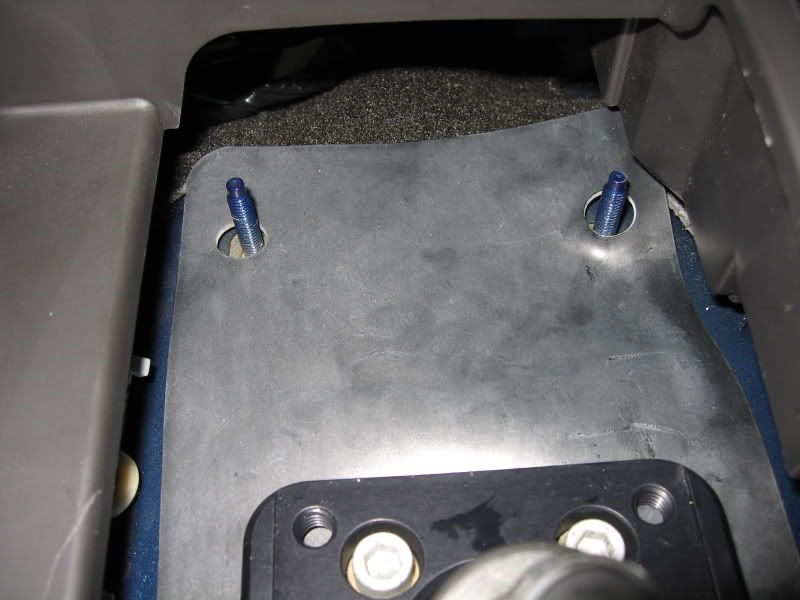
13A. Cut a rectangular piece off the Dynomat sheet to sufficiently cover both holes. Position this piece just forward of the shifter opening.
(Location of the 2 holes to be Dynomatted)
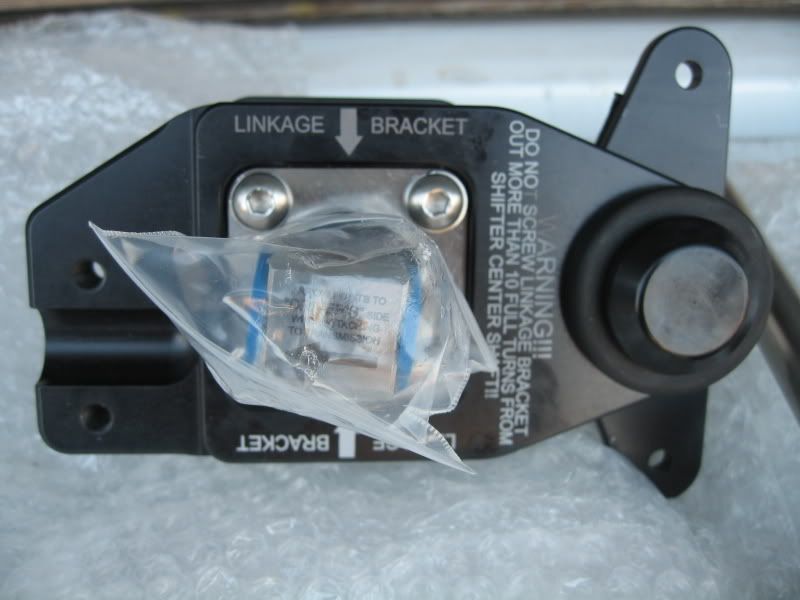
14. Set throw setting on MGW linkage block (0-10 turns max out)
MGW’s instructions will have you adjust the throw adjustment from under the car, but I found it easier to adjust it on the table. There’s moderate resistance screwing in/out the block, so there’s little chance of movement when positioning the shifter in place.
Just incase, I temporarily taped it down to prevent movement.
Turn calculation
When the linkage block is screwed all the way in (bottomed out), throw reduction (from stock) is approximately 15%. When screwed out 10 turns (max allowable), reduction is 50%.
At 5 turns out, reduction will be 33%.
Formula
((35% / 12) * X) + 15% = Y
X= number of turns out
Y= % of throw reduction of X
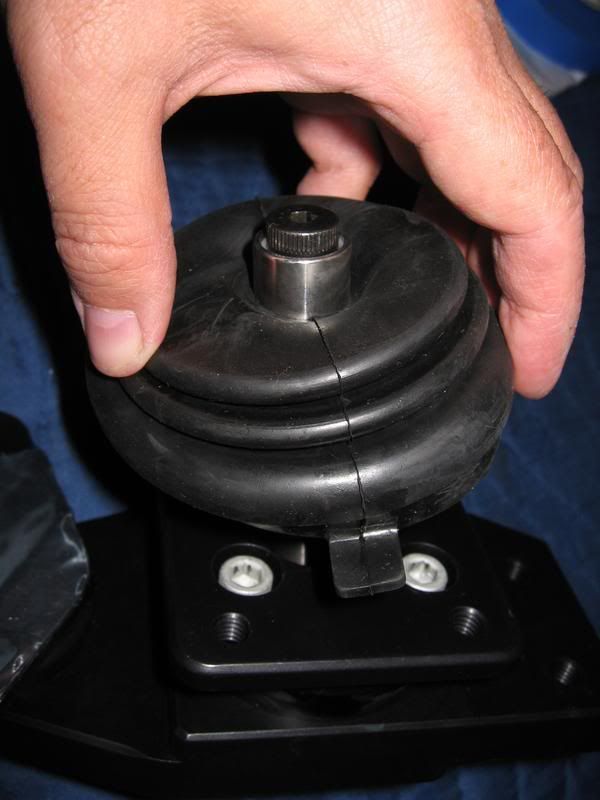
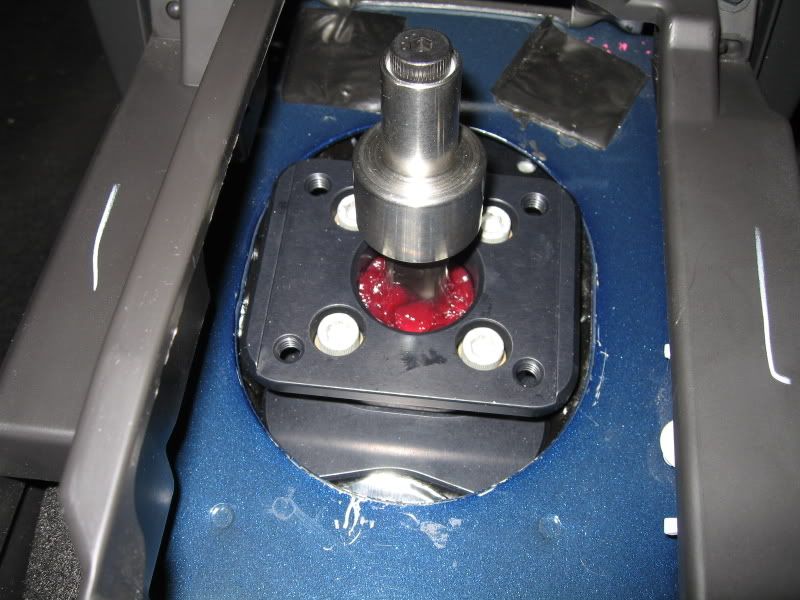
14A. Install MGW supplied upper dust boot around shifter center shaft and square base prior to dropping it down into the tunnel.
This step is a deviation from the MGW instructions which has you install the upper dust boot after the shifter is locked down in the car.
Reason: To make installation of the boot easier from better access outside the car.
NOTE: If you're installing the shift stop kit, do not install dust boot in this step; you'll install it in step 24.
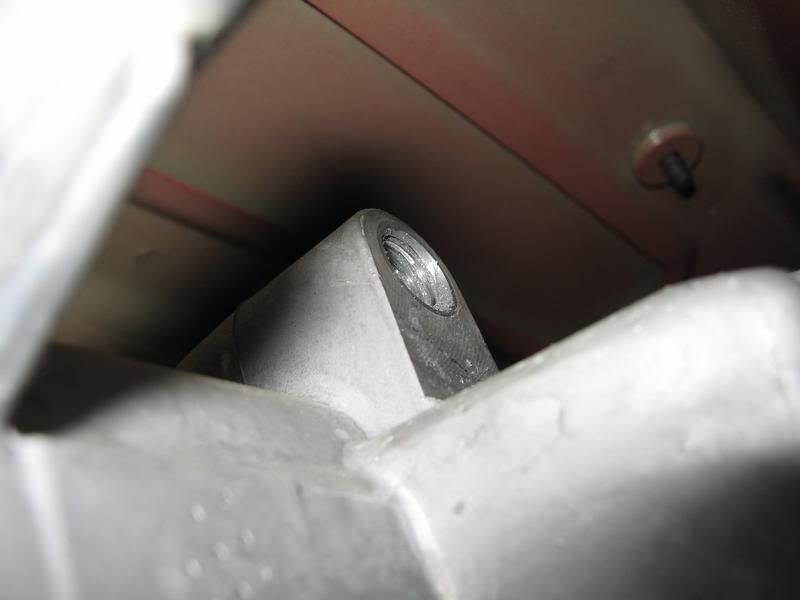
15. Insert MGW shifter down from top, triangular rear section FIRST!
NOTE: Disregard Dynomat shown.
NOTE: No Dynomat required on the INSIDE of the car. Replaced by a thin rubber insulation pad that rests on top of the trans tunnel, then the thicker foam insulator pad on top of it.
16. Re-attach (2) 10mm nuts to shifter and rear studs (from step 6) – SNUG ONLY!
Do not forget to use the supplied large flat and lock washers under the nuts.
17. Dynomat bottom of shifter opening; cut and trim to fit.
Cut pieces in such a manner where it makes a 90deg fold ('L' shape flashing method) to the shifter assembly base to the body, completely sealing off any heat/noise from entering the cabin.
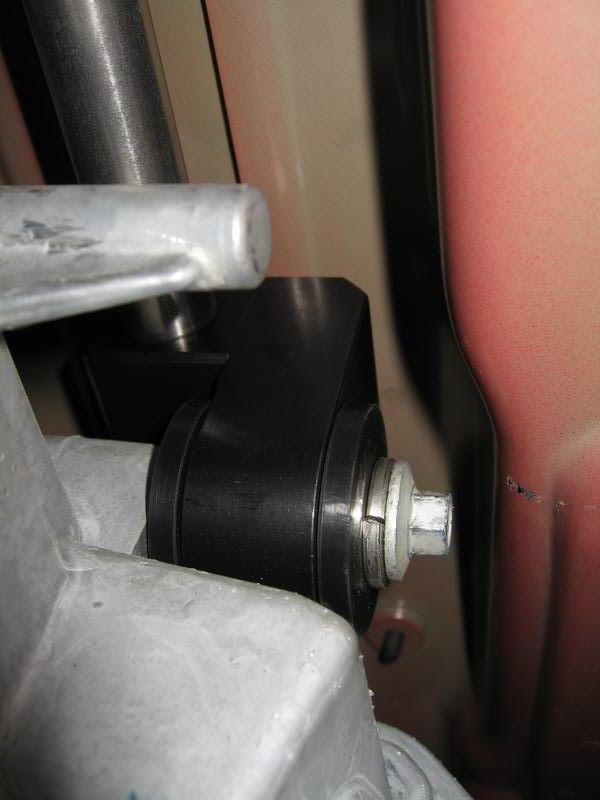
18. Connect the forward part of trans link arm support to trans using the 10mm bolt (removed from step 8) – USE SUPPLIED LOCKWASHER UNDER HEAD OF BOLT.
Trans link arm support goes on PASSENGER SIDE.
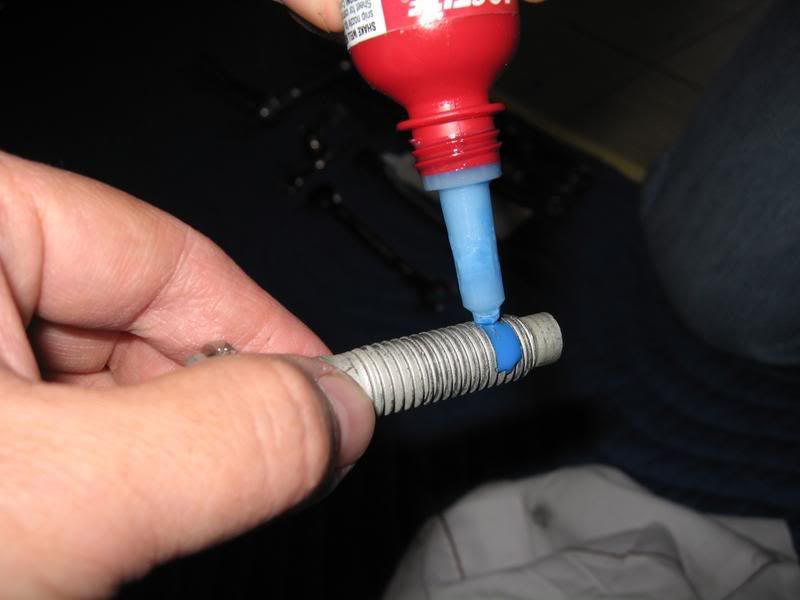
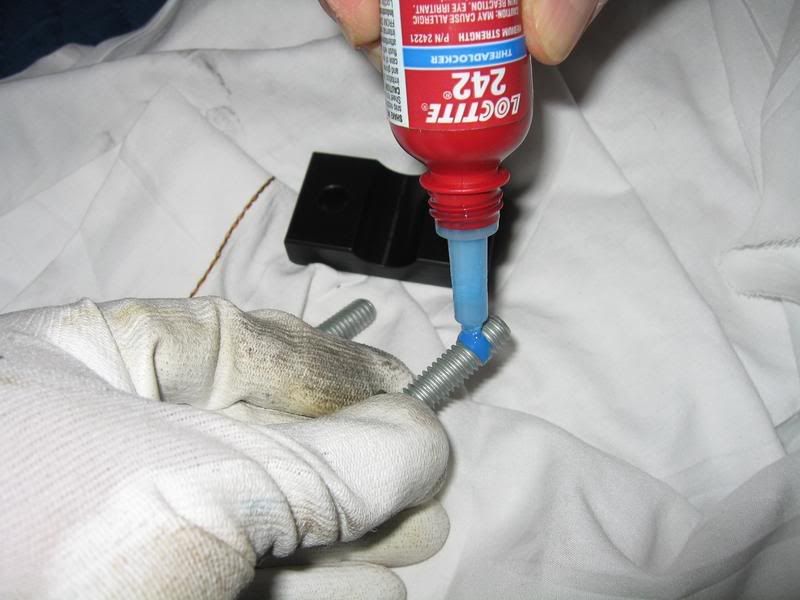
As stipulated in the MGW instructions, start this bolt by hand for at least 6-8 threads to ensure no cross-threading (blue Loctite optional). Tighten all the way.
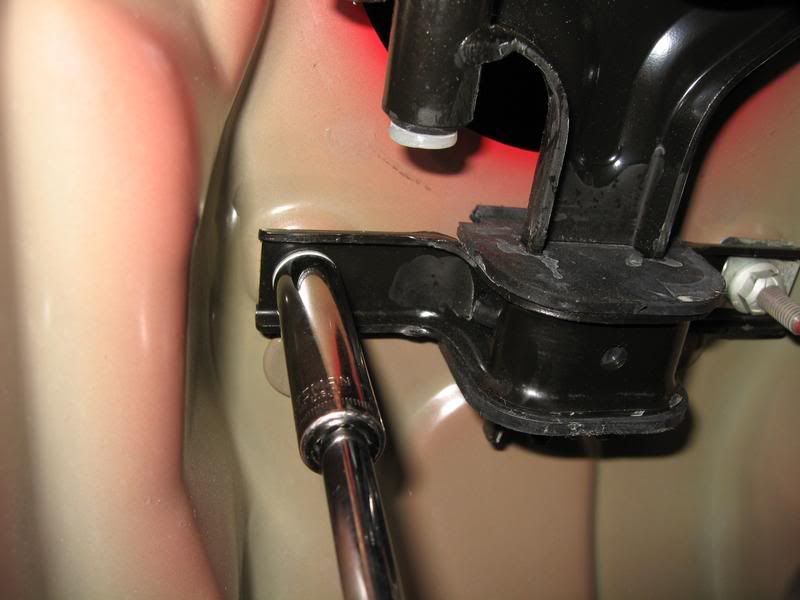
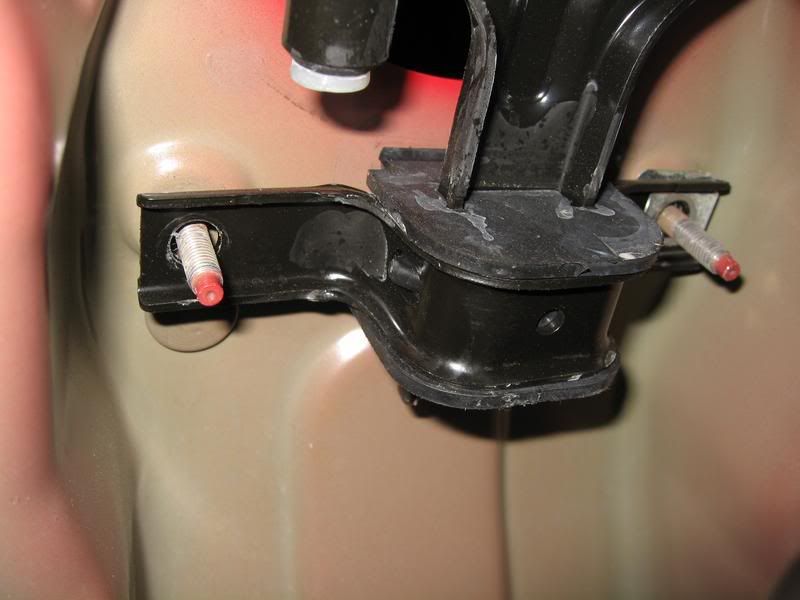
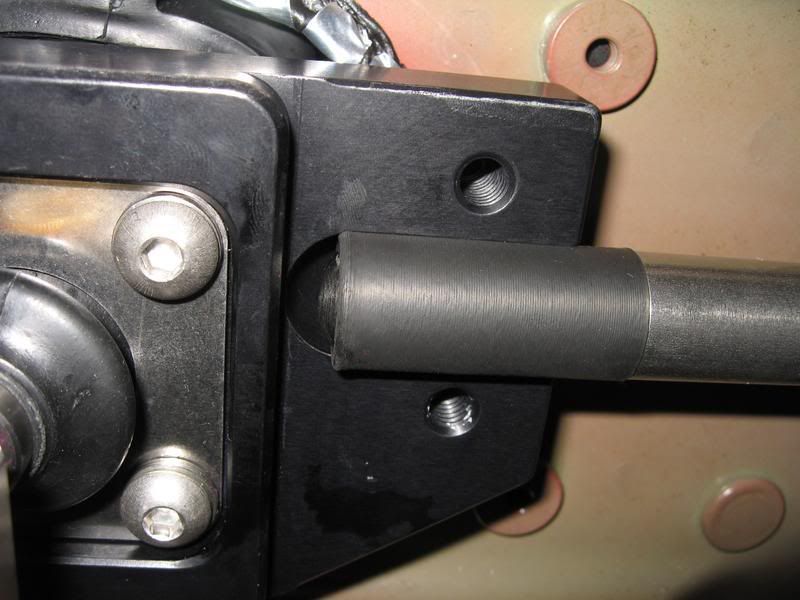
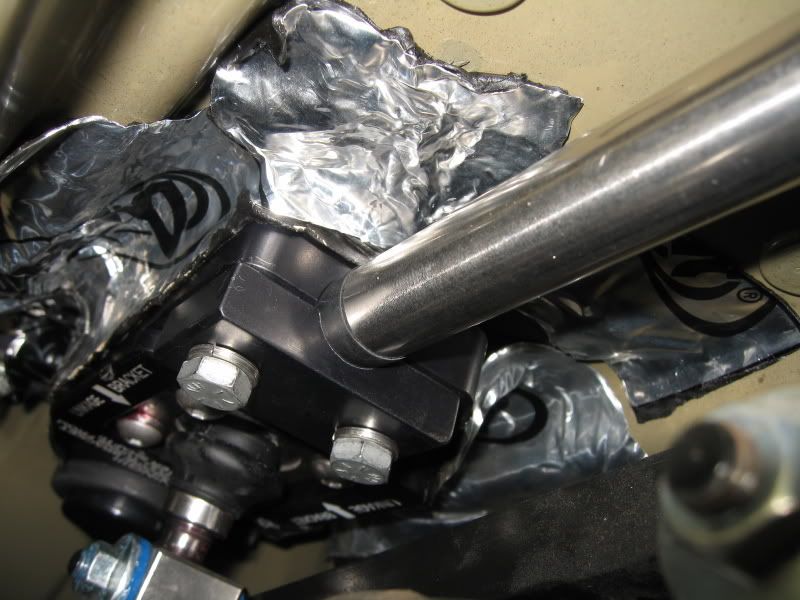
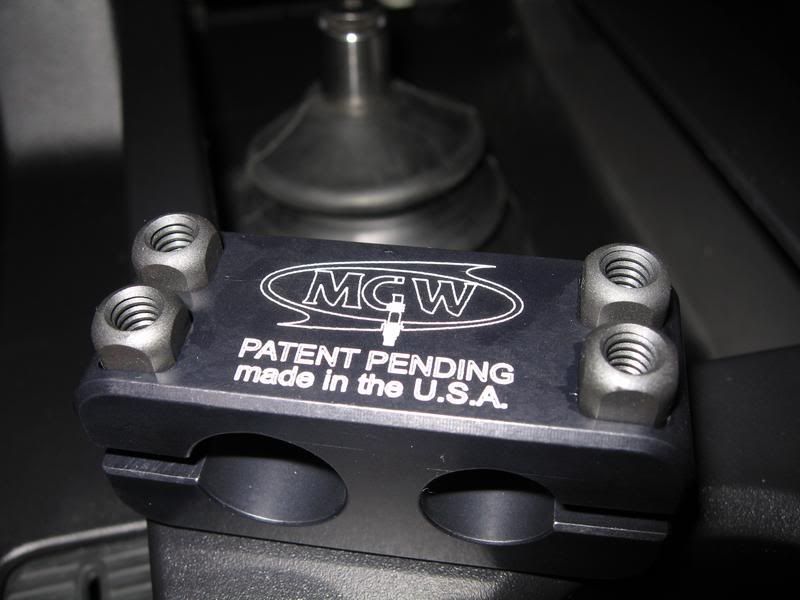
19. Using the supplied clamp, connect the link arm (rod) to shifter main body support.
Main body support has 1/2 round groove, may have to slightly rotate either assembly to align the rod into the groove (MUST ALIGN PERFECTLY).
Once aligned, use socket/wrench to evenly tighten down both 13mm bolts in clamp. (Blue Loctite optional)

20. Tighten the (2) 10mm nuts on the rear studs (from step 16).
(Continued on Post 3)
12. SKIP (10/23/07)
13. SKIP (10/23/07)
13A. Cut a rectangular piece off the Dynomat sheet to sufficiently cover both holes. Position this piece just forward of the shifter opening.
(Location of the 2 holes to be Dynomatted)
14. Set throw setting on MGW linkage block (0-10 turns max out)
MGW’s instructions will have you adjust the throw adjustment from under the car, but I found it easier to adjust it on the table. There’s moderate resistance screwing in/out the block, so there’s little chance of movement when positioning the shifter in place.
Just incase, I temporarily taped it down to prevent movement.
Turn calculation
When the linkage block is screwed all the way in (bottomed out), throw reduction (from stock) is approximately 15%. When screwed out 10 turns (max allowable), reduction is 50%.
At 5 turns out, reduction will be 33%.
Formula
((35% / 12) * X) + 15% = Y
X= number of turns out
Y= % of throw reduction of X
14A. Install MGW supplied upper dust boot around shifter center shaft and square base prior to dropping it down into the tunnel.
This step is a deviation from the MGW instructions which has you install the upper dust boot after the shifter is locked down in the car.
Reason: To make installation of the boot easier from better access outside the car.
NOTE: If you're installing the shift stop kit, do not install dust boot in this step; you'll install it in step 24.
15. Insert MGW shifter down from top, triangular rear section FIRST!
NOTE: Disregard Dynomat shown.
NOTE: No Dynomat required on the INSIDE of the car. Replaced by a thin rubber insulation pad that rests on top of the trans tunnel, then the thicker foam insulator pad on top of it.
16. Re-attach (2) 10mm nuts to shifter and rear studs (from step 6) – SNUG ONLY!
Do not forget to use the supplied large flat and lock washers under the nuts.
17. Dynomat bottom of shifter opening; cut and trim to fit.
Cut pieces in such a manner where it makes a 90deg fold ('L' shape flashing method) to the shifter assembly base to the body, completely sealing off any heat/noise from entering the cabin.
18. Connect the forward part of trans link arm support to trans using the 10mm bolt (removed from step 8) – USE SUPPLIED LOCKWASHER UNDER HEAD OF BOLT.
Trans link arm support goes on PASSENGER SIDE.
As stipulated in the MGW instructions, start this bolt by hand for at least 6-8 threads to ensure no cross-threading (blue Loctite optional). Tighten all the way.
19. Using the supplied clamp, connect the link arm (rod) to shifter main body support.
Main body support has 1/2 round groove, may have to slightly rotate either assembly to align the rod into the groove (MUST ALIGN PERFECTLY).
Once aligned, use socket/wrench to evenly tighten down both 13mm bolts in clamp. (Blue Loctite optional)
20. Tighten the (2) 10mm nuts on the rear studs (from step 16).
(Continued on Post 3)
(Continued from Post 2)
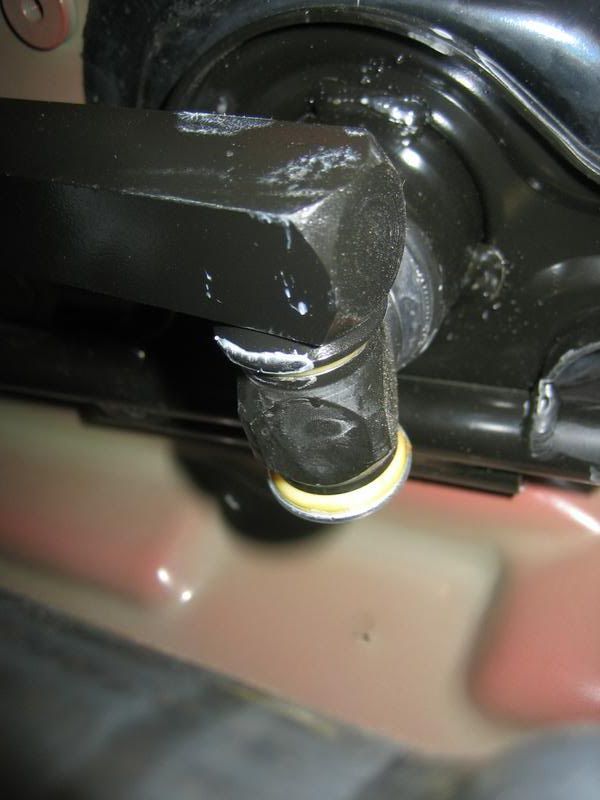
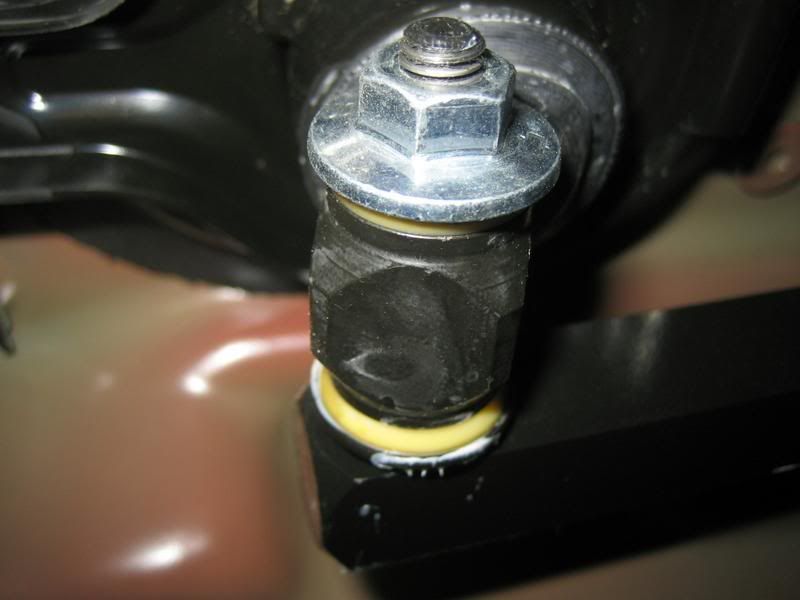
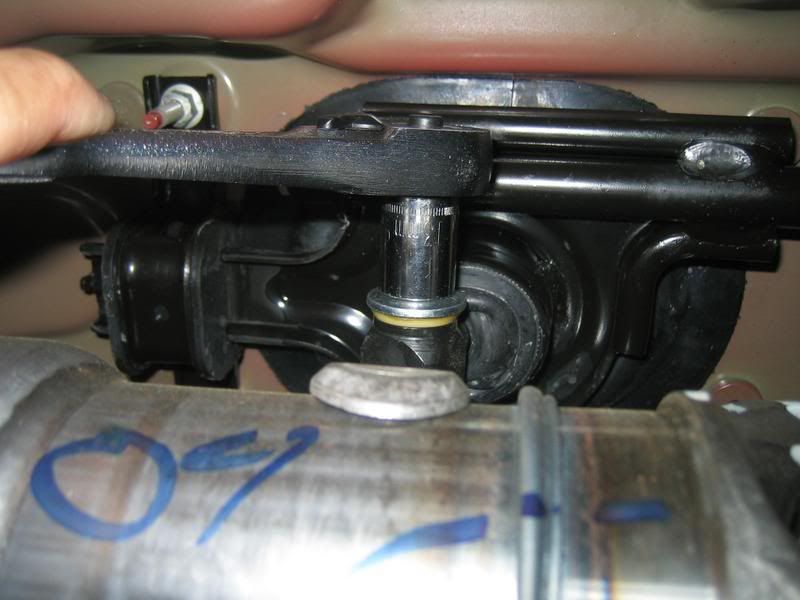
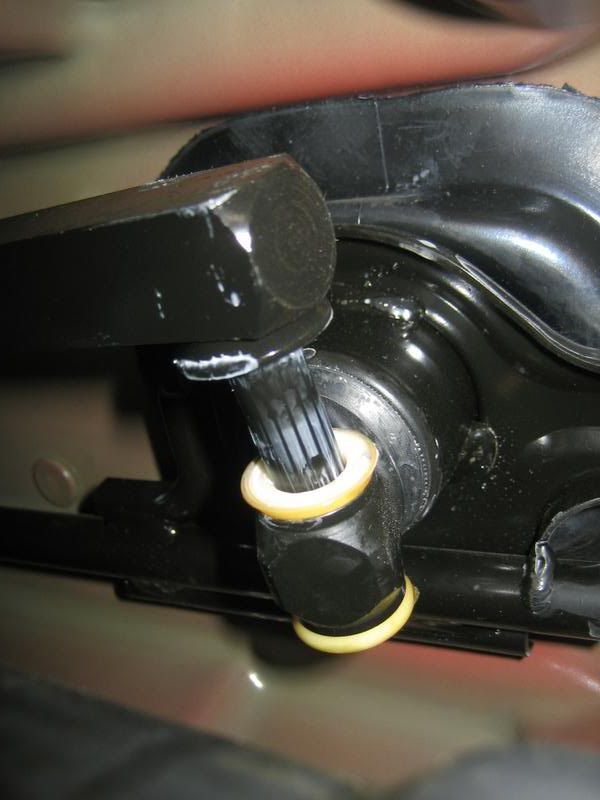
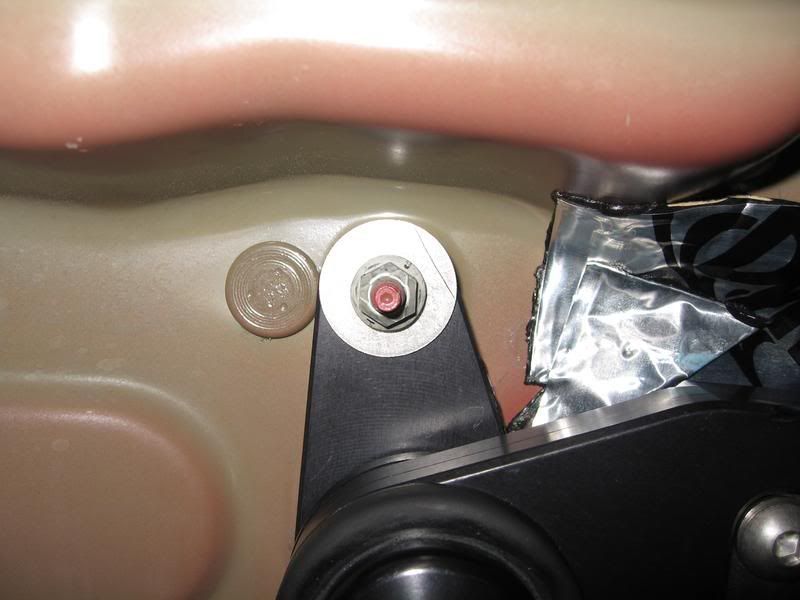
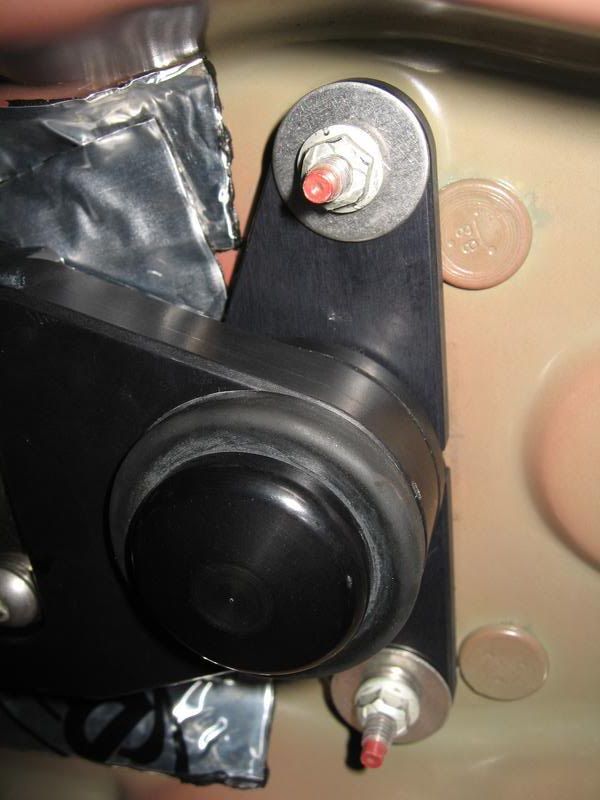
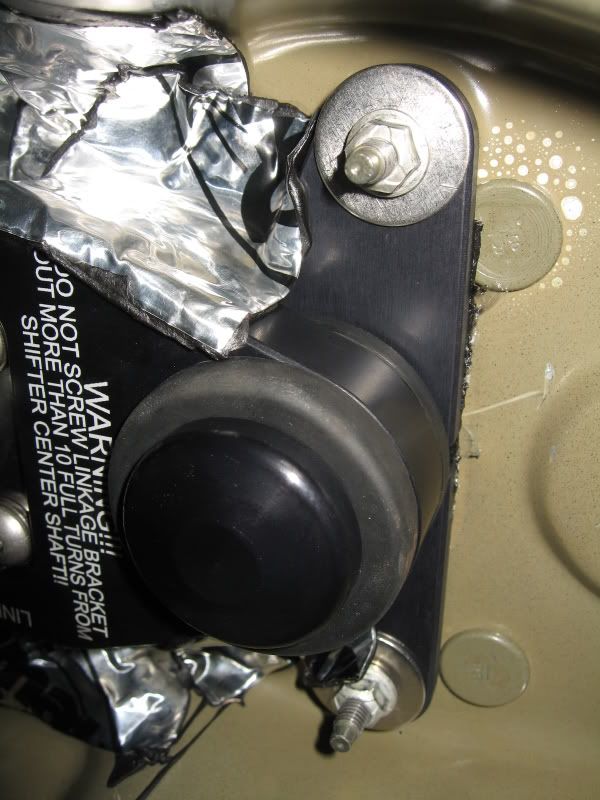
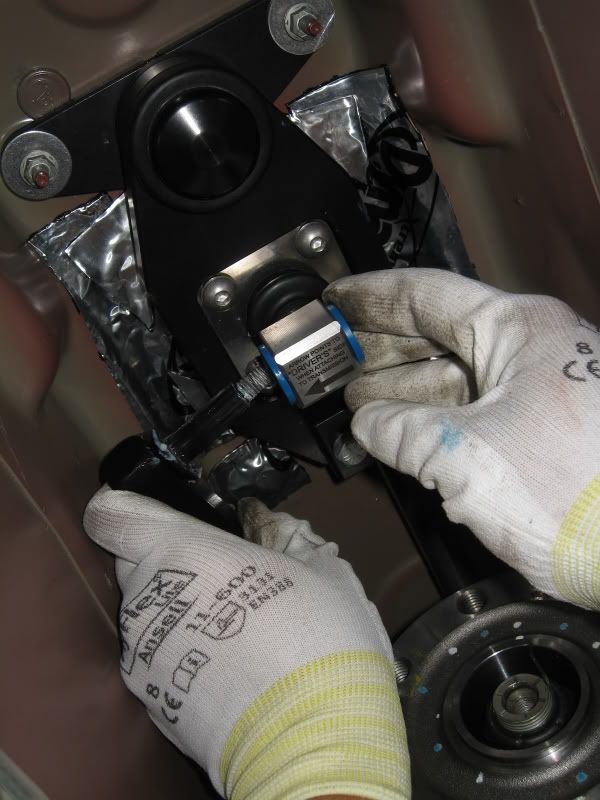
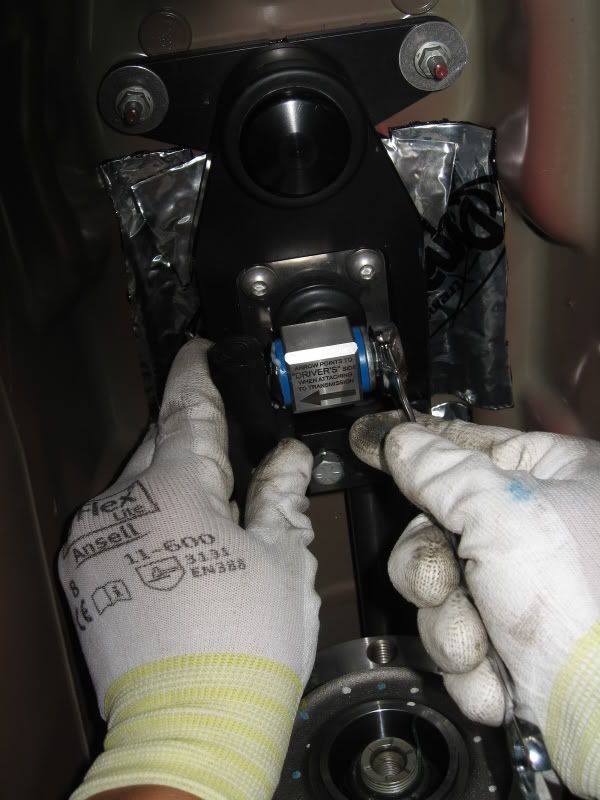
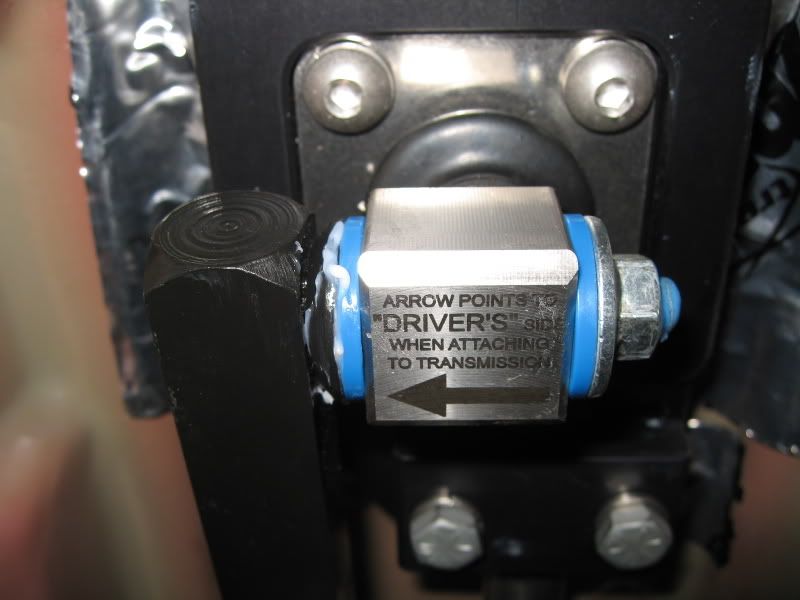
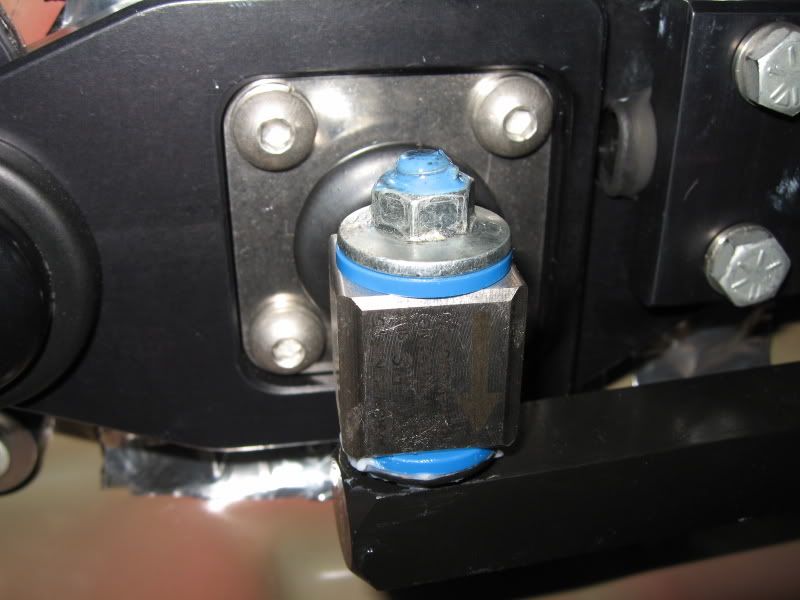
21. Remove temporary tape (on linkage block) and insert link arm stud through linkage block and reinstall the 13mm nut (from step 5).
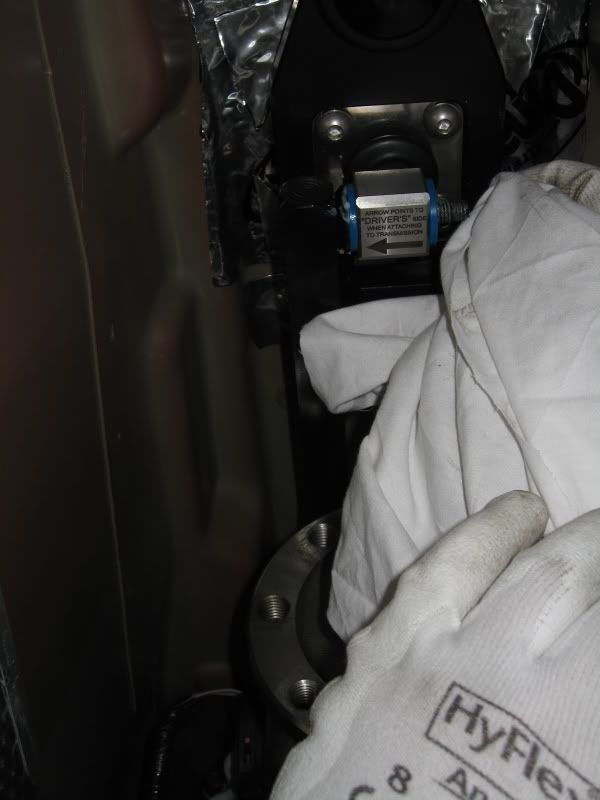
NOTE: Ensure large BLACK ARROW is pointing to the DRIVERS SIDE when attaching the trans link arm to the linkage block. If throw is being adjusted from underneath the car, it can be used as a reference on how many turns the linkage block is screwed out.
IMPORTANT note from MGW: The lock nut on the linkage should be locked down firmly. It is designed to actually seat against the rod just prior to locking down on the urethane bushings. You should get on them as if you were tightening down a bolt normally. Do not leave it loose.
In addition, DO NOT OVERTIGHTEN IT! The stud on the link arm may strip or break off if overtightened.
The nut also is a lock nut which is why Ford did not need a lock washer. Look at the end of the nut carefully and you will see 3 little prongs sticking inward into the threads. The blue loctite is definitlty a good added safety measure.
Wipe off any grease off the link arm stud threads after pushing it through the blue bushings.
22. SKIP (10/23/07)
23. Install shift stops at this point if desired (not recommended by MGW). See included directions on installation.
No picture.
24. SKIP (10/23/07)
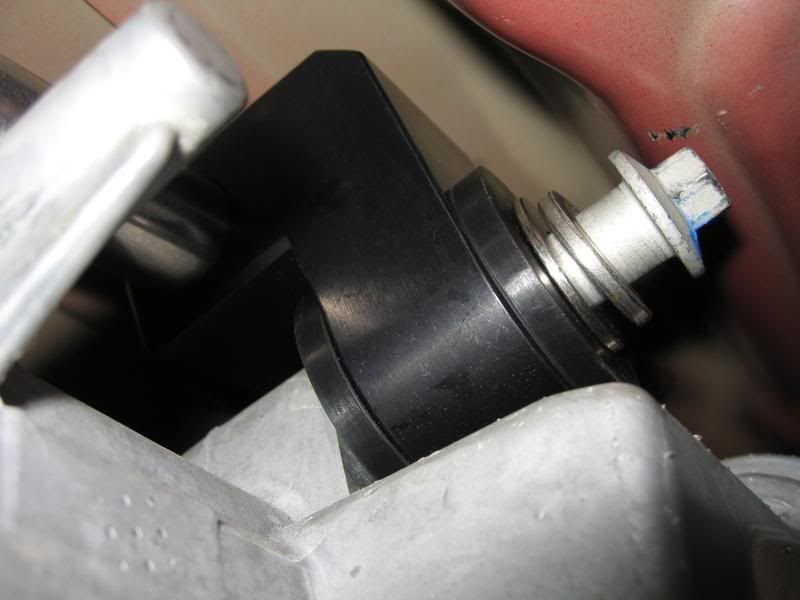
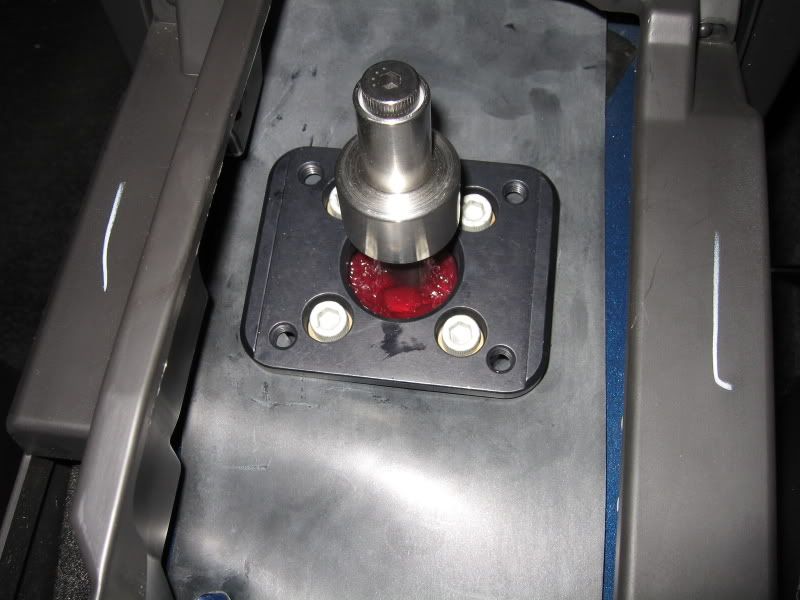
25. Laydown the sound and water barrier plate (black thin rubber piece).
Orient the plate so the 2 round holes are positioned over the studs in the rear.
Stretch the plate around the base cap of the shifter so that it goes under and lays flat on the topside of the transmission tunnel.
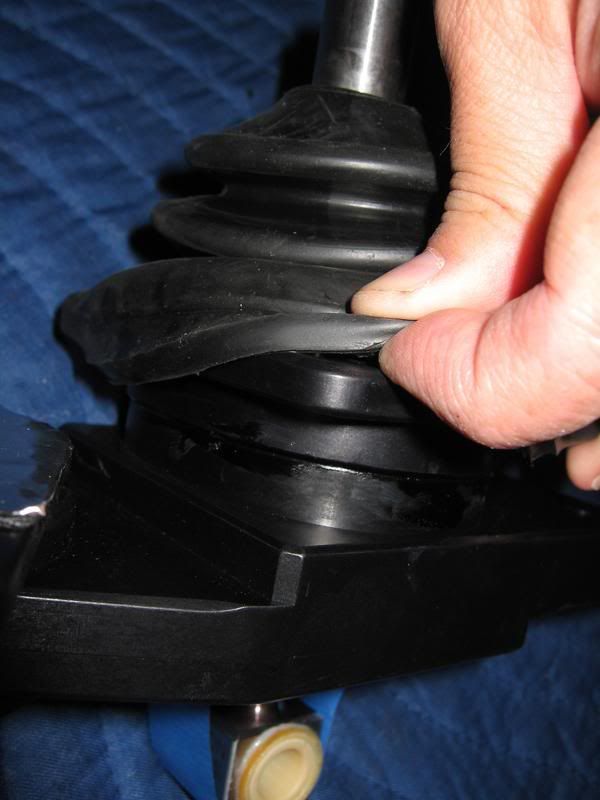
25A. Install the rubber dust boot at this point in the installation if haven't already done so.
Must go all the around the square base. Blowdryer/heatgun may facilitate installation, but be cautious of overheating the rubber, goal is to just make it more pliable.
25B. Install Dynomat sound plate barrier around shifter and boot.
Note the (2) slit cutouts for the studs in the rear, also used to correctly index the sound plate.
Work edges under the boot and square shifter base. Objective is to have the sound plate as flat as possible.


Carefully tuck the sound barrier under the shifter base. Caution! Don’t use anything sharp or risk cutting into the rubber dust boot!
26. Re-install center console removed from step 2.
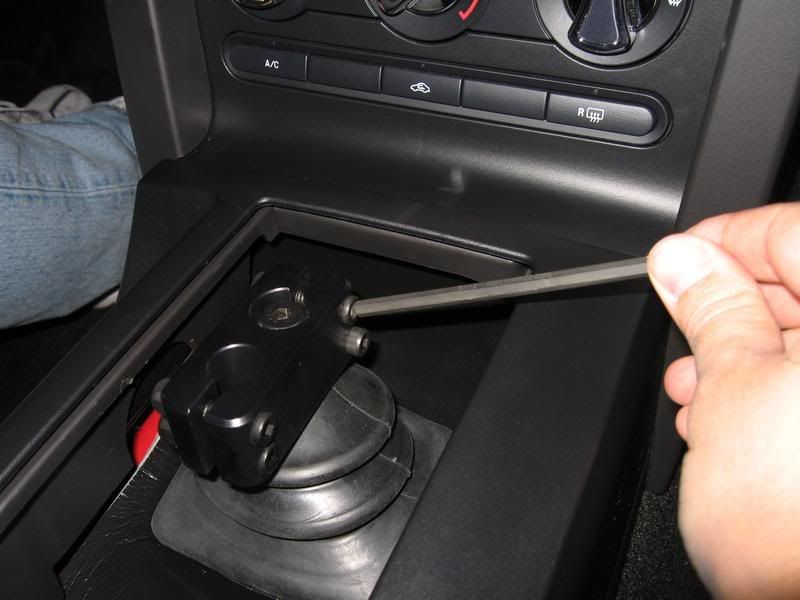
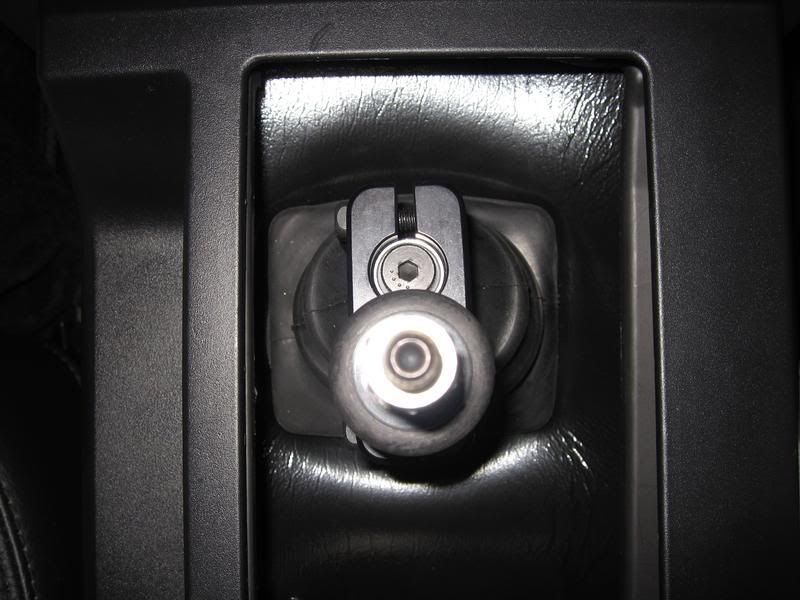
27. Install shift handle bracket to shifter center stud using the supplied (2) cap screws and long 3/16 Allen wrench.
Position the handle bracket so the MGW LOGO is facing the DRIVERS SIDE.
Bolt heads used on the handle bracket must be on the PASSENGER SIDE.
Rotate the handle bracket so the back handle stud hole is centered in the console shifter opening, then temporarily snug up.
IMPORTANT! Engage 1st and 2nd gear slowly and check for clearance between the handle bracket and the side of the console. If too close, loosen and rotate the handle bracket accordingly.
After final positioning, tighten the (2) cap screws down.
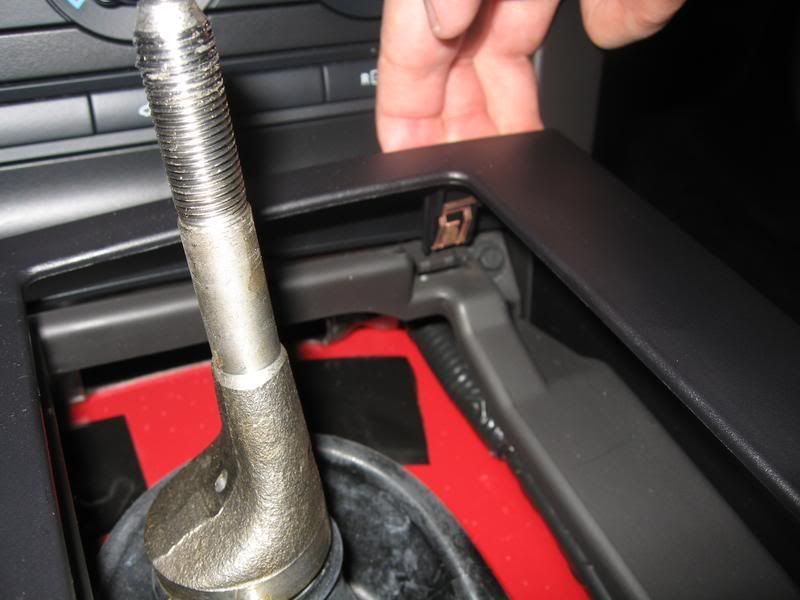
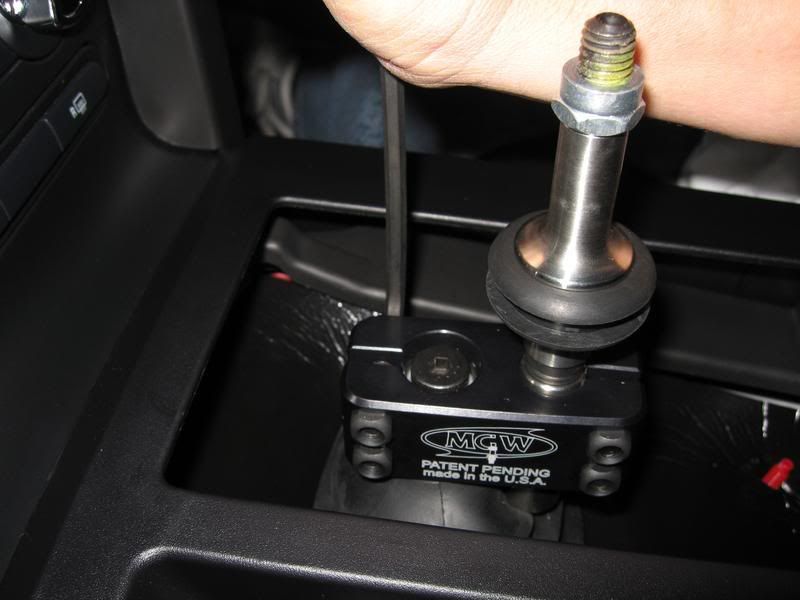
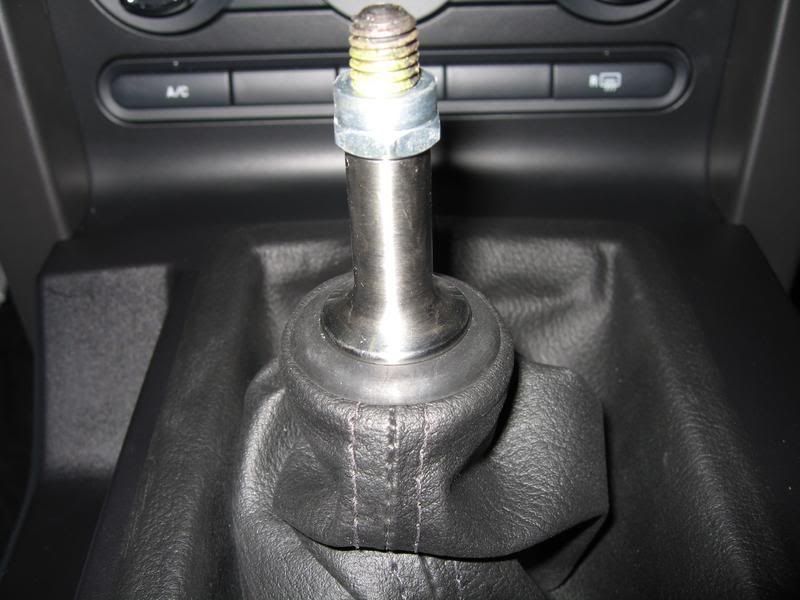
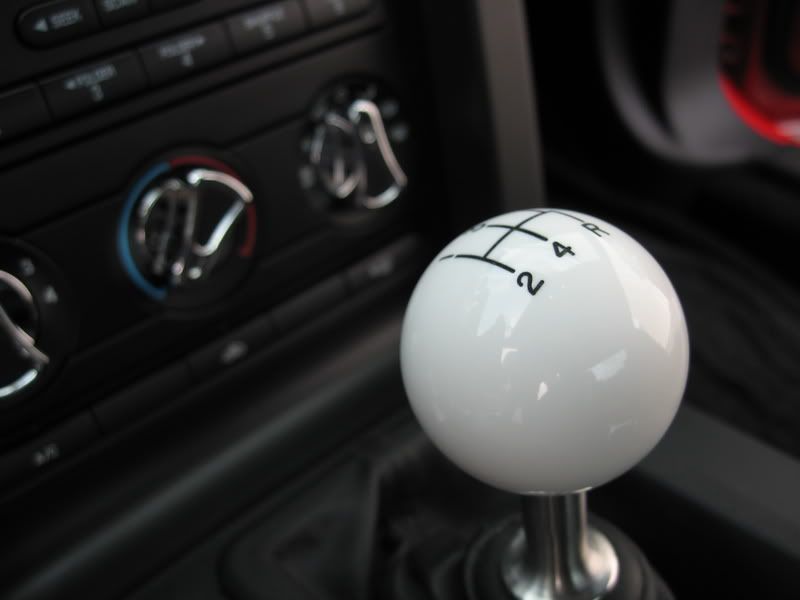
28. Install the shift **** shaft into the handle bracket.
Height of shift **** can be adjusted at this time. Make sure it’s within the range of the slit.
Rotaional positioning (clocking) of the **** can also be adjusted (after **** is installed and tightened down).

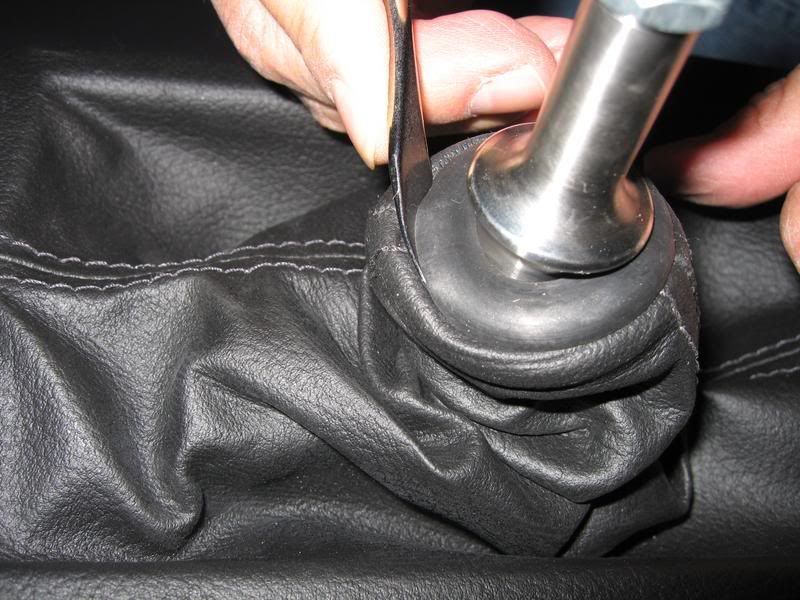
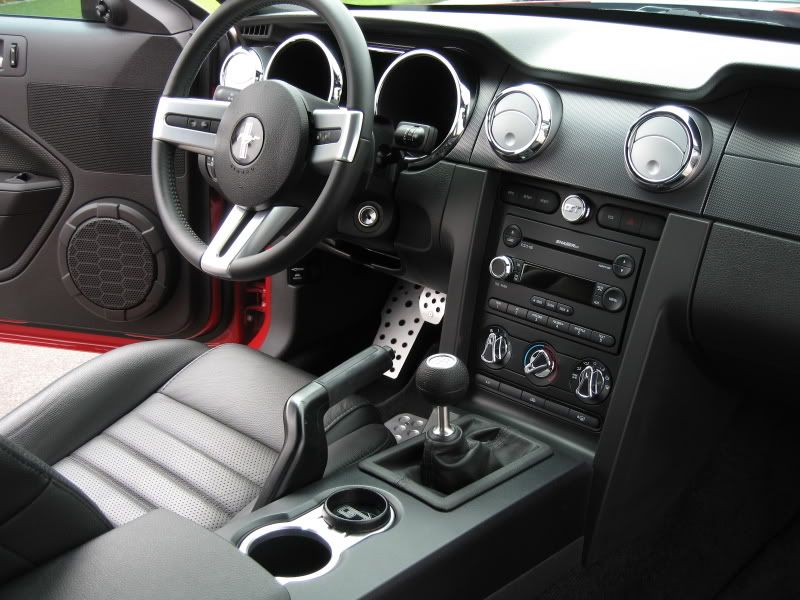
29. Reinstall leather shift boot by snapping it in.
Depending on which handle configuration you opted for, if it’s like mine, you may need a small putty knife to work the leather shift boot shifter hole opening around the rubber grommet of the shift **** shaft.
Note: That lock nut you see on the threaded shaft is part of my Hurst ball kit, not MGW’s.
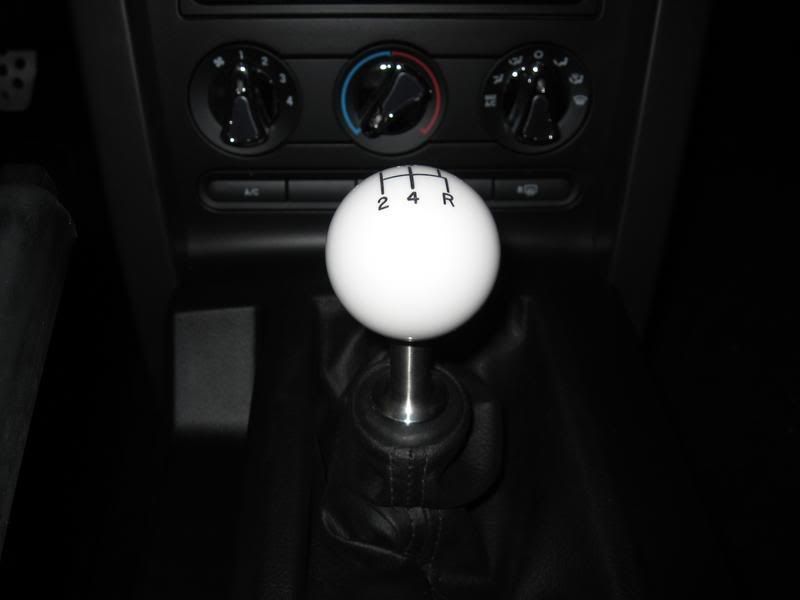
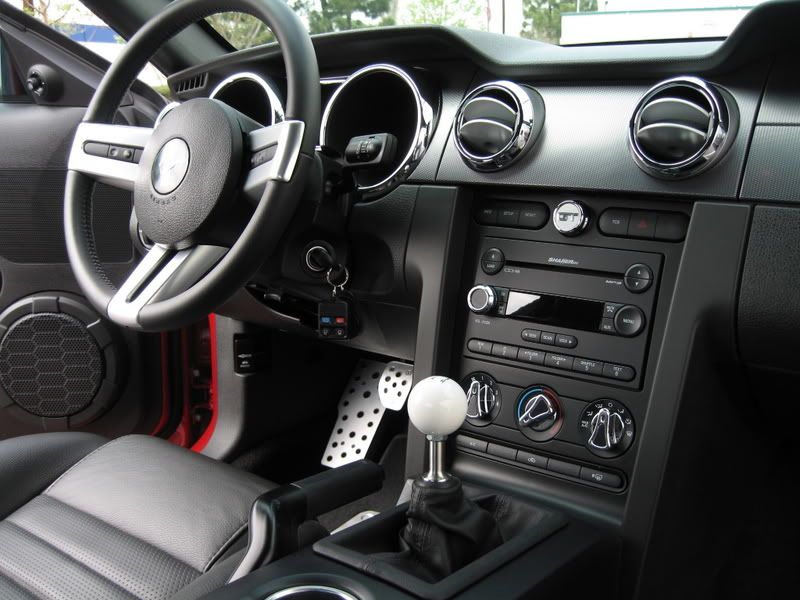
30. Reinstall shift ****.
31. Check for gear engagement for all gears including reverse prior to first test drive.
Installation complete!
Note: If shifter throw re-adjustment is necessary, only remove the 13mm lock nut from trans link arm to shifter linkage block. Adjust the throw as outlined in step 14, then re-install lock nut.
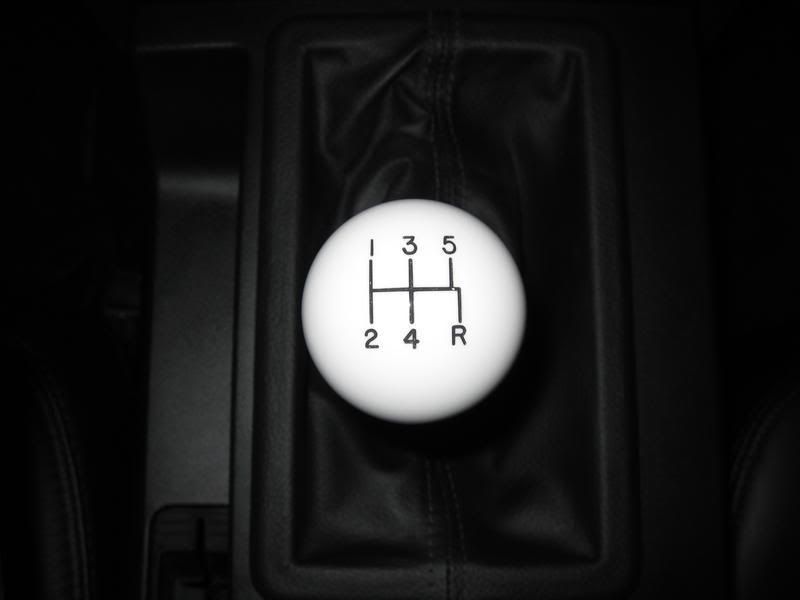
Optional MGW Gripper shift **** shown
Videos (throw is set to 6 turns out):
running thru the gears - engine off

some spirited shifting

normal shifting
normal shifting - top view
21. Remove temporary tape (on linkage block) and insert link arm stud through linkage block and reinstall the 13mm nut (from step 5).
NOTE: Ensure large BLACK ARROW is pointing to the DRIVERS SIDE when attaching the trans link arm to the linkage block. If throw is being adjusted from underneath the car, it can be used as a reference on how many turns the linkage block is screwed out.
IMPORTANT note from MGW: The lock nut on the linkage should be locked down firmly. It is designed to actually seat against the rod just prior to locking down on the urethane bushings. You should get on them as if you were tightening down a bolt normally. Do not leave it loose.
In addition, DO NOT OVERTIGHTEN IT! The stud on the link arm may strip or break off if overtightened.
The nut also is a lock nut which is why Ford did not need a lock washer. Look at the end of the nut carefully and you will see 3 little prongs sticking inward into the threads. The blue loctite is definitlty a good added safety measure.
Wipe off any grease off the link arm stud threads after pushing it through the blue bushings.
22. SKIP (10/23/07)
23. Install shift stops at this point if desired (not recommended by MGW). See included directions on installation.
No picture.
24. SKIP (10/23/07)
25. Laydown the sound and water barrier plate (black thin rubber piece).
Orient the plate so the 2 round holes are positioned over the studs in the rear.
Stretch the plate around the base cap of the shifter so that it goes under and lays flat on the topside of the transmission tunnel.
25A. Install the rubber dust boot at this point in the installation if haven't already done so.
Must go all the around the square base. Blowdryer/heatgun may facilitate installation, but be cautious of overheating the rubber, goal is to just make it more pliable.
25B. Install Dynomat sound plate barrier around shifter and boot.
Note the (2) slit cutouts for the studs in the rear, also used to correctly index the sound plate.
Work edges under the boot and square shifter base. Objective is to have the sound plate as flat as possible.
Carefully tuck the sound barrier under the shifter base. Caution! Don’t use anything sharp or risk cutting into the rubber dust boot!
26. Re-install center console removed from step 2.
27. Install shift handle bracket to shifter center stud using the supplied (2) cap screws and long 3/16 Allen wrench.
Position the handle bracket so the MGW LOGO is facing the DRIVERS SIDE.
Bolt heads used on the handle bracket must be on the PASSENGER SIDE.
Rotate the handle bracket so the back handle stud hole is centered in the console shifter opening, then temporarily snug up.
IMPORTANT! Engage 1st and 2nd gear slowly and check for clearance between the handle bracket and the side of the console. If too close, loosen and rotate the handle bracket accordingly.
After final positioning, tighten the (2) cap screws down.
28. Install the shift **** shaft into the handle bracket.
Height of shift **** can be adjusted at this time. Make sure it’s within the range of the slit.
Rotaional positioning (clocking) of the **** can also be adjusted (after **** is installed and tightened down).
29. Reinstall leather shift boot by snapping it in.
Depending on which handle configuration you opted for, if it’s like mine, you may need a small putty knife to work the leather shift boot shifter hole opening around the rubber grommet of the shift **** shaft.
Note: That lock nut you see on the threaded shaft is part of my Hurst ball kit, not MGW’s.
30. Reinstall shift ****.
31. Check for gear engagement for all gears including reverse prior to first test drive.
Installation complete!
Note: If shifter throw re-adjustment is necessary, only remove the 13mm lock nut from trans link arm to shifter linkage block. Adjust the throw as outlined in step 14, then re-install lock nut.
Optional MGW Gripper shift **** shown
Videos (throw is set to 6 turns out):
running thru the gears - engine off
some spirited shifting
normal shifting
normal shifting - top view

Legacy TMS Member
Joined: January 9, 2005
Posts: 6,982
Likes: 6
From: New Carlisle, Ohio (20 miles north of Dayton)
Hey Bill,
As usual your write up and installs are awesome and flawless!! That car of your looks cleaner than new underneath. It must not be a daily driver.
Scott
As usual your write up and installs are awesome and flawless!! That car of your looks cleaner than new underneath. It must not be a daily driver.
Scott
V6 Member
Joined: August 28, 2005
Posts: 79
Likes: 0
Just got done, the tip about putting the boot on before you put the shifter down the hole was great.
I used white lithium grease, it will be fine.
What is Krytox grease, and where do you get it? Is it better than say lithium grease?
I used white lithium grease, it will be fine.

V6 Member
Joined: July 24, 2006
Posts: 57
Likes: 0
WOW,,,,this write up is going to help me out big time,,,,THANKS for taking the time to do this.....
did you find that it was hard to do on your back rather then having it on a lift???
I was waiting to see if I could use my buddys lift, but now I have hope....
where did you get the white shift ball from????
did you find that it was hard to do on your back rather then having it on a lift???
I was waiting to see if I could use my buddys lift, but now I have hope....
where did you get the white shift ball from????
I'm sure that'll be fine too.
I just has some Krytox laying around the toolbox. It's essentially the same stuff, just made to survive in hostile temperature environments.
I'm sure doing the install on a lift will be way easier. But, after doing my suspension, H-Pipe, and now the shifter, it's not too bad. 
I got the Hurst ball from my friend. He ordered it thru some auto parts store. I think it was something like $49.
I just has some Krytox laying around the toolbox. It's essentially the same stuff, just made to survive in hostile temperature environments.
I got the Hurst ball from my friend. He ordered it thru some auto parts store. I think it was something like $49.

Mach 1 Member
Joined: August 9, 2005
Posts: 952
Likes: 2
From: Chesapeake, Va.
Team Mustang Source
Joined: December 12, 2004
Posts: 5,801
Likes: 5
From: NorCal
Great write-up Bill! I know that sometimes you get some flack about doing write-ups on simple things but personally all of your write-ups are very professional and you do a huge service for the boards and it's members~ 
I know that sometimes you get some flack about doing write-ups on simple things but personally all of your write-ups are very professional and you do a huge service for the boards and it's members~
Mach 1 Member
Joined: June 16, 2006
Posts: 628
Likes: 0
nobody has anything on bill and his writeups. Everyone takes a back seat to Bill. I must admit that I am a little torn about the installation of this. I am feeling like I don't want to risk it myself, yet I am unsure if my local performance shop will take the time to be as careful as Bill. Probably will skip the locktite, etc. Hey, Bill, you want to install another one?
Bullitt Member
Joined: February 24, 2007
Posts: 223
Likes: 0
From: Manteca, California
I have seen your sticky and all your write-ups are top notch!!!I am also interested in the comparision on the Saleen to the MGW...

FR500 Member
Joined: August 15, 2005
Posts: 3,084
Likes: 0
From: Honolulu
don't have a S197, but enjoy reading your how-to's. ha-ha, your car looks cleaner underneath than most cars do after they've been washed! you could probably make some money doing this stuff for magazines or something - probably do it better. awesome job, as usual.